
Configuring Strobes SAST
Strobes SAST Connector – Static Application Security Testing Integration
4 min readEdit
On this page⌄
- Overview
- Prerequisites
- Step 1: Access Strobes SAST Connector
- Step 2: Create a Strobes SAST Configuration (Step One – Configuration Details)
- Step 3: Select Version Control System
- Use Git Configuration in Strobes SAST
- Assets (Git-specific)
- Select GitHub
- Create GitHub Credentials (If Not Available)
- Choose Repositories
- Asset Mapping (GitHub)
- Select Azure Repos
- Create Azure Repos Credentials (If Not Available)
- Choose Repositories
- Click Save after selecting the required repositories.Asset Mapping (Azure Repos)
- D. Bitbucket Configuration
- Select Bitbucket
- Create Bitbucket Credentials (If Not Available)
- Choose Repositories
- Asset Mapping (Bitbucket)
- Step 4: Additional Scan Settings
- Step 5: Tracking & Notifications (Optional)
- Step 6: Complete Configuration
- Step 7: Run the Scan
Overview
This article explains how to configure the Strobes SAST connector within the platform. By using Strobes SAST, you can invoke static application security scans directly from Strobes, ingest and prioritize the resulting vulnerabilities, and manage remediation workflows through a centralized application security interface.
Prerequisites
- Access to the Connectors section in Strobes
- Owner/Manager role in your Strobes Account.
- Source code hosted in:
- Git
- GitHub
- Azure Repos
- Bitbucket
- Required repository access permissions
Step 1: Access Strobes SAST Connector
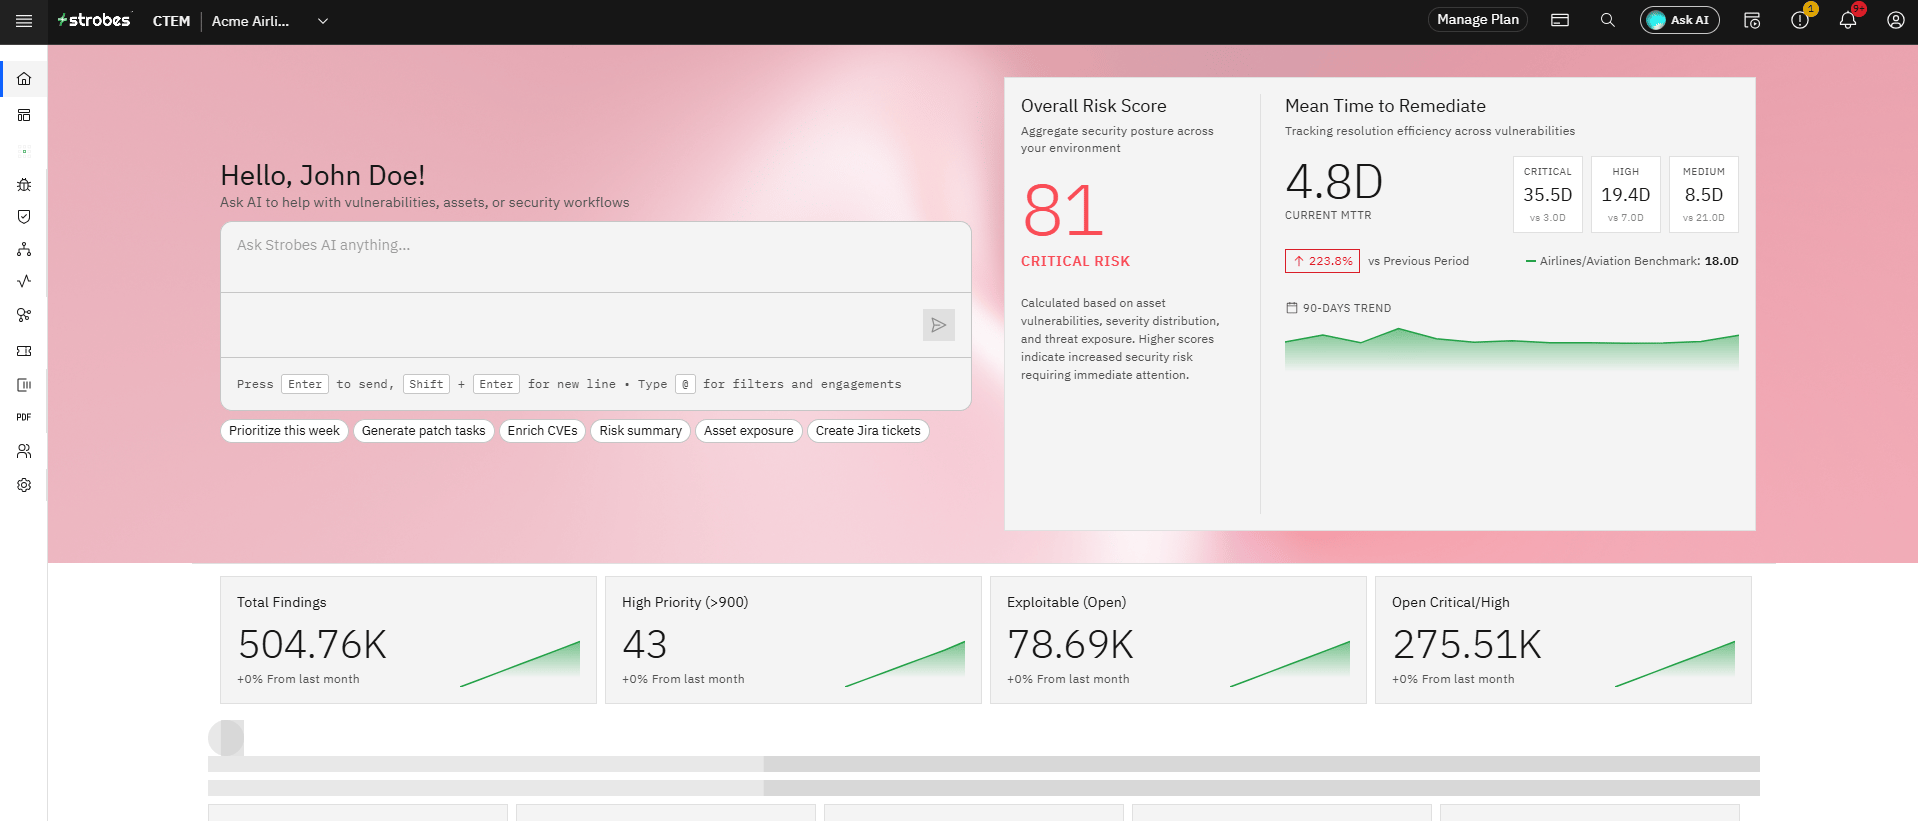
- Log in to Strobes.
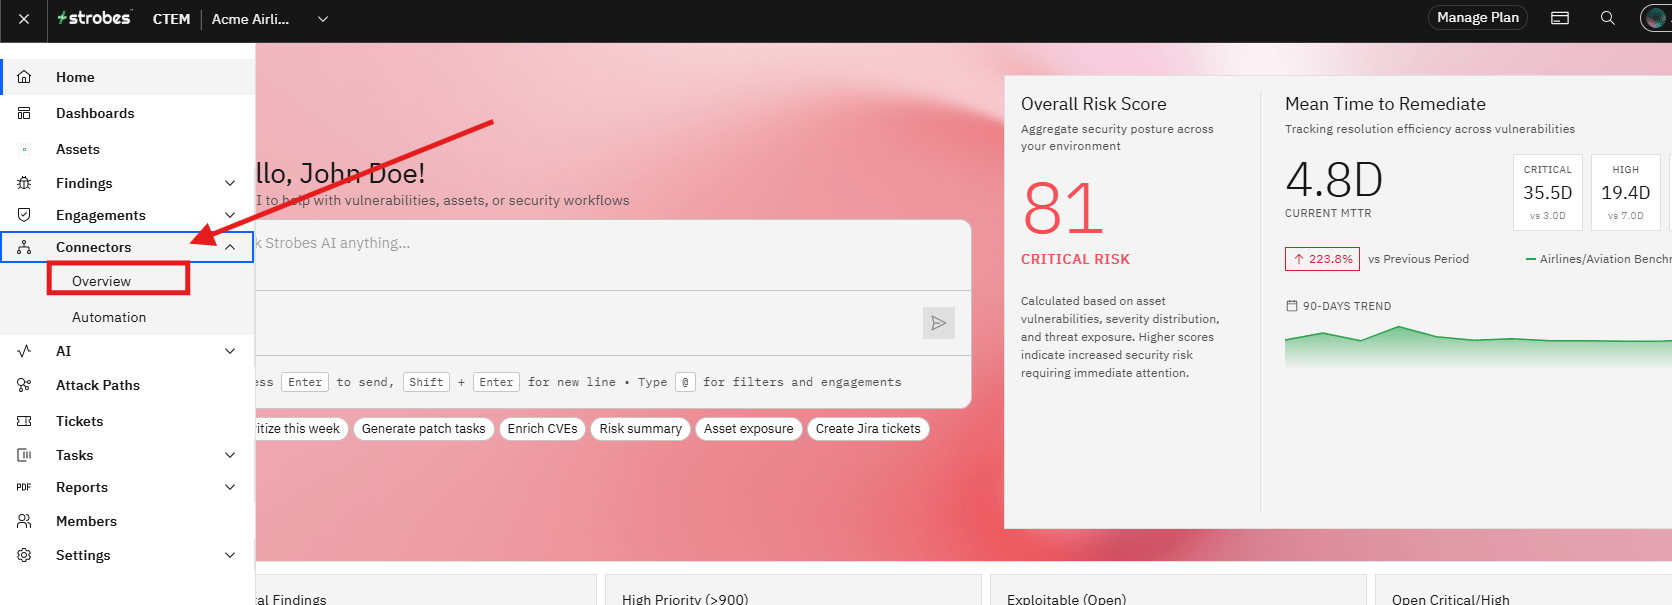
- Navigate to Connectors.
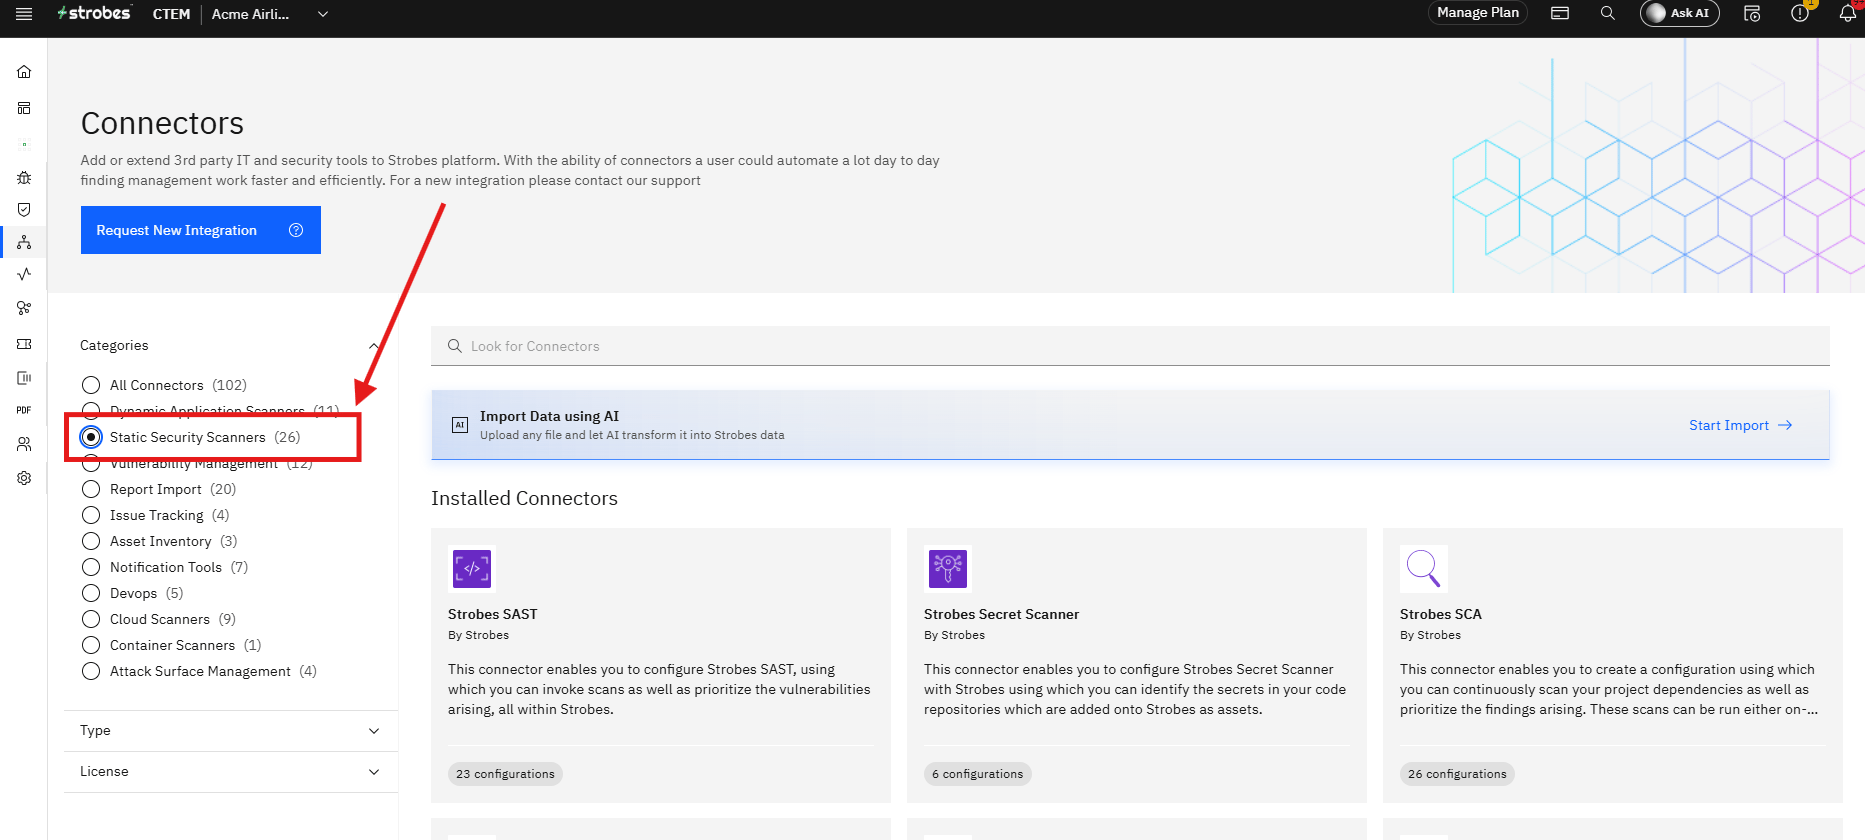
- Select Static Security Scanners.
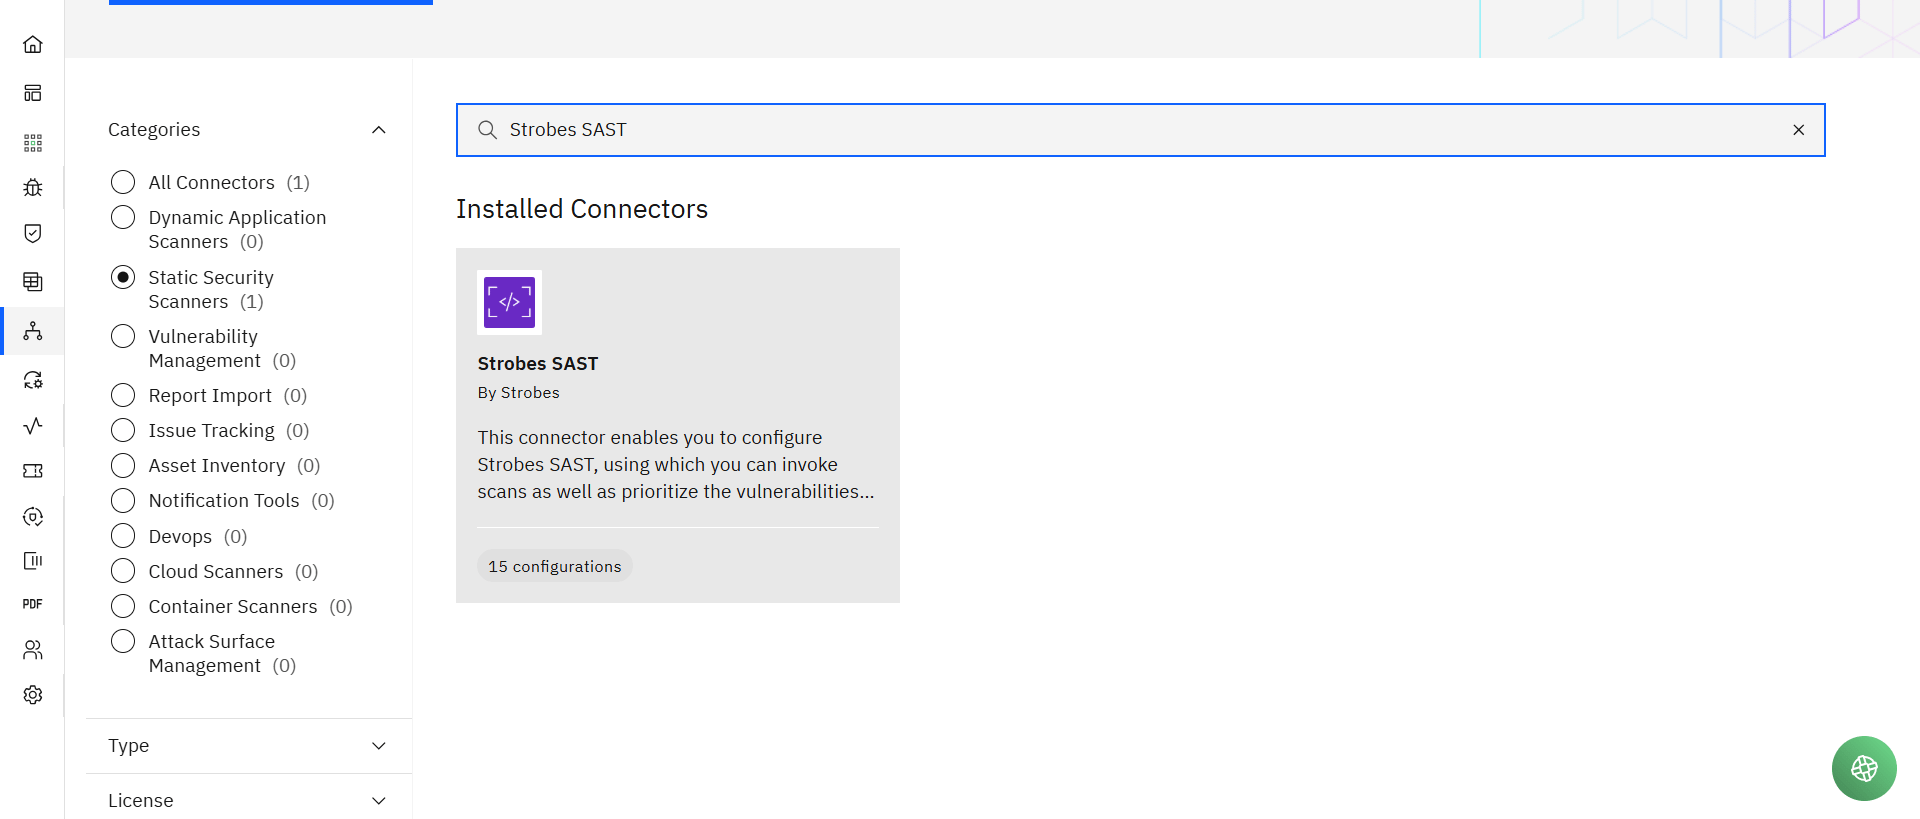
- Search for Strobes SAST.
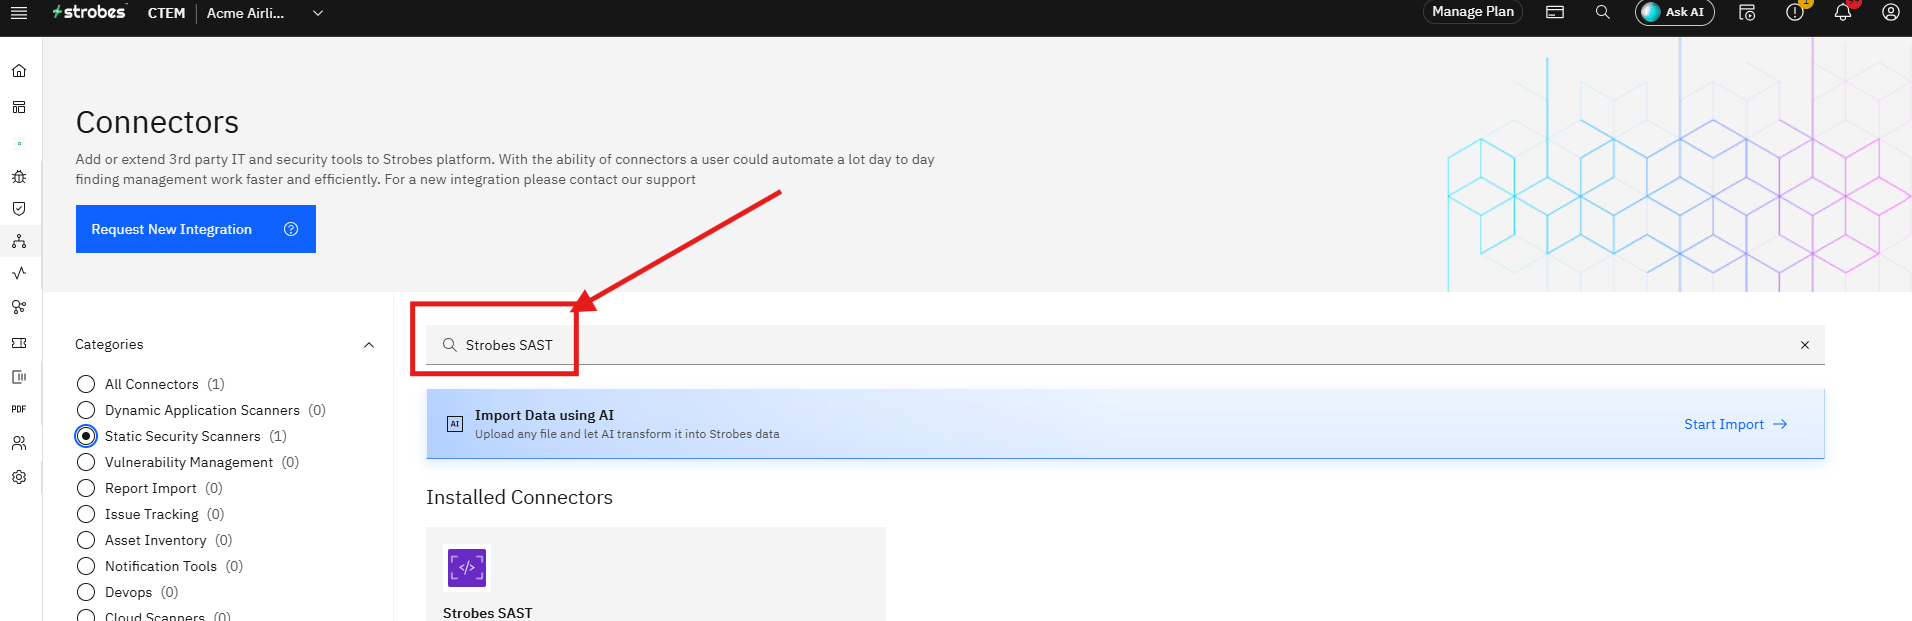
- Click on Strobes SAST to start creating a workflow.
Step 2: Create a Strobes SAST Configuration (Step One – Configuration Details)
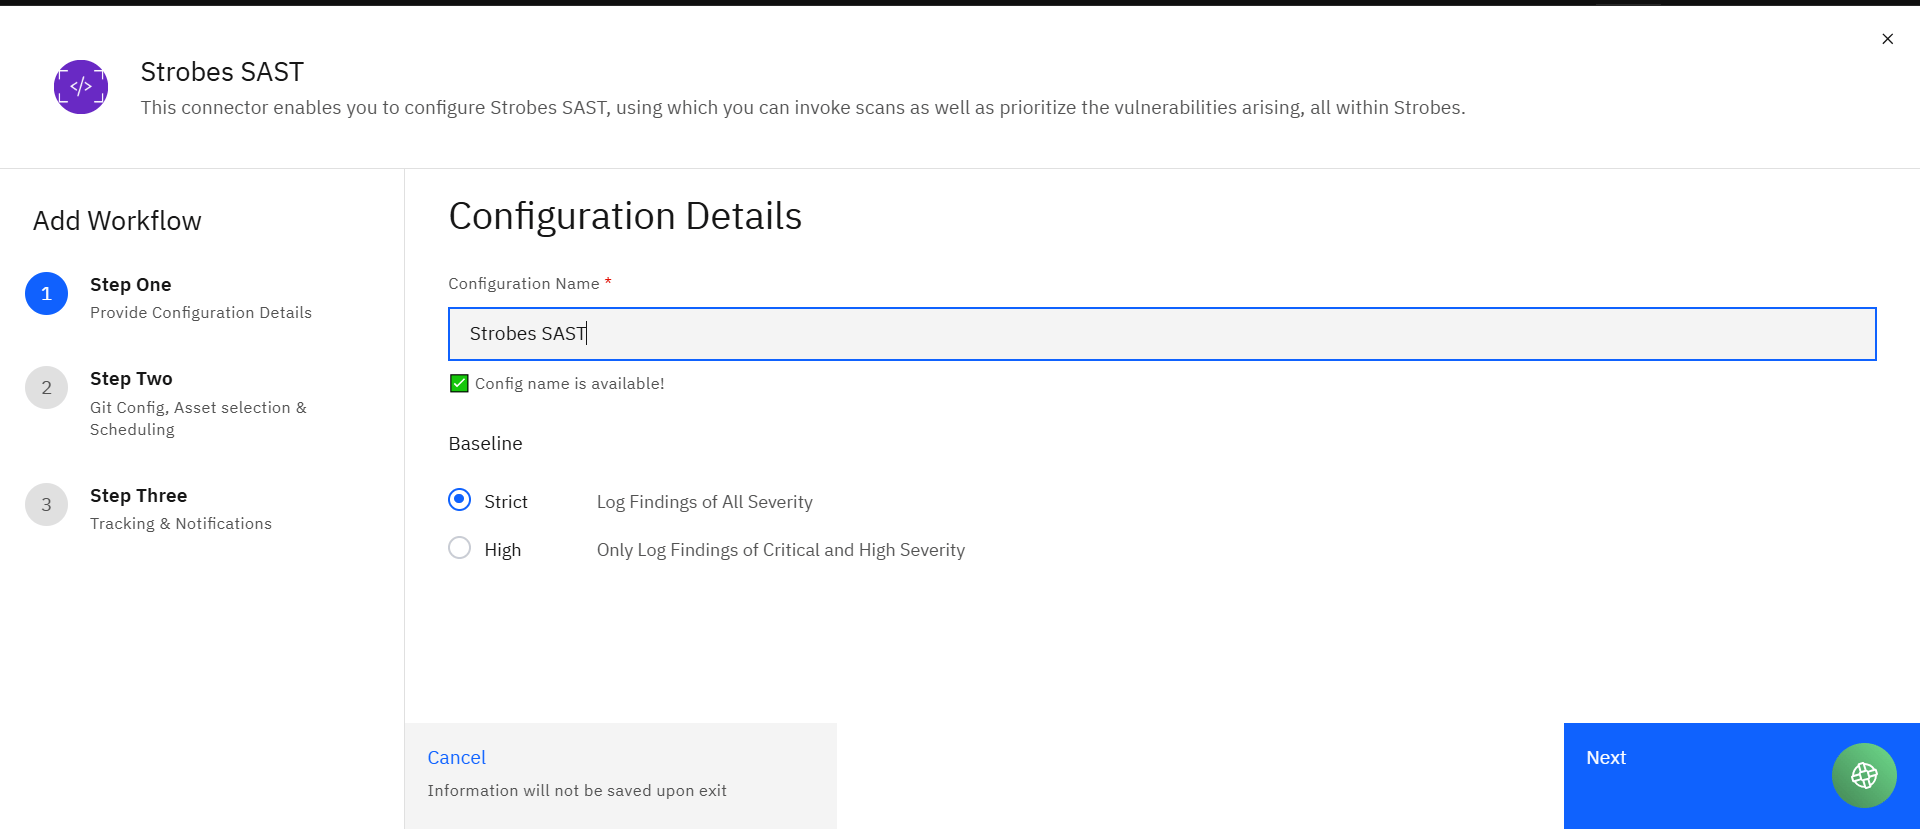
- Enter a Configuration Name. (Any name for your identification)
Click Next.
Step 3: Select Version Control System
(Step Two – Git Config, Asset Selection & Scheduling)
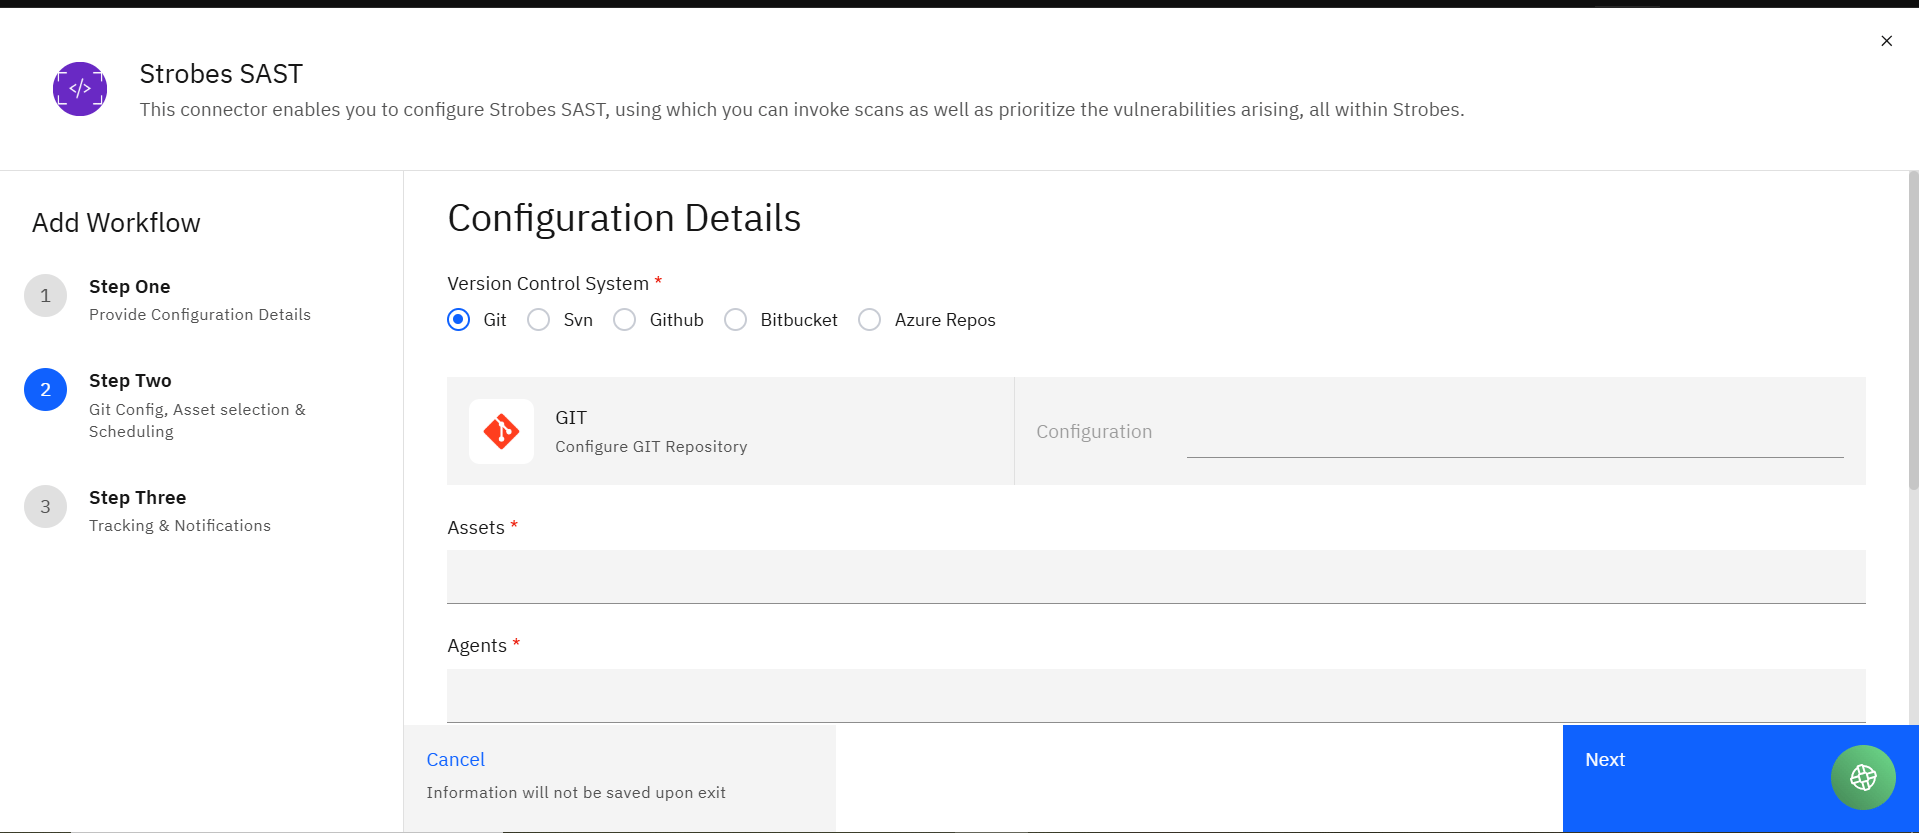
Choose the version control system where your source code is hosted:
- Git
- GitHub
- Azure Repos
- Bitbucket
- Svn
The configuration steps differ slightly based on the selected option.
Use Git Configuration in Strobes SAST
- Select Git as the Version Control System.
- Choose the Git configuration created earlier.
Assets (Git-specific)
- When Git is selected, the Assets field is mandatory.
- The selected asset represents the application or service being scanned.
- All Strobes SAST findings will be mapped to this selected asset.
B. GitHub Configuration
Select GitHub
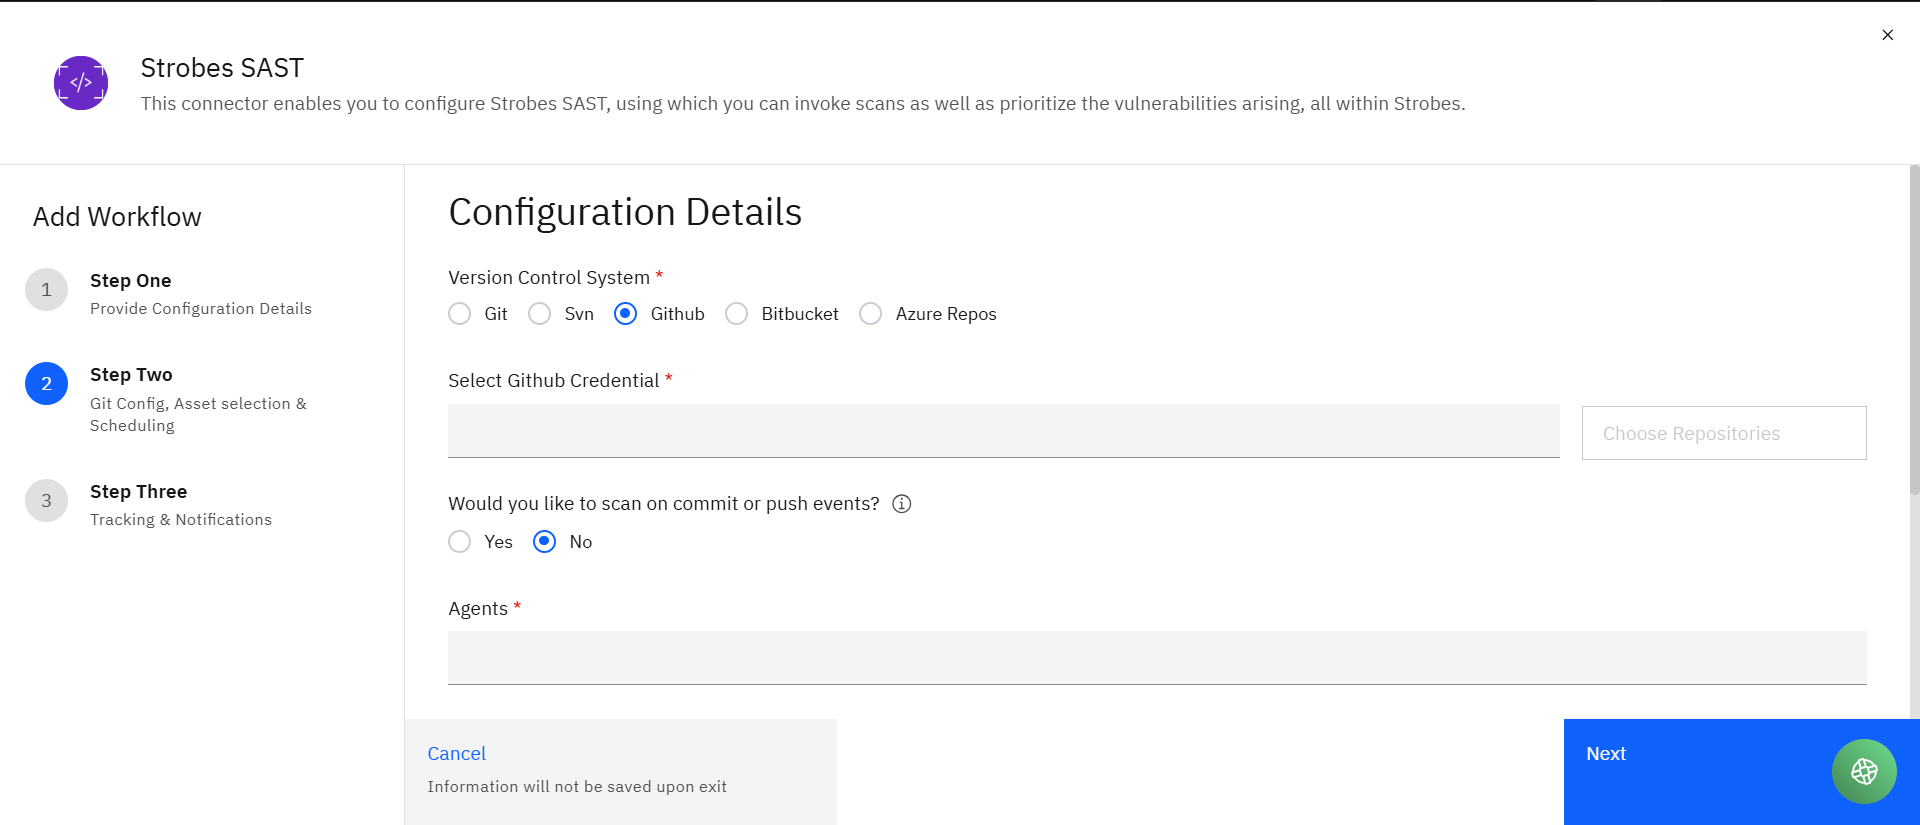
- In the Bandit configuration screen, select GitHub.
- Under Select GitHub Credential, choose an existing credential.
Create GitHub Credentials (If Not Available)
- Click Create Credential.
- Enter a Name for the credential.
- OAuth authentication is triggered automatically.
- After successful authentication, the credential is added.
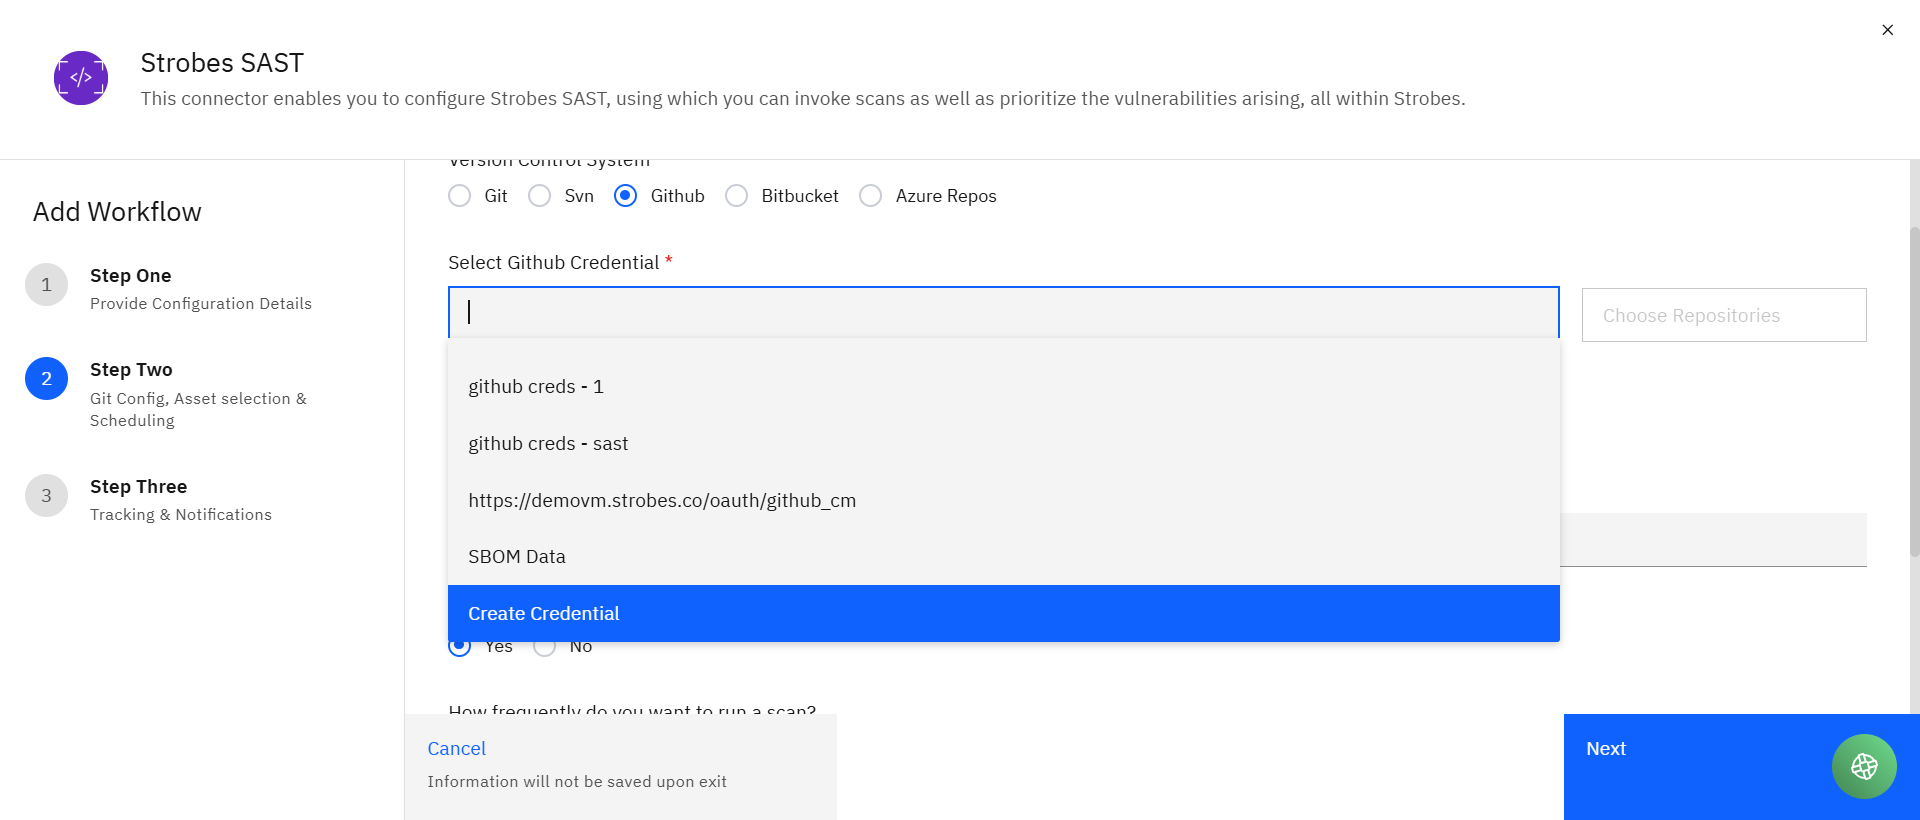
Choose Repositories
- Select the GitHub credential.
- Click Choose Repositories.
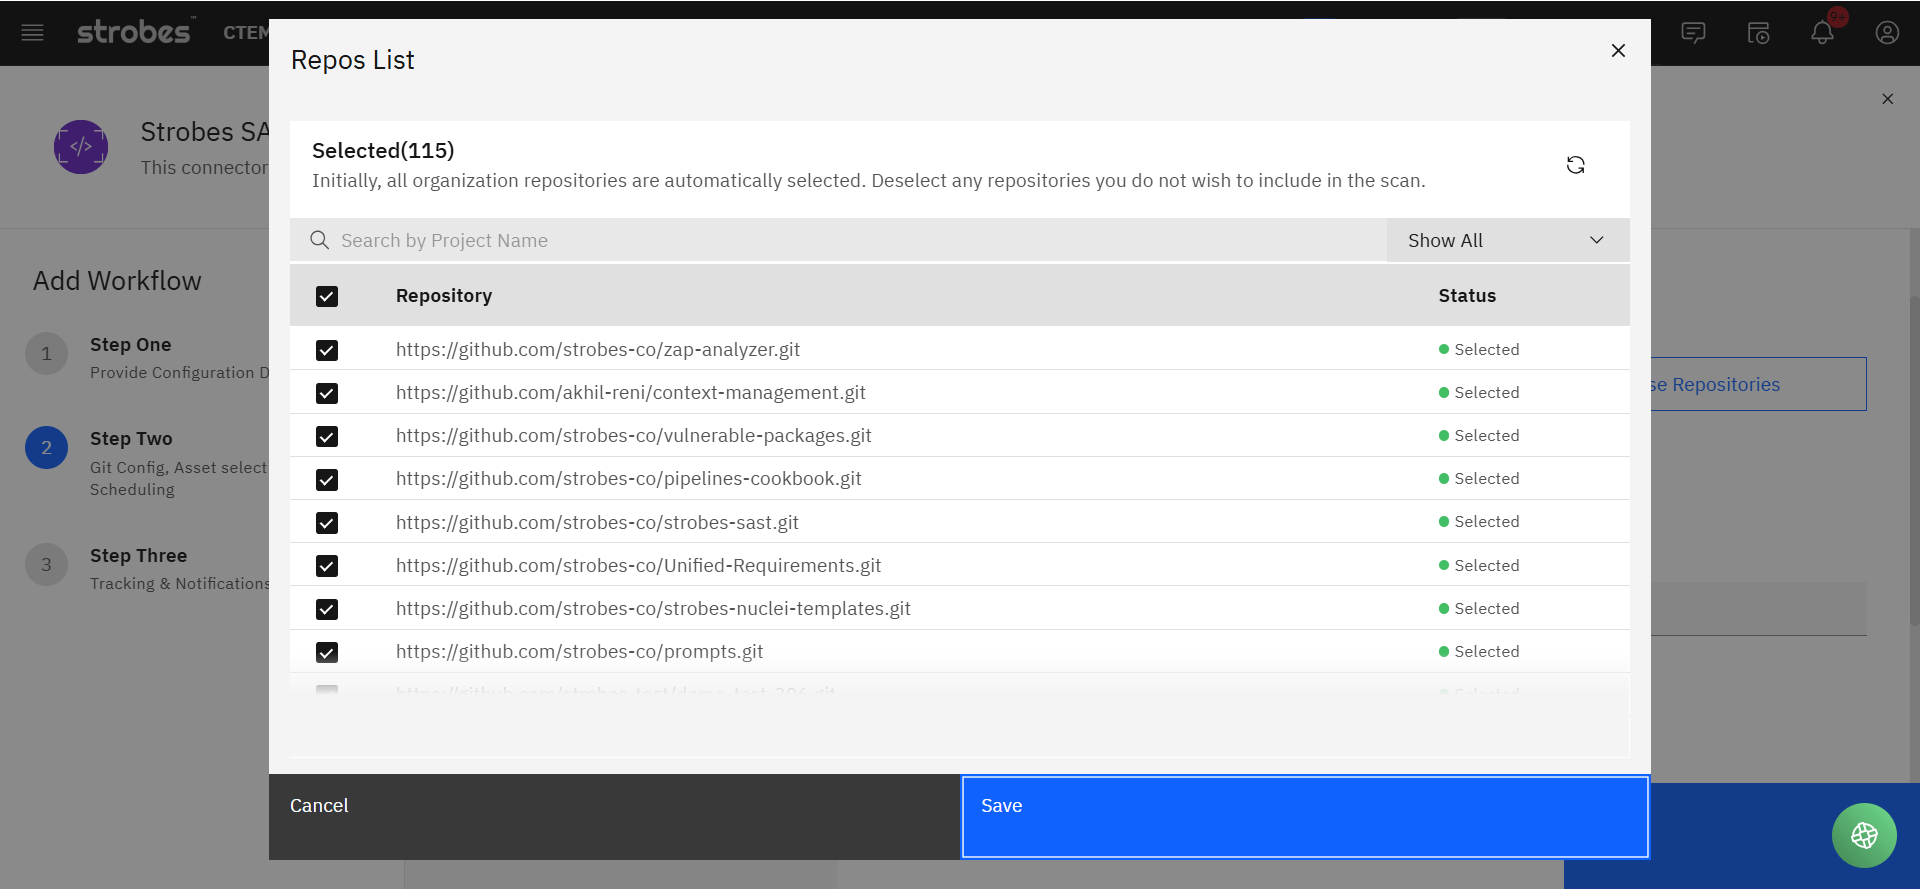
- The repository list opens:
- All repositories are selected by default.
- Users can:
- Select or deselect repositories
- Bulk select or unselect
- Search repositories
- Refresh the repository list
- Scroll to view all repositories
- Click Save after selecting the required repositories.
Asset Mapping (GitHub)
- For GitHub, there is no separate Asset field.
- Each selected repository automatically becomes an asset.
- Findings are imported against the respective repository.
C. Azure Repos Configuration
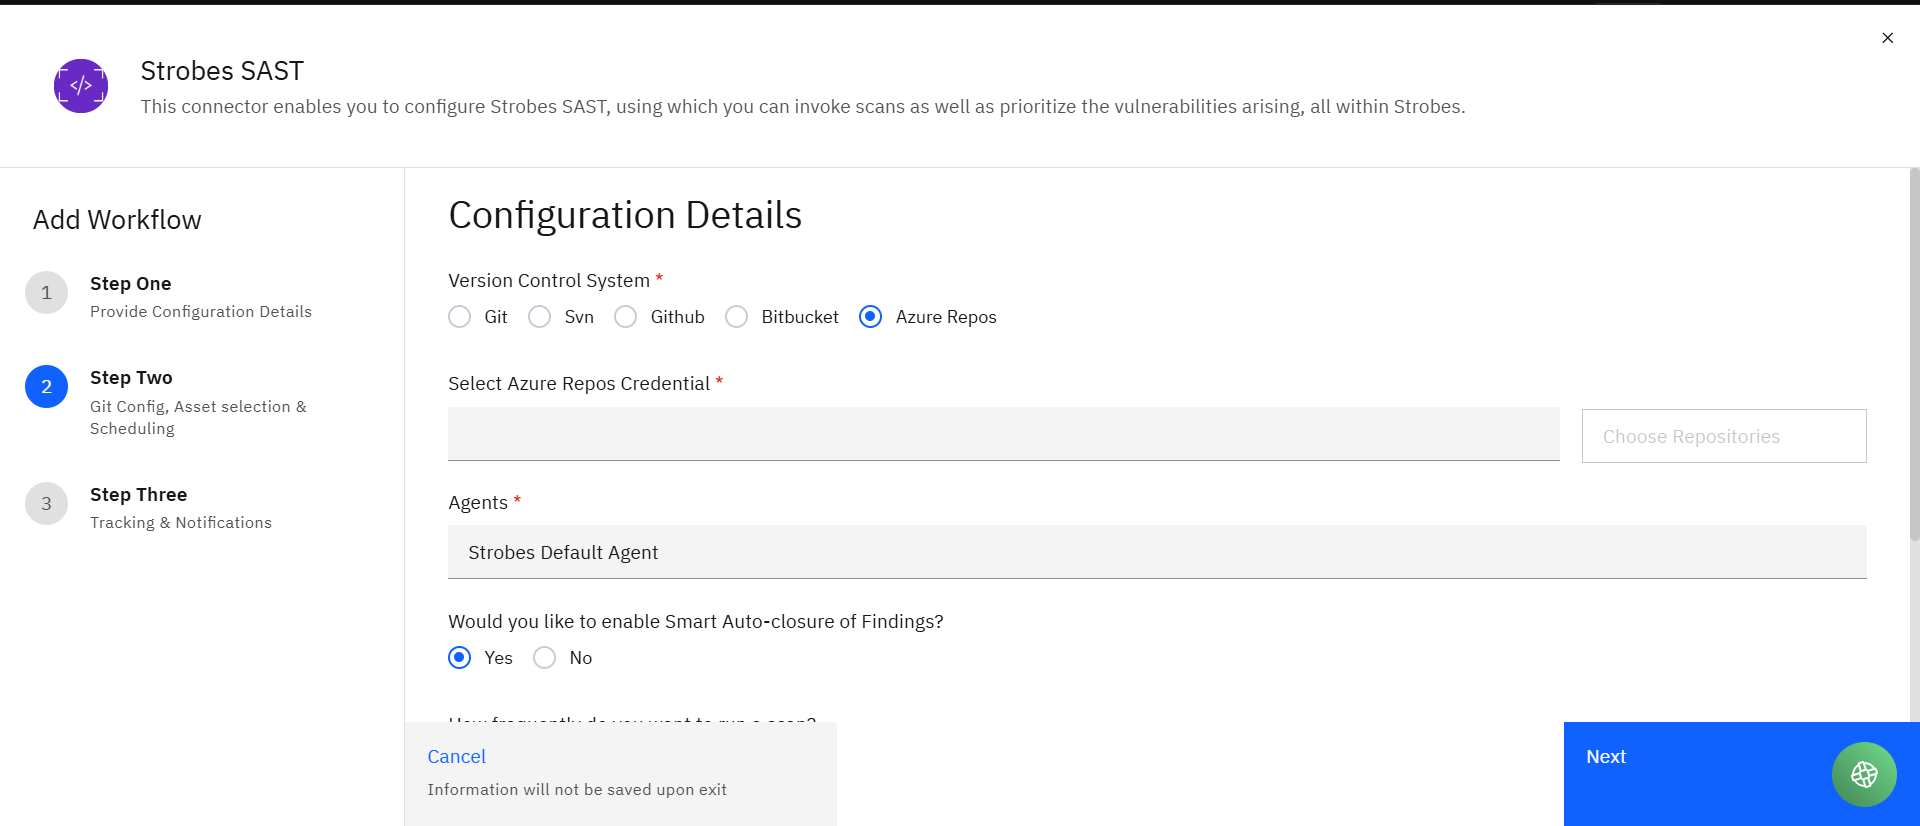
Select Azure Repos
- In the Strobes SAST configuration screen, select Azure Repos.
- Under Select Azure Repos Credential, choose an existing credential.
Create Azure Repos Credentials (If Not Available)
- Click Create Credential.
- Enter a Name for the credential.
- OAuth authentication with Azure DevOps is initiated.
- After successful authentication, the credential is added.
Choose Repositories
- Select the Azure Repos credential.
- Click Choose Repositories.
- The repository list opens:
- All accessible Azure repositories are selected by default.
- Users can:
- Select or deselect repositories
- Bulk select or unselect
- Search repositories
- Refresh the repository list
- Scroll through the repository list
Click Save after selecting the required repositories.
Asset Mapping (Azure Repos)
- There is no Asset field when Azure Repos is selected.
- Each selected Azure repository becomes an asset.
- Findings are imported and mapped to the respective repository.
D. Bitbucket Configuration
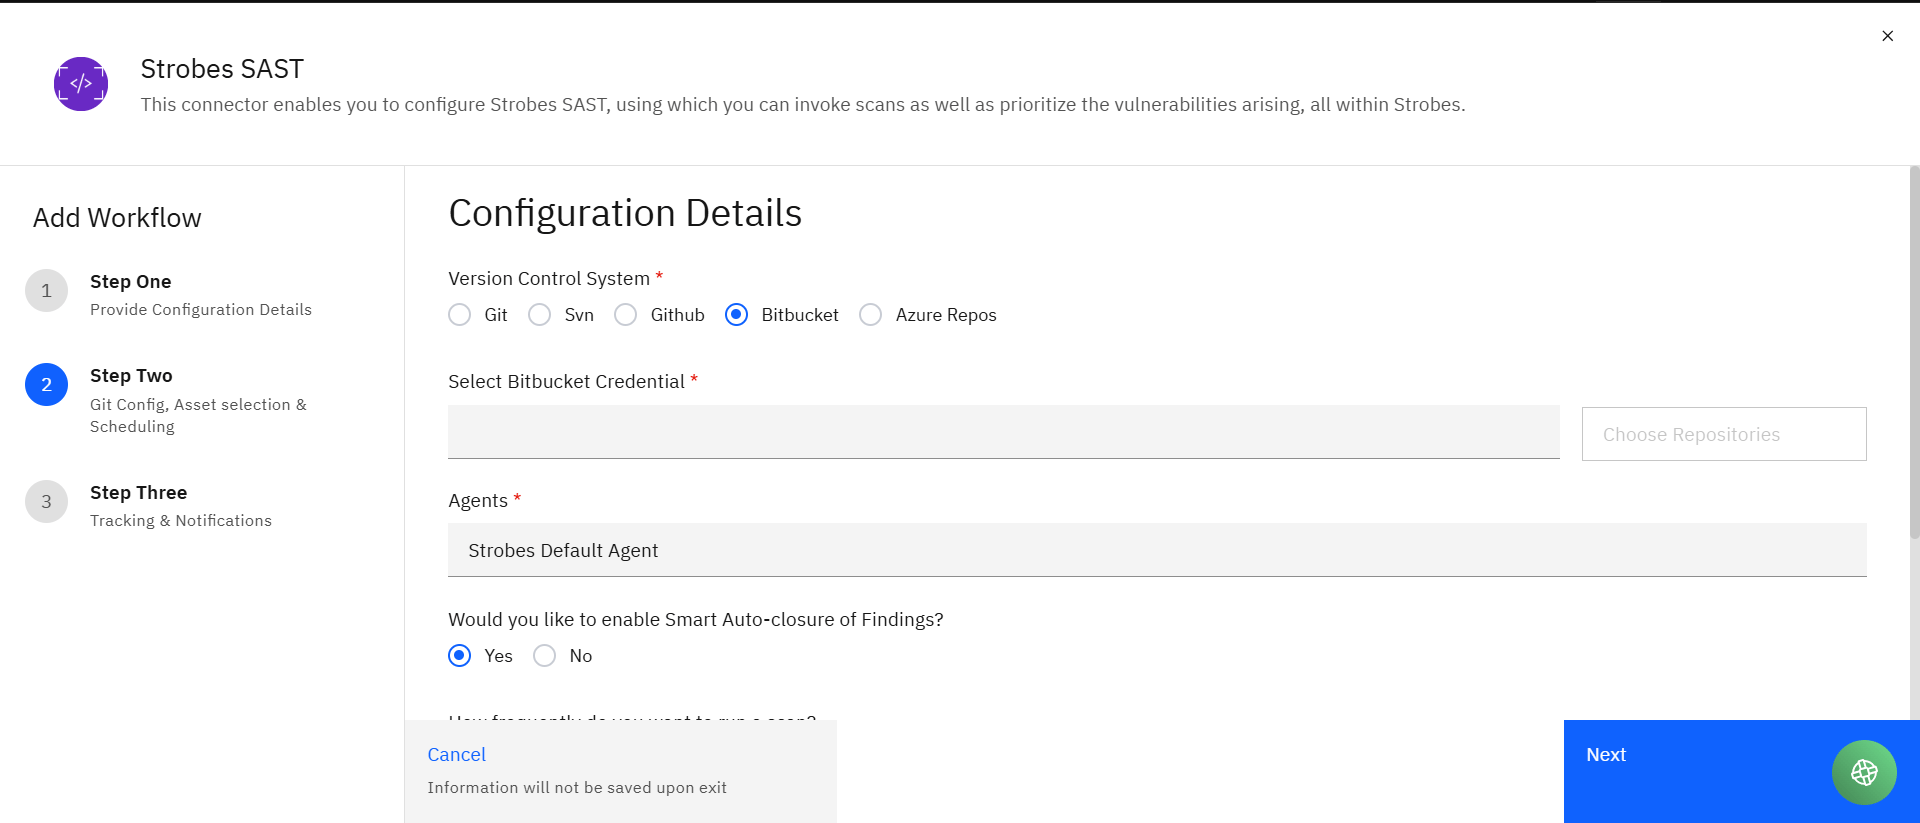
Select Bitbucket
- In the Bandit configuration screen, select Bitbucket.
- Under Select Bitbucket Credential, choose an existing credential.
Create Bitbucket Credentials (If Not Available)
- Click Create Credential.
- Enter a Name for the credential.
- OAuth authentication with Bitbucket is initiated.
- After successful authentication, the credential is added.
Choose Repositories
- Select the Bitbucket credential.
- Click Choose Repositories.
- The repository list opens:
- All repositories are selected by default.
- Users can:
- Select or deselect repositories
- Bulk select or unselect
- Search repositories
- Refresh the repository list
- Scroll to view all repositories
- Click Save after selecting the required repositories.
Asset Mapping (Bitbucket)
- There is no Asset field for Bitbucket.
- Selected repositories automatically act as assets.
- Findings are mapped directly to the respective repositories.
Step 4: Additional Scan Settings
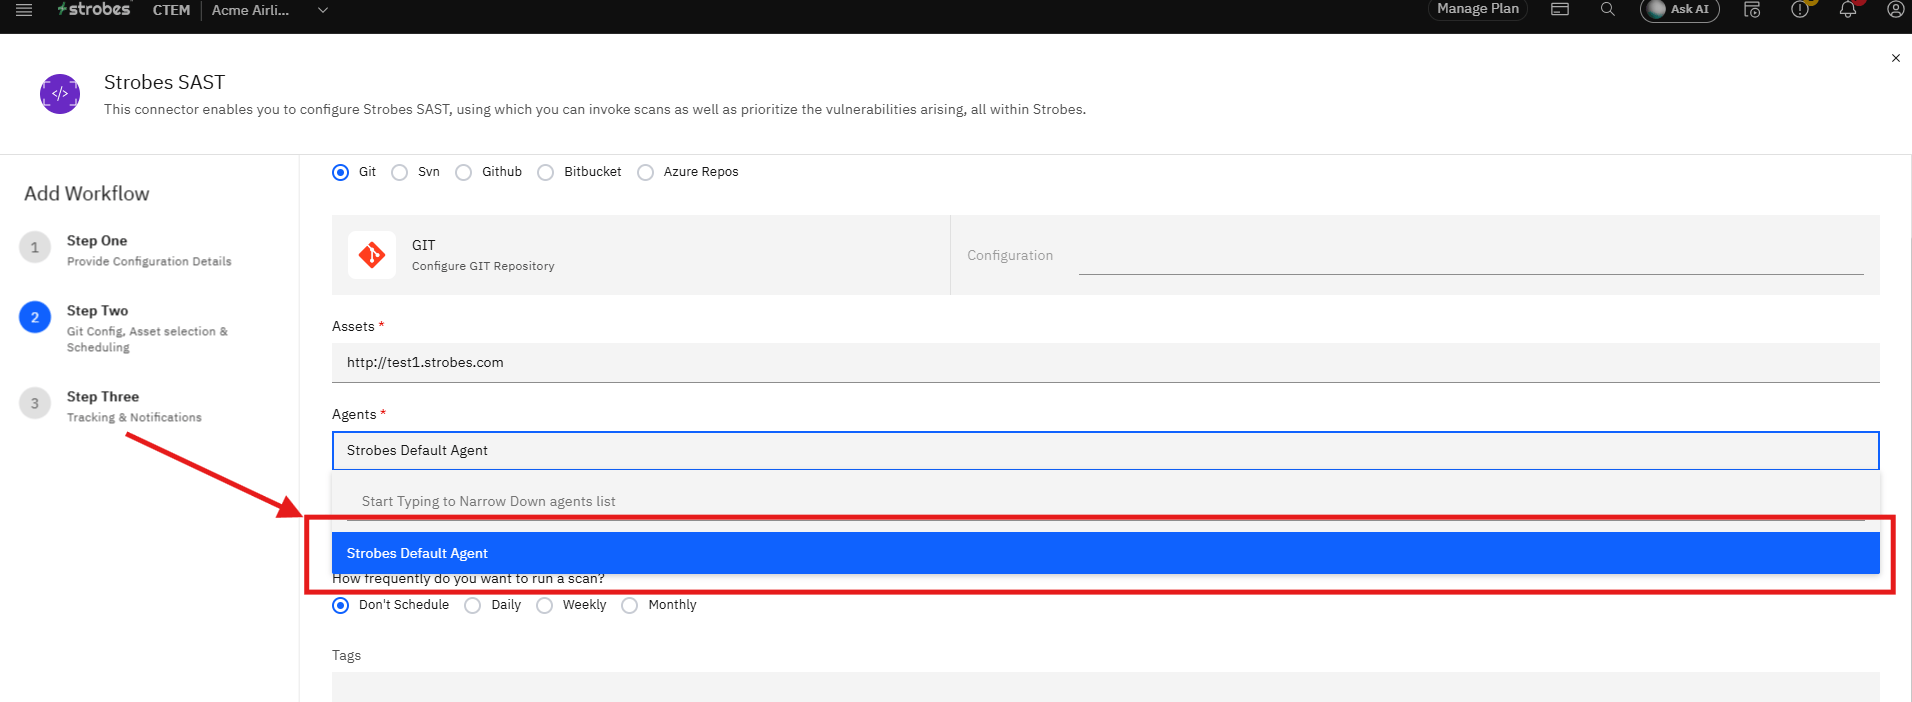
Agents
- Select the required Agents to execute the scan.
Smart Auto-closure of Findings
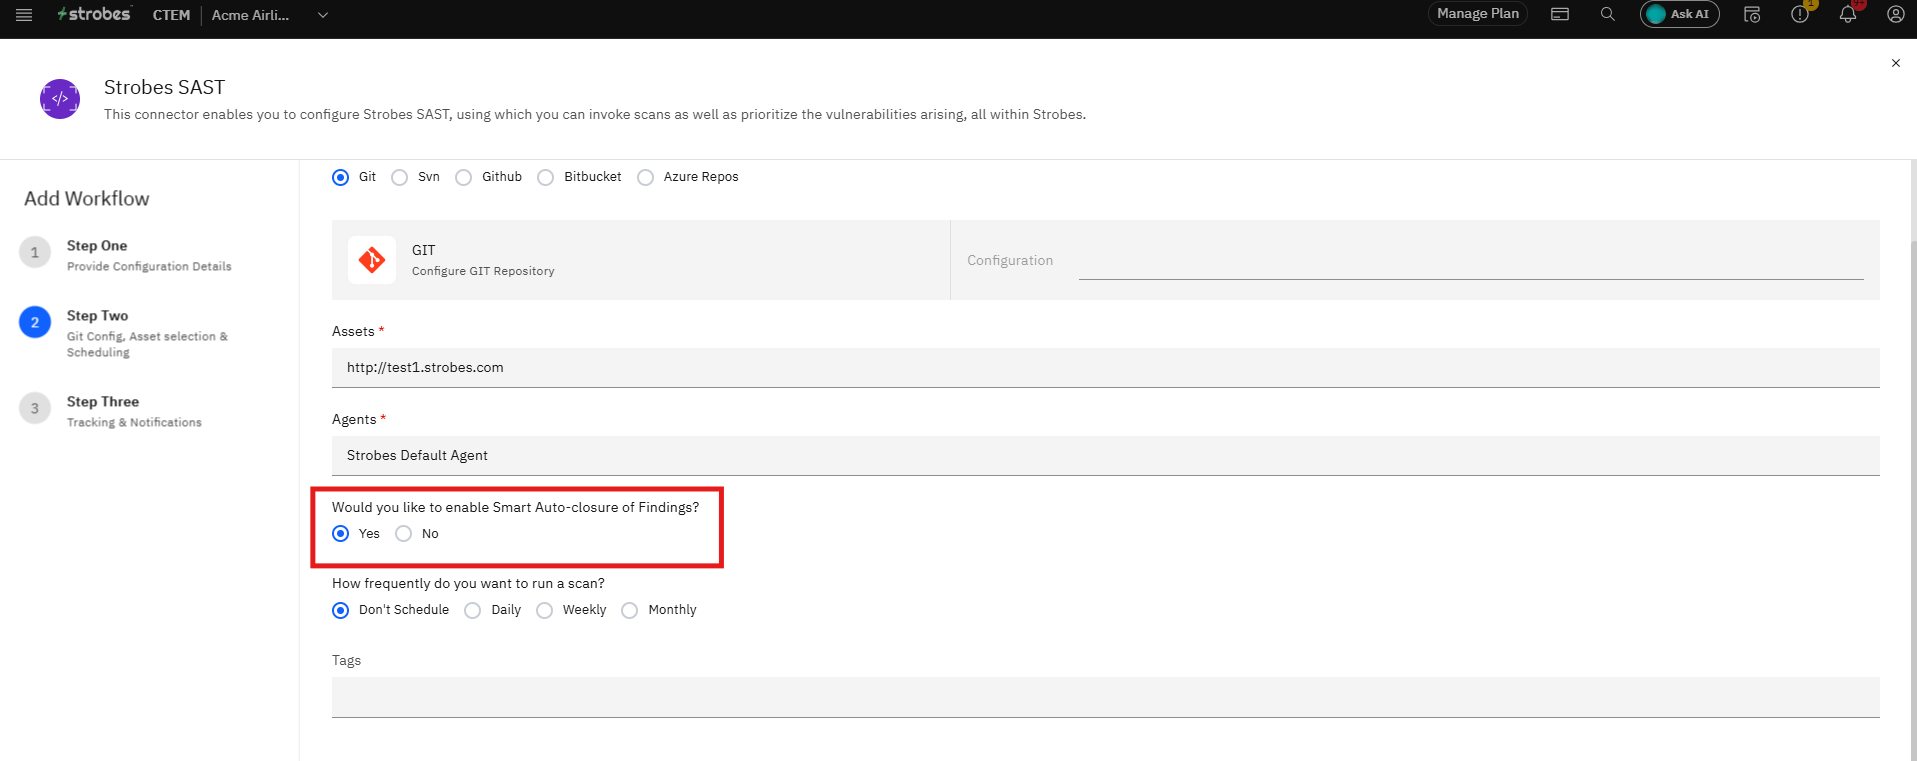
- Enable to automatically close findings when issues are fixed.
- Disable to manage closures manually.
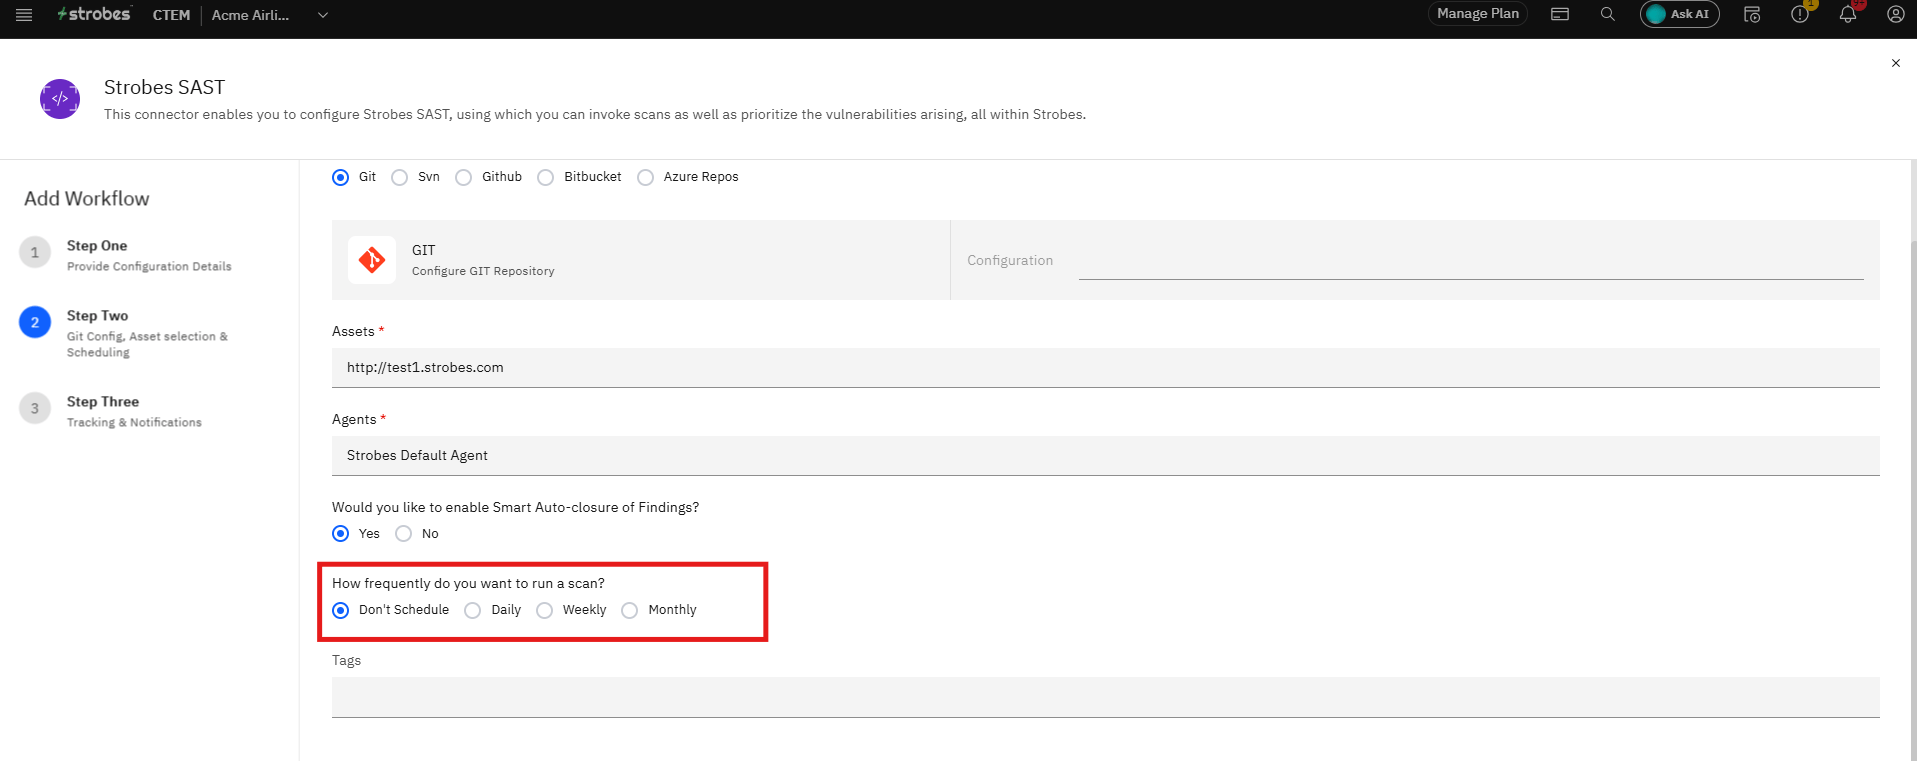
Scan Scheduling
Choose one of the following:
- Don’t Schedule
- Daily
- Weekly
- Monthly
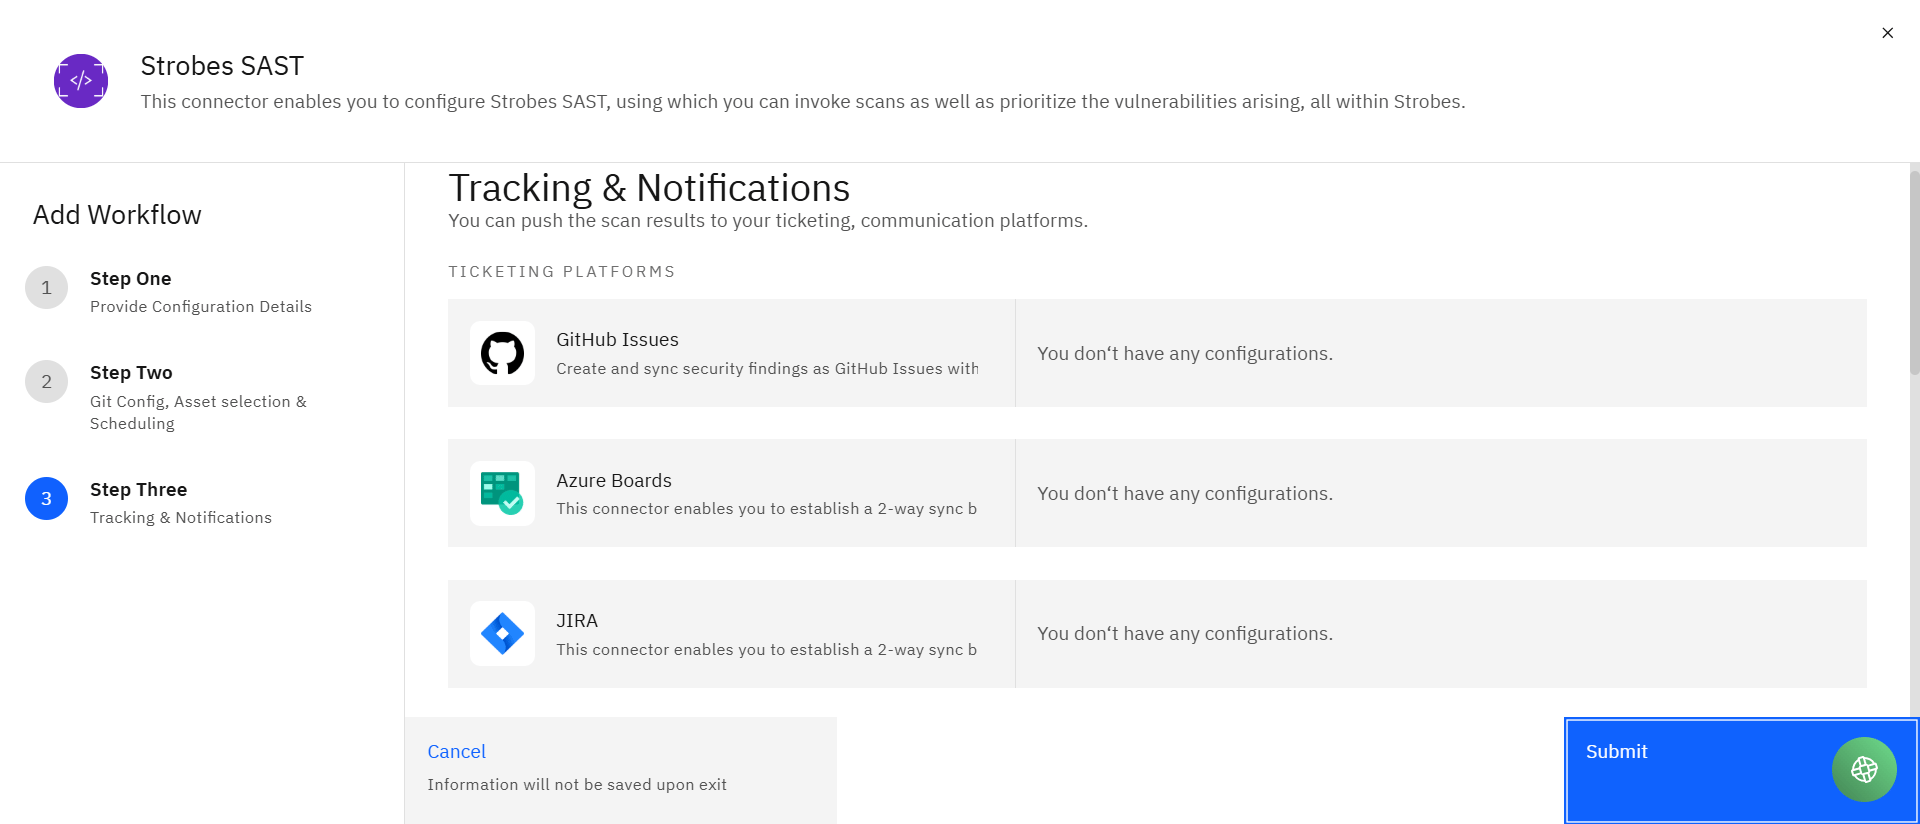
Step 5: Tracking & Notifications (Optional)
Users can configure integrations with:
- GitHub Issues
- Azure Boards
- Jira
- Bugzilla
- MS Teams
These integrations help push findings to ticketing systems and notify teams.
Step 6: Complete Configuration
- Review the configuration.
- Click Submit.
- The Strobes SAST workflow is created successfully.
Step 7: Run the Scan
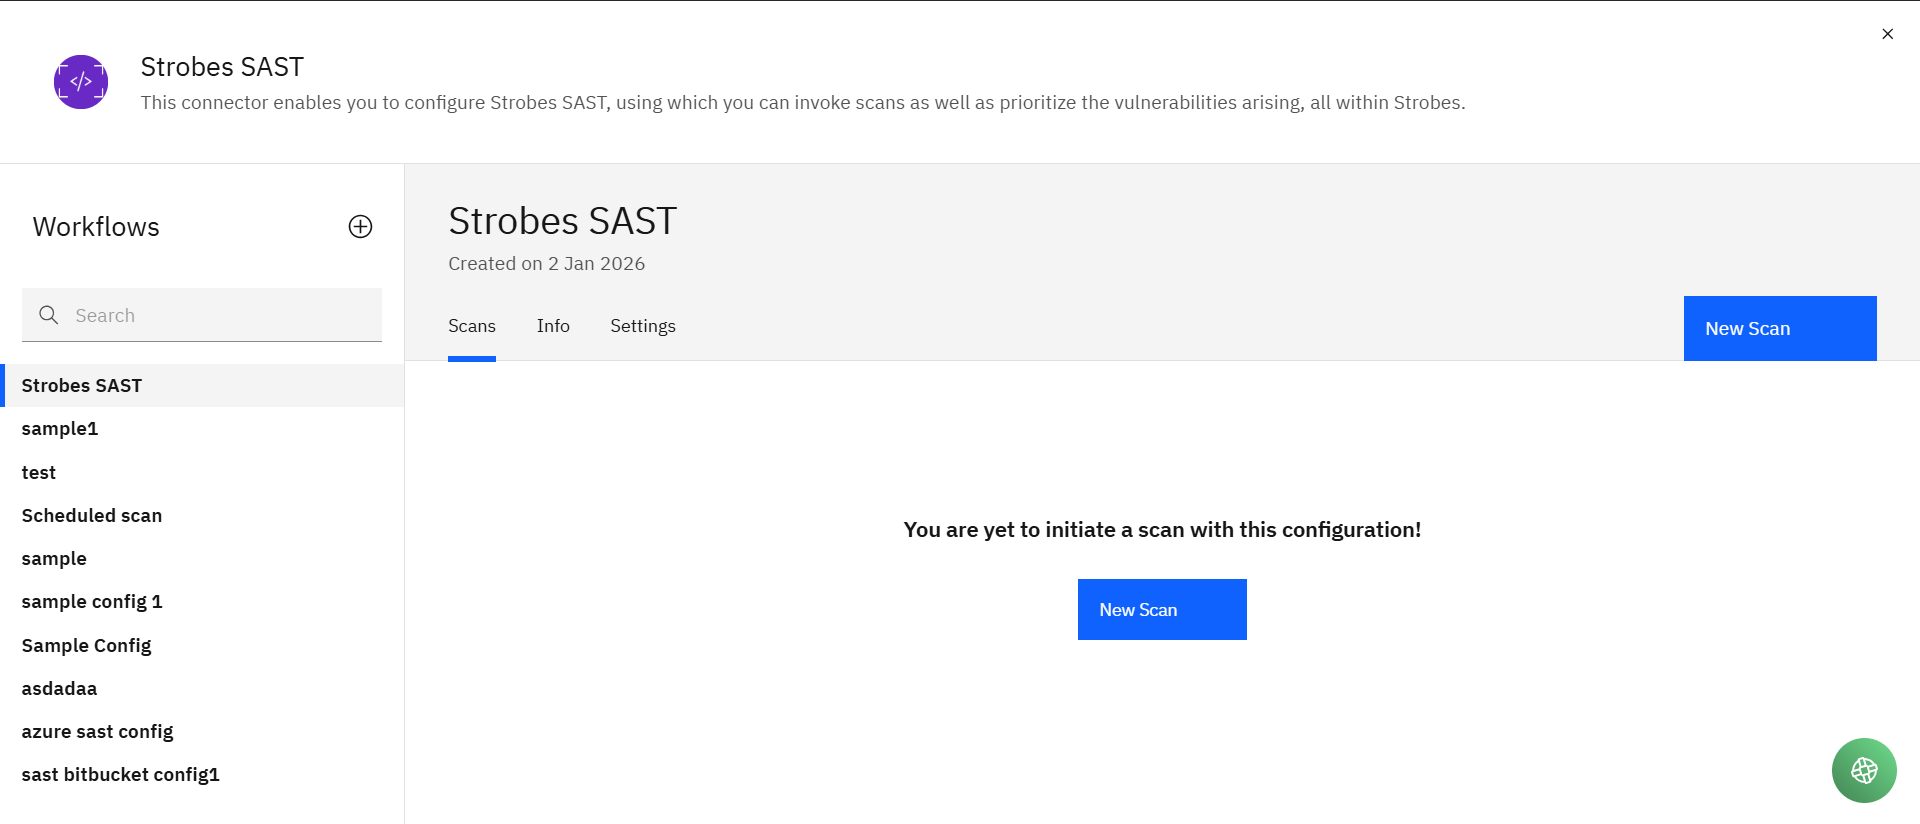
- Open the Strobes SAST workflow.
- Manual Scan (When “Don’t Schedule” Is Selected)
- Click New Scan.
- A scan configuration popup opens.
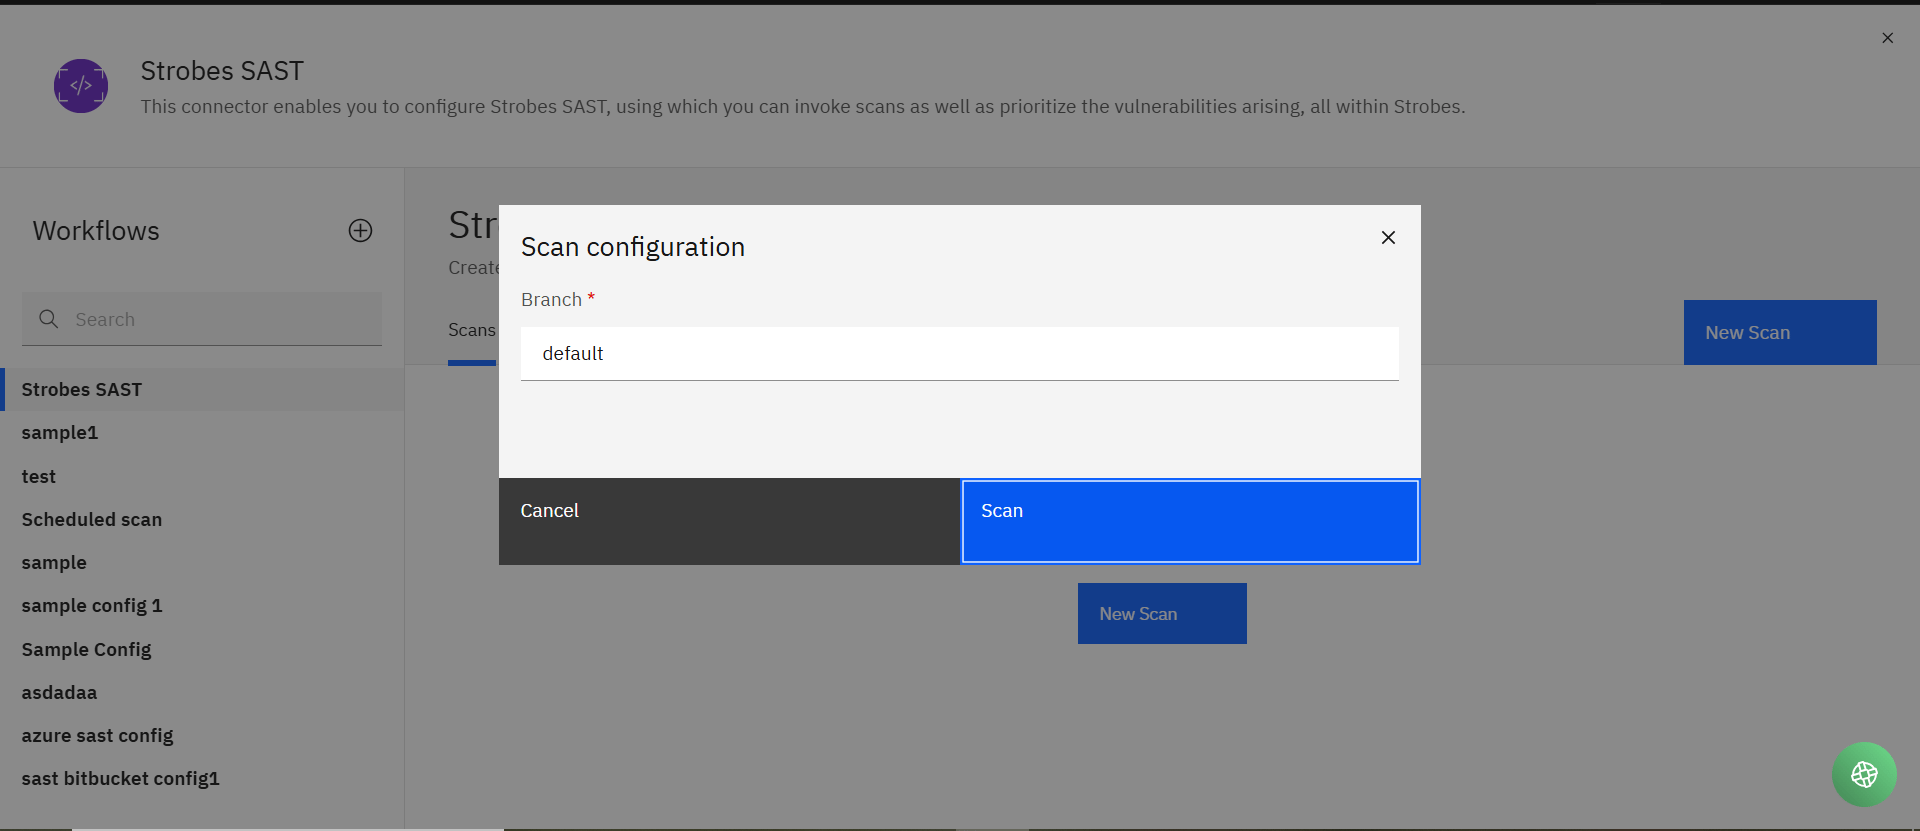
- Enter the Branch name.
- Click Scan to start.
- The scan starts on the selected repositories.
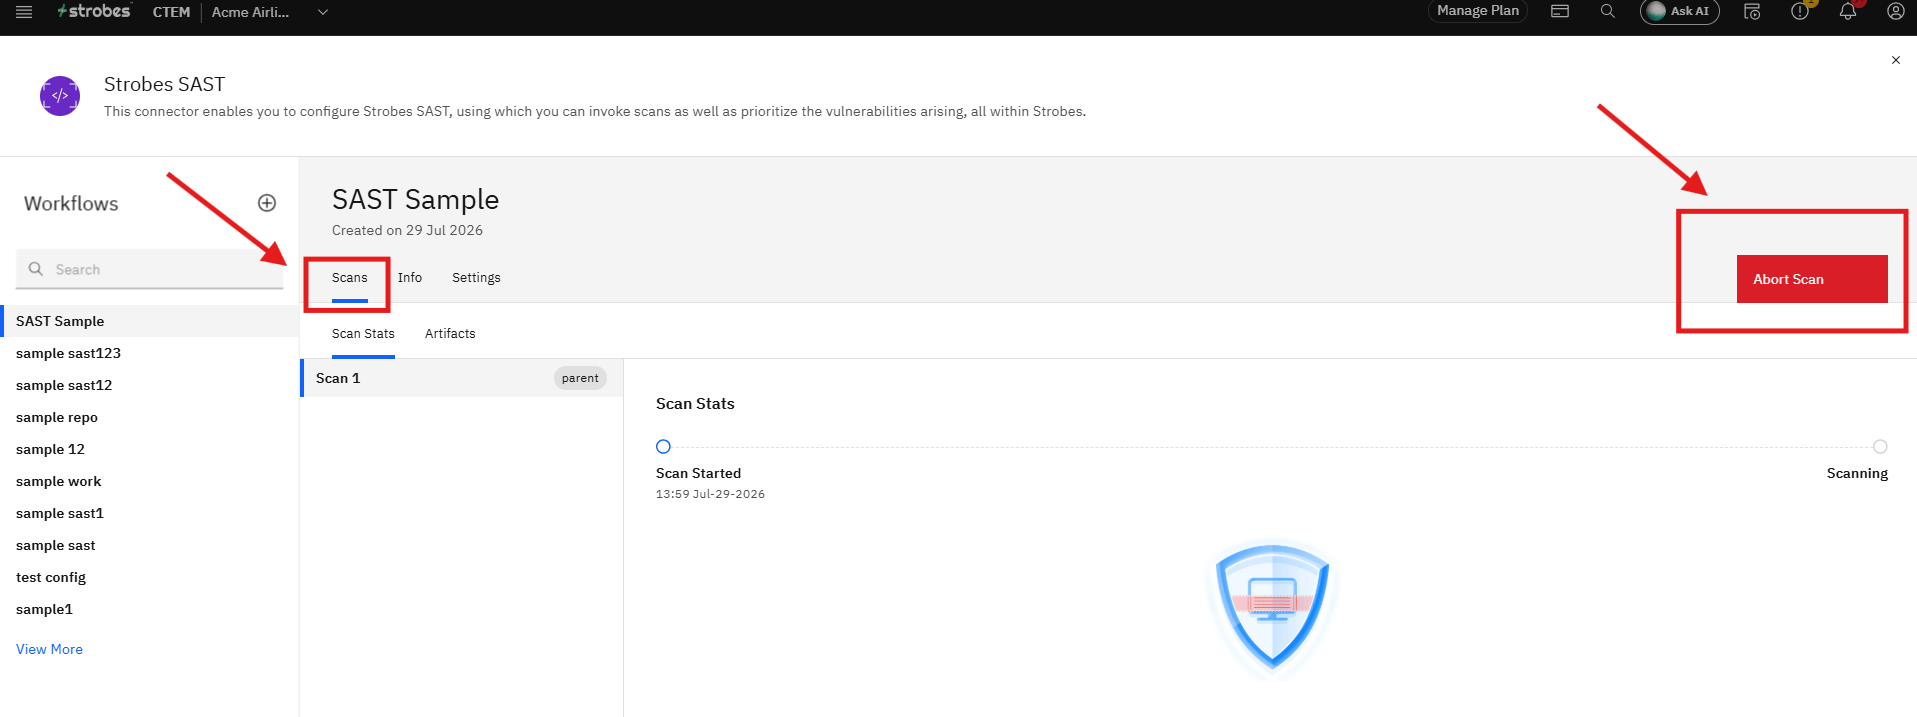
Aborting a Running Scan
- While a scan is running, users can abort it from the scan details page.
- Aborting stops the current scan execution.
- Users can initiate a new scan once ready.
Note: Aborting a scan does not impact results from completed scans.
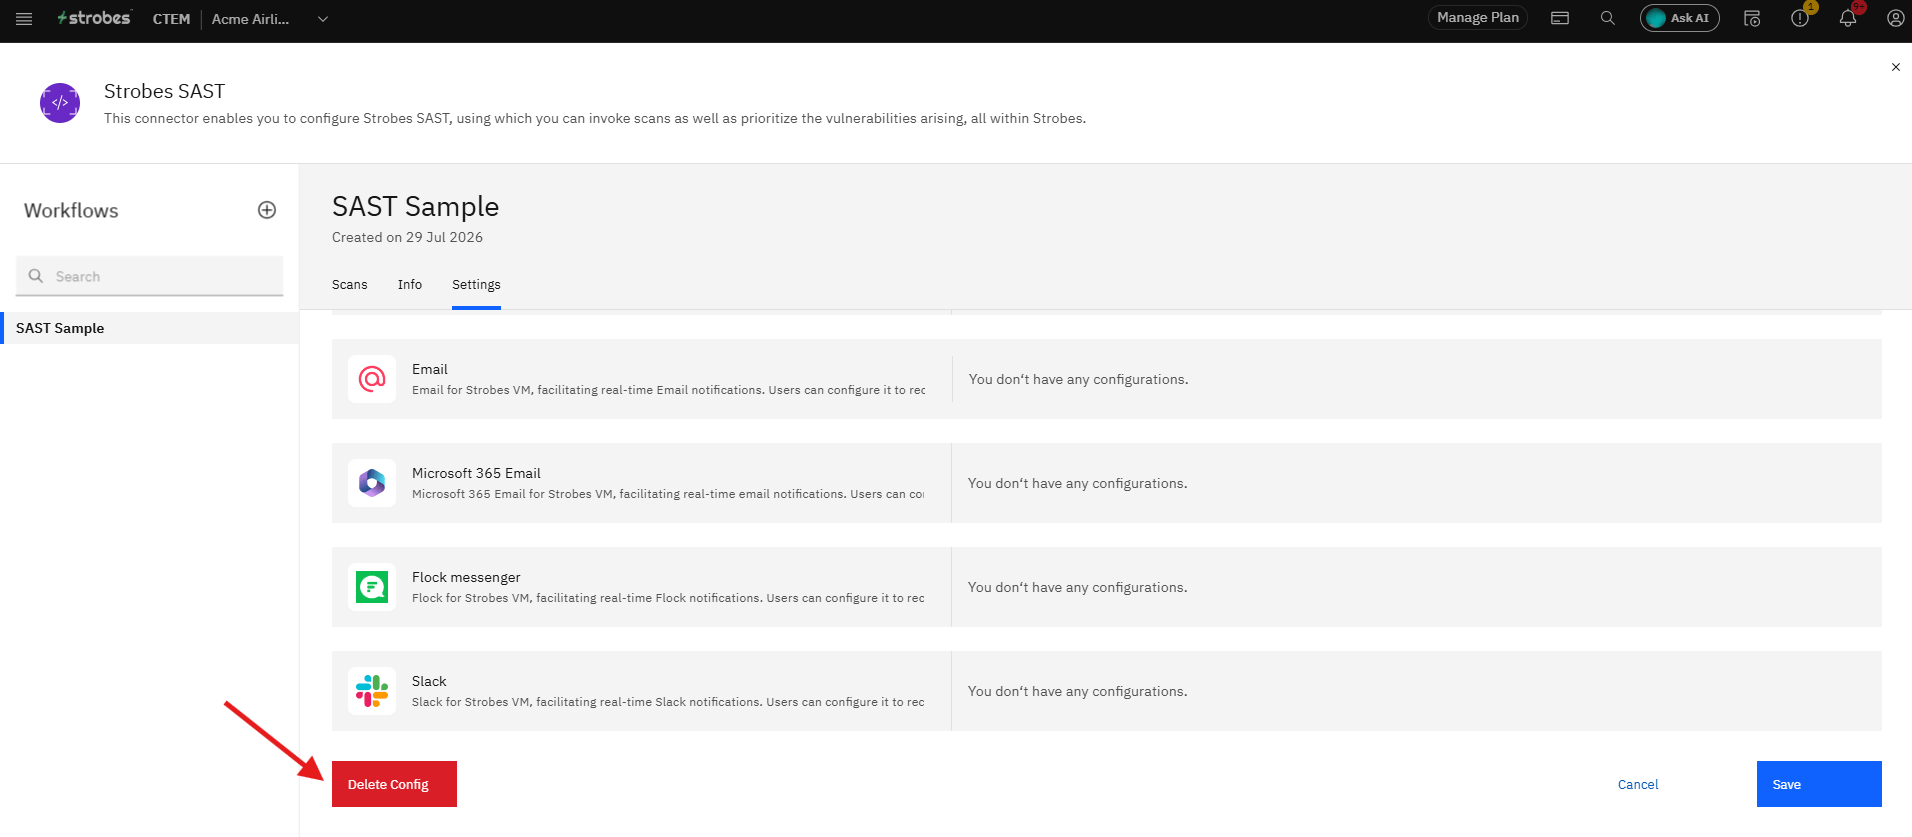
Editing or Deleting a Bandit Configuration
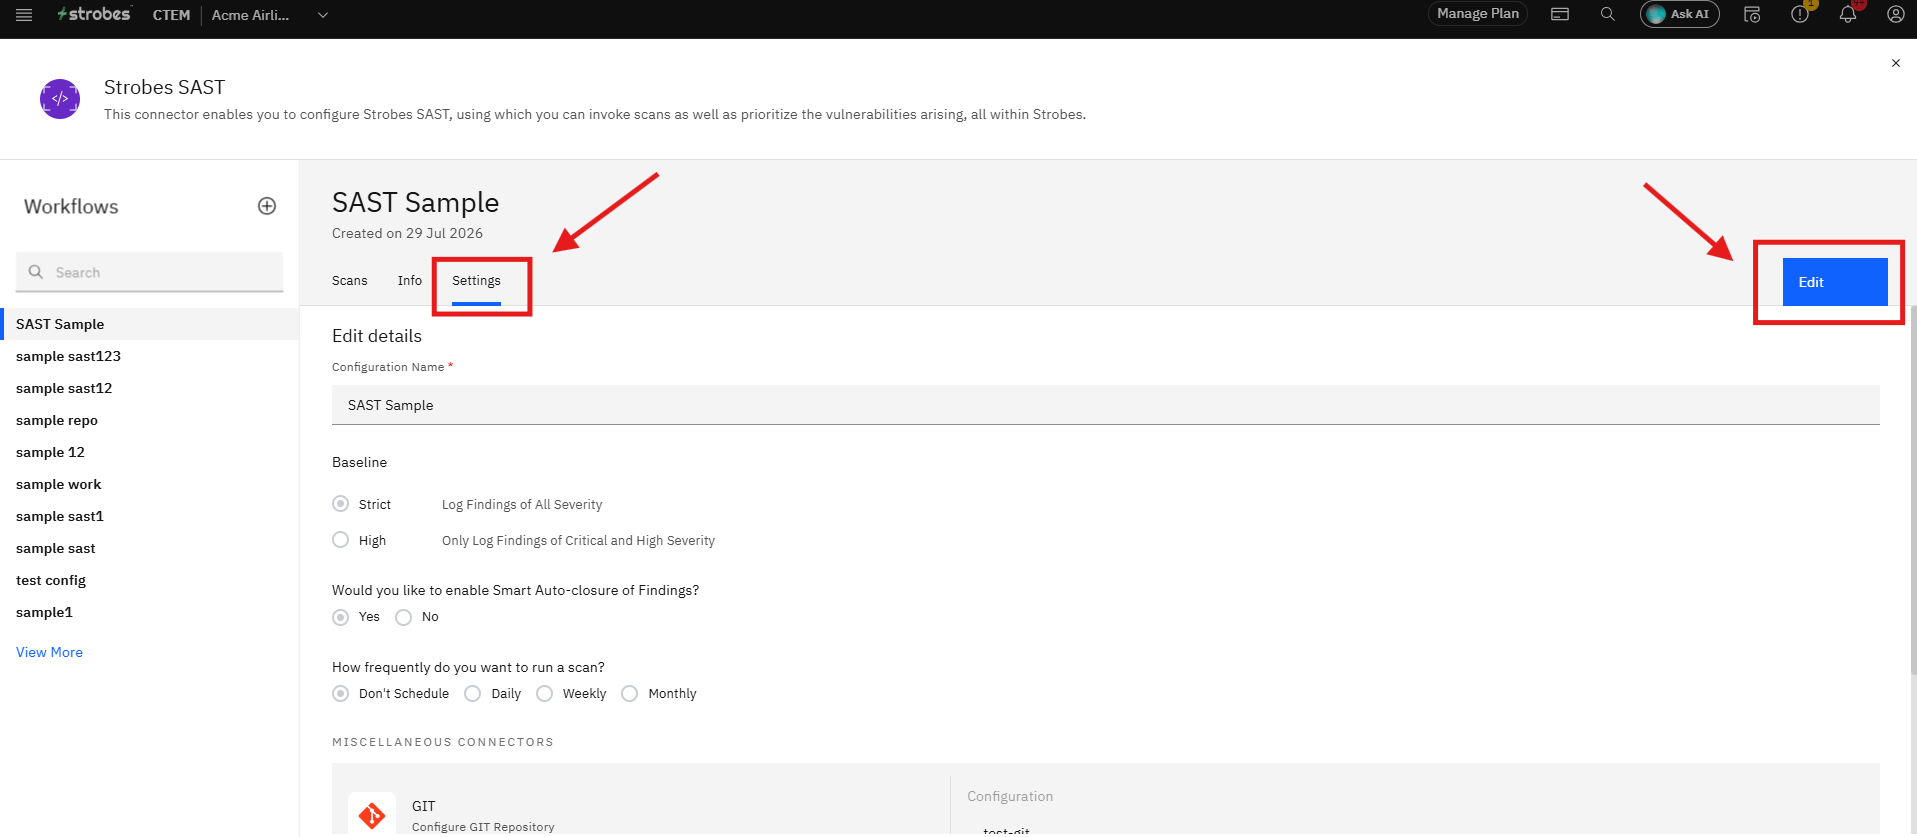
- Open the Strobes SAST workflow.
- Navigate to the Settings tab.
- From this page, users can:
- Edit the configuration
- Delete the configuration
View Scan Results
- Scan results are available in the Findings section.
- Findings are mapped to:
- Selected Assets (Git), or
- Selected Repositories (GitHub, Azure Repos, Bitbucket).
More in Strobes scanners
Was this page helpful?