
Creating a Widget
4 min readEdit
On this page⌄
- The Widgets Tab
- Creating a Widget
- Step 1: Open the Add Widget Form
- Step 2: Fill in the Basic Details
- Step 3: Choose the Data Source
- Step 4: Choose the Chart Type
- Step 5: Configure the Measure and Calculation
- Step 6: Configure Optional Display Settings
- Step 7: Configure the Search Query (if Apply Filters is On)
- Step 8: Preview and Save
- Adding a Saved Widget to a Dashboard
The Widgets Tab
Widgets are the individual charts and metrics that make up a dashboard. You can create a widget either from the Widgets tab or directly from inside the dashboard builder by clicking the + button in the Available Widgets panel.
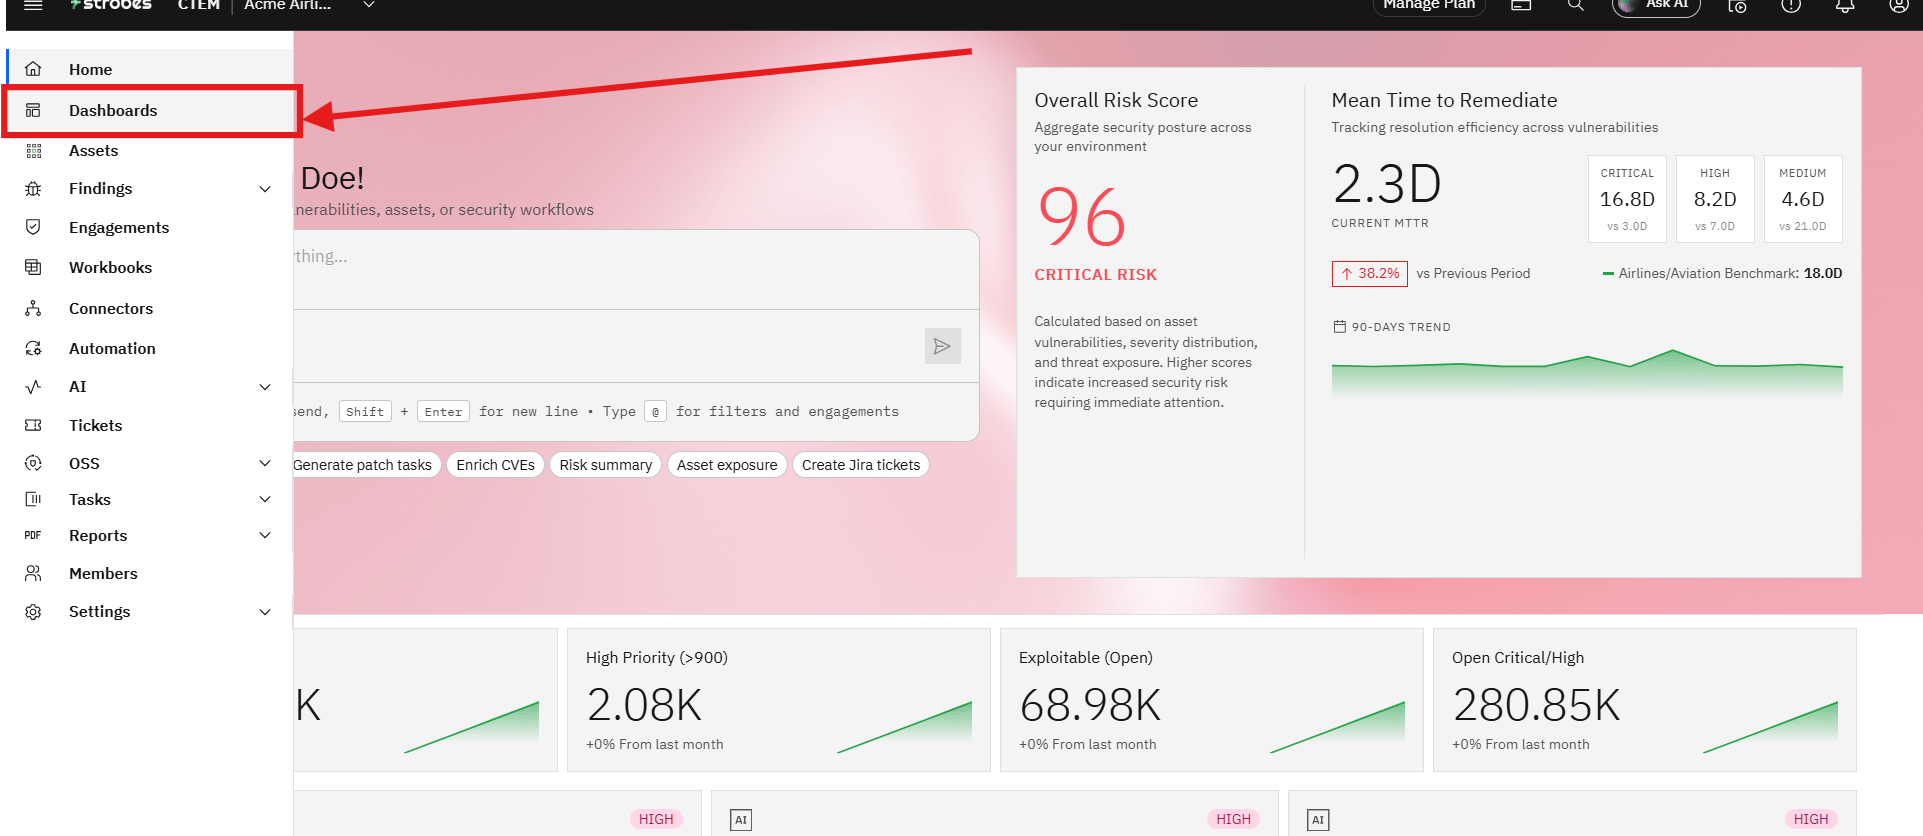
Step 1: Go to Dashboards
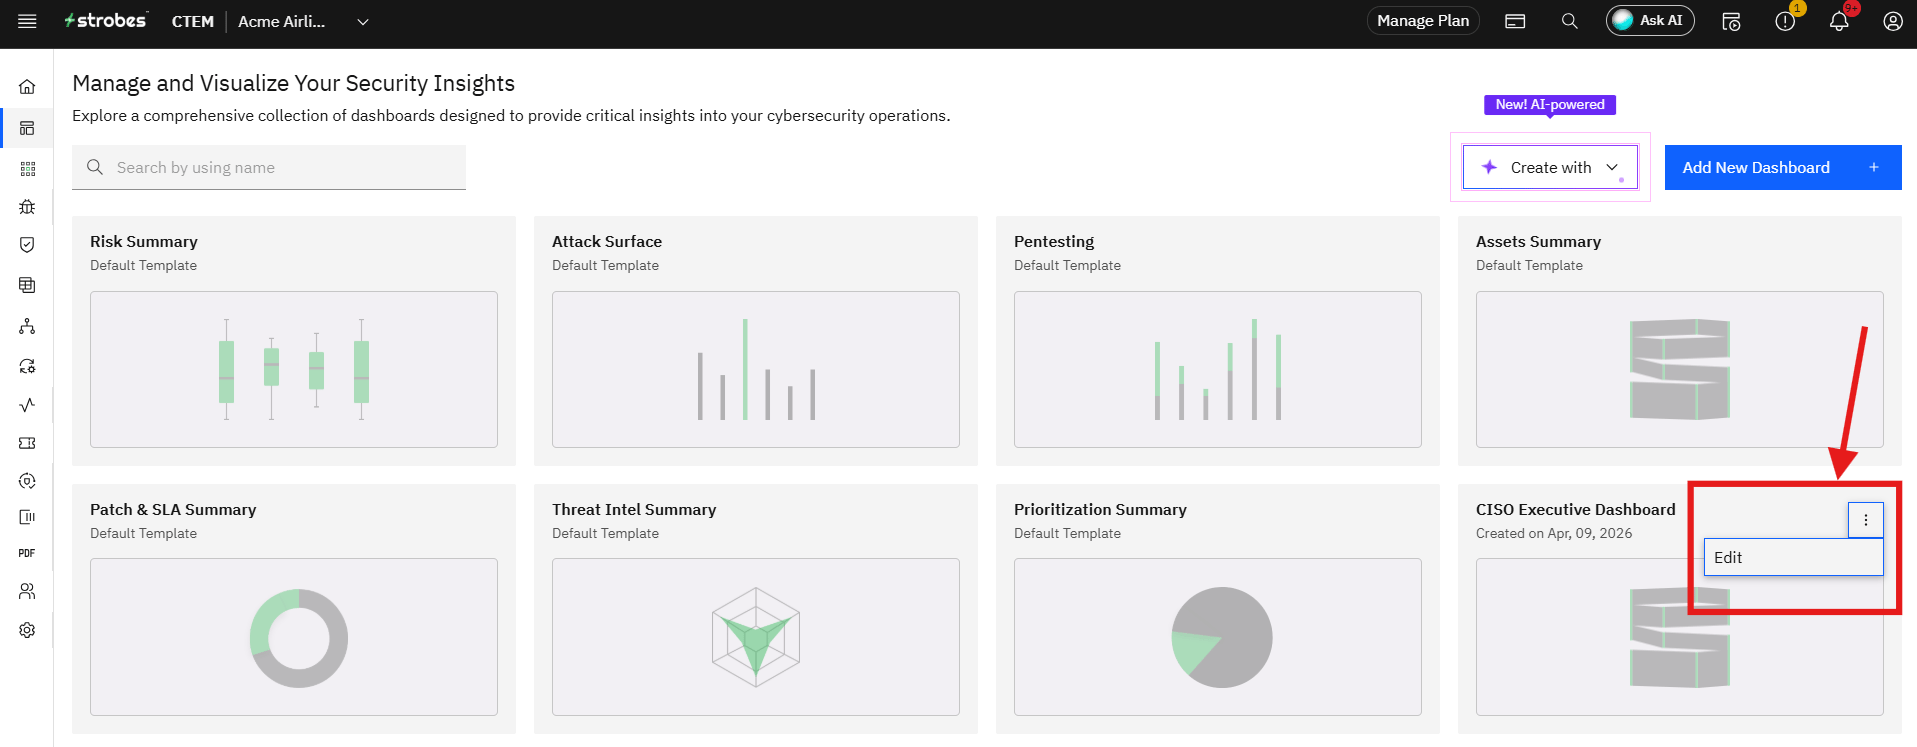
Step 2: On the customized dashboard, click on the three dots and choose Edit.
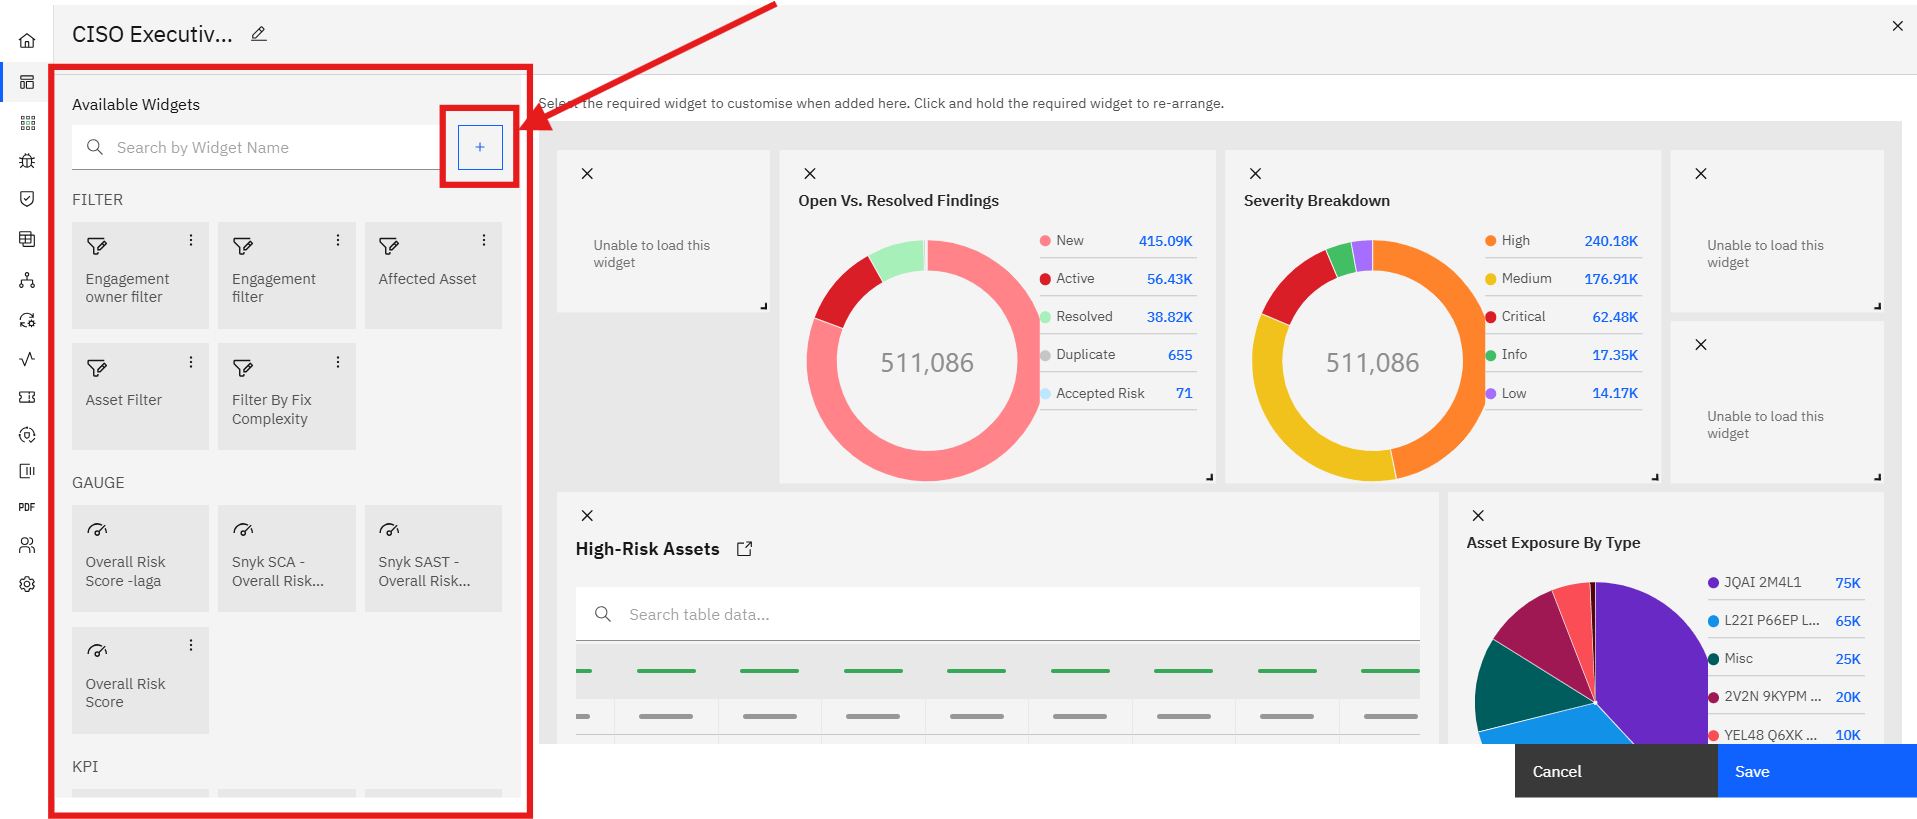
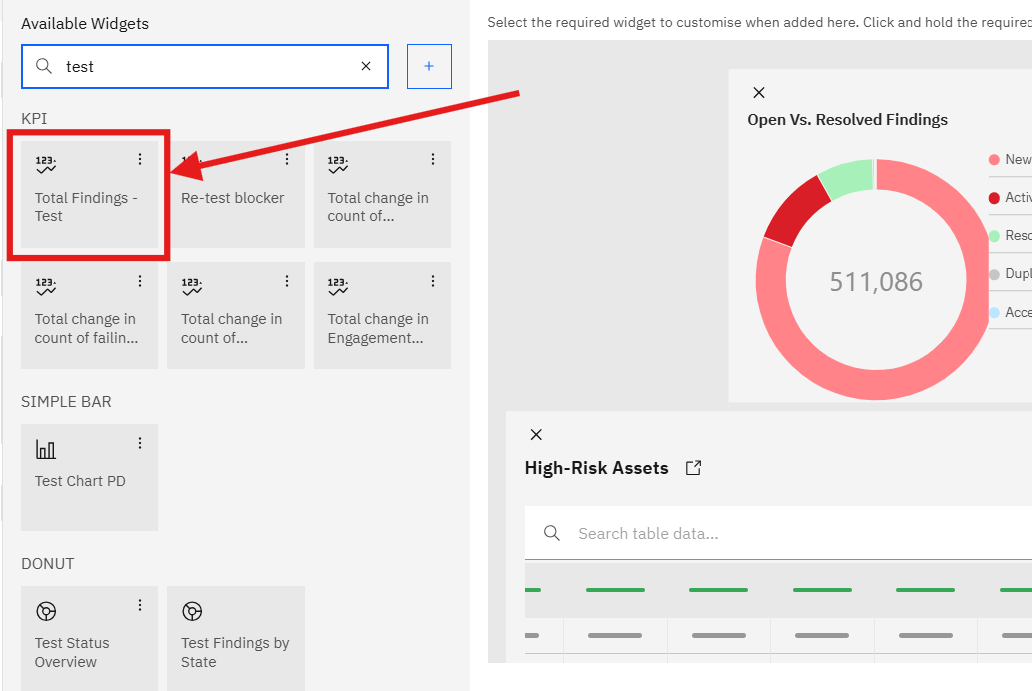
Step 3: You will be able to see the Available Widgets here.
Click on the + symbol create a new Widget.
Each widget card shows the widget name, creation date, and colored tags indicating its data source (e.g., Finding, Asset) and chart type (e.g., KPI, Donut, Simple Bar).
Strobes ships with a library of ready-made widgets, including: Attack Surface Map, Testing Coverage, Assets by Business Unit, Root Cause Analysis, Test Status Overview, Fix Complexity Analysis, Findings by Escalation, Asset Sensitivity and many more.
Creating a Widget
Step 1: Open the Add Widget Form
The page has two areas: a live preview canvas on the left that updates in real time as you fill in the form, and the configuration form on the right.
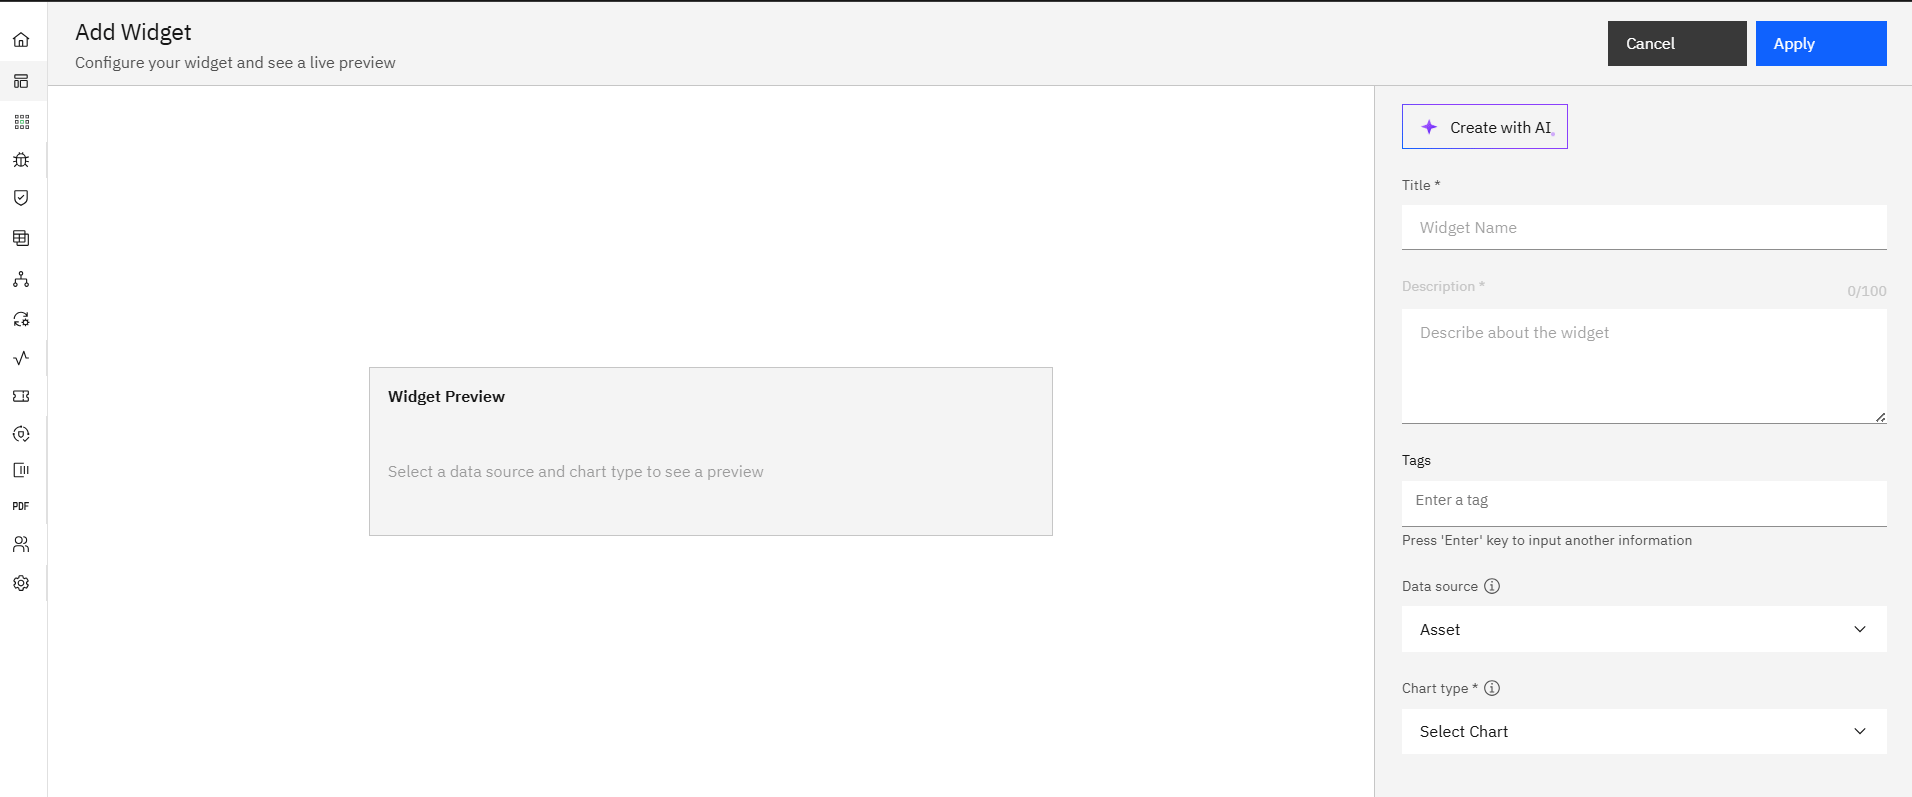
At the top of the form is a ✦ Create with AI button — click this if you'd prefer to describe the widget in plain English and let AI generate the configuration.
Step 2: Fill in the Basic Details
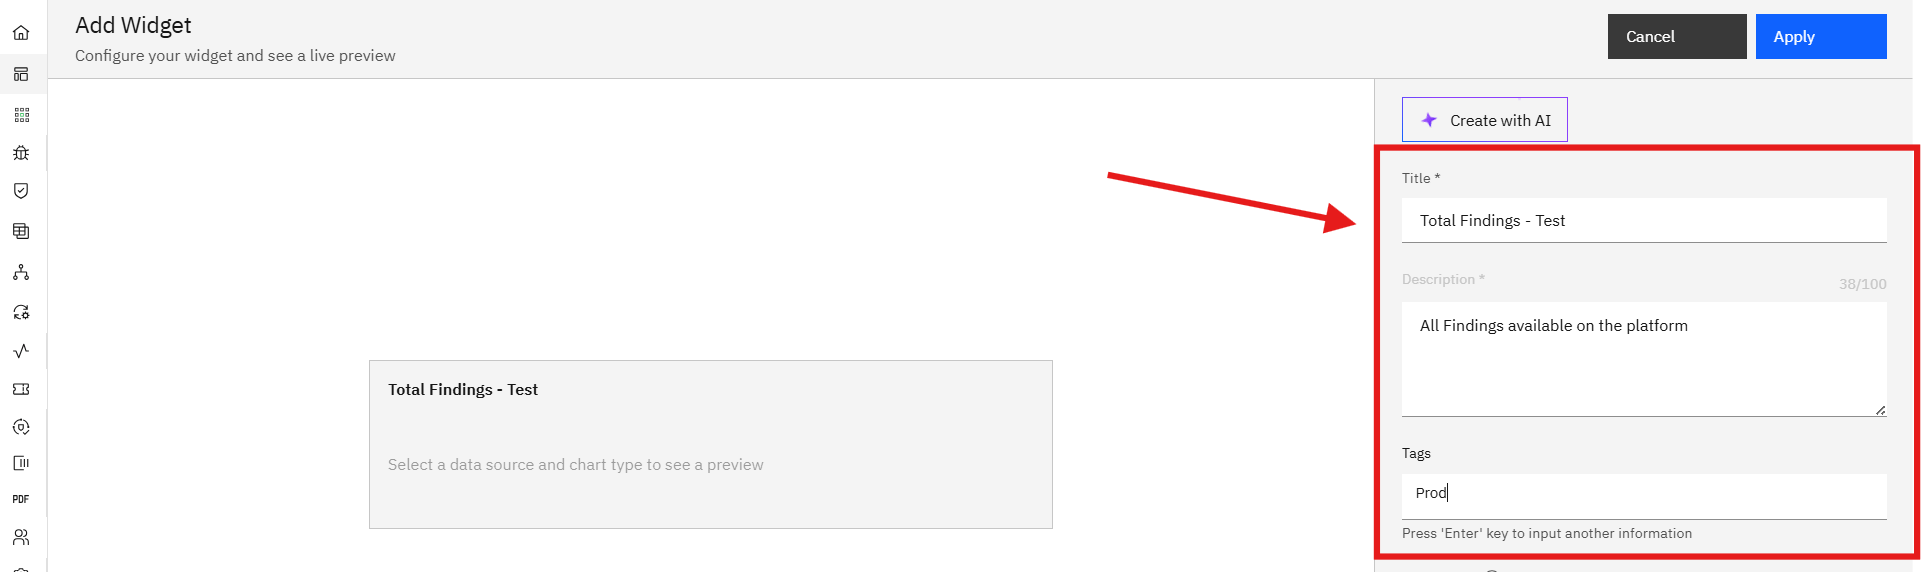
Title (required) The name that appears on the widget card in dashboards. Make it descriptive — for example, "Total Findings" or "Assets by Business Unit". The live preview on the left updates the widget title as you type.
Description (required, max 100 characters) A short explanation of what the widget shows.
Tags (optional) Type a tag and press Enter to add it. You can add multiple tags. Tags help you filter and organize widgets in the Widgets tab.
Step 3: Choose the Data Source
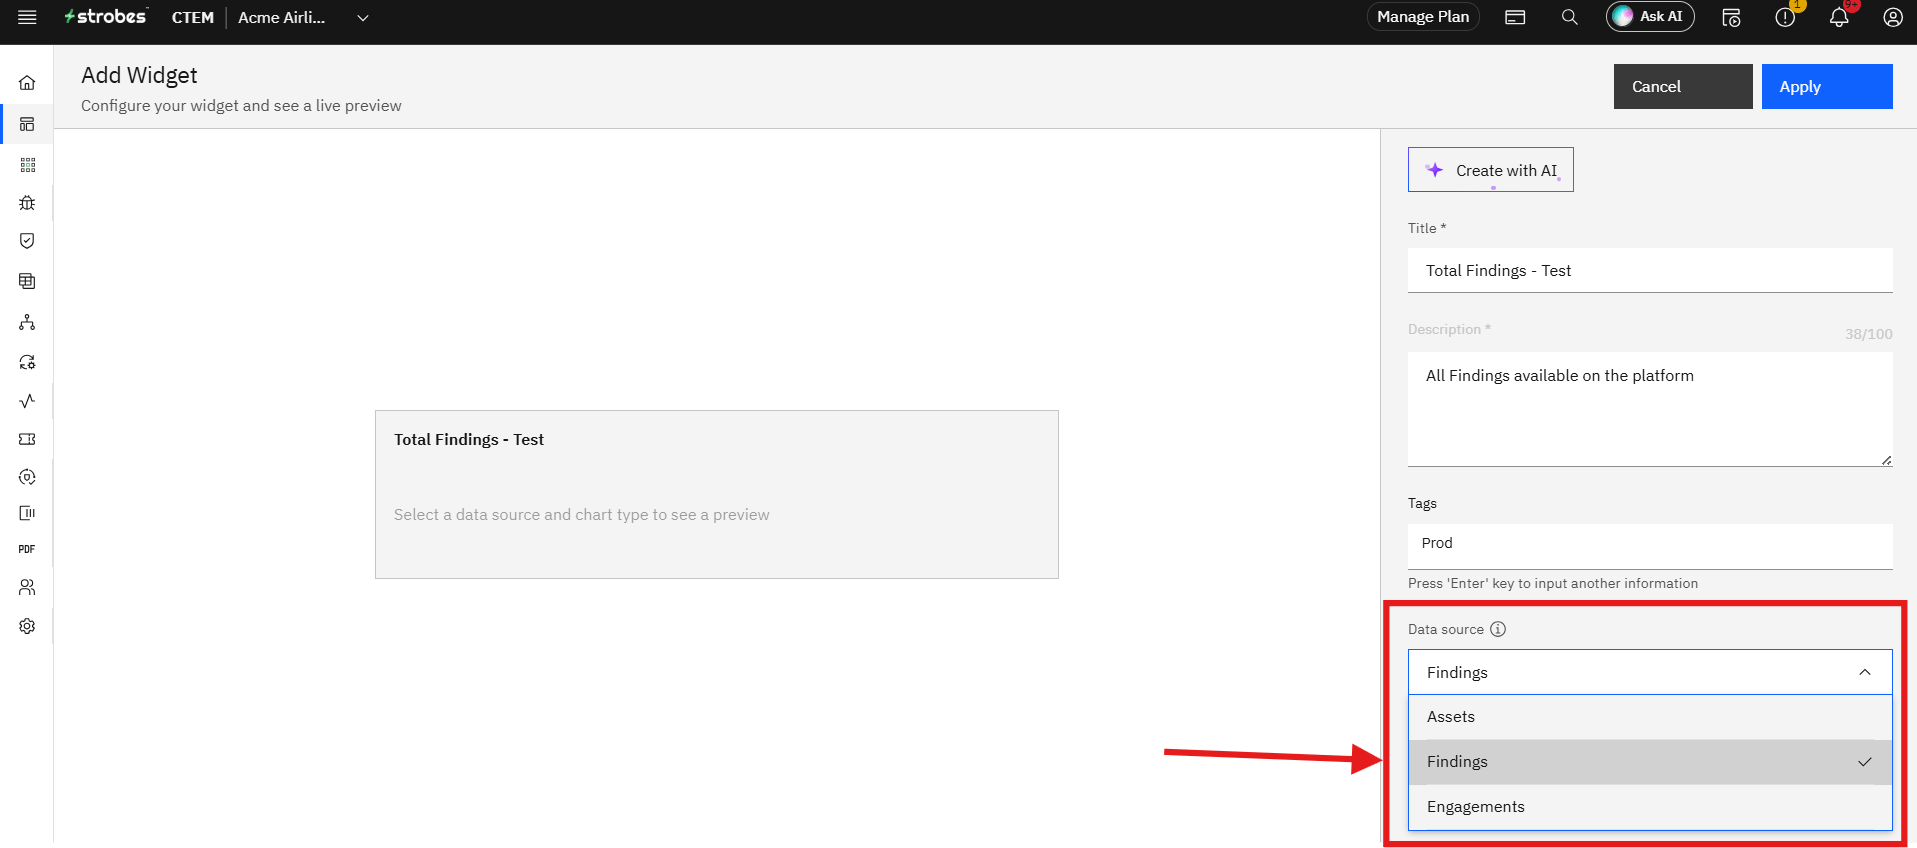
Select where the widget pulls its data from:
Data source | What it covers |
|---|---|
Assets | Your asset inventory — hosts, applications, cloud resources |
Findings | Vulnerabilities and security findings across all engagements |
Engagements | Pentest engagements and scan activities |
Step 4: Choose the Chart Type
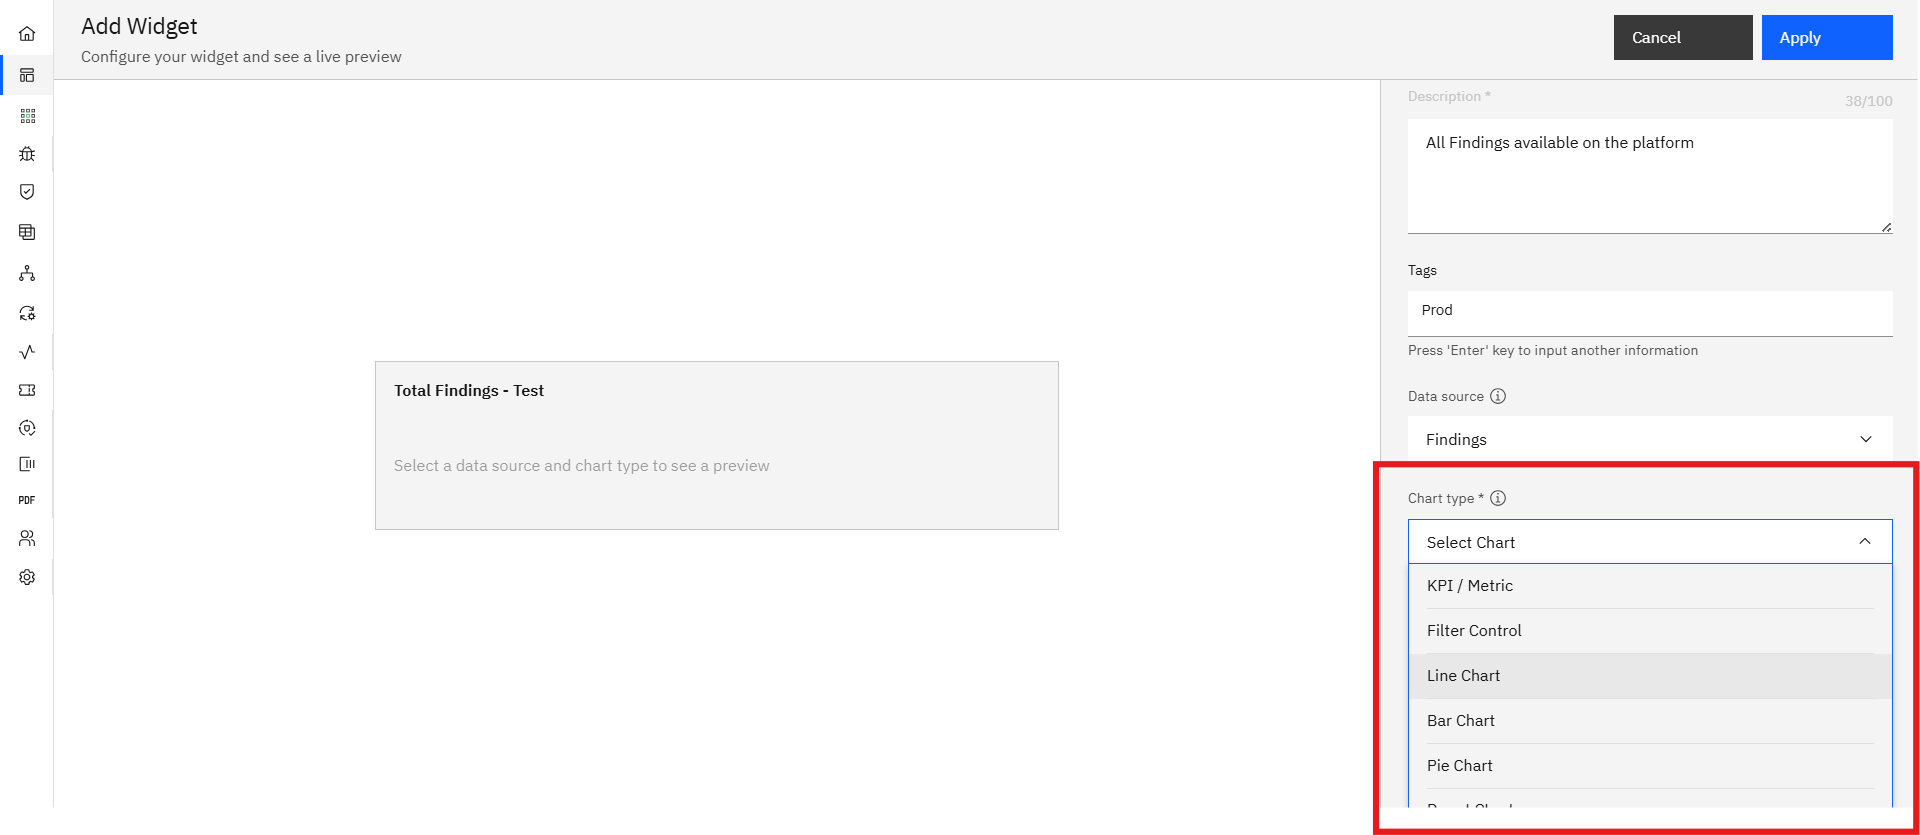
Select how the data is visualized:
Chart type | Best for |
|---|---|
KPI / Metric | A single headline number with trend indicator (e.g., "511.09K ▲ 9.1%") |
Filter Control | An interactive filter panel that lets dashboard viewers slice data |
Line Chart | Trends over time |
Bar Chart | Comparing values across categories |
Pie Chart | Showing proportional breakdown |
Donut Chart | Same as Pie with a hollow center for a secondary value |
Step 5: Configure the Measure and Calculation
Once you select a chart type, two additional fields appear:
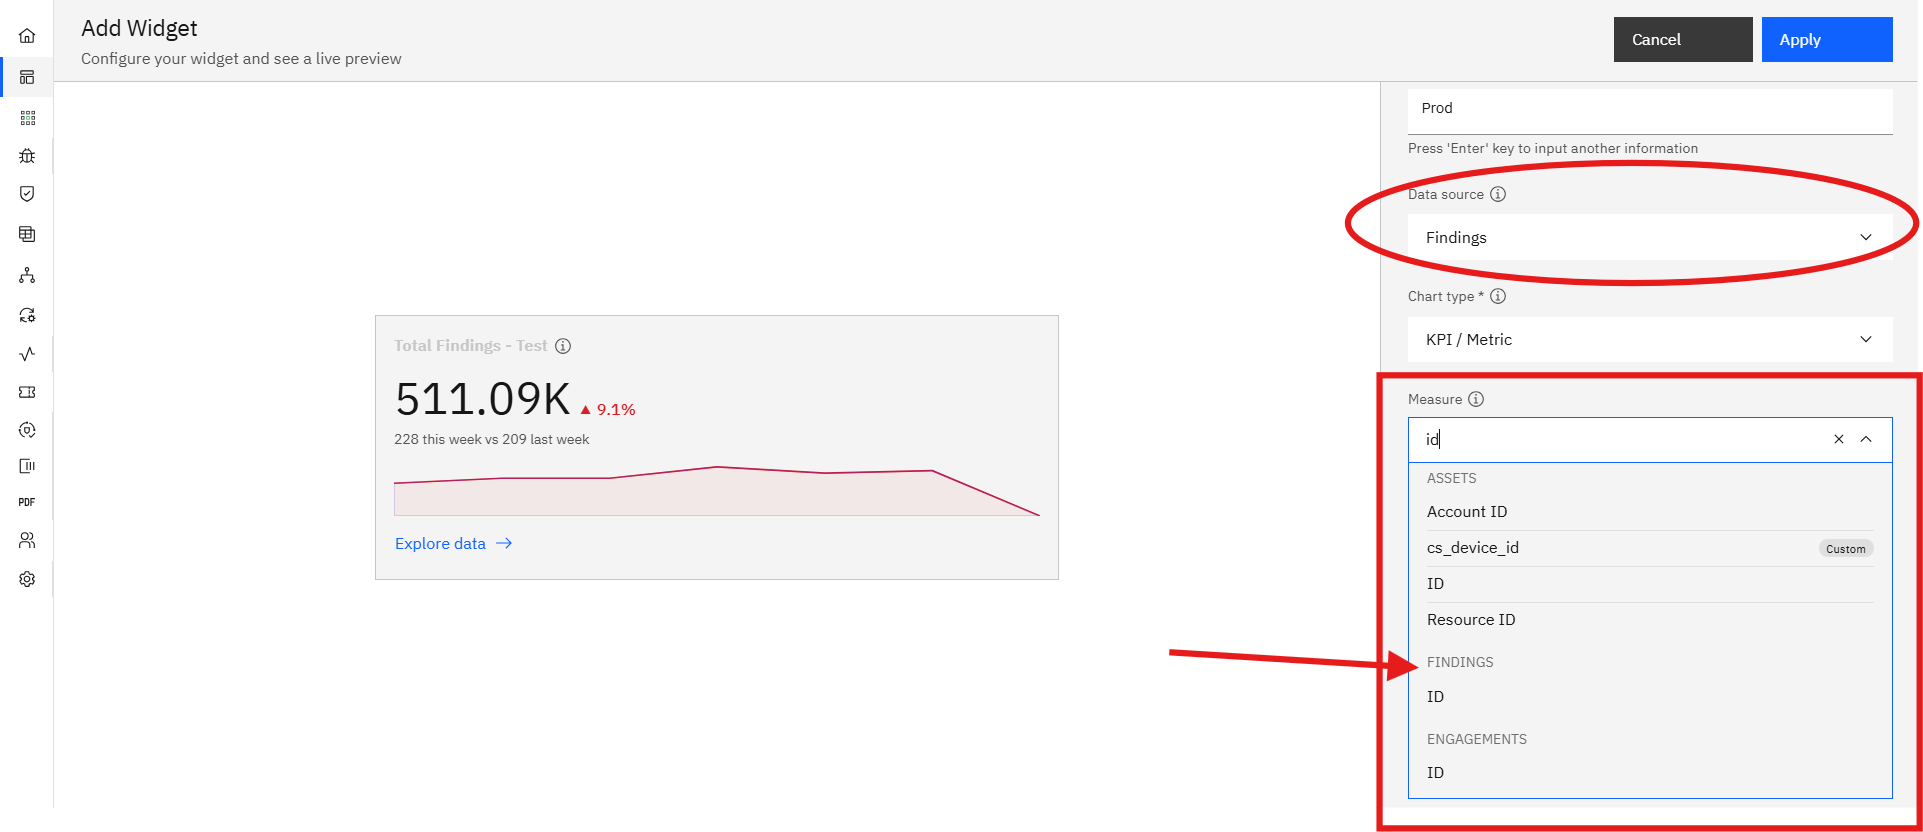
Measure Select the field from your data source that the widget counts or aggregates. The dropdown is searchable and groups fields by entity type. For example, under FINDINGS: ID, Finding Level, False Positive Signals. Under ASSETS: Business Unit, Business Impact, Asset Region, Cloud Type, and many others.
Calculation Select how the measure is aggregated. Currently available: Count.
Step 6: Configure Optional Display Settings
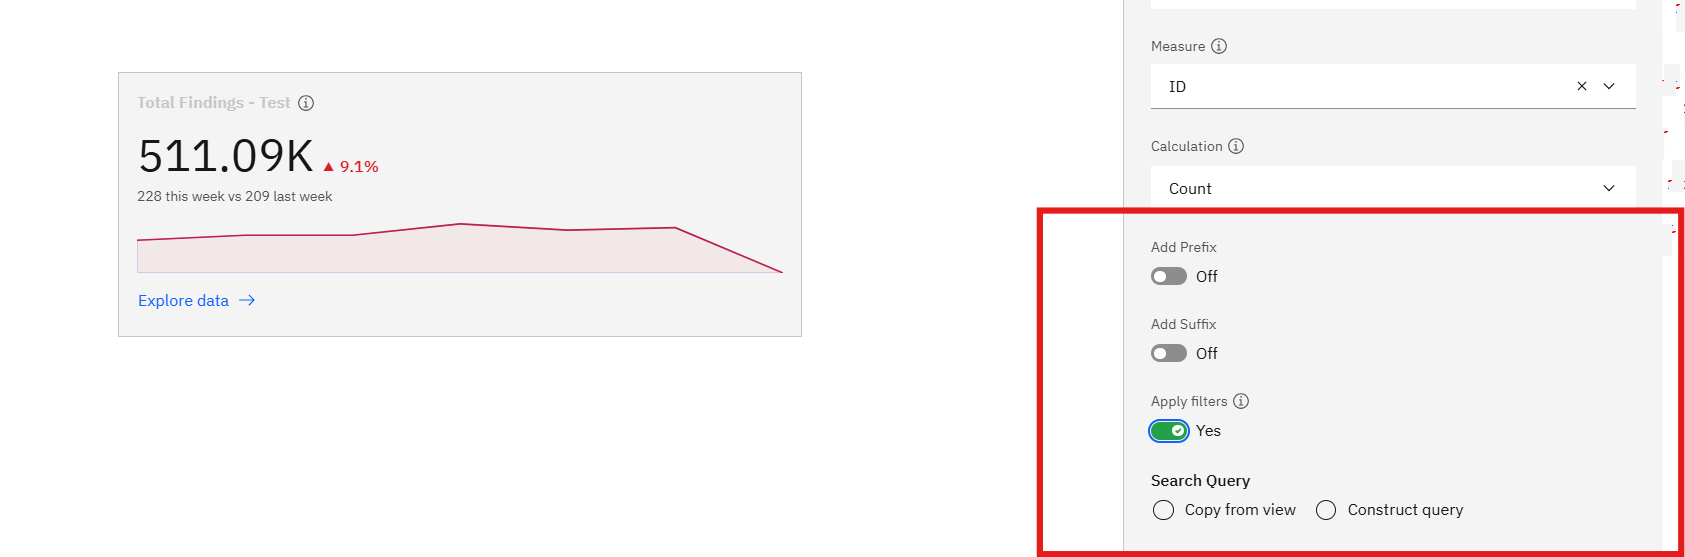
Add Prefix (toggle, default Off) When enabled, lets you prepend a symbol or label to the displayed value (e.g., "$" before a cost metric).
Add Suffix (toggle, default Off) When enabled, lets you append a unit or label after the value (e.g., "%" or "items").
Apply filters (toggle, default Off) When enabled, the widget respects the dashboard-level Asset View and Findings View filters. Turn this on so that when a dashboard viewer applies a filter, this widget's data updates to match.
Step 7: Configure the Search Query (if Apply Filters is On)
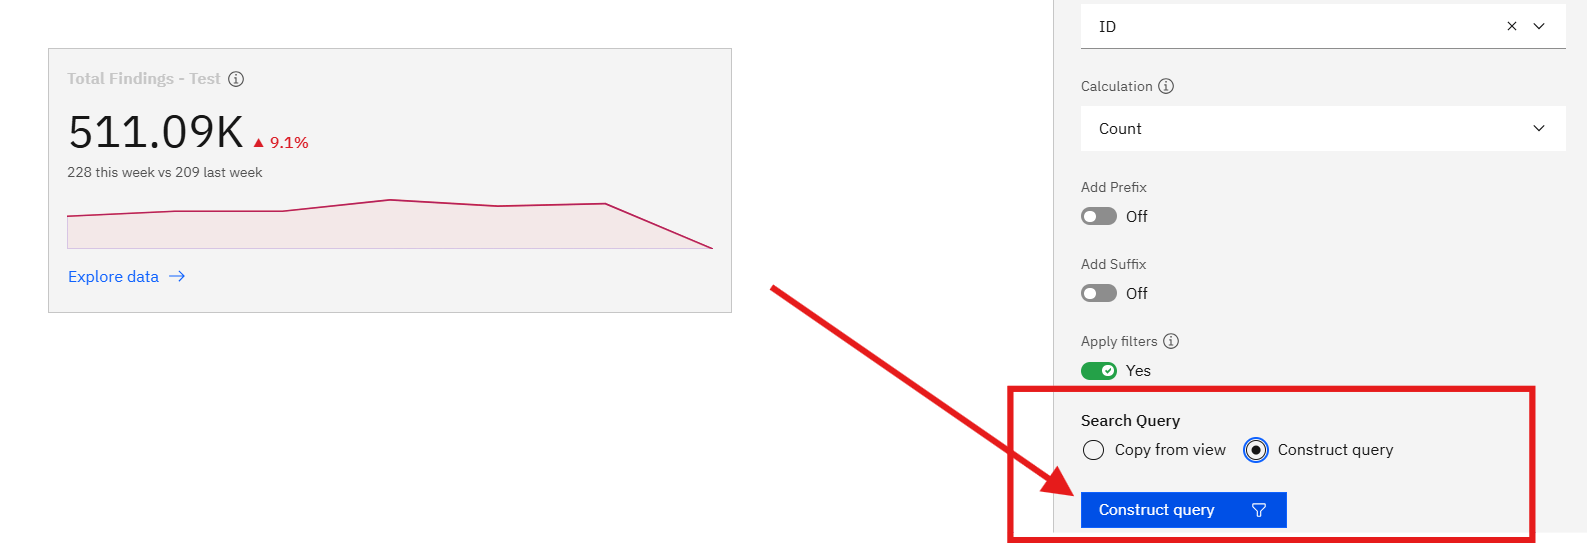
When Apply filters is toggled on, a Search Query section appears below it. You must configure a search query before saving.
Choose one of two options:
- Copy from view — inherits the query from the currently active view in the dashboard.
- Construct query — opens a query builder where you define the filter conditions manually.
Step 8: Preview and Save
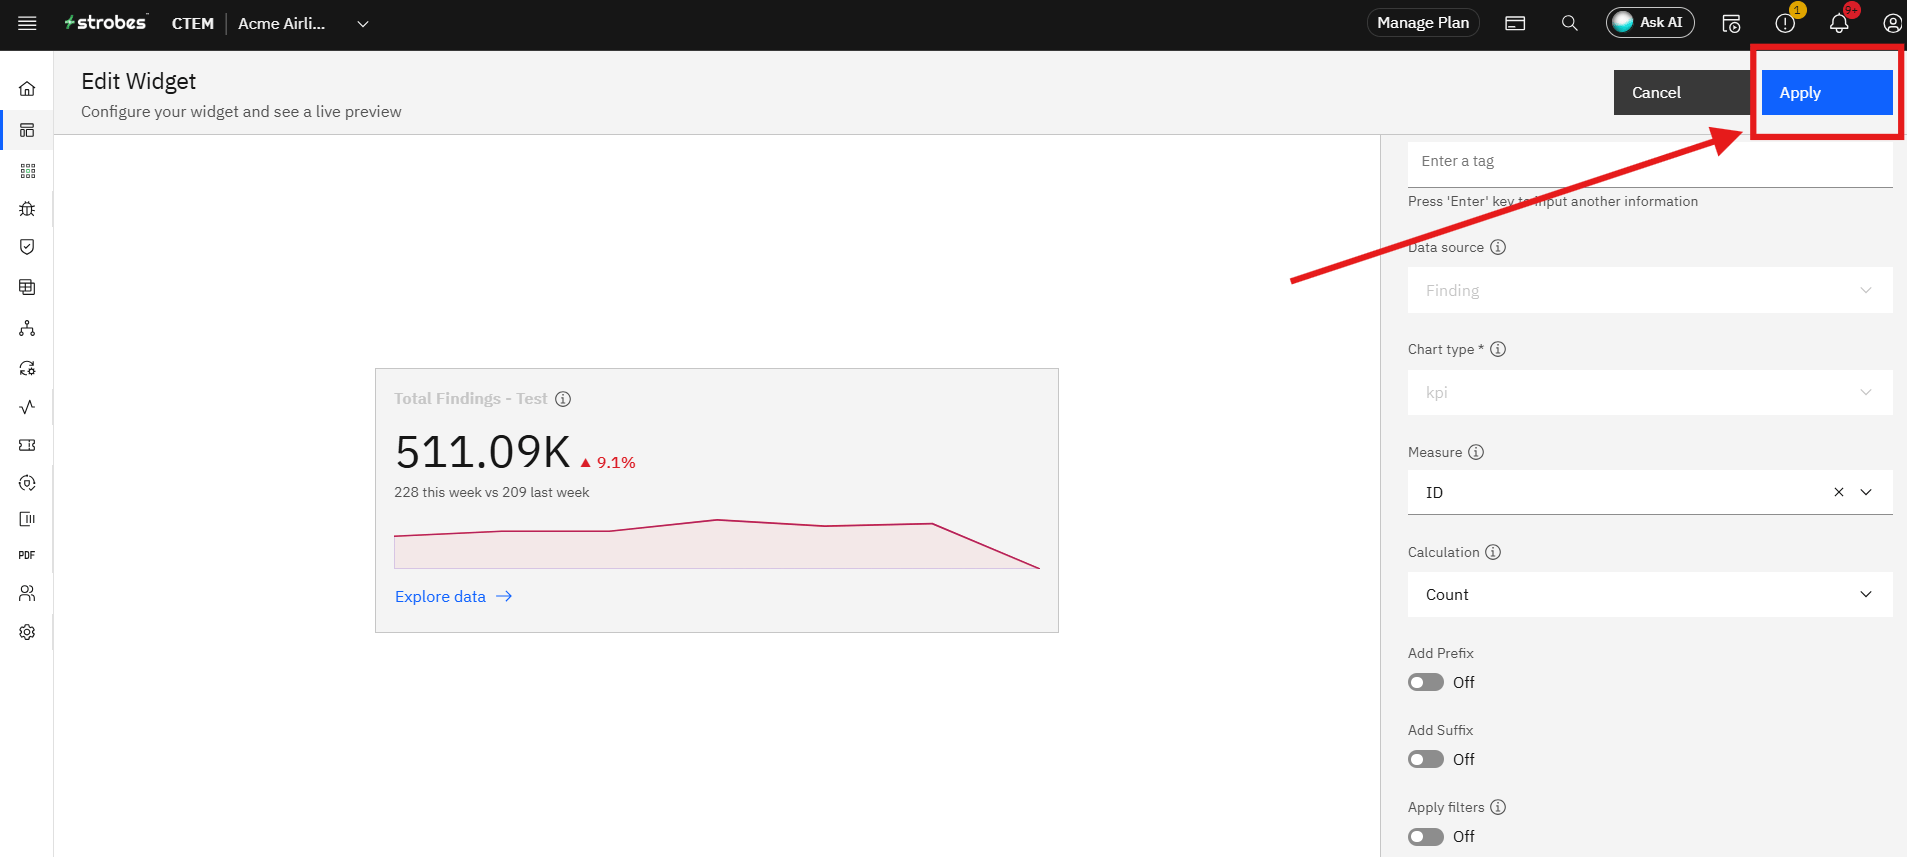
As you fill in the form, the live preview canvas on the left updates in real time. For example, with Title = "Total Findings", Data source = Findings, Chart type = KPI/Metric, Measure = ID, Calculation = Count, the preview shows:
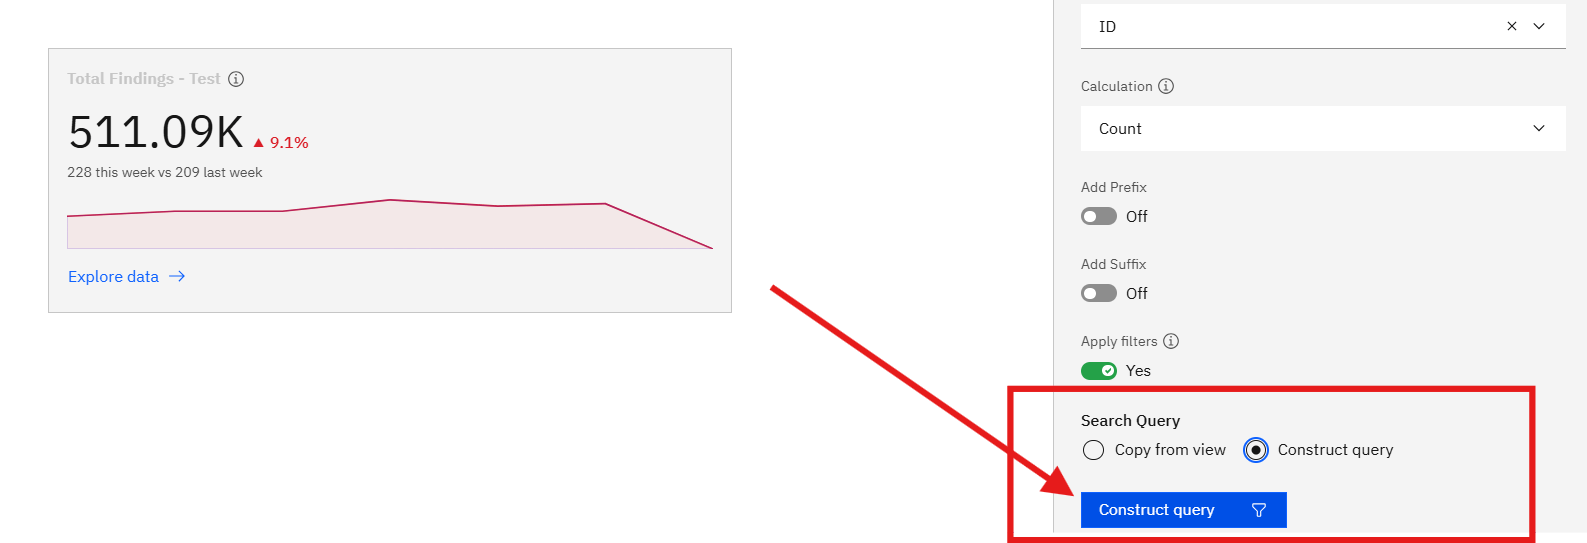
When you're satisfied with the preview, click Apply in the top right to save the widget. Click Cancel to discard.
After saving, Strobes returns you to the Widgets tab (or the dashboard builder if you started from there) with a green Widgets created successfully notification. The new widget appears immediately in the list and is available to add to any custom dashboard.
Adding a Saved Widget to a Dashboard
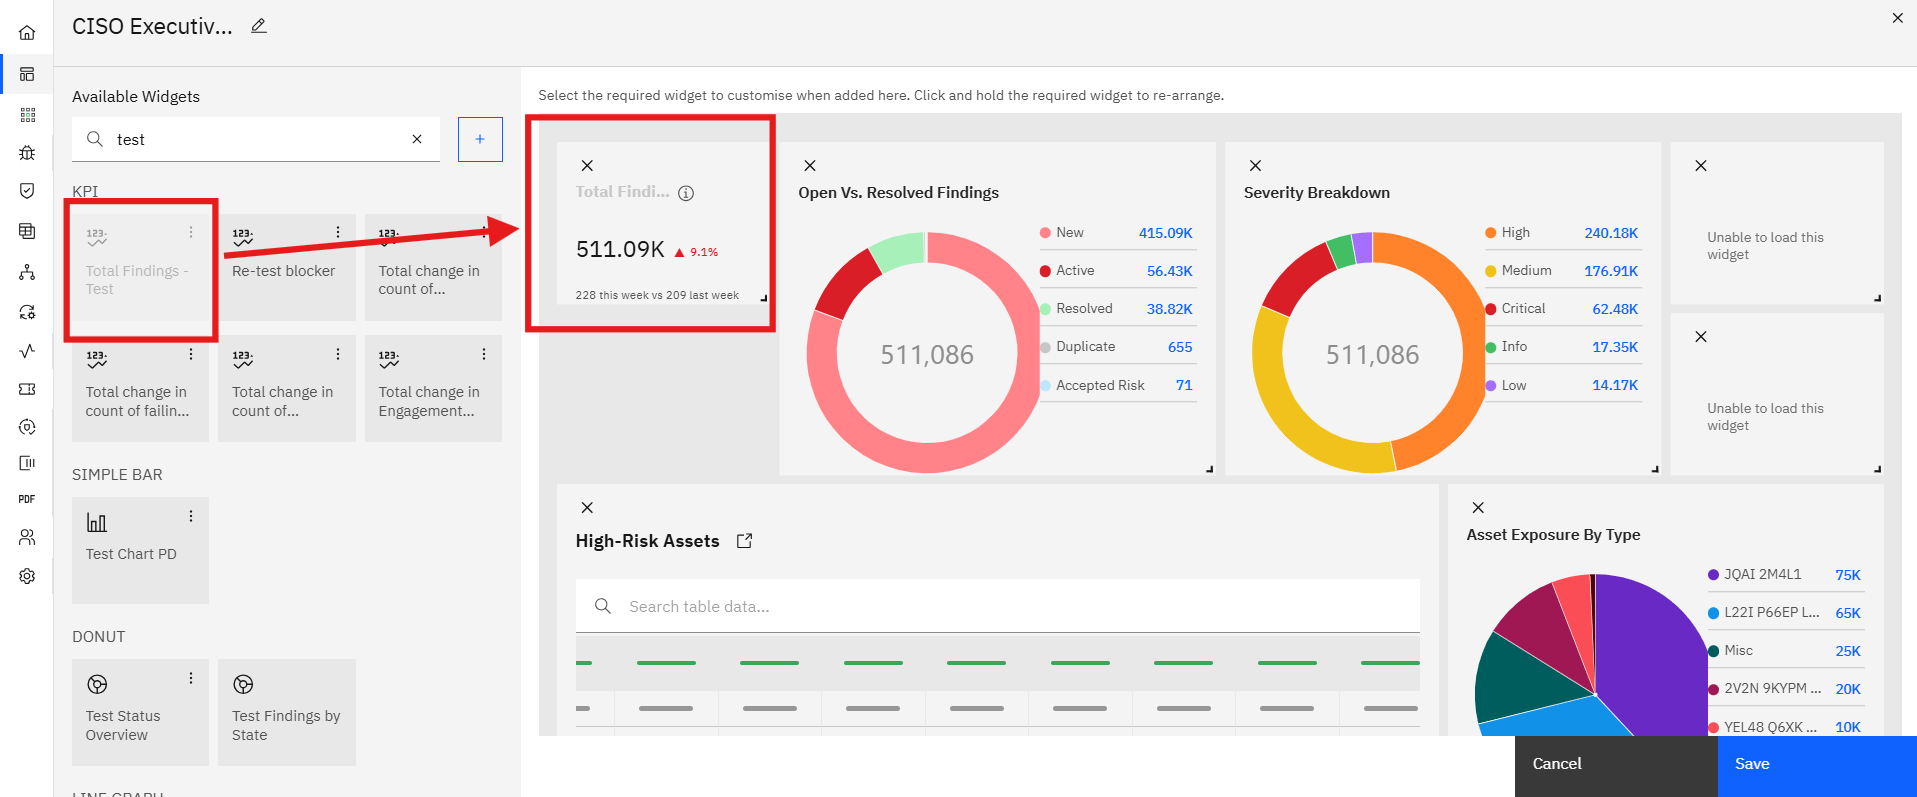
- Once a widget exists in the Widgets tab, you can drag and drop the widget to the canvas.
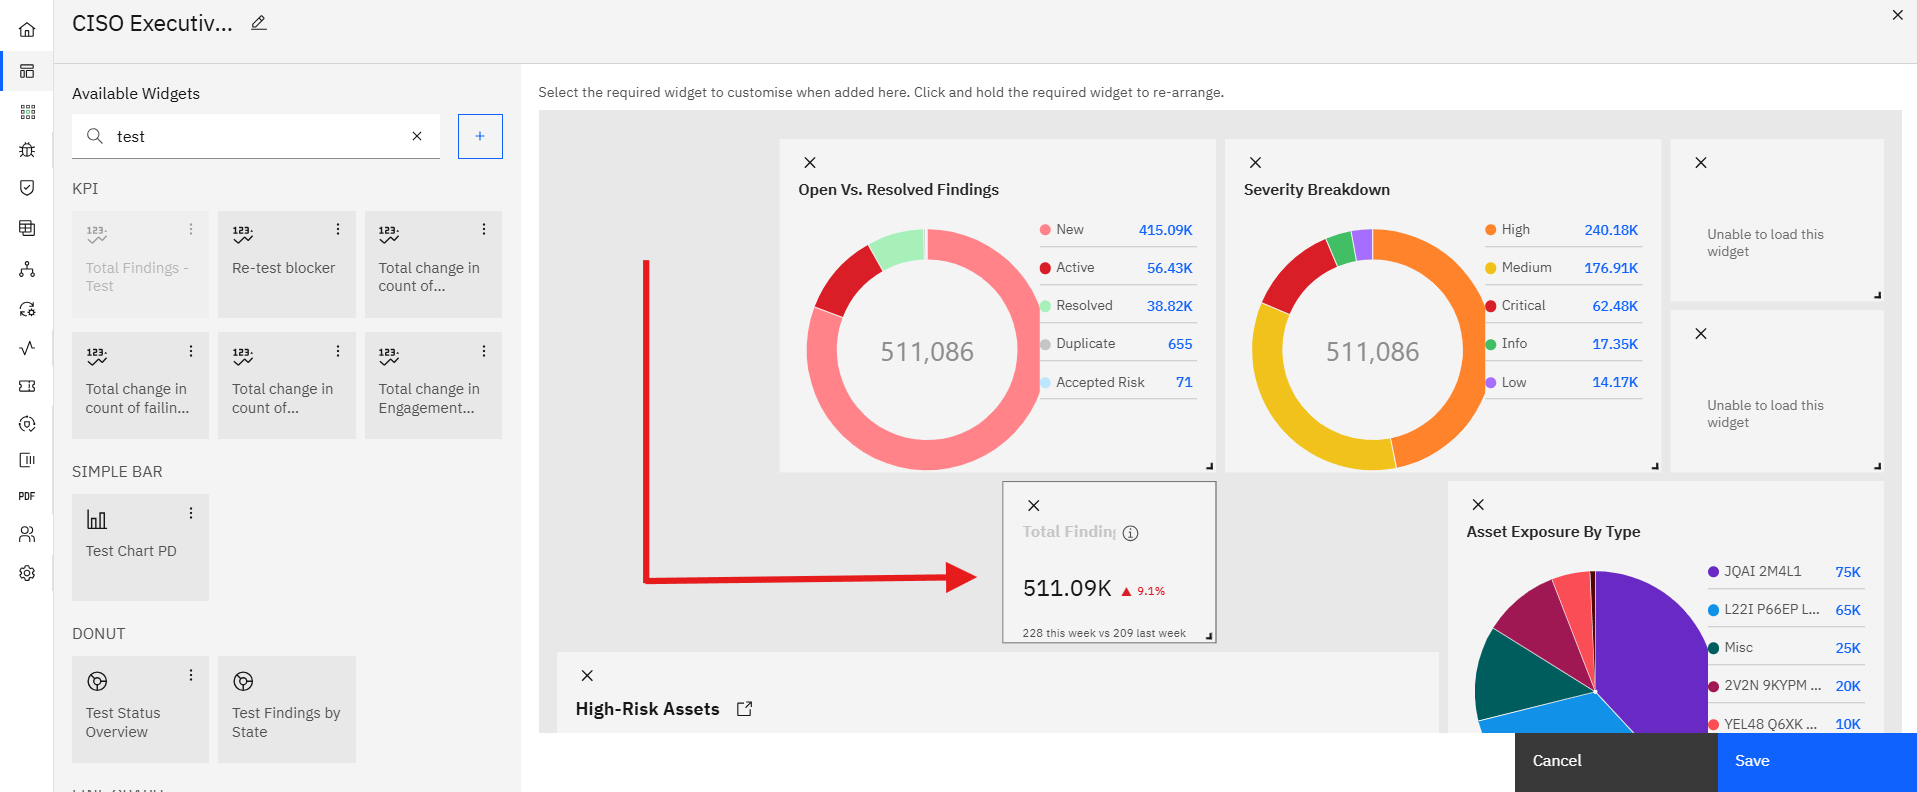
- Rearrange by clicking and holding any placed widget, then dragging it to a new position.
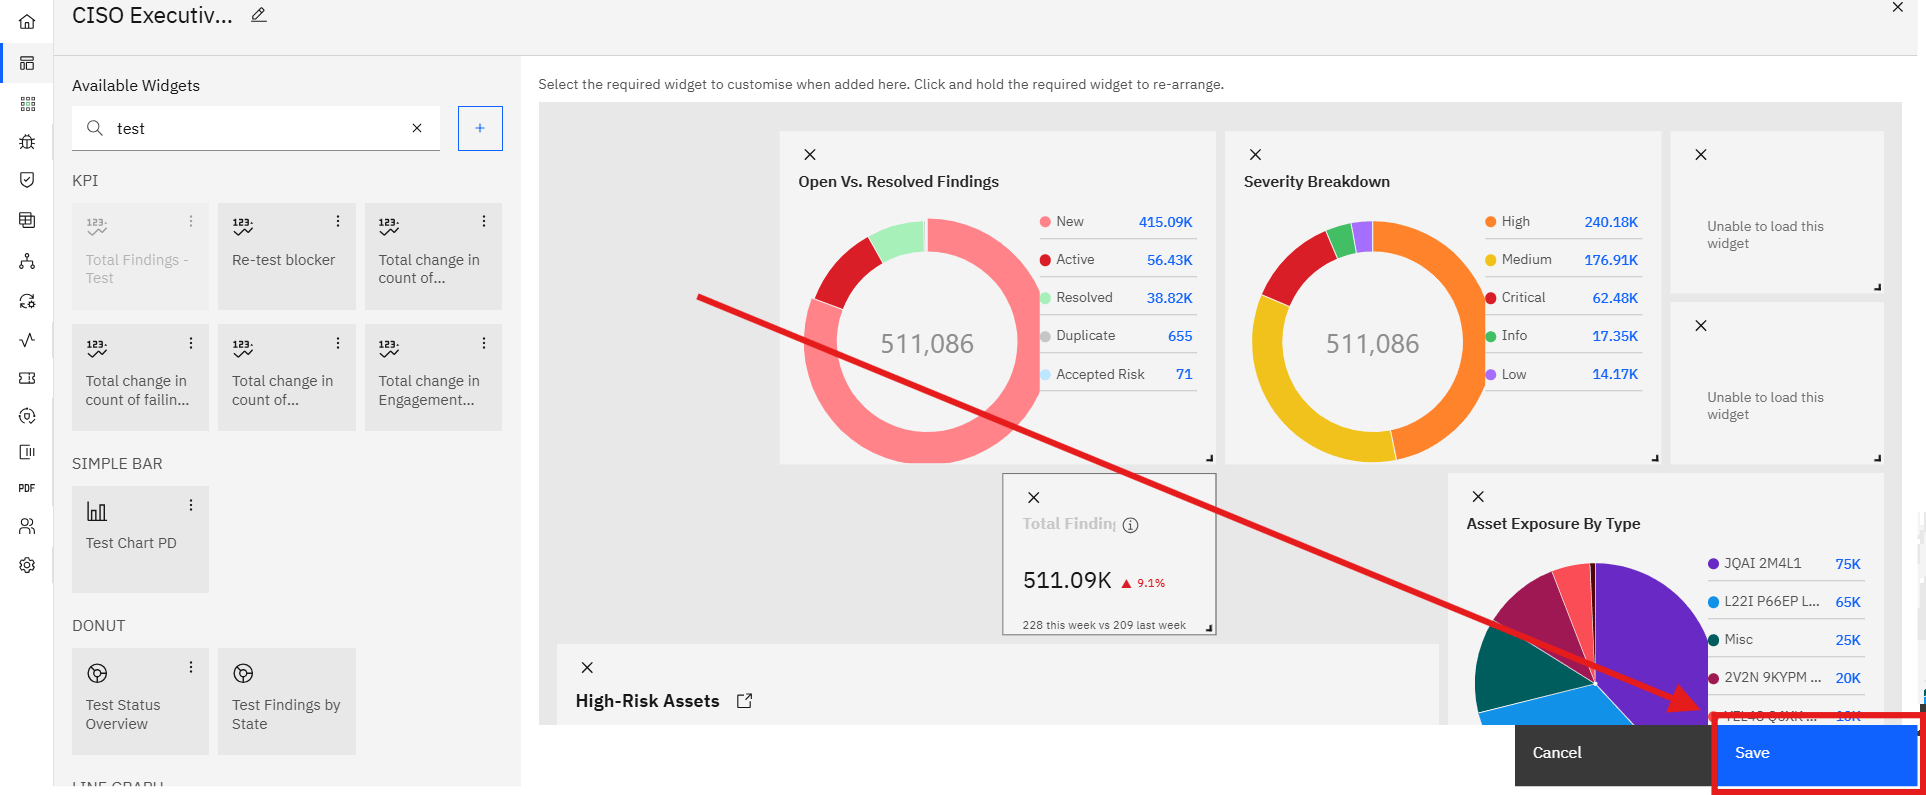
- Click Save when your layout is ready.
More in Dashboards
Was this page helpful?