
Importing CSV Data into Strobes Using AI
3 min readEdit
On this page⌄
- Overview
- Why Is It Needed?
- Prerequisites
- Importing a File
- Step 1: Open the Connectors Page
- Step 2: Click Start Import
- Step 3: Upload Your File
- Step 4: Start the Import
- Following the Import
- Step 5: Watch the Progress
- Step 6: See What the Agent Is Doing (Optional)
- Step 7: Review the Prepared Records
- Step 8: Import the Findings
- Step 9: Confirm the Result
- Tips
Overview
Import CSV Data using AI lets you bring findings and assets into Strobes from a file, even when the file does not match the Strobes format. You upload the file, and an AI agent reads it, maps its fields to the Strobes schema, and prepares the records for import. You review the result and approve it before anything is written to Strobes.
Why Is It Needed?
Data often arrives in formats that no connector covers, such as a spreadsheet exported from a scanner or a report from an internal tool. Reformatting that data by hand is slow and error-prone. With AI import, you upload the file as it is and check the prepared records, so you spend your time reviewing instead of reformatting.
Prerequisites
Before you start, make sure you have:
- Access to Integrations in Strobes.
- Enough AI credits. The import runs as an AI task.
- The file that contains the data you want to import, such as a CSV export.
Importing a File
Step 1: Open the Connectors Page
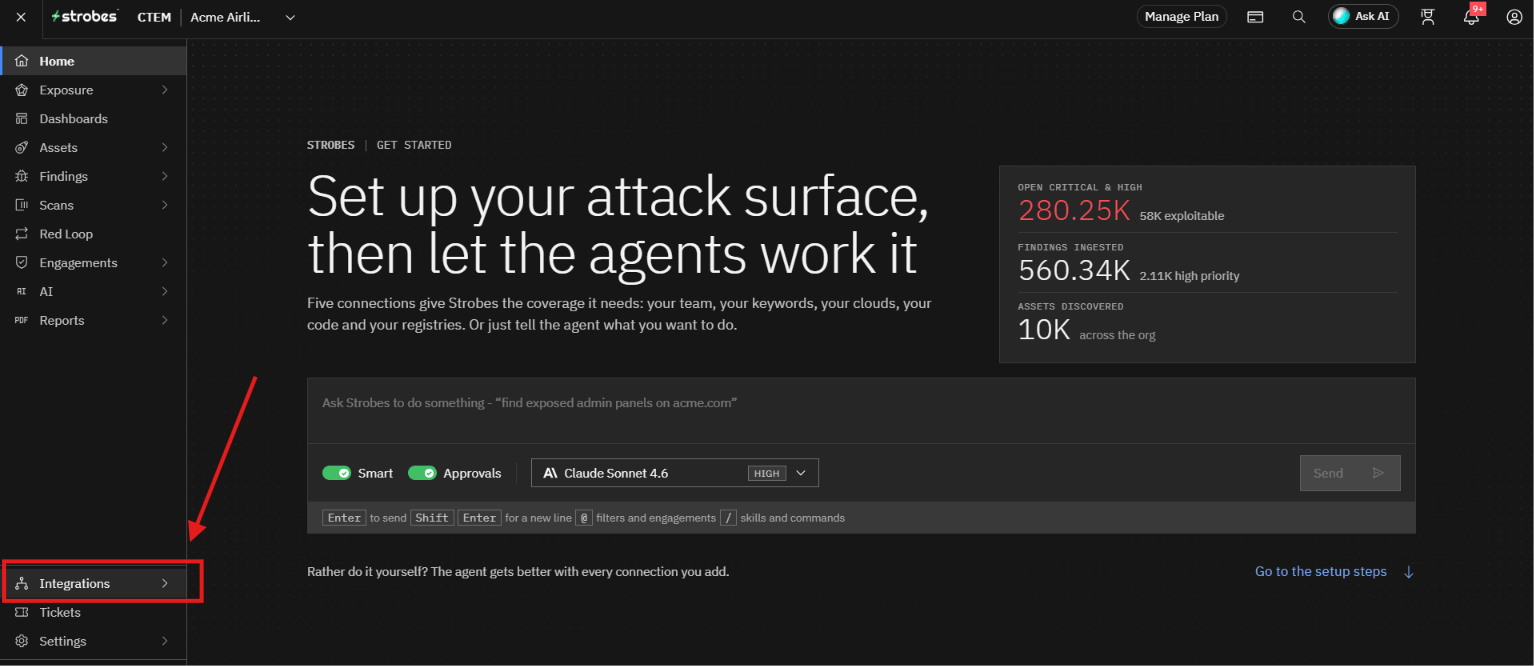
From the home screen, click Integrations in the left navigation. The Connectors page opens.
Step 2: Click Start Import
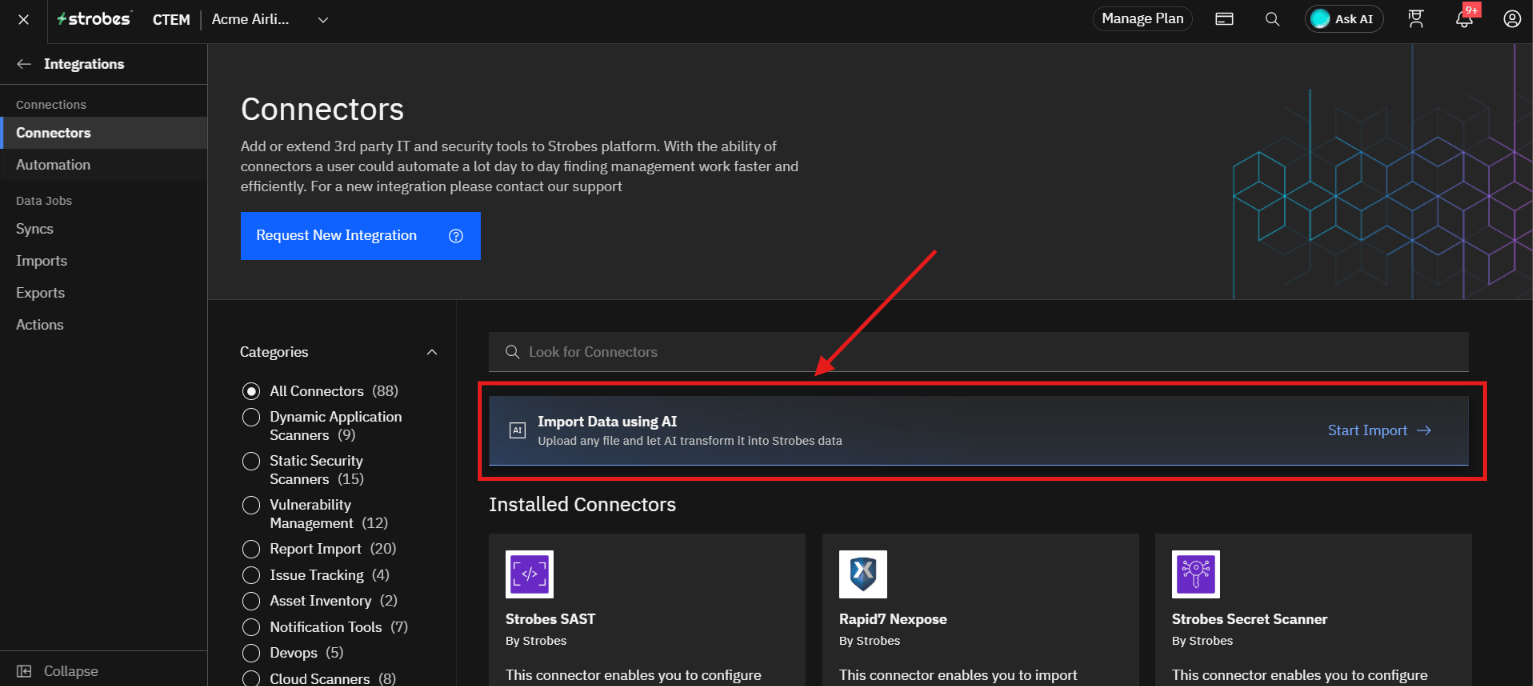
Find the Import Data using AI banner above the installed connectors and click Start Import.
Step 3: Upload Your File
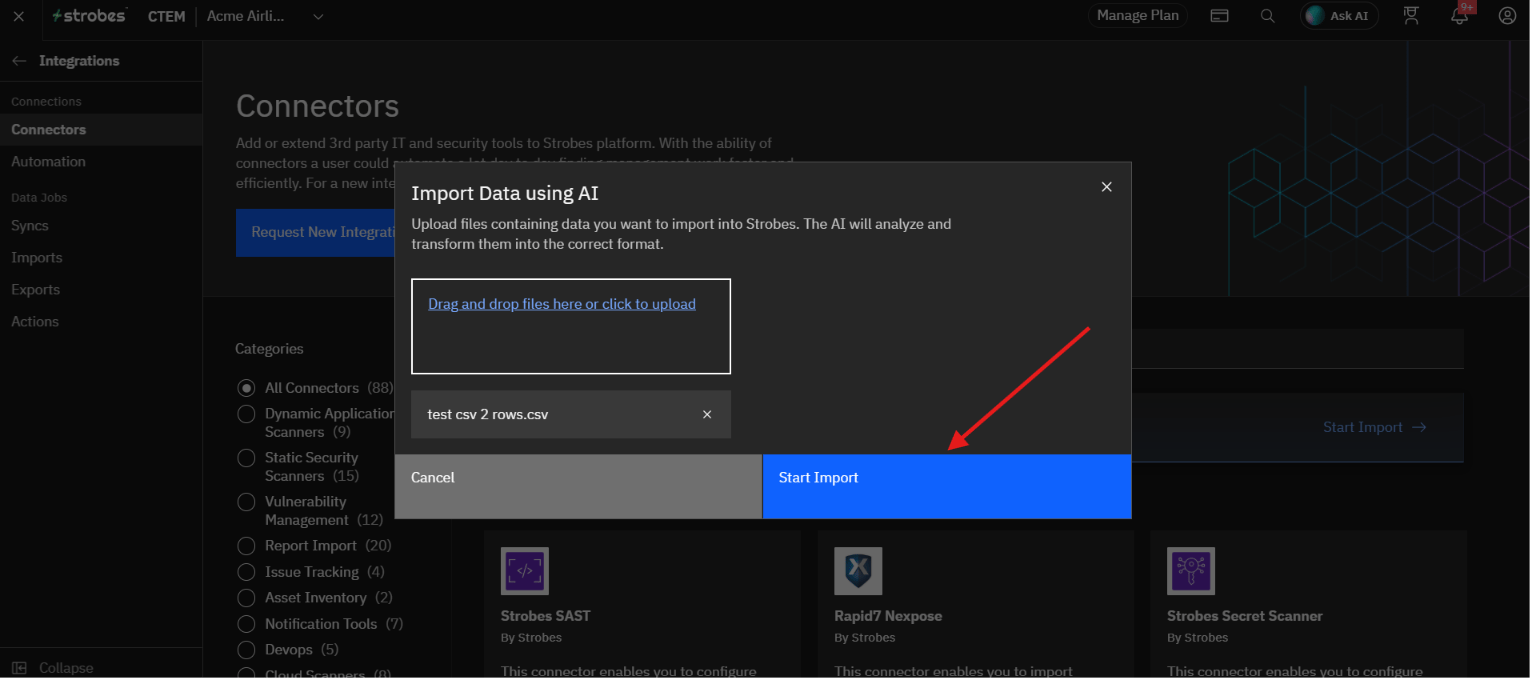
In the Import Data using AI window, drag your file into the upload area, or click the area to browse for it. Once the file is added, its name appears in the window.
Step 4: Start the Import
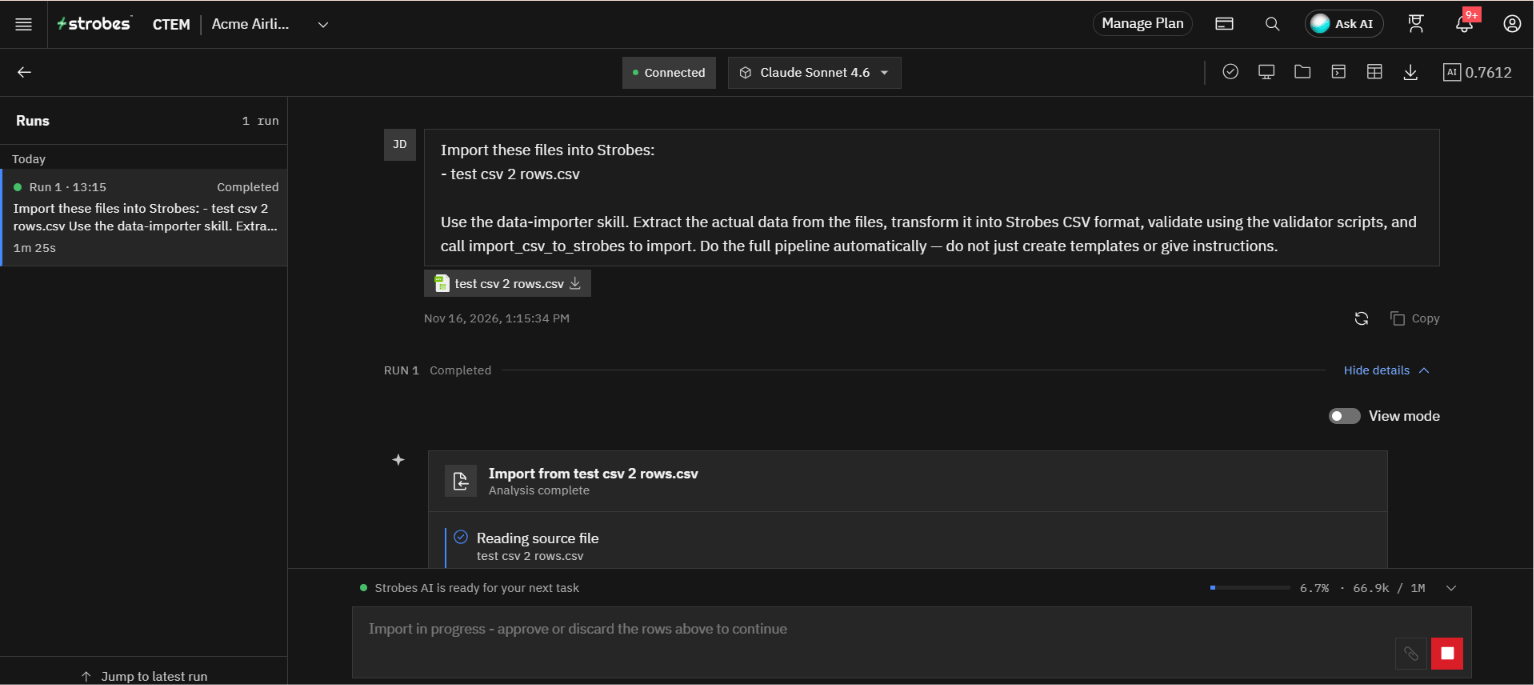
Click Start Import. Strobes creates an import session and opens the AI chat, where the agent starts working on your file.
Following the Import
Step 5: Watch the Progress
The chat opens with a message that lists your file and asks the agent to import it. A progress card then shows each stage as the agent works:
- Reading the source file
- Extracting assets and findings
- Transforming the data to the Strobes schema
- Ordering the import, with assets first and then findings
- Preparing a preview for your review
Step 6: See What the Agent Is Doing (Optional)
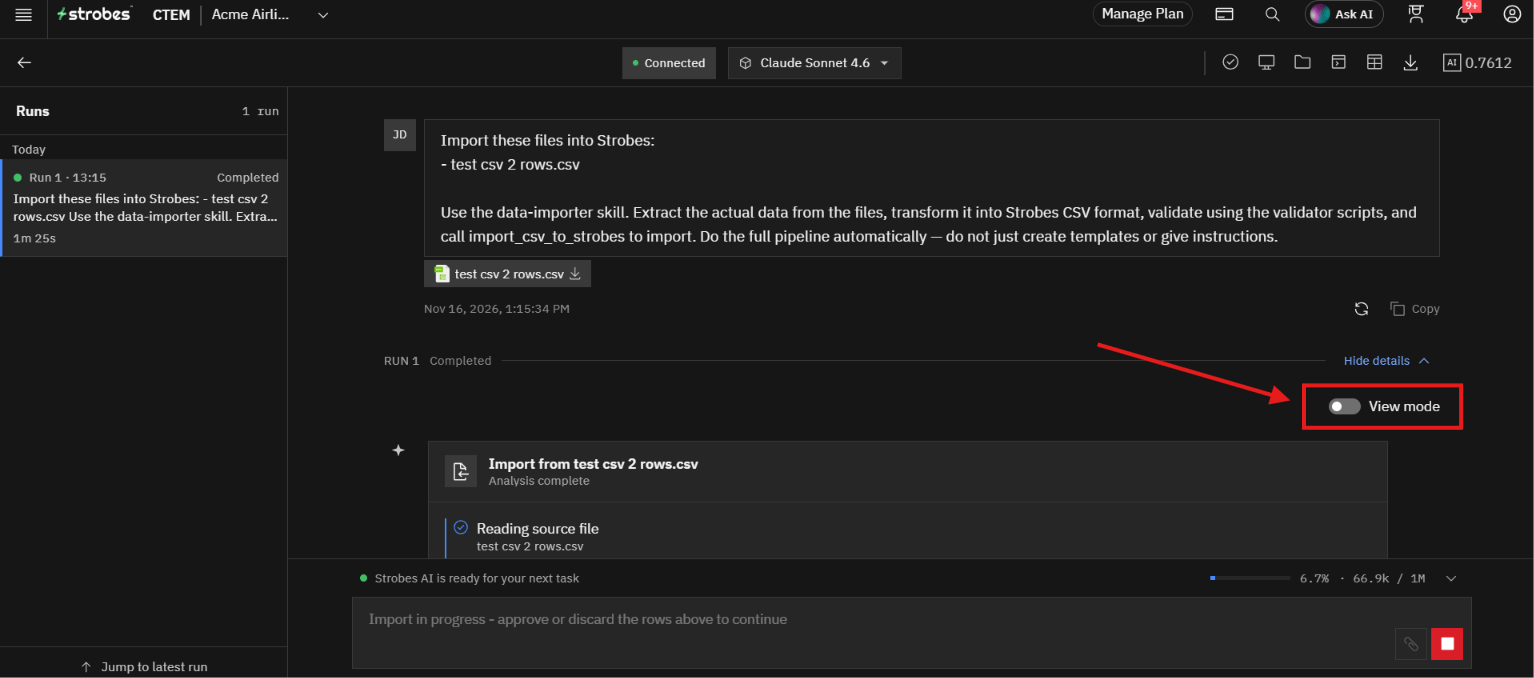
To see the agent's work in detail, turn on View mode. You can then expand the steps the agent took, such as reading your file, loading the data importer skill, checking the custom fields that already exist in your organization, and deciding how each column maps to a Strobes field. You do not need to do anything here, but it helps if you want to understand how your file was interpreted.
Step 7: Review the Prepared Records
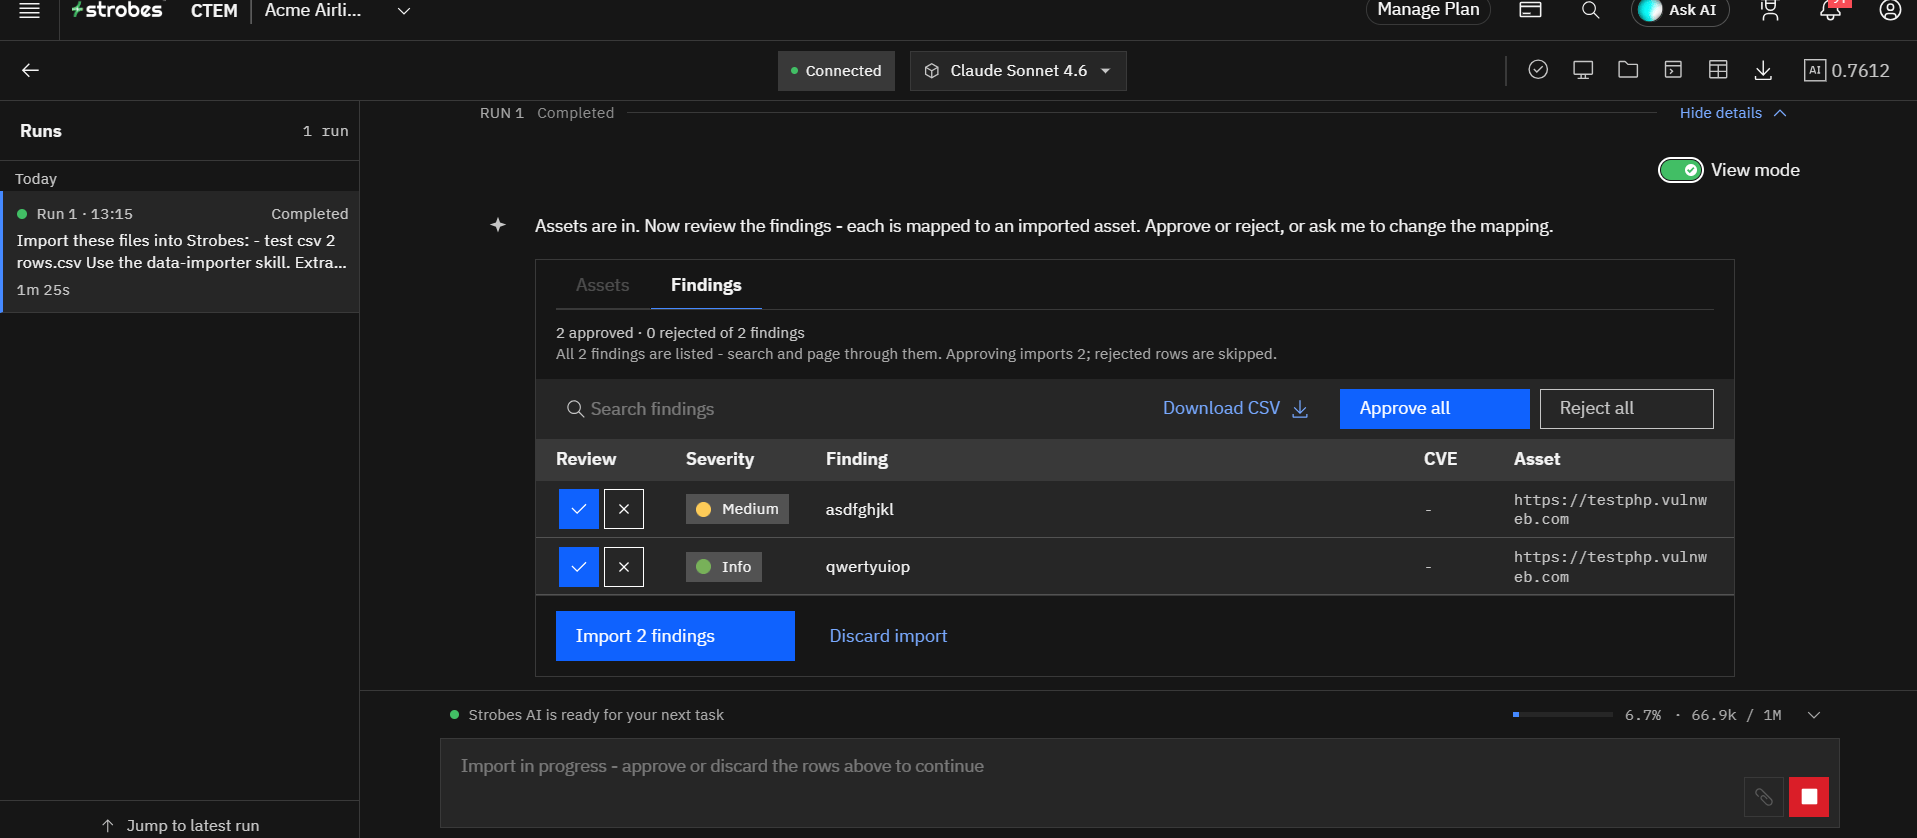
When the agent finishes preparing the import, a review card appears. It has an Assets tab and a Findings tab. In the Findings tab, each row shows its severity, title, CVE if there is one, and the asset it is linked to. You can:
- Use the search box to find a specific row.
- Approve or reject each row using the check and cross icons.
- Click Approve all or Reject all to apply your choice to every row.
- Click Download CSV to export the prepared rows.
A summary above the table shows how many rows are approved and rejected. Rejected rows are skipped during the import.
Step 8: Import the Findings
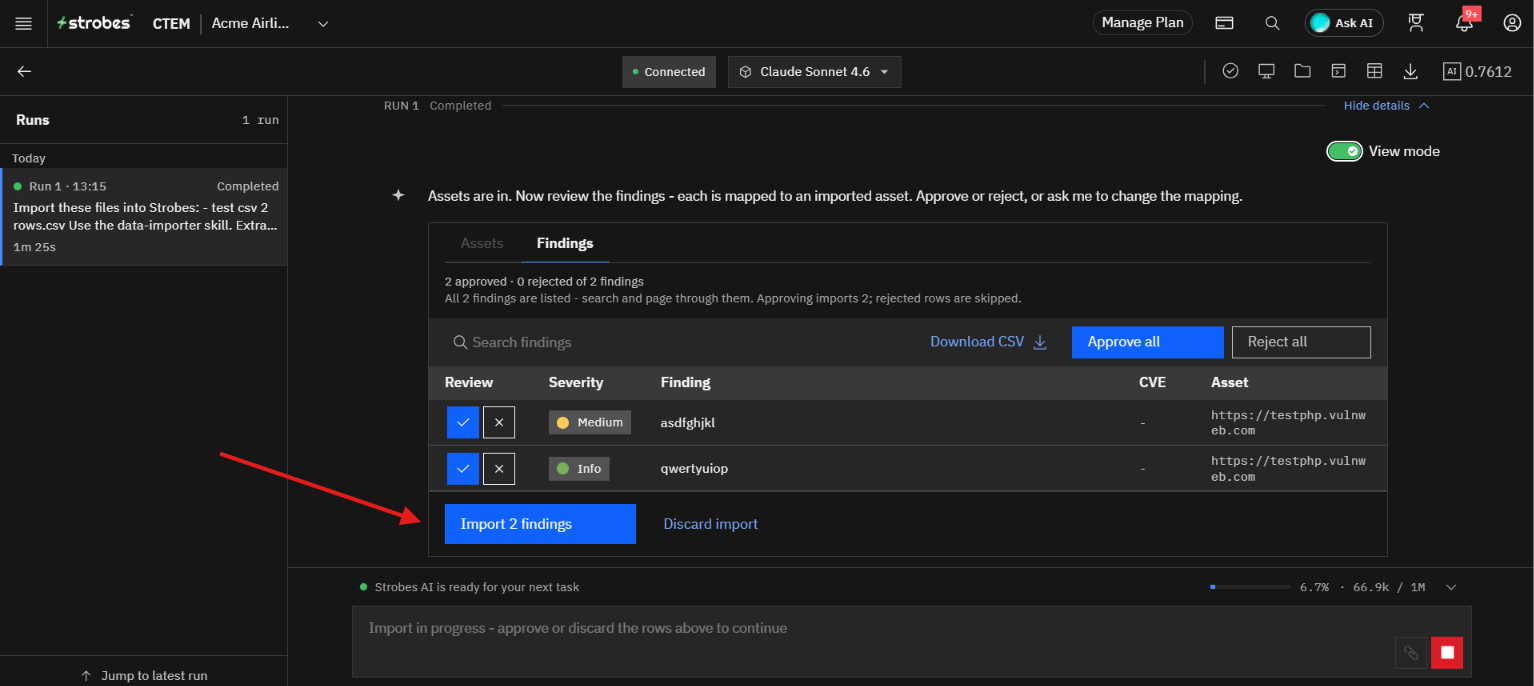
Once the rows look right, click Import findings. The button shows the number of approved rows, for example Import 2 findings.
Step 9: Confirm the Result
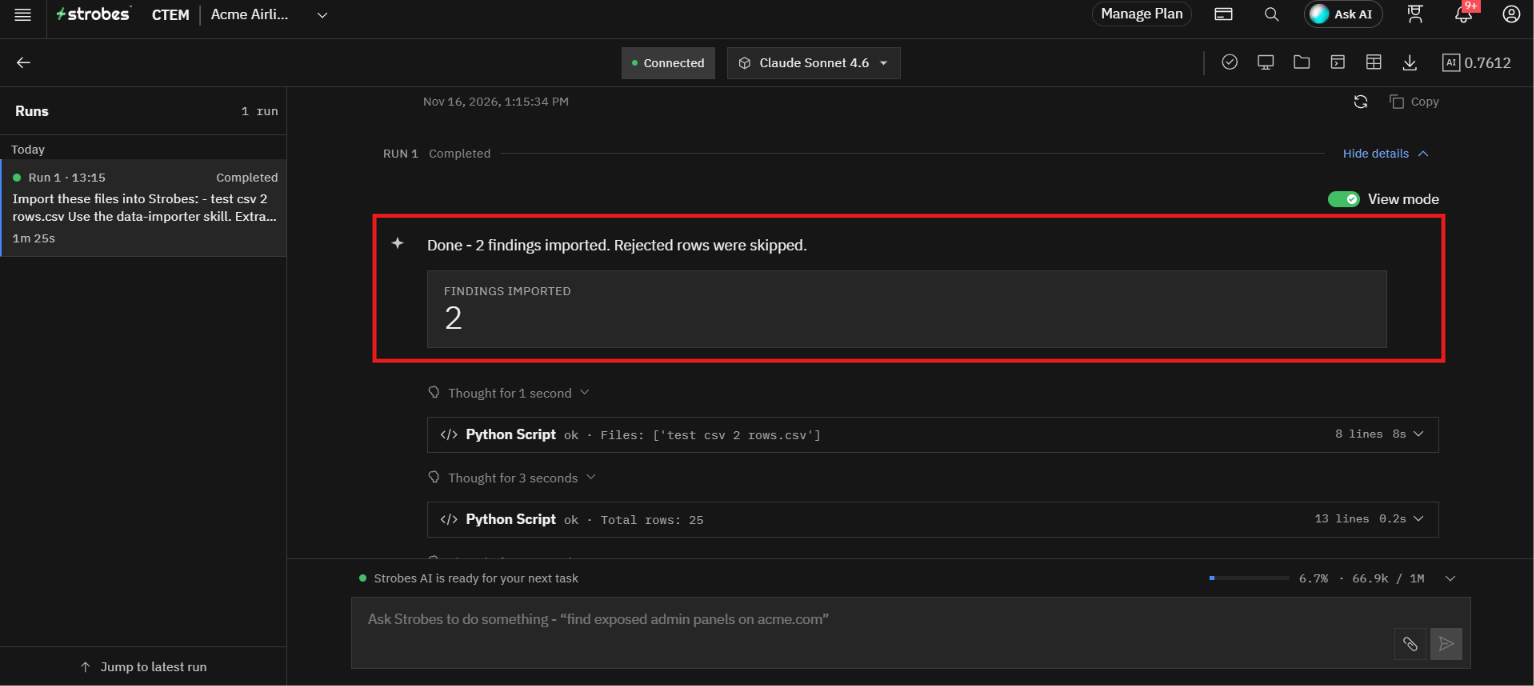
When the import completes, the agent confirms how many findings were imported and shows the count in a Findings imported card. The imported findings are now in Strobes, linked to their assets.
Tips
- Check the mapping before you import. The agent maps your columns to Strobes fields automatically, so look at severity, asset, and status values on the review card.
- Use Reject for rows you do not want, such as empty or duplicate rows. They are skipped and nothing is written for them.
- Rows with no real data are left out of the import. Spot-check the count in the summary against what you expect from your file.
- Use View mode if a field was mapped in a way you did not expect. The agent's steps show how it read your file.
- If you want to adjust the mapping, ask the agent in the chat before you import. The review card says you can ask it to change the mapping.
- Use Discard import if you decide not to continue. Nothing is imported until you click Import findings.
Was this page helpful?