
Workbooks
2 min readEdit
On this page⌄
What is Workbooks?
Workbooks is a spreadsheet-like feature in Strobes that helps security teams:
- Organize, analyse, and visualize vulnerability/security data.
- Create custom tables and track remediation progress.
- Generate insights with flexible data management and visualization tools.
Step 1 – Open Workbooks
- Launch CTEM.
- Click the menu (☰) button.
- Select Workbooks.
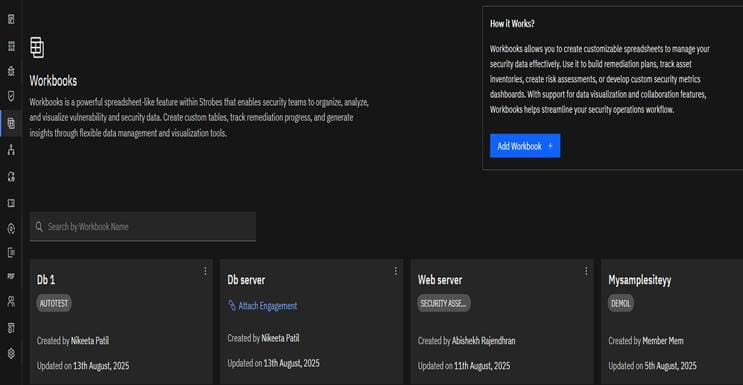
- You will land on the Workbooks list page with:
- A search bar.
- An Add Workbook button.
Step 2 – Create a Workbook from the Workbooks Page
- Click Add Workbook.
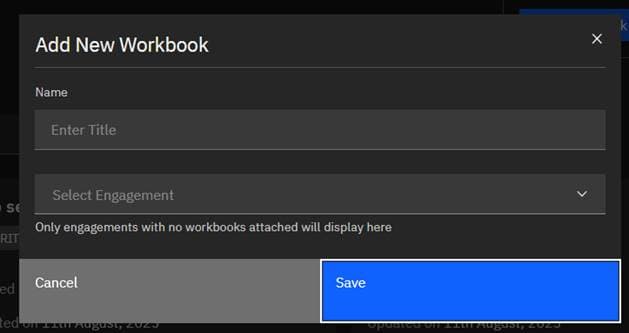
- In the popup:
- Name – Enter unique workbook name.
- Engagement – Open the dropdown and select one or more engagements to attach.
- Click Save.
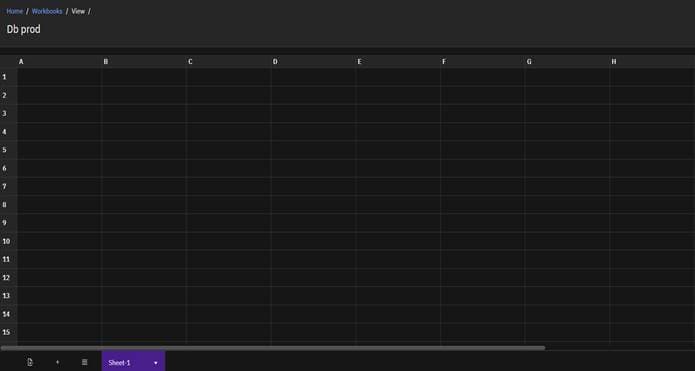
- Result – Workbook is created and linked to the selected engagement(s) and opens in spreadsheet view.
Step 3 – Create a Workbook from an Engagement Page
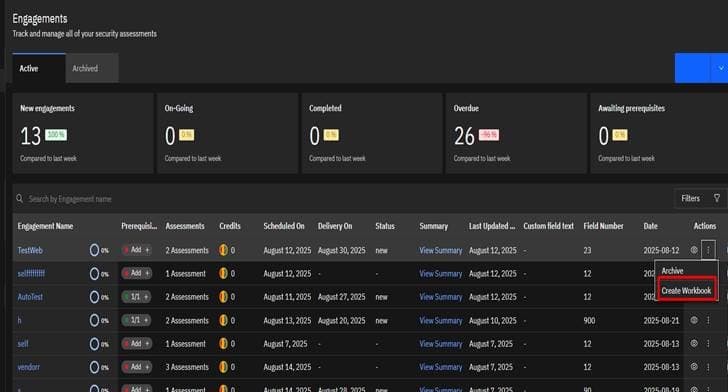
- Go to Engagements and open the specific engagement.
- Click Actions → Workbooks → Create/Add Workbook.
- In the popup:
- Enter the Name.
- Engagement will already be preselected.
- Click Save.
- Result – Workbook is created and automatically linked to that engagement.
Step 4 – Find & View Attached Workbooks
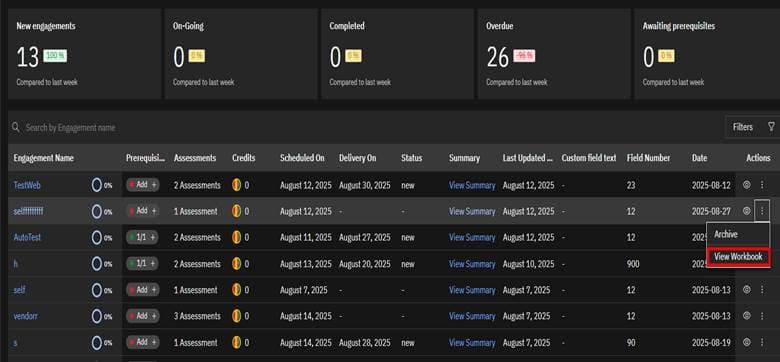
Option 1 – From Engagements:
- Open the engagement.
- Click View Workbook from the actions menu.
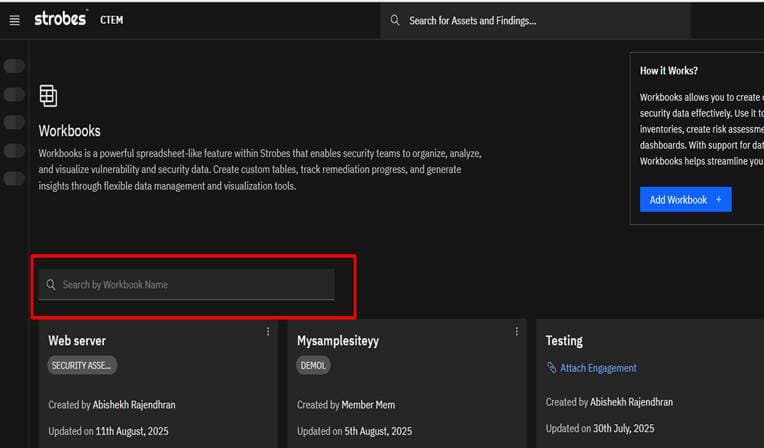
Option 2 – From the Workbooks Page:
- Use the search bar to find the workbook by name.
- Click to open it.
Step 5 – Work Inside a Workbook
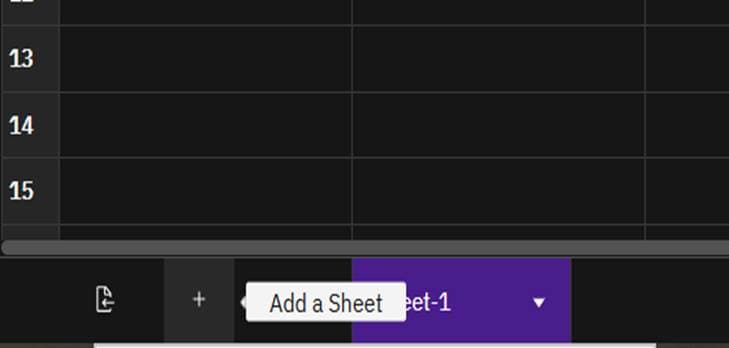
1) Add a Sheet
- Click ➕ Add sheet (bottom bar).
- A new sheet tab appears – rename if needed.
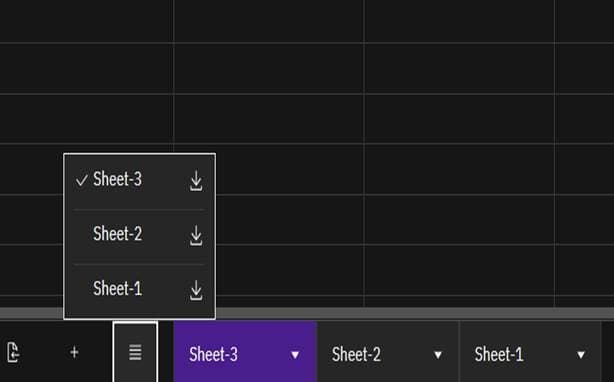
2) View All Sheets & Download
- Click the sheet list icon (three lines).
- A panel shows all sheets in the workbook.
- Click the download icon next to any sheet to export it.
3) Import CSV
- Click Import files.
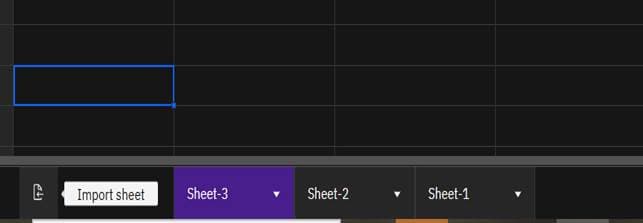
- In the popup:
- Click Add file and select a .csv file.
- Choose New or Override:
- New → Creates a new sheet with CSV data.
- Override → Replaces data in an existing sheet.
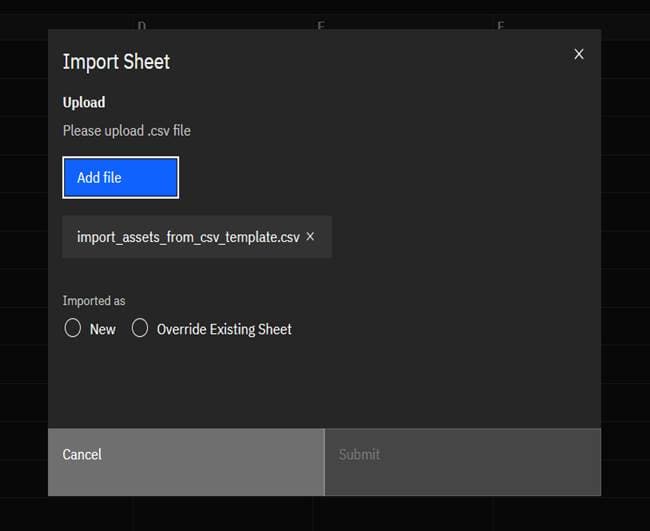
- If Override is chosen:
- A Choose sheet dropdown appears → select the target sheet.
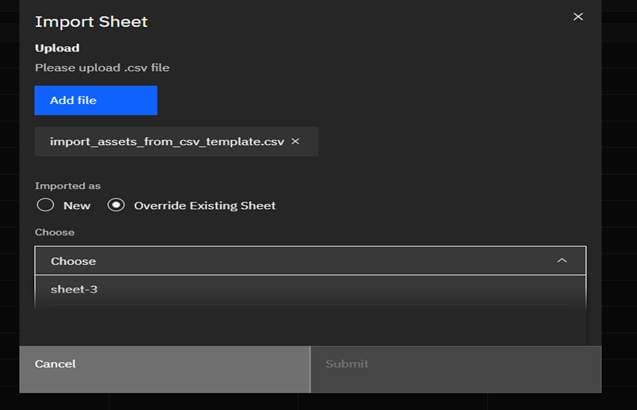
- Click Submit.
- Result:
- New → CSV data appears as a new sheet.
- Override → Data replaces the selected sheet’s contents.
Tip: If overriding, download the current sheet first as a backup.
Step 6 – Manage a Workbook
Once a workbook is created, you can:
Attach Engagement (after creation)
- If more engagements were attached, you can attach them later:
- Open the ⋮ (three dots) menu on the workbook card.
- Click Attach Engagement.
- Select one or more engagements → Save.
Clone Workbook
- Create a copy of an existing workbook:
- Open the ⋮ menu on the workbook card.
- Click Clone.
- A duplicate workbook is created with the same sheets and data.
Delete Workbook
- Remove a workbook permanently:
- Open the ⋮ menu on the workbook card.
- Click Delete.
- Confirm the deletion in the popup.
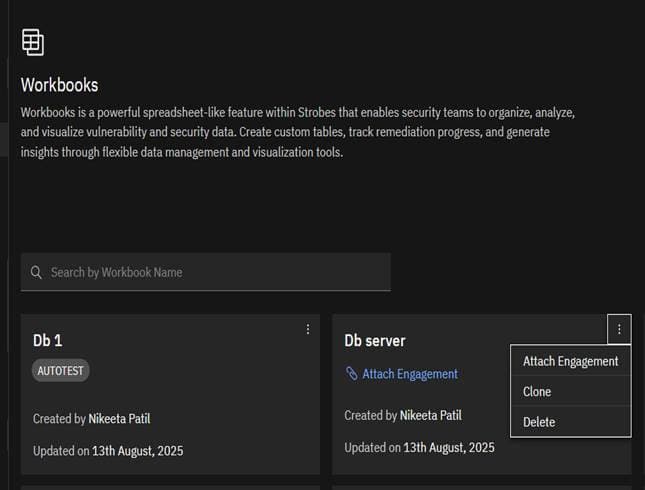
Note: Deleting a workbook cannot be undone.
Quick FAQs
- Attach to multiple engagements? → Yes, select multiple in the Engagement dropdown.
- Where to view an attached workbook? → From an engagement’s View Workbook or via the Workbooks page search.
- File type for import? → .CSV only.
- Does Override keep old data? → No, it replaces all contents.
More in Reports
Was this page helpful?