
Active Directory Pentest Template
3 min readEdit
On this page⌄
- Accessing the Active Directory Pentest Template
- Step 1: Select the Active Directory Pentest Template
- What the Assessment Covers
- Deliverables
- Step 2: Enter the Workspace Name
- Step 3: Select the Target Environment
- Step 4: Select the Domain Controller
- Step 5: Configure Assessment Credentials
- Best Practice
- Step 6: Select an AI Model
- Step 7: Select the Assessment Environment
- Step 8: Configure the Assessment Schedule
- One-Time Assessment
- Monthly Assessment
- Step 9: Configure Execution Mode
- Autonomous Mode
- Human-in-the-Loop Mode
- Step 10: Configure Auto-Remediation (Optional)
- Step 11: Review the Assessment Configuration
- Workspace Details
- Scope Details
- Configuration
- Automation Settings
- Step 12: Launch the Active Directory Pentest
- Notes
The Active Directory Pentest template helps security teams assess the security posture of their Active Directory environment by identifying misconfigurations, privilege escalation paths, weak permissions, exposed credentials, and potential attack vectors.
The assessment follows a structured methodology to enumerate domain objects, analyze permissions, identify security weaknesses, and provide remediation recommendations.
Accessing the Active Directory Pentest Template
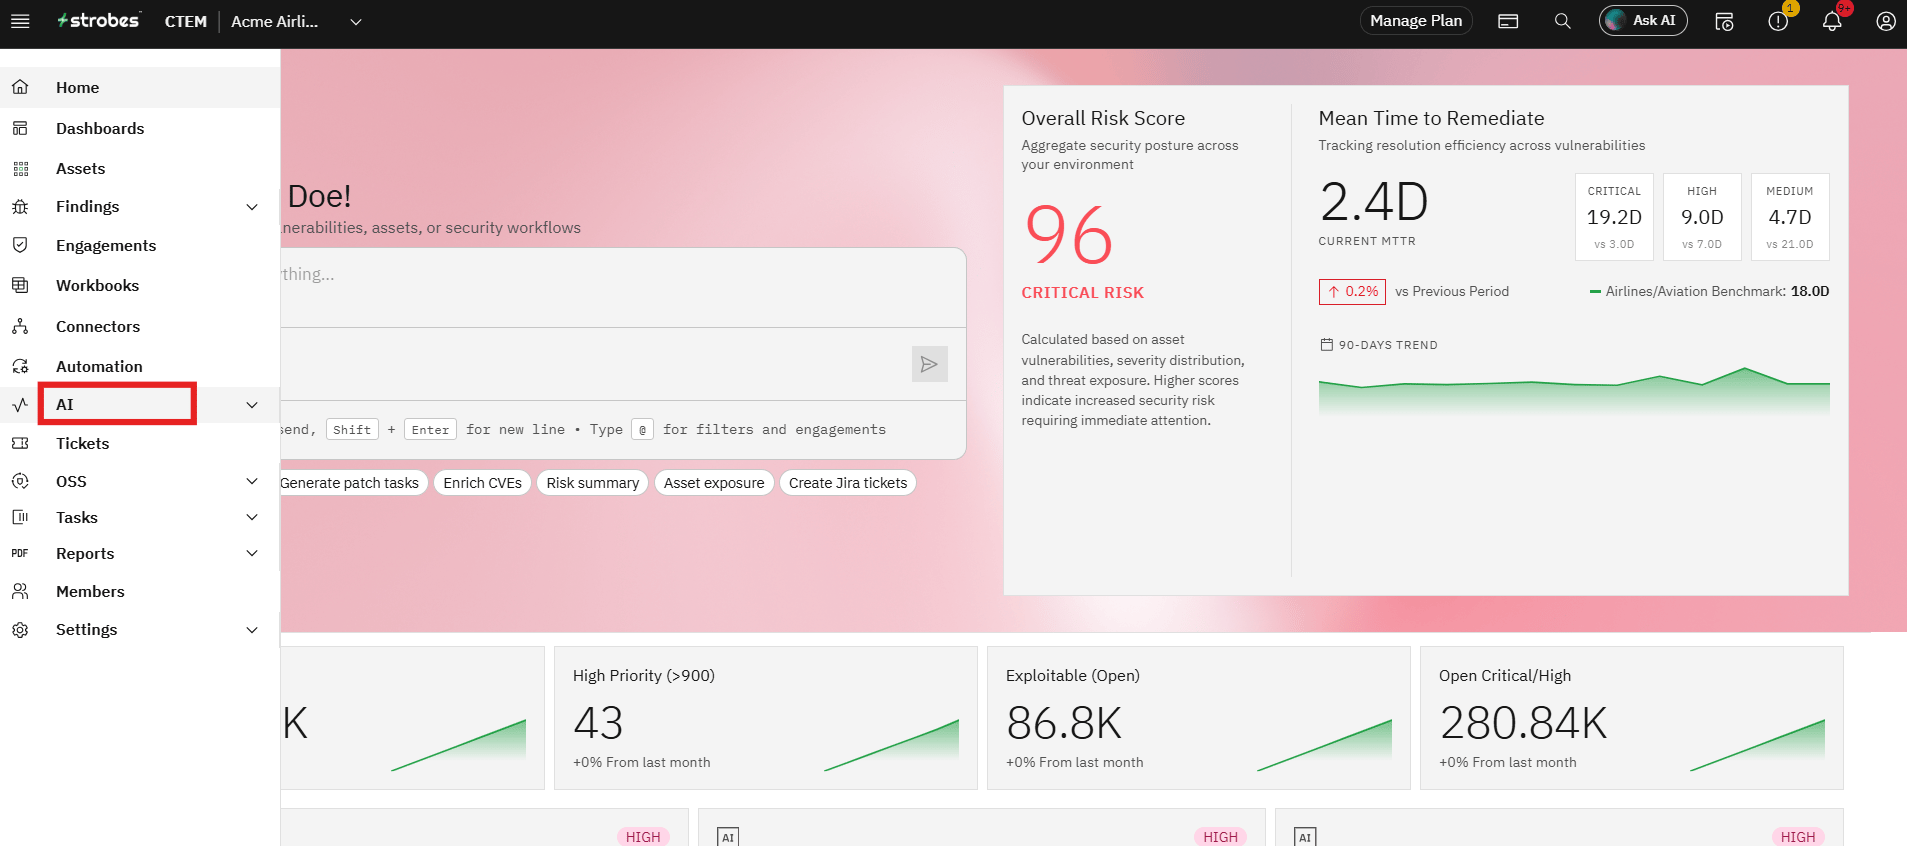
- Navigate to AI from the main navigation menu.
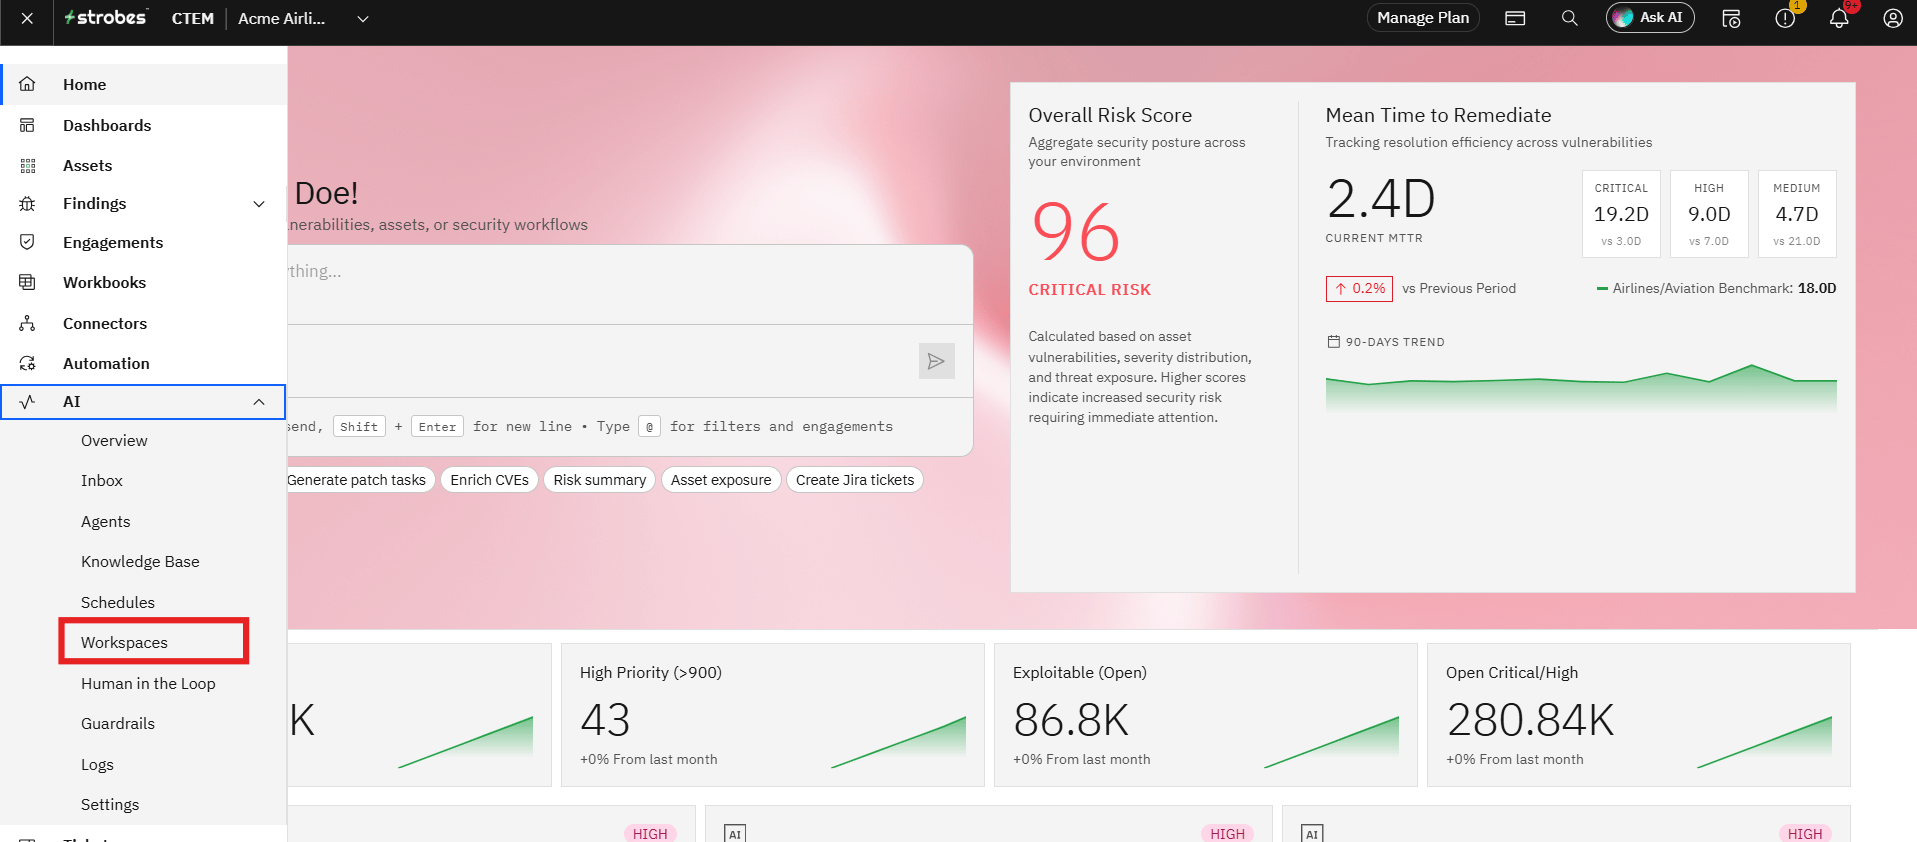
- Click Workspaces.
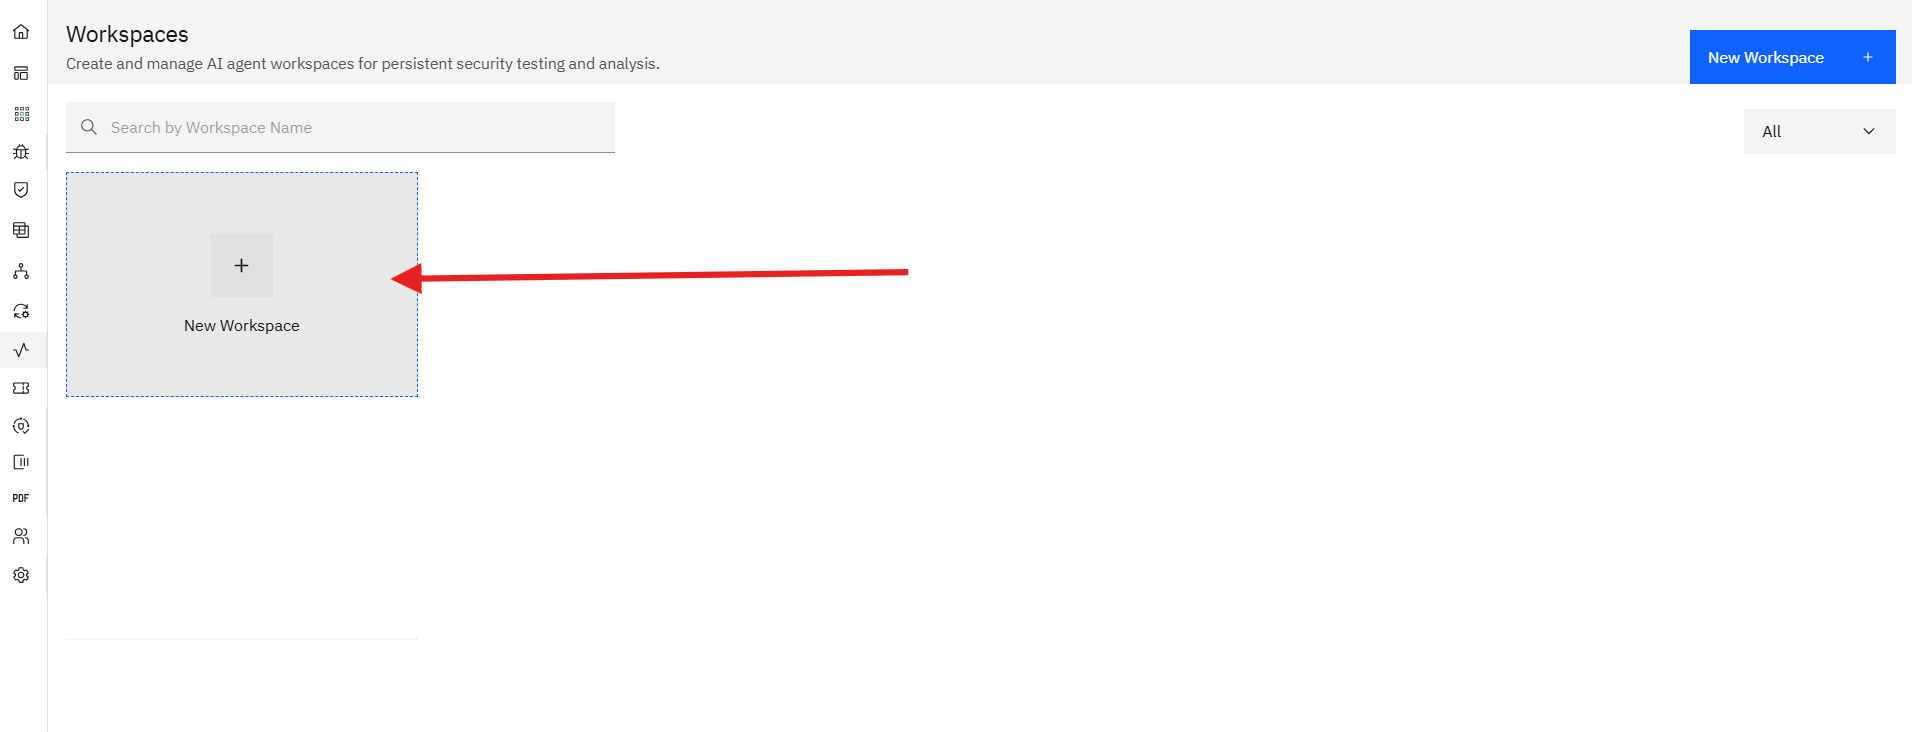
- Select New Workspace.
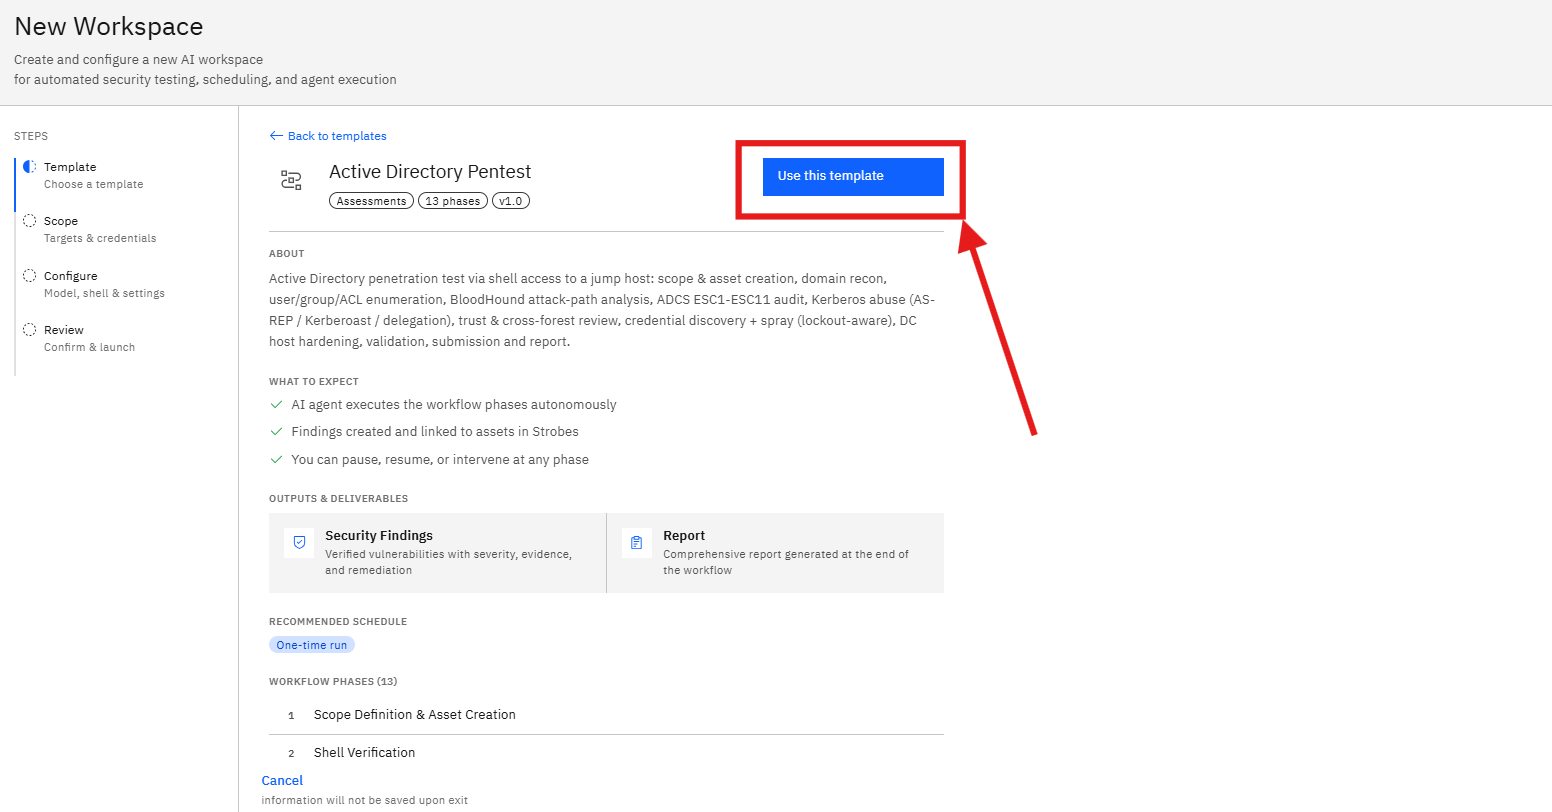
Step 1: Select the Active Directory Pentest Template
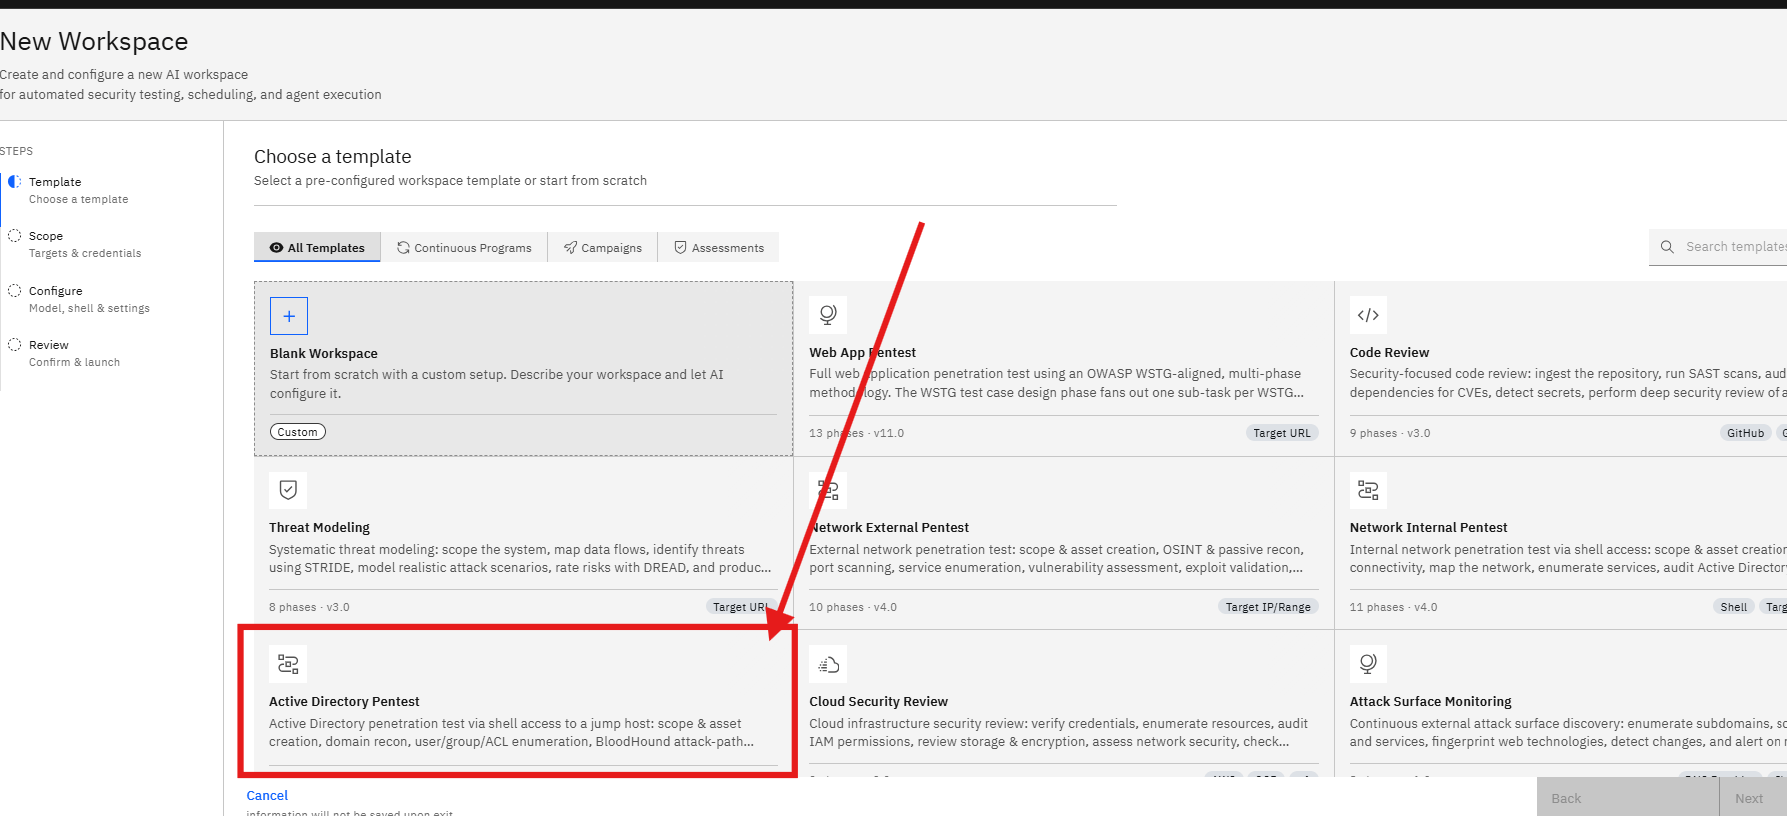
- Browse the available assessment templates.
- Locate Active Directory Pentest.
- Click the template card to view additional information.
The template provides:
- Assessment overview
- Estimated duration
- Number of phases
- Expected deliverables
What the Assessment Covers
The assessment typically performs:
- Domain enumeration
- User and group analysis
- Trust relationship validation
- Privilege escalation path discovery
- Access control review
- Security misconfiguration analysis
- Credential exposure checks
Deliverables
The assessment generates:
- Security Findings
- Attack Path Analysis
- Privilege Escalation Opportunities
- Risk Ratings
- Remediation Recommendations
- Click Use this Template.
Step 2: Enter the Workspace Name
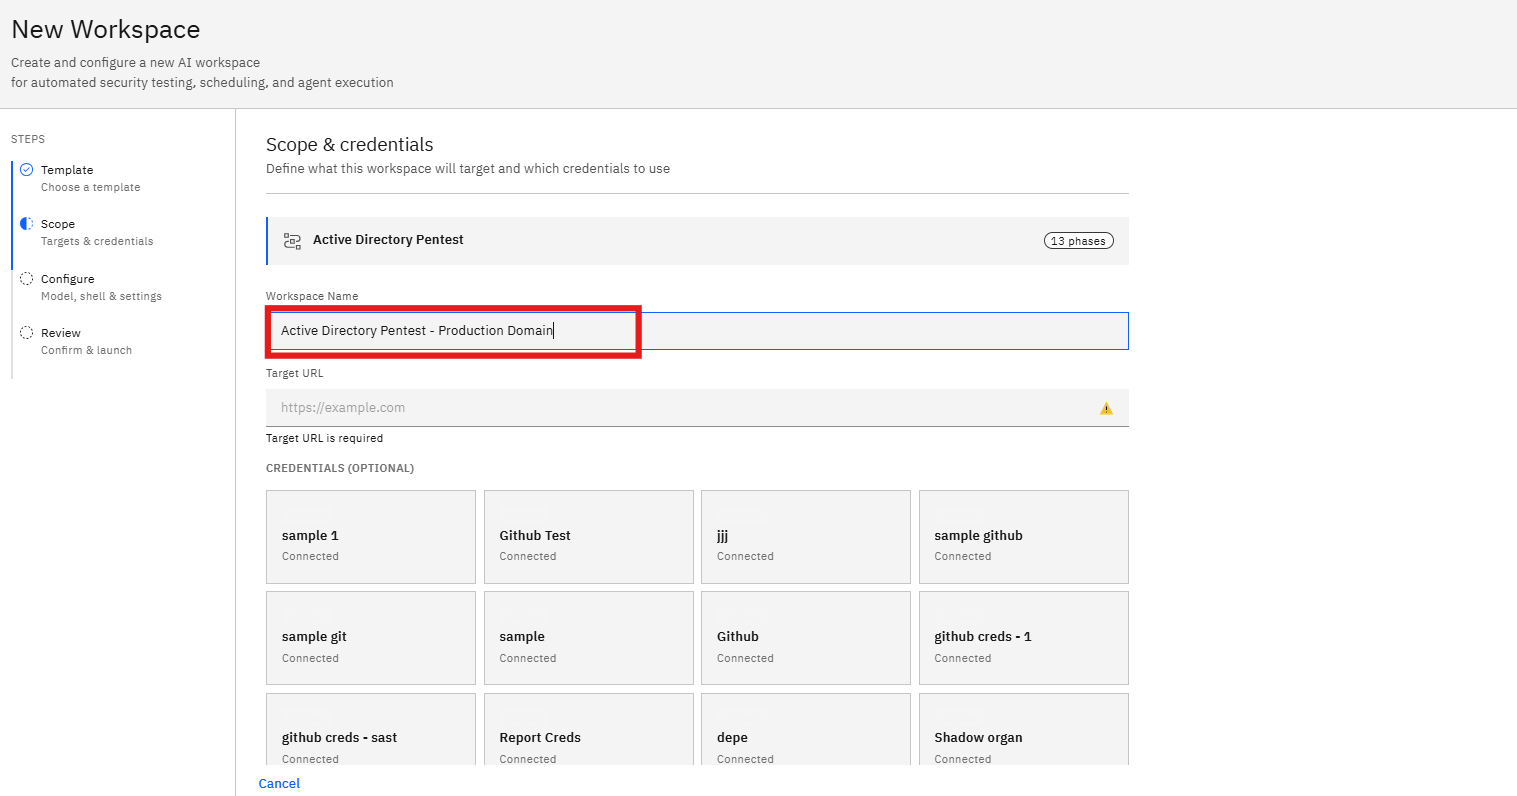
After selecting the template, the wizard moves to the Scope stage.
- Locate the Workspace Name field.
- Enter a descriptive name for the assessment.
Example:
Active Directory Pentest - Production DomainUsing a descriptive workspace name makes it easier to identify assessments later.
Step 3: Select the Target Environment
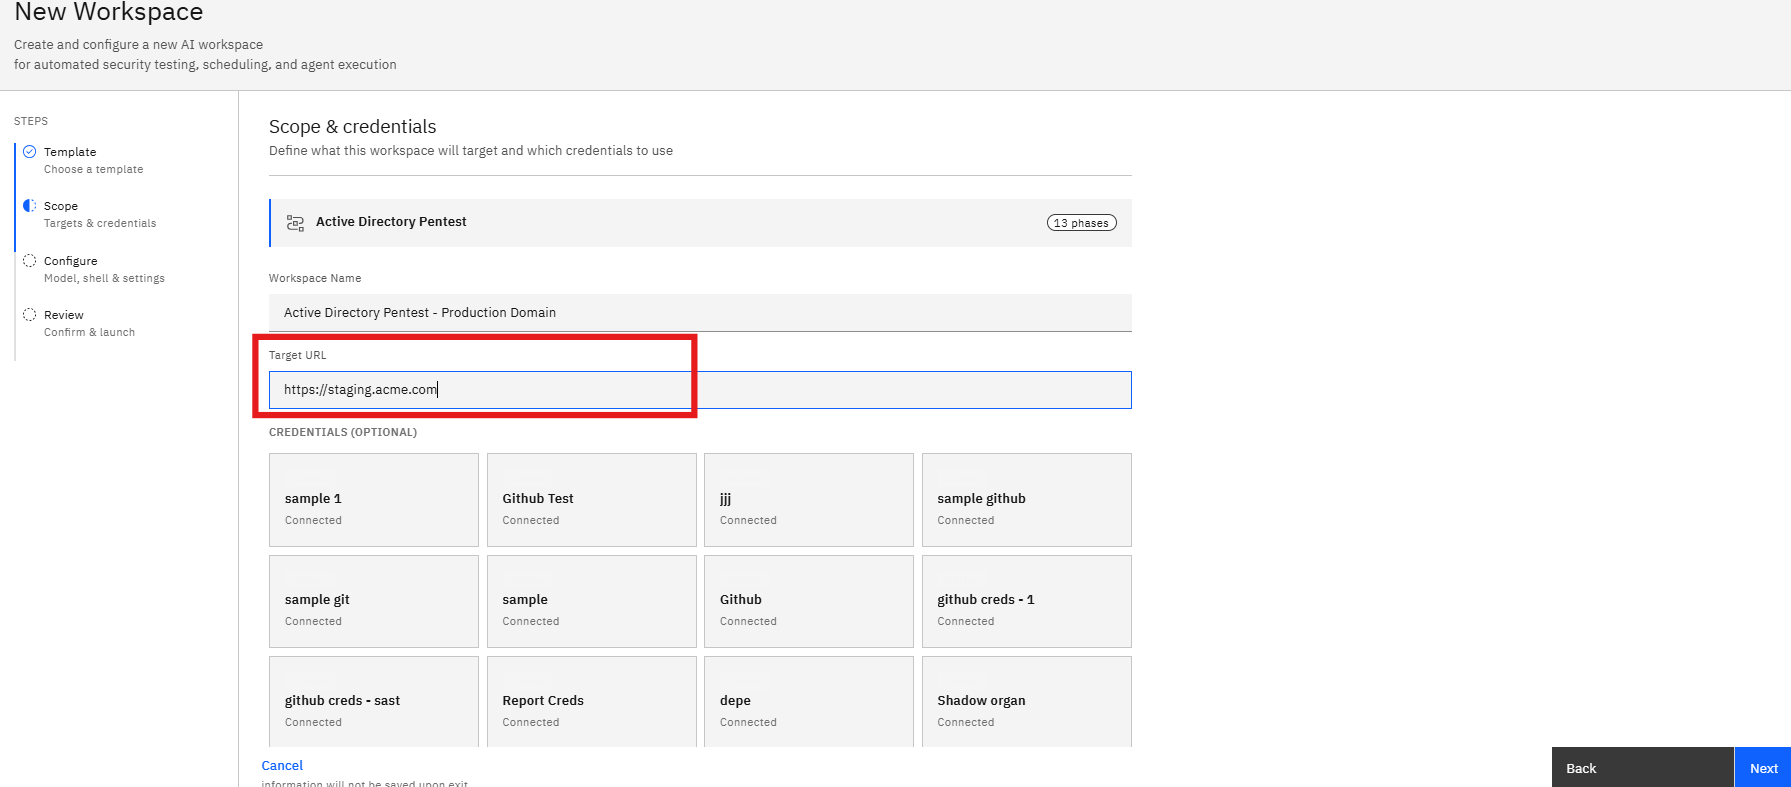
Choose the environment that contains the Active Directory infrastructure you want to assess.
- Locate the environment selection section.
- Select the appropriate environment.
- Verify the selected target.
Examples:
- Production Domain
- Staging Domain
- Corporate Directory
- Internal Network
Step 4: Select the Domain Controller
The assessment requires information about the Active Directory environment.
- Locate the Domain Controller field.
- Enter or select the target domain controller.
- Verify the hostname or IP address.
Examples:
dc01.company.localor
10.10.10.20The selected domain controller will be used during the enumeration process.
Step 5: Configure Assessment Credentials
Credentials are required for authenticated Active Directory analysis.
- Locate the Credentials section.
- Select an existing credential.
- Verify that the credential has the required permissions.
The assessment may use:
- Domain User Accounts
- Service Accounts
- Read-only Accounts
- Privileged Accounts (if required)
Best Practice
Use a dedicated assessment account whenever possible rather than a personal user account.
Step 6: Select an AI Model
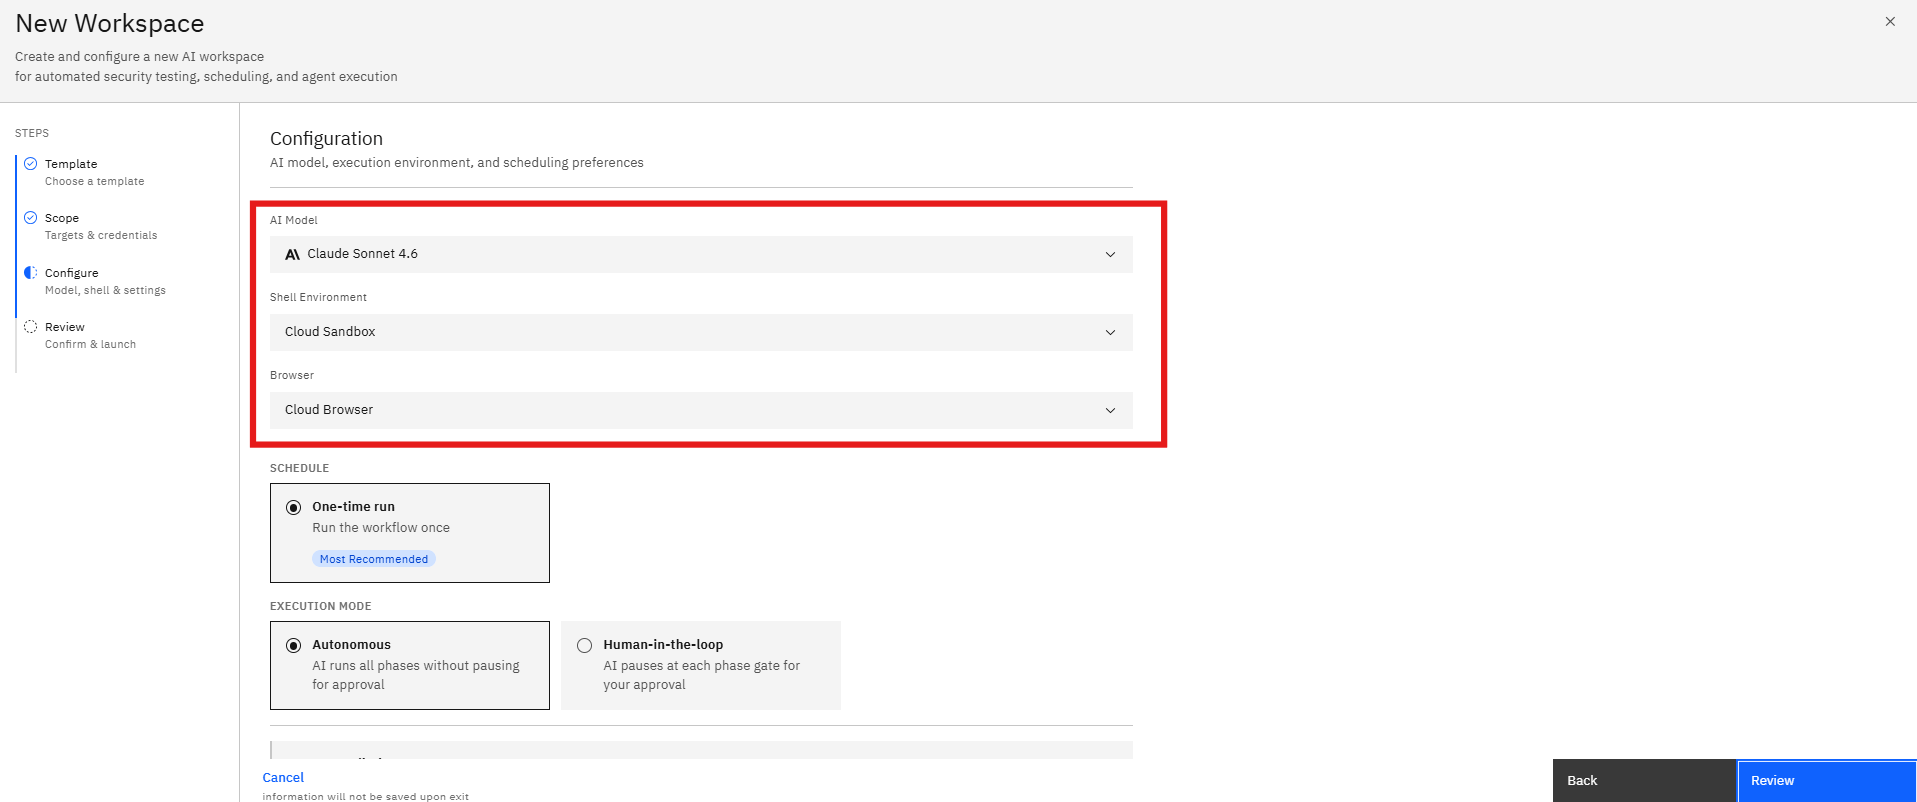
The AI Model determines the reasoning engine used during the assessment.
- Open the Model dropdown.
- Review the available models.
- Select the model best suited for the assessment.
The selected model impacts:
- Analysis quality
- Attack path identification
- Risk prioritization
- Recommendation accuracy
Step 7: Select the Assessment Environment
The execution environment determines how the AI agent performs the assessment.
- Open the environment selection dropdown.
- Choose the preferred environment.
- Confirm the selected option.
The environment controls:
- Assessment execution
- Tool availability
- Analysis workflow
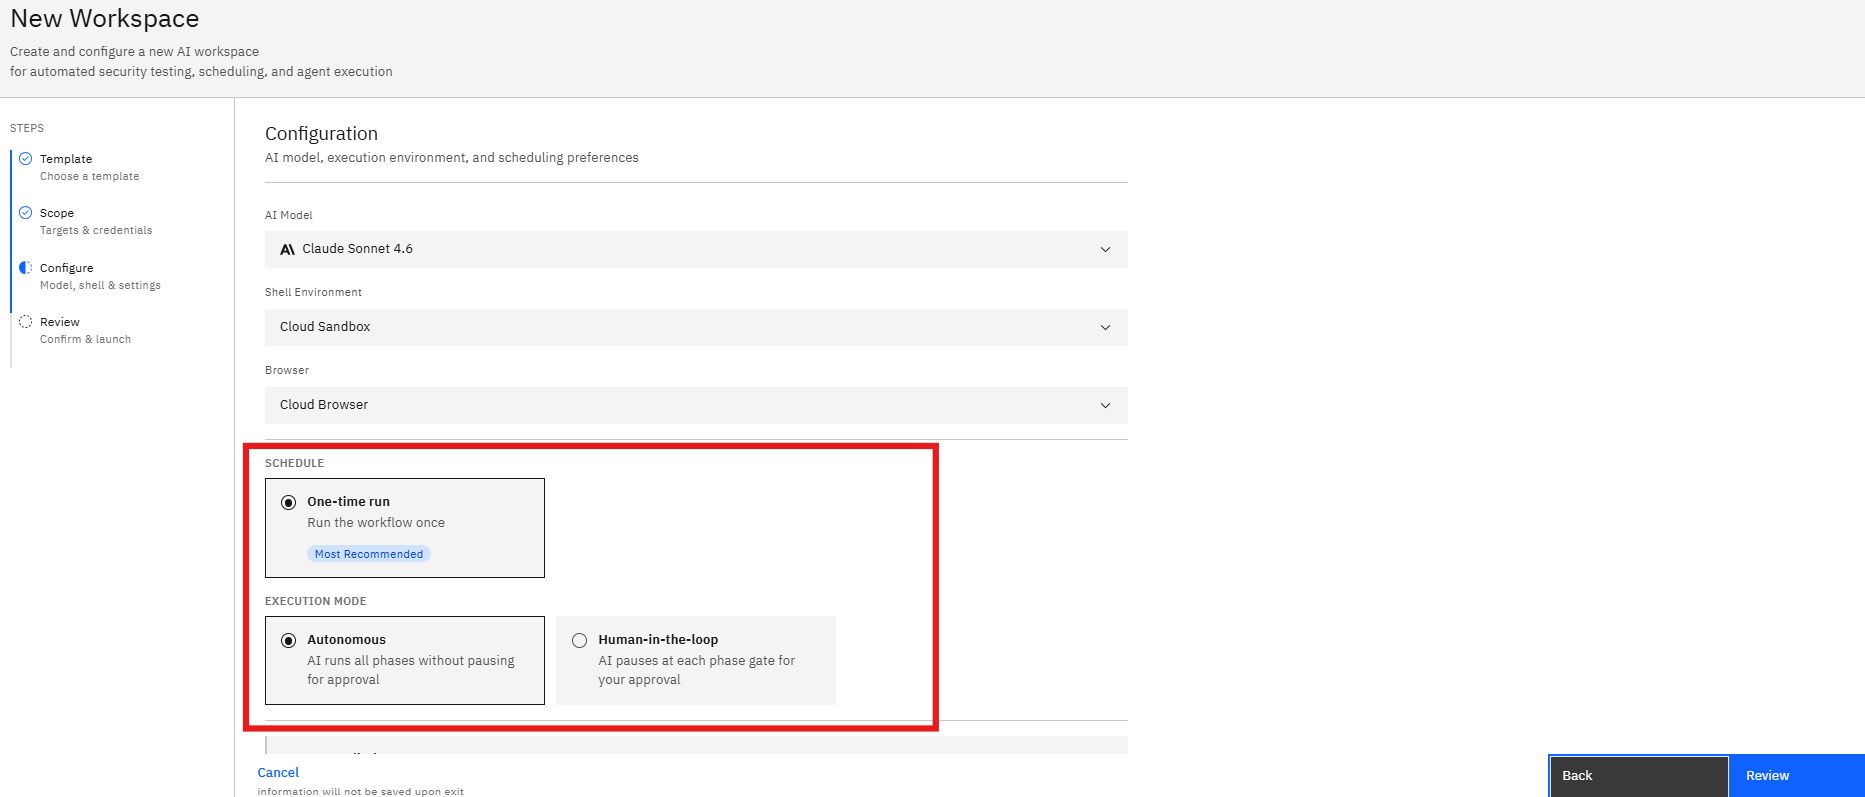
Step 8: Configure the Assessment Schedule
Select how frequently the assessment should run.
One-Time Assessment
Use this option when:
- Performing an initial review
- Conducting a point-in-time assessment
- Validating recent changes
Monthly Assessment
Use this option when:
- Monitoring Active Directory continuously
- Tracking security posture improvements
- Validating remediation efforts
- Select the preferred schedule.
- Review the execution frequency.
Step 9: Configure Execution Mode
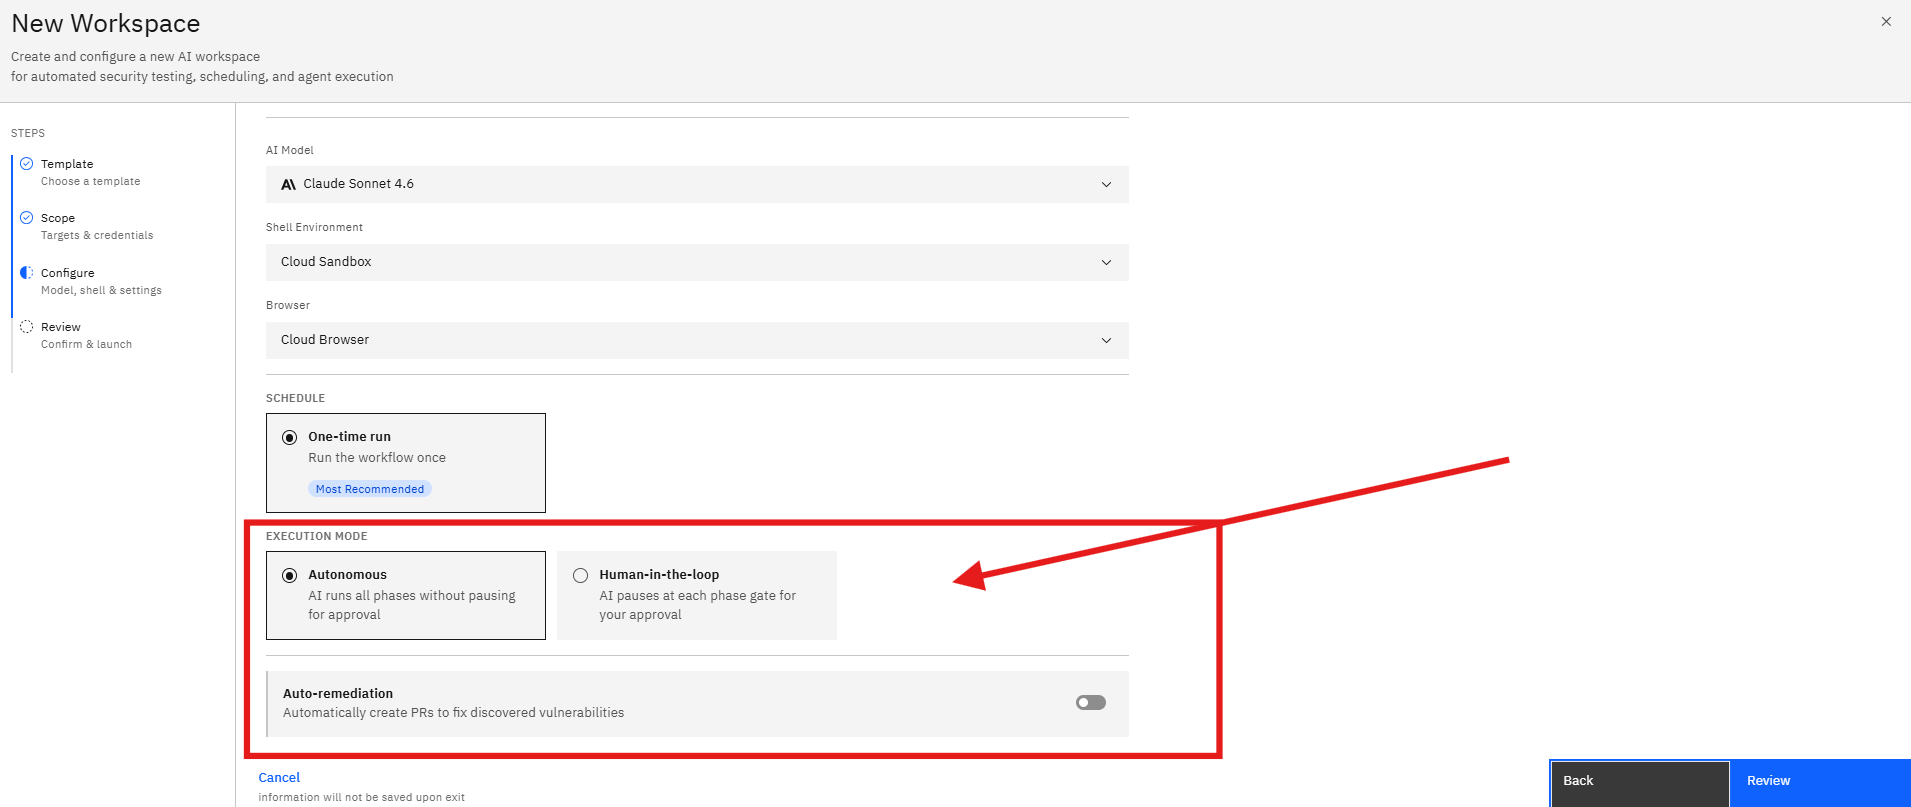
Choose how the AI agent progresses through the assessment.
Autonomous Mode
The AI automatically completes all assessment phases.
Recommended for:
- Faster assessments
- Standard security reviews
Human-in-the-Loop Mode
The AI pauses for approval between phases.
Recommended for:
- Controlled execution
- Manual validation
- Sensitive environments
- Select the preferred execution mode.
- Review the workflow behavior.
Step 10: Configure Auto-Remediation (Optional)
Auto-remediation settings determine whether remediation workflows can be generated automatically.
- Locate the Auto-remediation option.
- Enable or disable the feature.
- Review the selected configuration.
Step 11: Review the Assessment Configuration
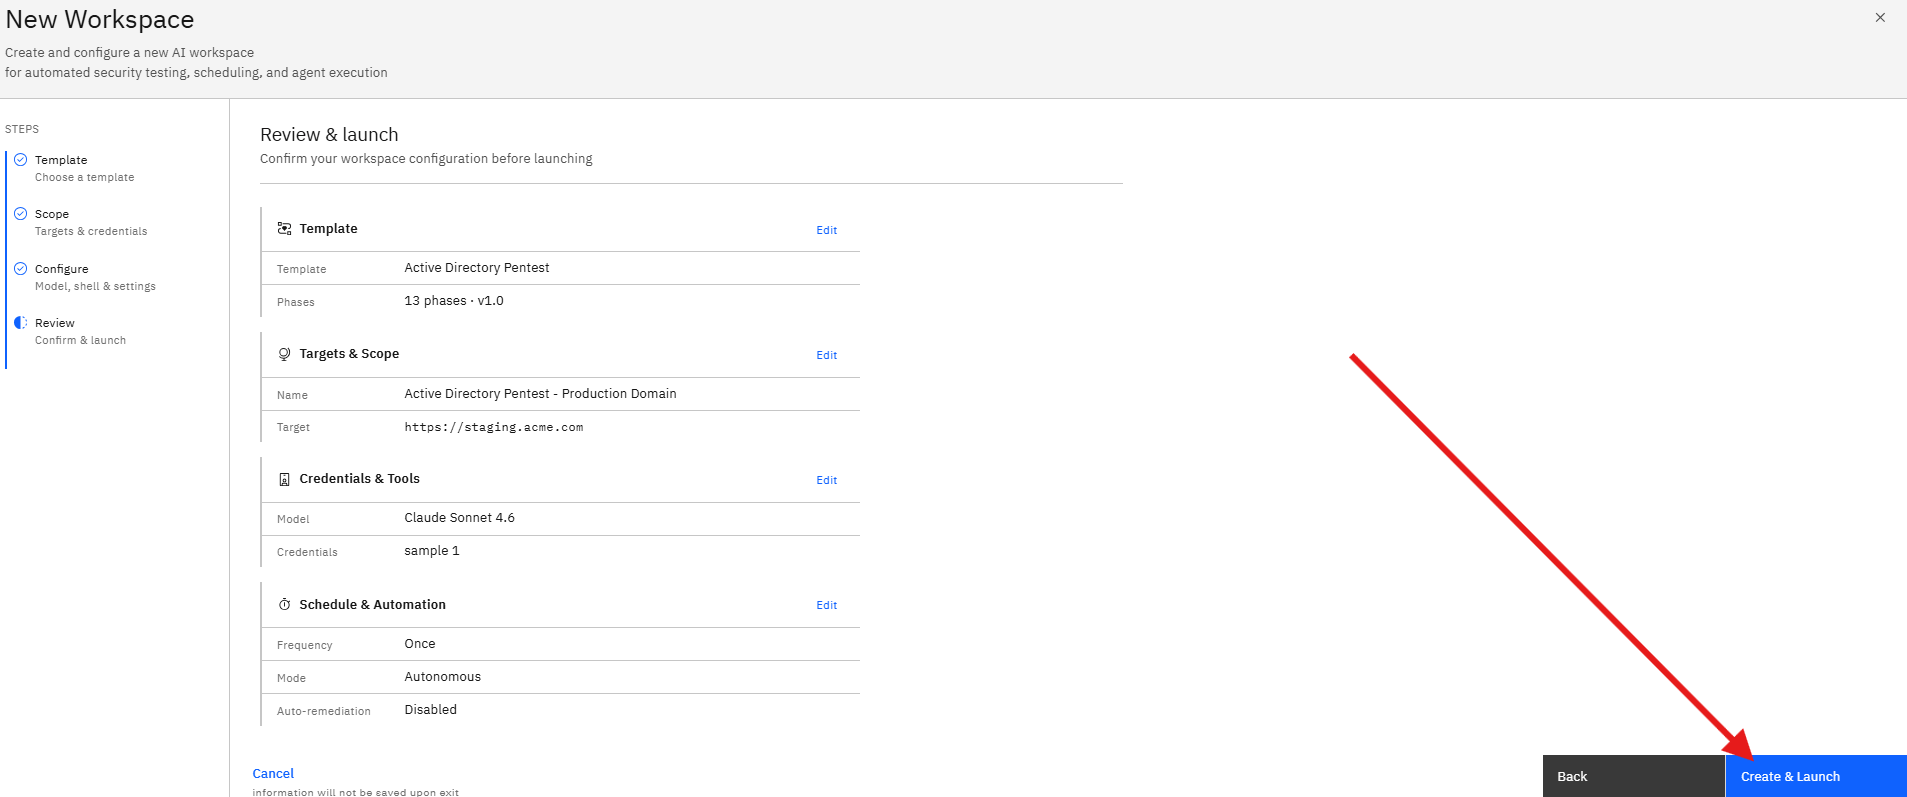
After completing the configuration, click Review.
The Review page displays:
Workspace Details
- Workspace Name
- Selected Template
Scope Details
- Environment
- Domain Controller
- Credentials
Configuration
- AI Model
- Execution Environment
- Schedule
- Execution Mode
Automation Settings
- Auto-remediation Status
Carefully review all settings before launching the assessment.
Step 12: Launch the Active Directory Pentest
Once all settings have been verified:
- Click Create & Launch.
- The workspace is created.
- The assessment begins automatically.
During execution, the platform performs:
- Active Directory Enumeration
- User and Group Analysis
- Permission Mapping
- Trust Relationship Analysis
- Attack Path Discovery
- Risk Assessment
- Remediation Planning
Notes
- Ensure the selected credentials have access to the target domain.
- Verify the domain controller information before launching the assessment.
- Human-in-the-Loop mode is recommended for production environments.
- Monthly assessments help identify newly introduced risks and configuration changes
More in Pentest templates
Was this page helpful?