
Threat Modeling Template
3 min readEdit
On this page⌄
- Accessing the Threat Modeling Template
- Step 1: Select the Threat Modeling Template
- What to Expect
- Outputs & Deliverables
- Step 2: Enter the Workspace Name
- Step 3: Specify the Target System
- Step 4: Select Supporting Credentials (Optional)
- Step 5: Proceed to Configuration
- Step 6: Select an AI Model
- Step 7: Configure the Execution Environment
- Step 8: Configure the Assessment Schedule
- One-Time Model
- Monthly Refresh
- Step 9: Select the Execution Mode
- Autonomous
- Human-in-the-Loop
- Step 10: Configure Auto-Remediation (Optional)
- Step 11: Review the Configuration
- Template Details
- Targets & Scope
- Credentials & Tools
- Schedule & Automation
- Step 12: Launch the Threat Modeling Assessment
- Notes
The Threat Modeling template helps security teams systematically identify threats, analyze attack scenarios, evaluate risks, and generate mitigation recommendations for applications, systems, or cloud environments.
The assessment uses industry-standard methodologies such as STRIDE and DREAD to model realistic attack paths and prioritize security risks.
Accessing the Threat Modeling Template
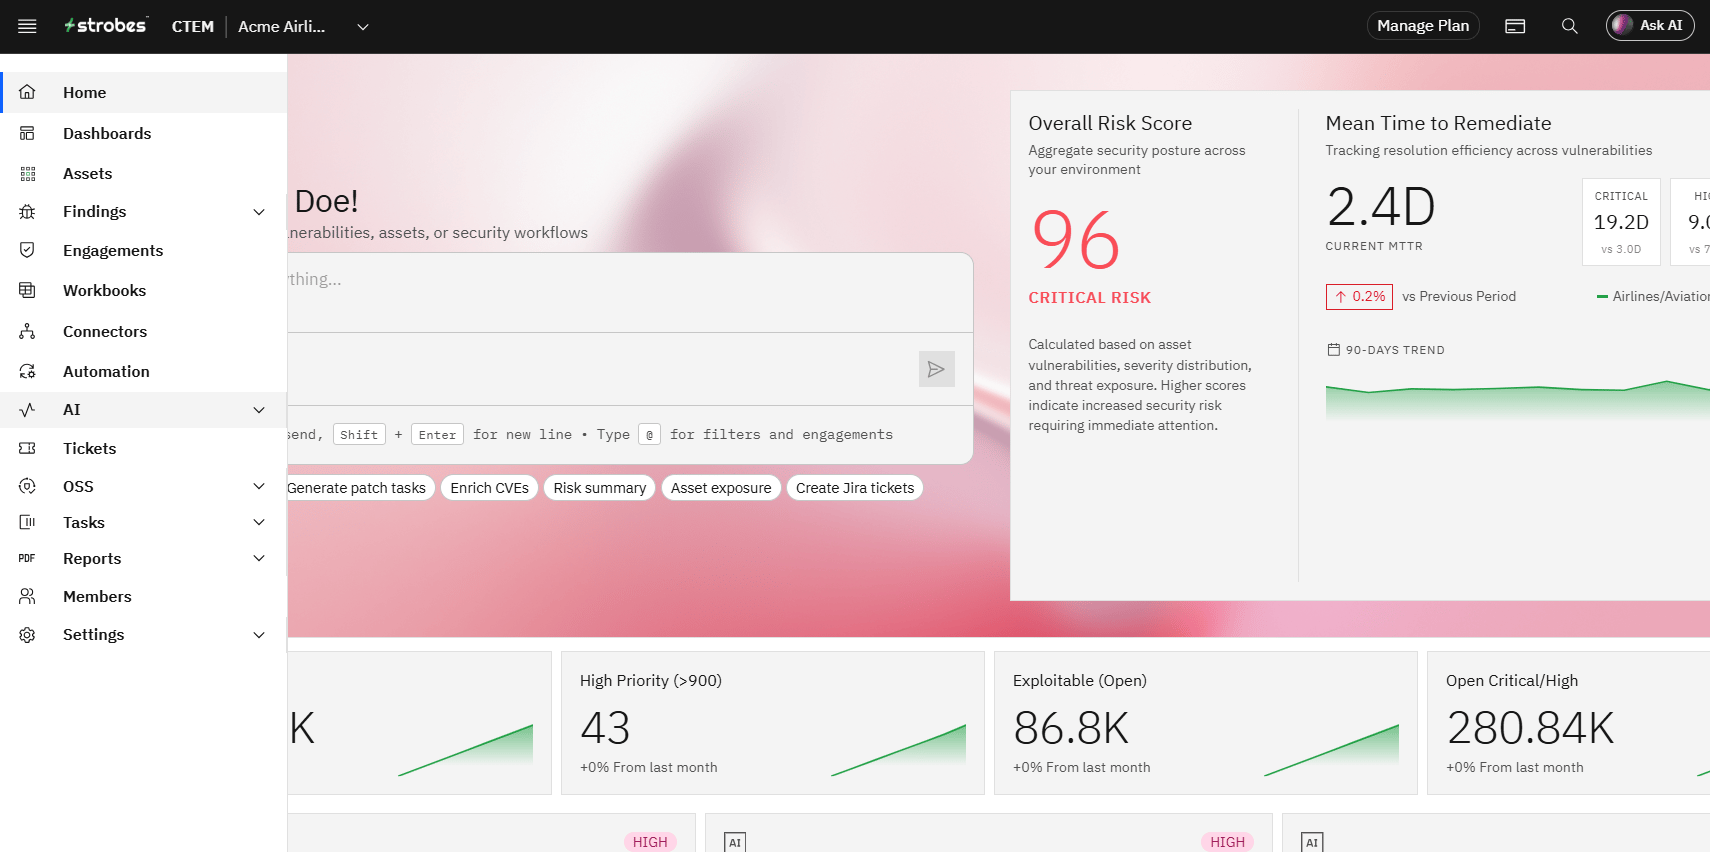
- Navigate to AI from the main navigation menu.
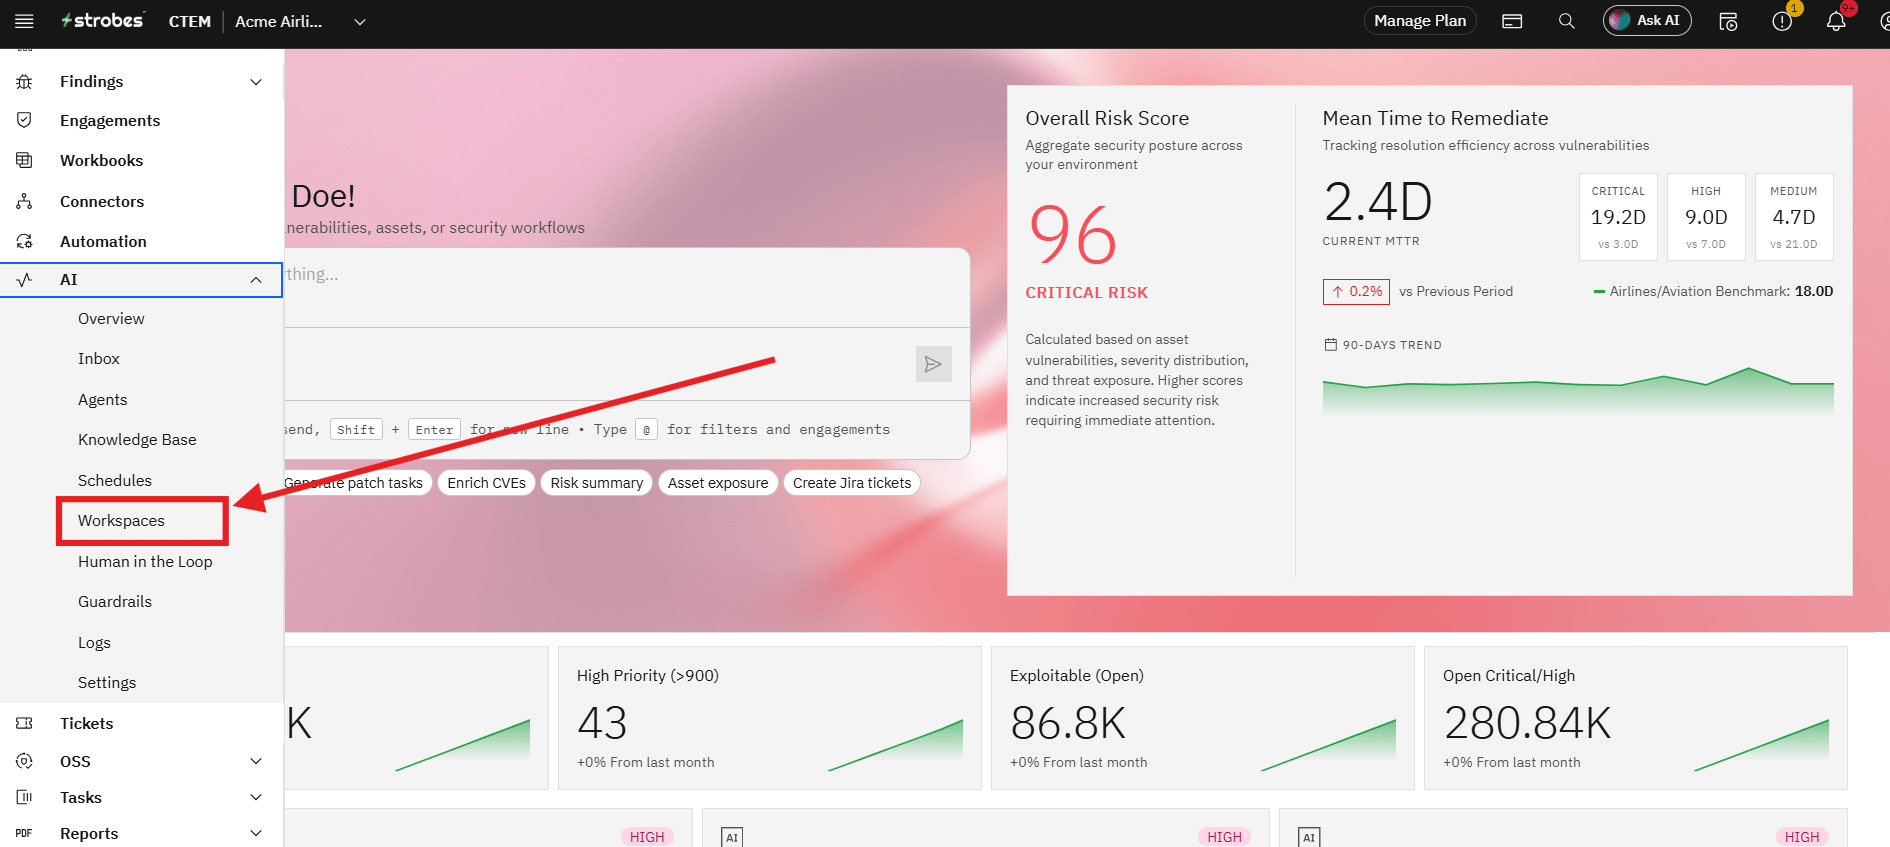
- Click Workspaces.
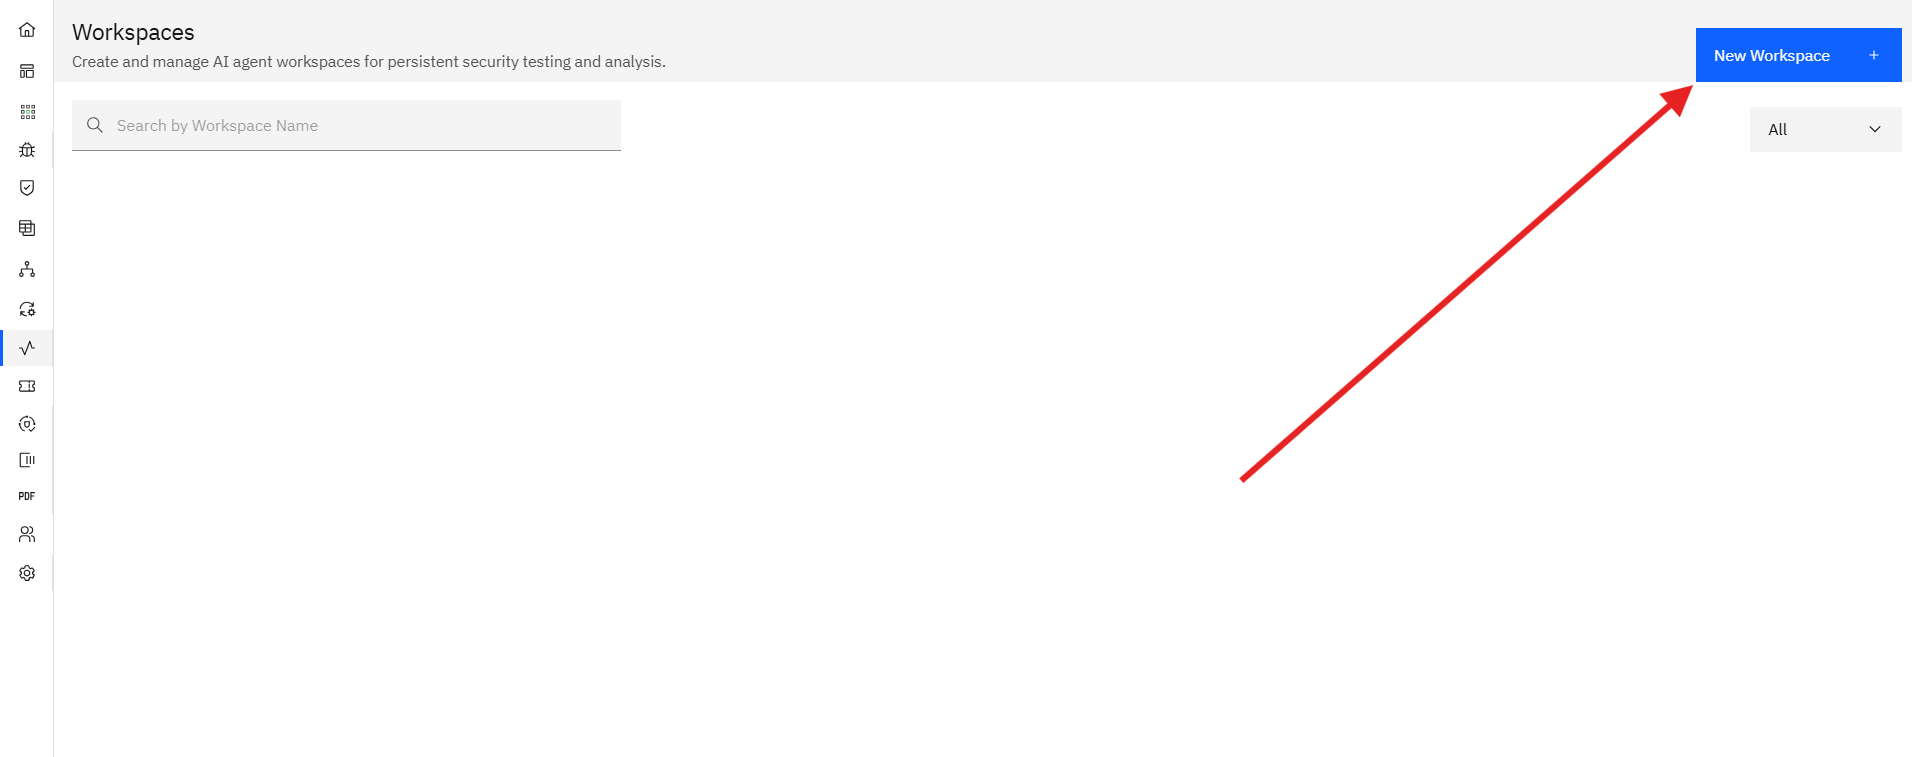
- Select New Workspace.
Step 1: Select the Threat Modeling Template
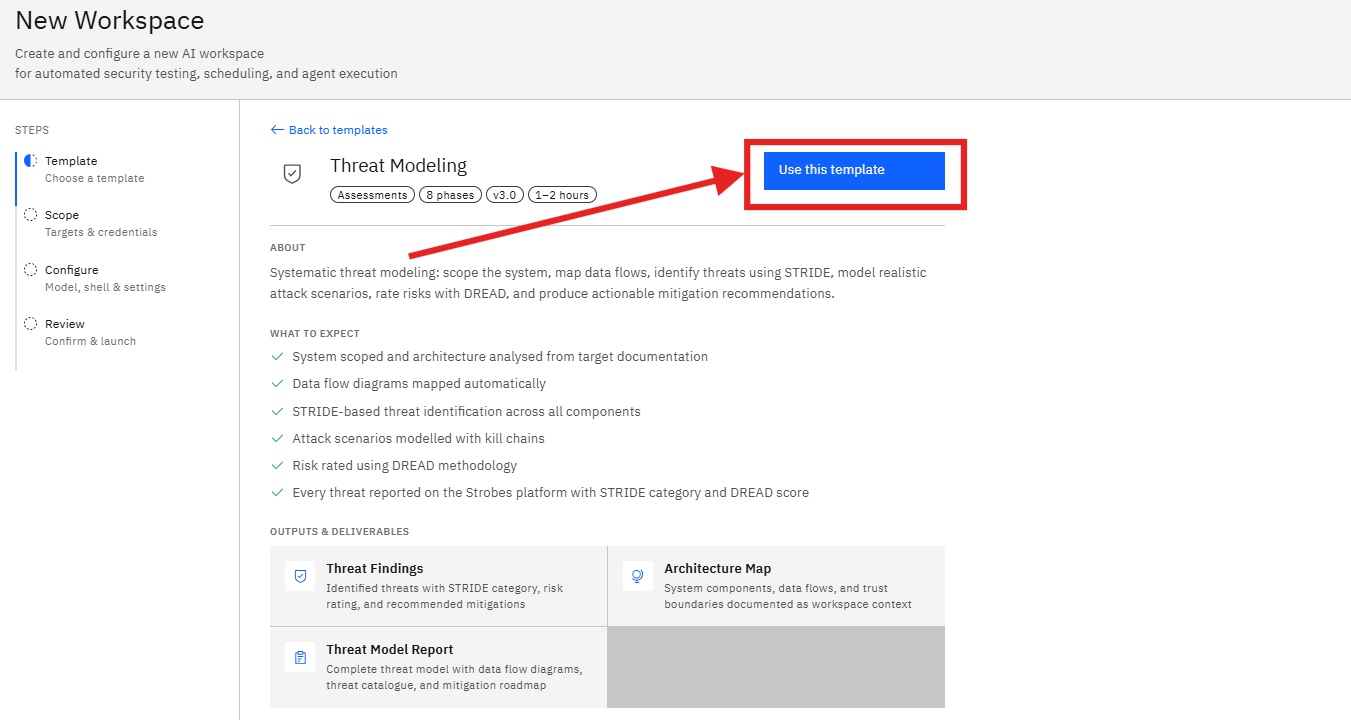
- From the available templates, locate Threat Modeling.
- Click the template card to view additional details.
The template provides:
- Estimated assessment duration
- Number of assessment phases
- Expected outputs and deliverables
- Threat modeling methodology

What to Expect
The assessment performs:
- System scoping and architecture analysis
- Data flow mapping
- STRIDE-based threat identification
- Attack scenario modeling
- DREAD risk scoring
- Mitigation recommendation generation
Outputs & Deliverables
The assessment generates:
- Threat Findings
- Architecture Maps
- Data Flow Documentation
- Risk Ratings
- Mitigation Recommendations
- Click Use this template.
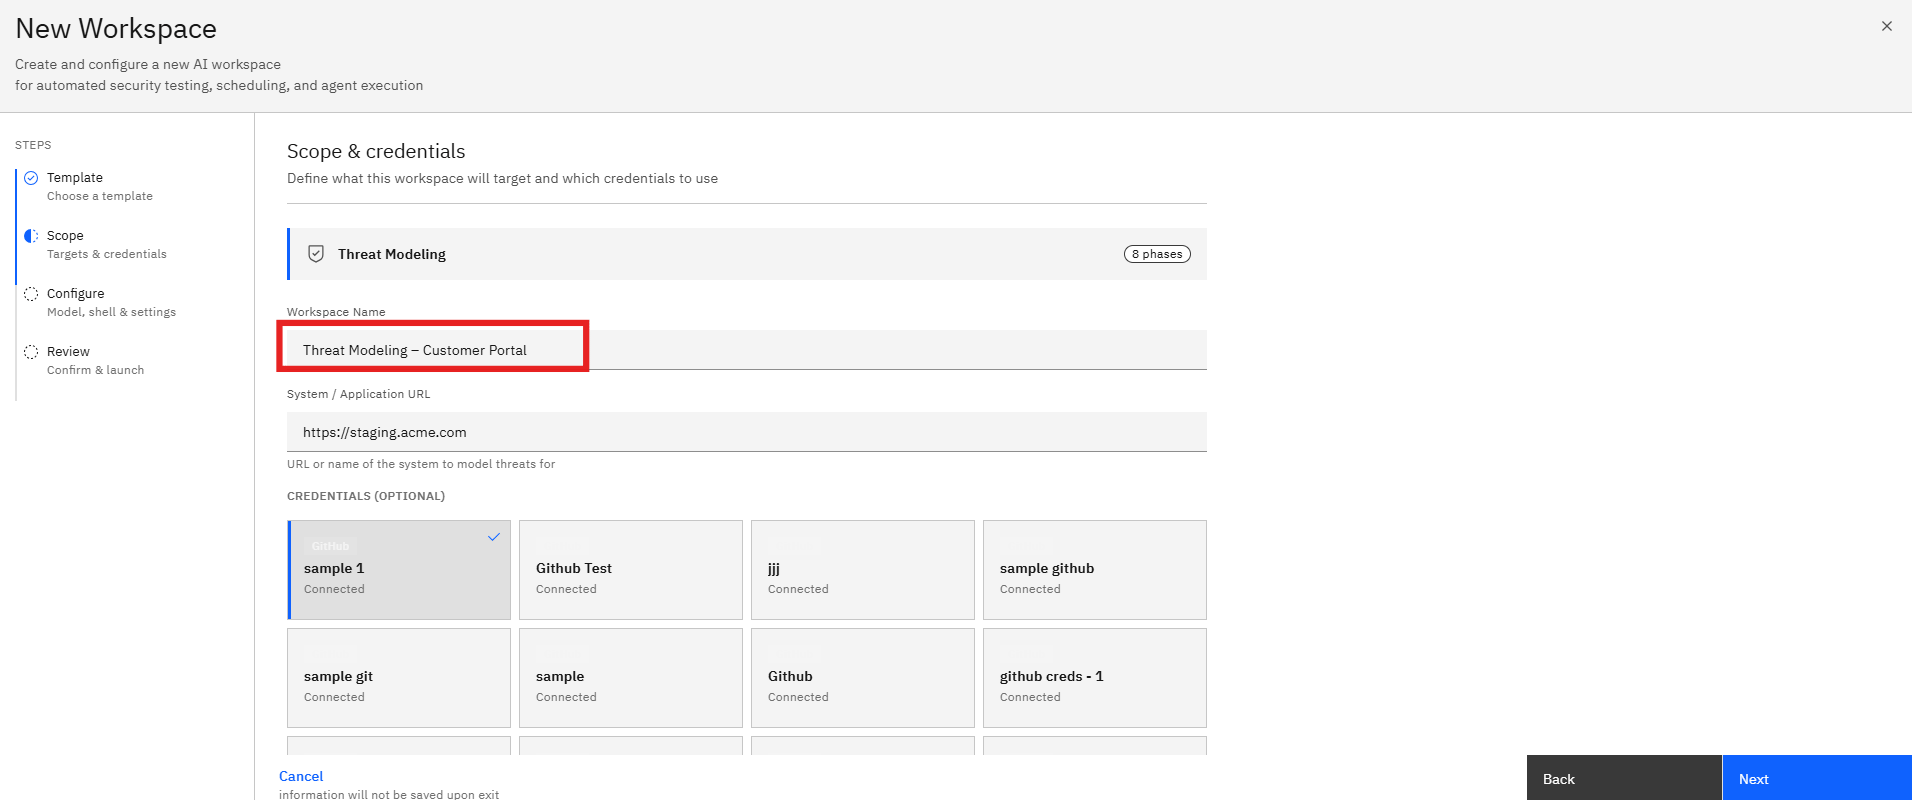
Step 2: Enter the Workspace Name
After selecting the template, the wizard moves to the Scope step.
- Locate the Workspace Name field.
- Enter a descriptive name for the assessment.
Example:
Threat Modeling – Customer Portal
A meaningful name helps distinguish assessments across projects and environments.
Step 3: Specify the Target System
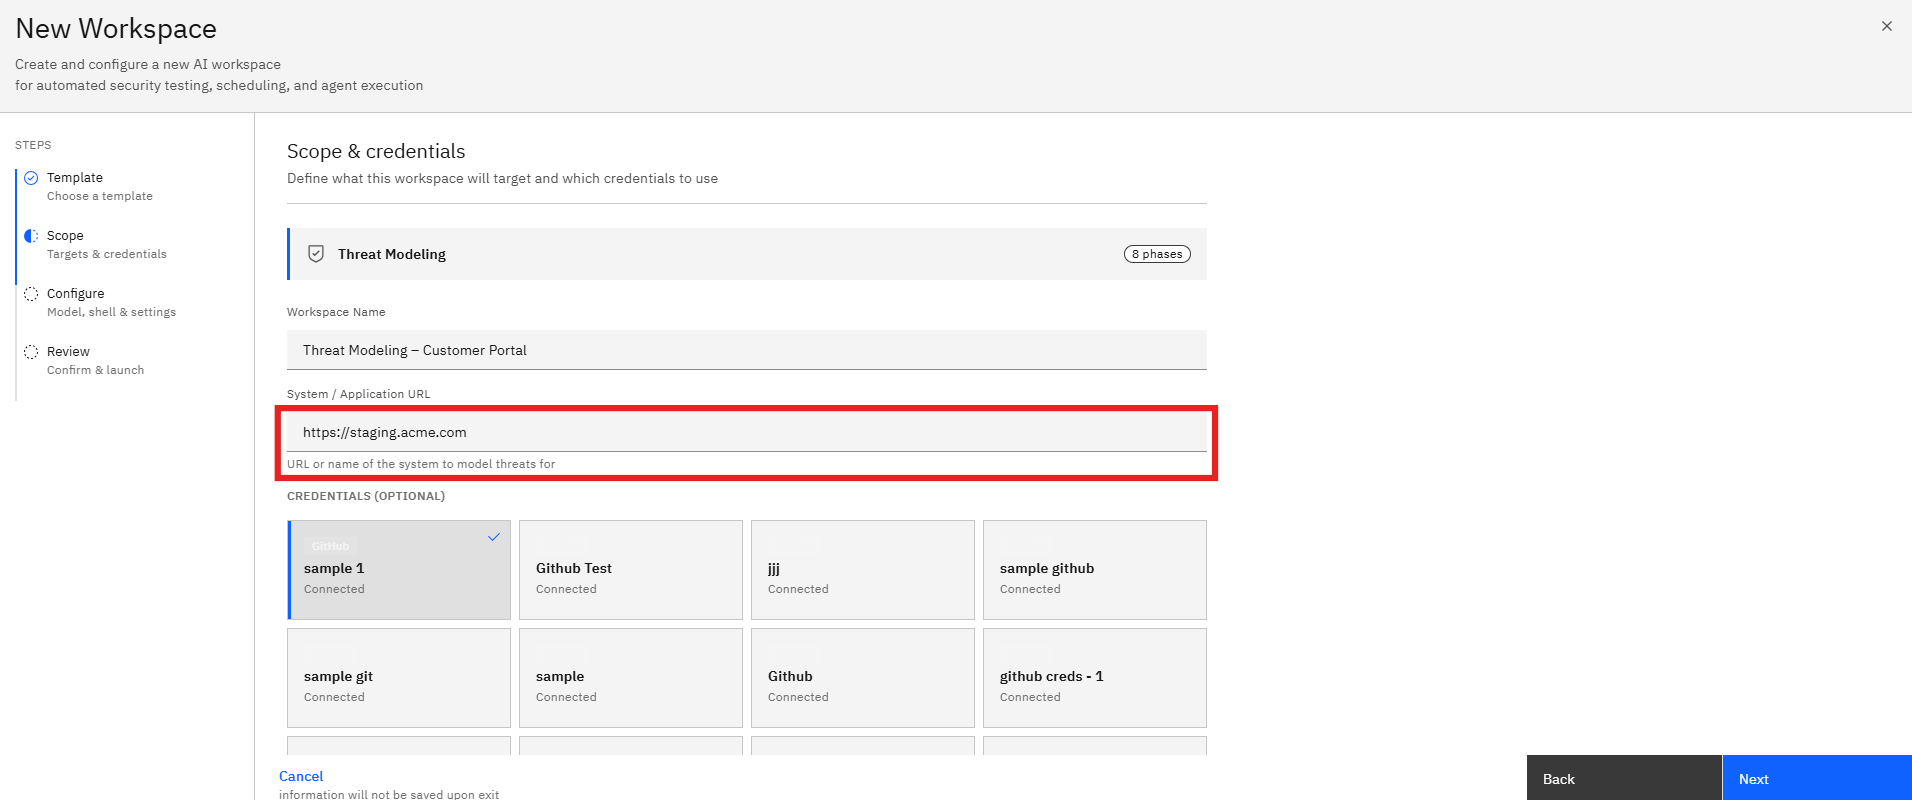
The target system defines the application, service, or environment that will be analyzed.
- Locate the System / Application URL field.
- Enter the application URL or system name.
The platform may display previously used assets or targets for quick selection.
Step 4: Select Supporting Credentials (Optional)
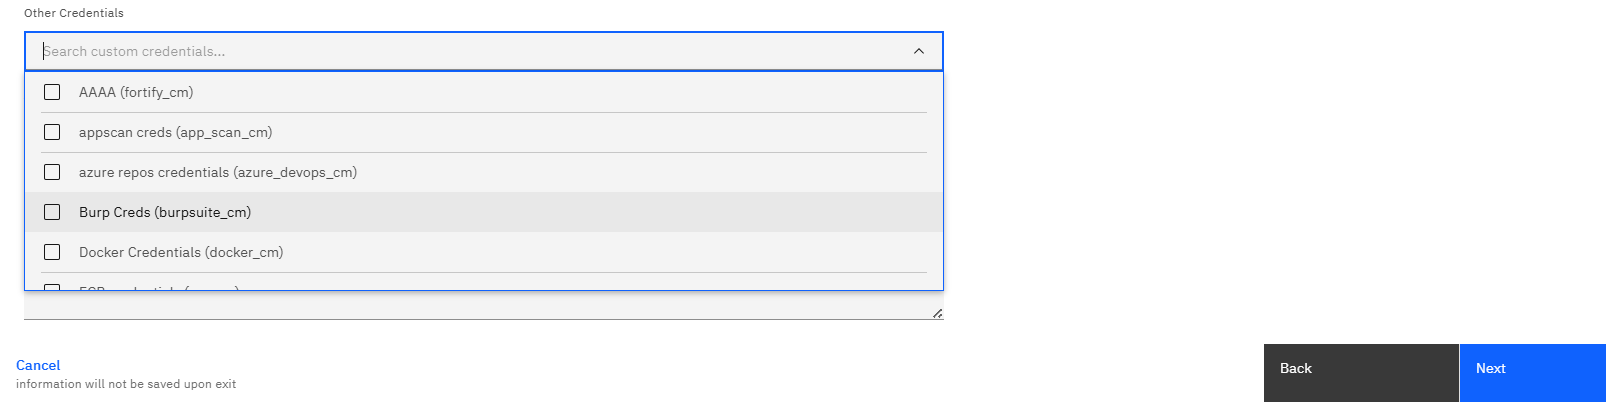
Threat modeling can leverage existing credentials and integrations to gather additional context.
- Review the available credentials.
- Select any credentials relevant to the target environment.
Providing credentials enables the assessment to collect additional architectural and configuration information where applicable.
Step 5: Proceed to Configuration
After completing the scope details:
- Verify the workspace name.
- Confirm the target application or system.
- Review any selected credentials.
- Click Next.
The wizard opens the Configure page.
Step 6: Select an AI Model
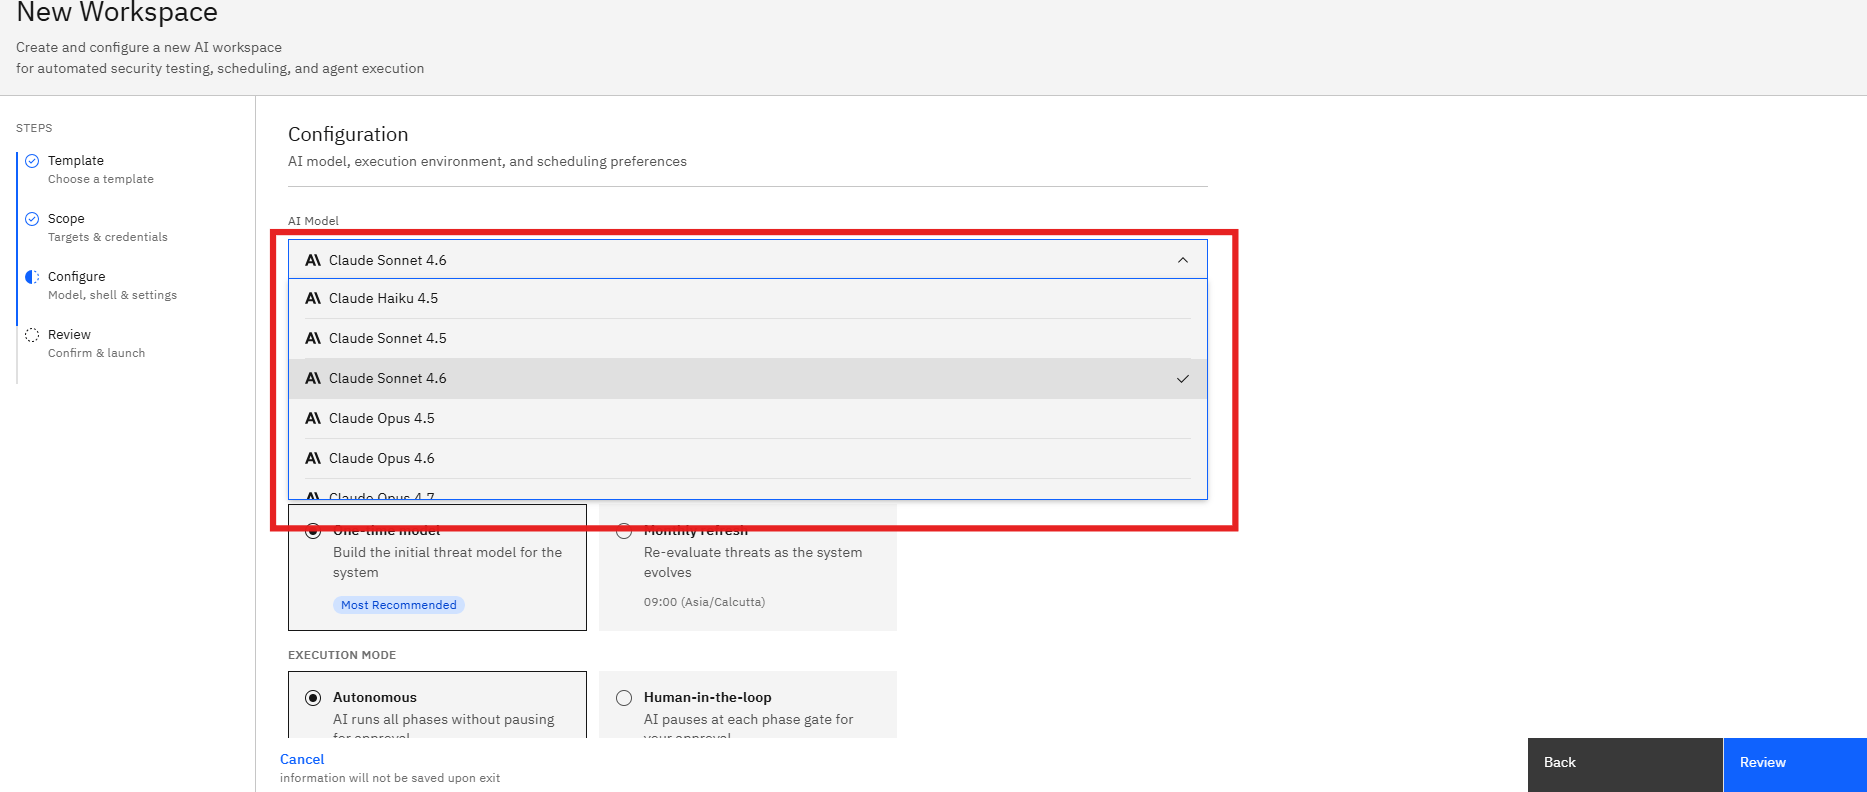
The AI Model determines the reasoning engine used throughout the threat modeling process.
- Open the Model dropdown.
- Review the available models.
- Select the model best suited for your assessment.
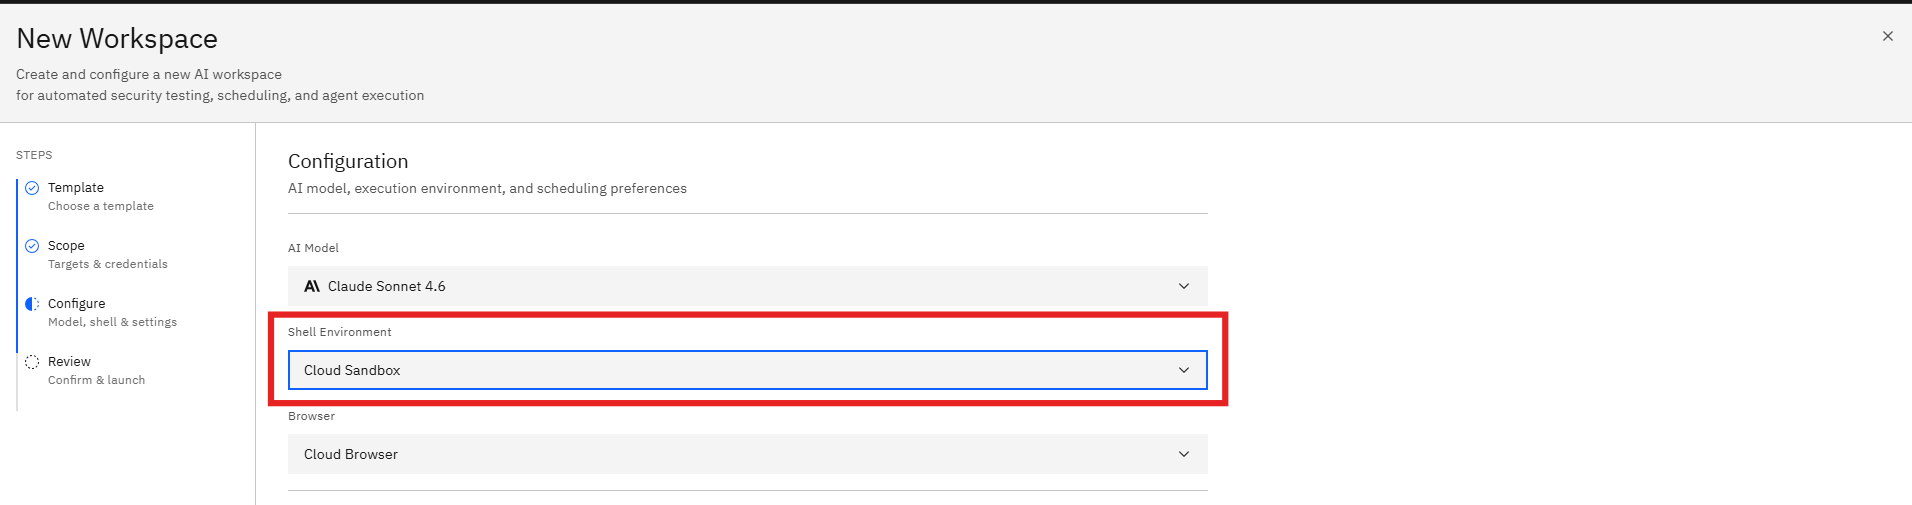
Step 7: Configure the Execution Environment
The execution environment determines how the AI agent performs the assessment.
Select the environment that best supports the target assessment.
Step 8: Configure the Assessment Schedule
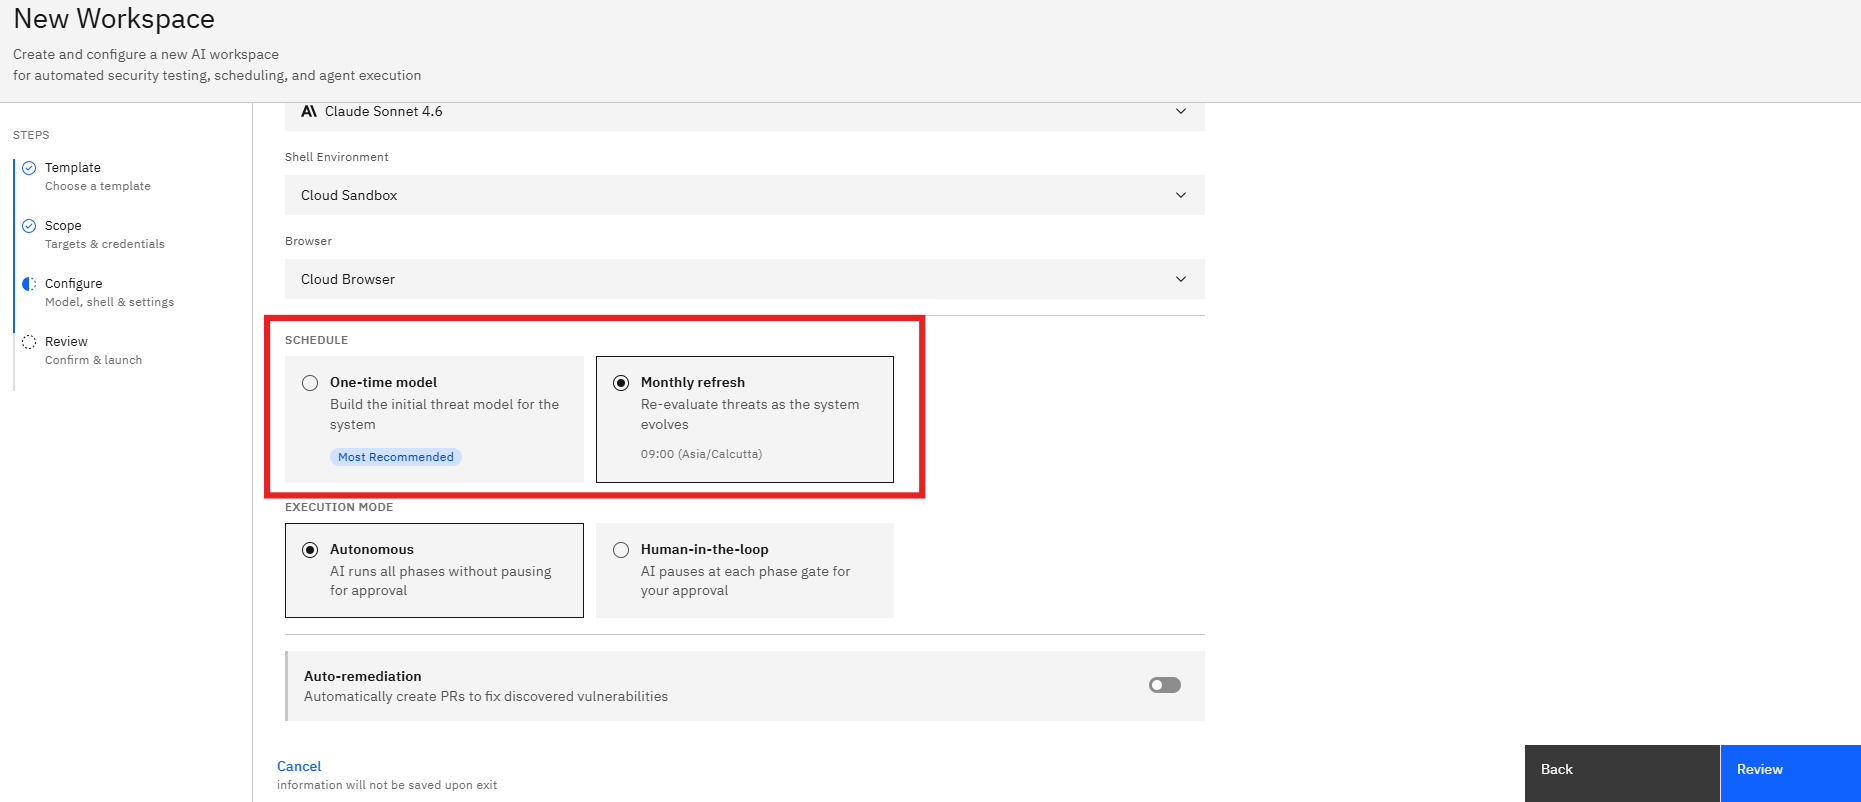
The Threat Modeling template supports different execution schedules.
One-Time Model
Creates an initial threat model for the selected system.
Use this option when:
- Performing a first-time assessment
- Reviewing a newly developed application
- Conducting a point-in-time analysis
Monthly Refresh
Re-evaluates threats on a recurring schedule.
Use this option when:
- The application changes frequently
- New features are released regularly
- Continuous threat monitoring is required
- Select the desired schedule.
- Review the execution frequency.
Step 9: Select the Execution Mode
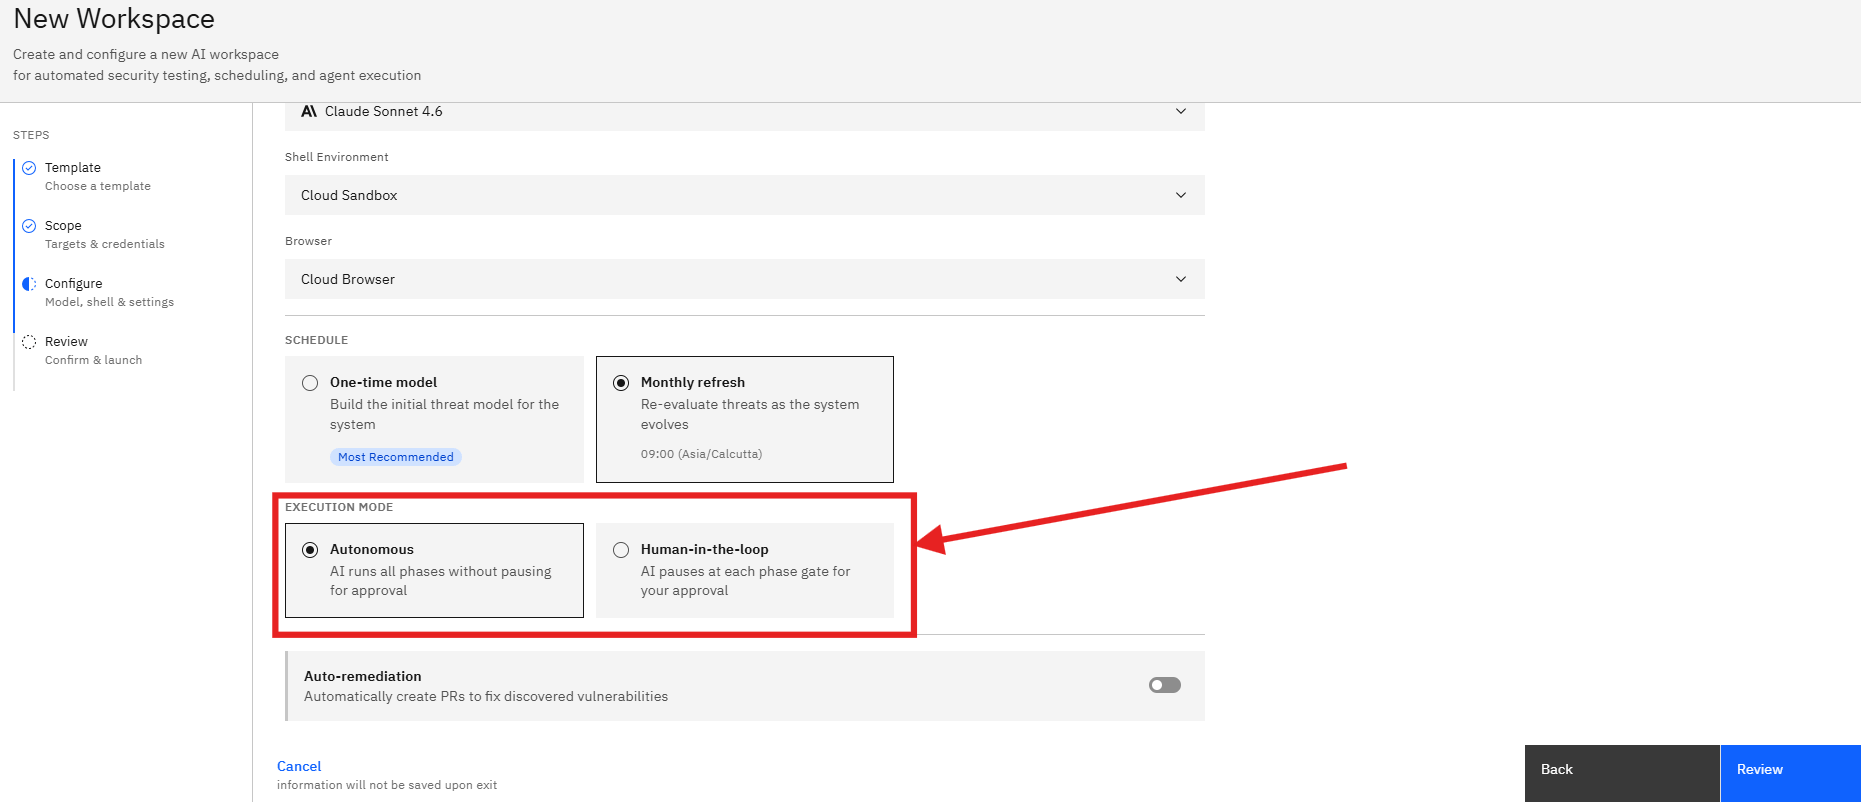
Choose how the AI agent progresses through the assessment.
Autonomous
The AI completes all assessment phases automatically.
Recommended when:
- Minimal manual intervention is required.
- Faster assessment completion is preferred.
Human-in-the-Loop
The AI pauses between phases for user approval.
Recommended when:
- Validation is required before proceeding.
- Teams want greater control over assessment execution.
- Select the preferred execution mode.
- Review the associated workflow behavior.
Step 10: Configure Auto-Remediation (Optional)
Auto-remediation enables automated remediation workflows when supported.
- Locate the Auto-remediation toggle.
- Enable or disable the setting as required.
When enabled, the platform can generate remediation actions for identified security issues.
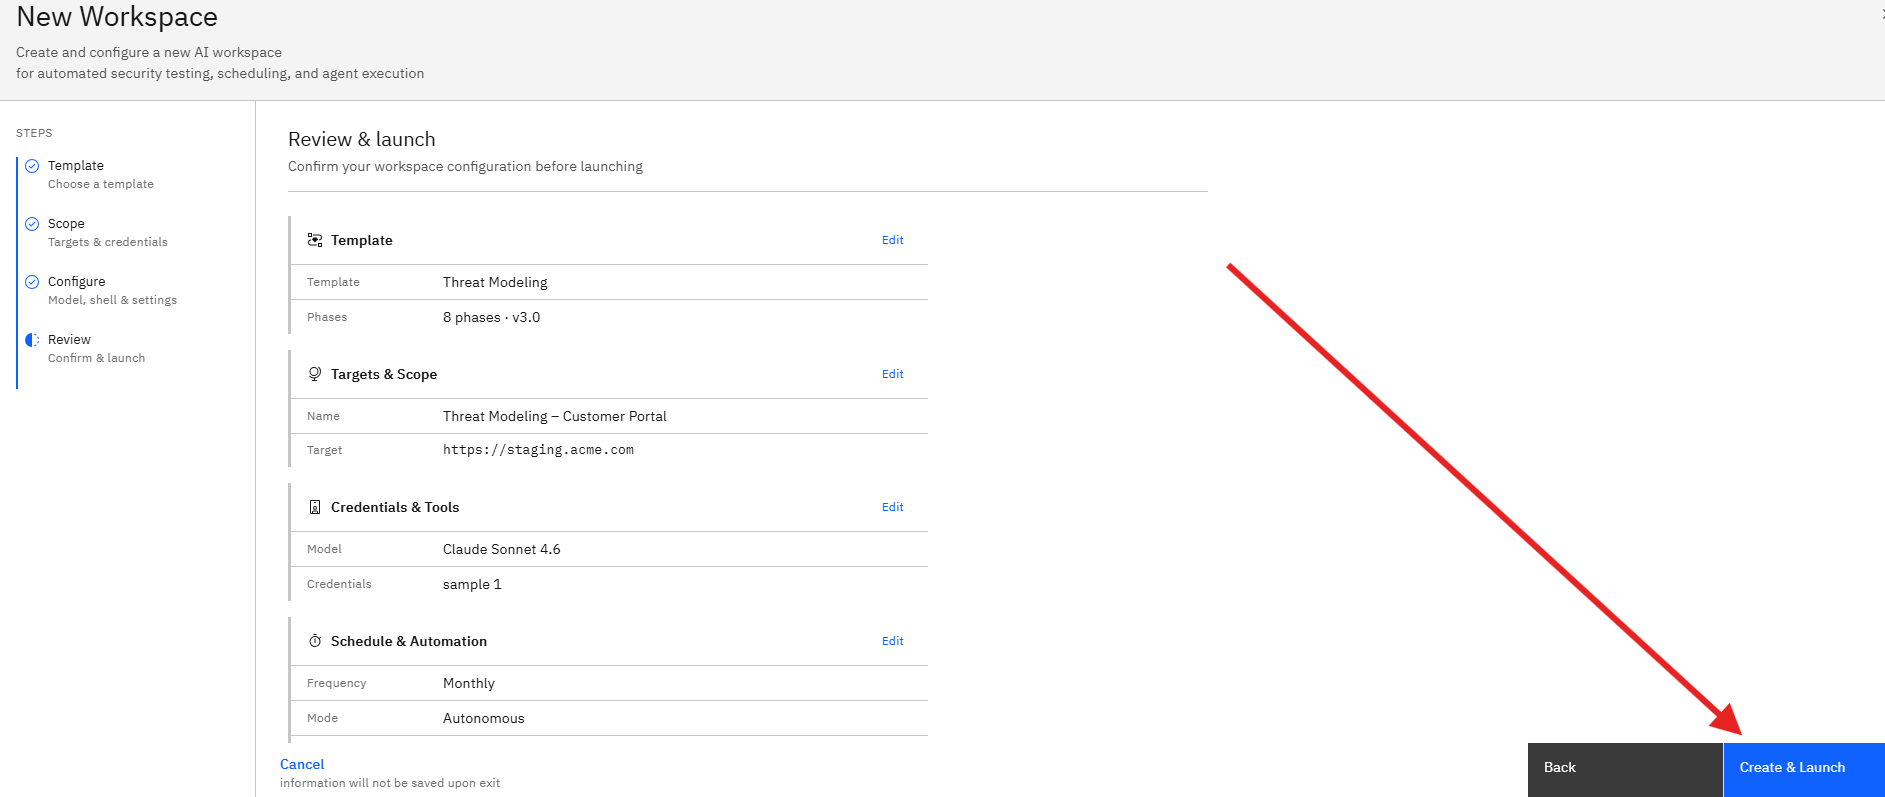
Step 11: Review the Configuration
After completing the configuration:
- Click Review.
The Review page displays:
Template Details
- Selected template
- Assessment phases
- Template version
Targets & Scope
- Workspace name
- Target application or system
Credentials & Tools
- Selected AI model
- Connected credentials
Schedule & Automation
- Assessment frequency
- Execution mode
- Automation settings
Review all settings carefully before launching the assessment.
Step 12: Launch the Threat Modeling Assessment
Once all settings have been verified:
- Click Create & Launch.
- The workspace is created.
- The Threat Modeling assessment begins execution.
The AI agent will:
- Analyze the target system
- Build architecture context
- Map data flows
- Identify threats using STRIDE
- Assign DREAD risk scores
- Generate mitigation recommendations
Notes
- Use clear and descriptive system names whenever possible.
- Providing application URLs improves assessment context.
- Monthly Refresh is recommended for frequently changing applications.
- Human-in-the-Loop mode provides additional control during assessment execution.
- Review all configuration settings before launching the assessment.
More in Pentest templates
Was this page helpful?