
Configuring Burp Suite credentials
1 min readEdit
On this page⌄
This article explains how to configure your Burp Suite Enterprise credentials within the Strobes platform using the Credential Manager. This setup is essential to enable Burp-based scans and asset/vulnerability sync within Strobes.
Prerequisites
Before proceeding, ensure you have:
- Access to your Burp Suite Enterprise dashboard.
- Your Burp Suite API Key and the REST API endpoint URL.
- Necessary permissions in Strobes to manage credentials.
Step-by-Step Instructions
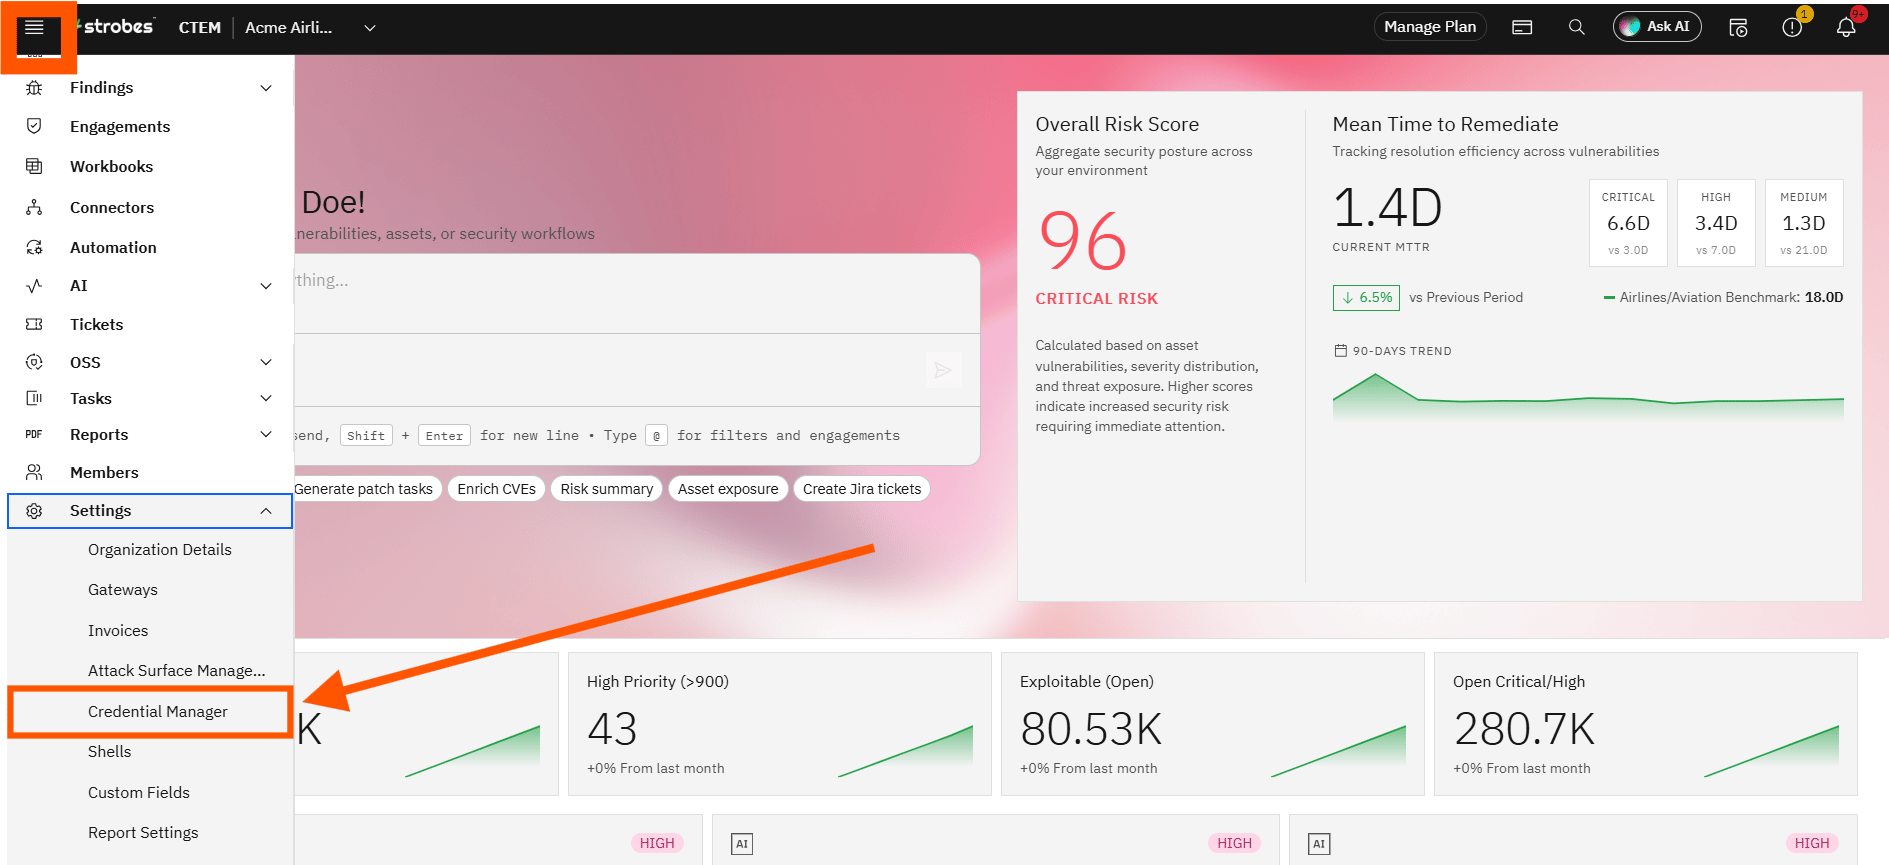
1. Navigate to Credential Manager
- Log into your Strobes instance.
- Go to the Settings tab from the main menu.
- Click on Credential Manager.
2. Add a New Credential
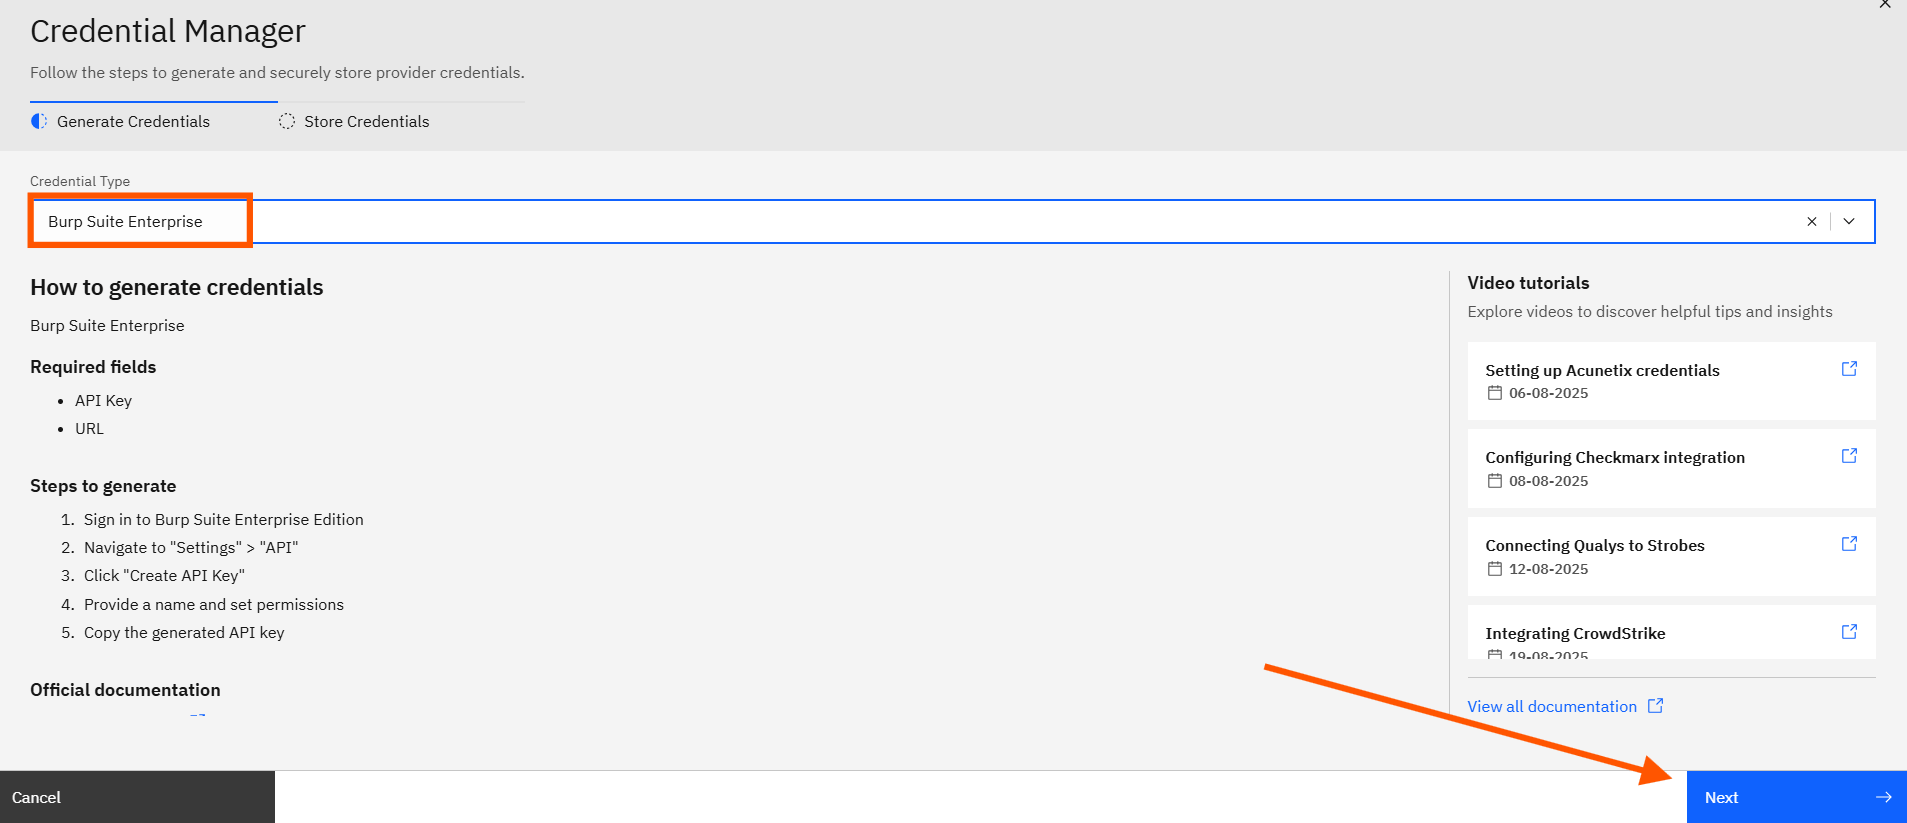
- Click on the "Add Credential" button.
- From the list of available connectors, select Burp Suite Enterprise.
3. Enter Burp Configuration Details
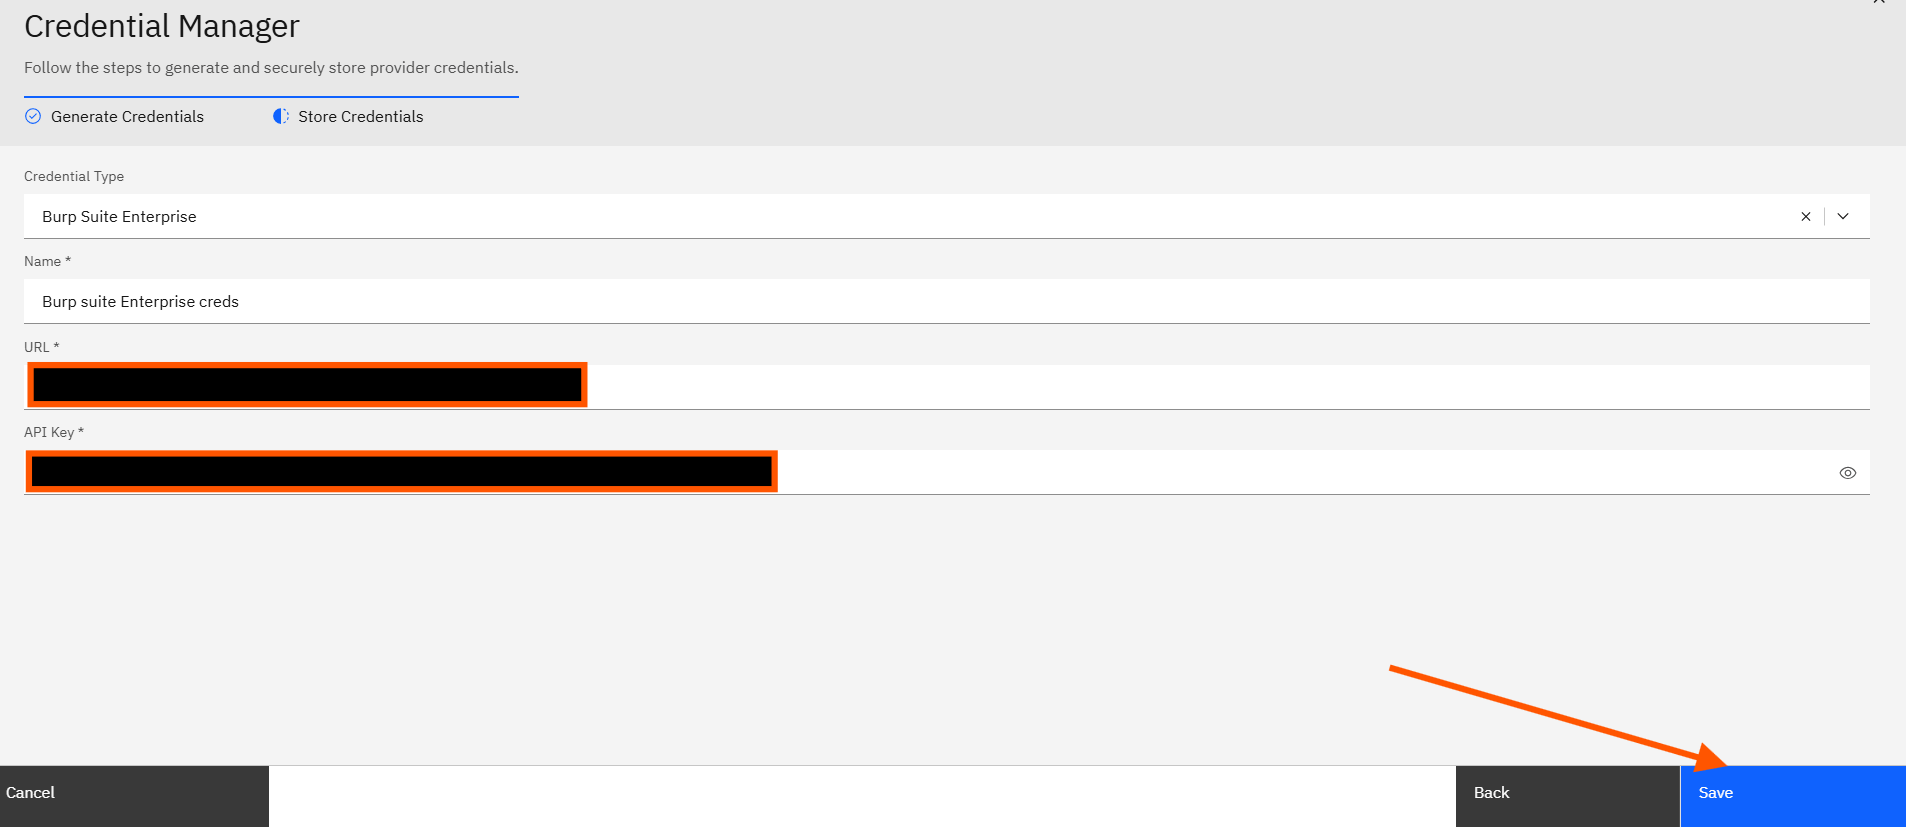
You will now be prompted to fill in the required configuration fields:
- Name: Provide a name for this credential (e.g., Burp Production, Burp QA).
- URL: Enter the base URL where your Burp REST API service is hosted (e.g., https://burp.example.com/api).
- API Key: Paste the API key generated from your Burp instance.
4. Save the Credential
- Once all fields are filled in, click on Save.
- Your Burp credentials are now securely stored and ready to use for scan configurations.
What’s Next?
Now that your Burp credentials are configured, you can use them to:
- Set up a Burp scan in the Dynamic Application Scanners section.
- Automatically fetch vulnerabilities into Strobes from your Burp instance.
More in Application security tools
Was this page helpful?