
Inviting members to a Private Workspace
2 min readEdit
On this page⌄
Overview
A private workspace is visible only to the people who have been added to it. Even a manager in your organization cannot see or open it until a workspace Owner adds them. This article shows how an Owner adds a manager to a private workspace and assigns their workspace role.
Why Is It Needed?
Organization-level roles do not grant access to a private workspace. Adding the manager to the workspace gives them access to the findings and files they need, and lets you choose how much they can do there.
Prerequisites
Before you start, make sure you have:
- Owner access to the private workspace.
- The manager's name or email address.
- The workspace role the manager should have: Viewer, Contributor, or Owner.
Giving Access
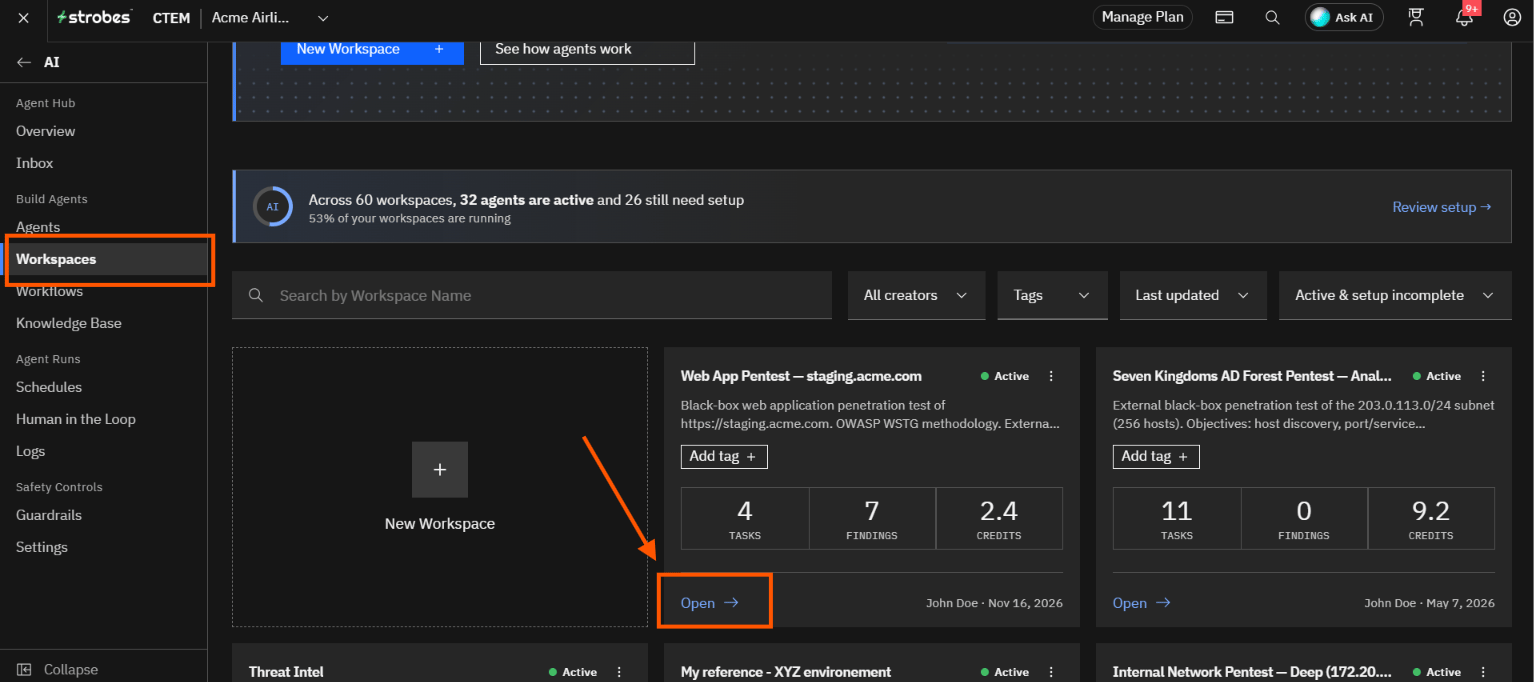
Step 1: Open the Workspace
In the left navigation, go to AI > Workspaces and click open the private workspace.
Step 2: Open the Members Page
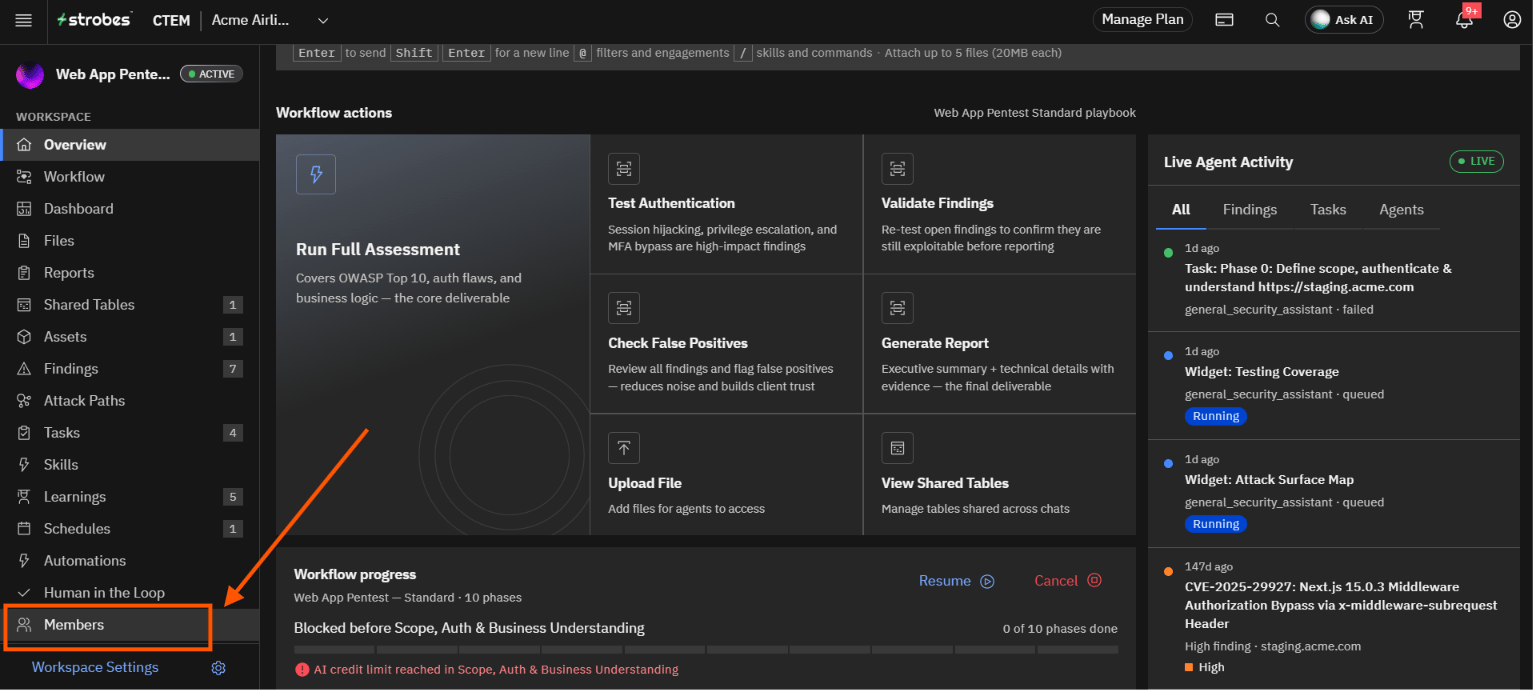
In the workspace left menu, click Members. The page lists everyone who has access to the workspace.
Step 3: Click Add Member
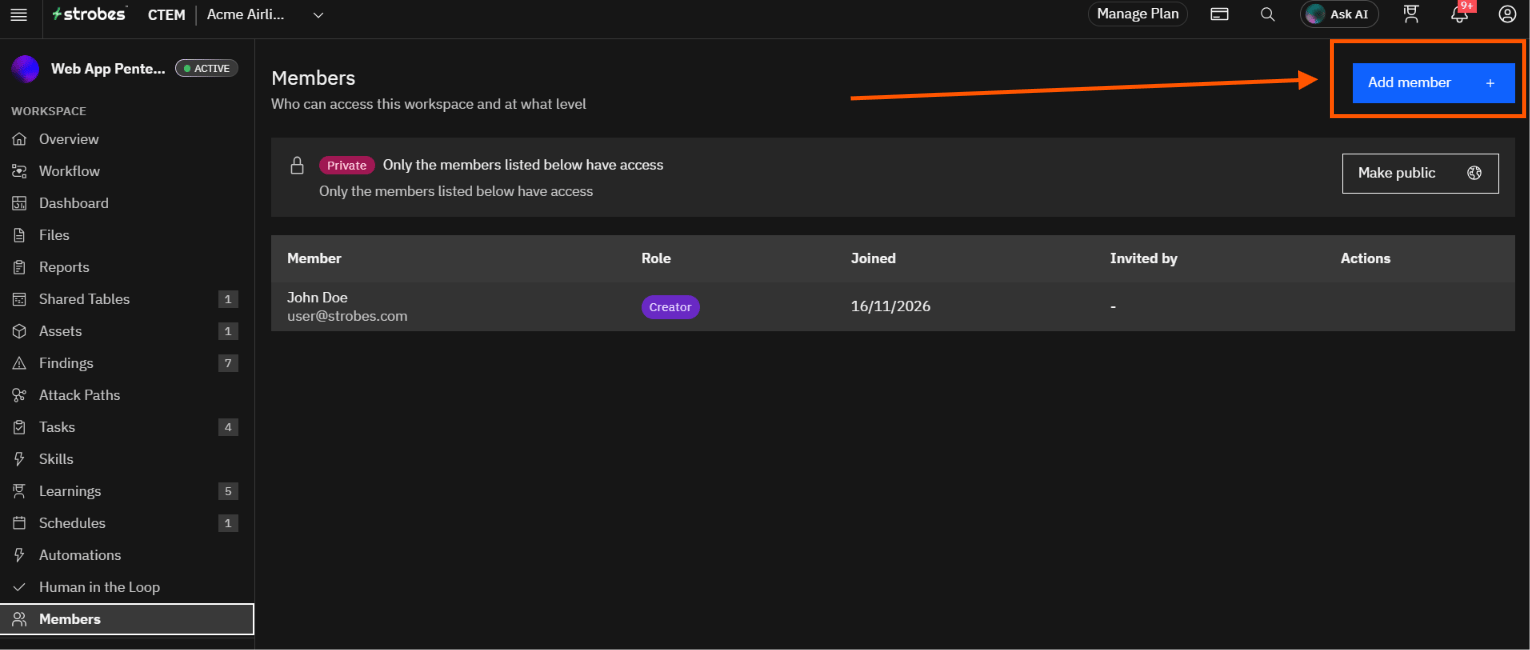
Click Add member at the top right. The Add workspace members window opens.
Step 4: Select the Manager
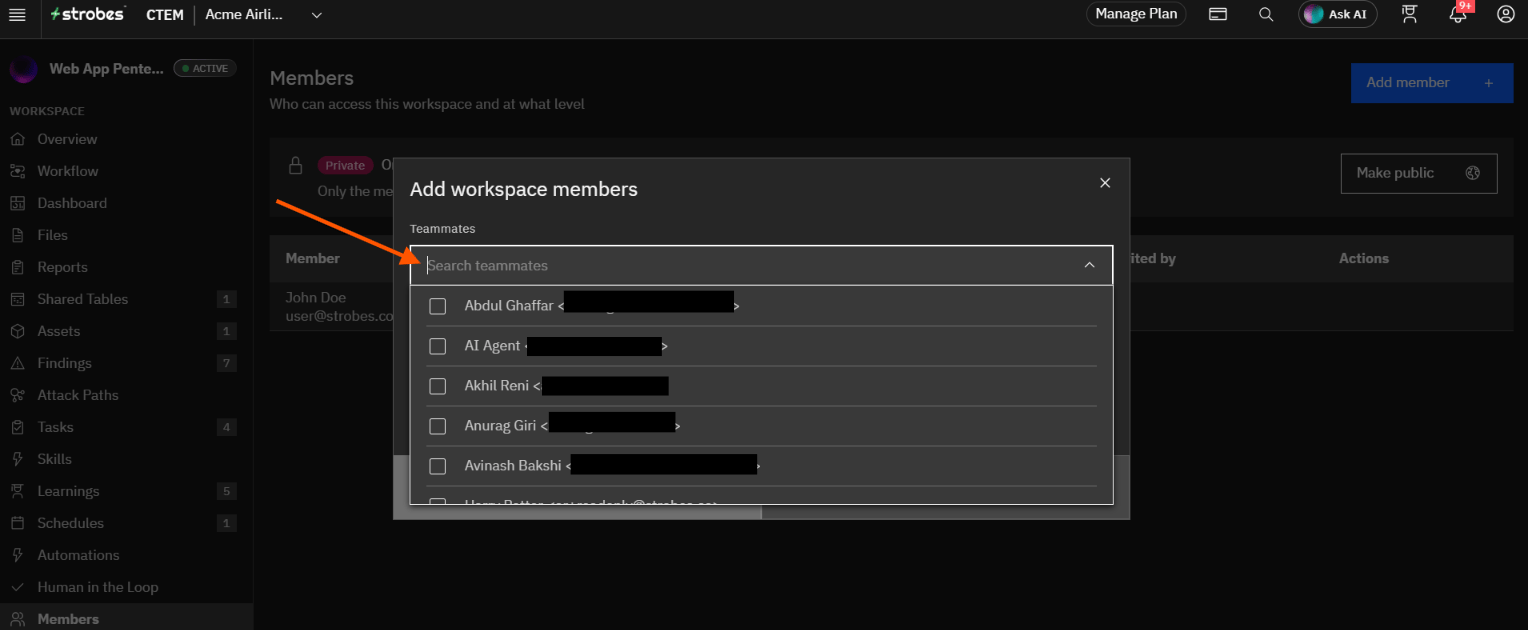
Click the Teammates field and type the manager's name or email. Select the checkbox next to their name. They appear as a chip at the top of the field.
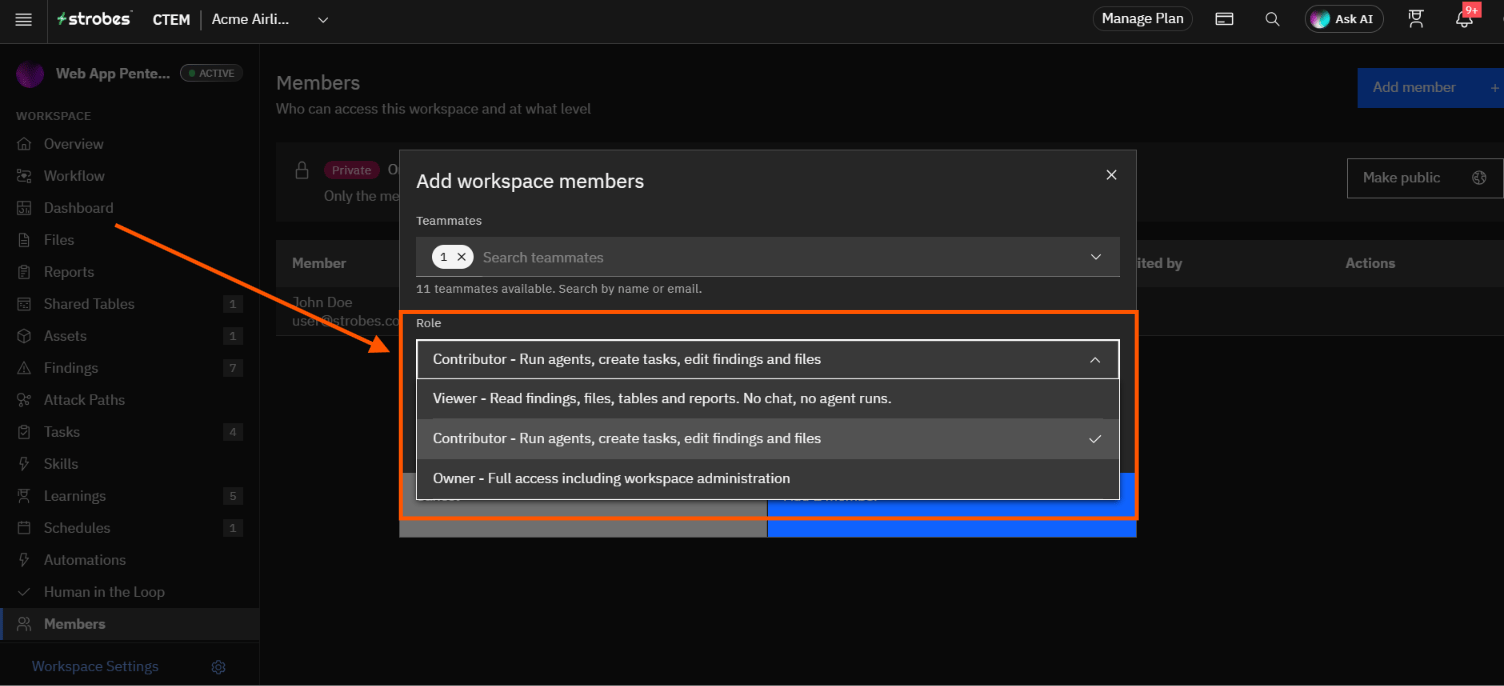
Step 5: Choose a Role
Open the Role dropdown and select the role for the manager:
Role | Choose it when the manager needs to |
|---|---|
Viewer | Read findings, files, tables, and reports only. |
Contributor | Run agents, create tasks, and edit findings and files. |
Owner | Manage workspace settings and members as well. |
Step 6: Click Add
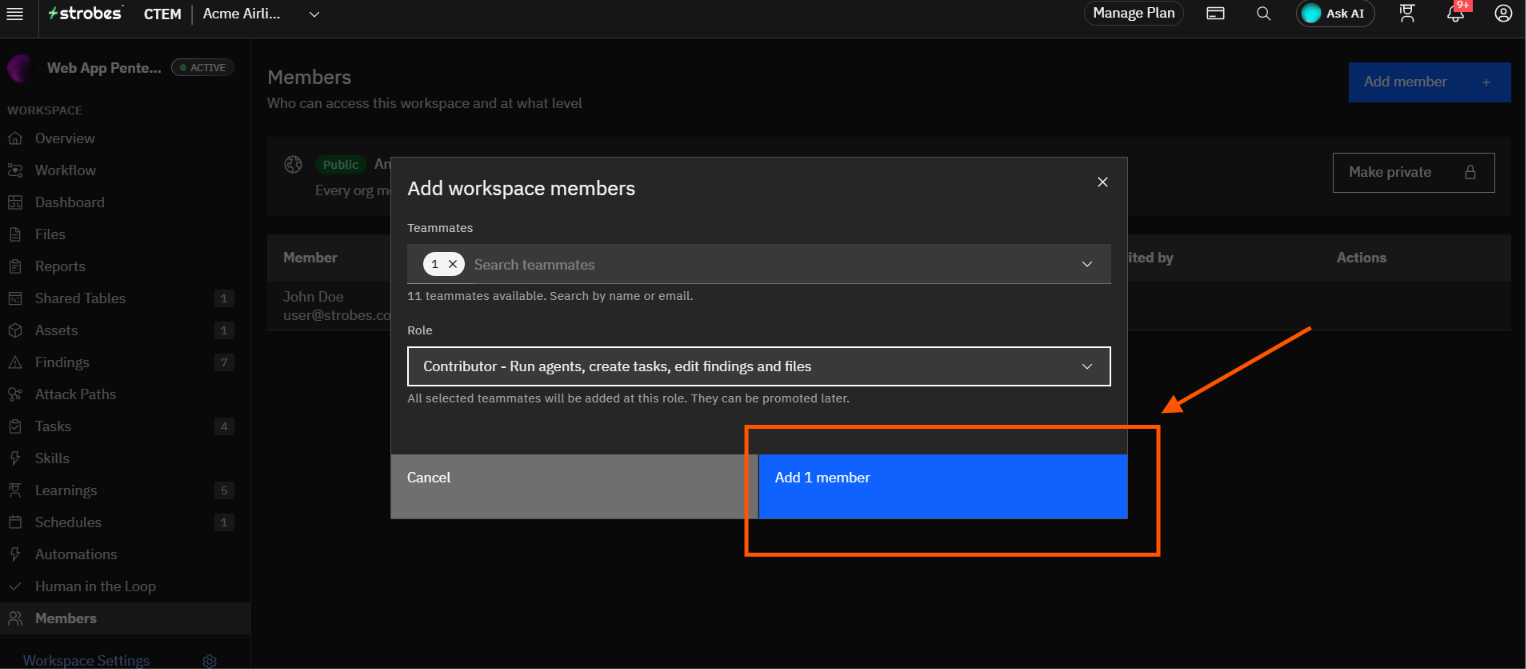
Click the Add button at the bottom right of the window. The manager now appears in the member list with their role, and the workspace shows up in their Workspaces page.
Tips
- Give the lowest role that lets the manager do their job. You can promote them later from the Actions menu on their row by clicking Change role.
- A manager at the organization level does not get access to a private workspace automatically. They must be added here.
- Only workspace Owners can add members. If you do not see Add member, ask an Owner of the workspace to add the manager.
- Adding a member does not send a notification, so let the manager know the workspace is ready.
- To remove access later, open the Actions menu on the manager's row and click Remove from workspace.
More in Agentic Pentesting
- What is a workspace?A Workspace is the container for a single AI pentest engagement on Strobes.
- Choosing a template or a blank workspaceAI Workspaces
- Creating a Blank Workspace
- Initiating an AI PentestThis article walks you through the high-level flow of running your first AI-driven penetration test on Strobes
Was this page helpful?