
Running a Code Remediation Campaign using Strobes AI
6 min readEdit
On this page⌄
- Overview
- Why Is It Needed?
- Prerequisites
- Accessing the Code Remediation Campaign Template
- Configuring the Repository Scope
- Step 1: Provide a Workspace Name
- Step 2: Enter the Repository URL
- Step 3: Connect a Source Code Platform (Optional)
- Step 4: Choose Which Findings to Fix
- Step 5: Import a Findings File (Optional)
- Step 6: Add Other Credentials (Optional)
- Step 7: Add Custom Instructions (Optional)
- Step 8: Proceed to Configuration
- Configuring the Run
- Step 9: Select an AI Model
- Step 10: Select the Execution Shell
- Step 11: Review the Browser
- Step 12: Select the Execution Mode
- Step 13: Select the Schedule
- Step 14: Click Next
- Step 15: Review and Launch the Workspace
- Tips
Overview
A Code Remediation Campaign in Strobes helps you fix the security vulnerabilities already found in your source code. An AI agent imports your existing findings, maps them to specific files and lines, prioritizes them by risk, generates minimal code fixes, and creates pull requests for your team to review. It then verifies each fix by re-scanning the patched code and tracks the progress of the campaign across your repositories.
The campaign typically takes 1 to 4 hours. You can track each vulnerability as fixed, in progress, or deferred, with every pull request linked back to its Strobes finding. A campaign report shows the fix rate by severity, the remaining work, and any blockers.
Why Is It Needed?
Finding vulnerabilities is only half of the work. Teams often have long backlogs of findings and limited time to fix them. A remediation campaign turns that backlog into ready-to-review pull requests, so developers spend their time reviewing fixes instead of writing them from scratch.
Each pull request links back to its Strobes finding, so you can trace every fix from the finding to the code change, and see what is fixed, what is in progress, and what is blocked. It is a good fit for clearing a backlog of code vulnerabilities, fixing the findings from a recent scan or audit, and keeping repositories clean with a recurring fix cycle.
Prerequisites
Before you start, make sure you have:
- Access to Strobes AI Workspaces in your organization.
- Enough AI credits. Each run uses AI credits.
- Repository URL: The URL of the repository you want to remediate.
- Source code platform access: A GitHub, Bitbucket, or Azure DevOps credential with permission to open pull requests. Without it, Strobes cannot create the remediation pull requests.
- Findings to fix: Existing findings in Strobes for the repository, or a findings file (CSV, JSON, or SARIF) to import.
- Authorization to change the repository.
Accessing the Code Remediation Campaign Template
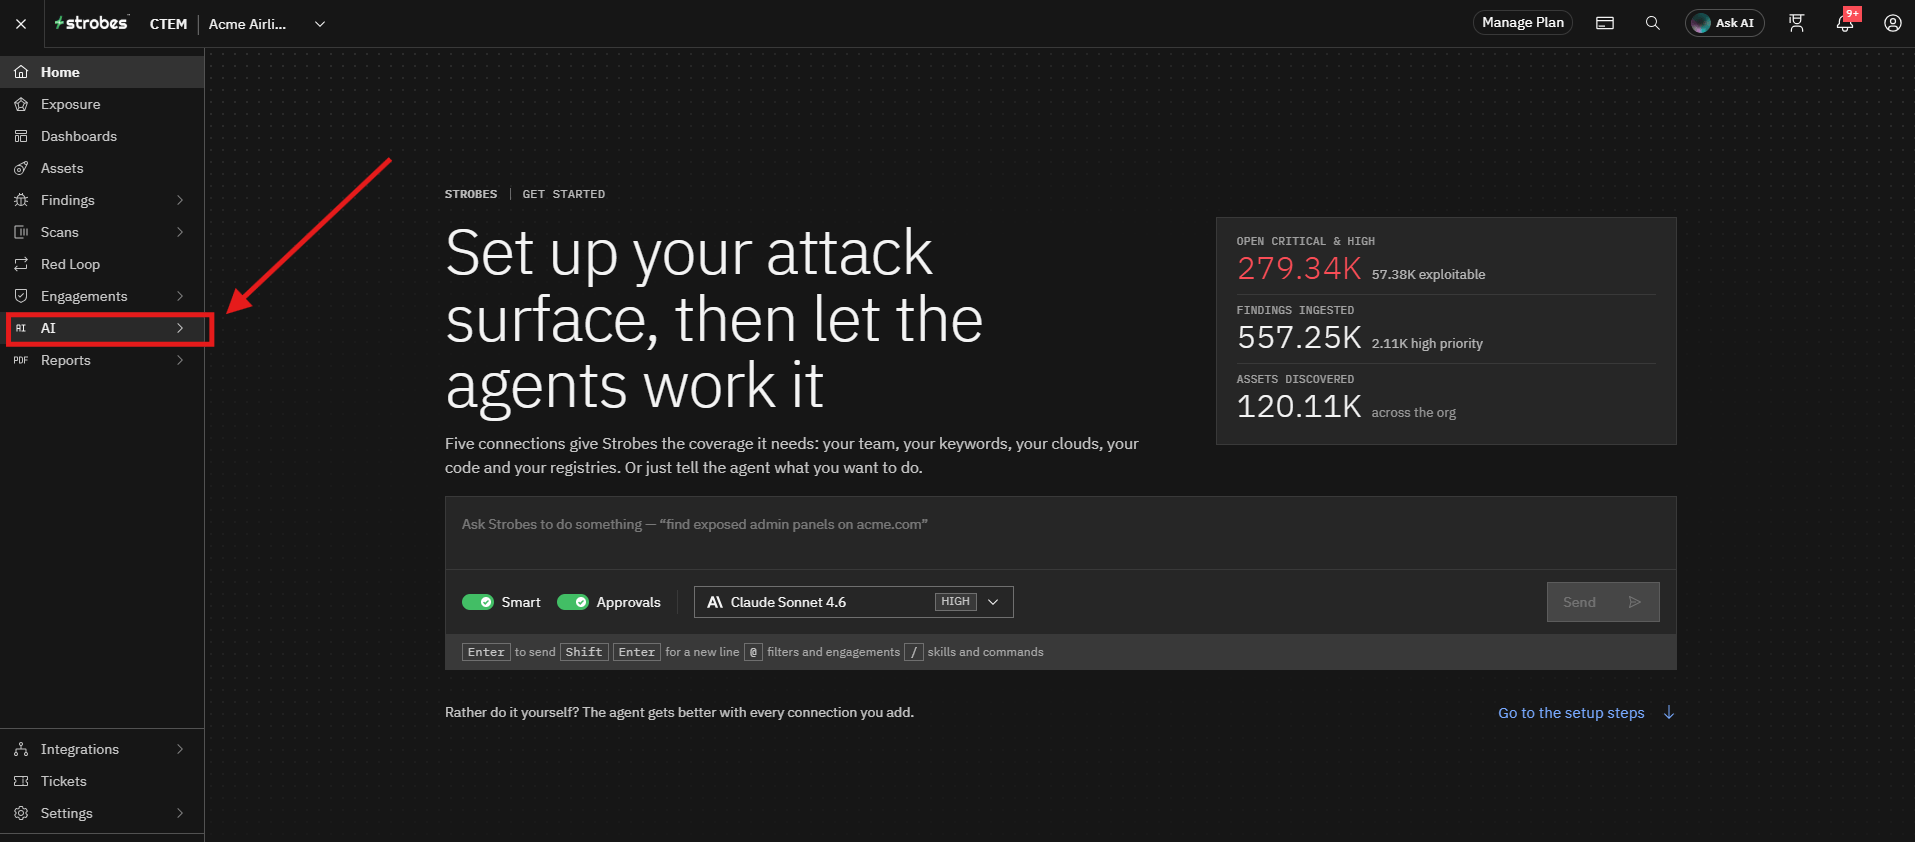
- Navigate to AI from the main navigation menu.
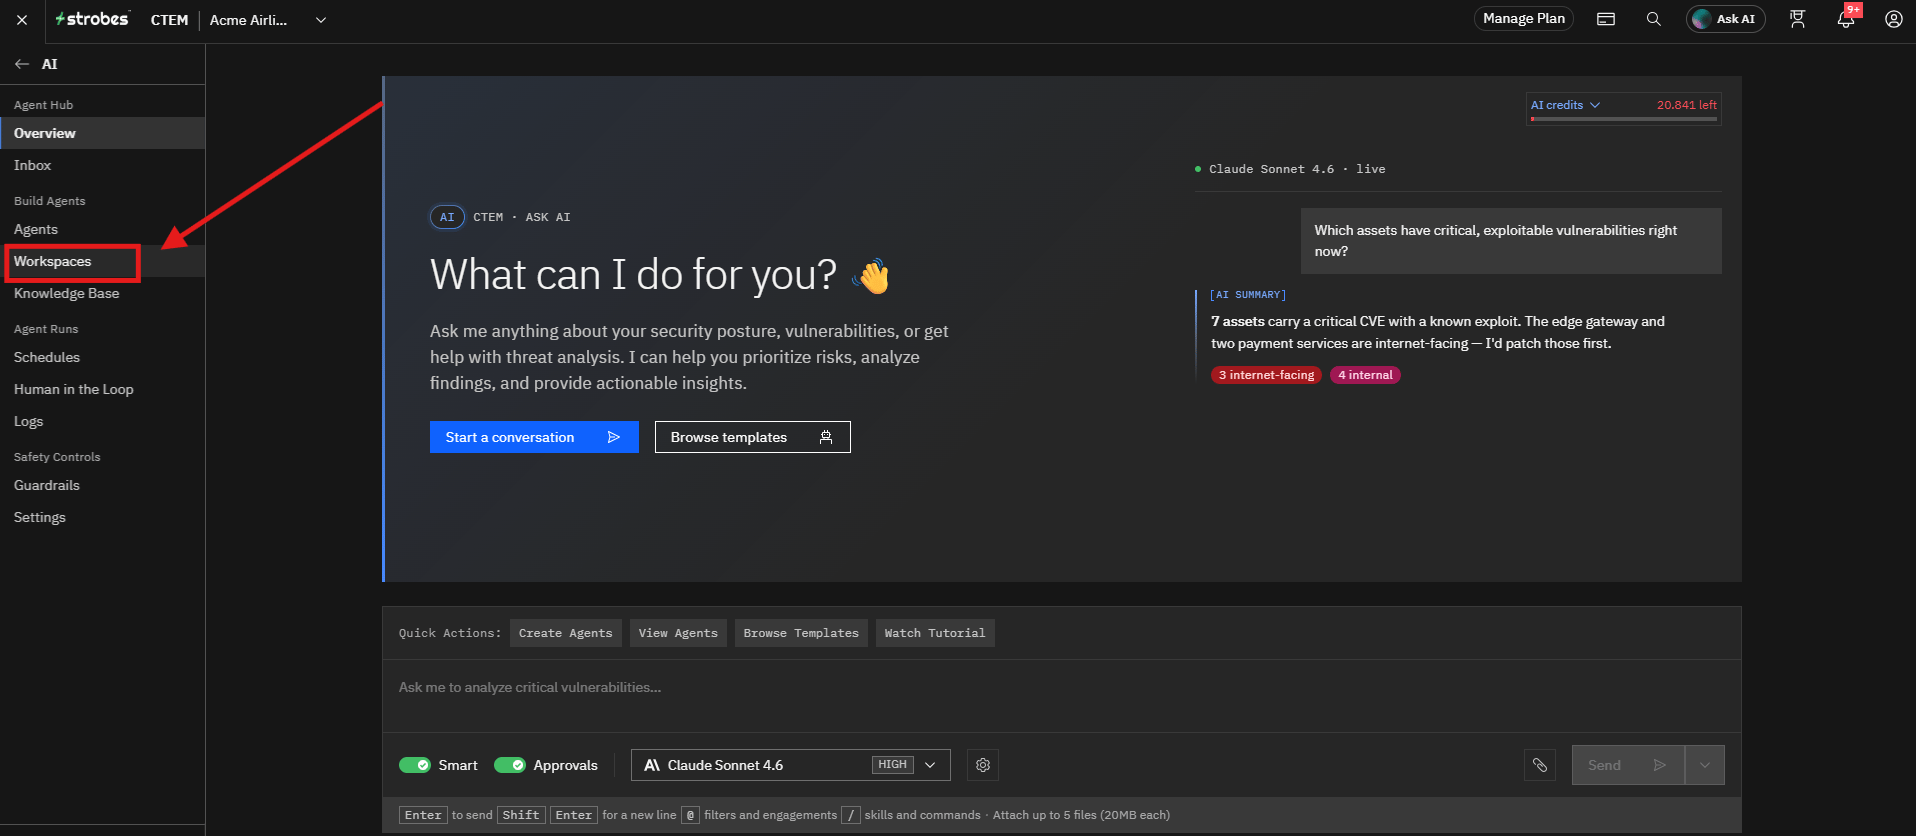
- Open the Workspaces page.
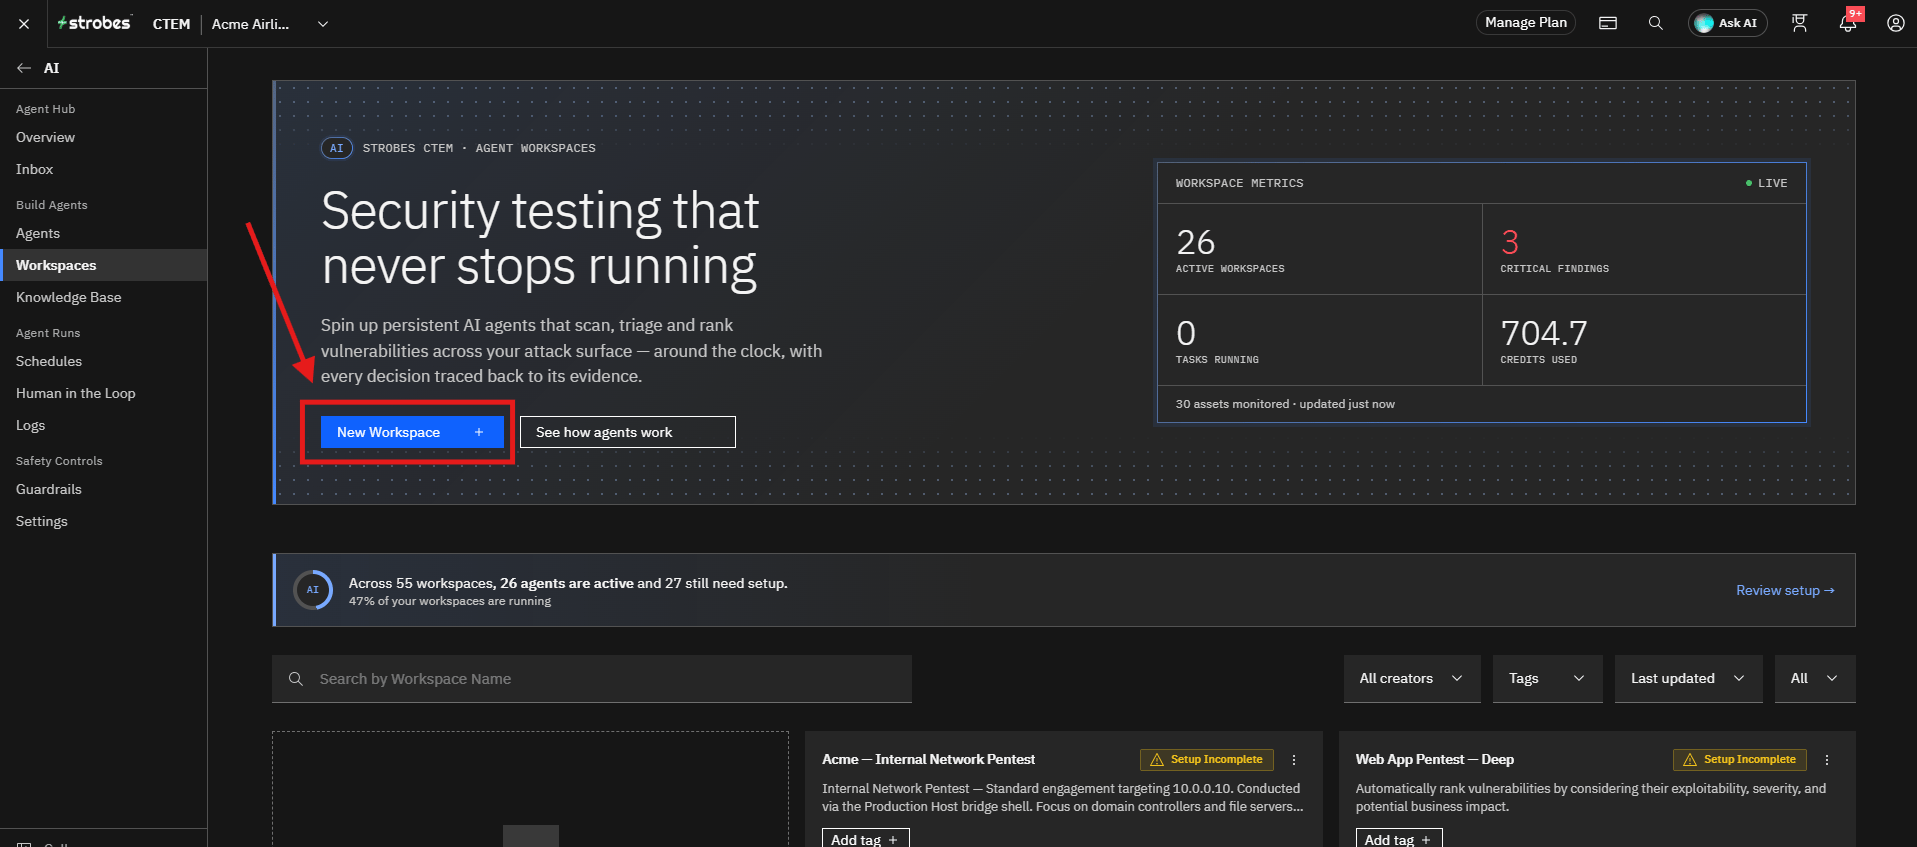
- Click New Workspace.
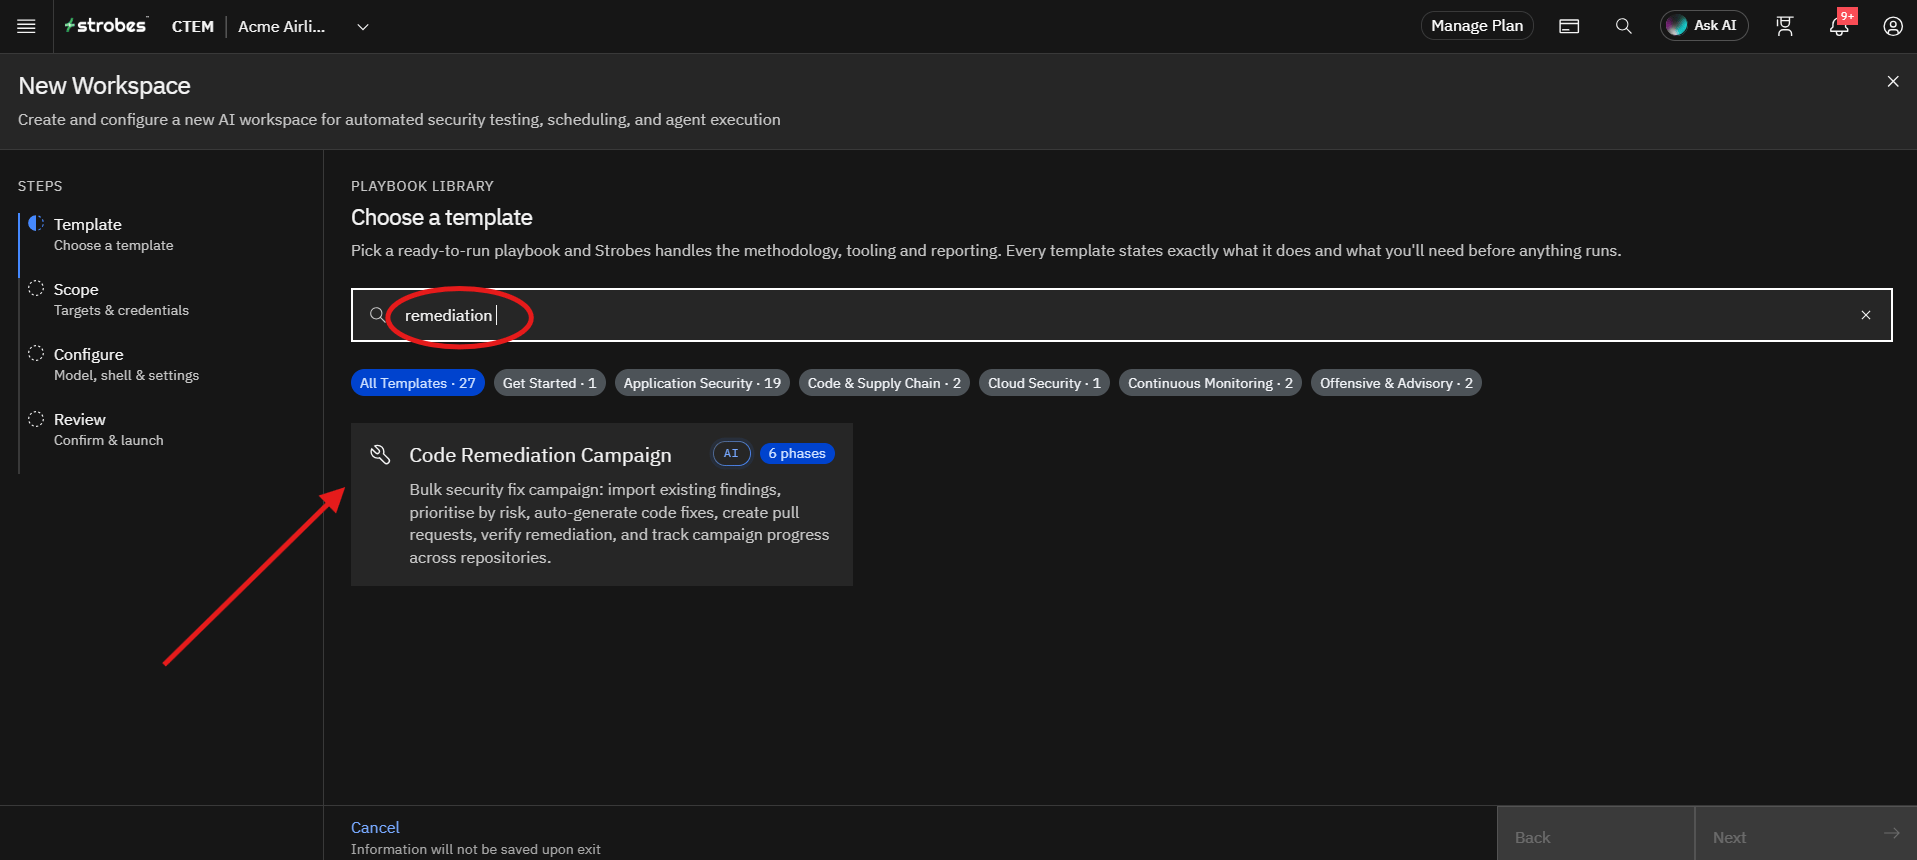
- In the Playbook Library, search for
remediationand select the Code Remediation Campaign template.
- Review the template details.
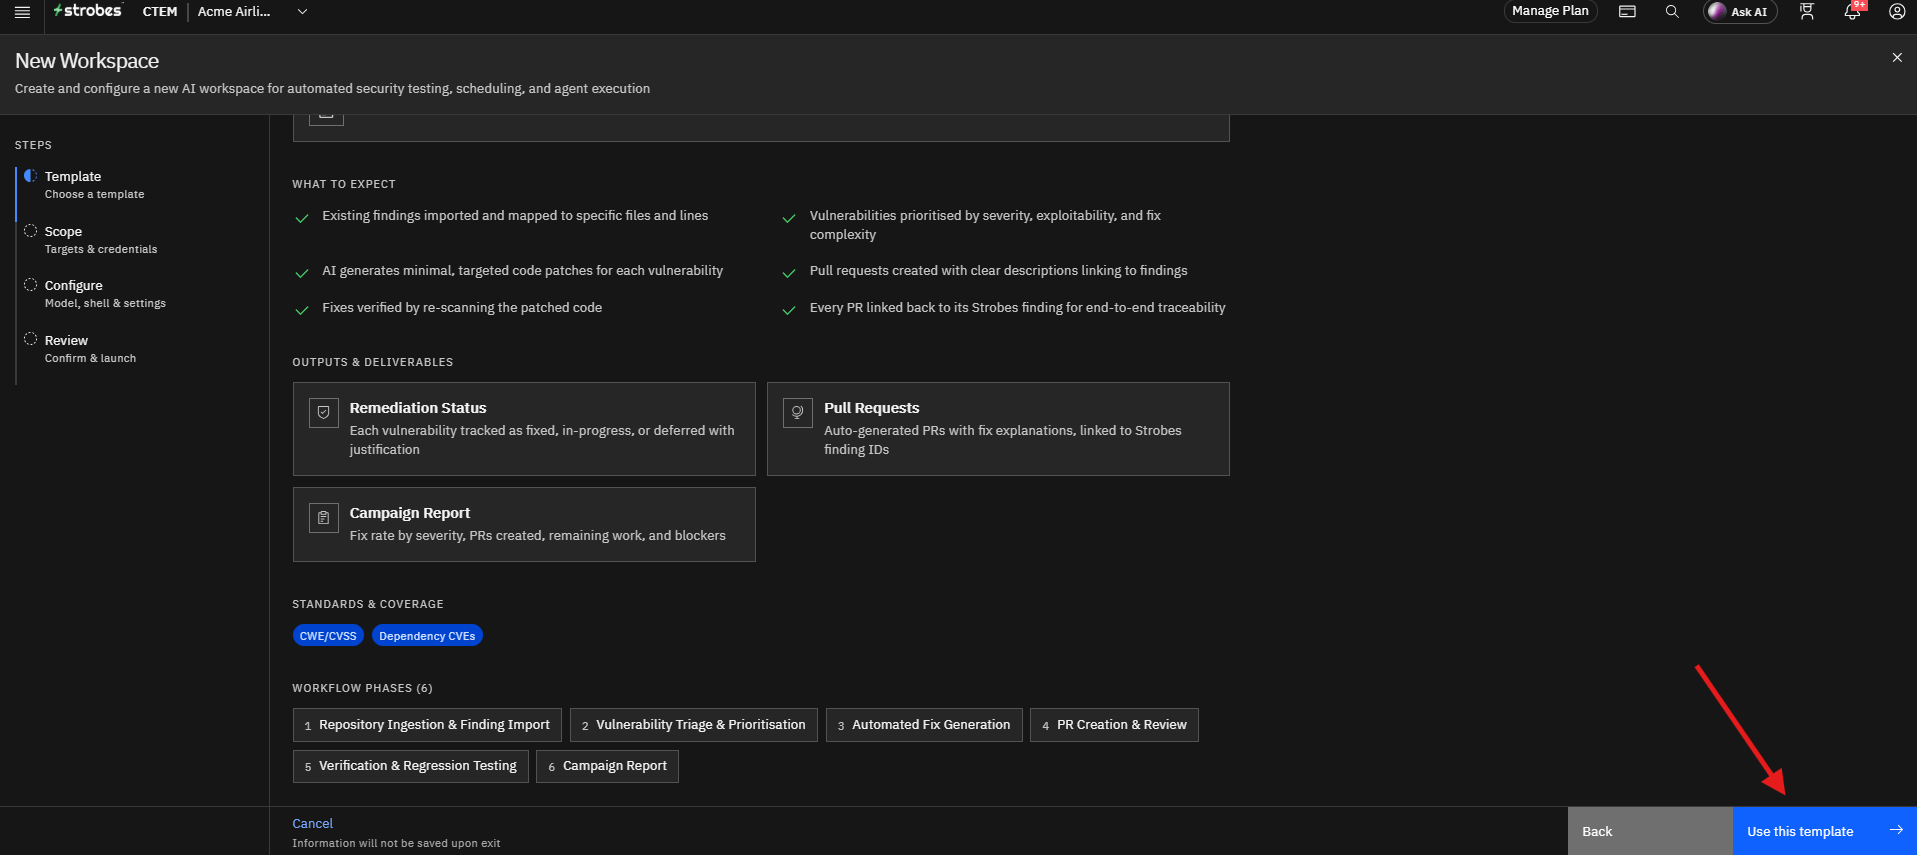
Selecting the template opens its details page, which shows:
- Tags: The category, number of phases, version, and expected duration.
- About: What the template does.
- What you'll need: A GitHub or Bitbucket connection.
- What to expect: Existing findings imported and mapped to specific files and lines, vulnerabilities prioritized by severity, exploitability, and fix complexity, minimal and targeted code patches for each vulnerability, pull requests with clear descriptions linking to findings, fixes verified by re-scanning the patched code, and every pull request linked back to its Strobes finding.
- Outputs & deliverables: Remediation Status, Pull Requests, and a Campaign Report.
- Standards & coverage: CWE/CVSS and dependency CVEs.
- Workflow phases: The 6 phases, in order.
To continue, select Use this template. To choose a different template, select Back or Back to templates.
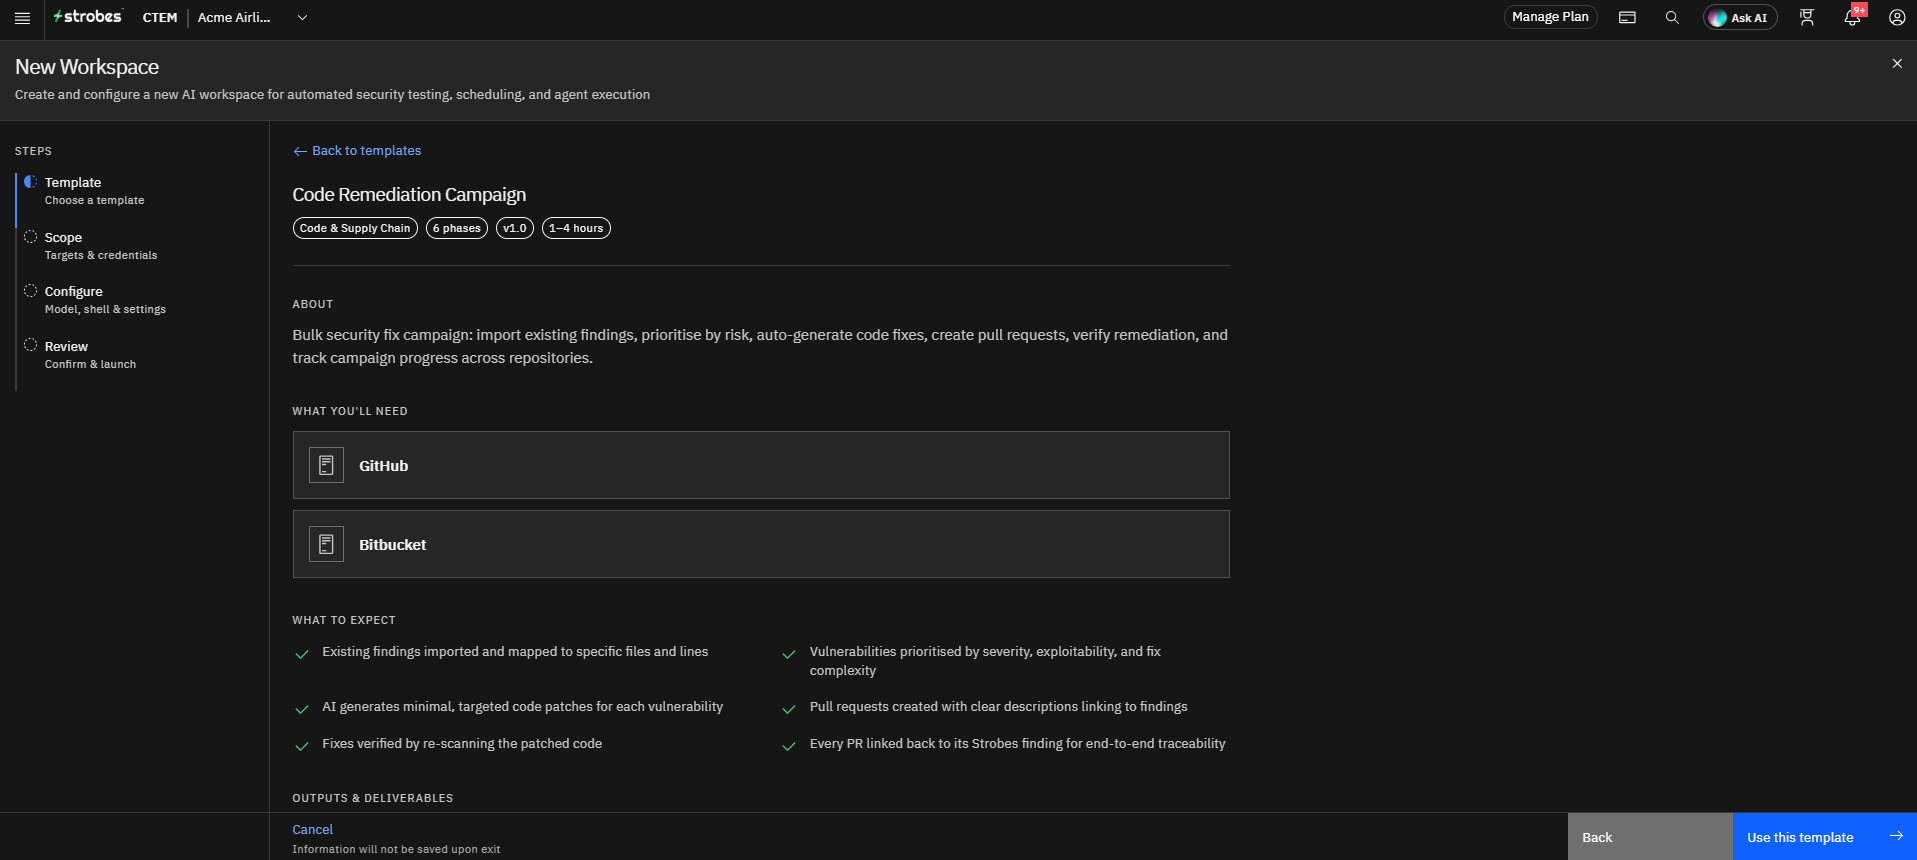
- Click Use this template.
Configuring the Repository Scope
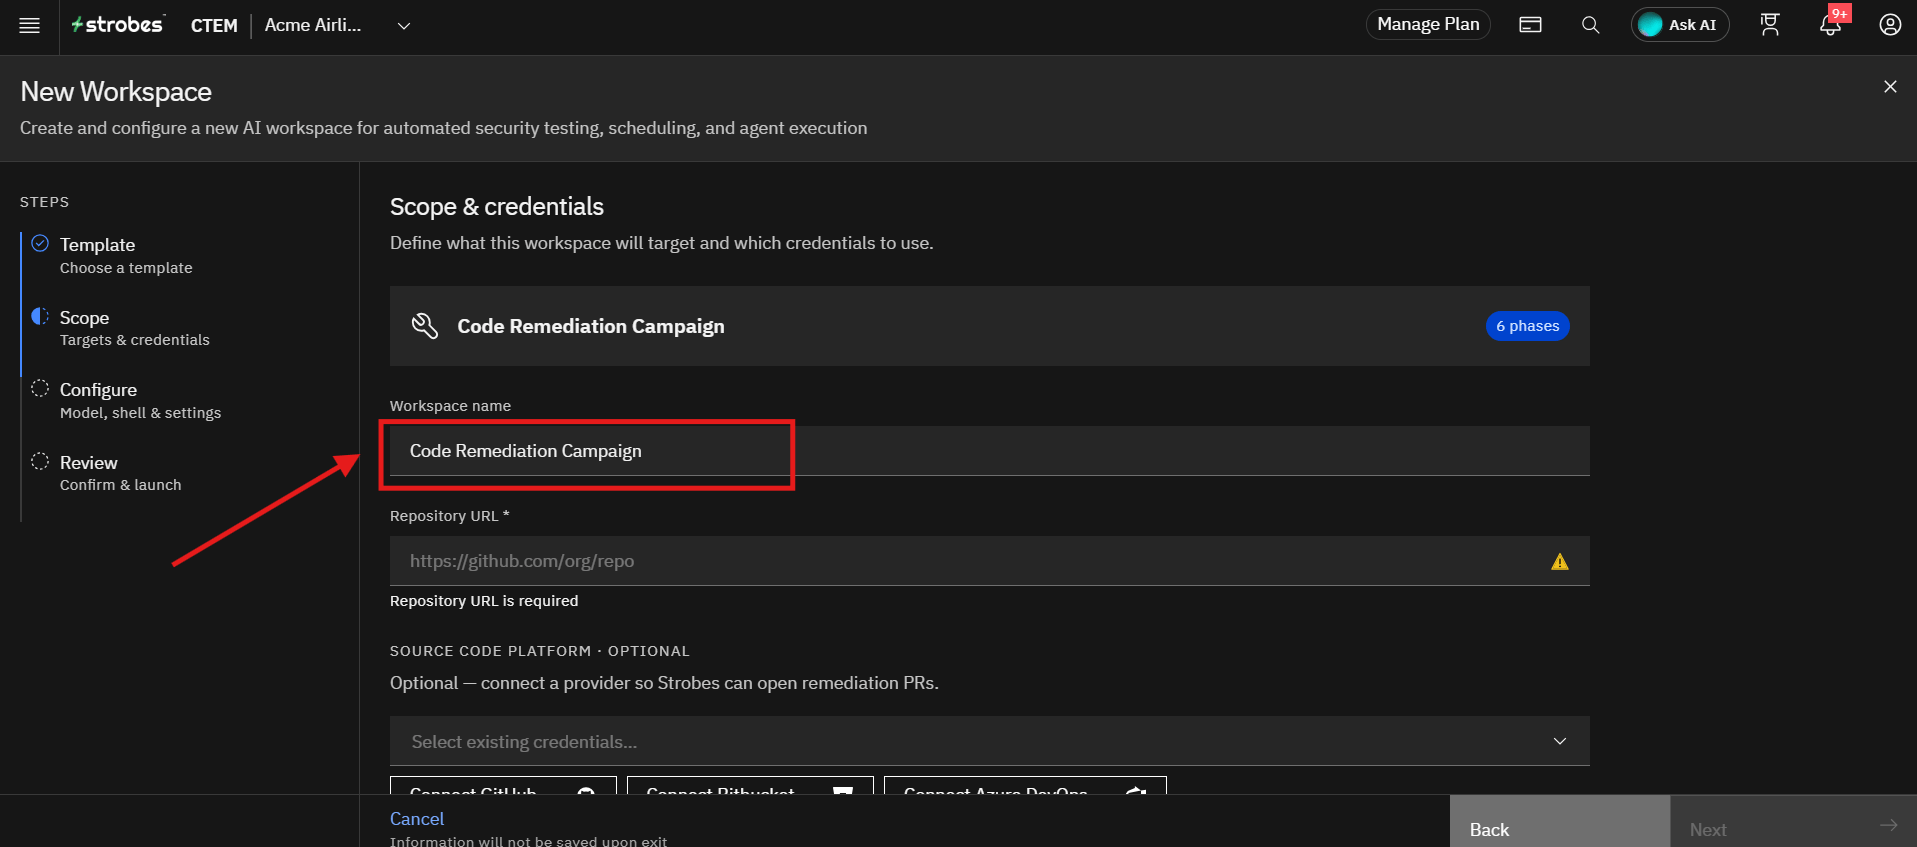
After selecting the template, the wizard automatically moves to the Scope step.
Step 1: Provide a Workspace Name
The workspace name is pre-filled with the template name. Enter a more meaningful name for the campaign if you want, such as the repository or team name.
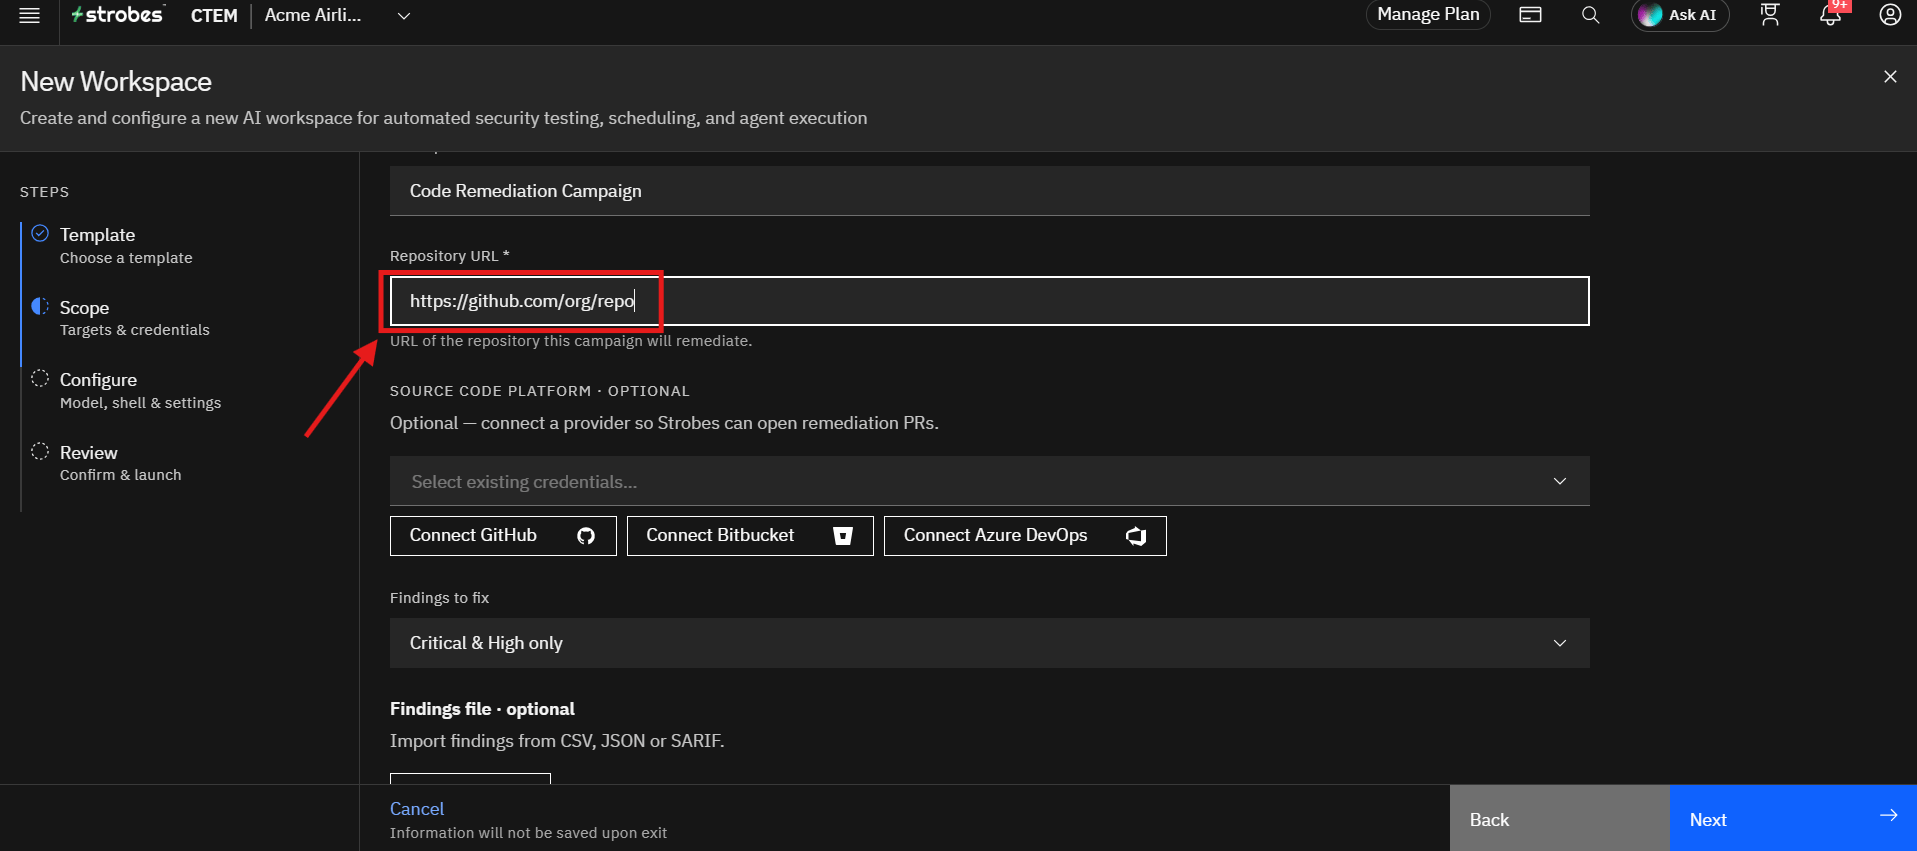
Step 2: Enter the Repository URL
In Repository URL (required), enter the URL of the repository this campaign will remediate, for example https://github.com/org/repo.
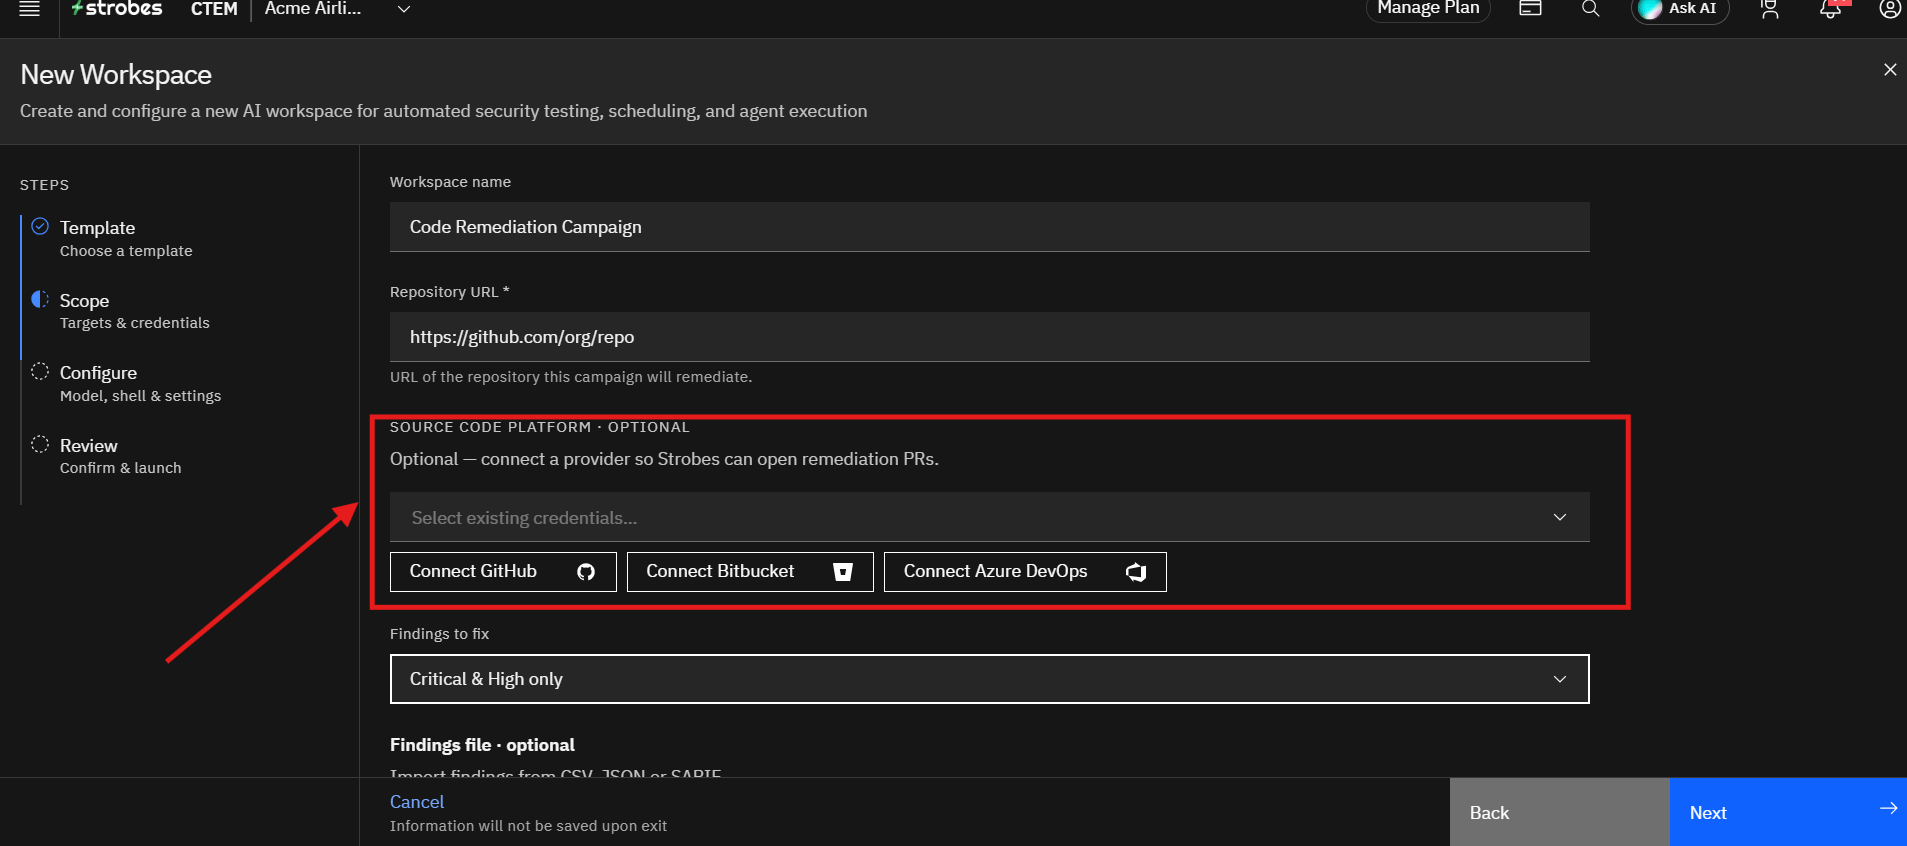
Step 3: Connect a Source Code Platform (Optional)
Under Source code platform, select an existing credential from the list, or click Connect GitHub, Connect Bitbucket, or Connect Azure DevOps to add a new one. Strobes uses this connection to open the remediation pull requests, so connect a provider if you want the campaign to create them. Ensure the credential has access to the repository.
Step 4: Choose Which Findings to Fix
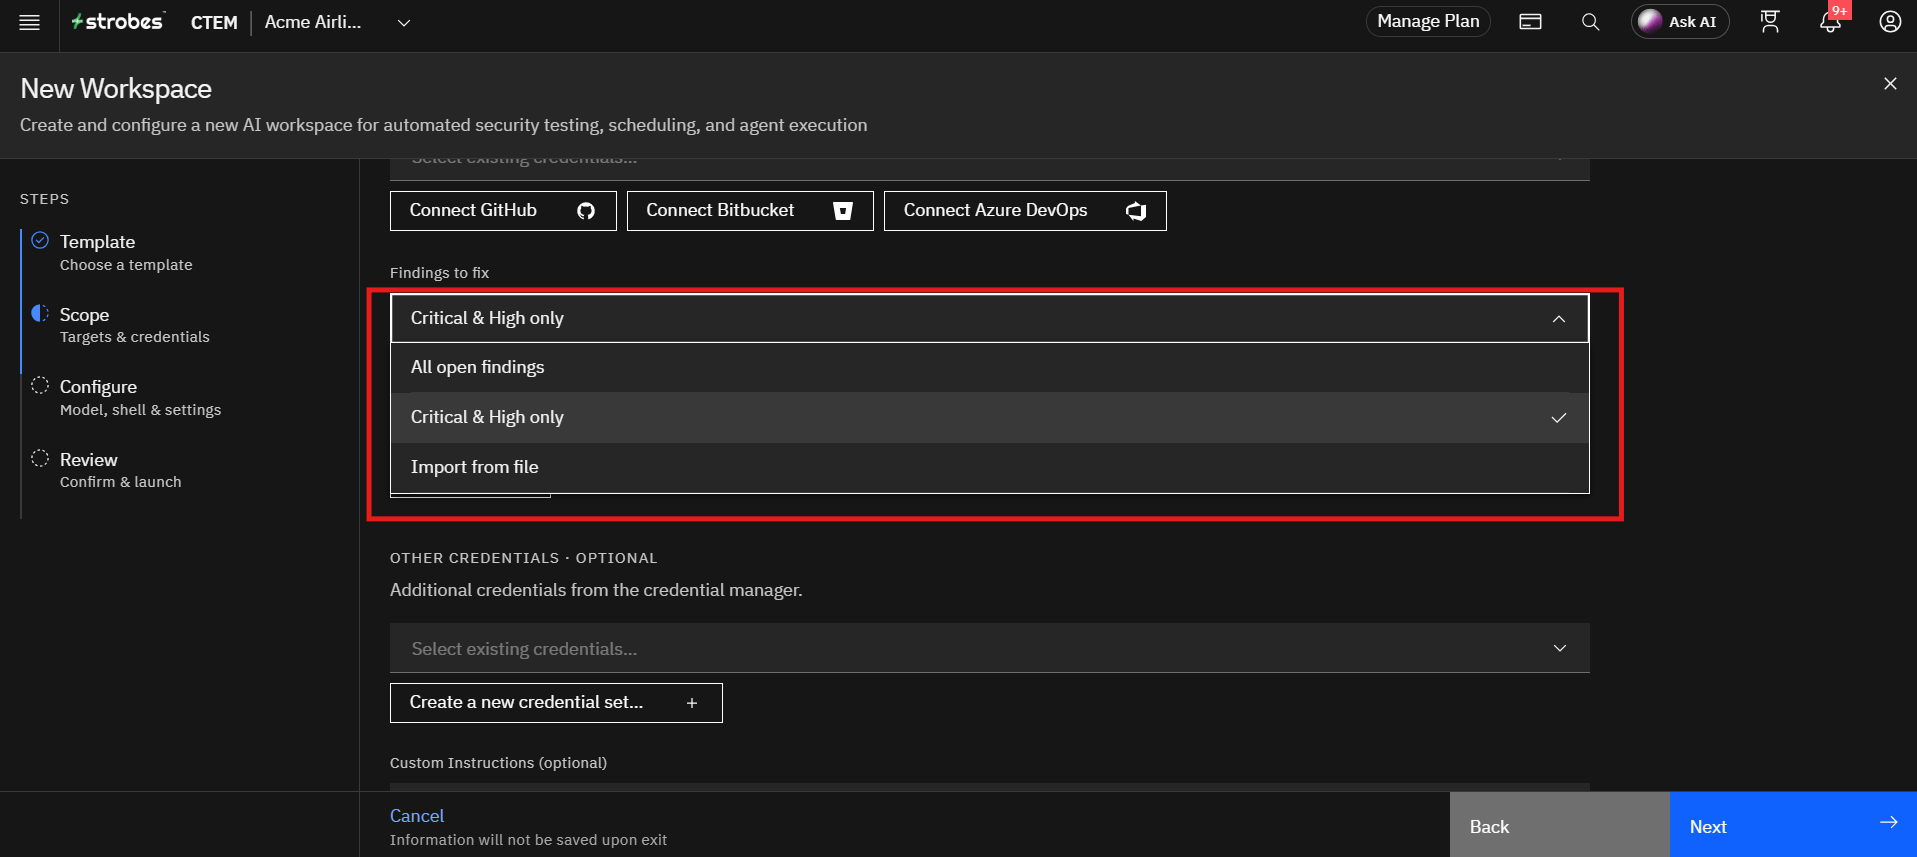
Open the Findings to fix dropdown and select the scope of the campaign:
Option | What it does |
|---|---|
Critical & High only | Fixes only Critical and High severity findings. This is selected by default and keeps the campaign focused on the highest risk. |
All open findings | Fixes every open finding for the repository. Choose this to clear the whole backlog. |
Import from file | Fixes the findings in a file you provide. Choose this when your findings come from another tool. |
Step 5: Import a Findings File (Optional)
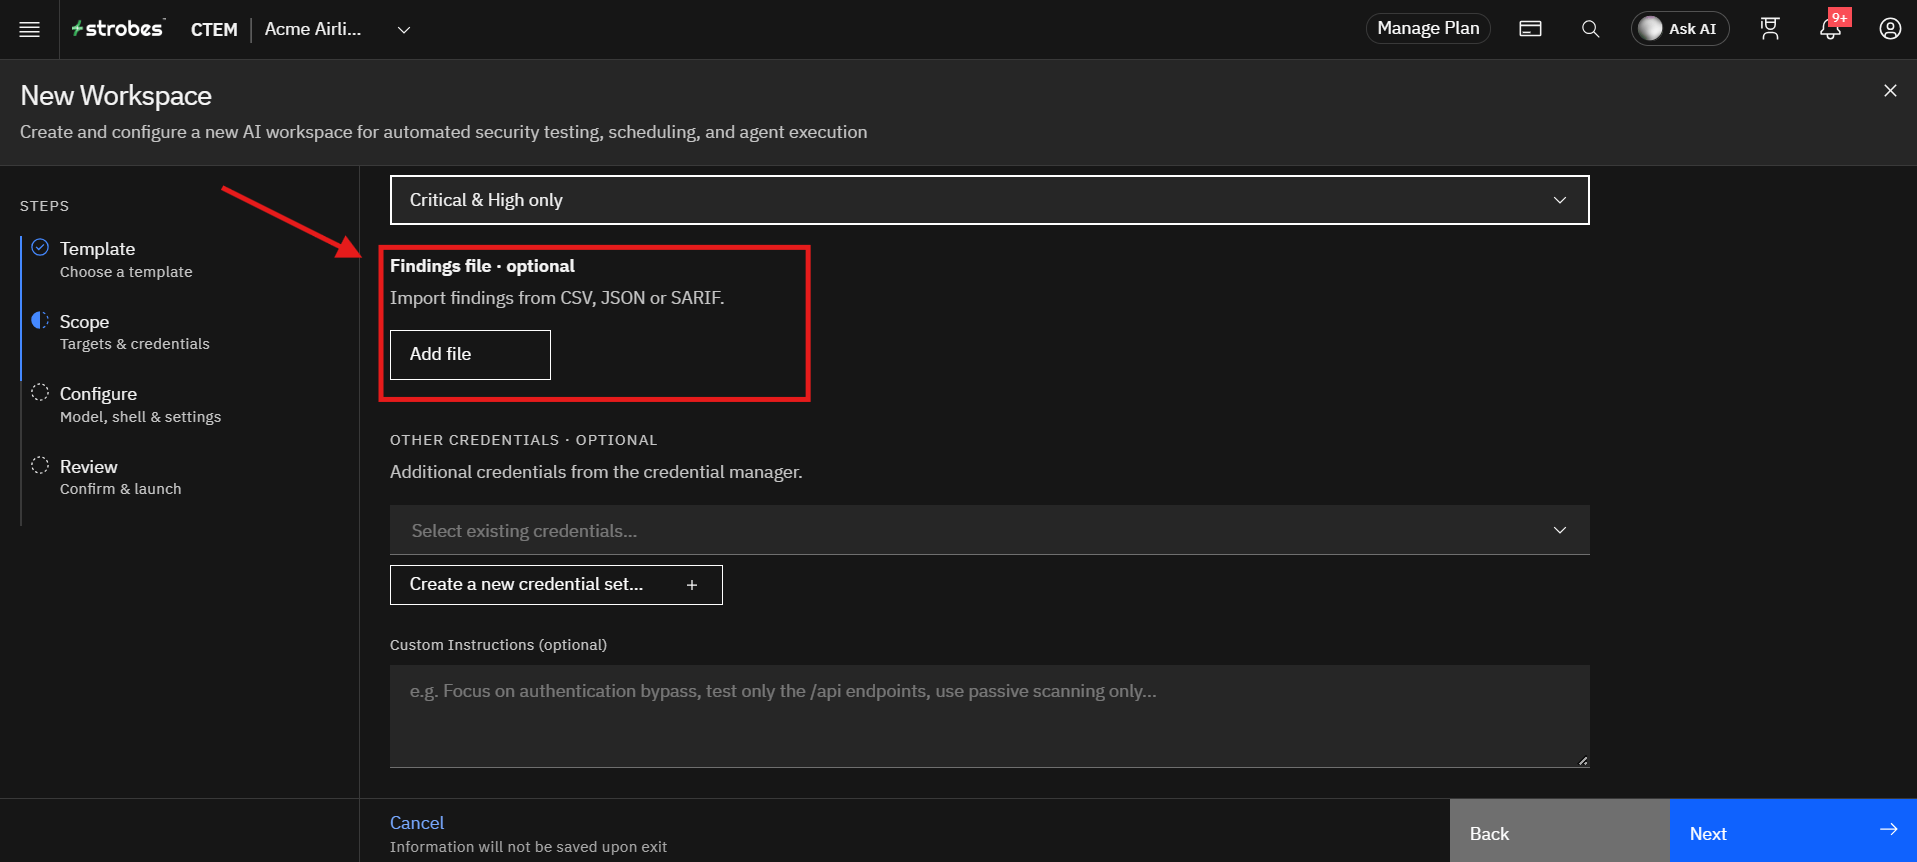
Under Findings file, click Add file and upload your findings in CSV, JSON, or SARIF format.
Step 6: Add Other Credentials (Optional)
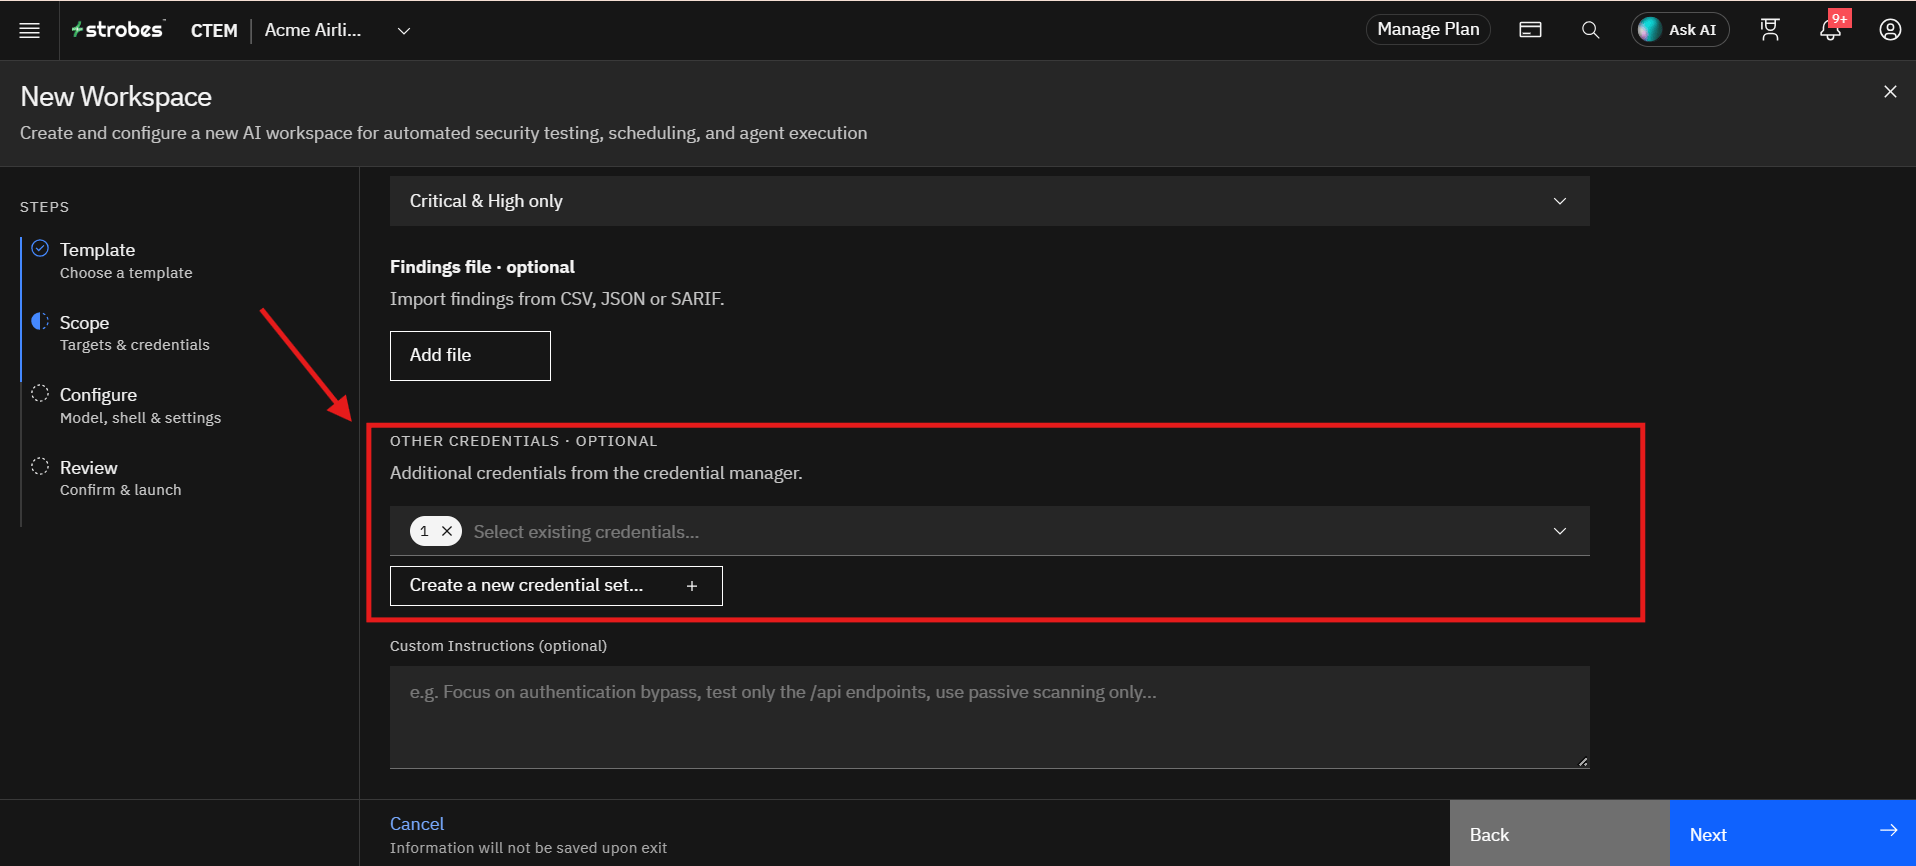
Under Other Credentials, select additional credentials from the credential manager, or click Create a new credential set to add them.
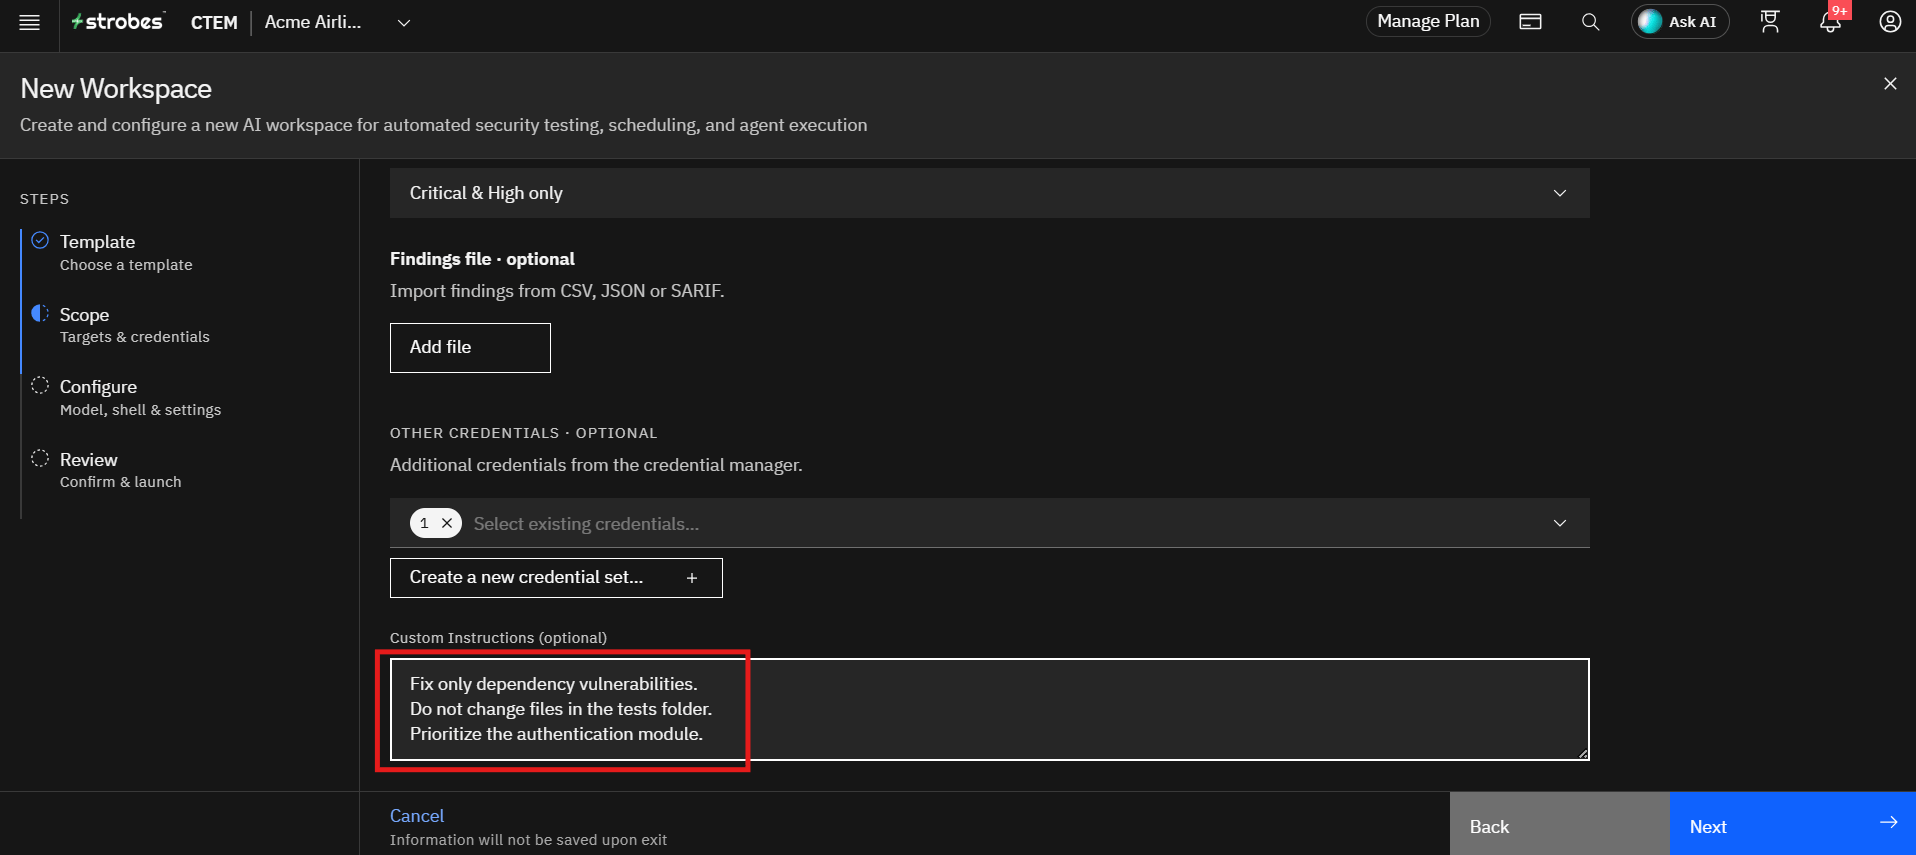
Step 7: Add Custom Instructions (Optional)
Use the Custom Instructions field to guide the campaign.
Example instructions:
- Fix only dependency vulnerabilities.
- Do not change files in the
testsfolder. - Prioritize the authentication module.
These instructions help tailor the AI analysis to specific objectives.
Step 8: Proceed to Configuration
After completing the scope details:
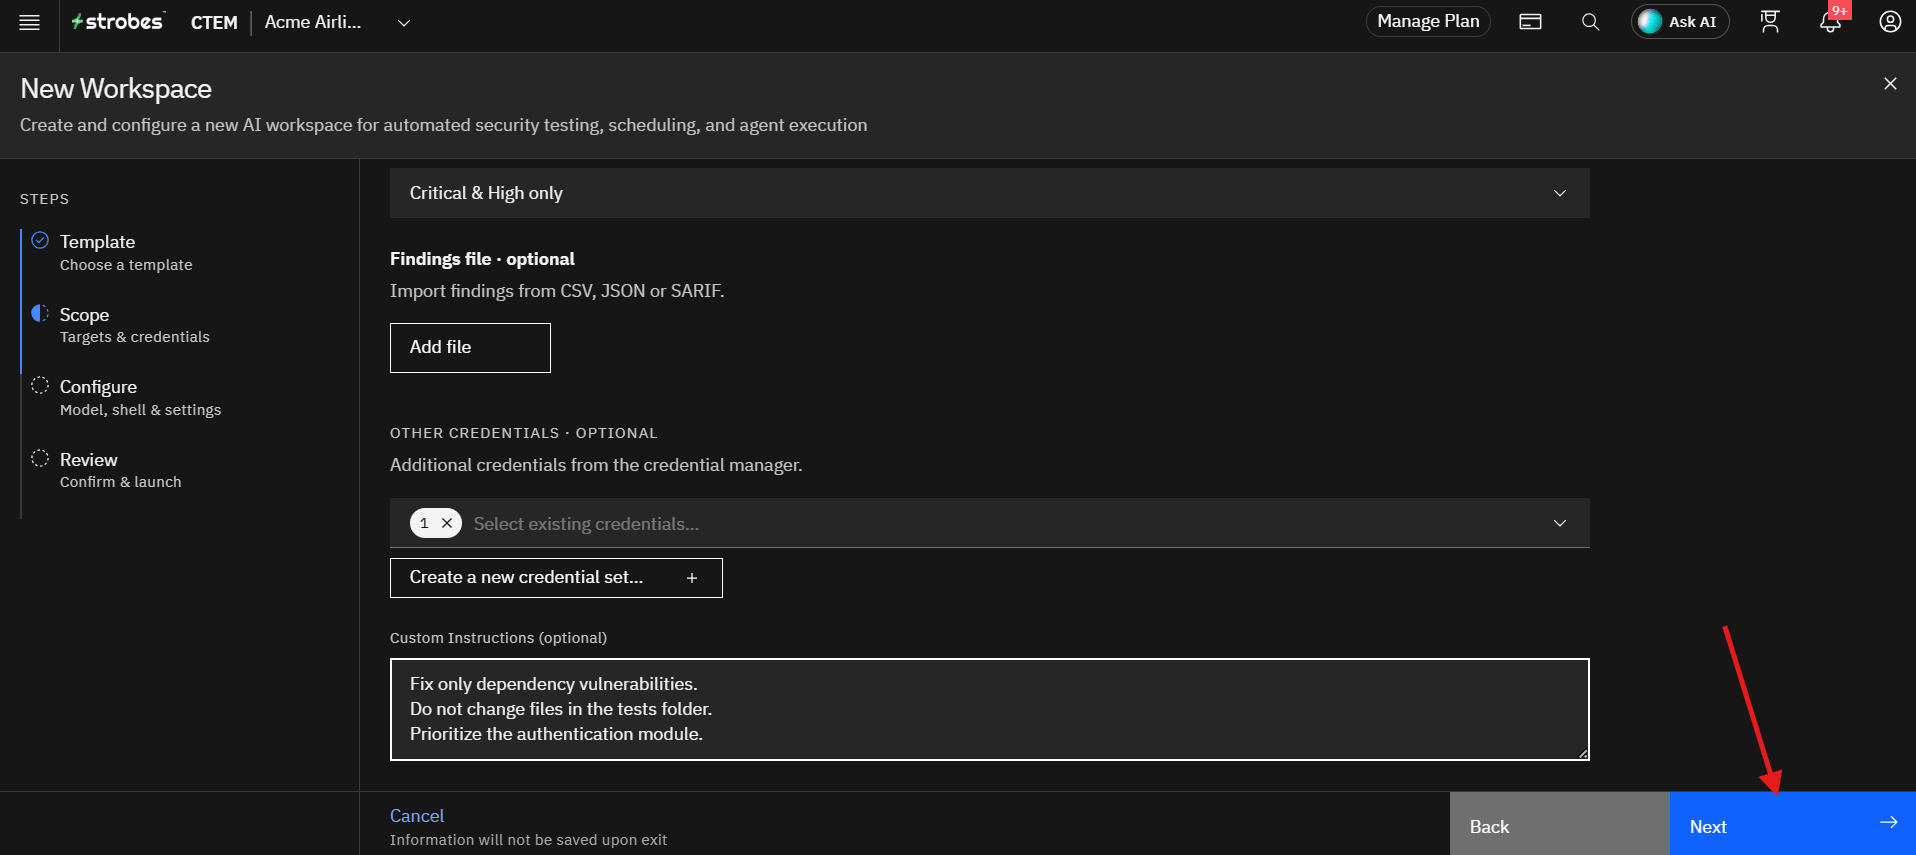
- Verify the repository URL and the findings scope.
- Click Next.
The Next button stays unavailable until the repository URL is entered. The wizard then proceeds to the Configure step.
Configuring the Run
Step 9: Select an AI Model
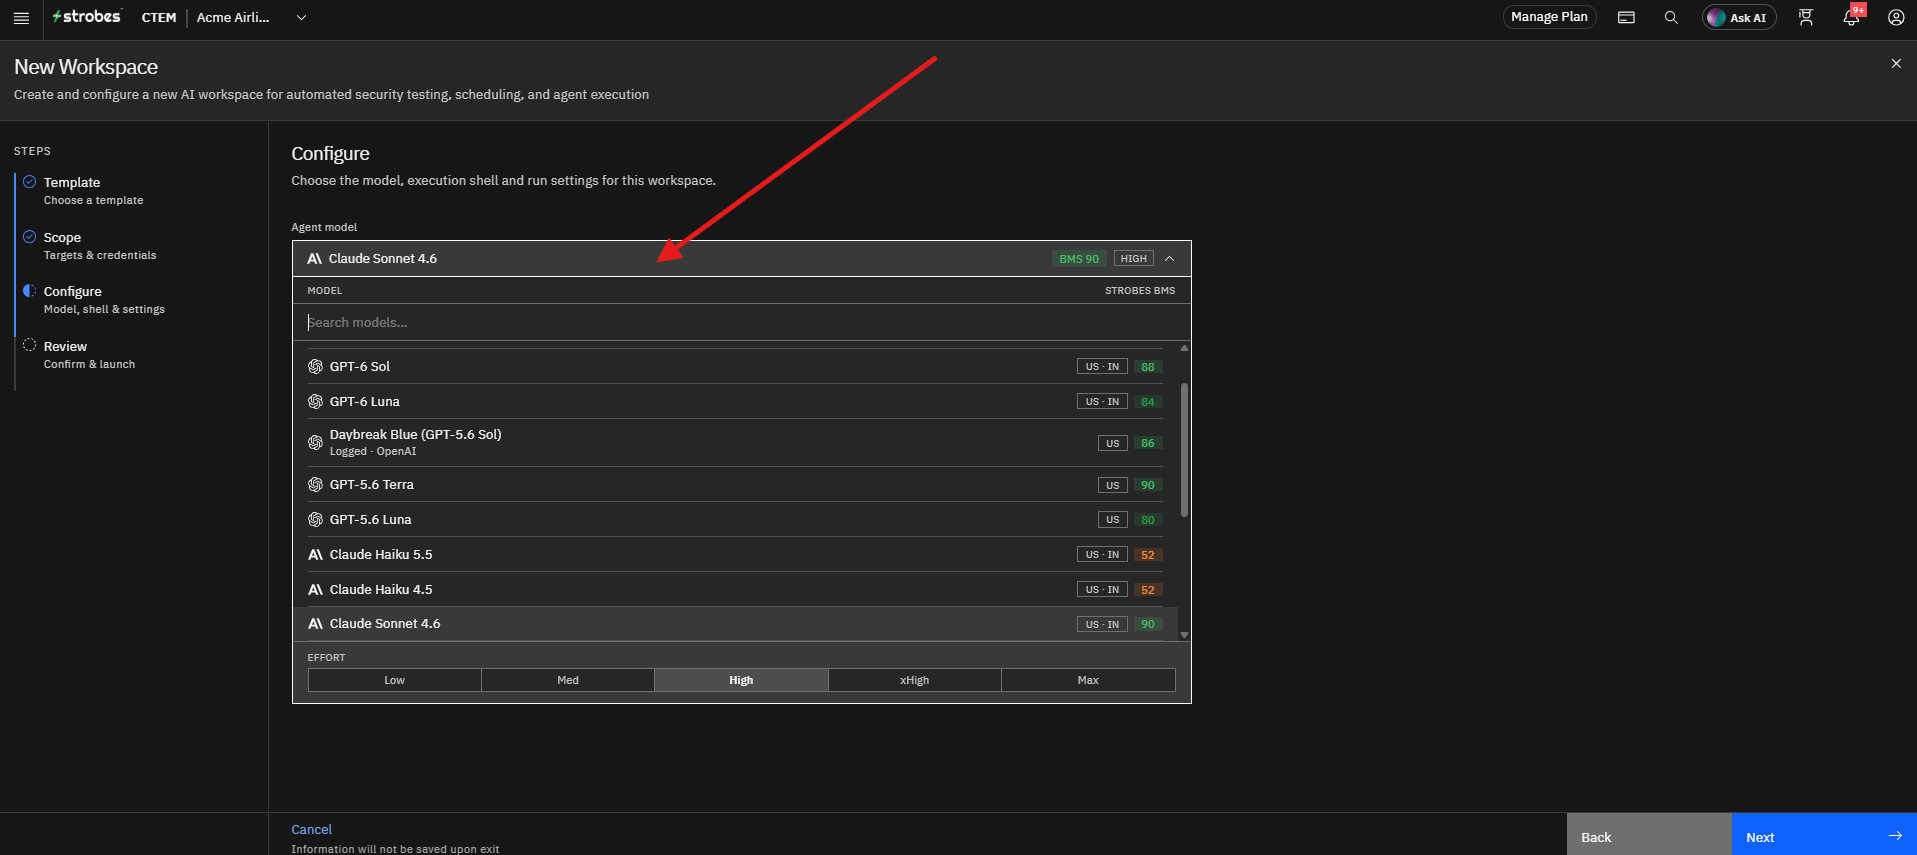
The Agent model determines the Large Language Model (LLM) used during the campaign.
- Open the Agent model dropdown.
- Review the available models and their Strobes BMS scores.
- Select the model that best fits your requirements, or choose Smart Router to let Strobes pick the best model for each task.
Step 10: Select the Execution Shell
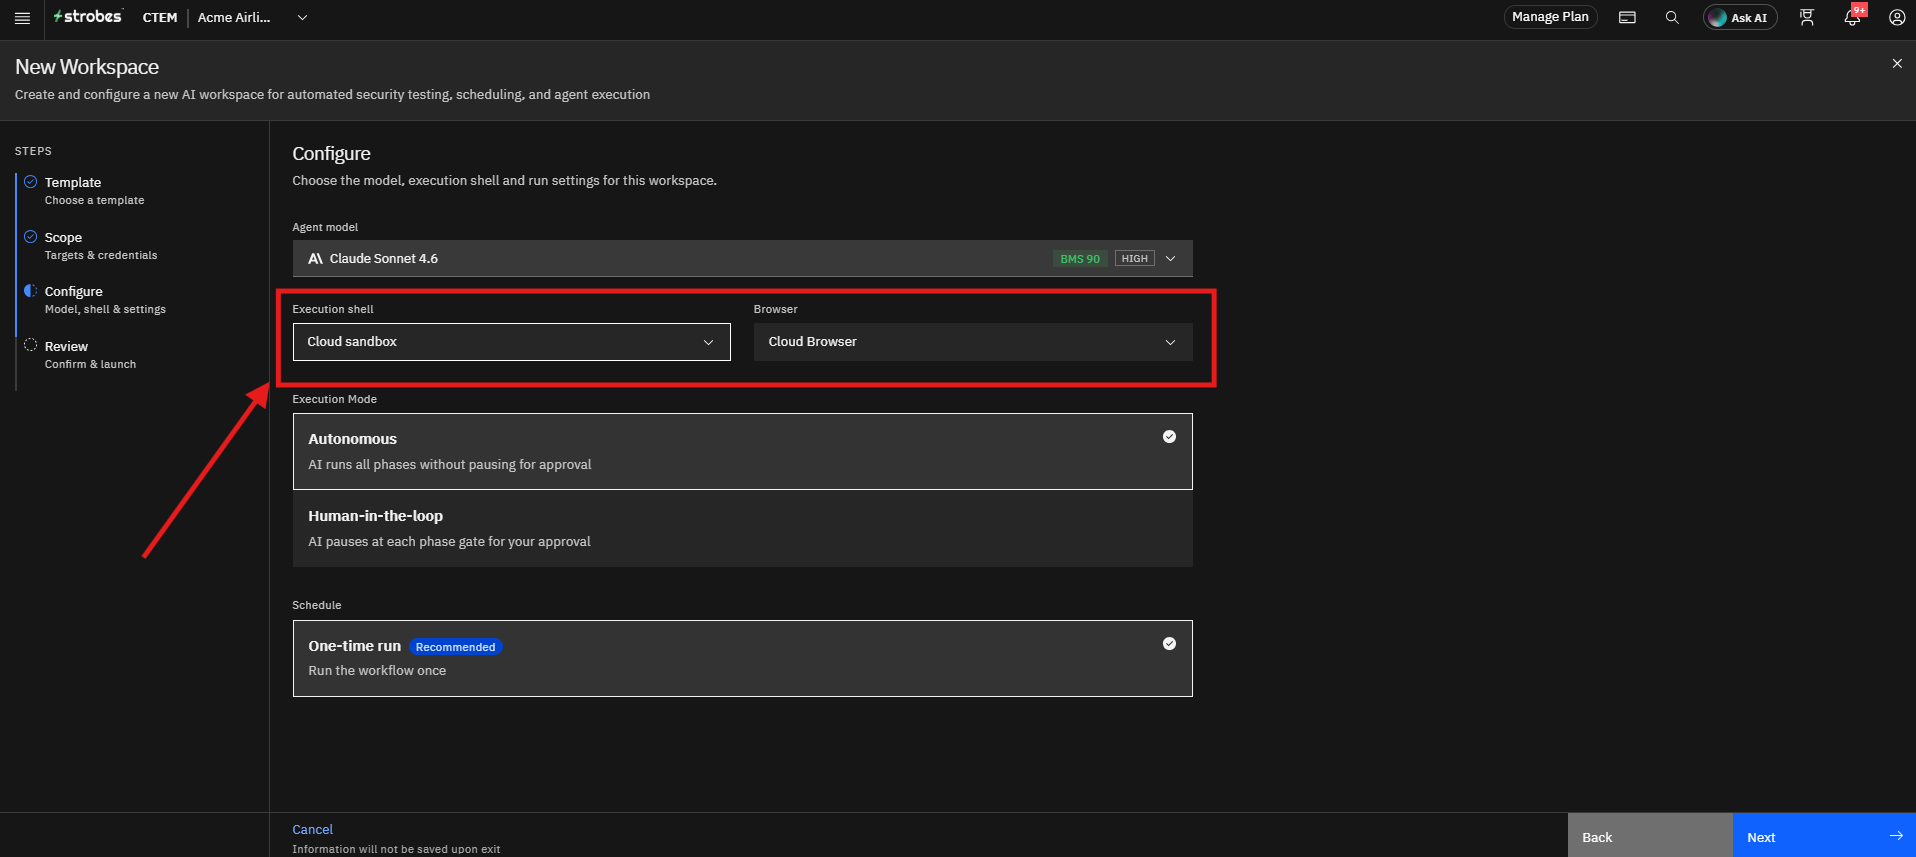
The Execution shell defines where the agent runs its commands. Cloud sandbox is selected by default. If you need the agent to run from one of your own hosts, open the Execution shell dropdown and select it instead.
Step 11: Review the Browser
The Browser is Cloud Browser by default. Keep the default.
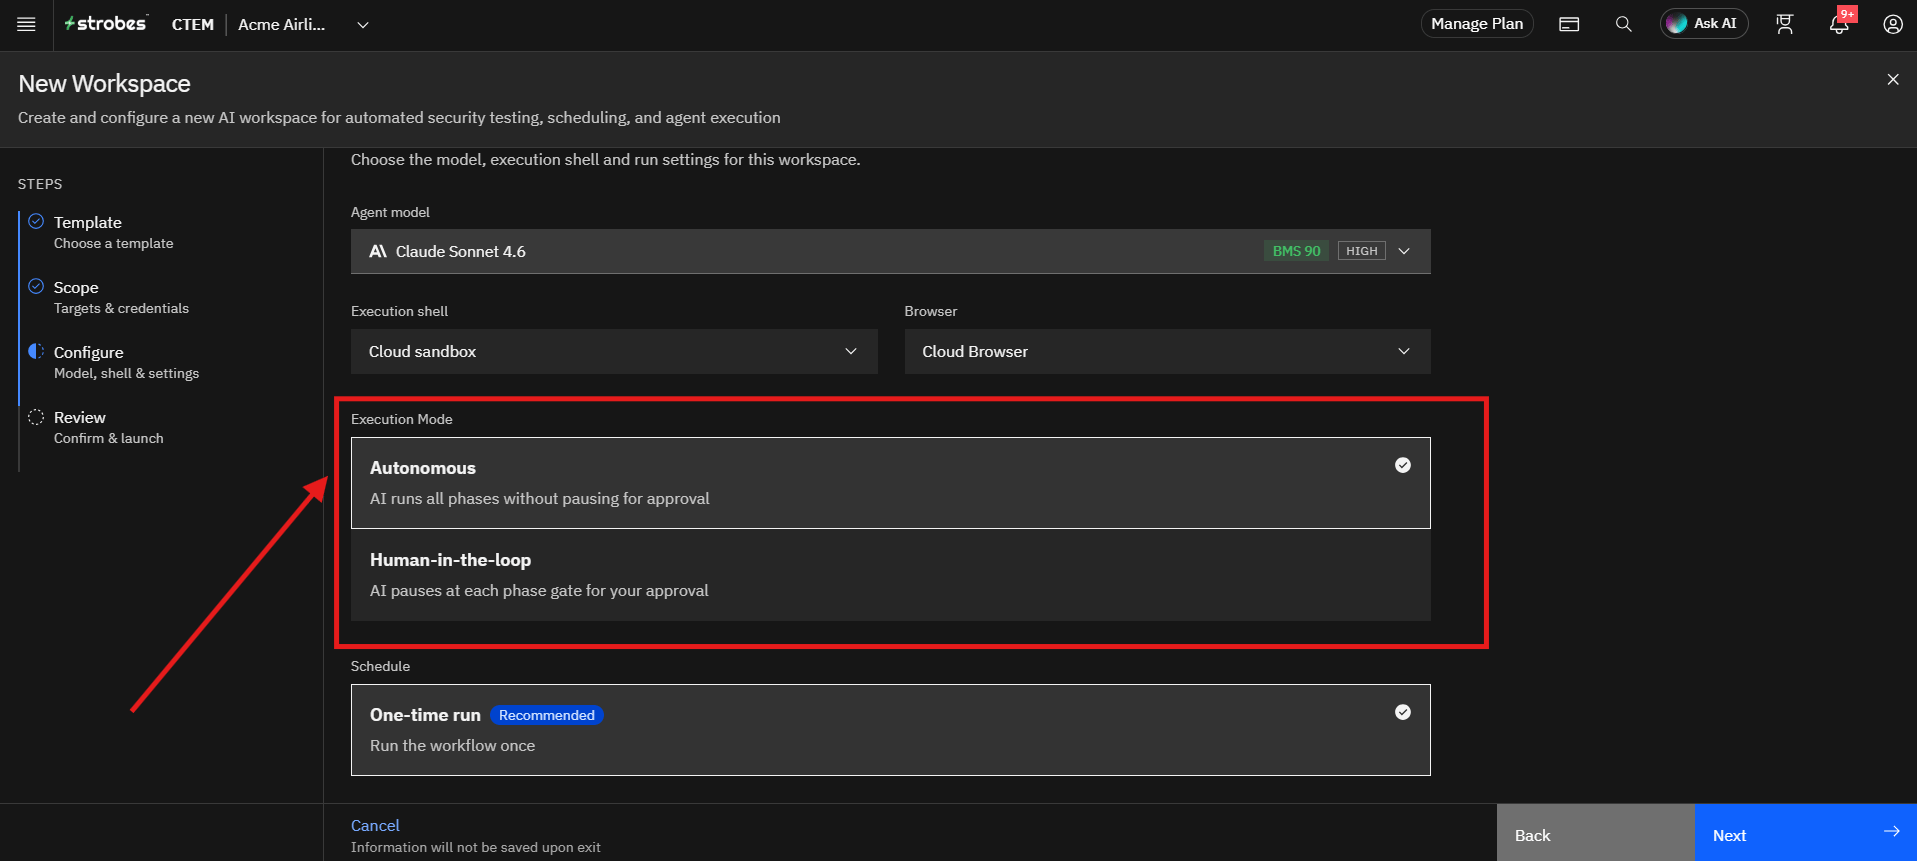
Step 12: Select the Execution Mode
Choose how the AI runs the campaign. Autonomous is selected by default.
- Autonomous: The AI runs all phases without pausing for approval.
- Human-in-the-loop: The AI pauses at each phase gate and waits for your approval before continuing.
Because this campaign opens pull requests in your repository, Human-in-the-loop is a good choice if you want to approve the fixes before they are submitted.
Step 13: Select the Schedule
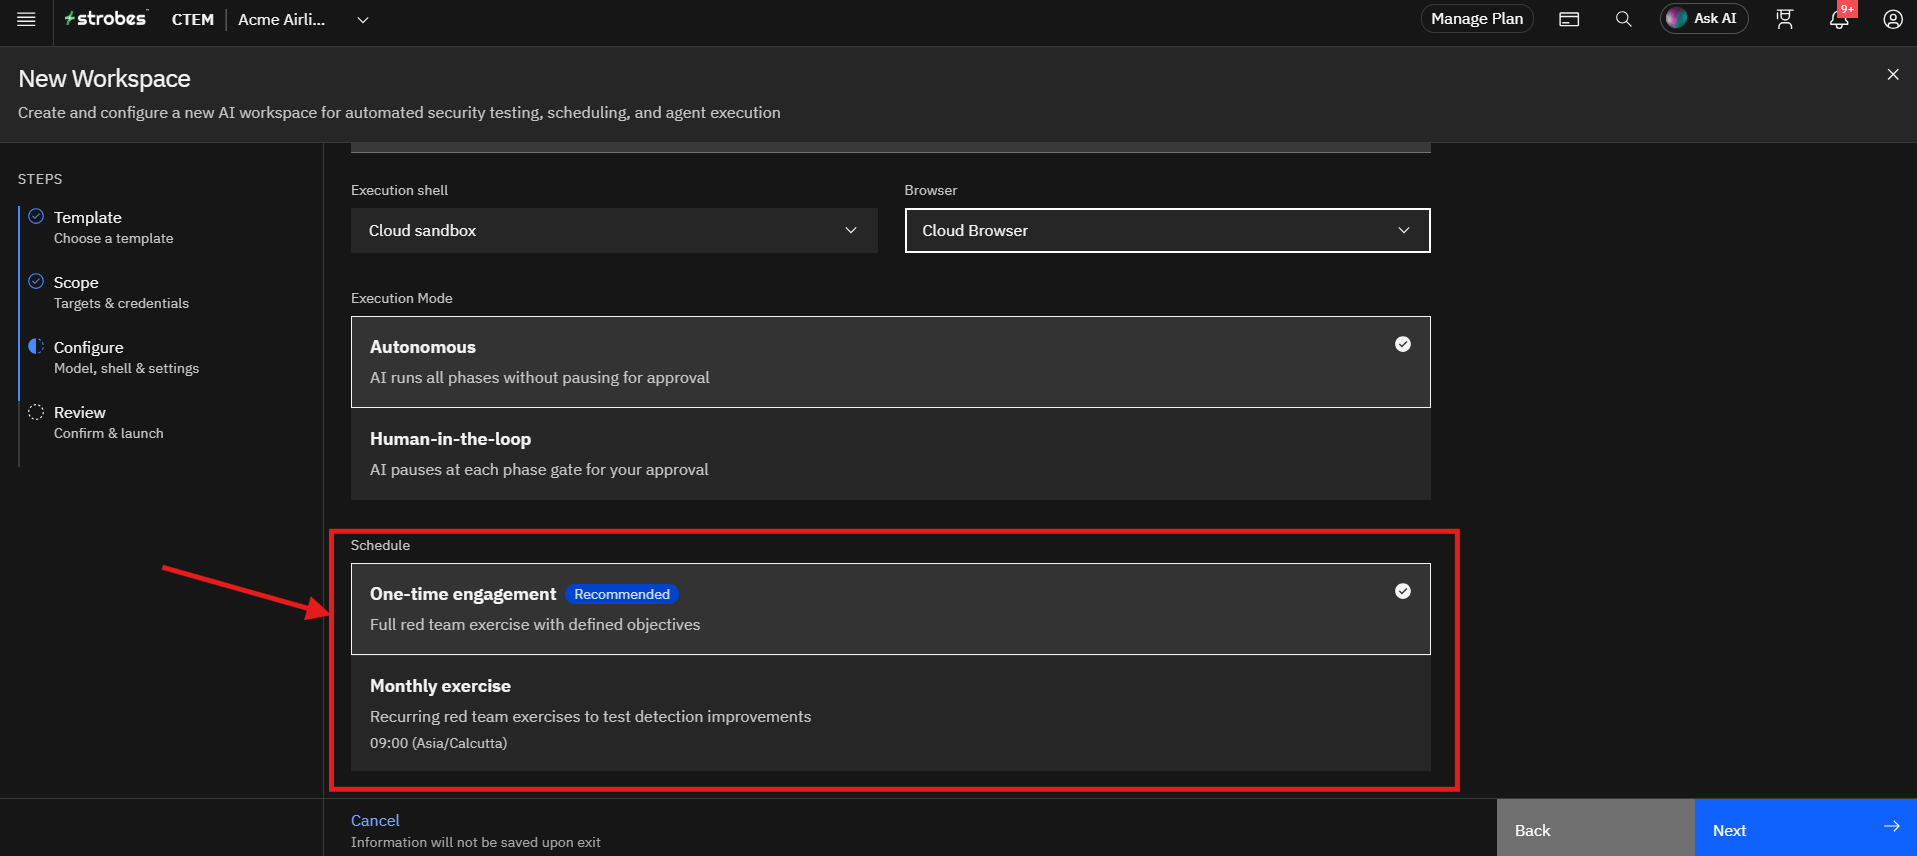
Choose how often the campaign runs:
Option | Behaviour |
|---|---|
One-time campaign (Recommended) | Fixes the existing vulnerabilities across the repository in a single run. |
Weekly fix cycle | Fixes newly discovered vulnerabilities automatically every week. |
Step 14: Click Next
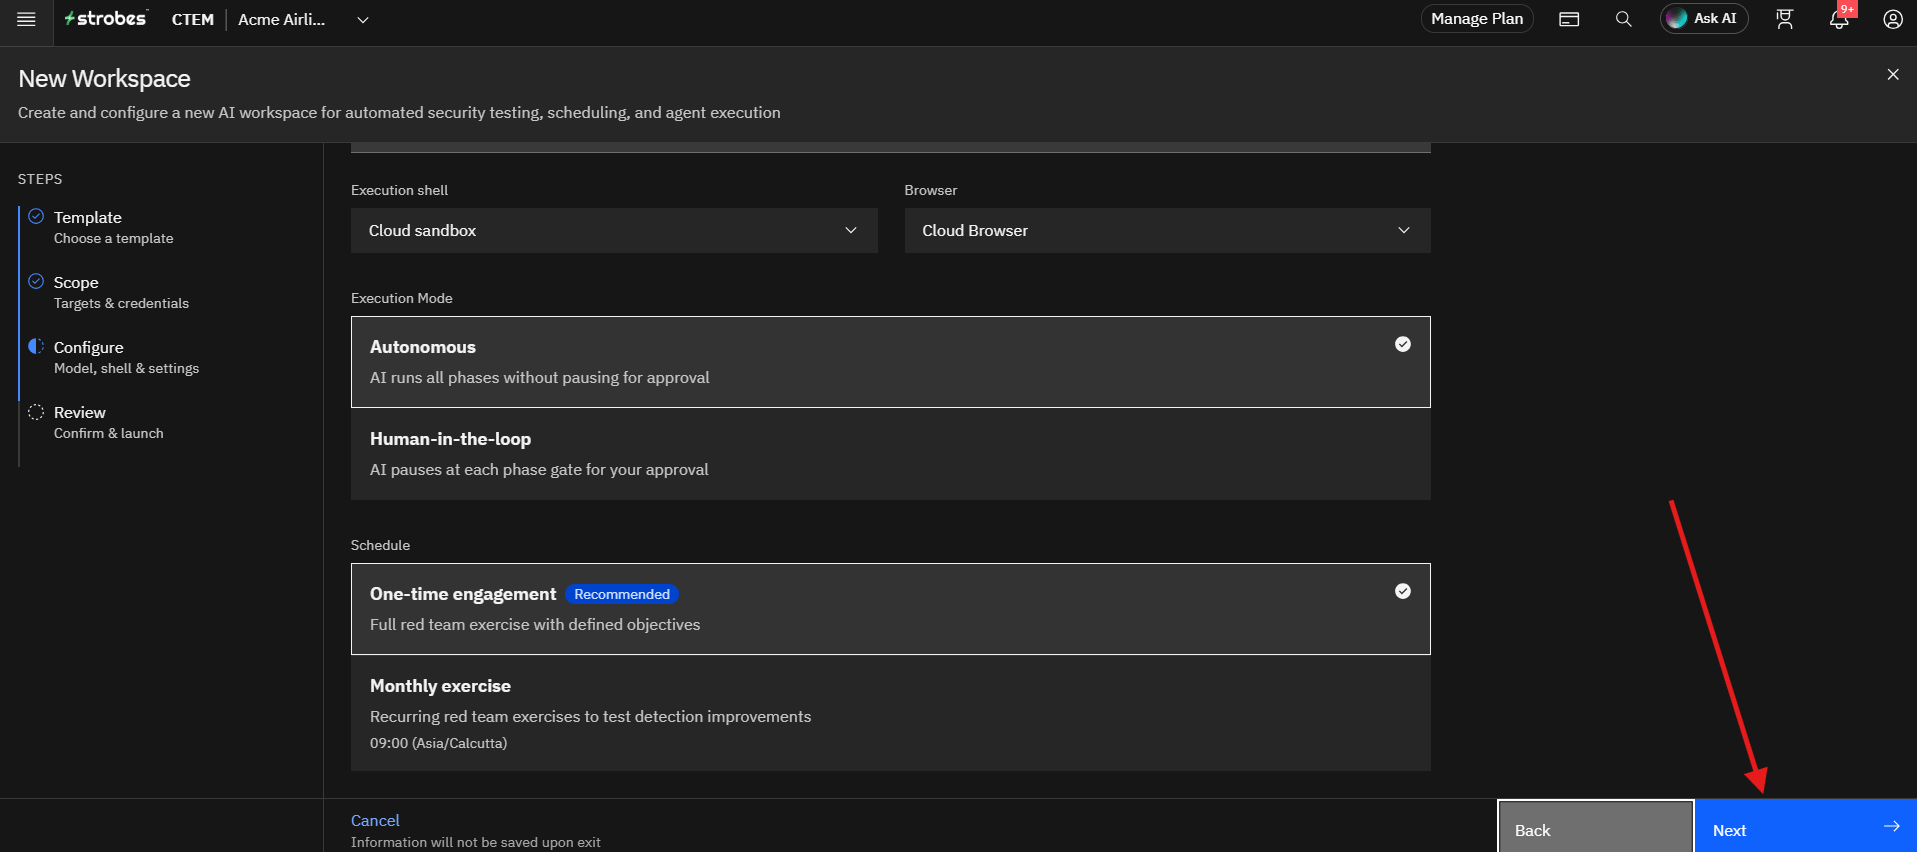
Once all configuration settings have been verified, click Next. The wizard opens the Review page.
Step 15: Review and Launch the Workspace
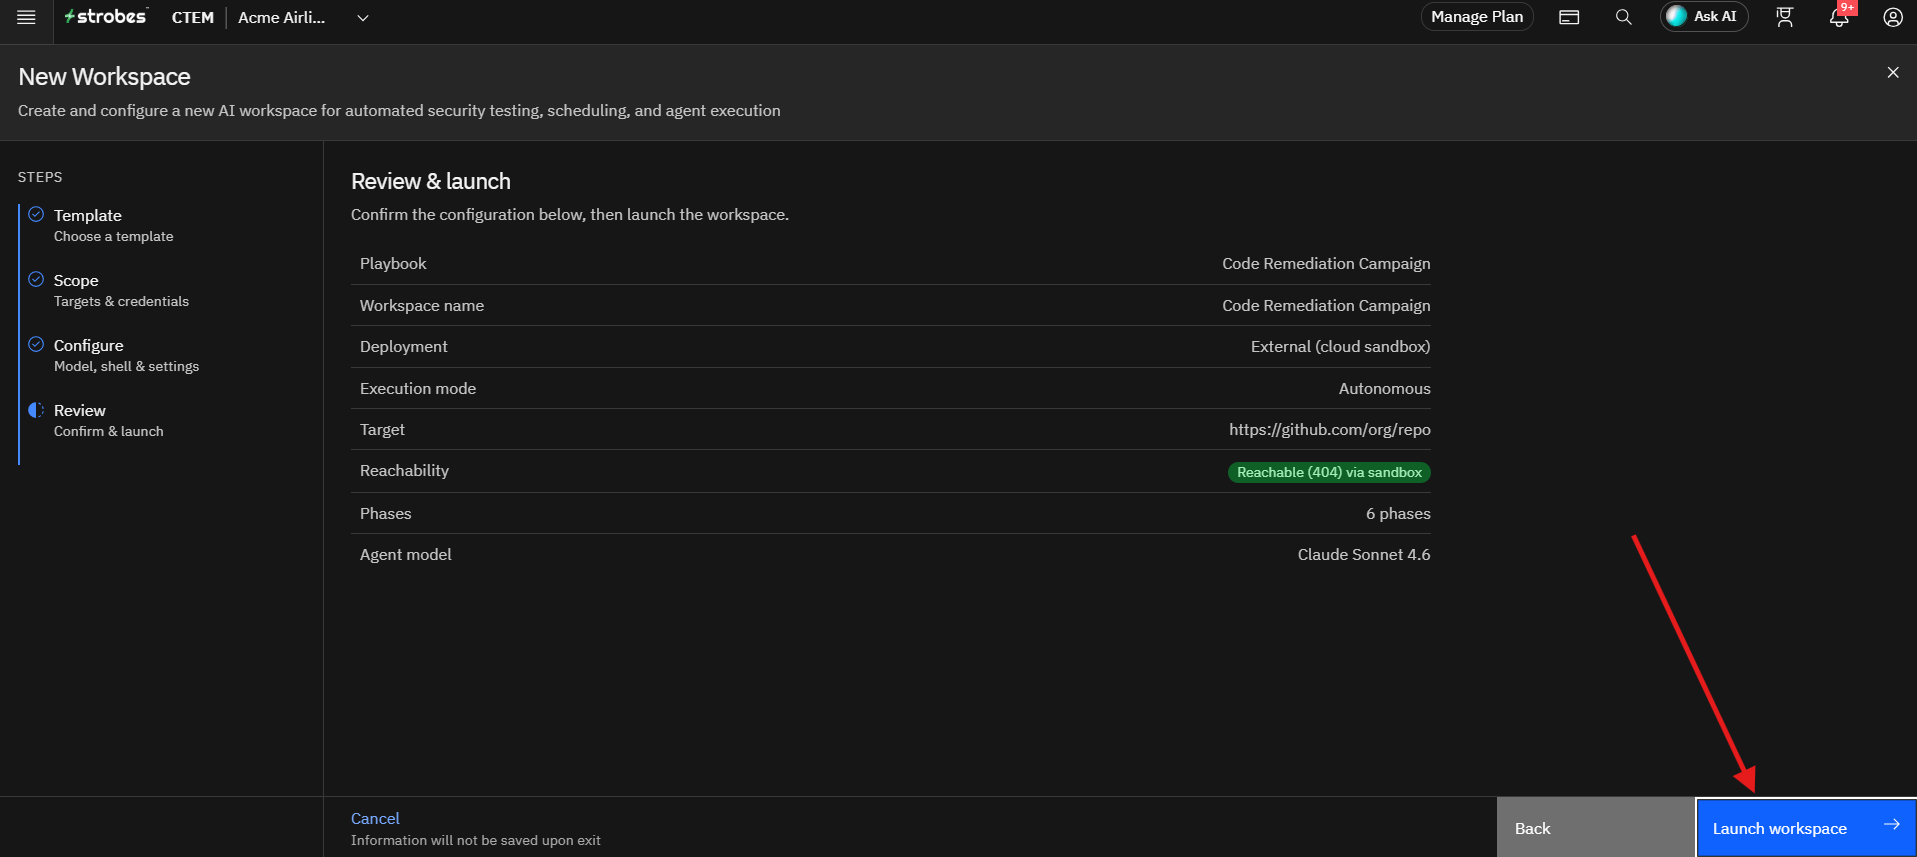
Review the configuration summary, including the playbook, workspace name, deployment, execution mode, target, phases, and agent model.
Strobes automatically checks whether the target is reachable. Once everything looks correct, click Launch workspace to start the campaign. When it completes, the pull requests appear in your repository, linked to their Strobes findings, and the campaign report is available in the workspace.
Tips
- Connect a source code platform. Without it, Strobes cannot open the remediation pull requests.
- Start with Critical & High only. It keeps the first campaign small and easy to review. Switch to All open findings once you are comfortable with the results.
- Always review the pull requests before merging. The agent generates minimal fixes, and your team should confirm that each one is correct.
- Use Human-in-the-loop if you want to approve each phase before the agent submits pull requests.
- Use the Weekly fix cycle to keep new vulnerabilities from piling up.
- Use Custom Instructions to exclude files or folders, or to focus on specific modules.
- The campaign typically takes 1 to 4 hours, depending on the number of findings and the size of the repository.
- Only run campaigns on repositories you are authorized to change.
More in Workspace configuration
- Running an LLM / Agentic Chatbot Pentest using Strobes AI
- Running a Red Team Engagement using Strobes AI
- Running AWS Cloud Security Review using Strobes AI
- Running Mobile App Pentest (Android) using Strobes AI
- Running Azure Cloud Security Review using Strobes AI
- Running External Network Pentest using Strobes AI
Was this page helpful?