
Running an LLM / Agentic Chatbot Pentest using Strobes AI
5 min readEdit
On this page⌄
- Overview
- Why Is It Needed?
- Prerequisites
- Accessing the LLM / Agentic Chatbot Pentest Template
- Configuring the Chatbot Scope
- Step 1: Provide a Workspace Name
- Step 2: Enter the Target Chatbot URL
- Step 3: Enter a Working Request (cURL)
- Step 4: Select Credentials (Optional)
- Step 5: Add Other Credentials (Optional)
- Step 6: Add Custom Instructions (Optional)
- Step 7: Proceed to Configuration
- Configuring the Run
- Step 8: Select an AI Model
- Step 9: Review the Execution Shell and Browser
- Step 10: Select the Execution Mode
- Step 11: Review the Schedule
- Step 12: Click Next
- Step 13: Review and Launch the Workspace
- Tips
Overview
An LLM / Agentic Chatbot Pentest in Strobes helps identify security vulnerabilities in chatbots and agentic applications built on large language models (LLMs). An AI agent tests your chatbot as a black box, using a 19-phase methodology aligned with the OWASP LLM Top 10 plus agentic-specific attack classes, such as MCP poisoning, tool-argument injection, browser-agent injection, and identity asymmetry.
It sends targeted probes, inspects each response, verifies what it finds, and provides evidence and remediation guidance to help teams address the risks. You receive verified findings with severity, evidence, and remediation guidance, along with a report.
Why Is It Needed?
LLM-powered chatbots can leak system prompts and sensitive data, follow injected instructions, or take actions they should not, especially when they are connected to tools and other systems. These risks are different from traditional web vulnerabilities, so regular scanners do not catch them.
Testing your chatbot before and after release helps you find these issues early. Because the agent only reports findings after confirming them, your team spends time on genuine issues instead of noise. It is a good fit for chatbots and AI assistants before release, agentic applications that use tools or external systems, and reviews aligned with the OWASP LLM Top 10.
Prerequisites
Before you start, make sure you have:
- Access to Strobes AI Workspaces in your organization.
- Enough AI credits. Each run uses AI credits.
- Target chatbot URL: The API endpoint of the chatbot you want to test.
- A working request (cURL): One request that works today, so Strobes can replay and mutate it.
- Authorization to test the chatbot.
- (Optional) Credentials the chatbot needs for authenticated testing.
Accessing the LLM / Agentic Chatbot Pentest Template
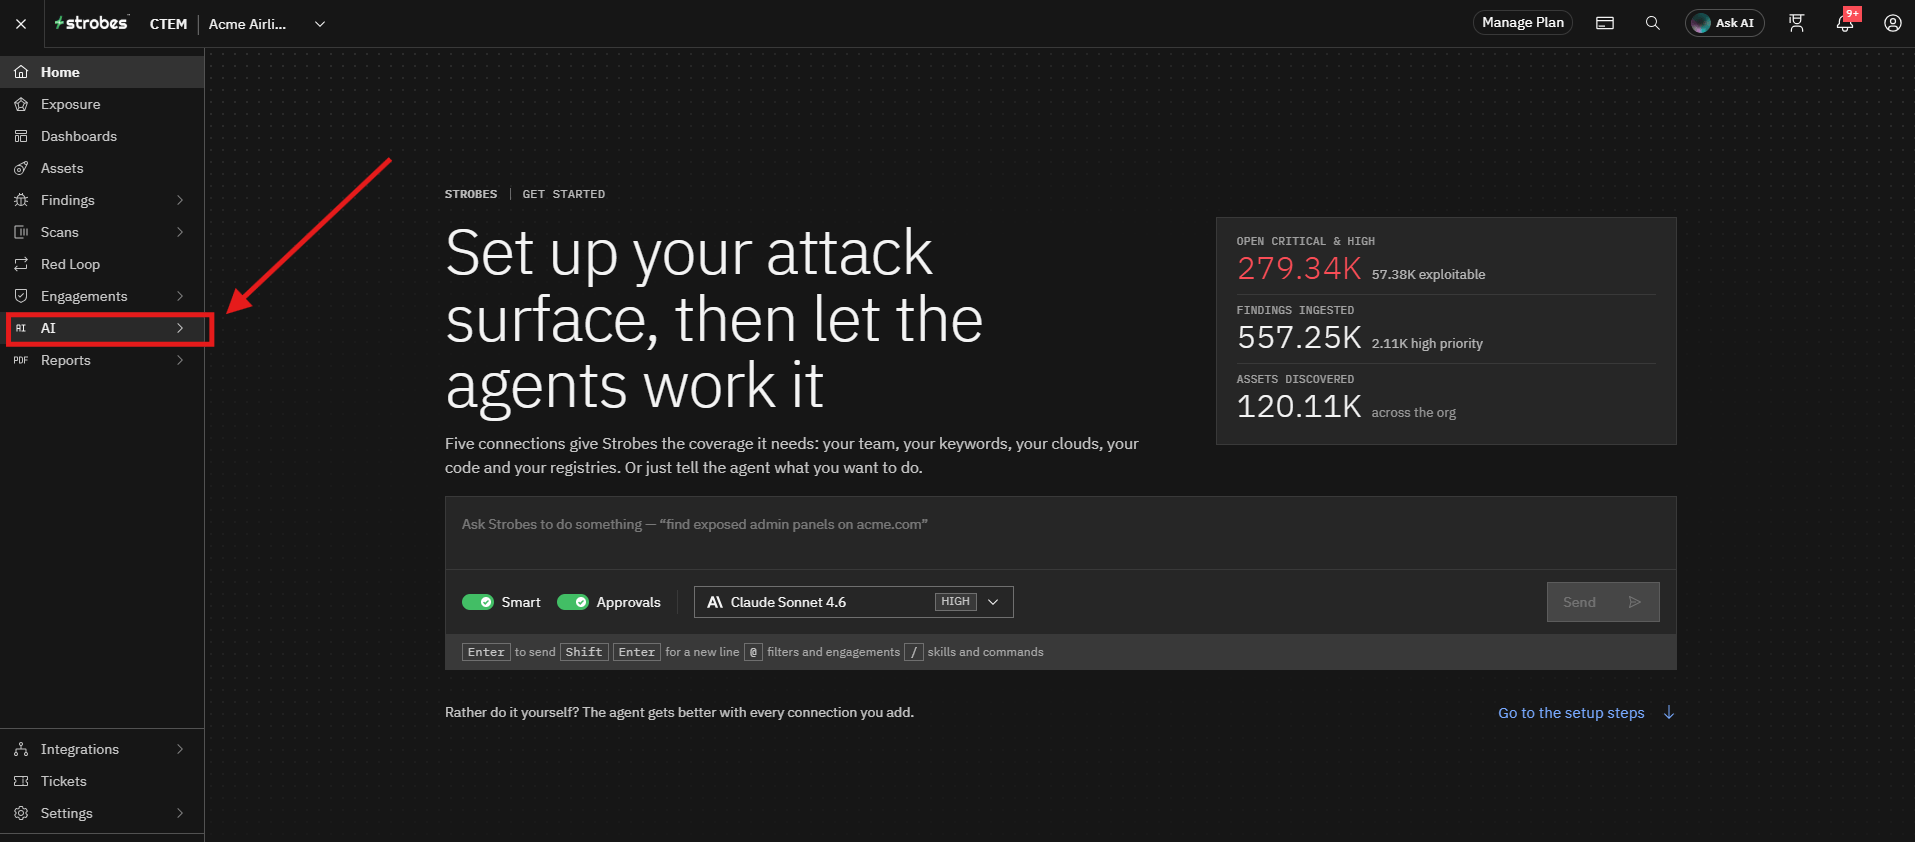
- Navigate to AI from the main navigation menu.
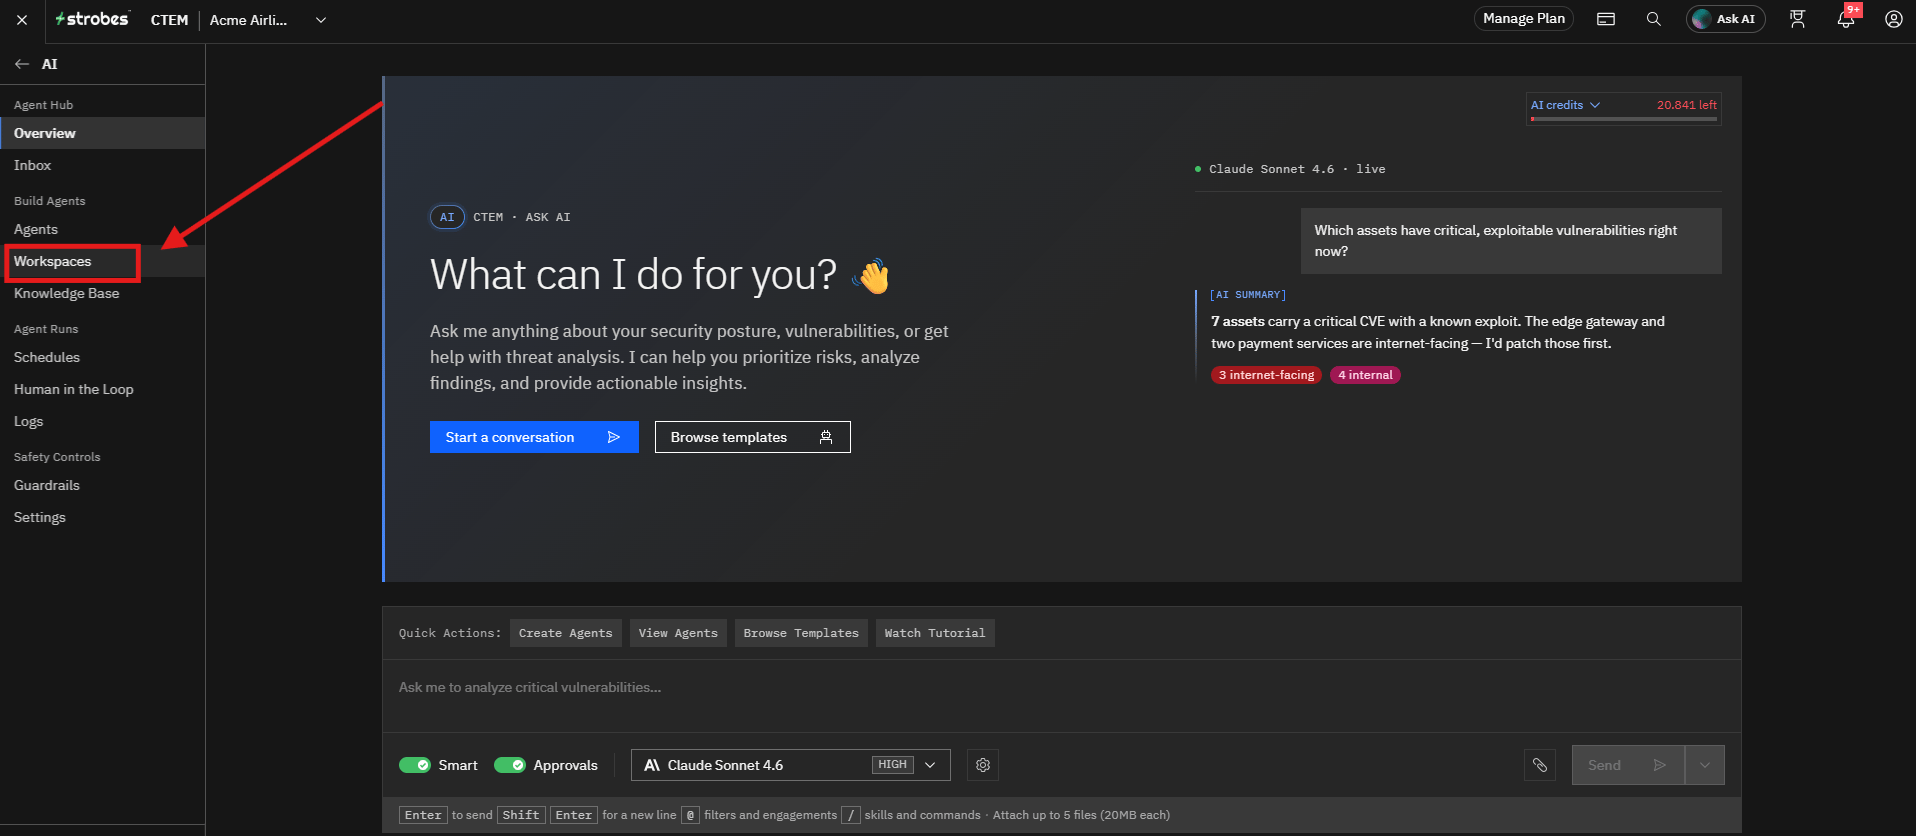
- Open the Workspaces page.
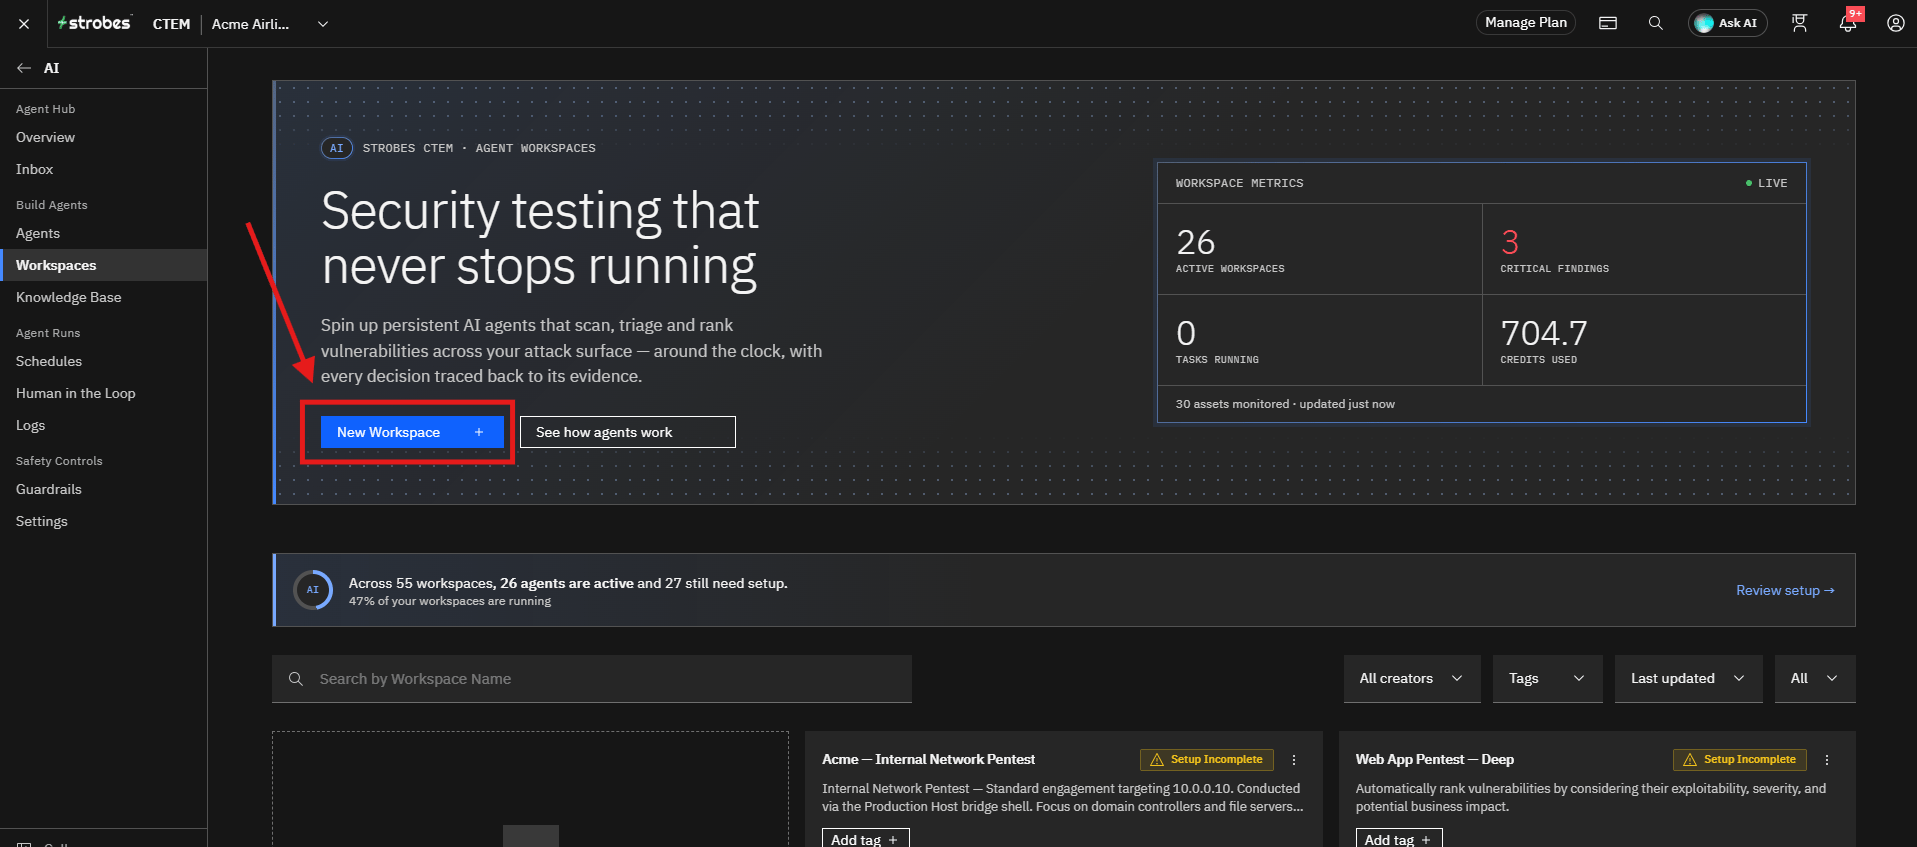
- Click New Workspace.
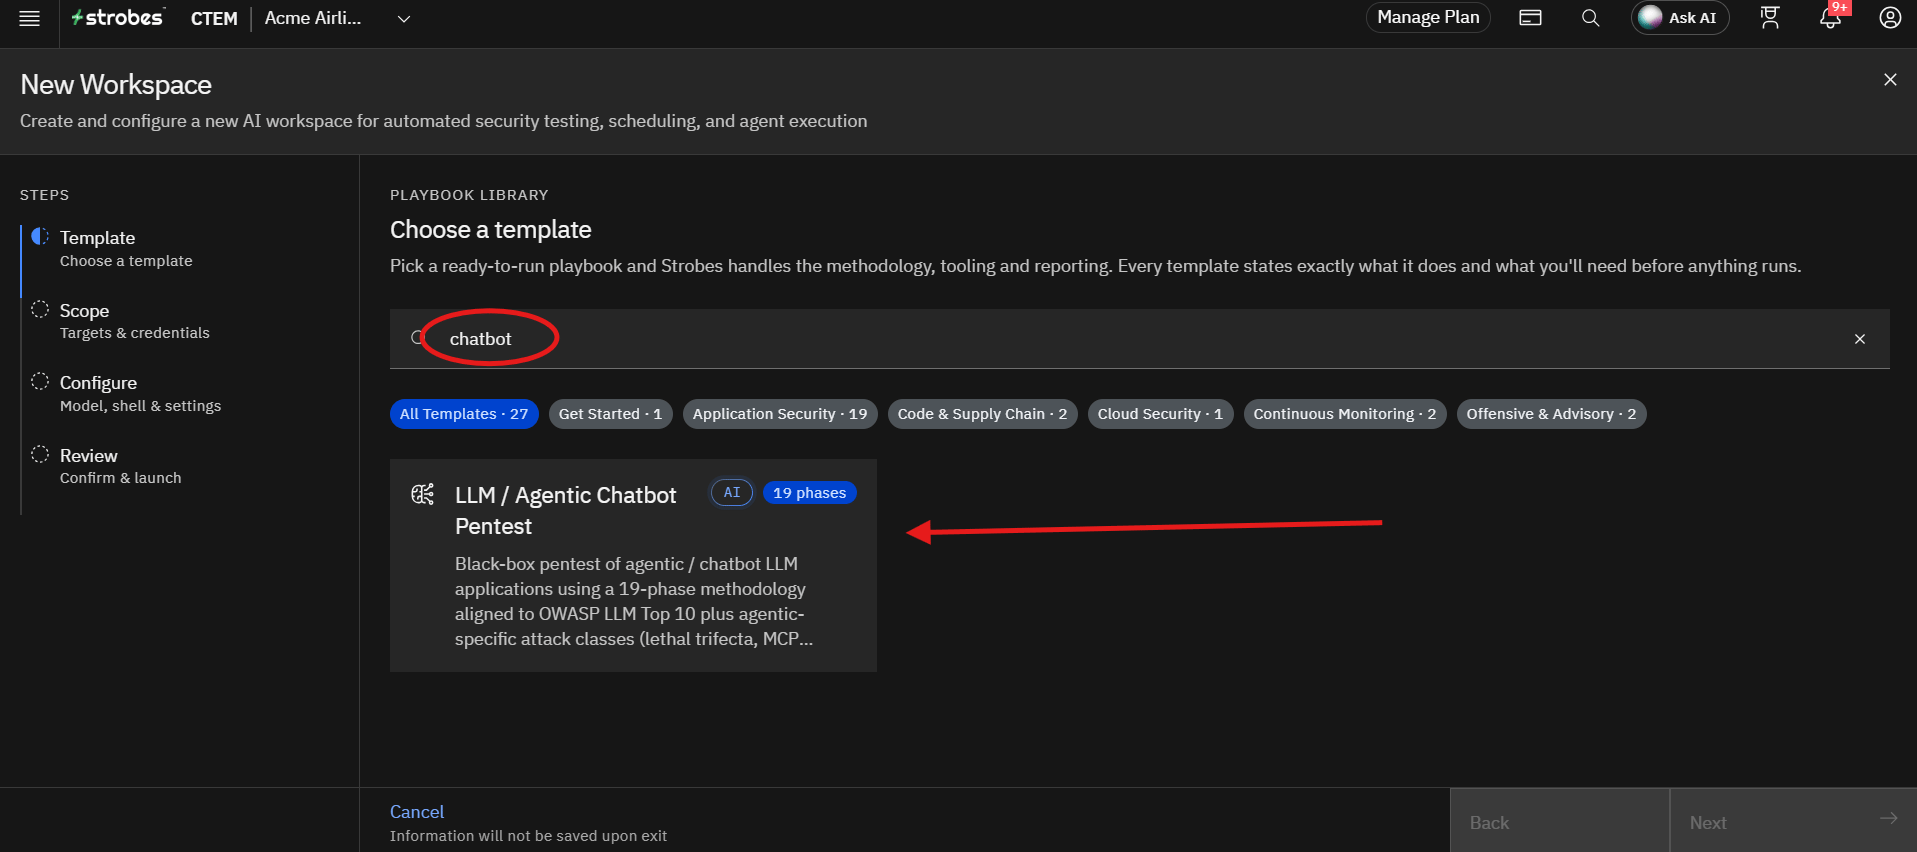
- In the Playbook Library, search for
chatbotand select the LLM / Agentic Chatbot Pentest template.
- Review the template details.
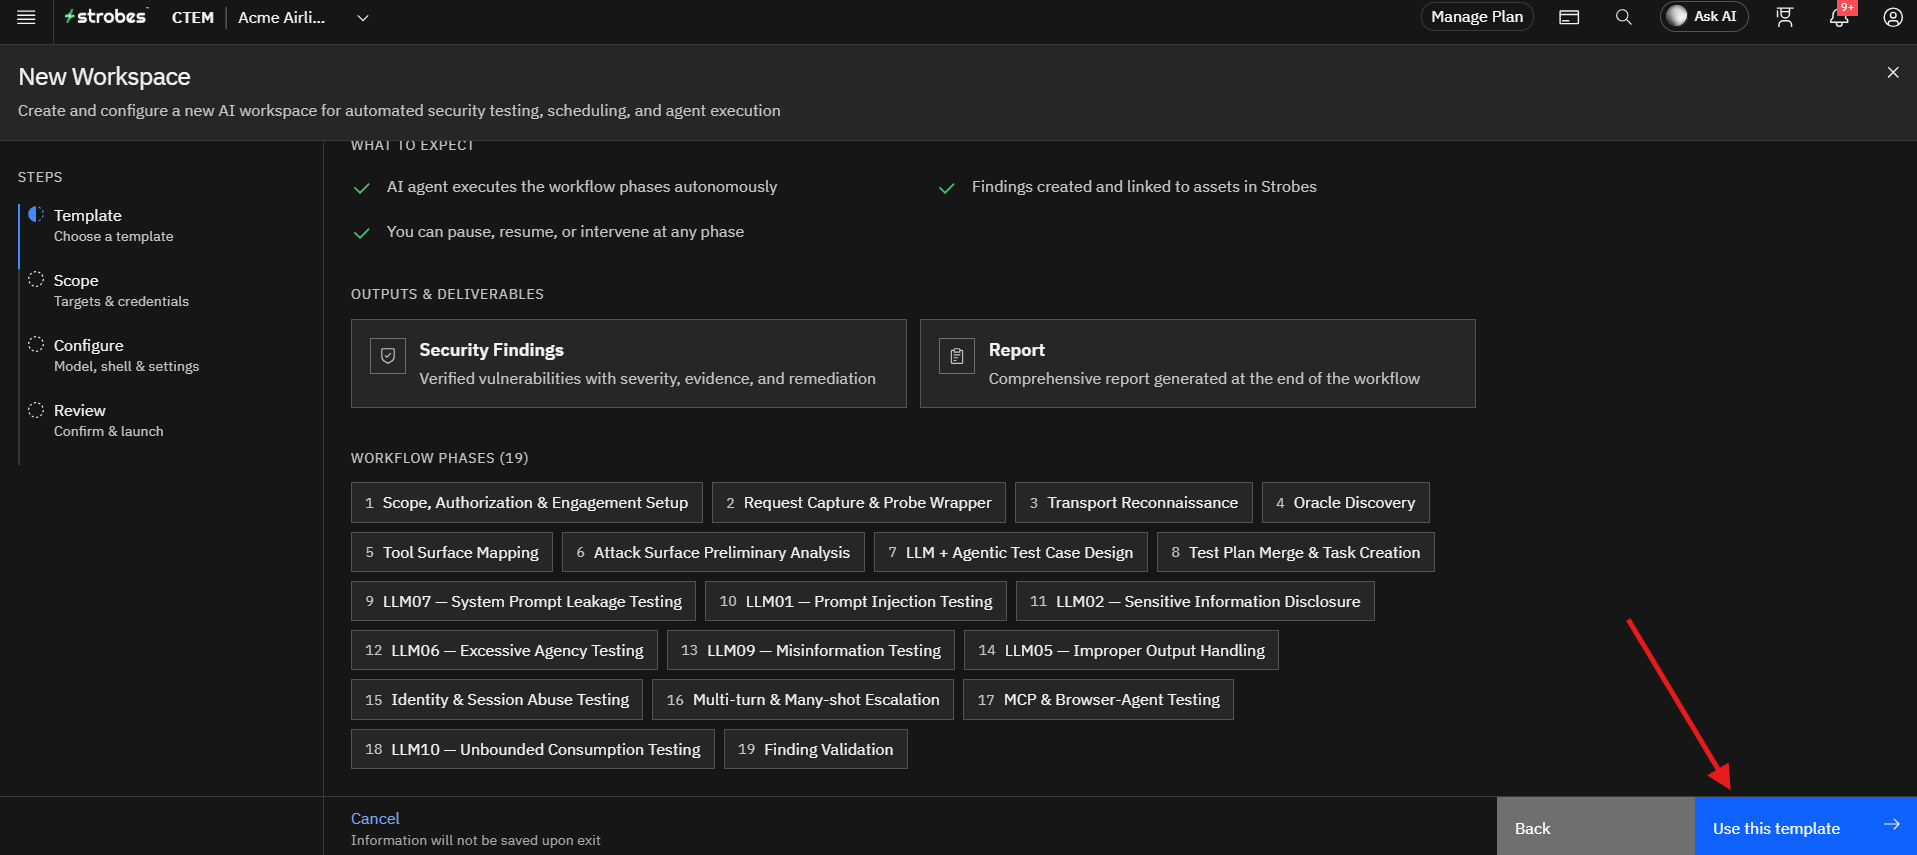
Selecting the template opens its details page, which shows:
- Tags: The category, number of phases, and version.
- About: What the template does.
- What you'll need: The target chatbot URL and a working request (cURL).
- What to expect: The AI agent executes the workflow phases autonomously, findings are created and linked to assets in Strobes, and you can pause, resume, or intervene at any phase.
- Outputs & deliverables: Security Findings and a Report.
- Workflow phases: The 19 phases, in order.
To continue, select Use this template. To choose a different template, select Back or Back to templates.
- Click Use this template.
Configuring the Chatbot Scope
After selecting the template, the wizard automatically moves to the Scope step.
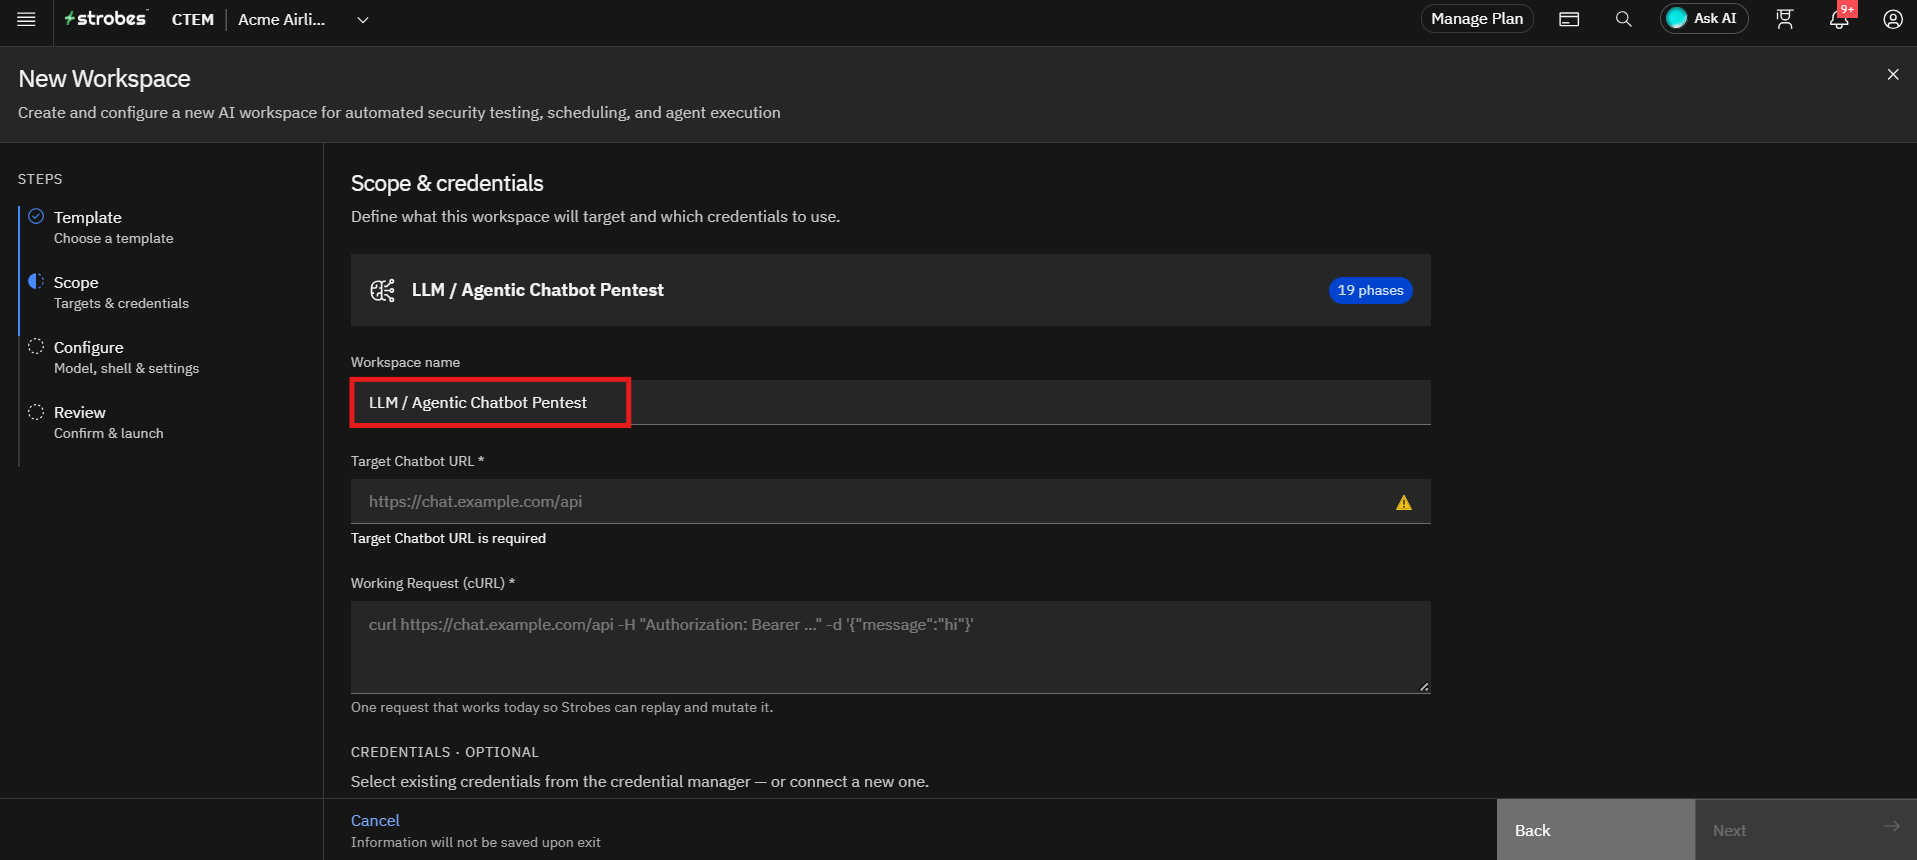
Step 1: Provide a Workspace Name
The workspace name is pre-filled with the template name. Enter a more meaningful name for the assessment if you want, such as the chatbot or application name.
Step 2: Enter the Target Chatbot URL
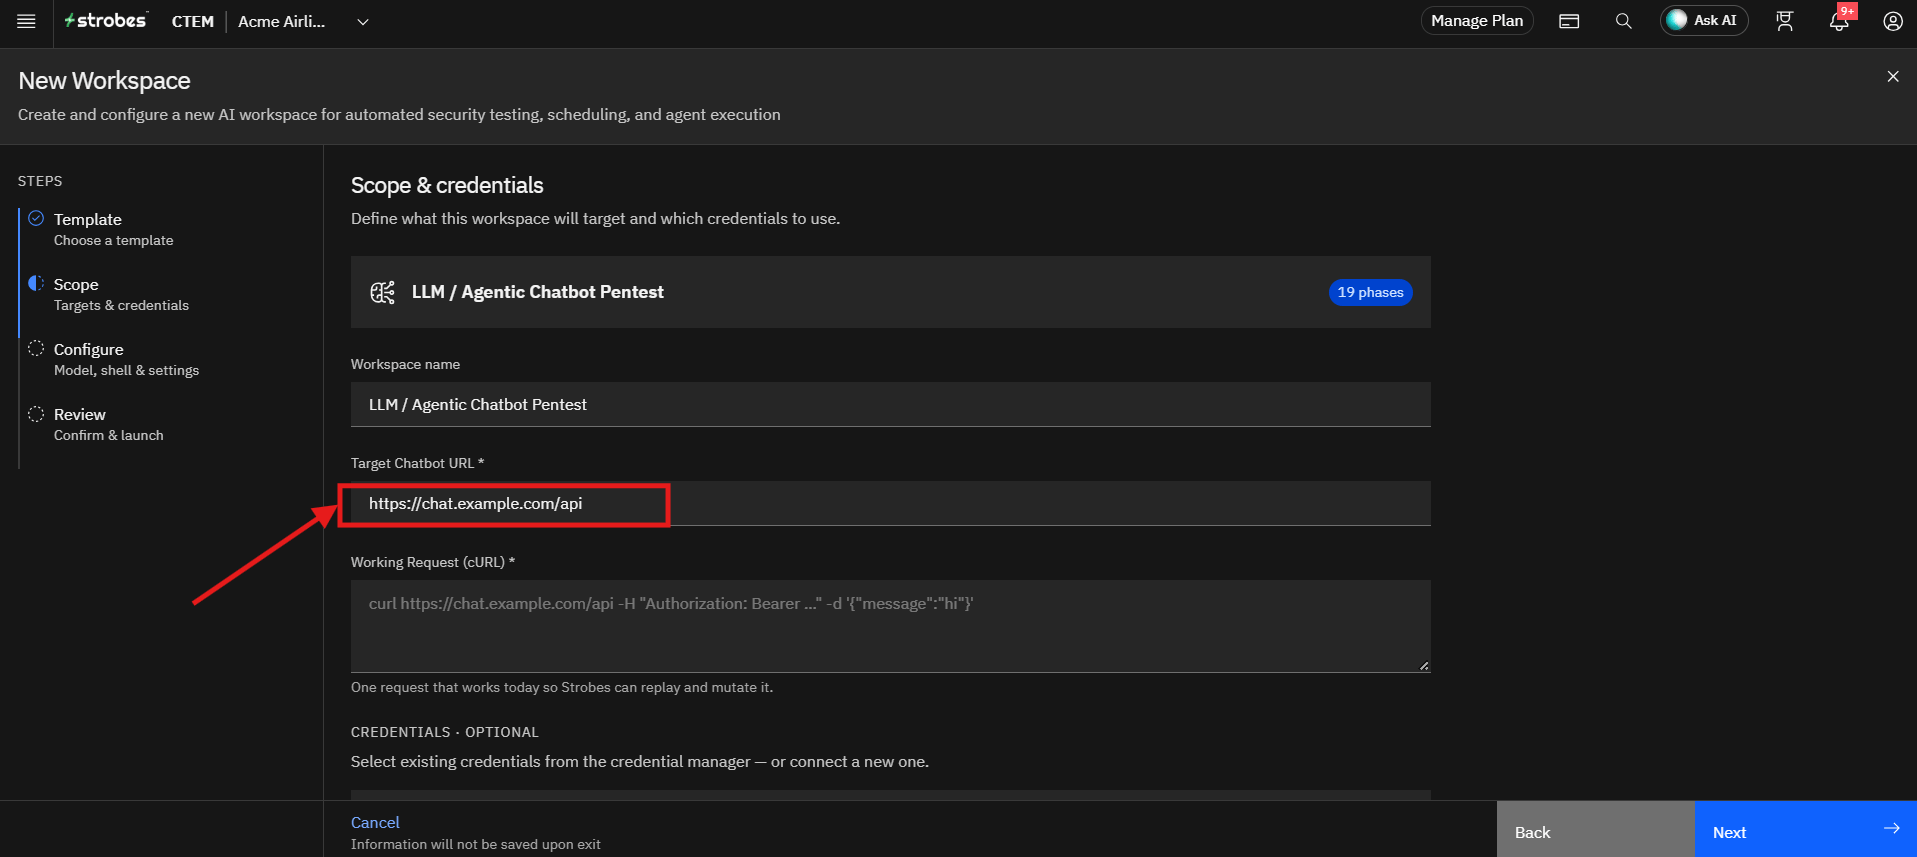
In Target Chatbot URL (required), enter the API endpoint of the chatbot you want to test, for example https://chat.example.com/api.
Step 3: Enter a Working Request (cURL)
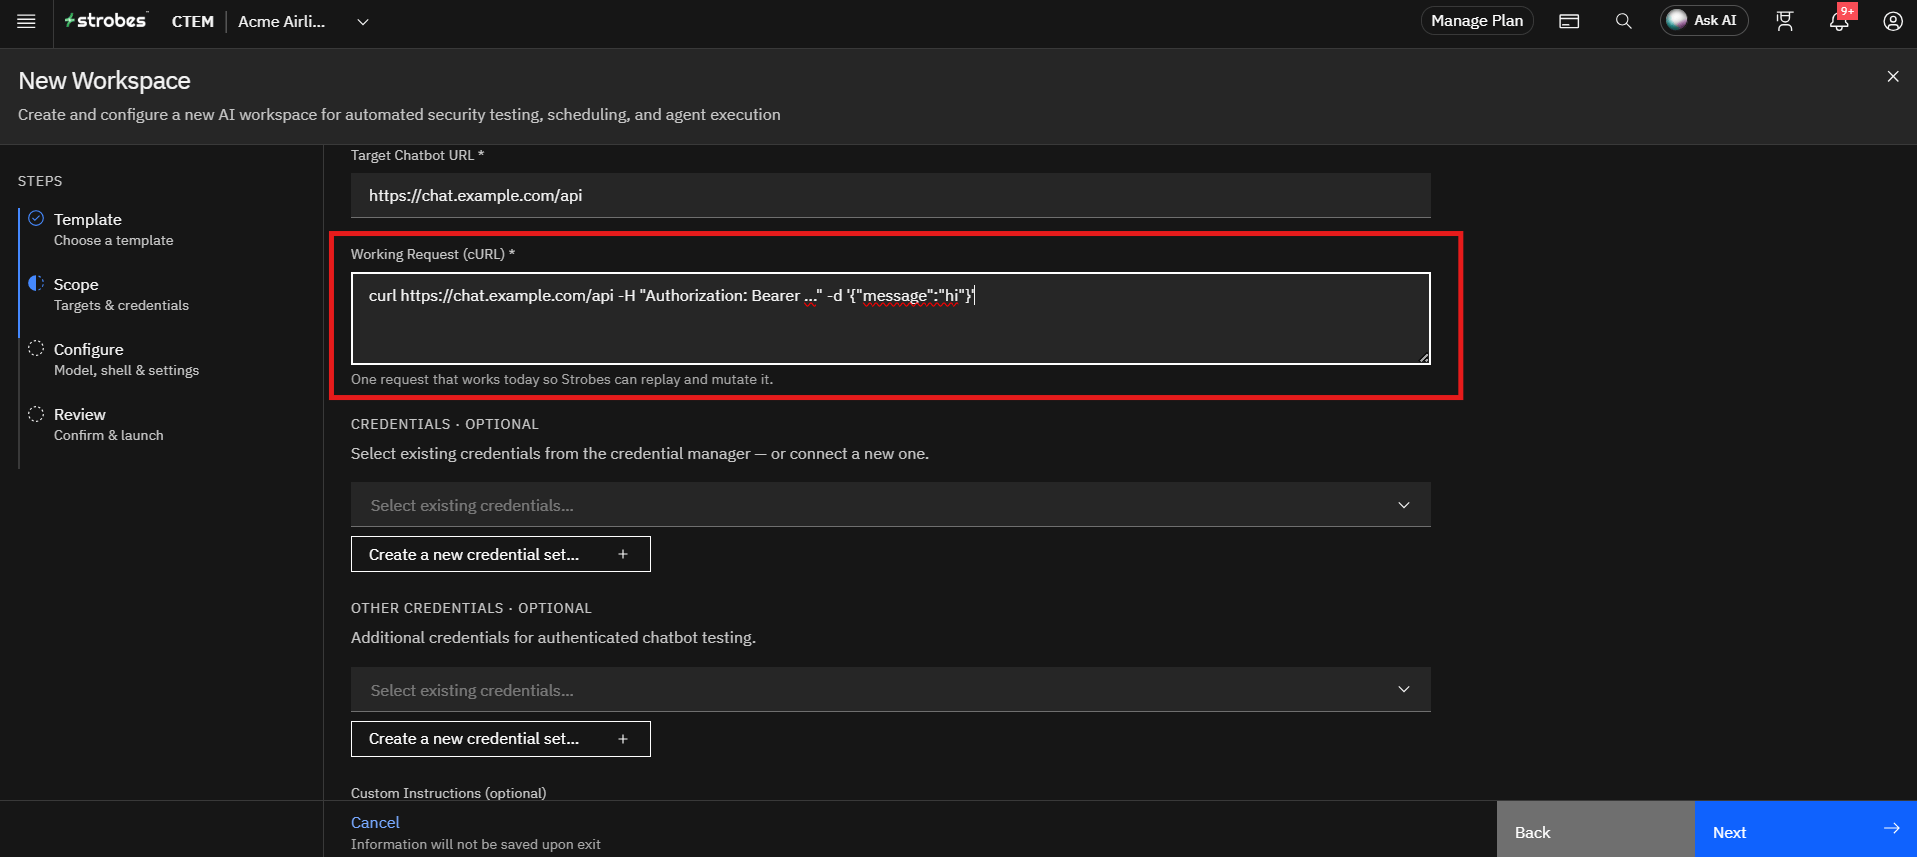
In Working Request (cURL) (required), paste one request that works today, so Strobes can replay and mutate it. Include any headers the chatbot needs, such as an authorization header, and a sample message body.
Example format: curl https://chat.example.com/api -H "Authorization: Bearer ..." -d '{"message":"hi"}'
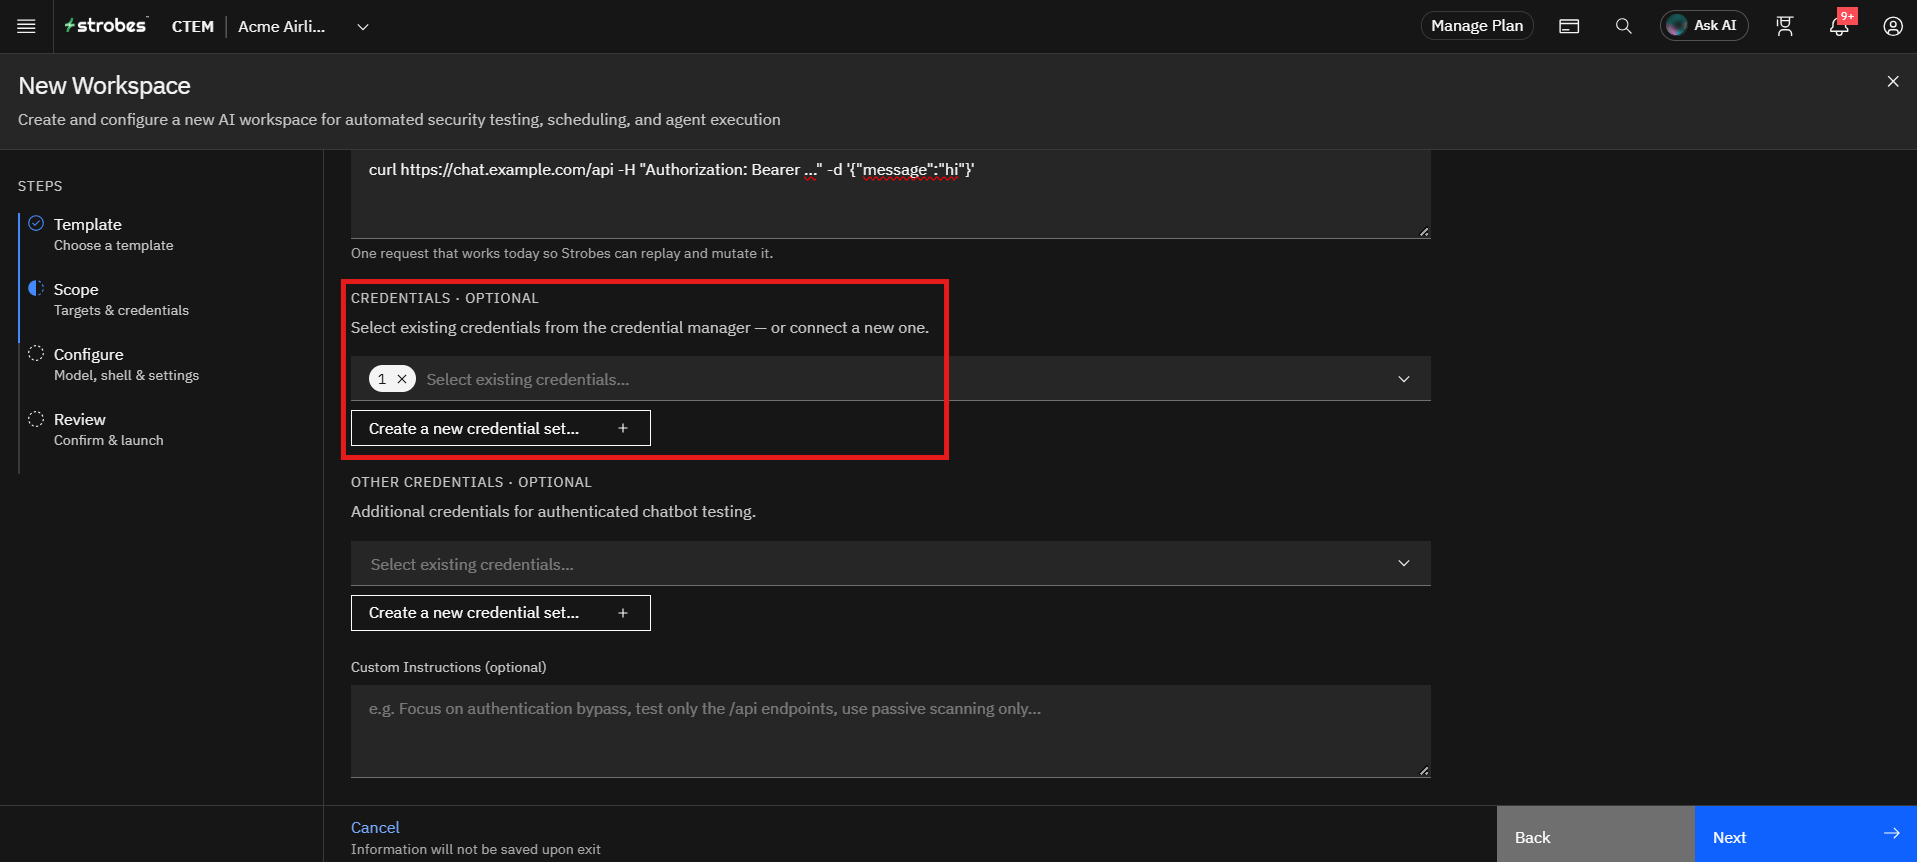
Step 4: Select Credentials (Optional)
Under Credentials, select existing credentials from the credential manager, or click Create a new credential set to add them.
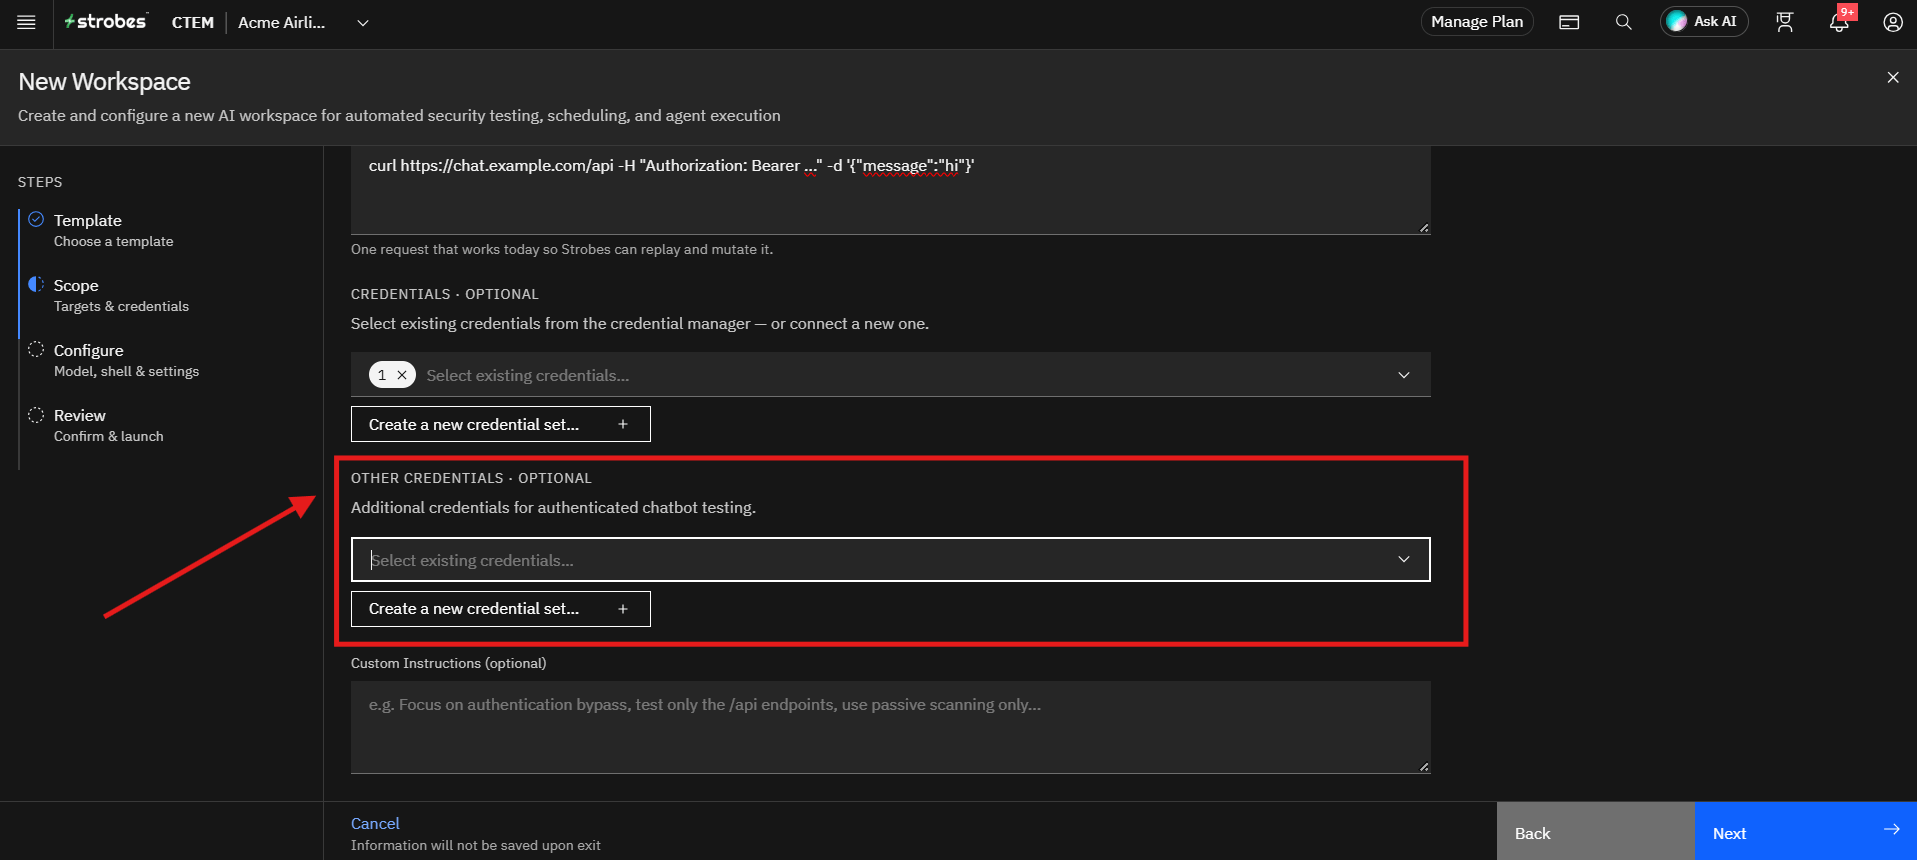
Step 5: Add Other Credentials (Optional)
Under Other Credentials, select additional credentials for authenticated chatbot testing, or click Create a new credential set to add them.
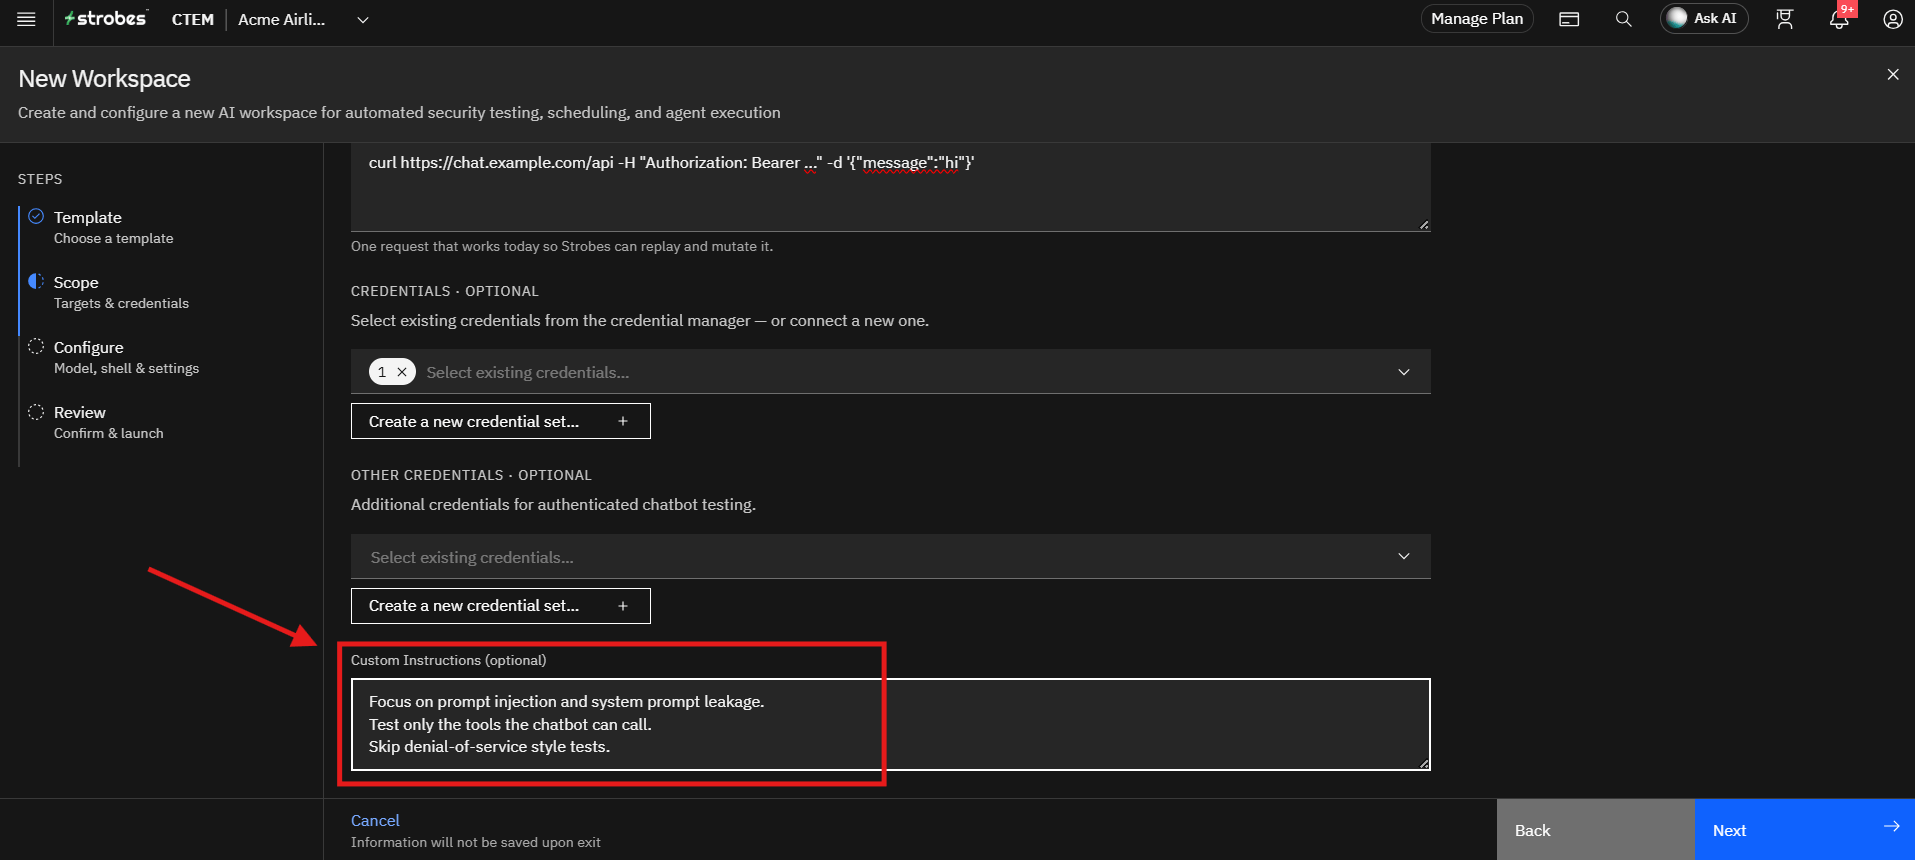
Step 6: Add Custom Instructions (Optional)
Use the Custom Instructions field to guide the assessment.
Example instructions:
- Focus on prompt injection and system prompt leakage.
- Test only the tools the chatbot can call.
- Skip denial-of-service style tests.
These instructions help tailor the AI analysis to specific objectives.
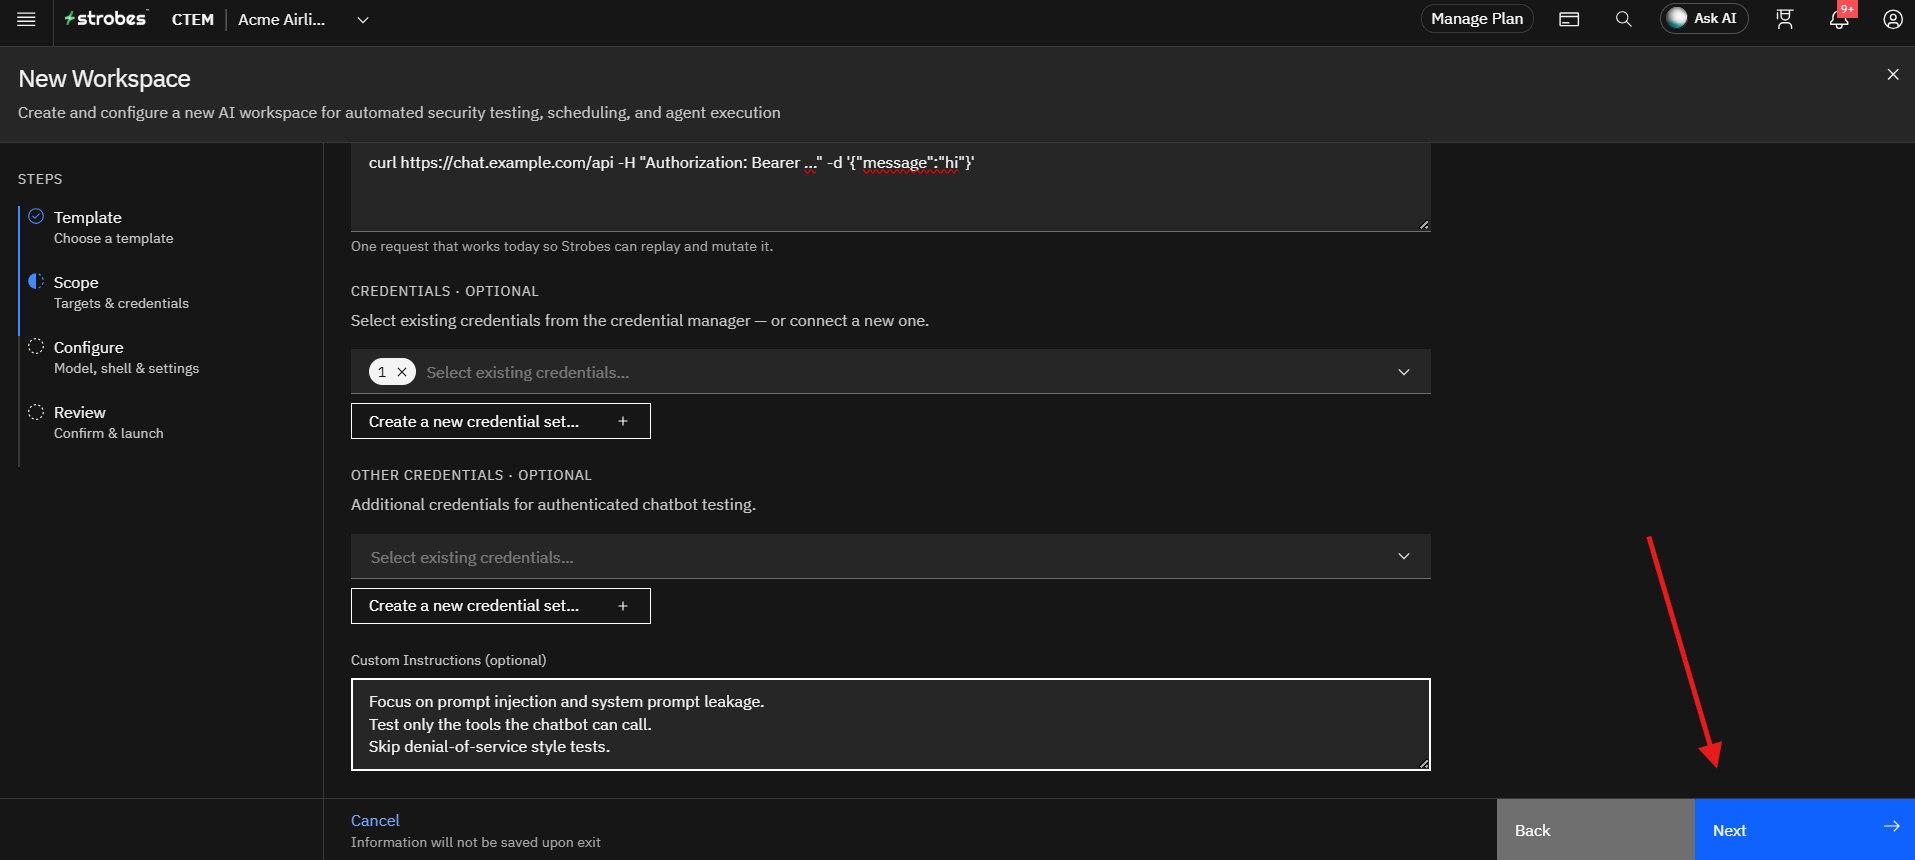
Step 7: Proceed to Configuration
After completing the scope details:
- Verify the target URL and the working request.
- Click Next.
The Next button stays unavailable until both required fields are filled in. The wizard then proceeds to the Configure step.
Configuring the Run
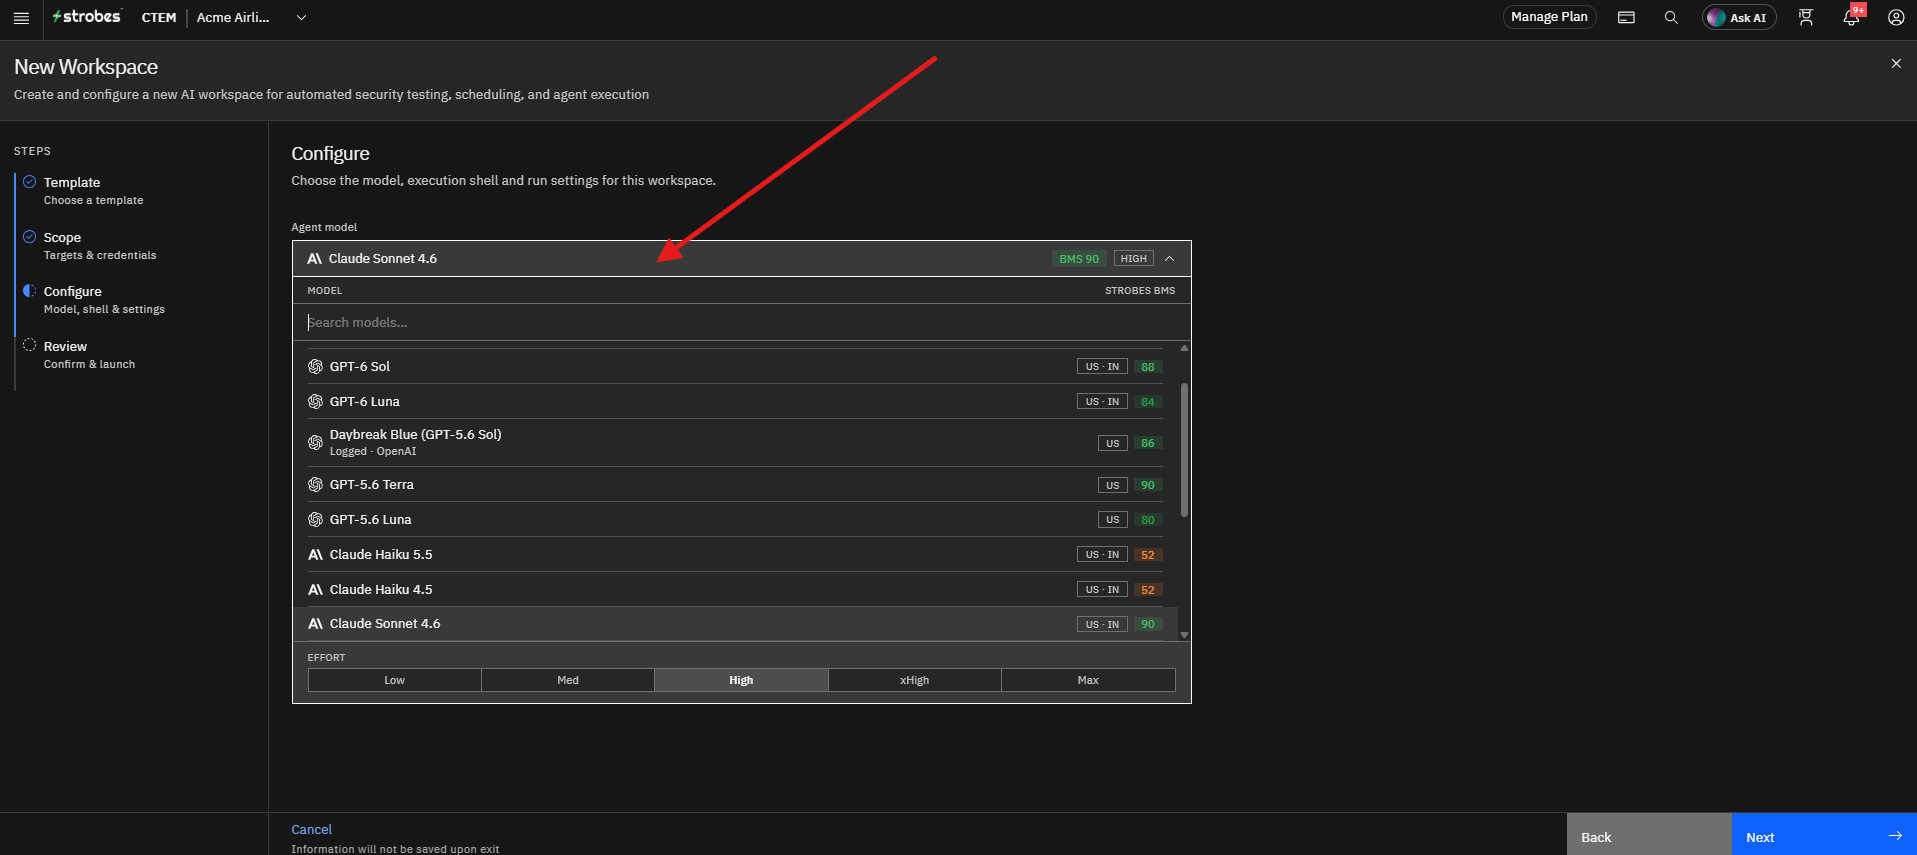
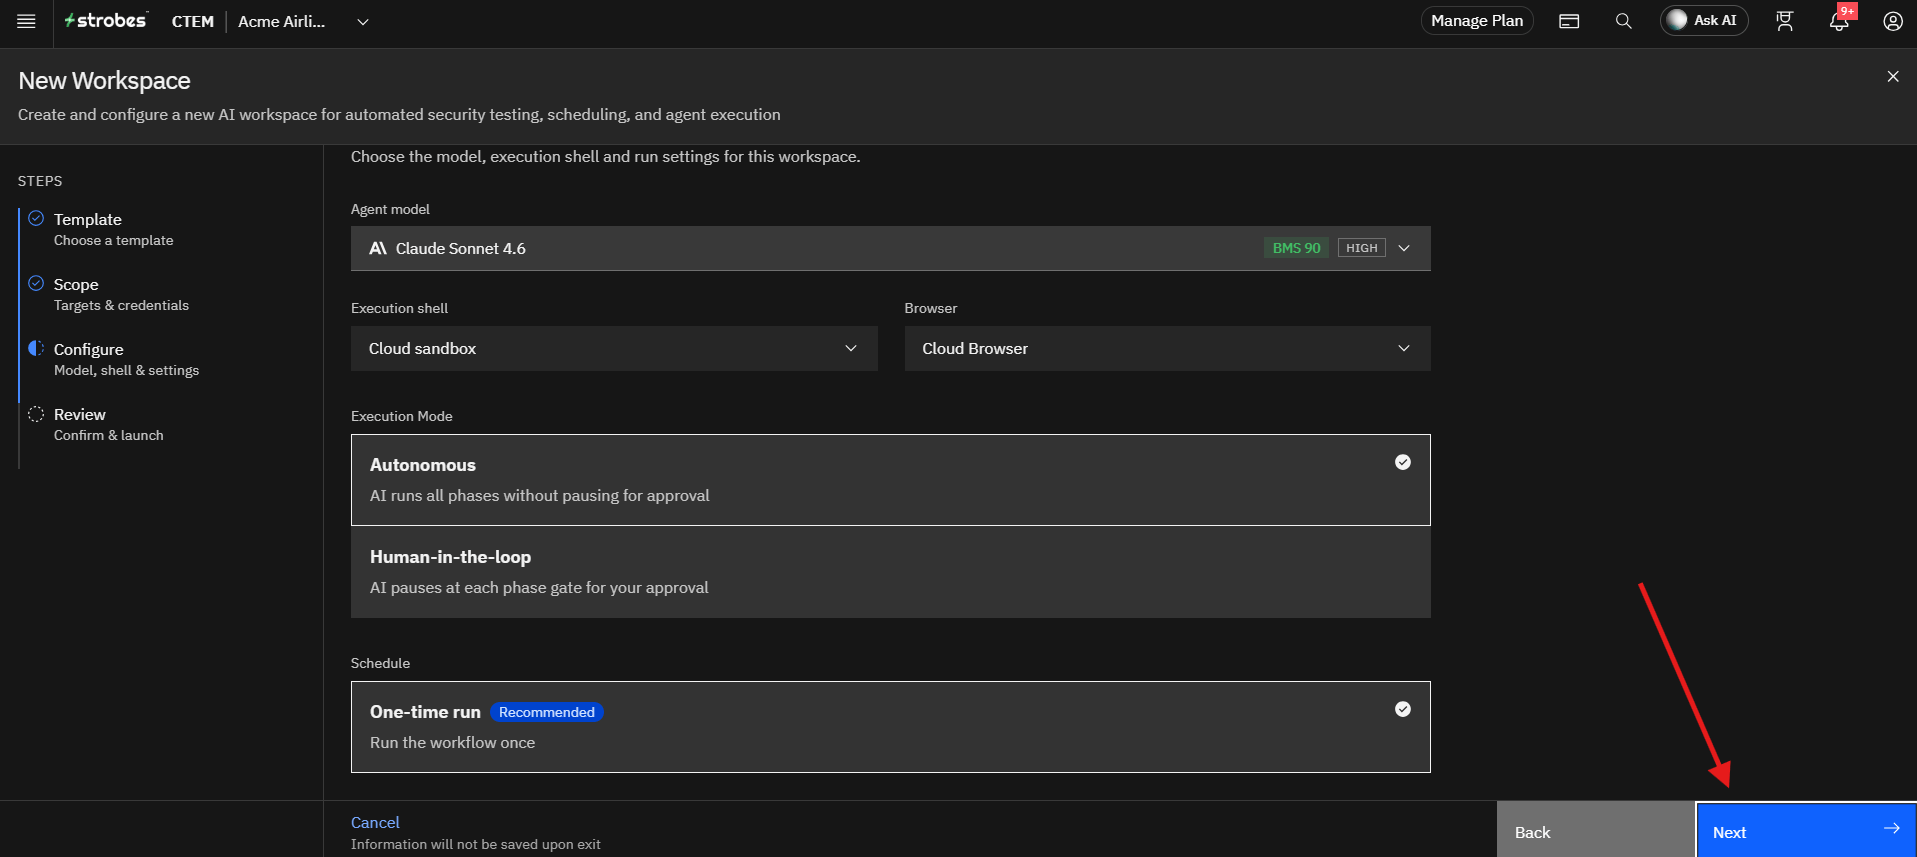
Step 8: Select an AI Model
The Agent model determines the Large Language Model (LLM) used during the assessment.
- Open the Agent model dropdown.
- Review the available models and their Strobes BMS scores.
- Select the model that best fits your requirements, or choose Smart Router to let Strobes pick the best model for each task.
Step 9: Review the Execution Shell and Browser
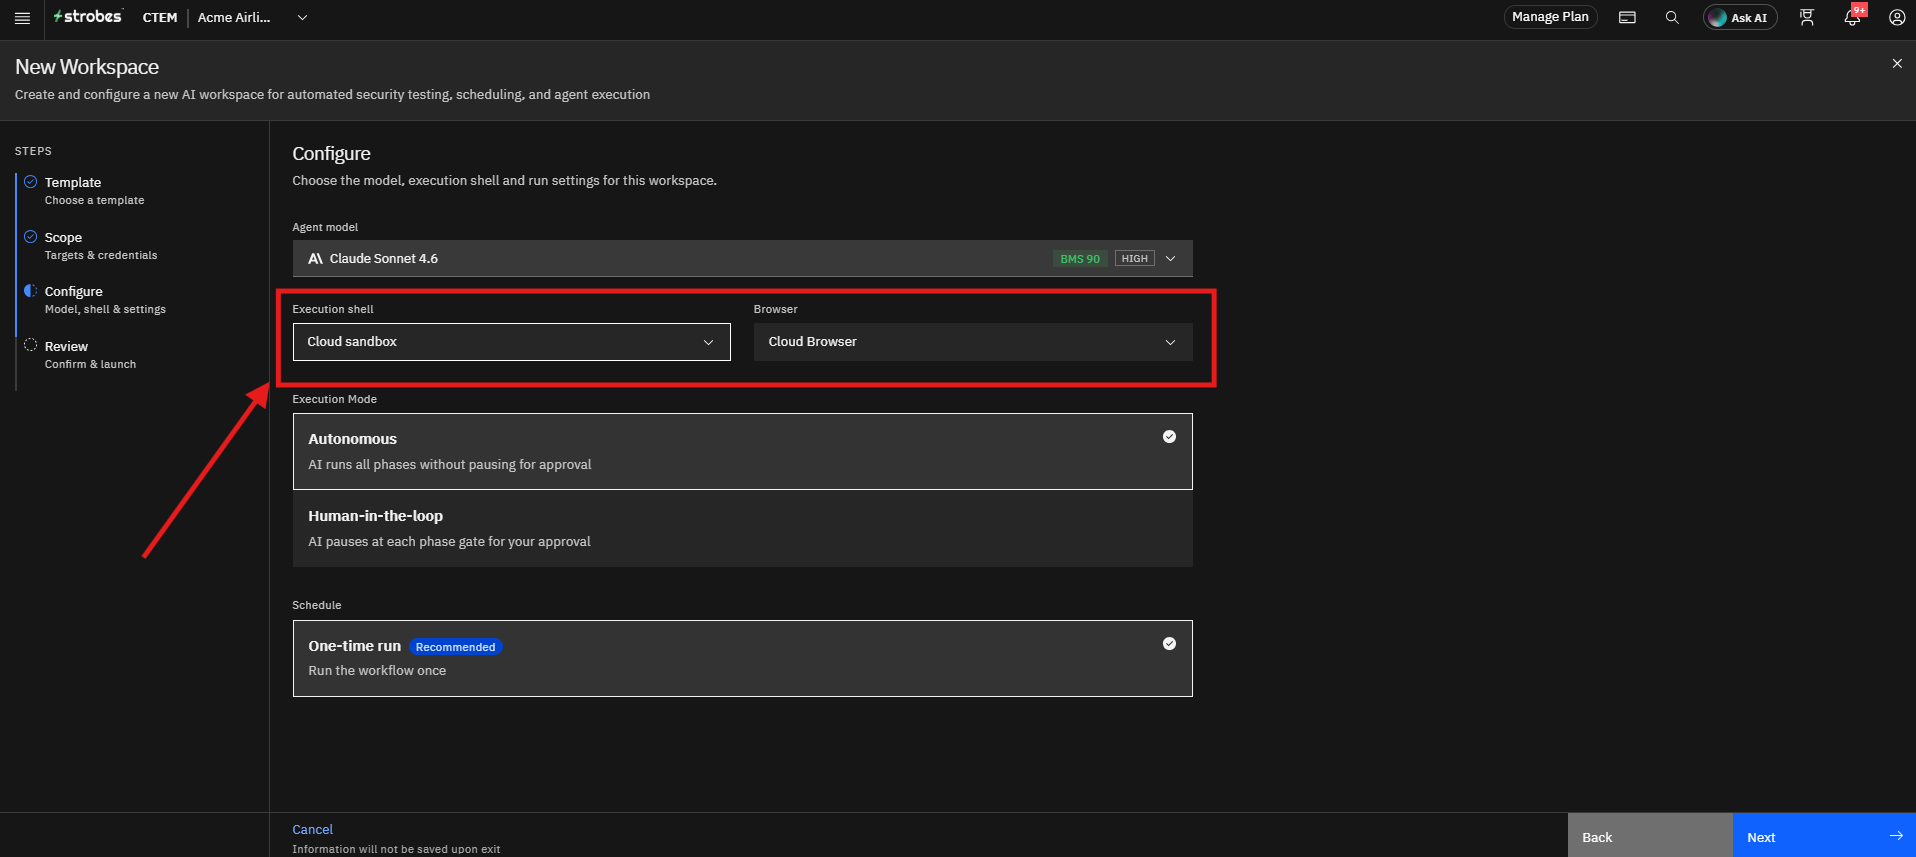
The Execution shell is Cloud sandbox and the Browser is Cloud Browser by default. Keep the defaults.
Step 10: Select the Execution Mode
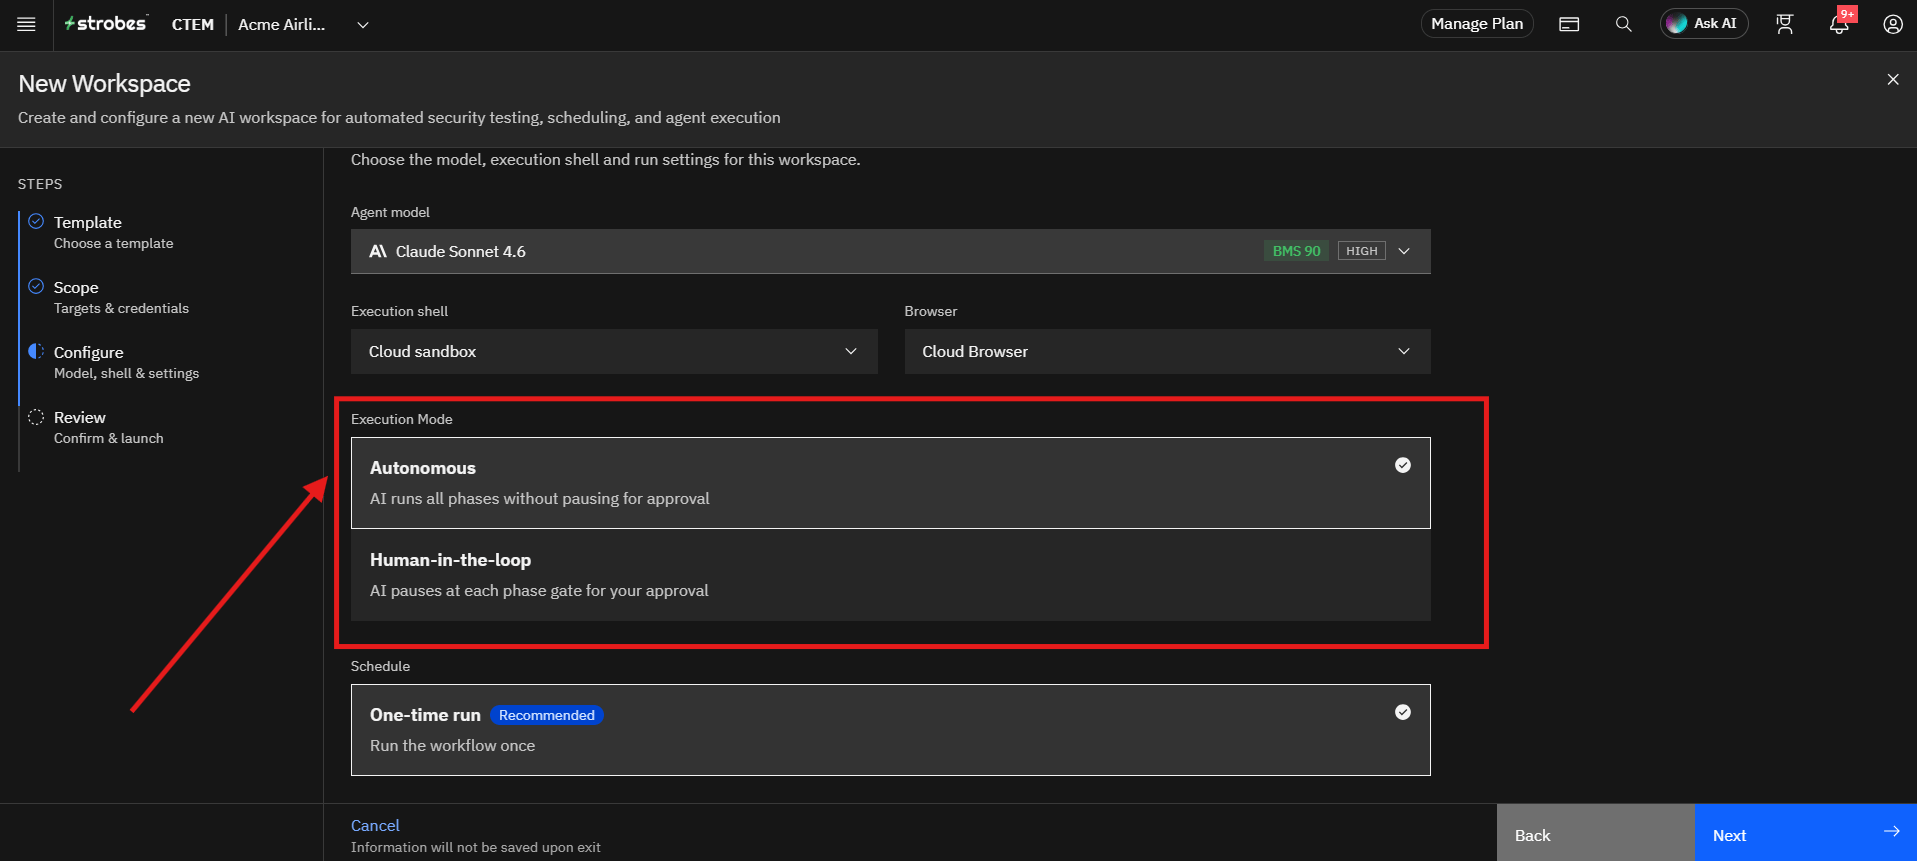
Choose how the AI runs the assessment. Autonomous is selected by default.
- Autonomous: The AI runs all phases without pausing for approval.
- Human-in-the-loop: The AI pauses at each phase gate and waits for your approval before continuing.
Step 11: Review the Schedule
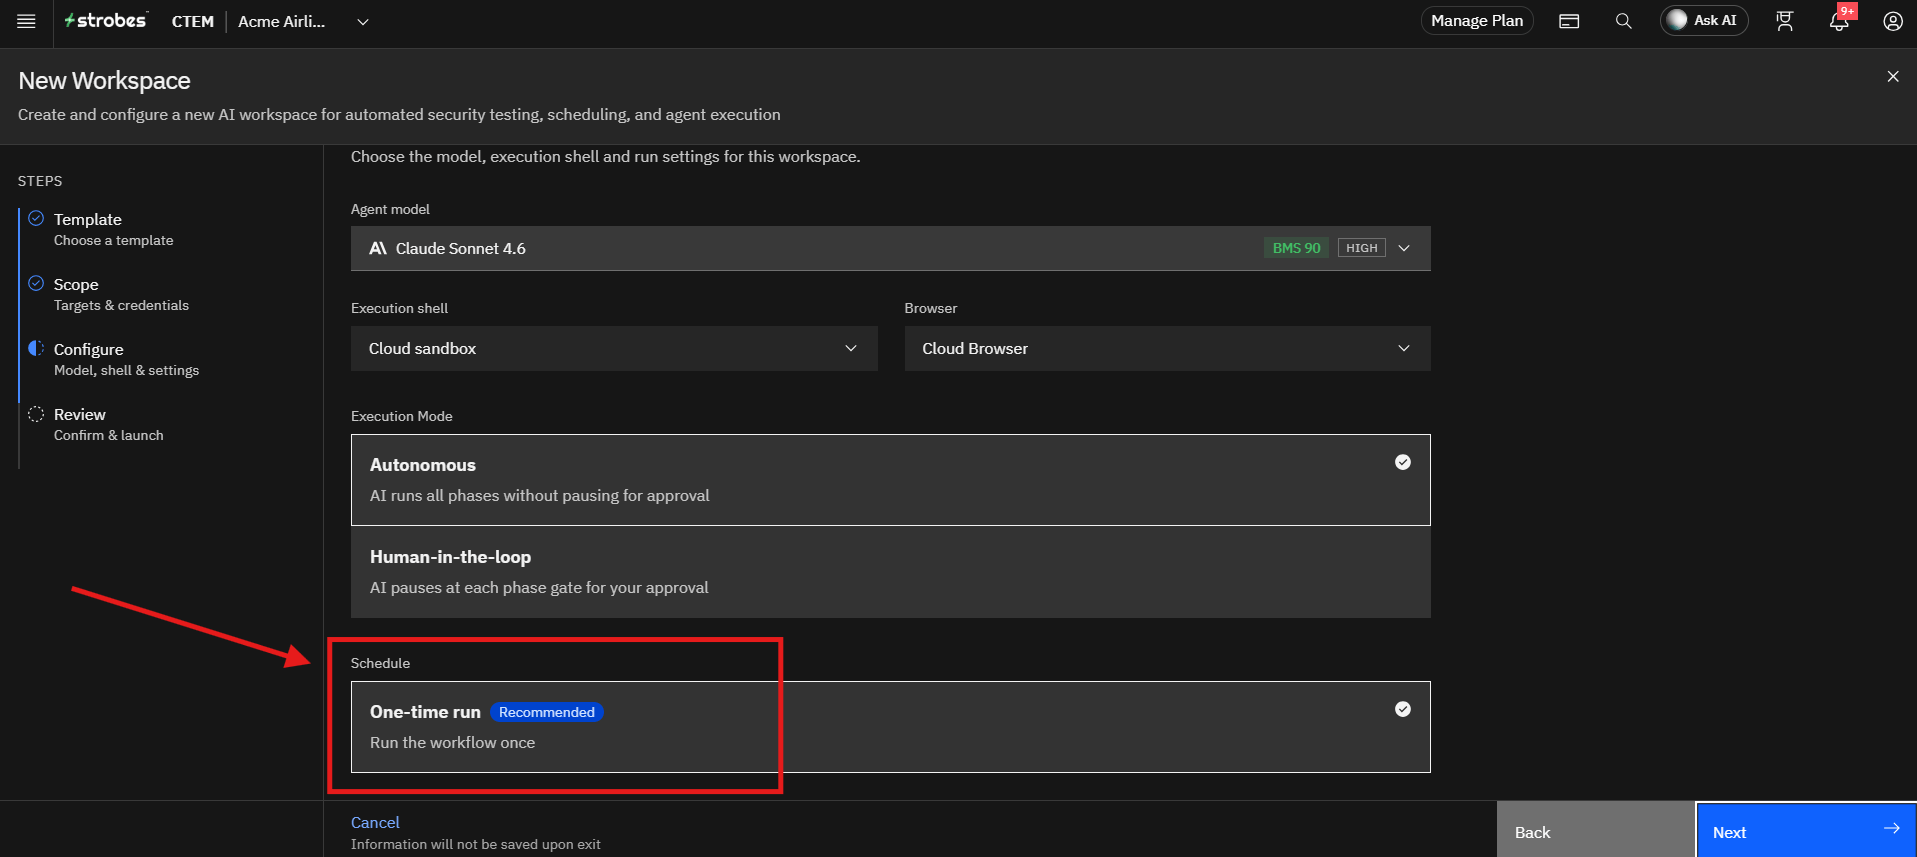
The workflow is set to One-time run by default, so it runs once.
Step 12: Click Next
Once all configuration settings have been verified, click Next. The wizard opens the Review page.
Step 13: Review and Launch the Workspace
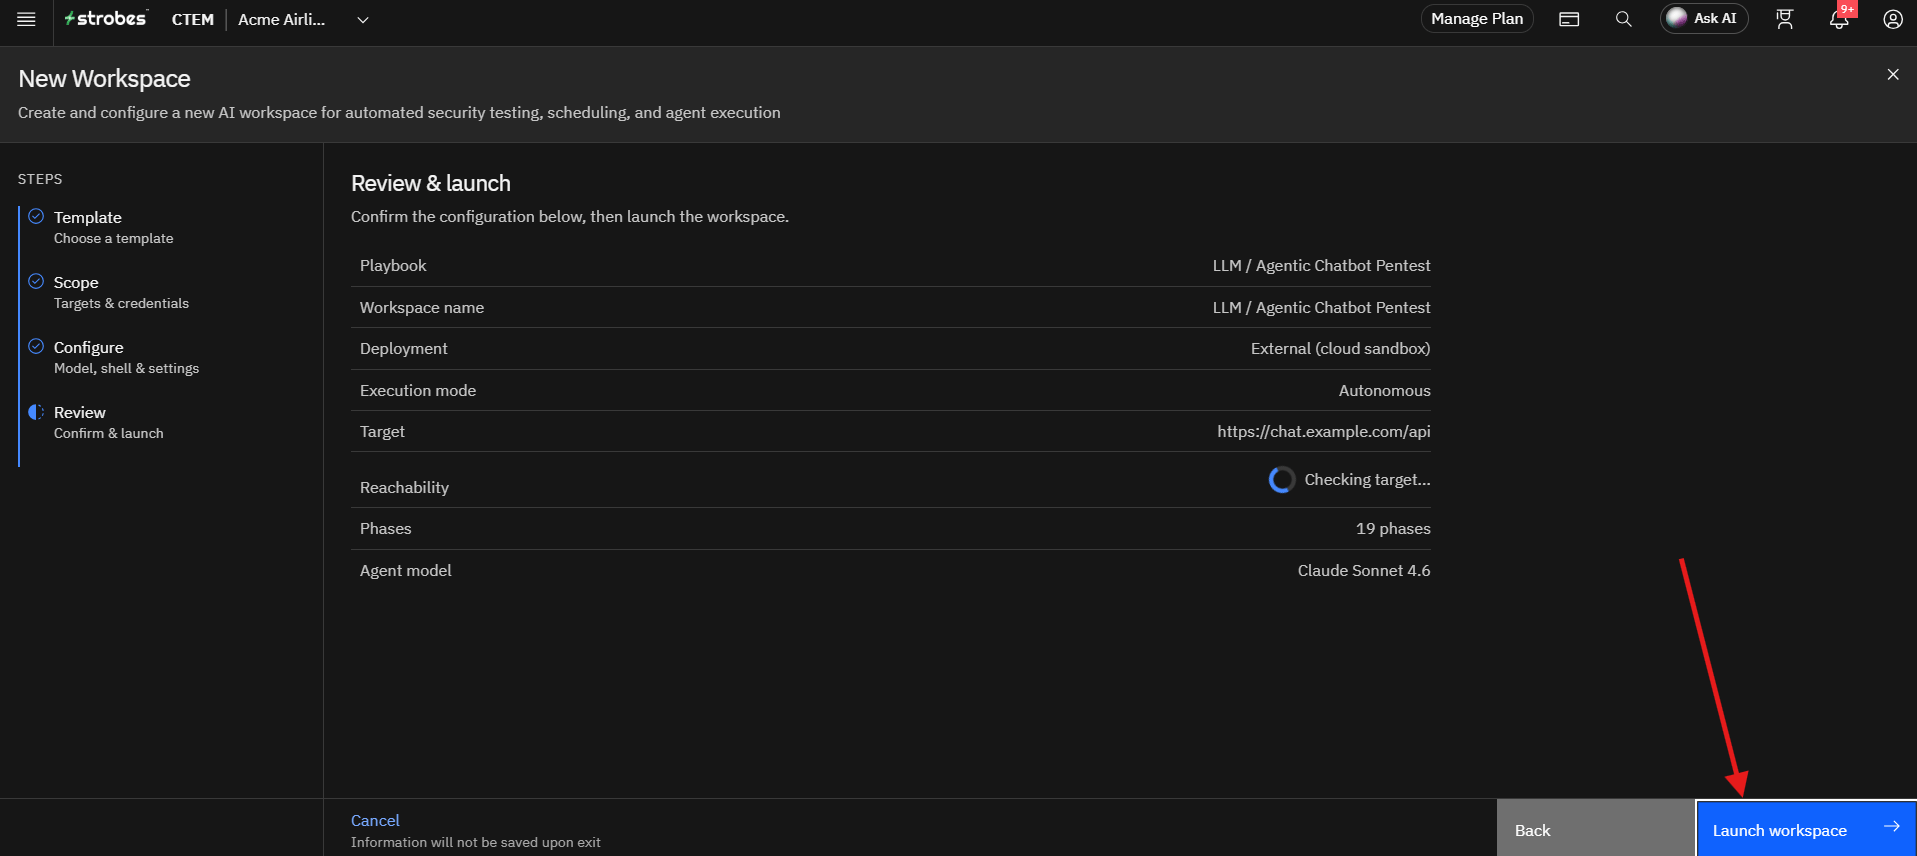
Review the configuration summary, including the playbook, workspace name, deployment, execution mode, target, phases, and agent model.
Strobes automatically checks whether the target is reachable. Once everything looks correct, click Launch workspace to start the assessment. When it completes, findings appear in Strobes linked to your assets, and the report is available in the workspace.
Tips
- Use a working request. Make sure the cURL request returns a normal response before you paste it, because Strobes replays and mutates it.
- Test a non-production chatbot where possible. The agent sends many probes and may trigger tool actions.
- Use Human-in-the-loop if the chatbot is connected to tools or systems that can take real actions, so you can approve each phase.
- Use Custom Instructions to focus the test on specific attack classes, such as prompt injection.
- The Target Chatbot URL and Working Request are required.
- Only test chatbots you are authorized to test.
More in Workspace configuration
- Running a Code Remediation Campaign using Strobes AI
- Running a Red Team Engagement using Strobes AI
- Running AWS Cloud Security Review using Strobes AI
- Running Mobile App Pentest (Android) using Strobes AI
- Running Azure Cloud Security Review using Strobes AI
- Running External Network Pentest using Strobes AI
Was this page helpful?