
Running Azure Cloud Security Review using Strobes AI
4 min readEdit
On this page⌄
- Overview
- Why Is It Needed?
- Workflow Phases
- Prerequisites
- Accessing the Azure Cloud Security Review Template
- Review the template details
- Configuring the Cloud Account Scope
- Step 1: Provide a Workspace Name
- Step 2: Select the Azure Cloud Account
- Step 3: Select the Scope
- Step 4: Add Other Credentials (Optional)
- Proceeding to Configuration
- Step 5: Select an AI Model
- Step 6: Review the Execution Shell and Browser
- Step 7: Select the Execution Mode
- Step 8: Review the Schedule
- Step 9: Continue to Review and Launch
- Step 10: Review and Launch the Workspace
- Tips
Overview
An Azure Cloud Security Review in Strobes helps identify security misconfigurations and risks in your Azure environment. An AI agent runs the Strobes Cloud Security Posture Management (CSPM) scan, which is powered by Prowler, triages the findings, discovers additional issues, validates them, and produces a report with rule-based attack paths, evidence, and remediation guidance.
Why Is It Needed?
Cloud environments change constantly, and a single misconfiguration can expose data or services. Reviewing your Azure subscriptions regularly helps you find and fix these gaps early. The review starts from a CSPM scan, so results are reproducible. Because the agent triages and validates findings before reporting them, your team spends time on genuine issues instead of noise.
Workflow Phases
Phase | Name | What it does |
|---|---|---|
1 | Workspace Setup | Prepares the workspace and connects your Azure account. |
2 | Strobes CSPM Scan | Runs the Strobes CSPM (Prowler) scan against your Azure account. |
3 | Triage Findings | Triages the findings ingested from the scan. |
4 | Prove Tier 1 | Proves the highest-priority findings. |
5 | Validate | Validates the findings before they are reported. |
6 | Report | Produces the final report, with rule-based attack paths. |
Best for: Regular security reviews of Azure subscriptions, pre-audit checks, and validating your cloud configuration after major changes.
Prerequisites
Before you start, make sure you have:
- Access to Strobes AI Workspaces in your organization.
- Enough AI credits. Each run uses AI credits.
- A read-only Azure account (credential) for the CSPM scan. You can connect your Azure account while creating the workspace or use a saved credential.
- Authorization to review the Azure environment.
Note: The review uses a read-only Azure account, so it only reads your configuration and never changes your resources.
Accessing the Azure Cloud Security Review Template
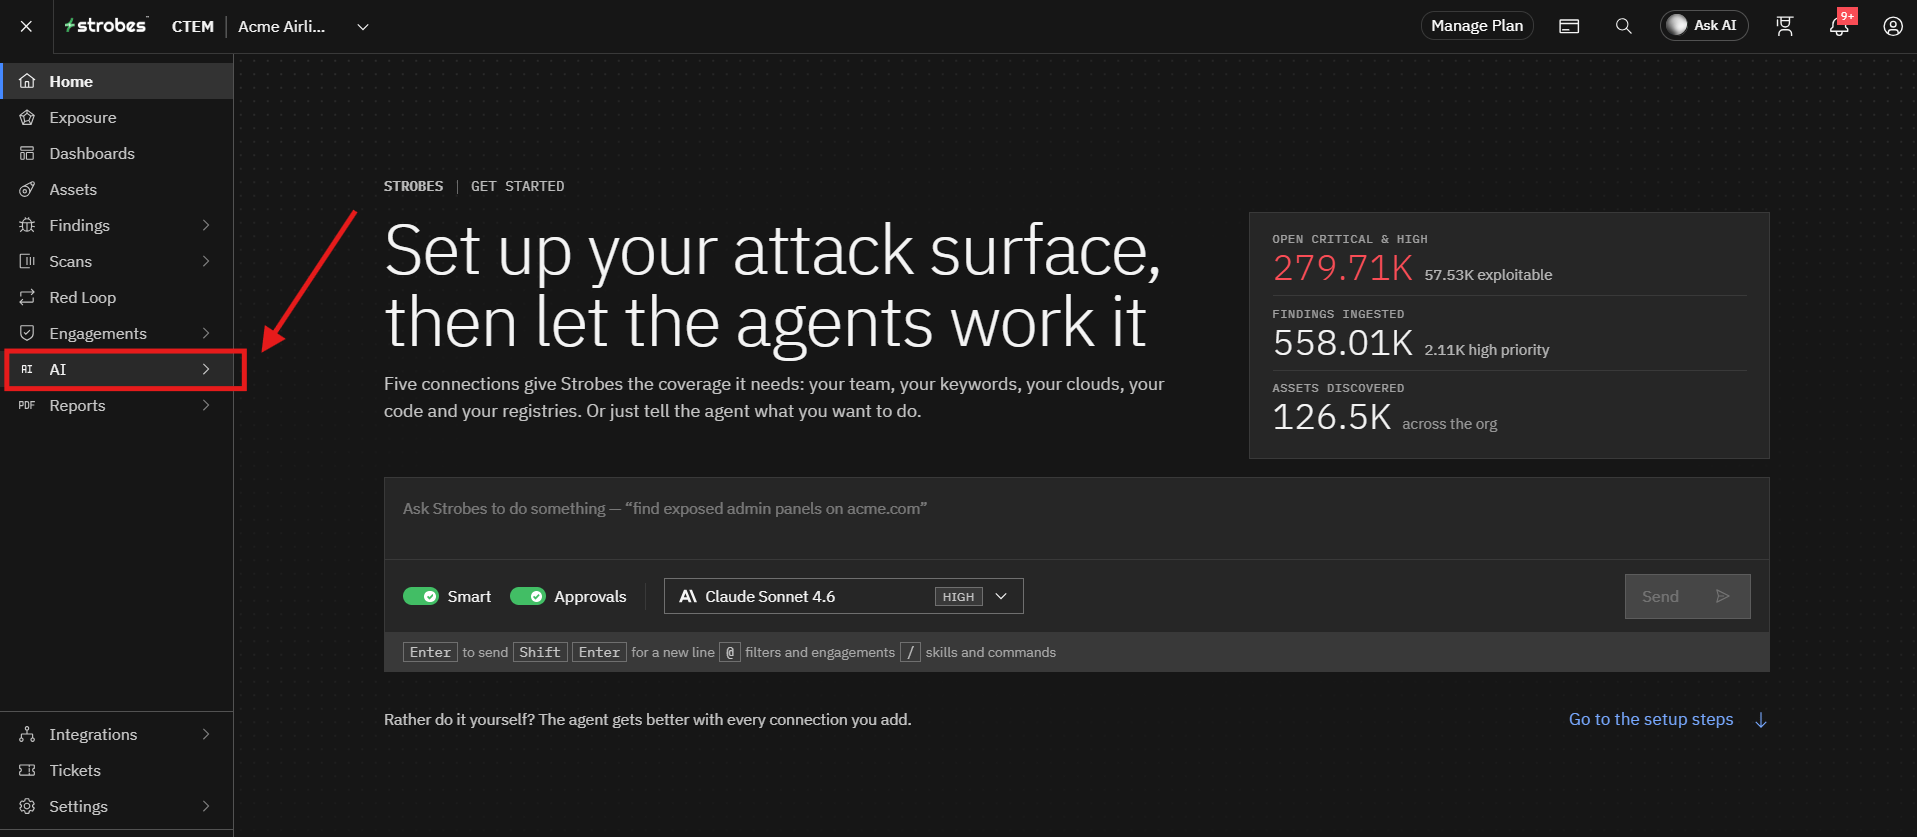
- Navigate to AI from the main navigation menu.
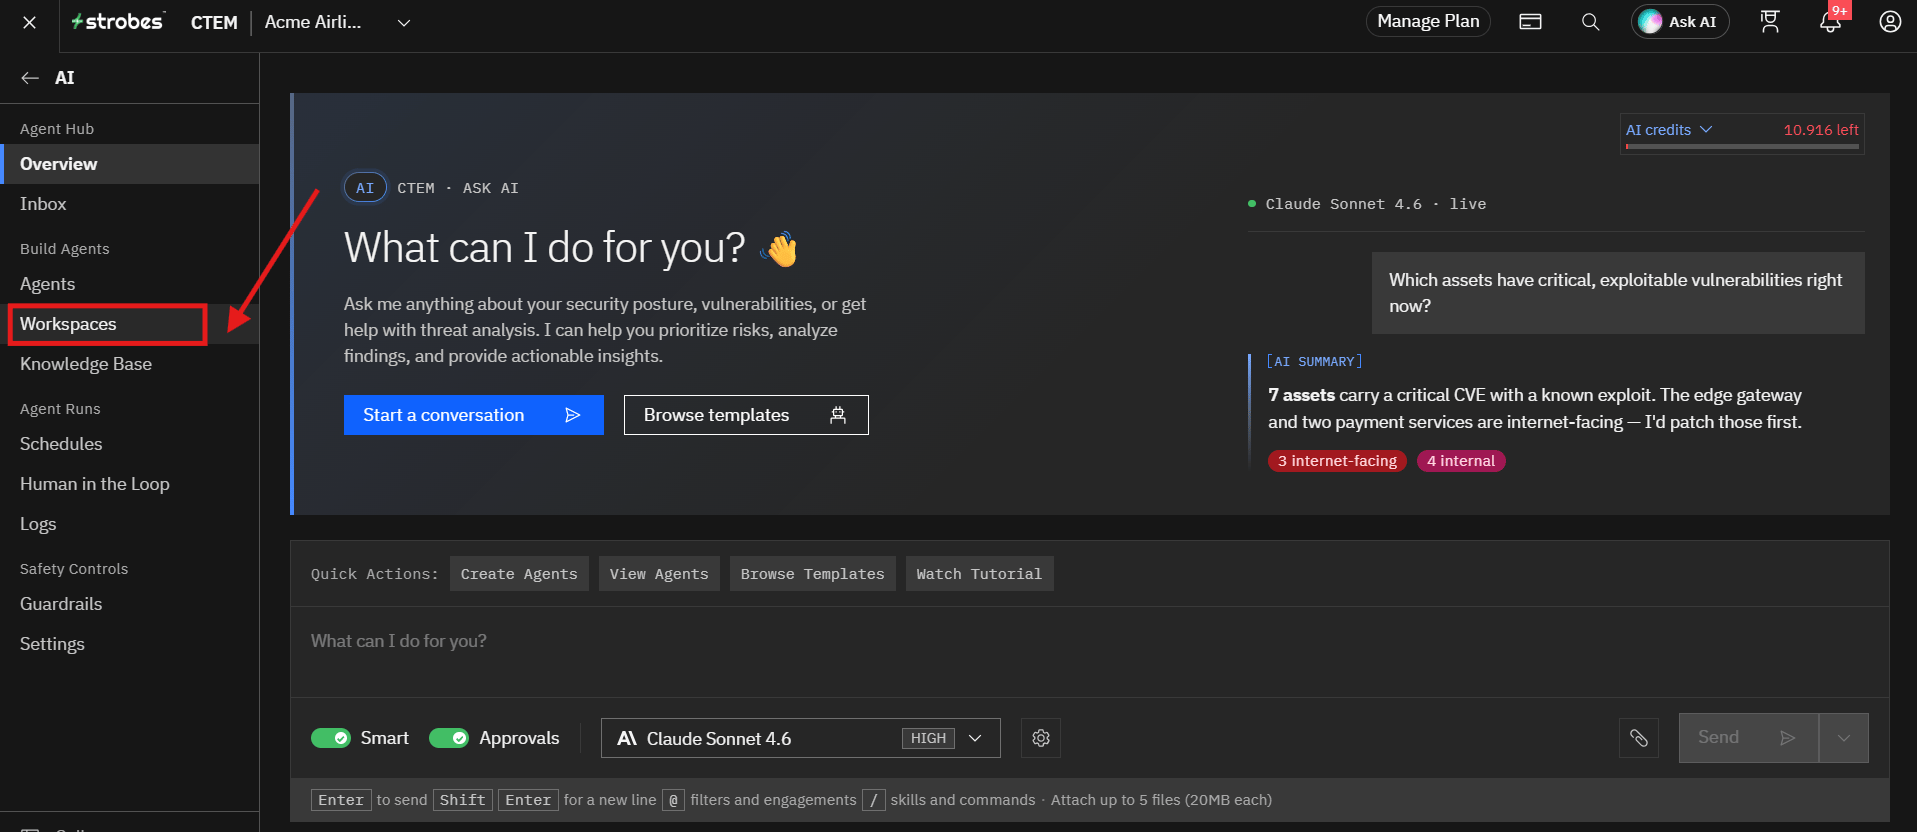
- Open the Workspaces page.
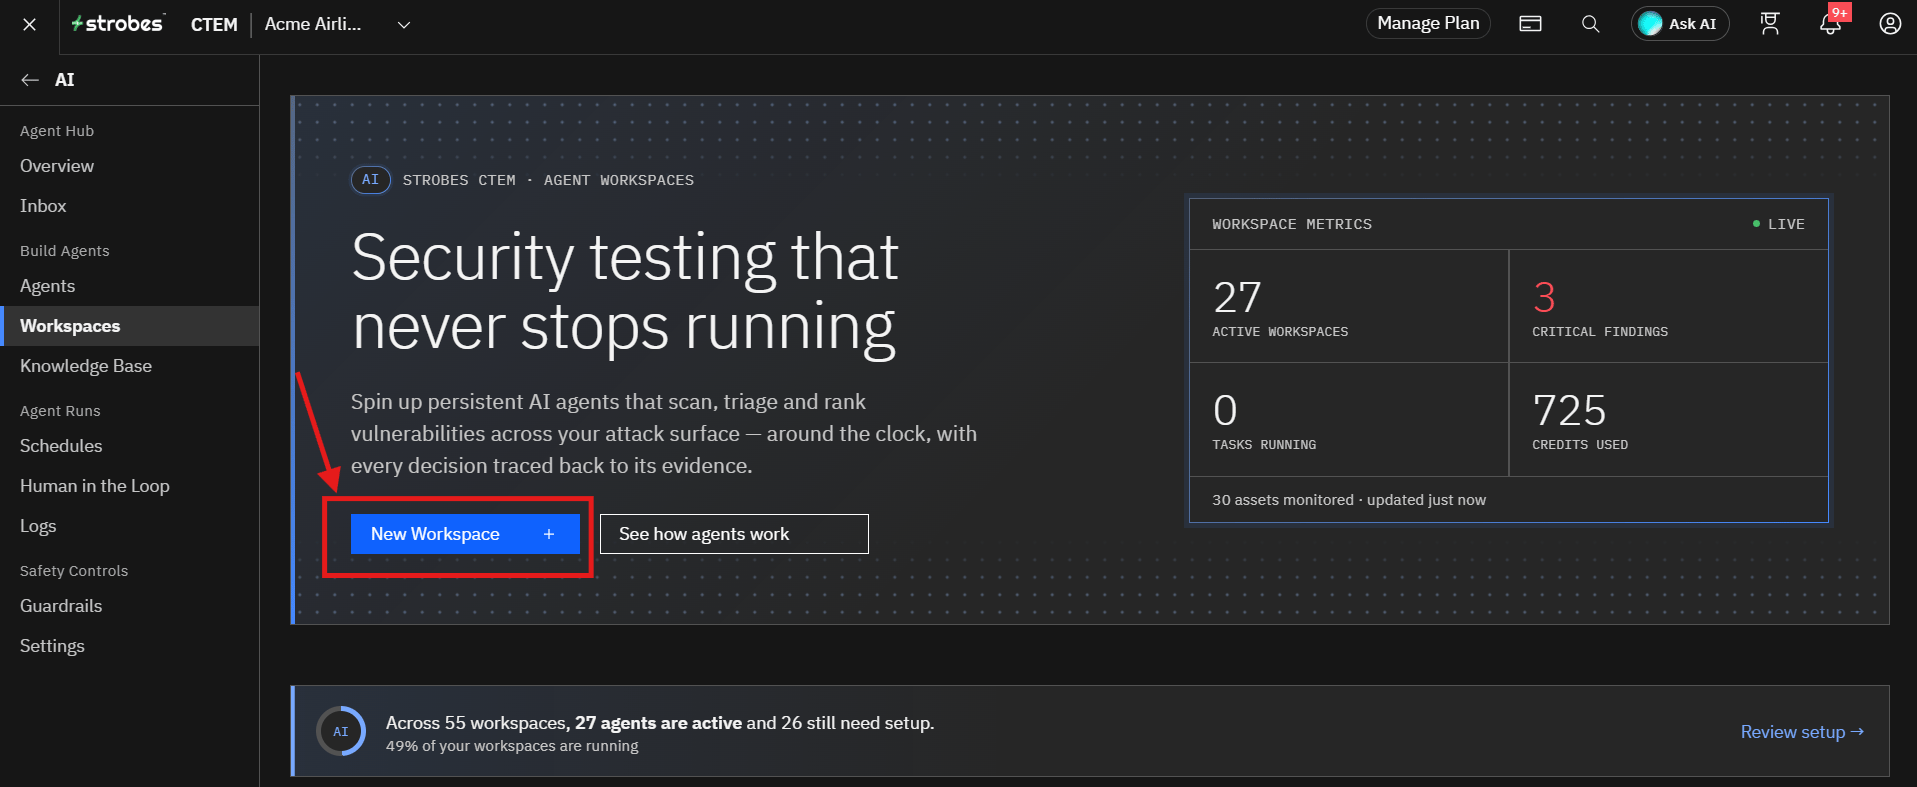
- Click New Workspace.
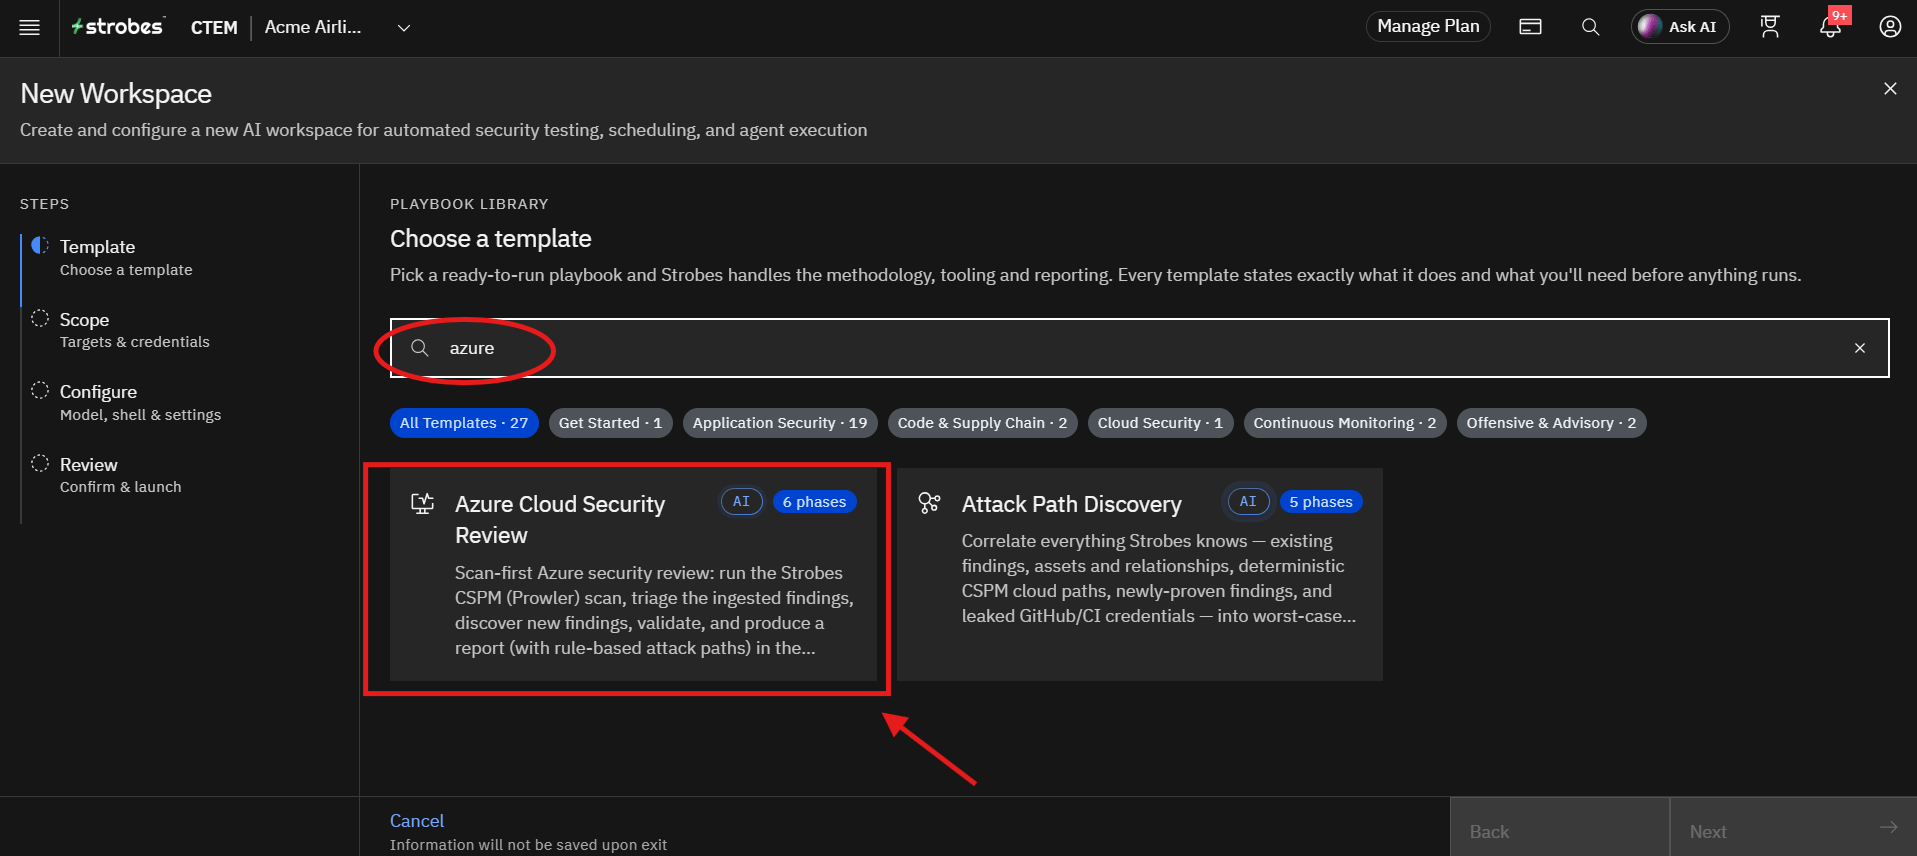
- In the Playbook Library, search for
azureand select the Azure Cloud Security Review template.
Review the template details
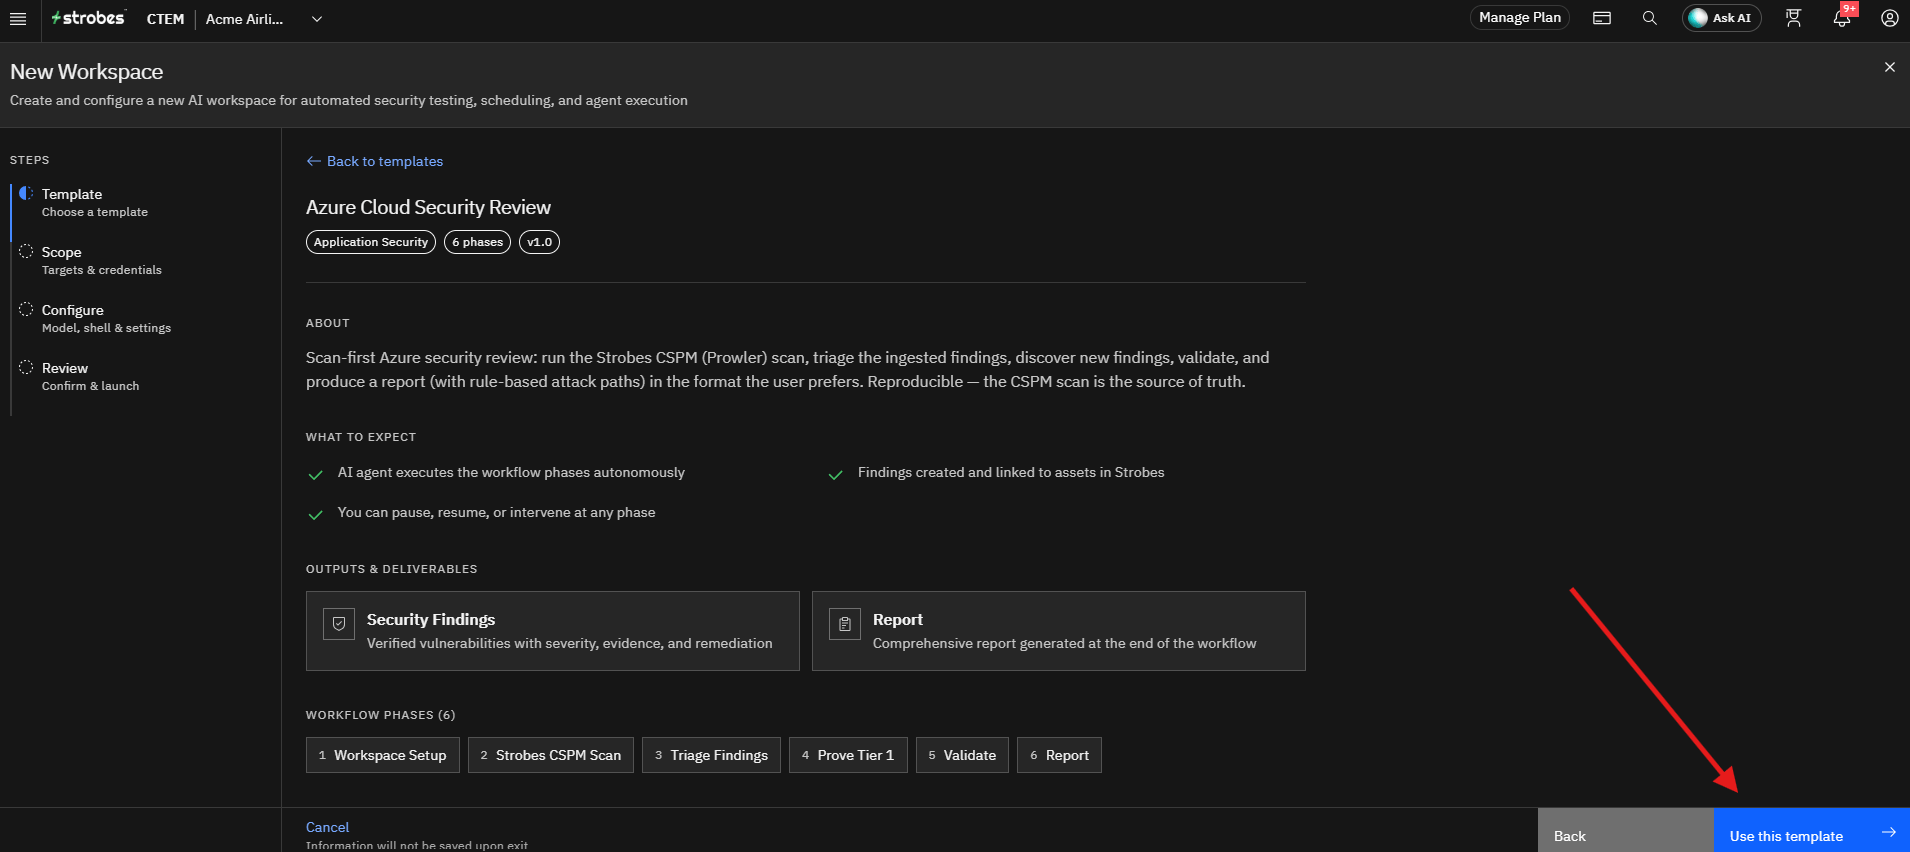
Selecting the template opens its details page, which shows:
- Tags: The category, number of phases, and version.
- About: What the template does.
- What to expect: The AI agent executes the workflow phases autonomously, findings are created and linked to assets in Strobes, and you can pause, resume, or intervene at any phase.
- Outputs & deliverables: Security Findings and a Report.
- Workflow phases: Workspace Setup, Strobes CSPM Scan, Triage Findings, Prove Tier 1, Validate, and Report.
To continue, select Use this template. To choose a different template, select Back or Back to templates.
- Click Use this template.
Configuring the Cloud Account Scope
After selecting the template, the wizard automatically moves to the Scope step.
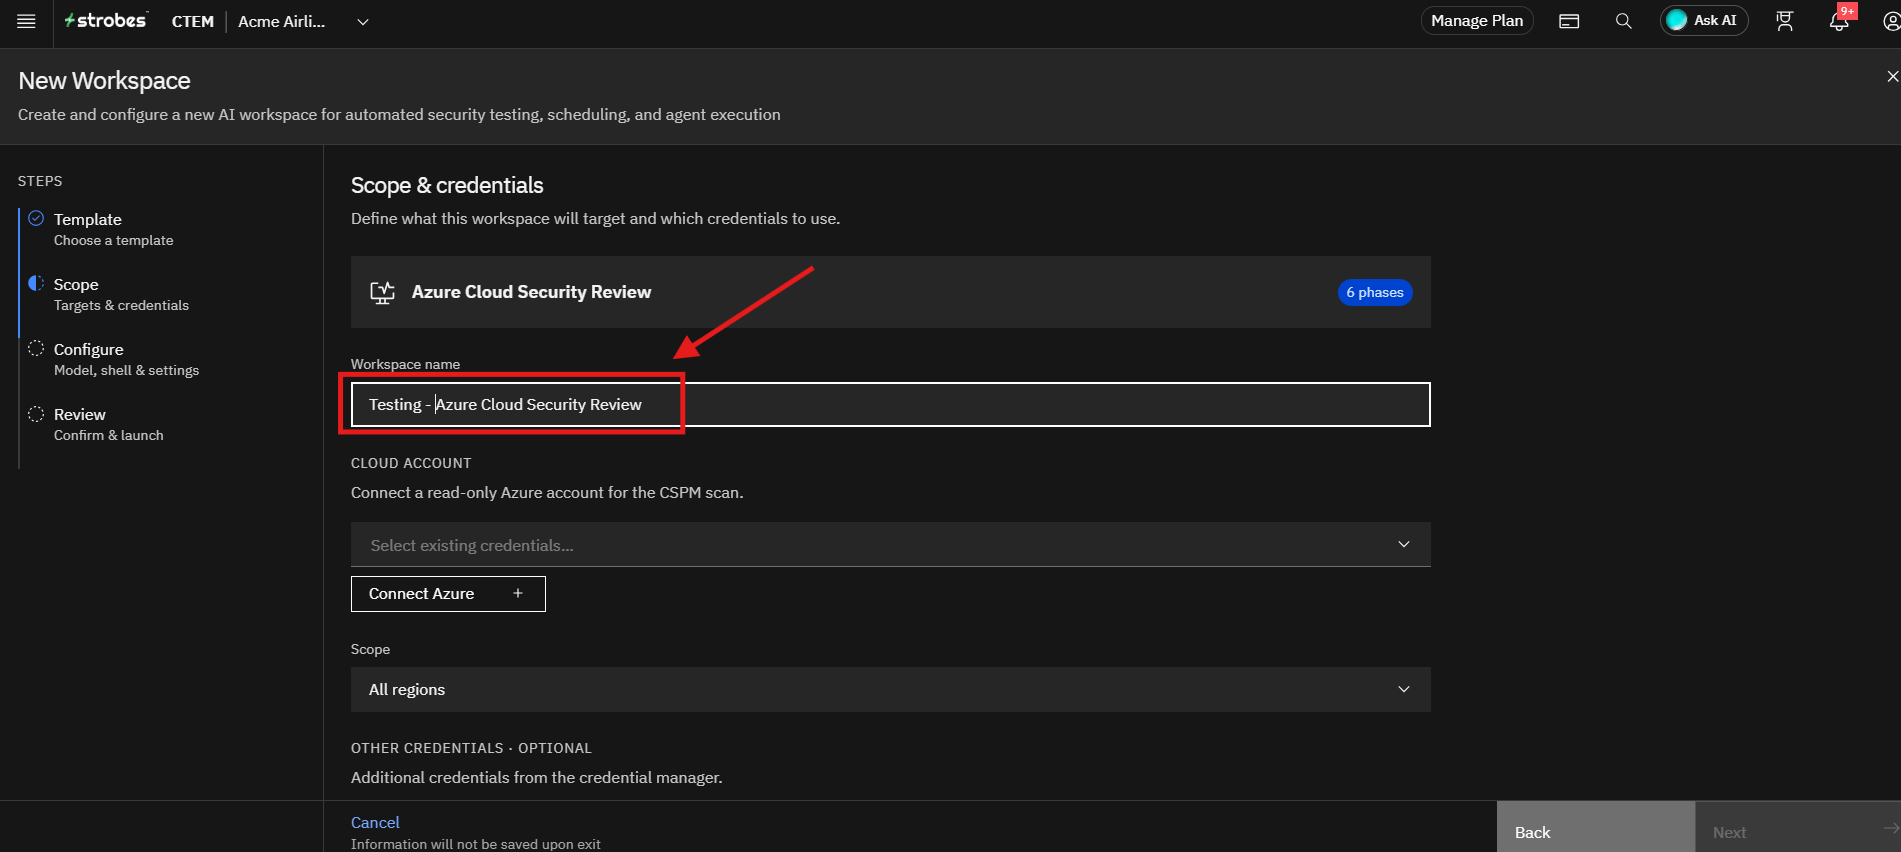
Step 1: Provide a Workspace Name
The Workspace name is pre-filled with the template name. Enter a more meaningful name for the assessment if you want, such as the name of the subscription or environment.
Step 2: Select the Azure Cloud Account
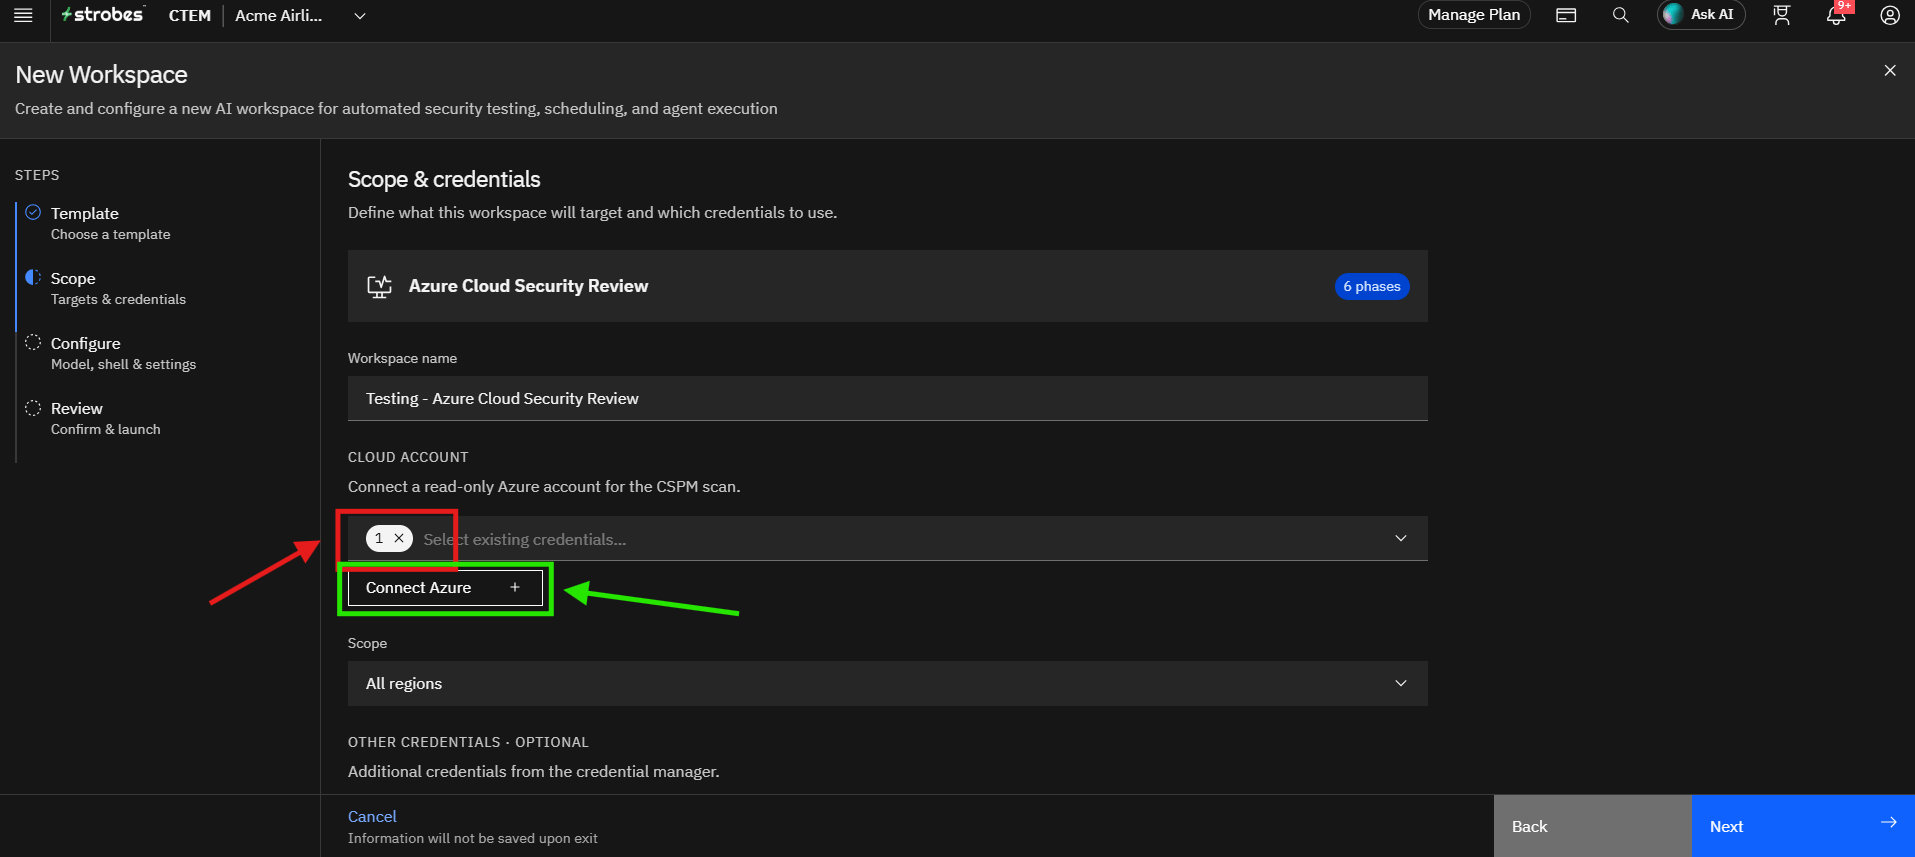
Under Cloud Account, open the Select existing credentials dropdown and select the read-only Azure credential to use for the CSPM scan. You can select more than one credential.
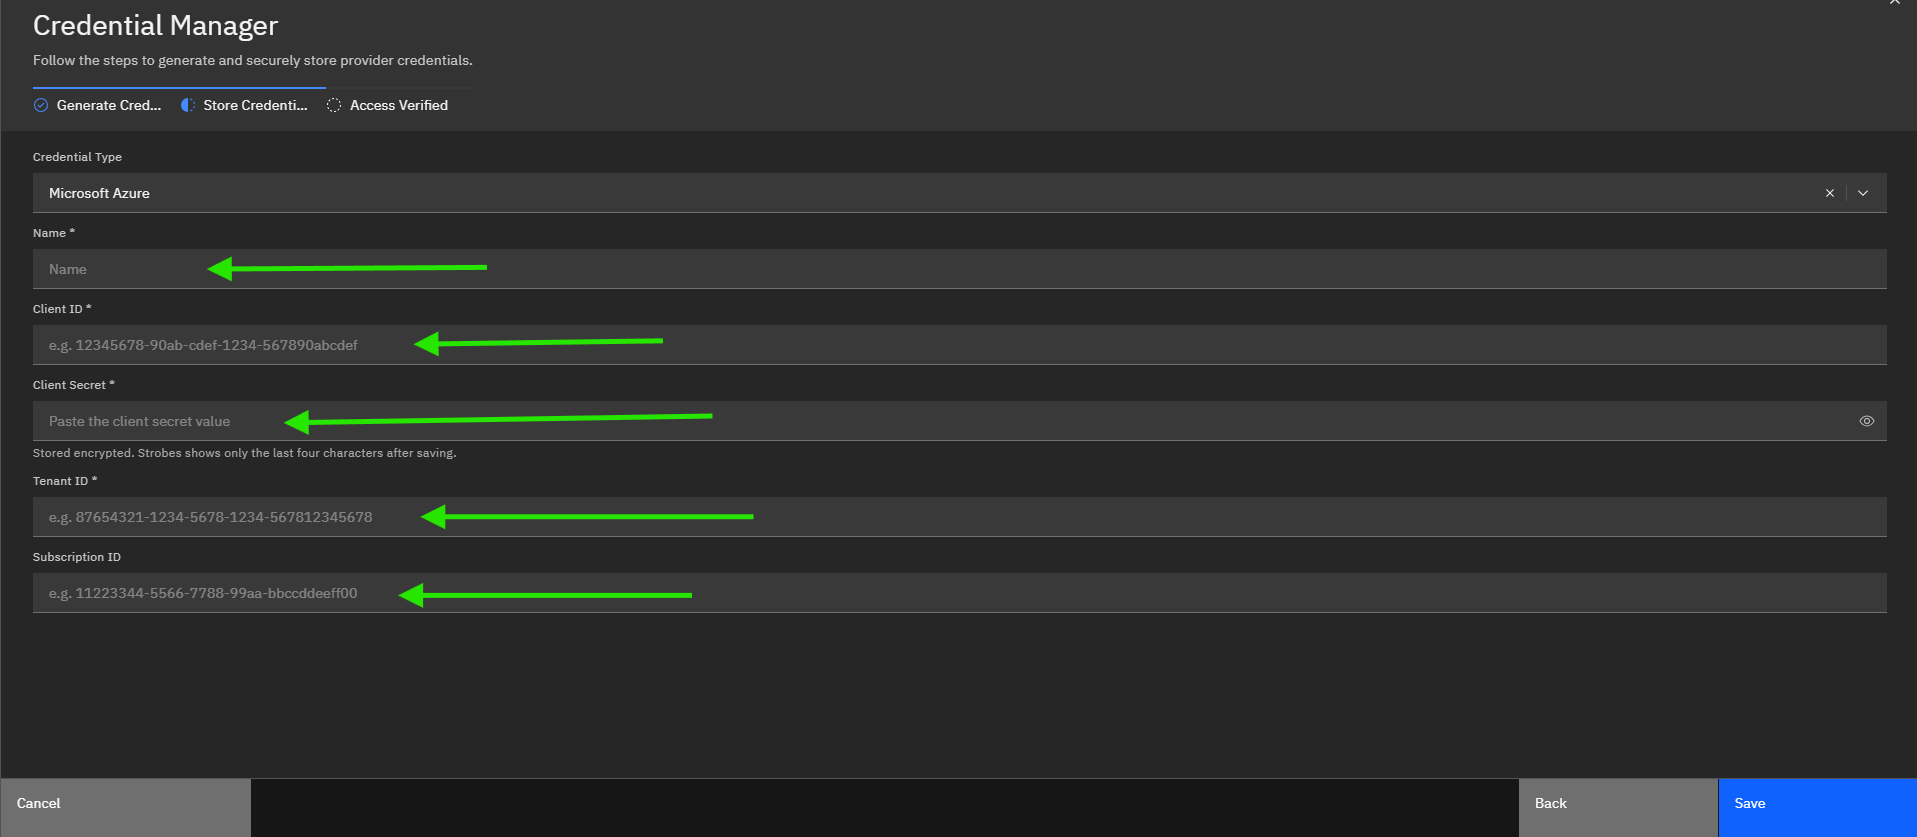
If you do not have a saved credential, click Connect Azure to add one.
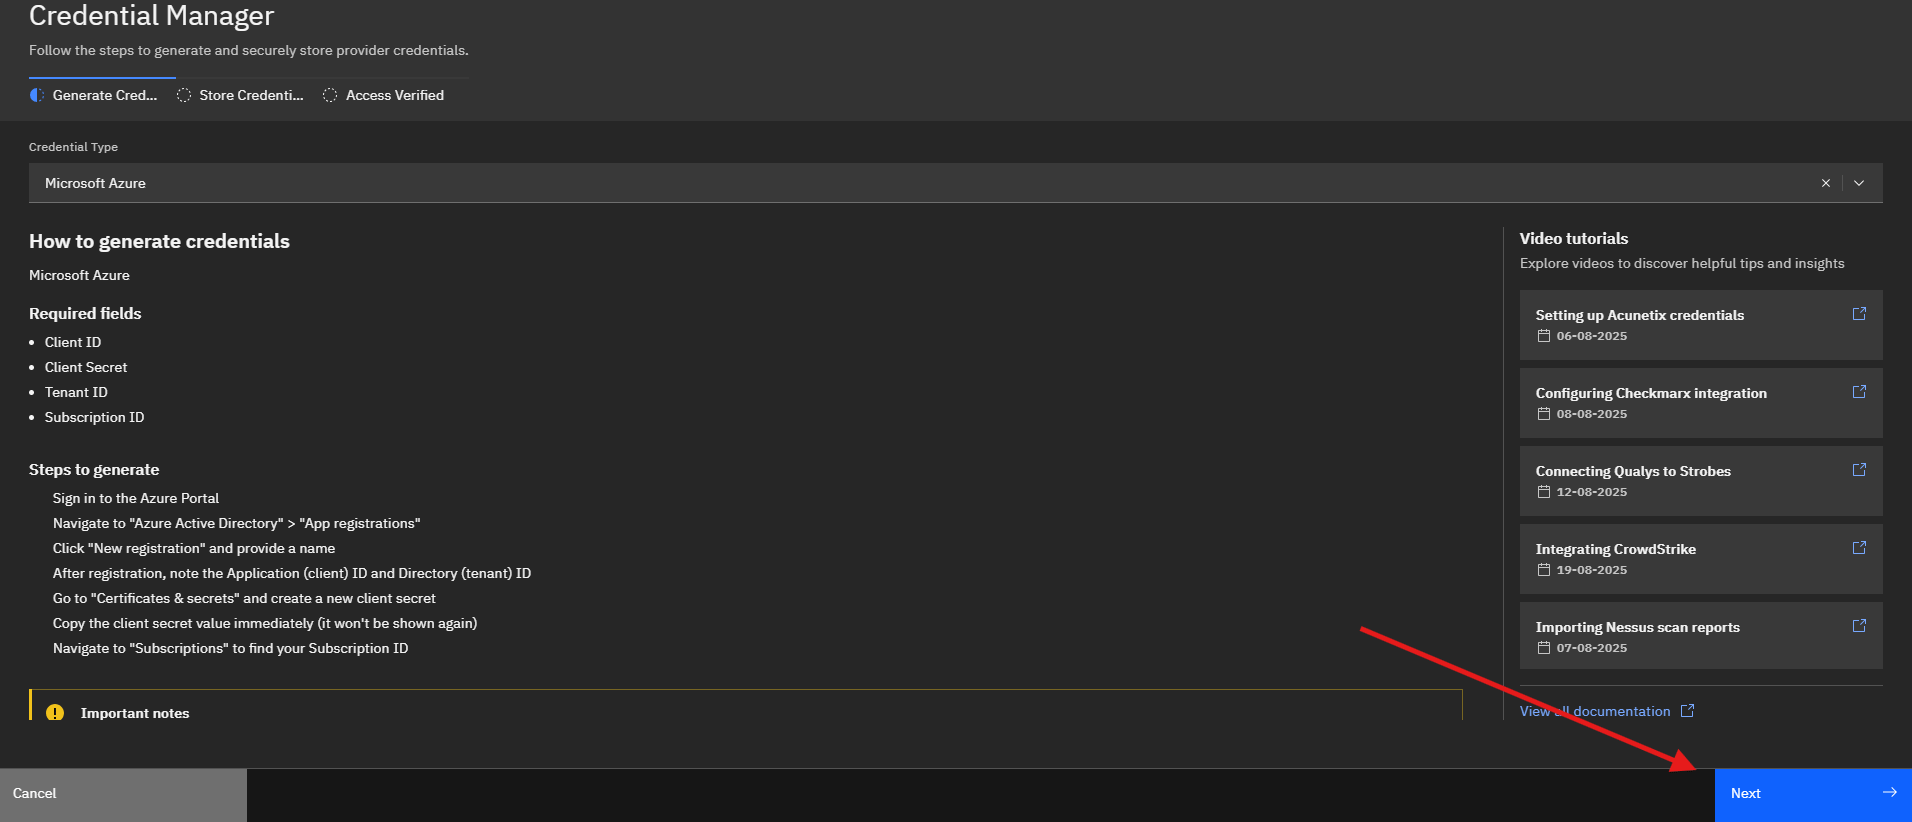
To create the Azure credential follow the below 2 steps and enter the required details from Azure.
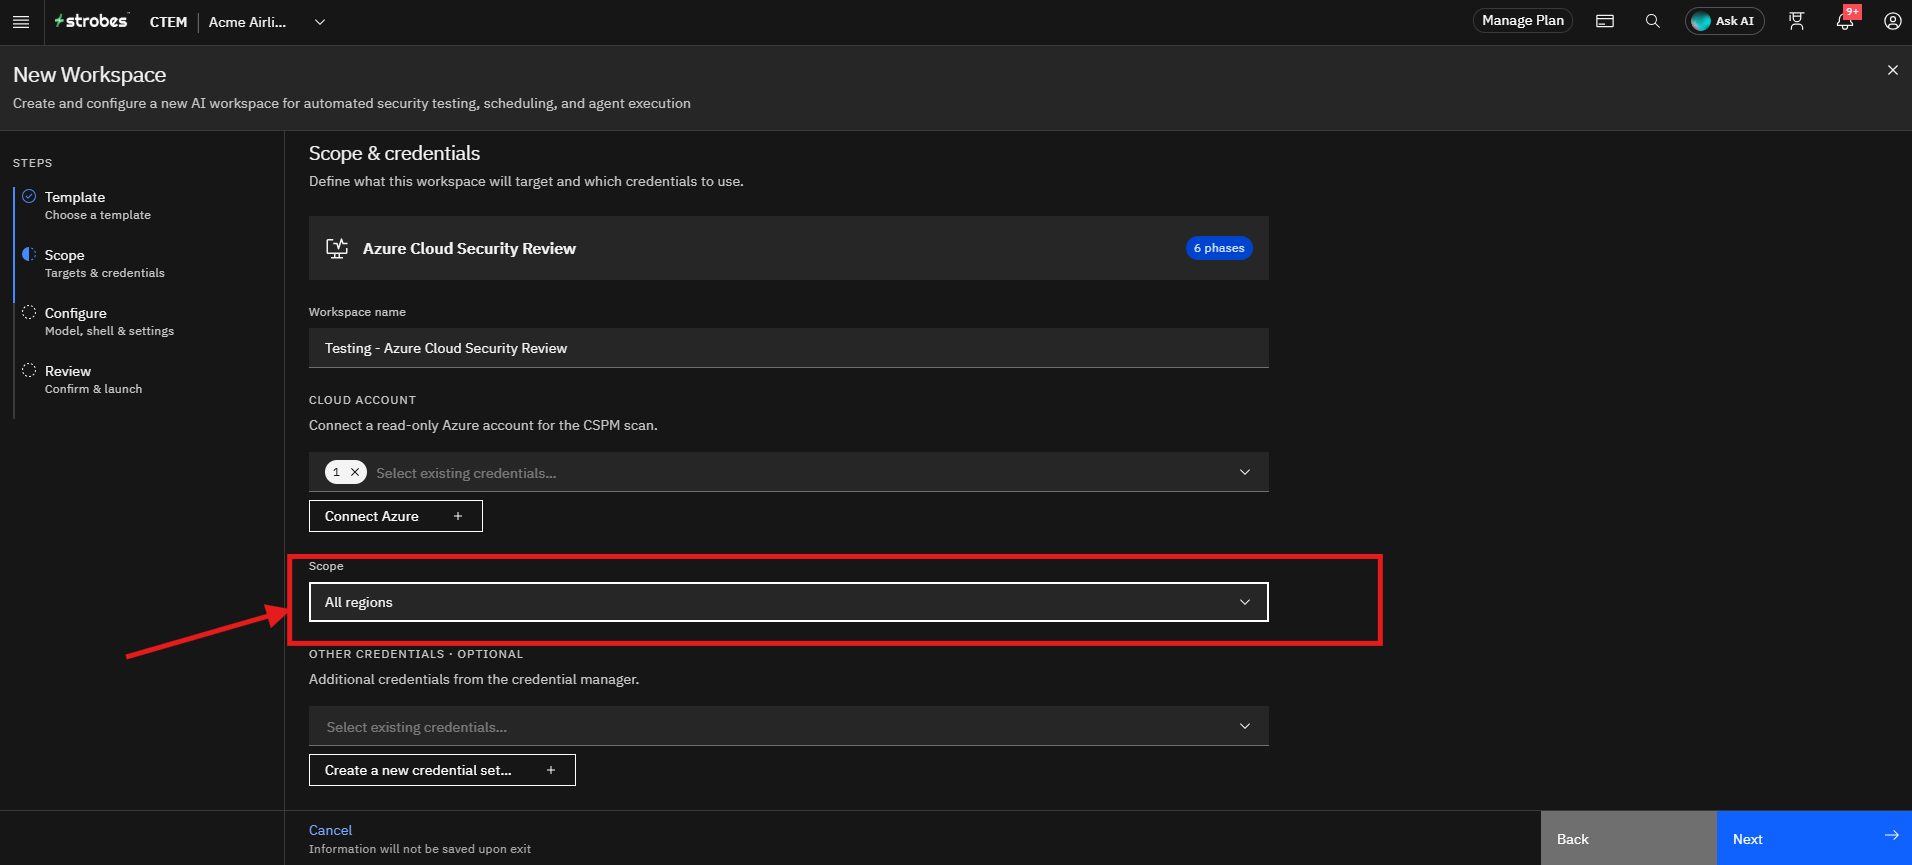
Step 3: Select the Scope
In the Scope dropdown, choose which Azure regions to review. All regions is selected by default.
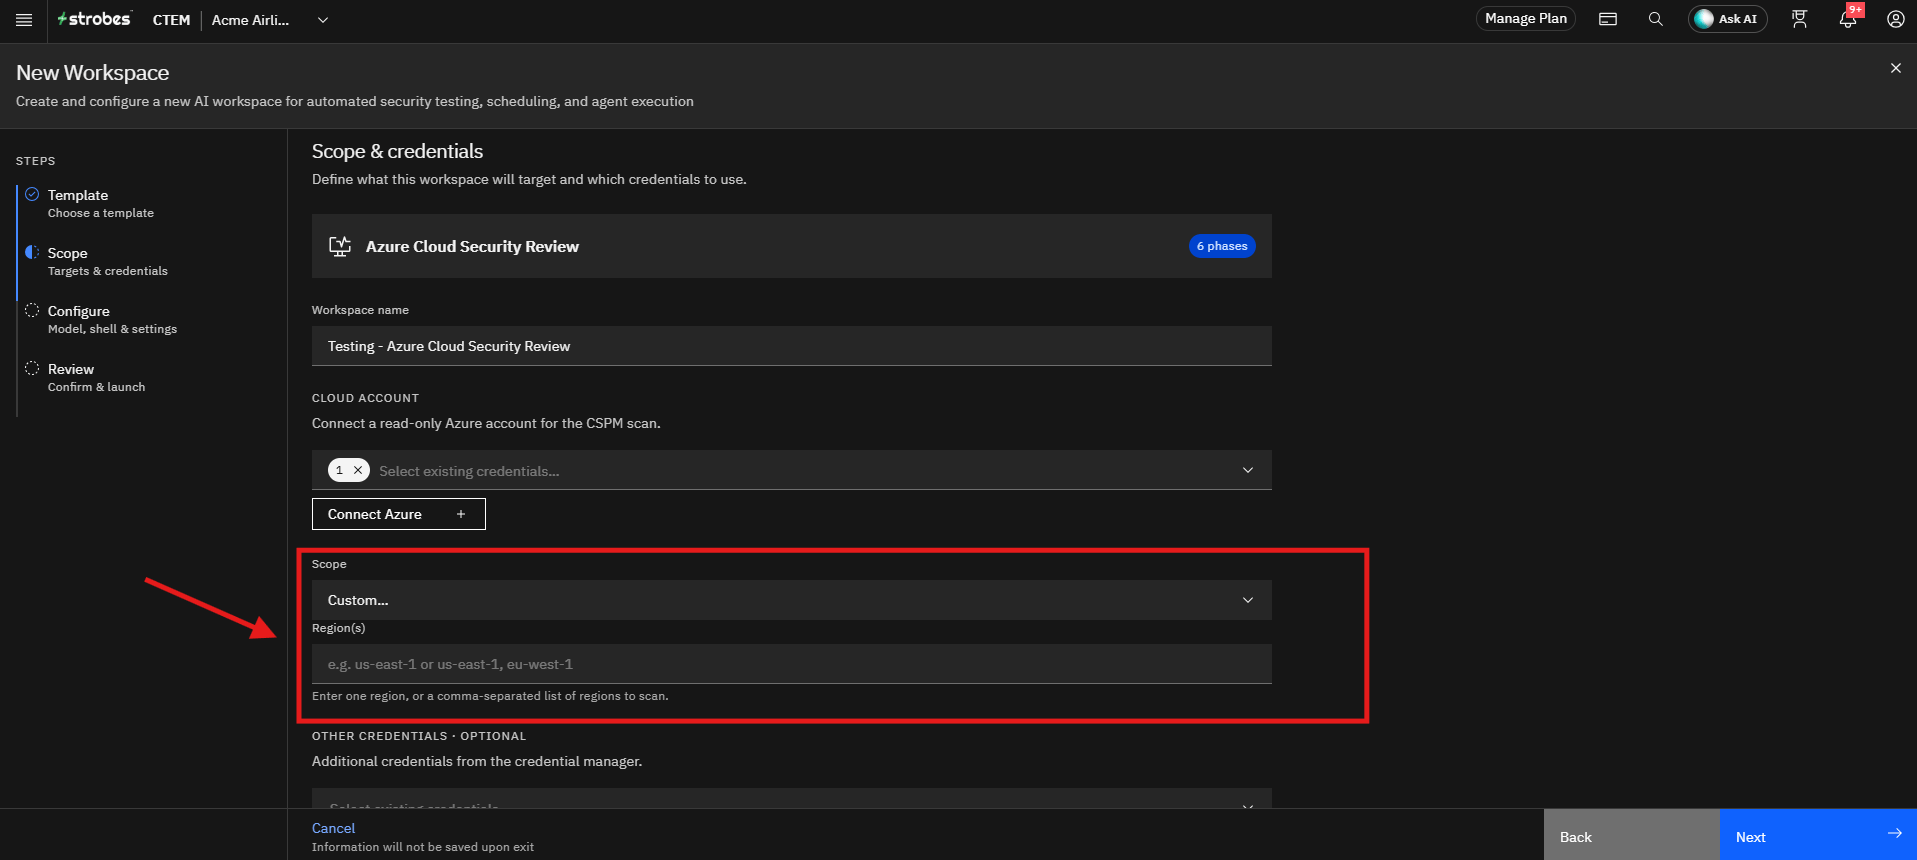
If you choose Custom, then please enter one region, or a comma-separated list of regions to scan.
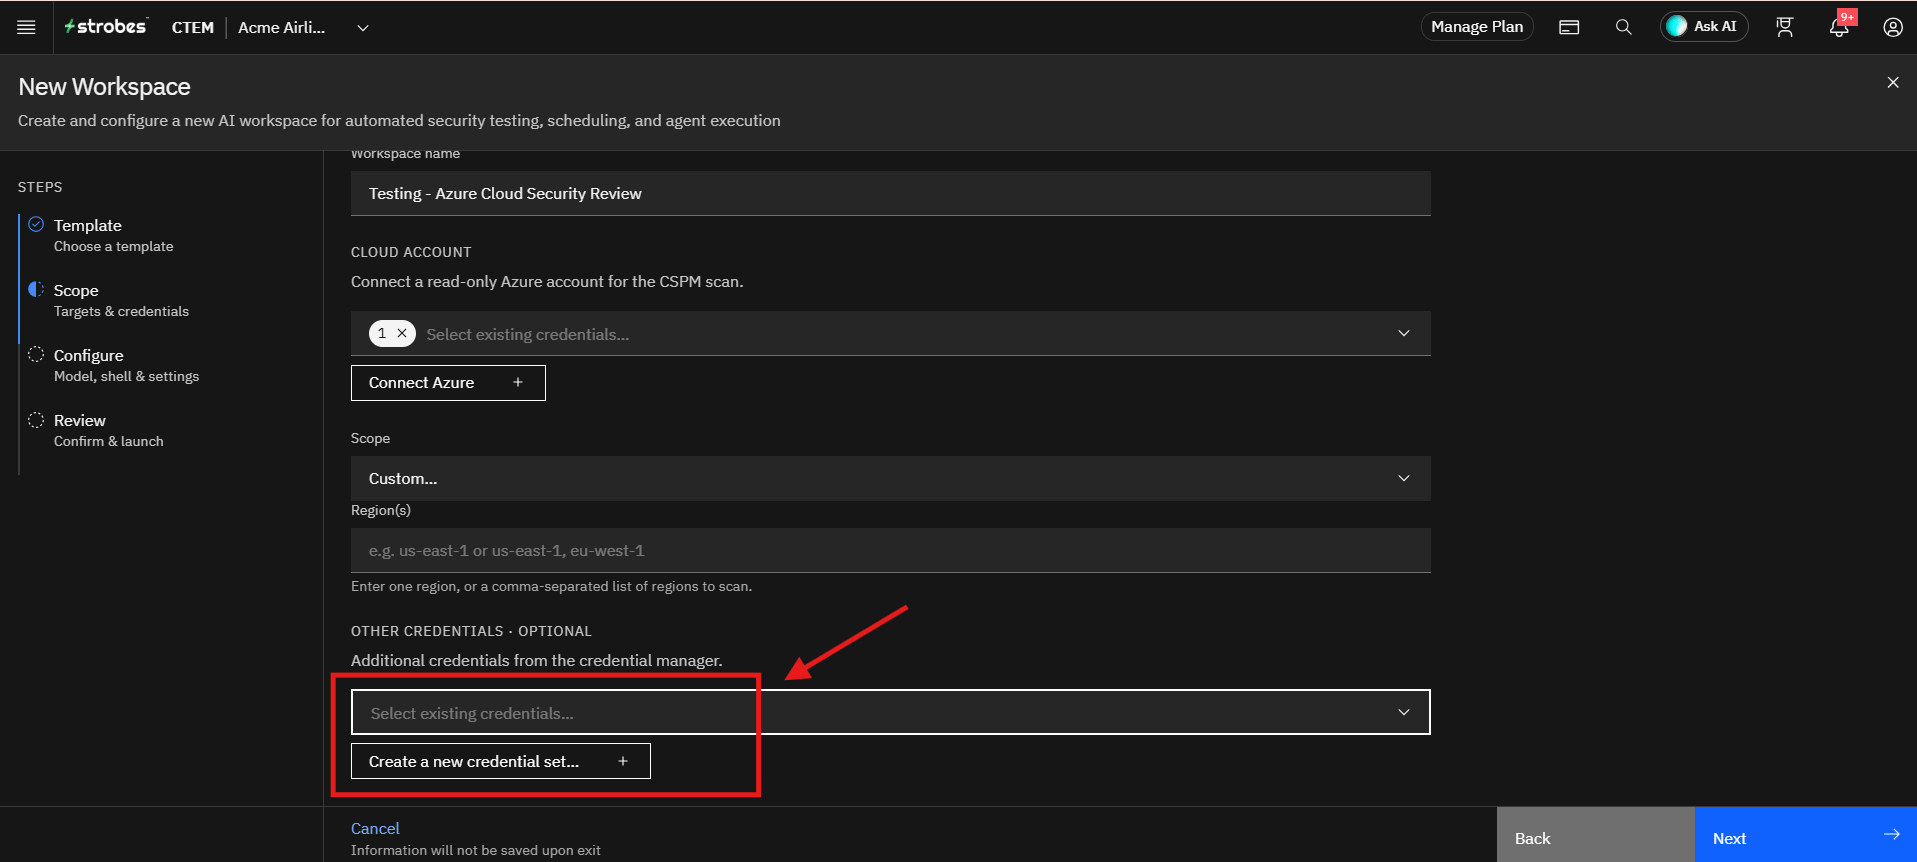
Step 4: Add Other Credentials (Optional)
Under Other Credentials, select additional credentials from the credential manager, or click Create a new credential set to add them.
Proceeding to Configuration
After completing the scope details:
- Verify the selected Azure credential and scope.
- Click Next.
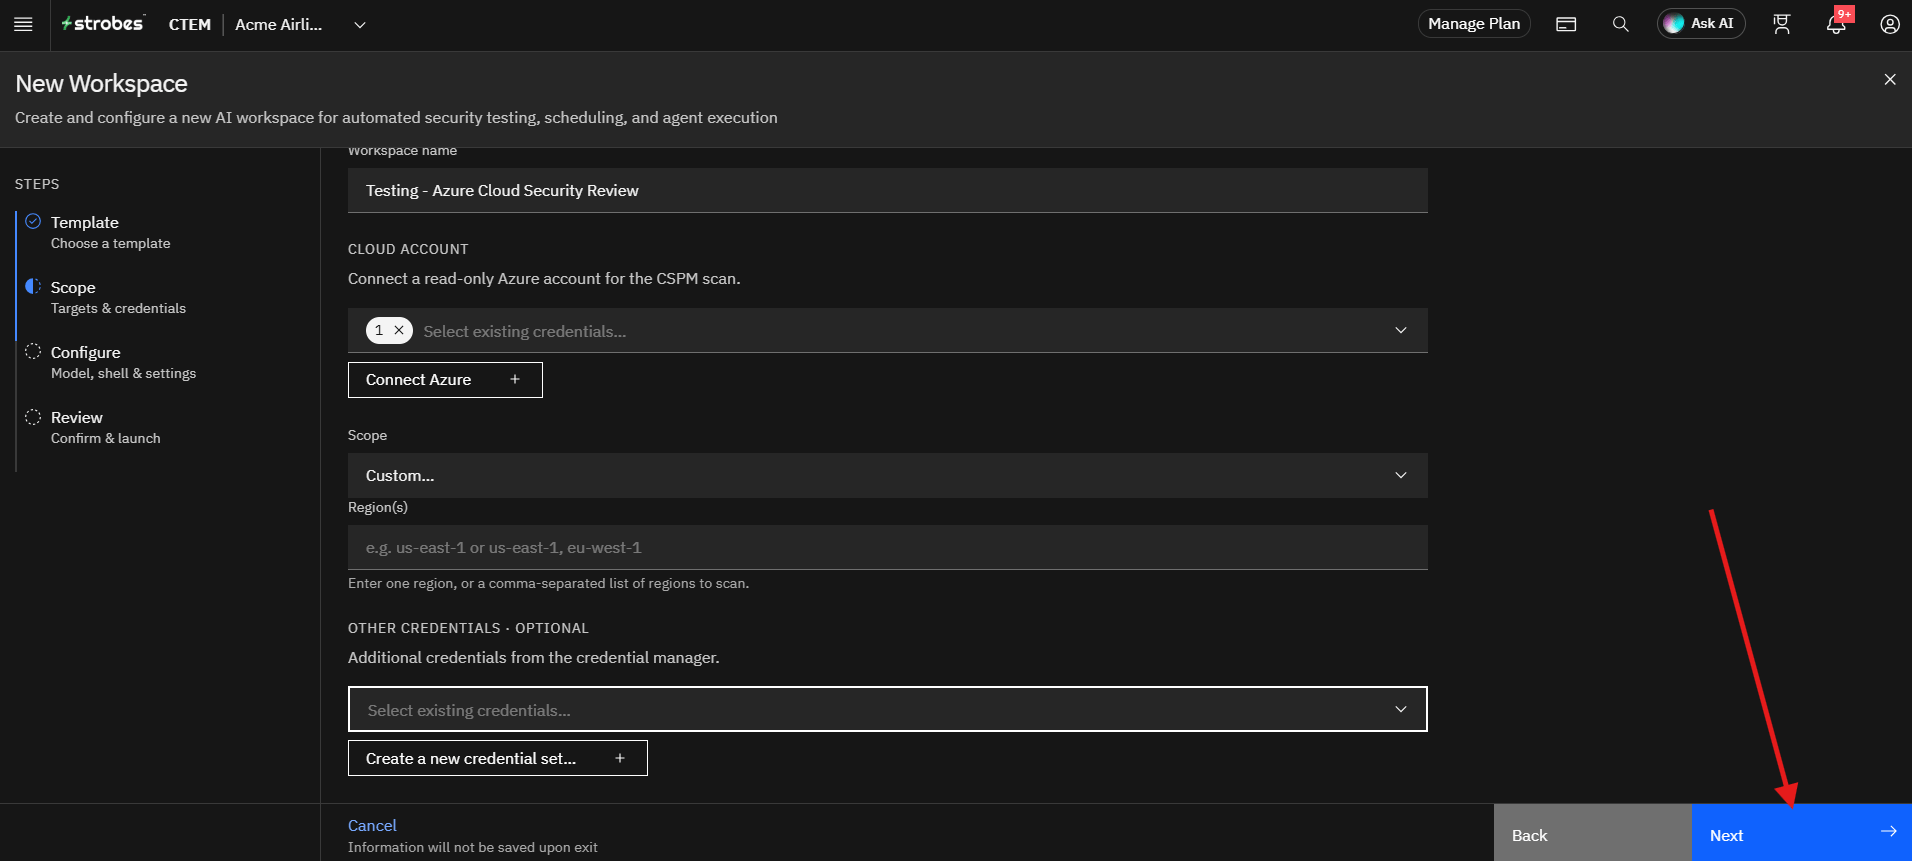
The wizard proceeds to the Configure step, where the model, shell, and execution settings can be customized.
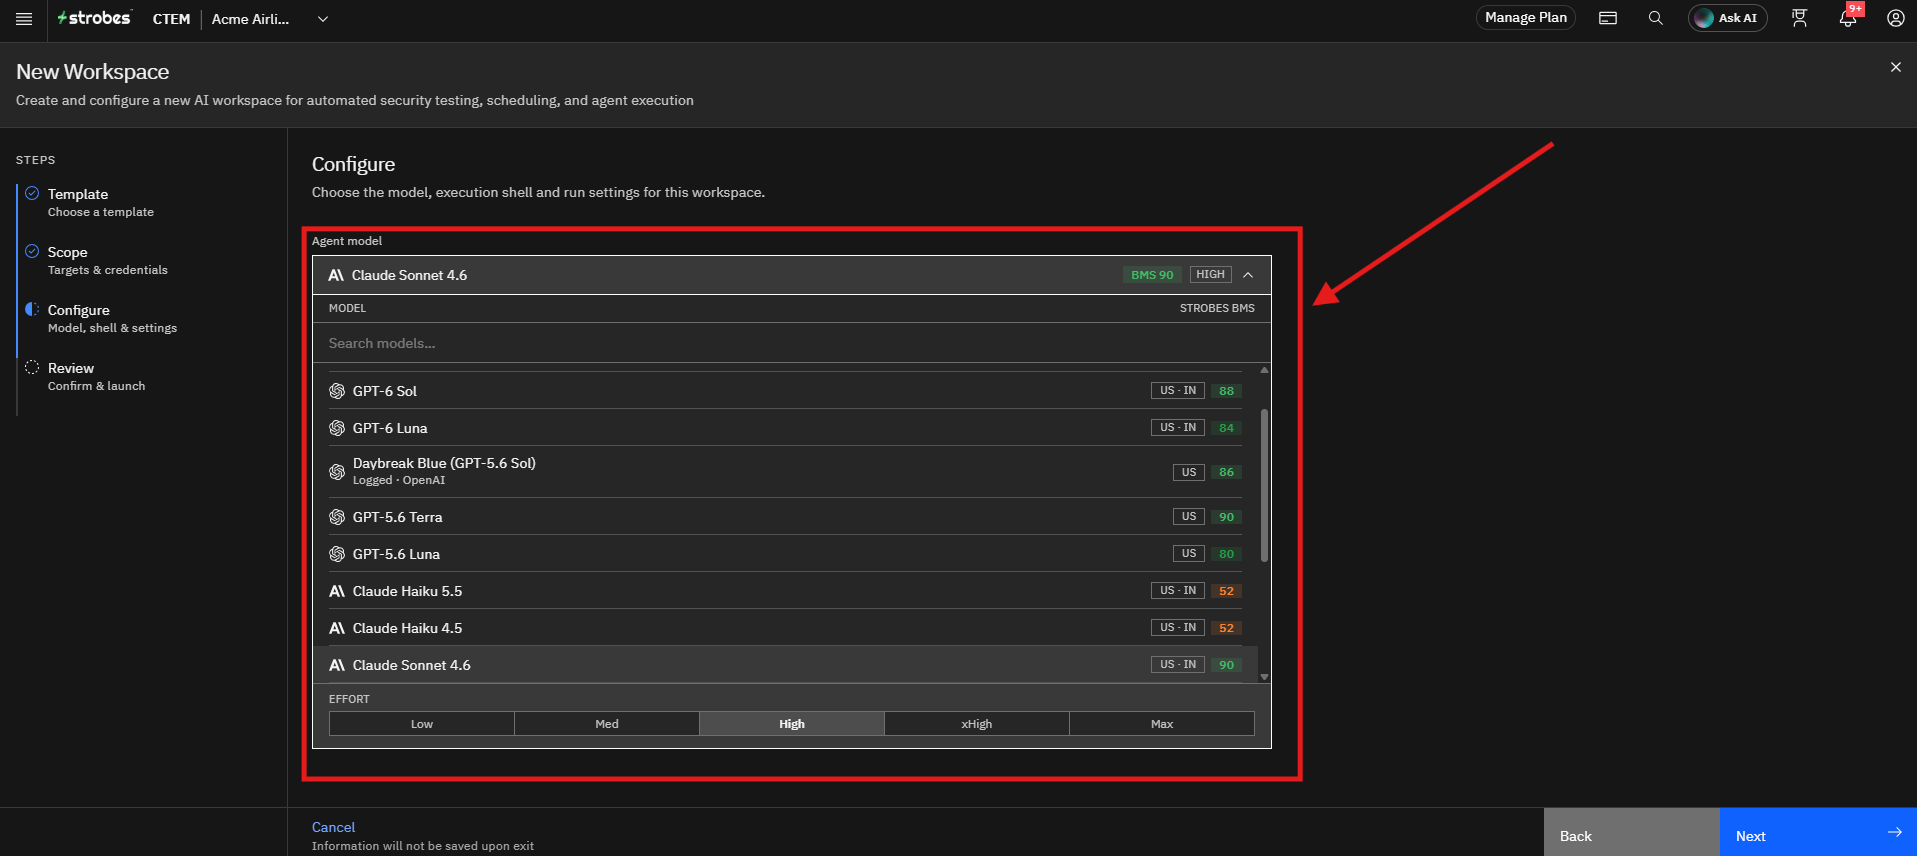
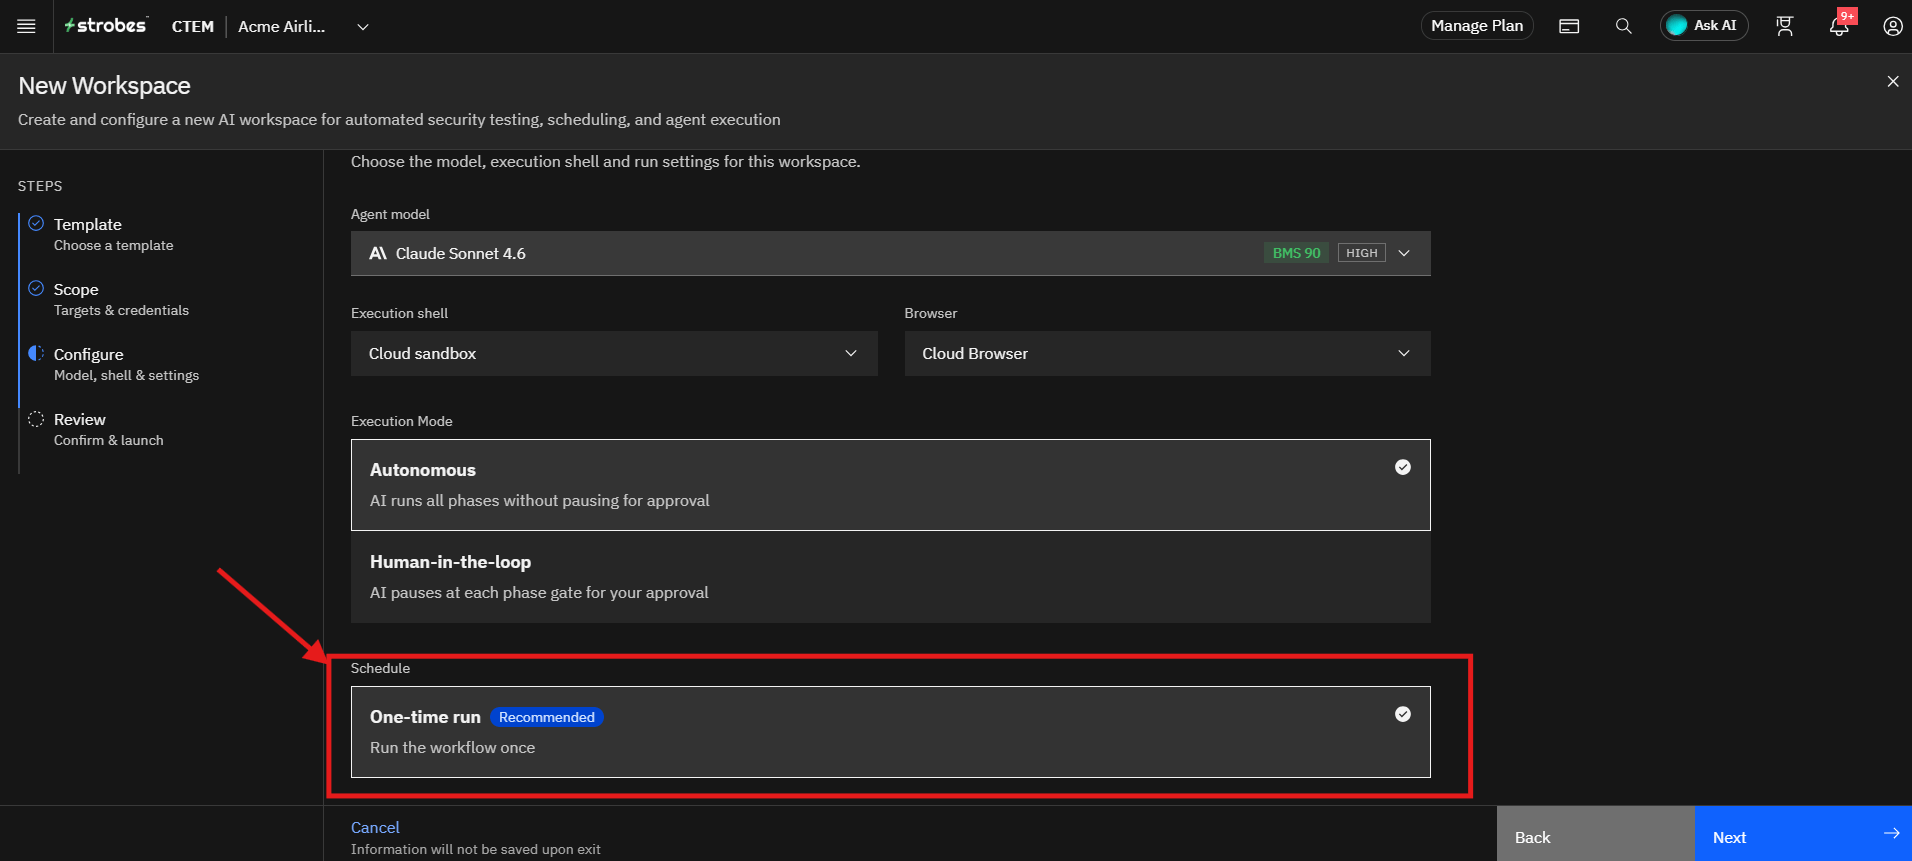
Step 5: Select an AI Model
The Agent model determines the Large Language Model (LLM) used during the assessment.
To select a model:
- Open the Agent model dropdown.
- Review the available models and the effort level.
- Select the model that best fits your assessment requirements.
The selected model influences analysis depth, reasoning capabilities, response quality, and assessment speed.
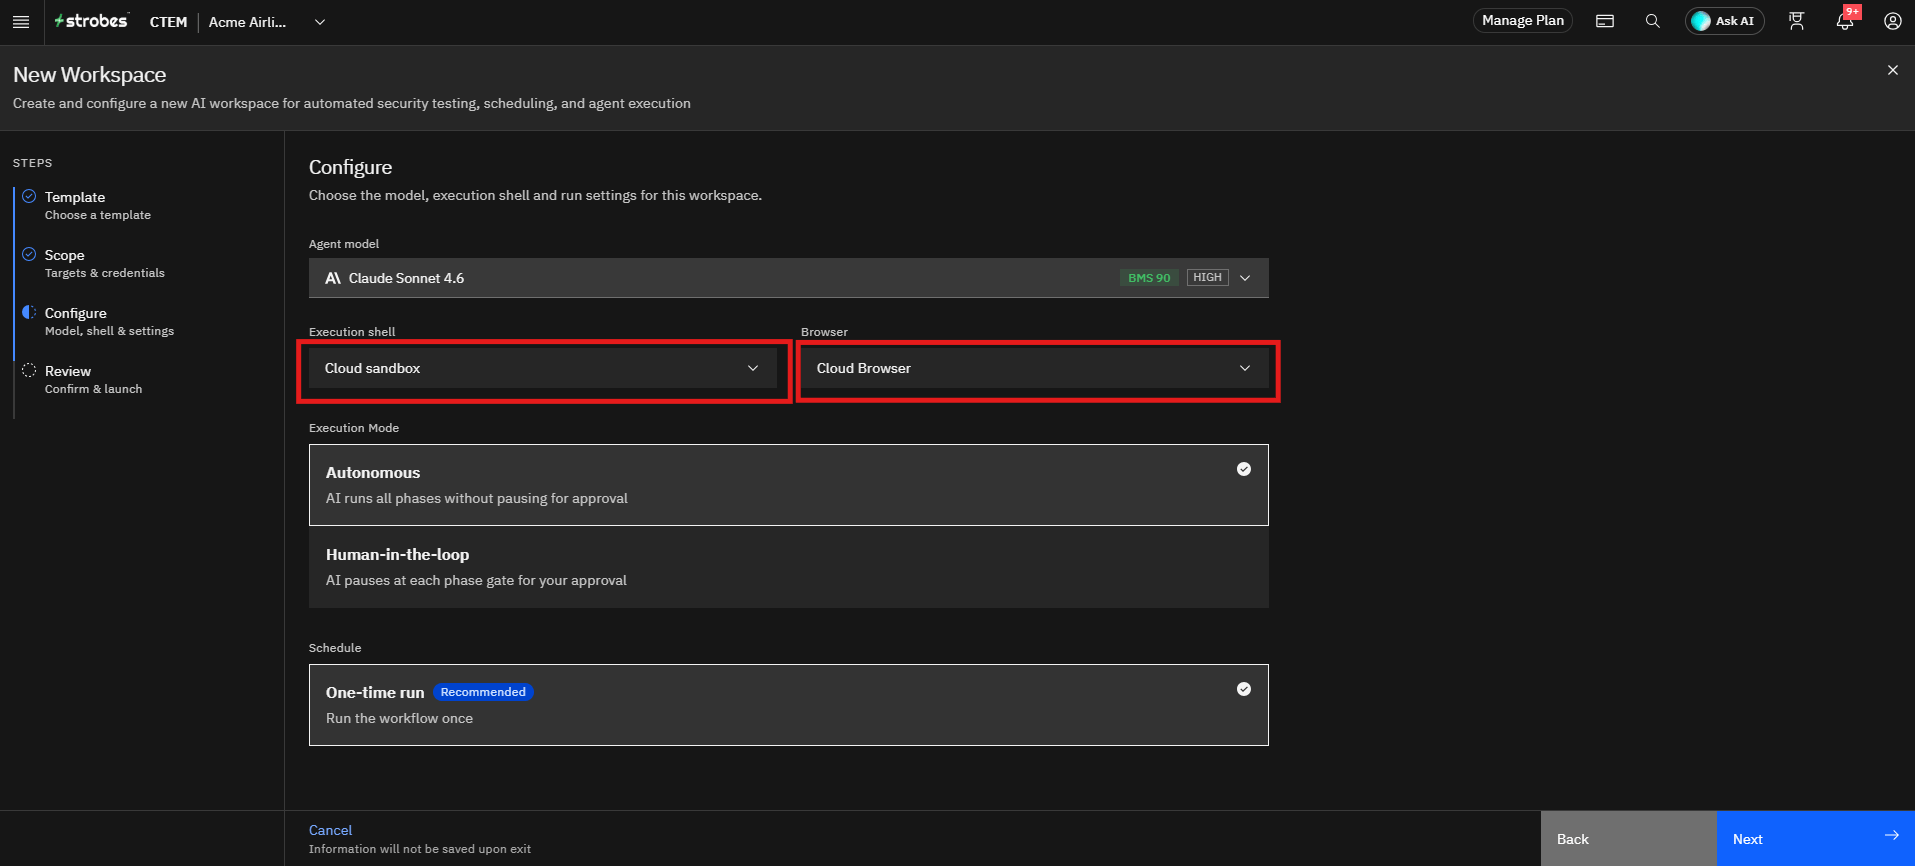
Step 6: Review the Execution Shell and Browser
The Execution shell is Cloud sandbox and the Browser is Cloud Browser by default. This is the recommended setup for this template.
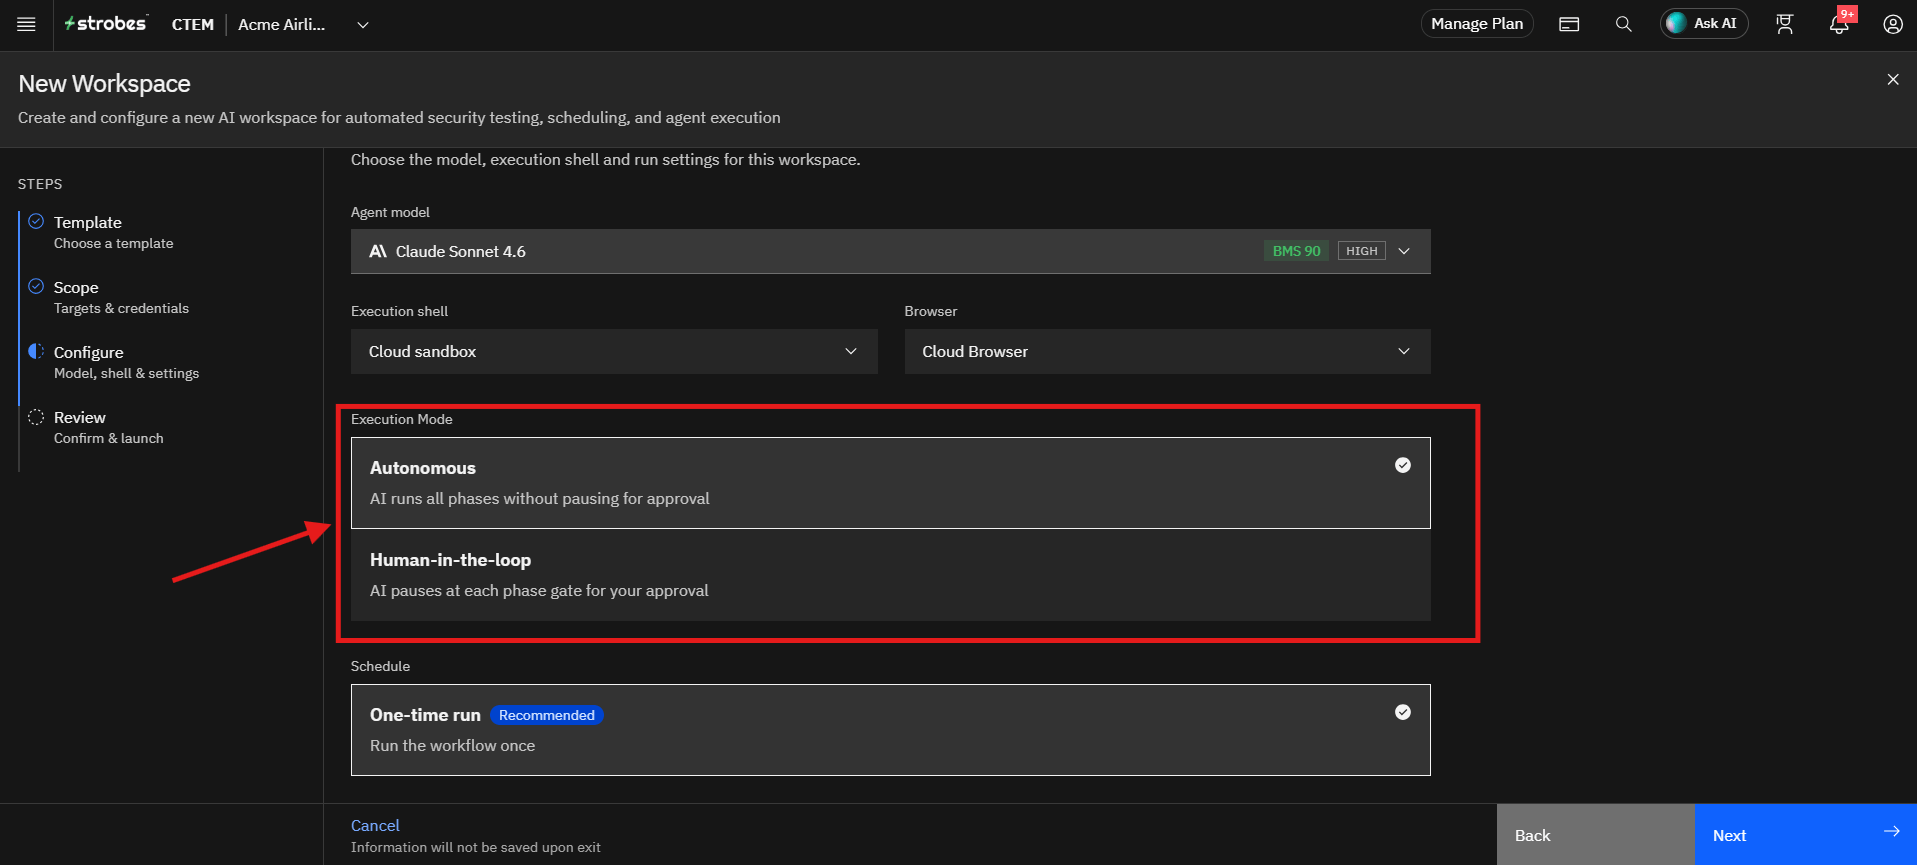
Step 7: Select the Execution Mode
Choose how the AI runs the assessment. Autonomous is selected by default.
- Autonomous: The AI runs all phases without pausing for approval.
- Human-in-the-loop: The AI pauses at each phase gate and waits for your approval before continuing.
Step 8: Review the Schedule
The workflow is set to One-time run by default, so it runs once.
Step 9: Continue to Review and Launch
Once all configuration settings have been verified:
- Click Next.
- The wizard opens the Review page.
Step 10: Review and Launch the Workspace
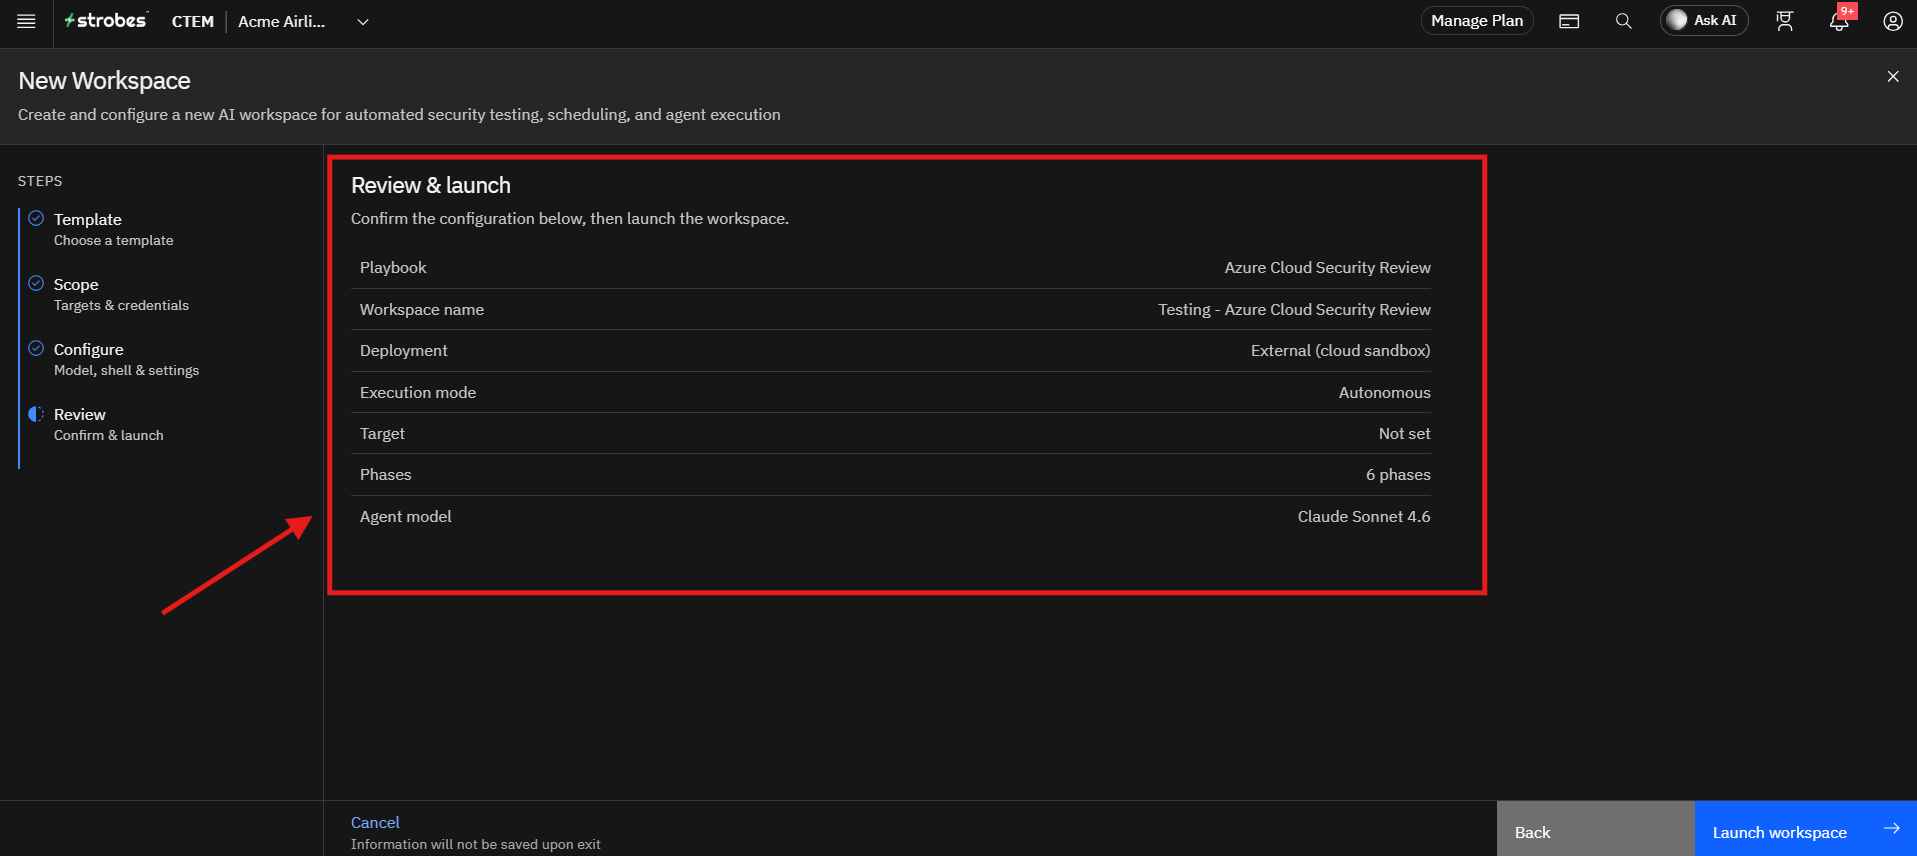
Review the configuration summary, including the playbook, workspace name, deployment, execution mode, phases, and agent model.
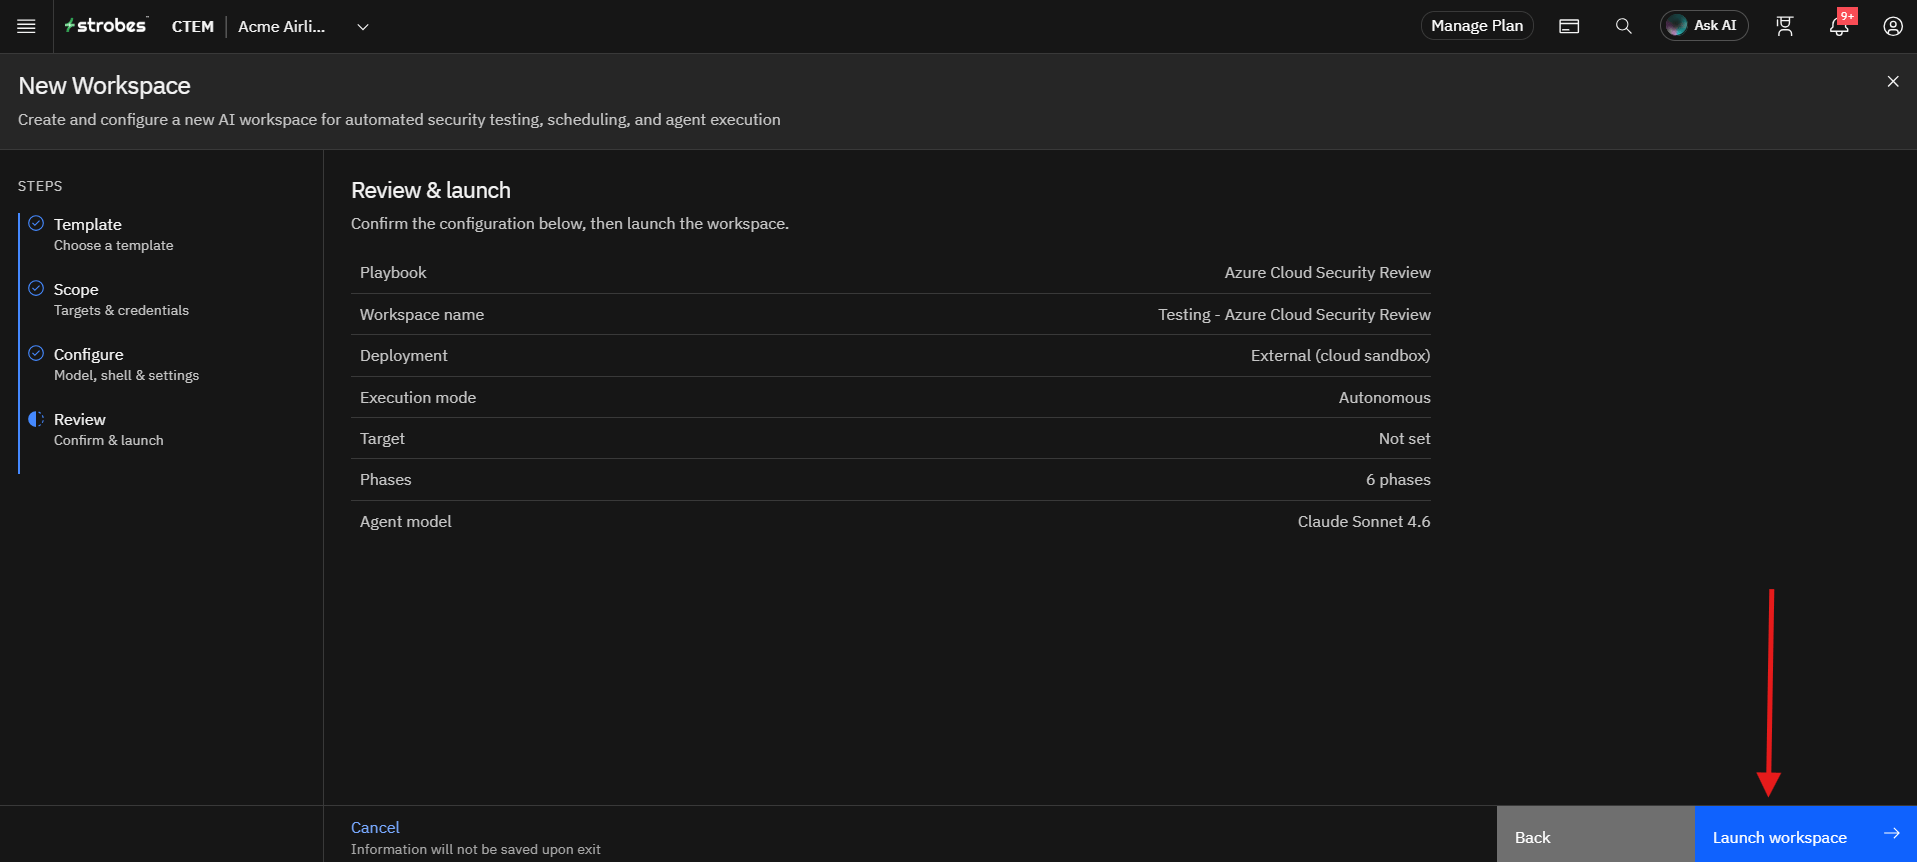
Once everything looks correct, click Launch workspace to start the assessment. When the run completes, findings appear in Strobes linked to your assets, and the report is available in the workspace.
Tips
- Connect a read-only Azure account. The scan only needs to read your configuration.
- The Next button stays unavailable on the Scope step until a cloud account is selected.
- Keep the Scope on All regions for full coverage, or narrow it to the regions you actually use.
- Use Human-in-the-loop if you want to approve each phase before it continues.
- The CSPM scan is the source of truth for the review, so you can re-run the workspace to reproduce results.
- The assessment duration varies based on the size of your Azure environment.
- Only review Azure environments you are authorized to review.
More in Workspace configuration
Was this page helpful?