
Configure Nessus Credential Manager
Integrating Nessus with Strobes via the Credential Manager allows you to securely store authentication details and streamline automated vulnerability scanning. Follow this step-by-step guide to configure your Nessus credentials in Strobes.
Prerequisites
Before you begin, ensure:
- You have admin access to the Strobes Platform
- Nessus is already set up and accessible via a valid URL
- You have valid Nessus credentials (username and password)
Step-by-Step Configuration Guide
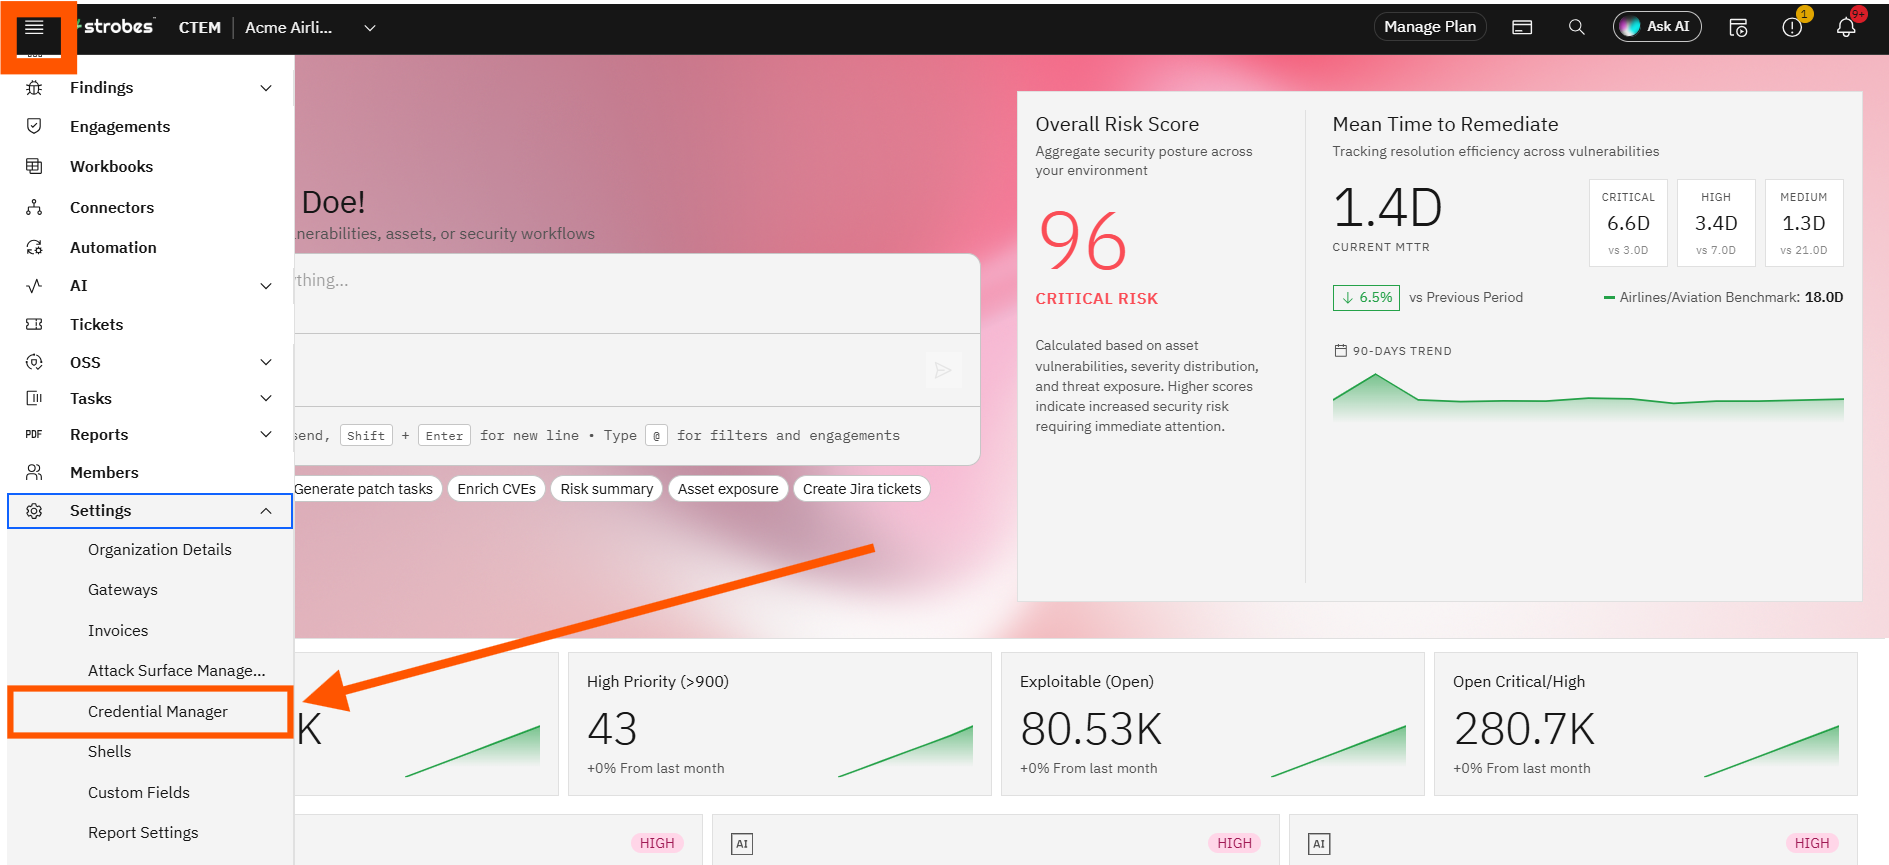
Step 1: Access Credential Manager
- Log in to your Strobes Dashboard.
- From the left-hand menu, navigate to Settings.
- In the settings submenu, click on Credential Manager.
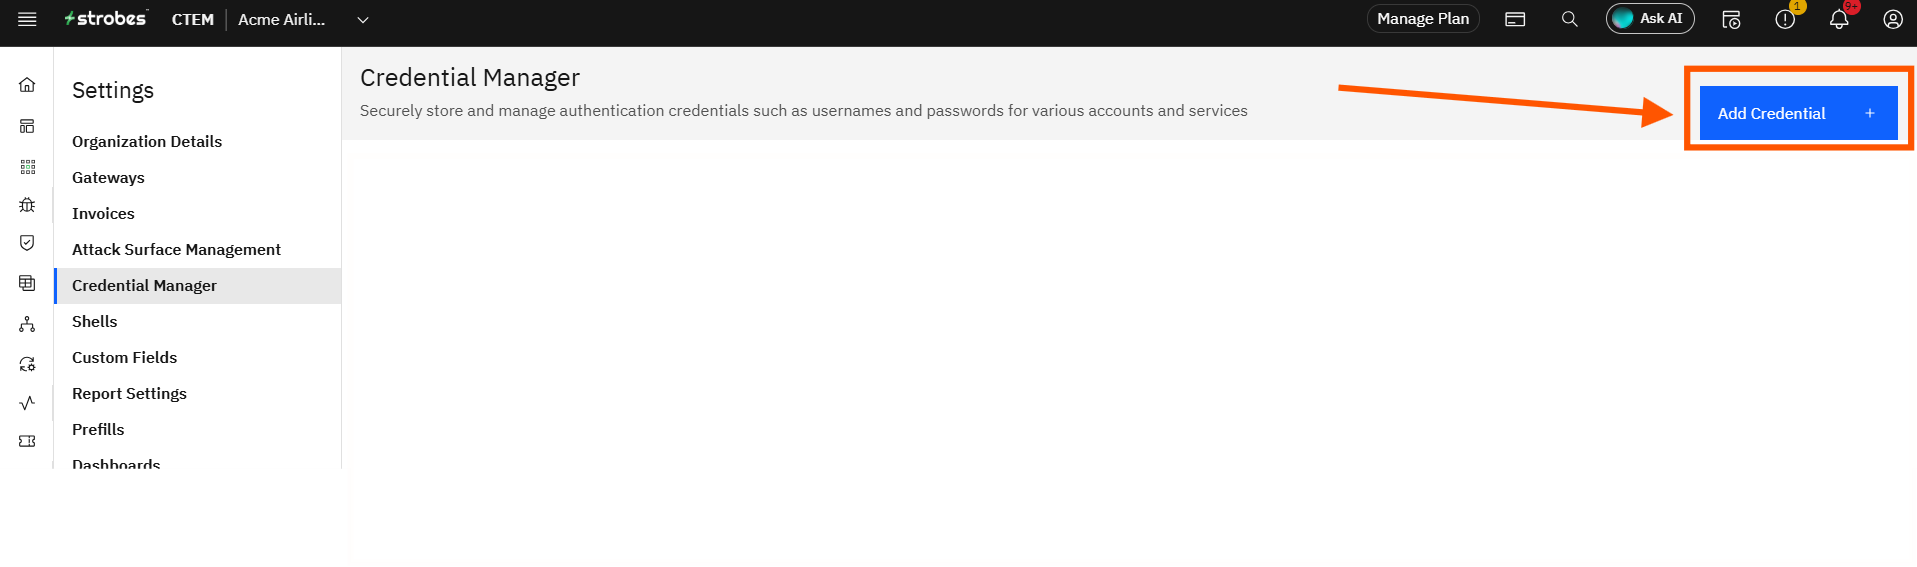
Step 2: Add New Credential
- On the Credential Manager screen, click the Add Credential button in the top-right corner.
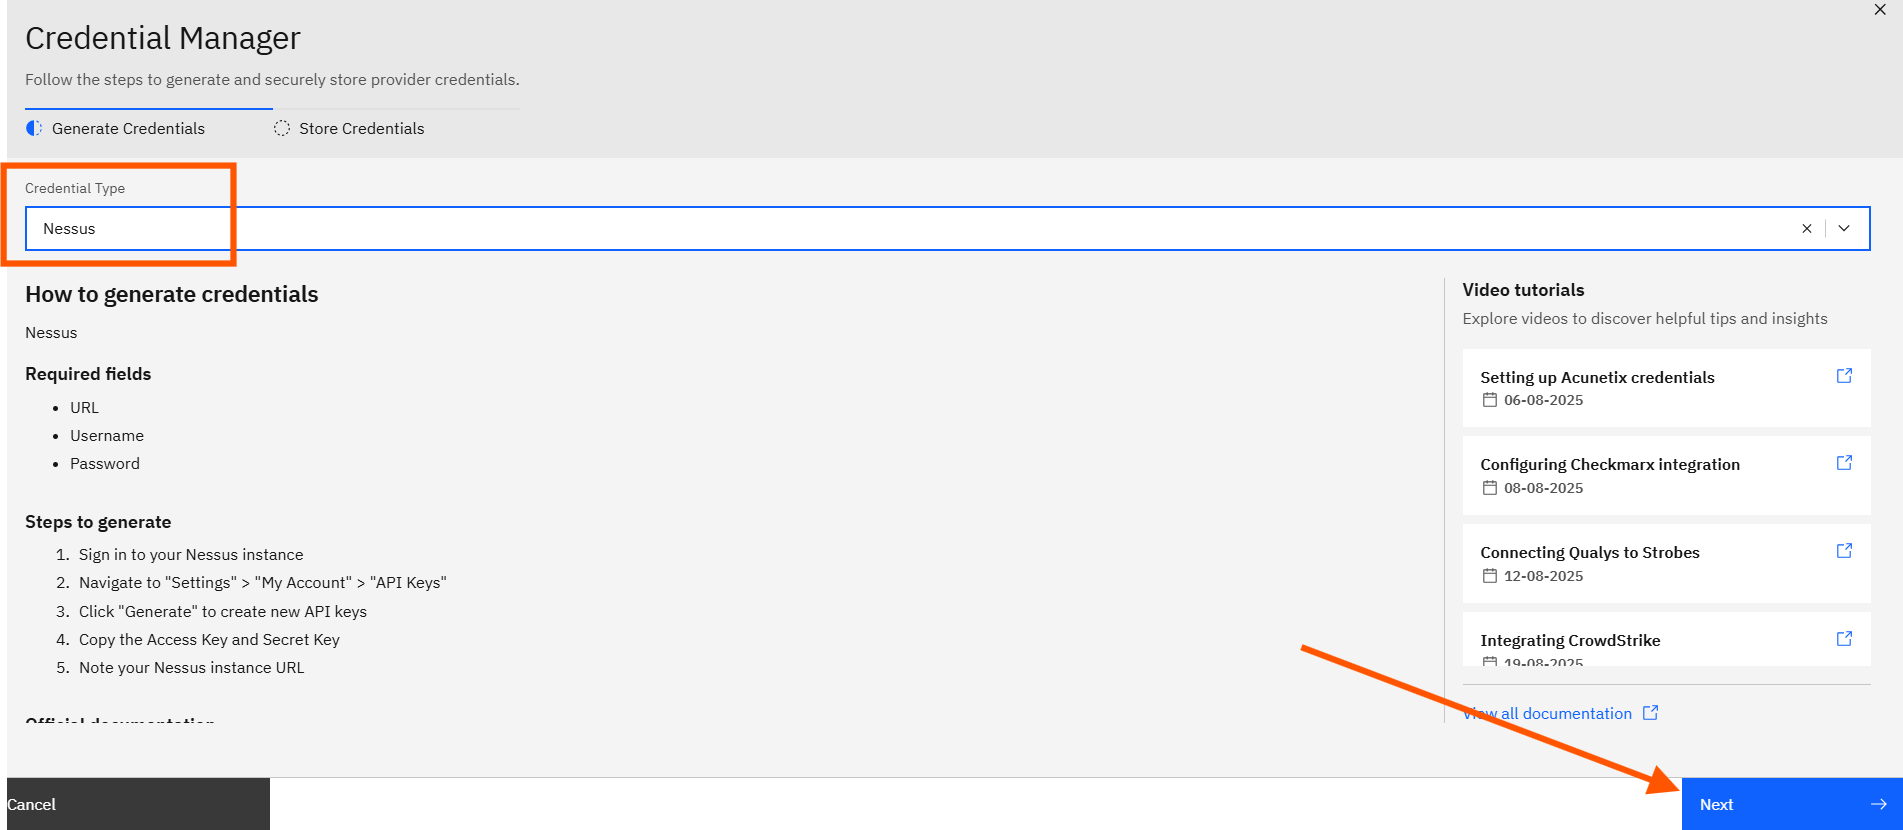
Step 3: Select Nessus Connector
- In the Connector Type dropdown, select Nessus.
- This ensures the configuration fields match the authentication requirements of the Nessus scanner.
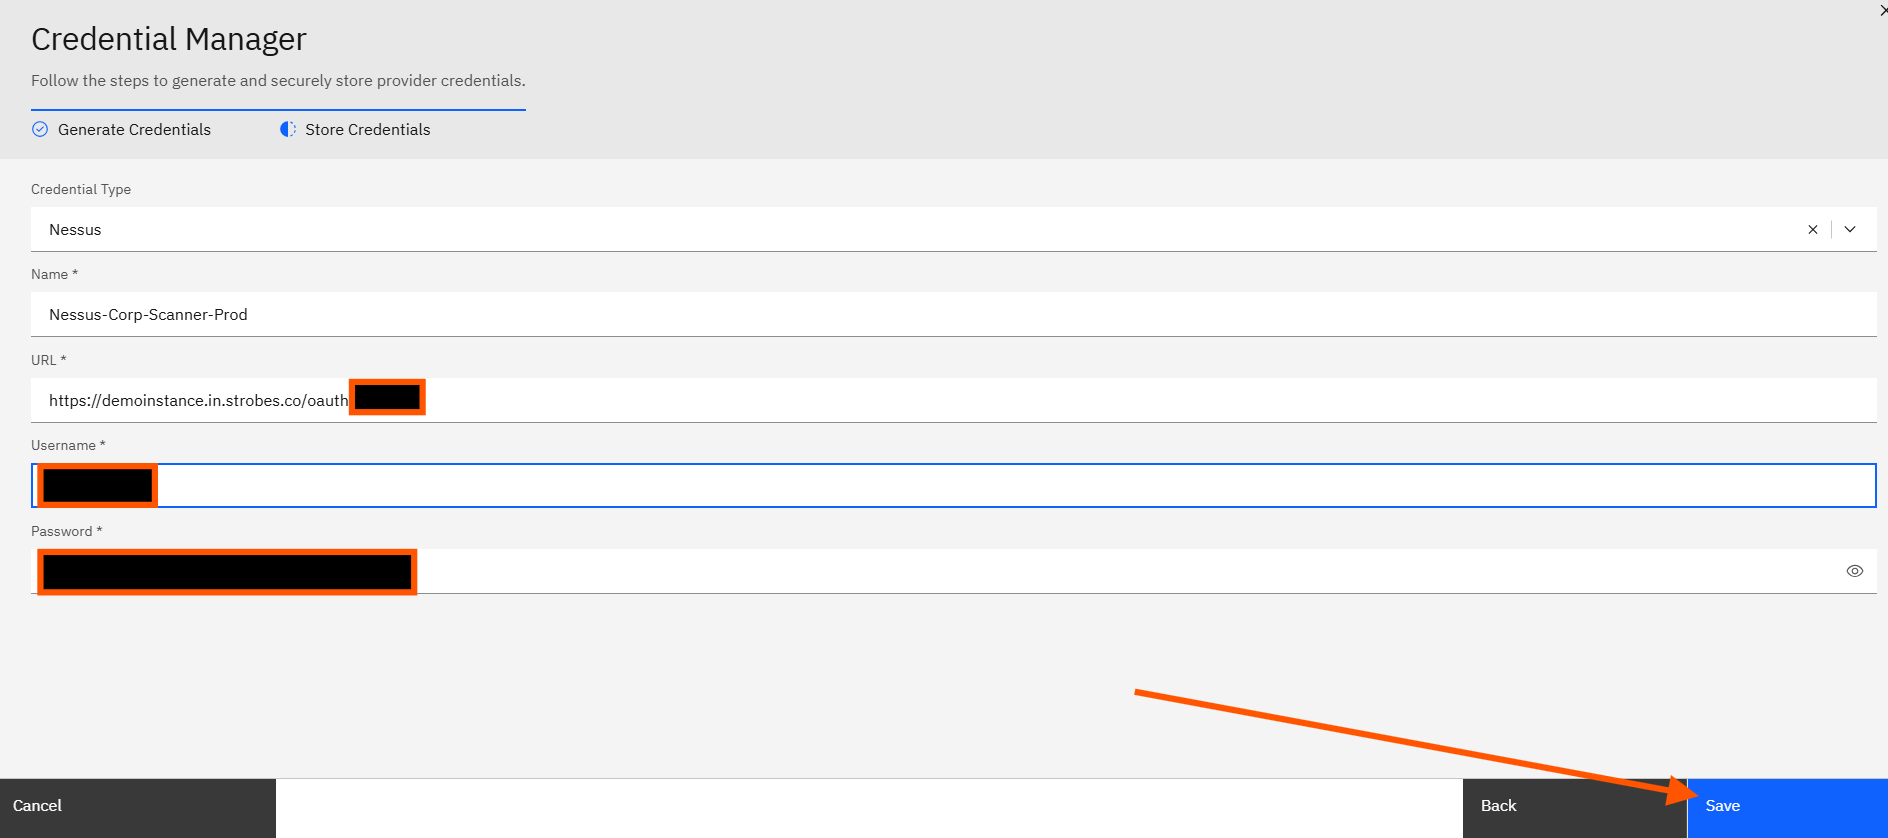
Step 4: Enter Credential Details
You will now see a form with the following fields:
- Name
Give your credential a meaningful name.
Example: Nessus-Corp-Scanner-Prod - URL
Enter the full URL where your Nessus instance is hosted.
Format: https://<your-nessus-domain>:8834 - Username
Enter the Nessus account username with appropriate privileges for scanning. - Password
Provide the password associated with the above username.
Note: Ensure that the user account has necessary access rights to initiate scans or pull data from Nessus.
Step 5: Save Your Configuration
Once all fields are filled out correctly:
- Double-check the information you entered.
- Click Save to securely store the credential in Strobes.
What Happens Next?
- Your Nessus credentials are now saved securely within the Strobes platform.
- These credentials can be used when setting up automated vulnerability scans or scheduling integrations involving the Nessus scanner.
Troubleshooting Tips
- Incorrect URL or port? Double-check that Nessus is accessible from the Strobes network and that port 8834 (default for Nessus) is open.
- Login failed? Verify that the username and password are active and have not expired.
Permission issues? Ensure the Nessus user account has scanning permissions for the relevant asset groups.