
Configuring Tanium Credentials Using Credential Manager
Integrating Tanium with the Strobes platform allows for seamless vulnerability and asset data ingestion. To begin, you’ll first need to configure your Tanium credentials using the Credential Manager. Follow the step-by-step guide below to complete the setup.
Prerequisites
Before you begin, ensure the following:
- You have a valid Tanium API Key.
- You know your Tanium Console URL.
- You have admin-level access to the Strobes platform.
If you need help generating the Tanium API key, click here to view our detailed guide.
Step-by-Step Instructions
Step 1: Access the Credential Manager
- Log in to your Strobes account.
- In the left-hand menu, navigate to Settings.
- Under Settings, click on Credential Manager.
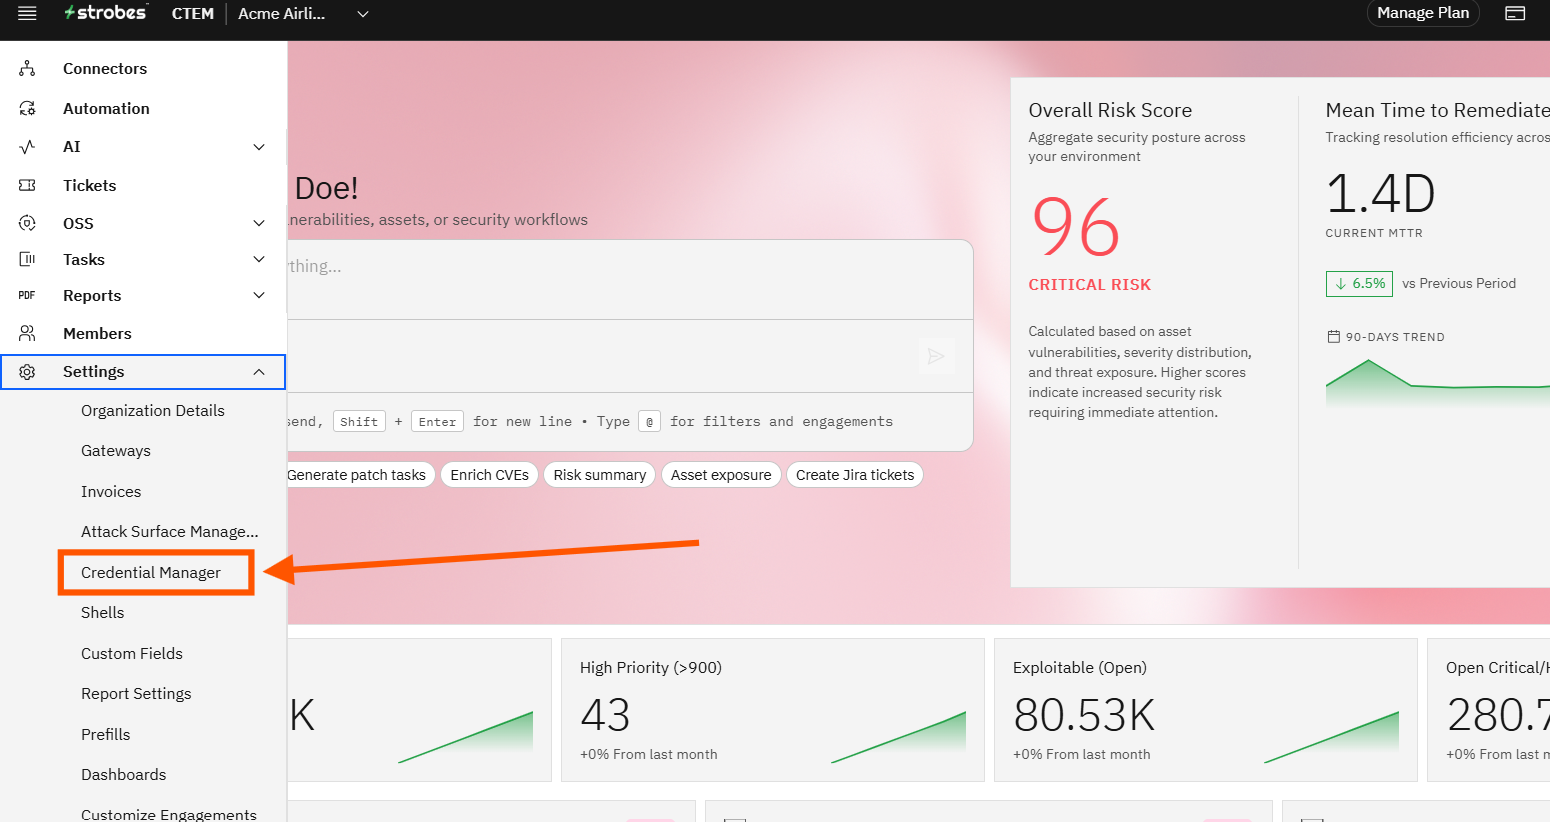
The Credential Manager is the centralized location for managing all third-party integration credentials in Strobes.
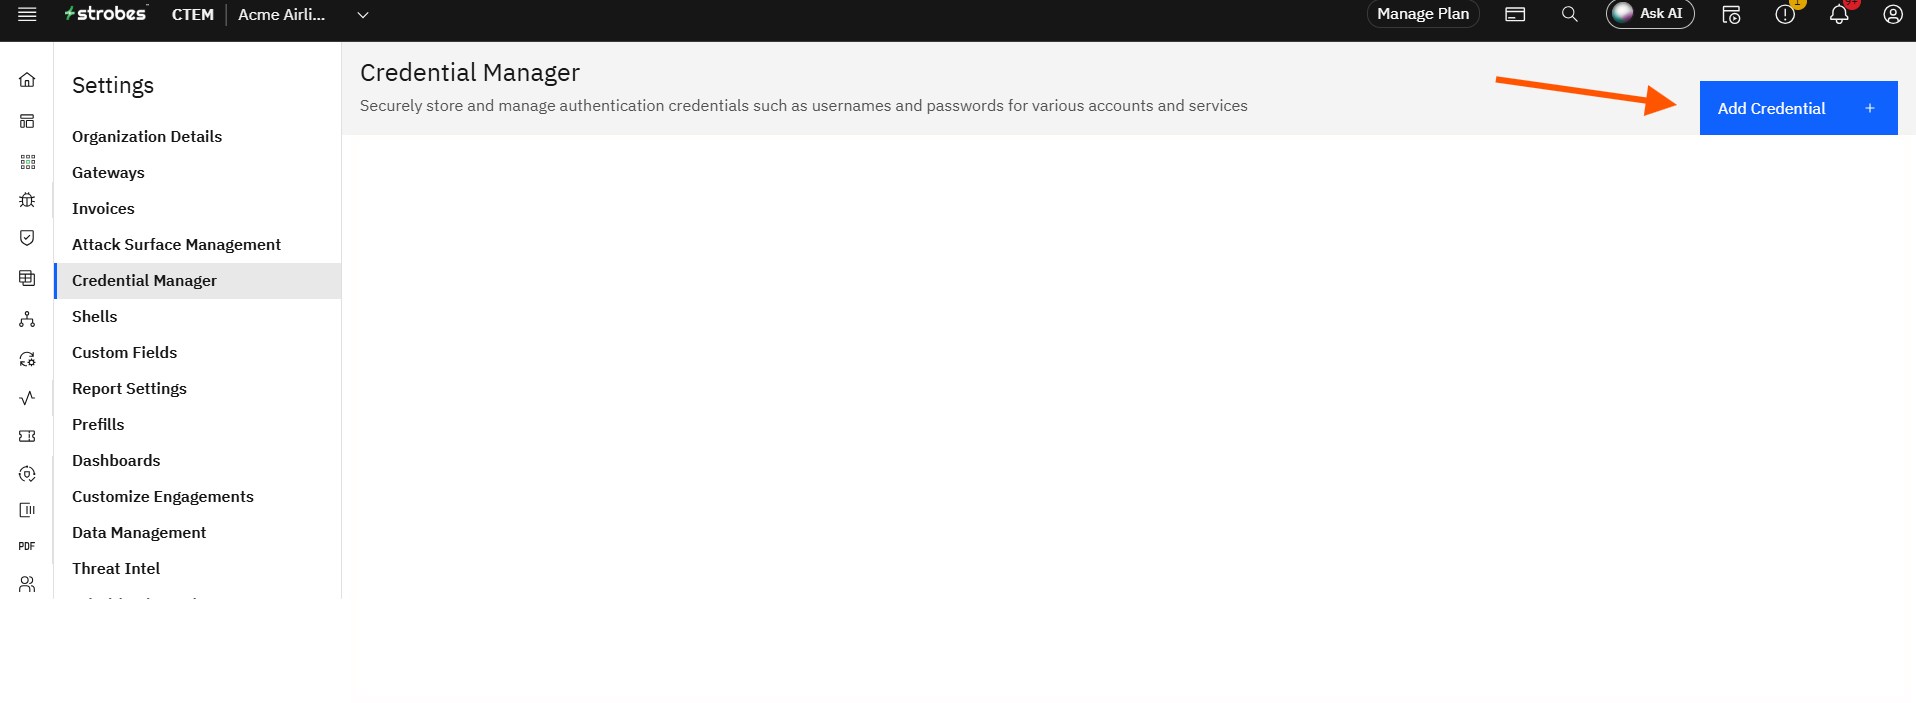
Step 2: Add a New Credential
- Inside the Credential Manager, click the Add Credential button (usually located in the top-right corner).
- A form will appear prompting you to configure a new credential.
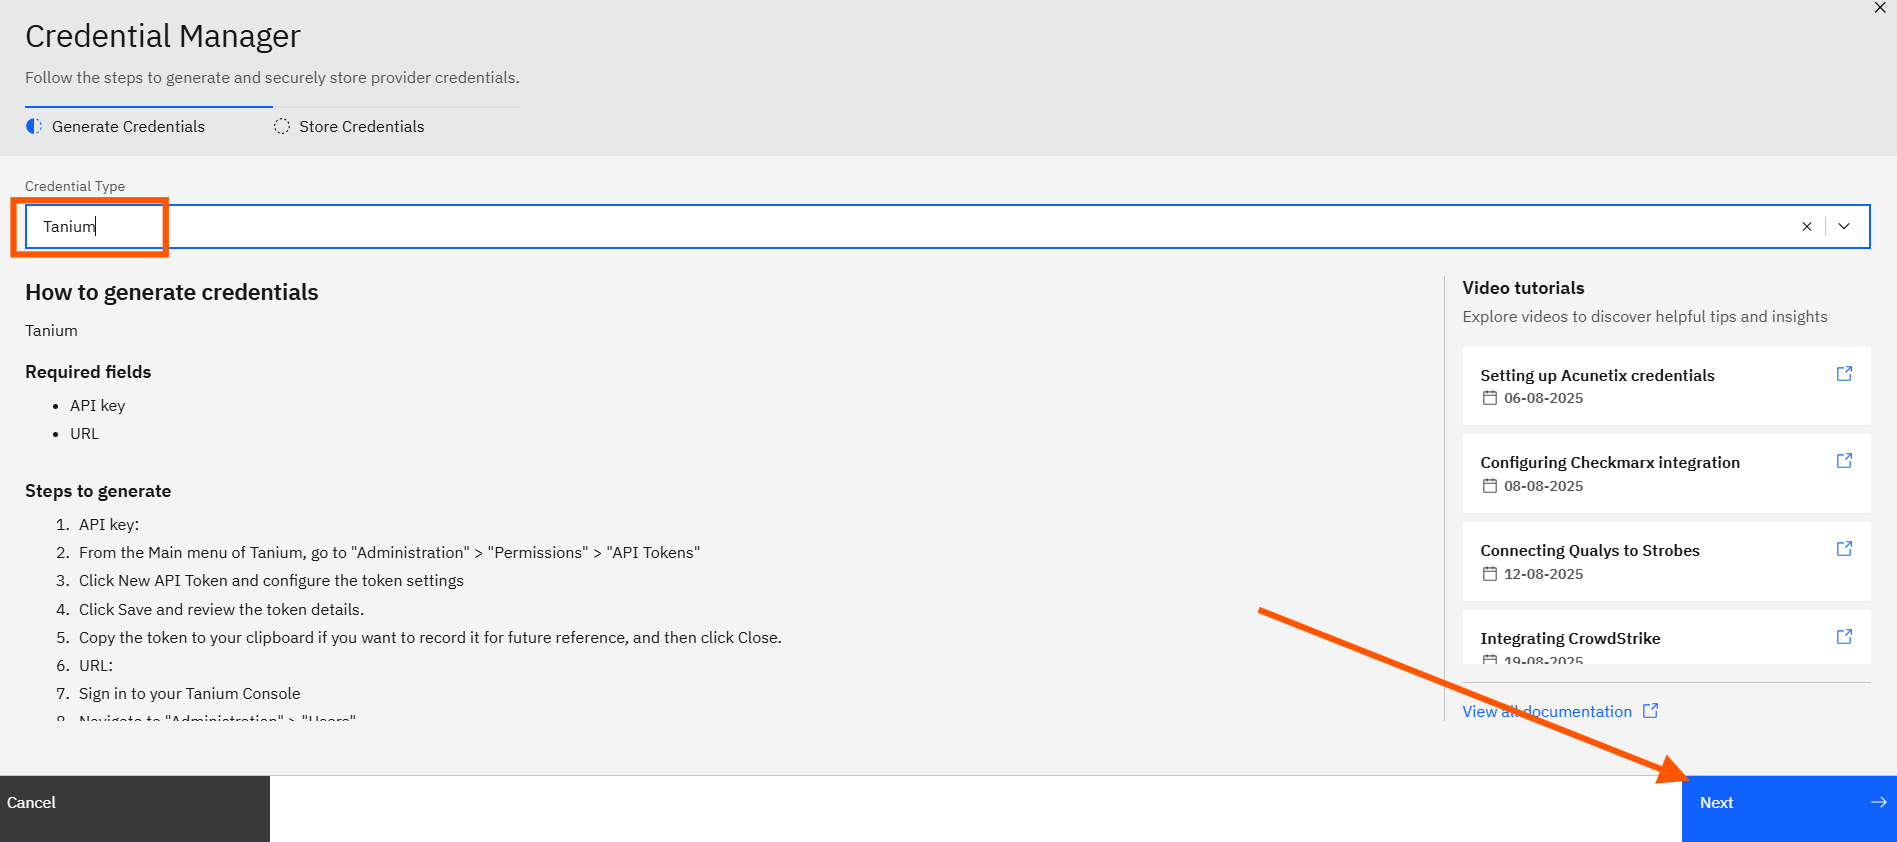
Step 3: Select the Connector Type
- From the Connector dropdown, select Tanium.
This ensures the system knows which integration type you are setting up and applies the relevant logic behind the scenes.
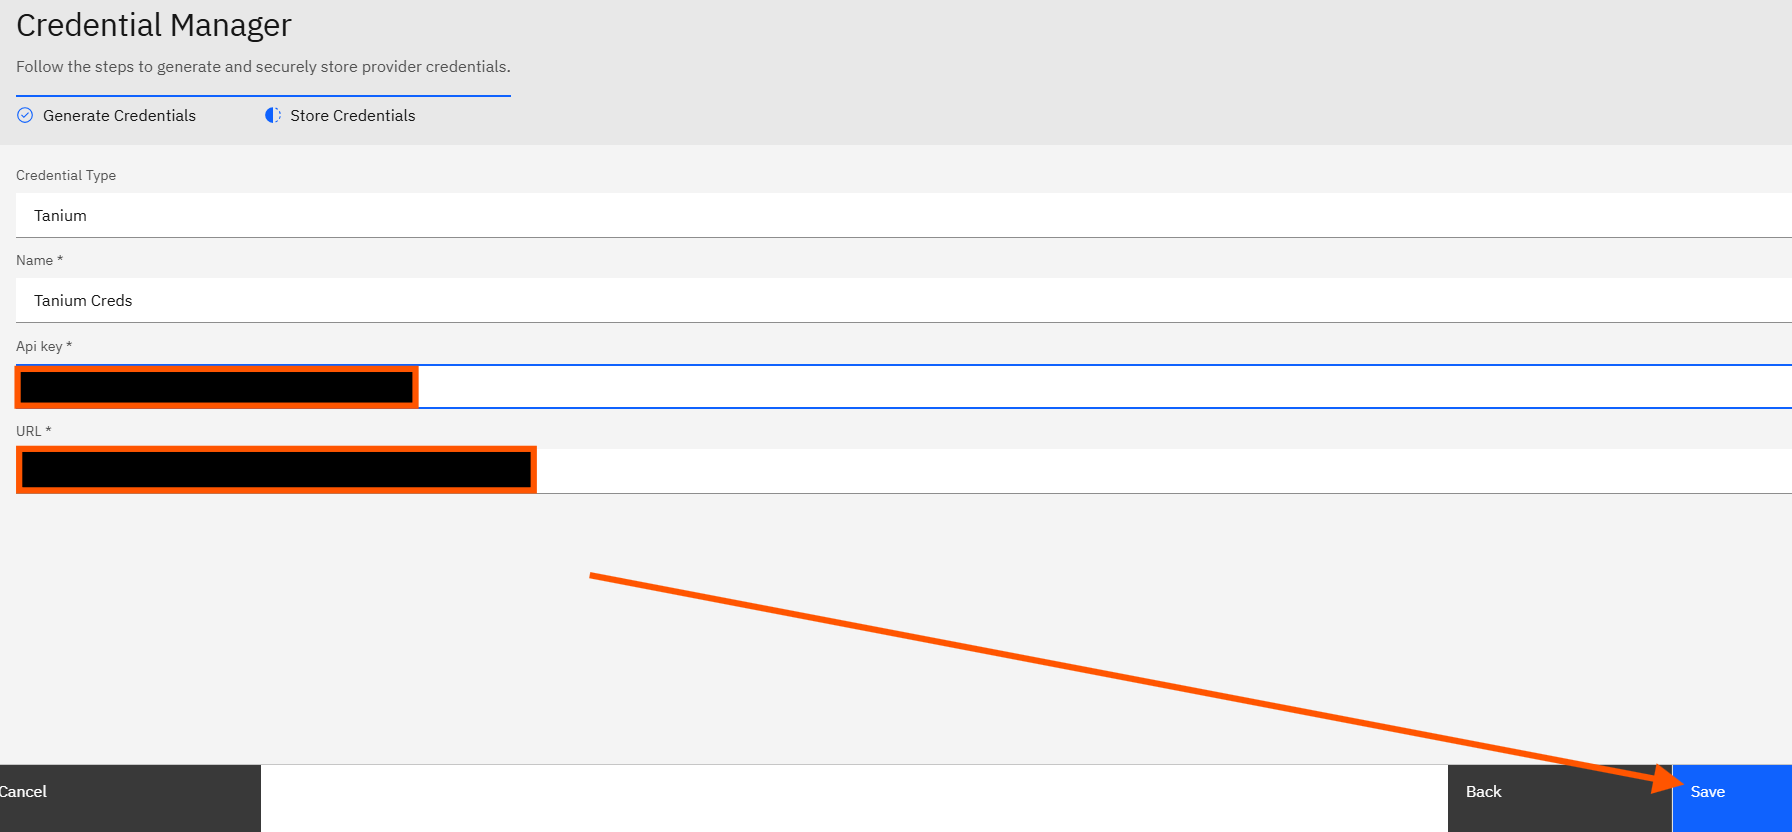
Step 4: Enter Tanium Credential Details
Fill in the following fields:
- Name: Provide a unique and recognizable name for this Tanium configuration (e.g., Tanium-US-East-Prod).
- Tanium API Key: Paste the API key generated from your Tanium console.
- Tanium URL: Enter the base URL of your Tanium instance (e.g., https://your-instance.tanium.com).
Ensure the URL is accessible from your Strobes environment. Any connectivity issues here can prevent successful integration.
Step 5: Save Your Configuration
- After filling in the required fields, click Save.
- You will see a success message confirming that the Tanium credential has been stored securely.
Your Tanium connector is now ready to be used in workflows and data sync operations.
Next Steps
- To start syncing data from Tanium, navigate to Integrations > Connectors, find your newly added Tanium configuration, and initiate a scan or connection test.
Review logs under Audit Trail to ensure the integration is functioning as expected.