
Strobes Attack Surface Management (ASM)
How to Configure Attack Surface Management
1. External Attack Surface
Step 1: Open External Attack Surface Tab
- Go to Settings → Attack Surface Management → External Attack Surface.
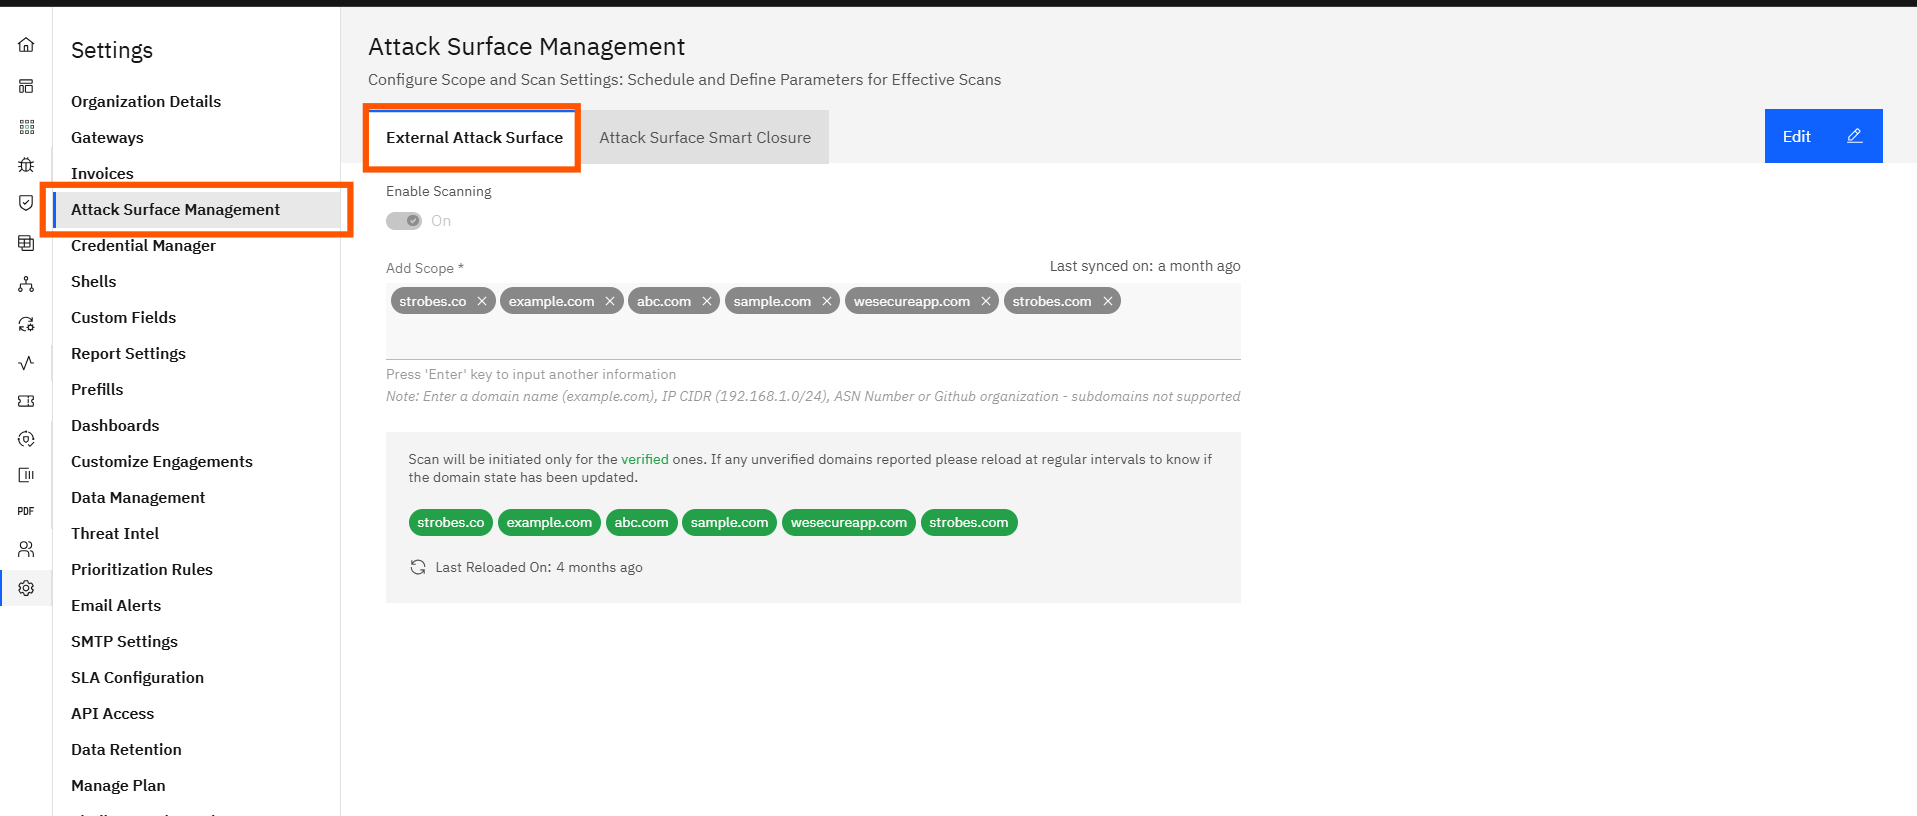
Step 2: Click the Edit Button
- Click the blue “Edit” button at the top-right of the screen to start configuring.

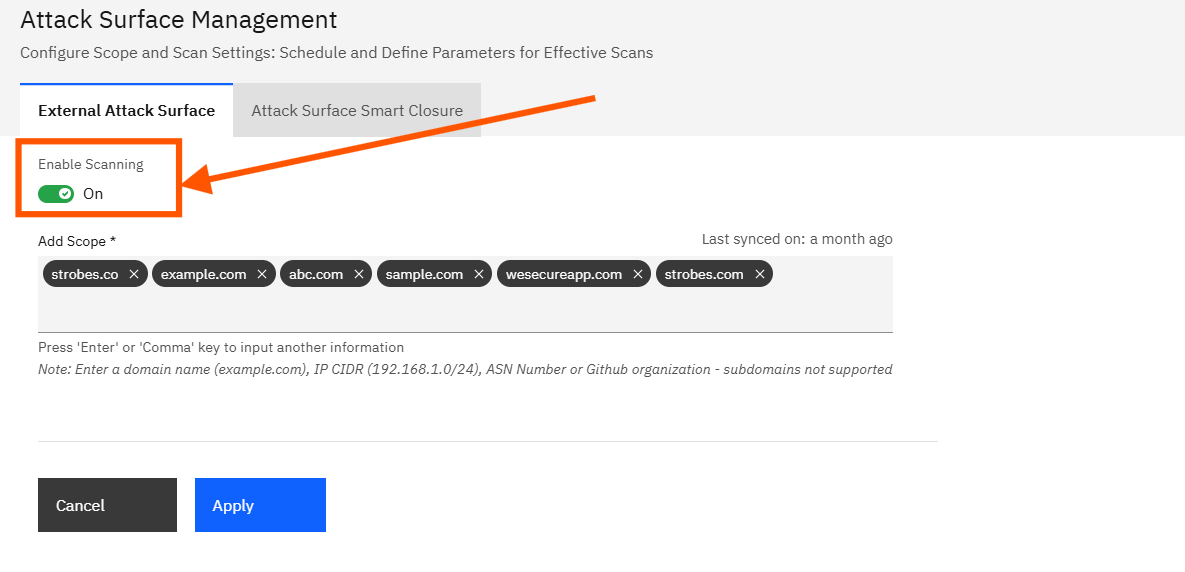
Step 3: Enable Scanning
- Toggle the “Enable Scanning” switch to the ON position
- This activates automated scanning for all verified scopes.
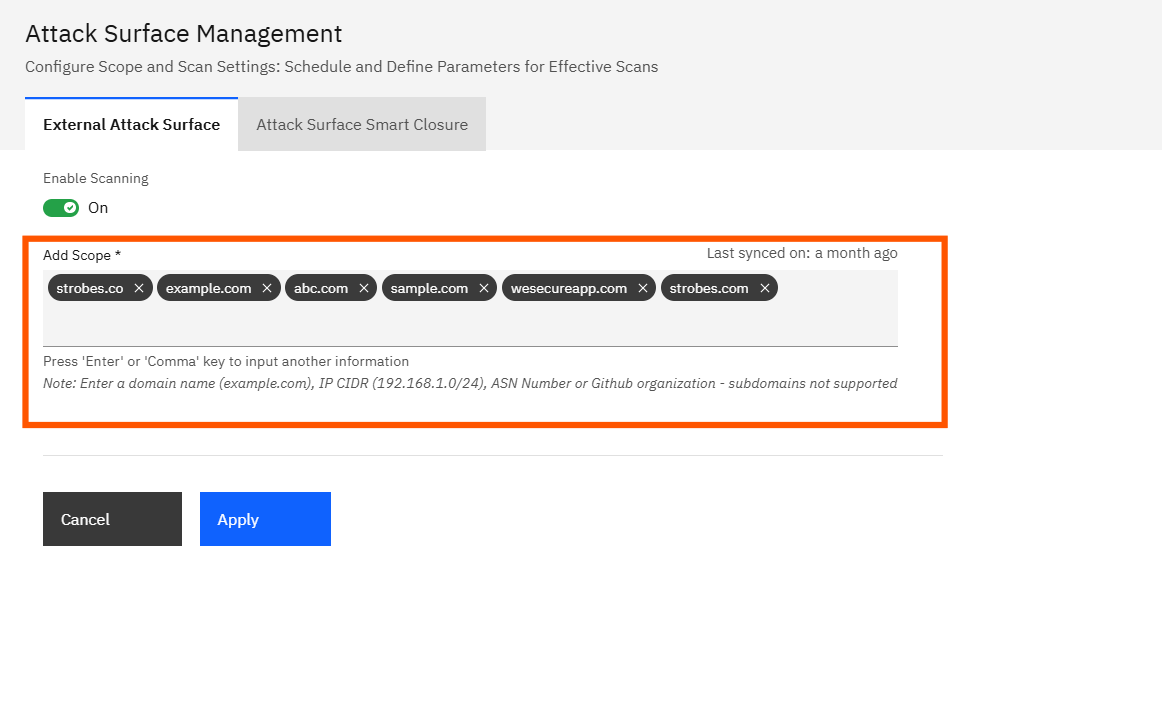
Step 4: Add Your Scope
In the Add Scope input box, type one of the following:
- Domain name (e.g., example.com)
- IP range in CIDR format (e.g., 192.168.1.0/24)
- ASN Number
- GitHub organization name
- Press Enter after each entry to add it.
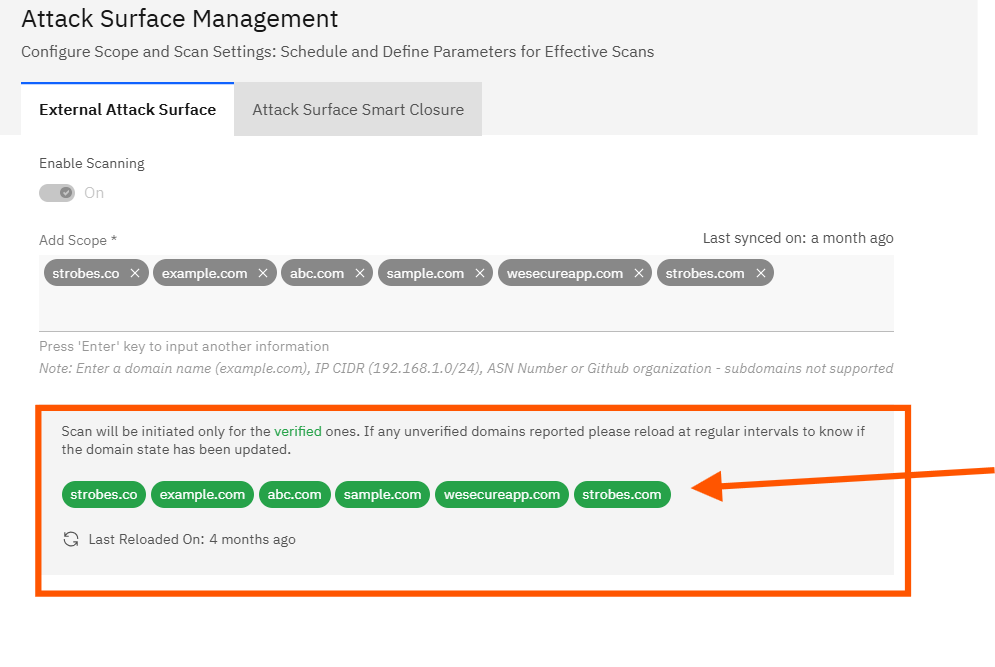
Step 5: Verify the Domains
- The system will attempt to verify the domains automatically.
- Only verified domains (shown with green tags) will be scanned.
- Unverified domains will not be scanned until verification is complete.
Step 6: Click Apply
- After enabling the toggle and adding scopes, click “Apply” to save your changes and initiate scanning.
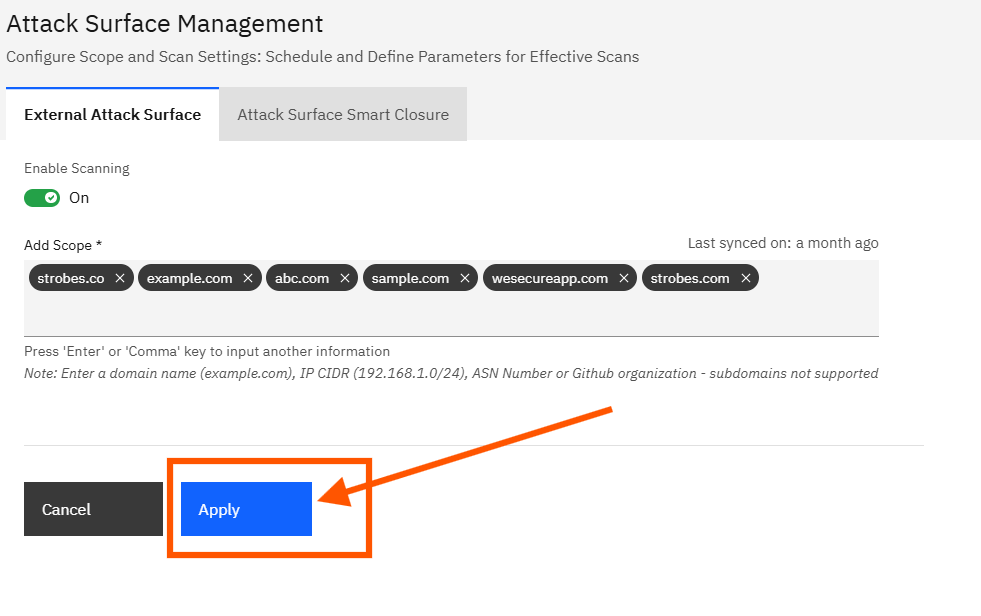
Step 7: Sync Status
- Once applied, Strobes will start syncing with the ASM discovery service.
- A message will show the last synced time (e.g., "3 days ago").
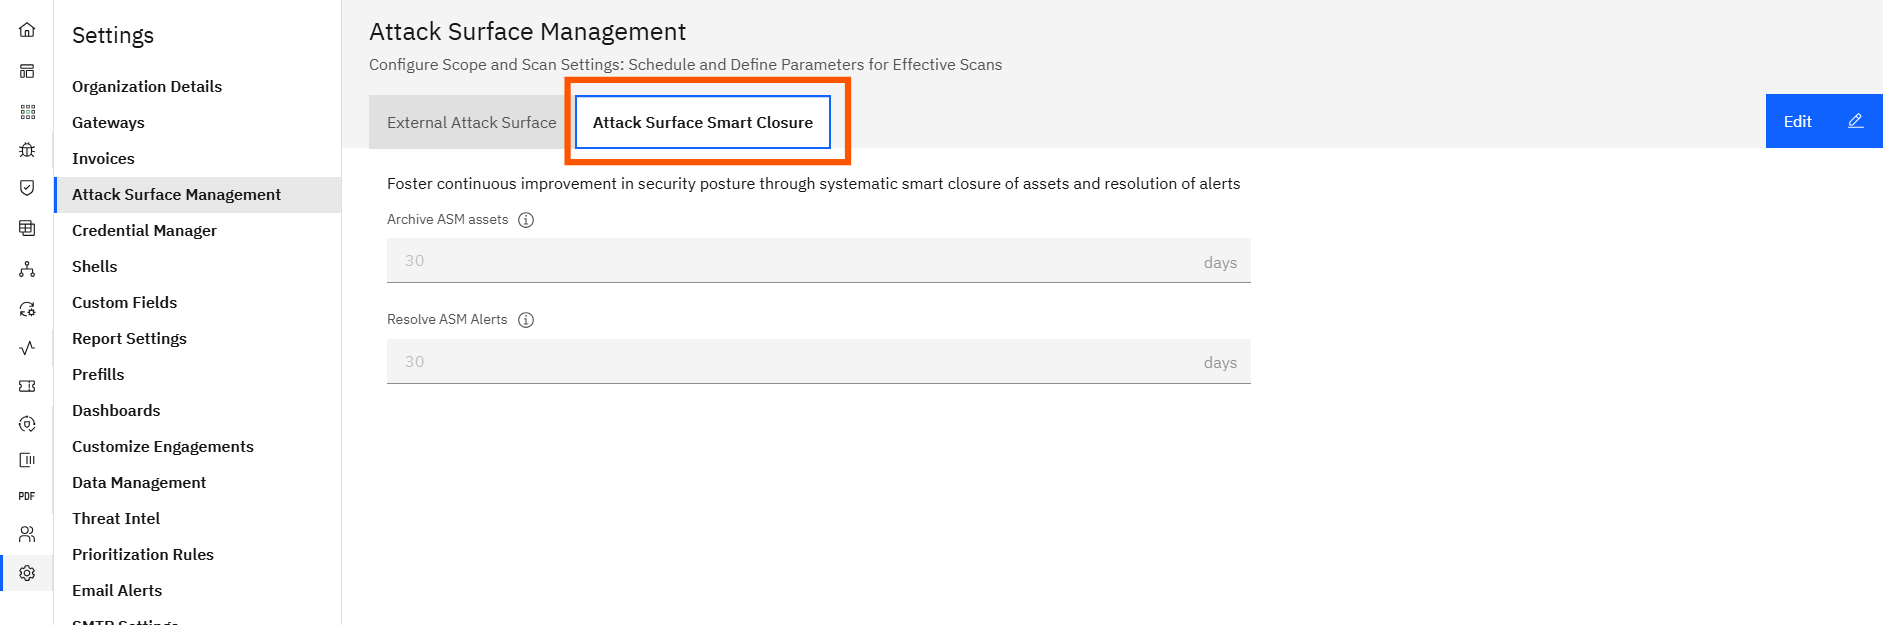
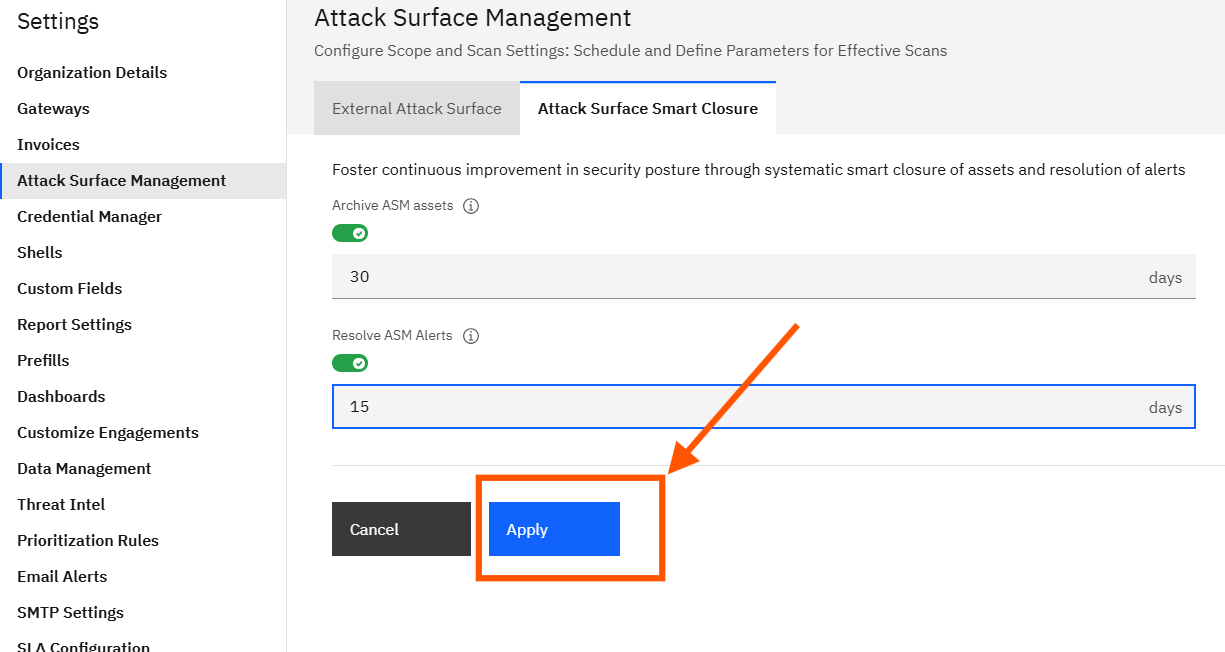
Attack Surface Smart Closure
The Smart Closure tab provides automated cleanup and maintenance of the attack surface by archiving inactive assets and resolving unaddressed alerts
Step 1: Go to Smart Closure Tab
Navigate to Settings → Attack Surface Management → Attack Surface Smart Closure tab.
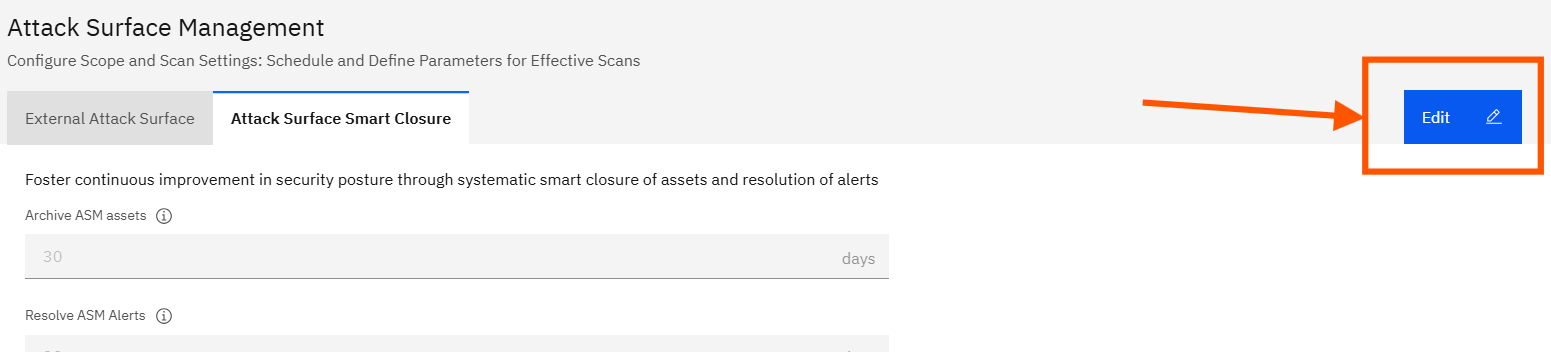
Step 2: Click the Edit Button
Click the blue “Edit” button at the top-right corner of the screen to begin setting up your automation preferences.
Step 3: Enable “Archive ASM Assets” (Optional)
- Toggle the “Archive ASM Assets” switch to ON if you want to automatically archive inactive assets.
- In the input box below it, enter the number of days after which inactive ASM assets should be archived.
🛈 Example: If you enter “30”, any asset not seen as active in the last 30 days will be archived automatically.
Step 4: Enable “Resolve ASM Alerts” (Optional)
- Toggle the “Resolve ASM Alerts” switch to ON if you want to automatically resolve alerts that haven’t been addressed.
- In the input box below it, enter the number of days after which stale alerts should be marked as resolved.
🛈 Example: If you enter “15”, any alert not acknowledged or resolved in 15 days will be auto-closed.
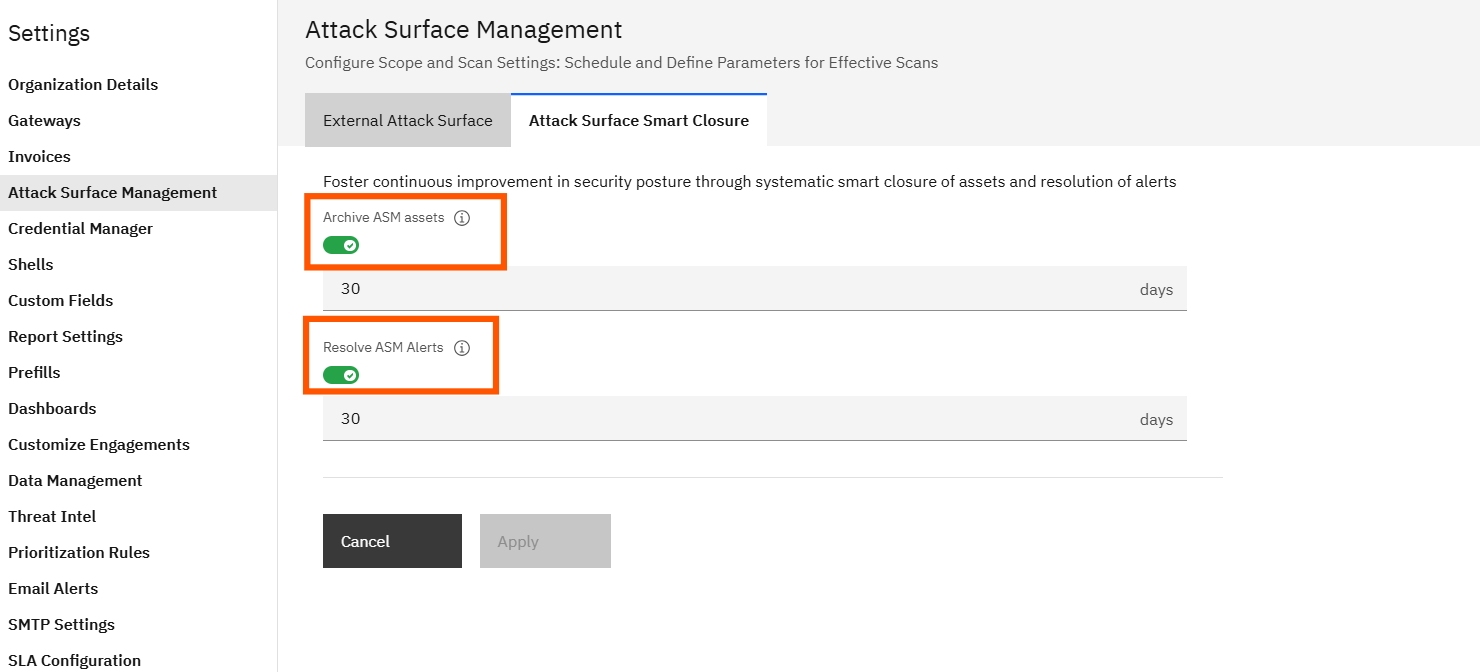
Step 5: Click Apply
After setting your desired durations and enabling the toggles, click the “Apply” button to save your configuration.
Once applied:
- The system will begin monitoring assets and alerts.
- Actions will be taken automatically based on the defined number of days.
- This helps reduce noise and ensures your attack surface data remains relevant and actionable.
What Strobes ASM Detects:
With real-time discovery and analysis, Strobes ASM can detect:
- Exposed domains or subdomains
- Open ports and misconfigured services
- Malware-hosting domains
- Phishing pages using your brand
- Expired SSL certificates
- Public code repositories linked to your organization
- Shadow IT assets
- Unpatched external-facing applications