Configuring Git Credentials Using Credential Manager
This article provides step-by-step instructions to configure Git credentials within the Strobes platform using Credential Manager. Setting up Git credentials is a prerequisite for enabling various Git-based integrations across the platform such as syncing code repositories or fetching vulnerability data.
Overview
Git credentials are stored securely in the Credential Manager within Strobes. Once configured, these credentials can be used across multiple connectors that require Git access including source code scanning tools, ticketing integrations, and workflow automations.
Use Case Examples
- Authenticating your GitHub organization while setting up a connector.
- Syncing repositories with integrated static code analysis tools.
- Triggering scans via workflows using Git-based assets.
Step-by-Step Instructions
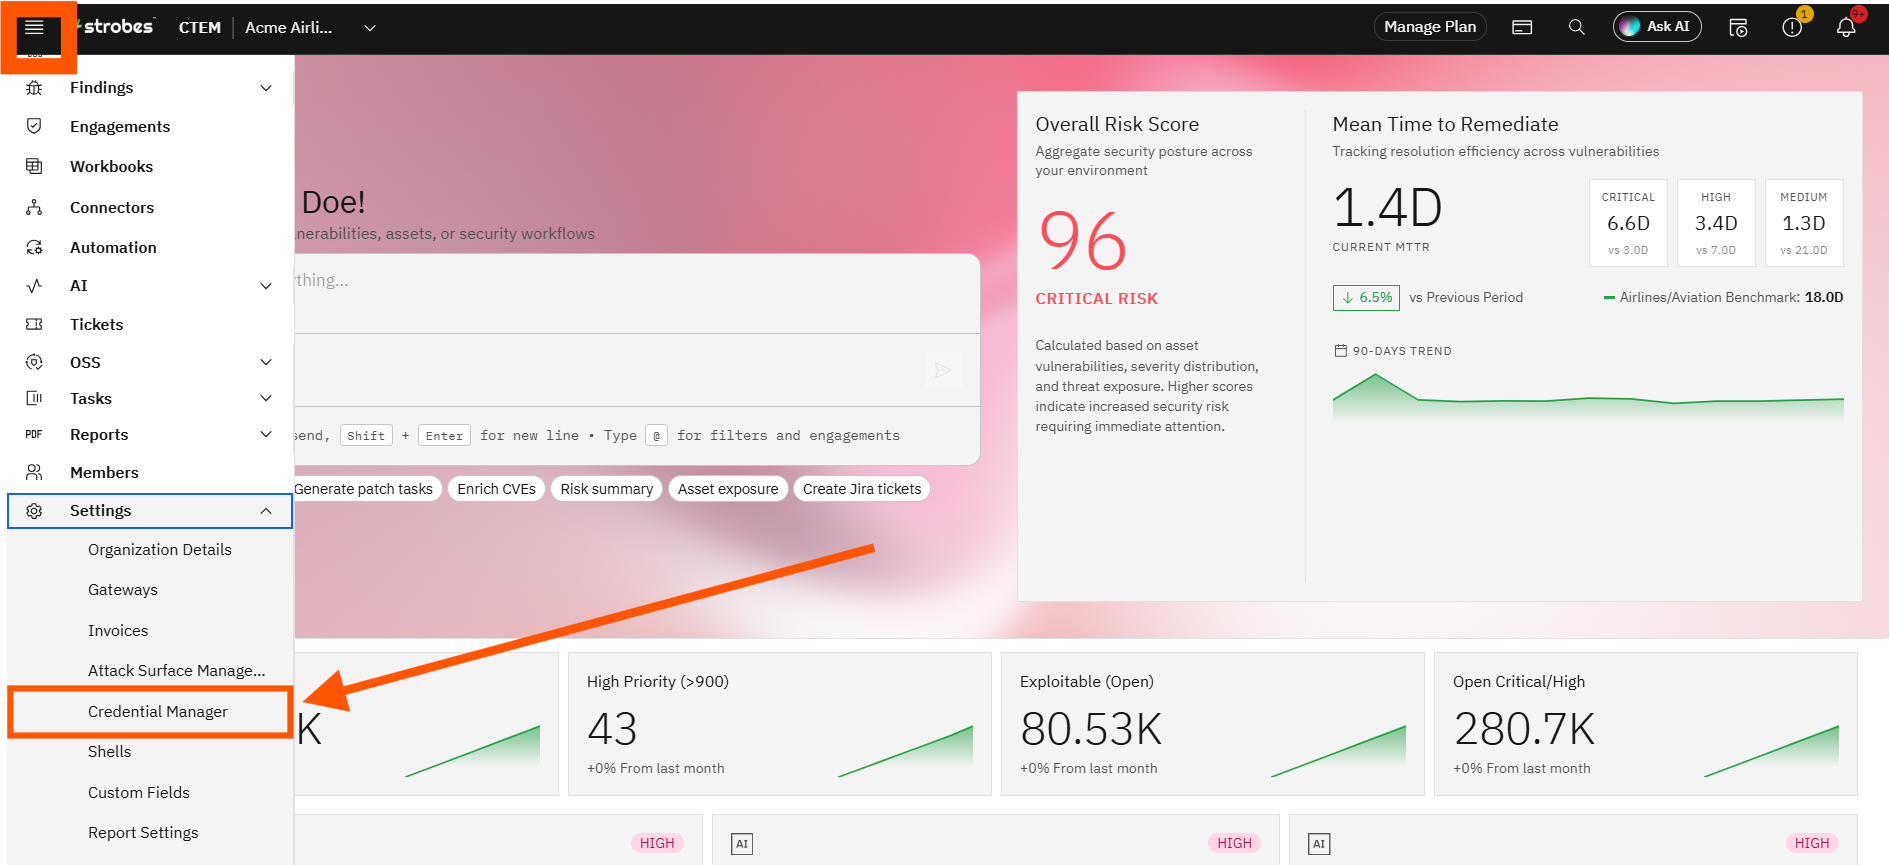
Step 1: Navigate to Credential Manager
- Log in to your Strobes instance.
- Click on Settings from the left sidebar.
- Select Credential Manager from the Settings menu.
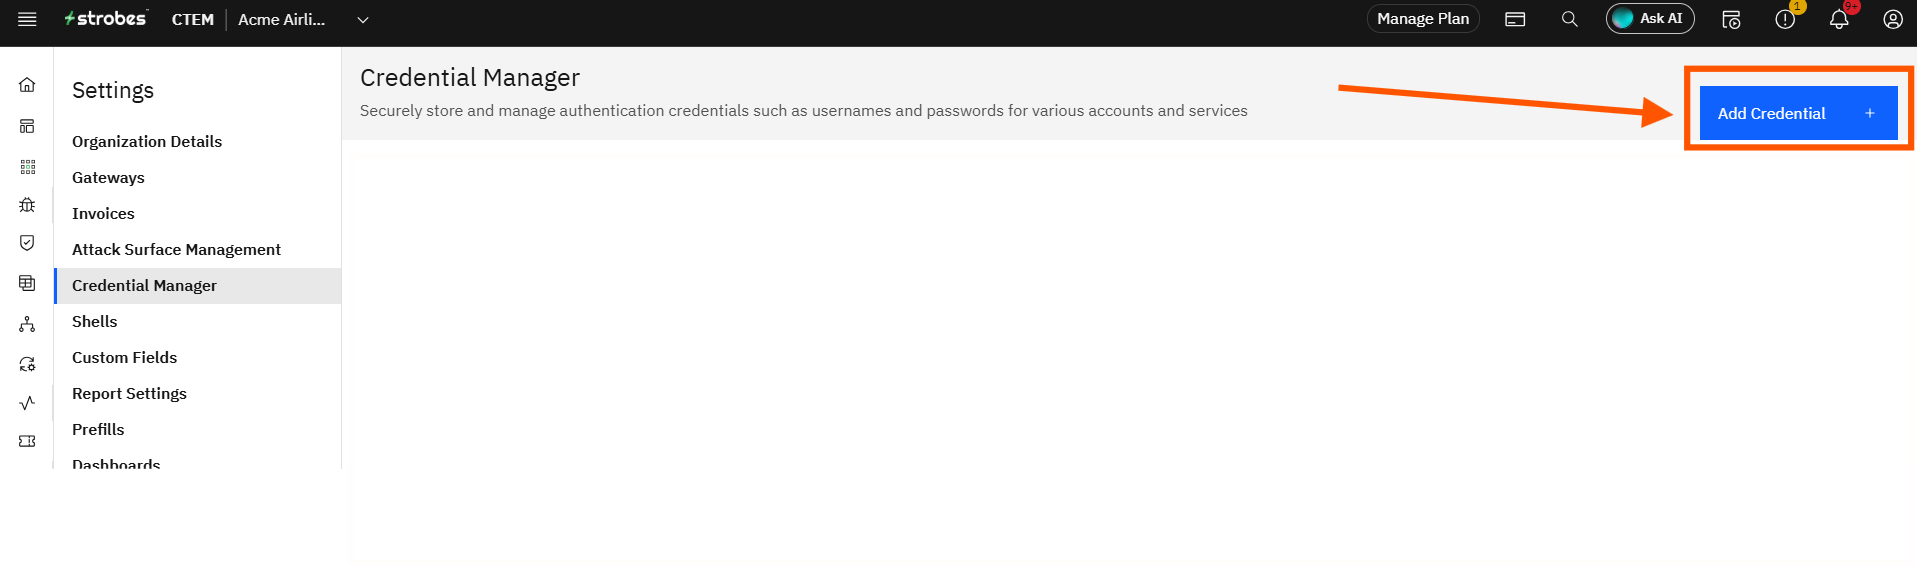
Step 2: Add a New Credential
- Click on Add Credential at the top-right corner.
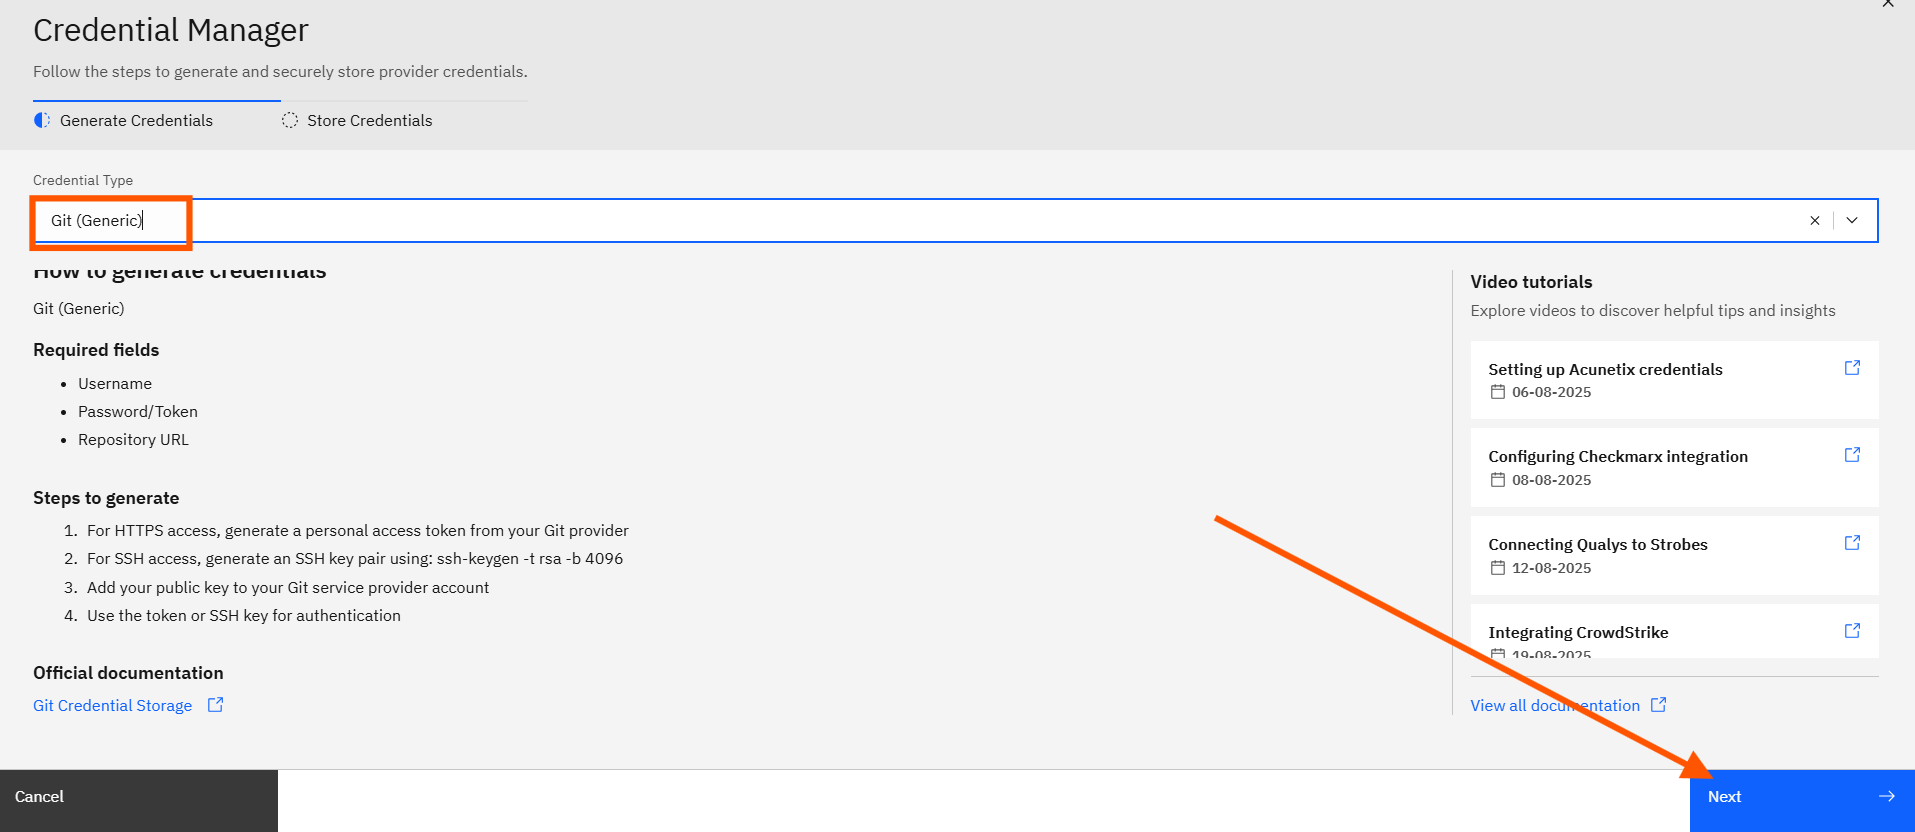
- From the dropdown, select Git as your connector type.
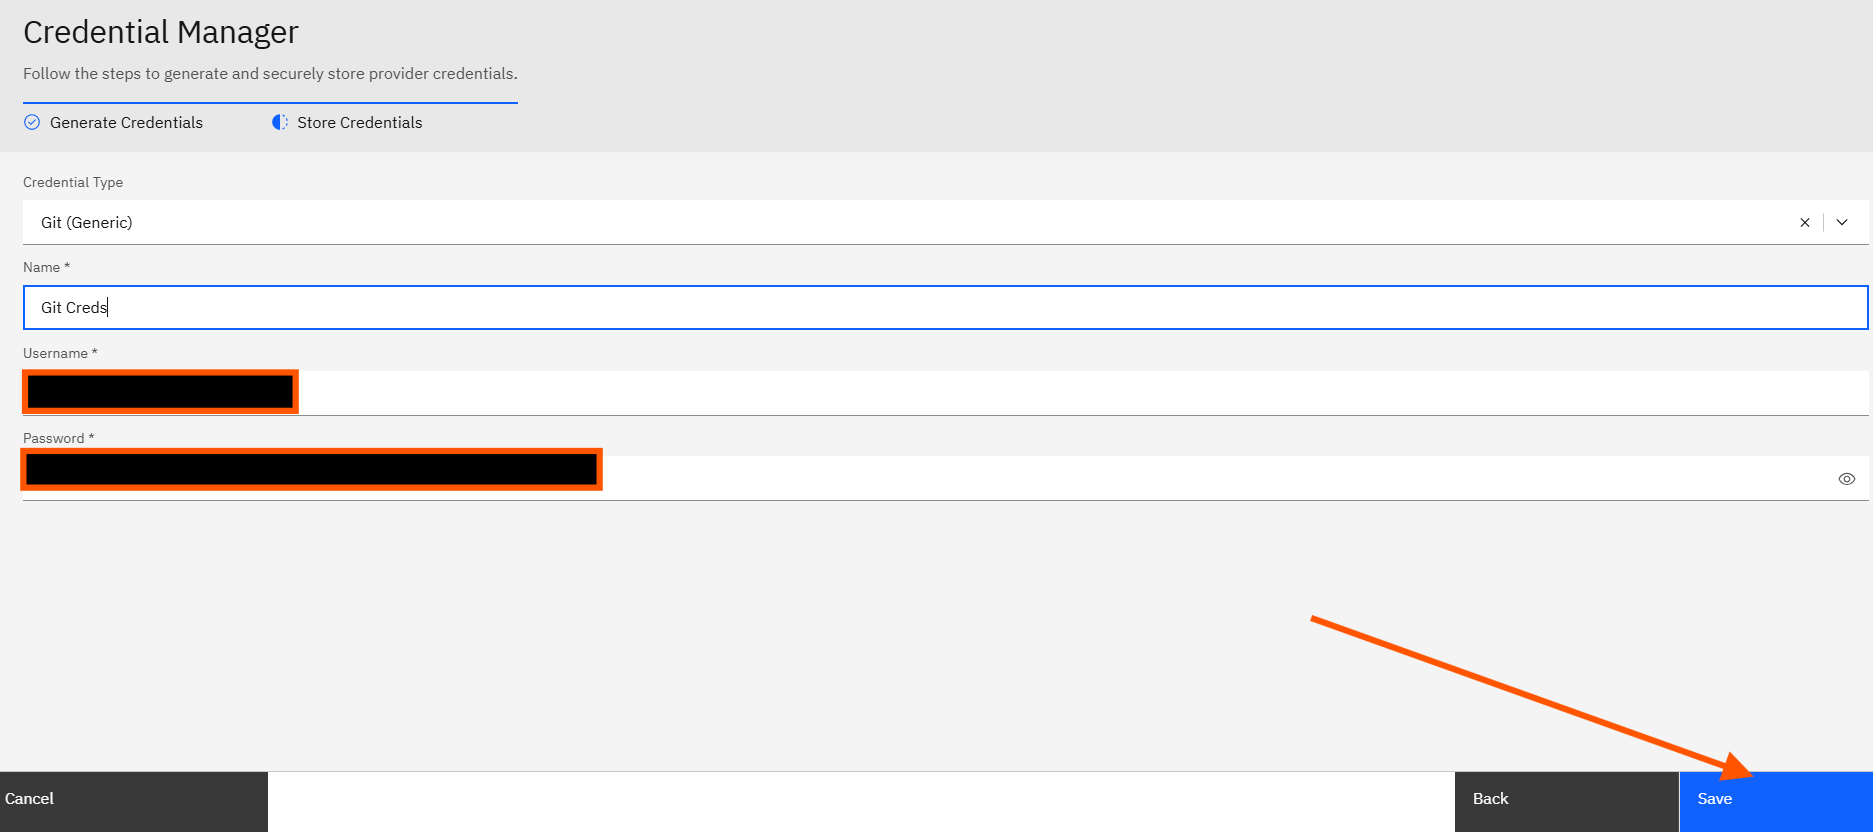
Step 3: Enter Credential Details
Fill in the following fields:
- Name:
Provide a descriptive name for the credential. (Example: GitHub - DevSecOps Team) - Username:
Your Git username (this is required for all Git platforms). - Password / Personal Access Token:
- If 2FA is not enabled, enter your Git password.
- If 2FA is enabled, use a Personal Access Token (PAT) instead.
Refer to the links provided in the Pre-requisites section to generate one.
Ensure the PAT has appropriate scopes such as repo, read: org, or write:repo_hook based on your use case.
Step 4: Save the Credential
- Click on Save.
- Your Git credentials are now securely stored and available for use with relevant integrations.