
Automations || Launching an AI Agent Task
Overview
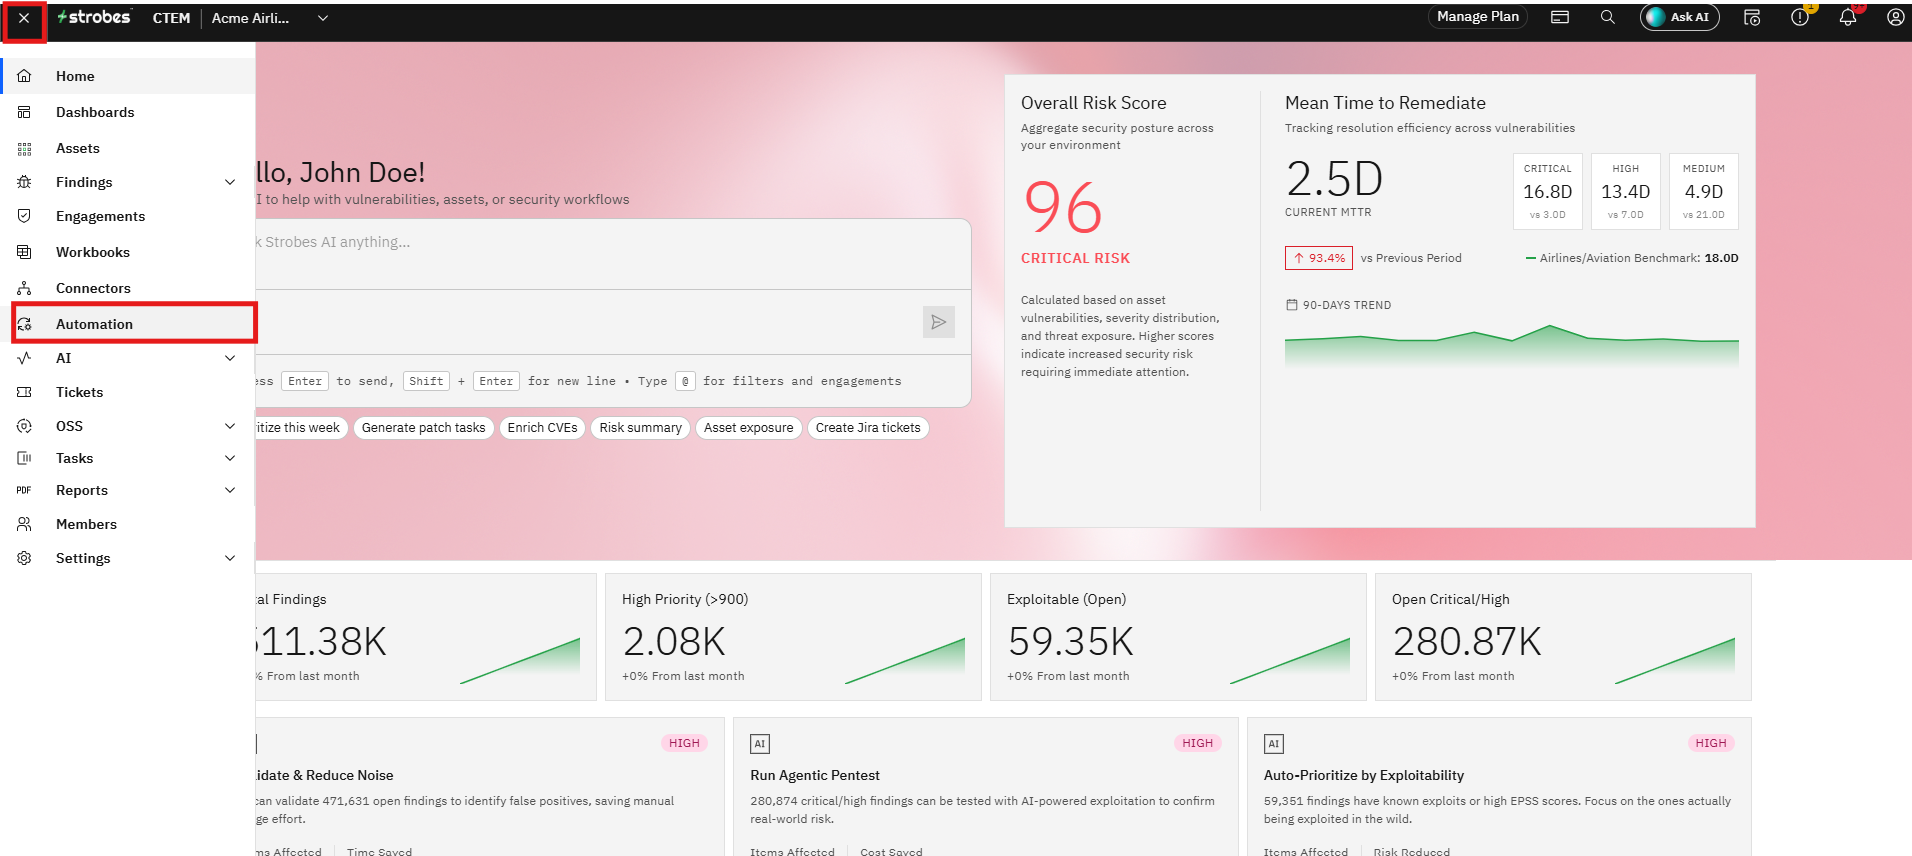
Launching an AI Agent Task can happen by Strobes Automation. It lets you build event-driven workflows that act on your security data automatically. Each automation watches for a specific trigger, filters the data it cares about, and then executes one or more actions; such as updating asset fields, applying tags, or launching a Pulse AI agent run. Automations are built through a five-step wizard that covers configuration, events, filters, pipelines, and actions.
Configuring an AI Agent Task automatically happens from the Automations tab from the strobes Instance.
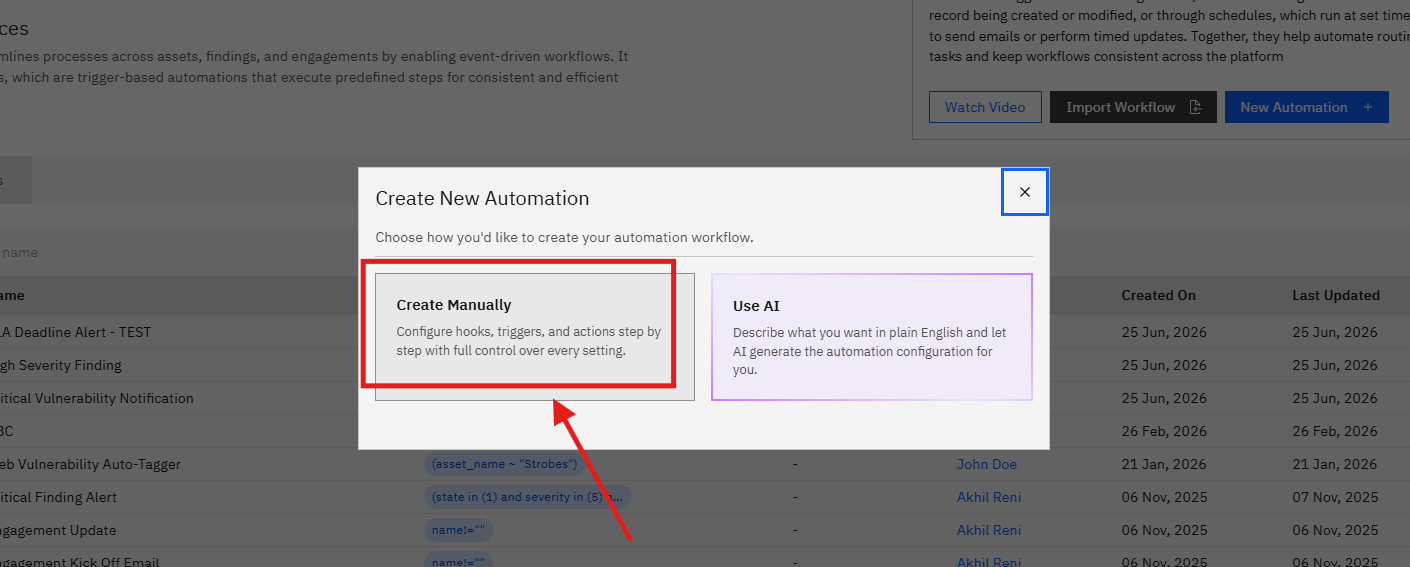
Click on New Automation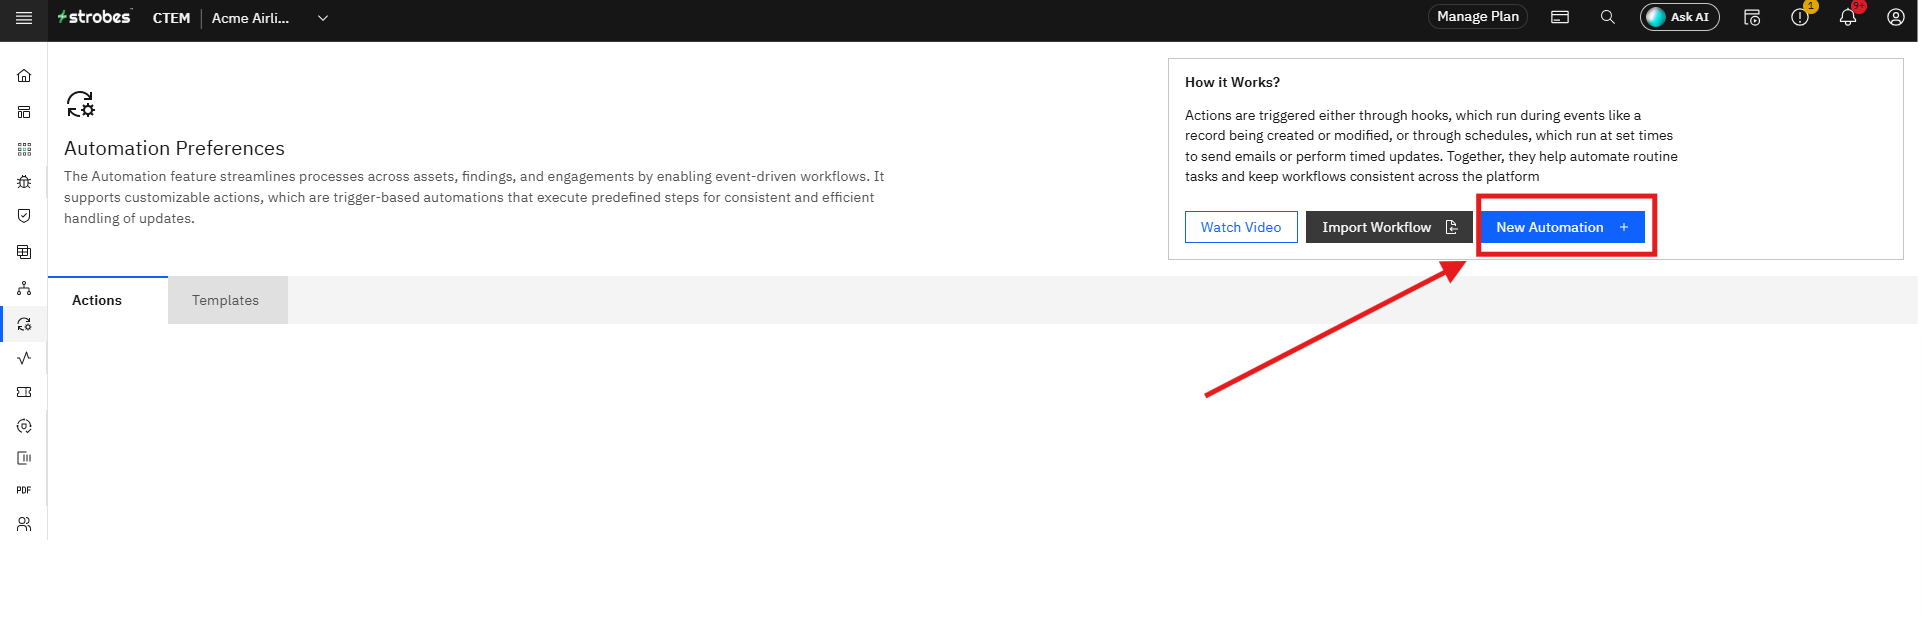
Step 1: Configuration Details (Step 1 of 5)
Fill in the three fields on this step:
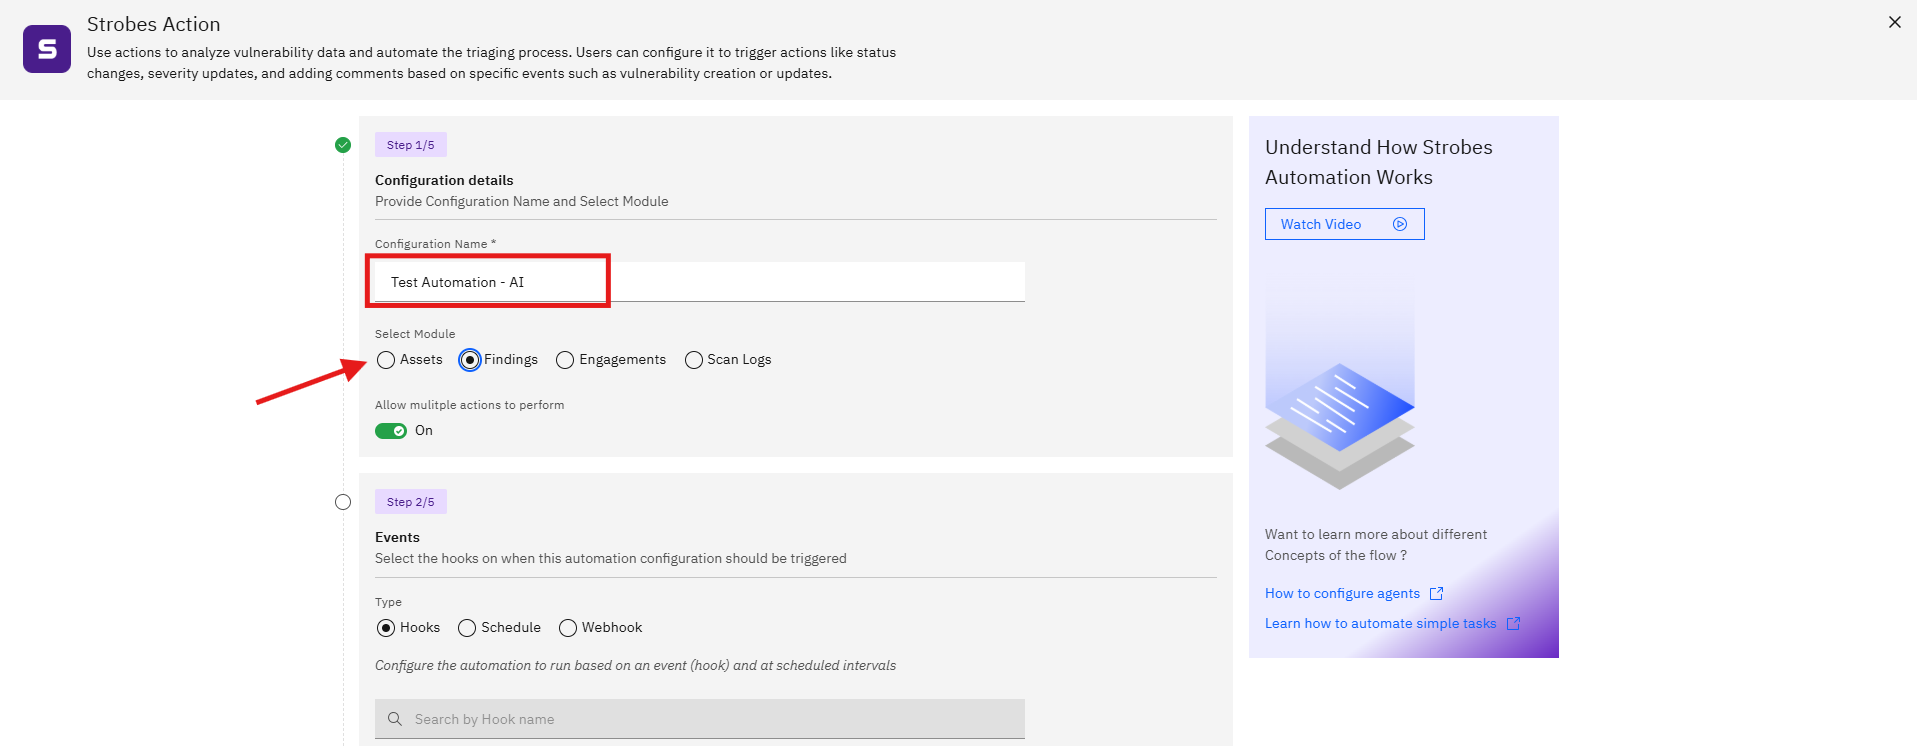
Configuration Name (required) Enter a descriptive name for the automation. Use a name that clearly identifies the workflow's purpose, for example: "Tag Critical Assets on Creation" or "Notify on High Severity Findings."
Select Module (required) Choose the data module this automation will operate on. The available options are:
Module | Description |
|---|---|
Assets | Triggers and actions apply to asset records |
Findings | Triggers and actions apply to vulnerability findings |
Engagements | Triggers and actions apply to engagement records |
Scan Logs | Triggers and actions apply to scan log data |
Allow Multiple Actions to Perform Toggle this on if you want the automation to execute more than one action when it fires. Leave it off if the automation should perform only a single action.
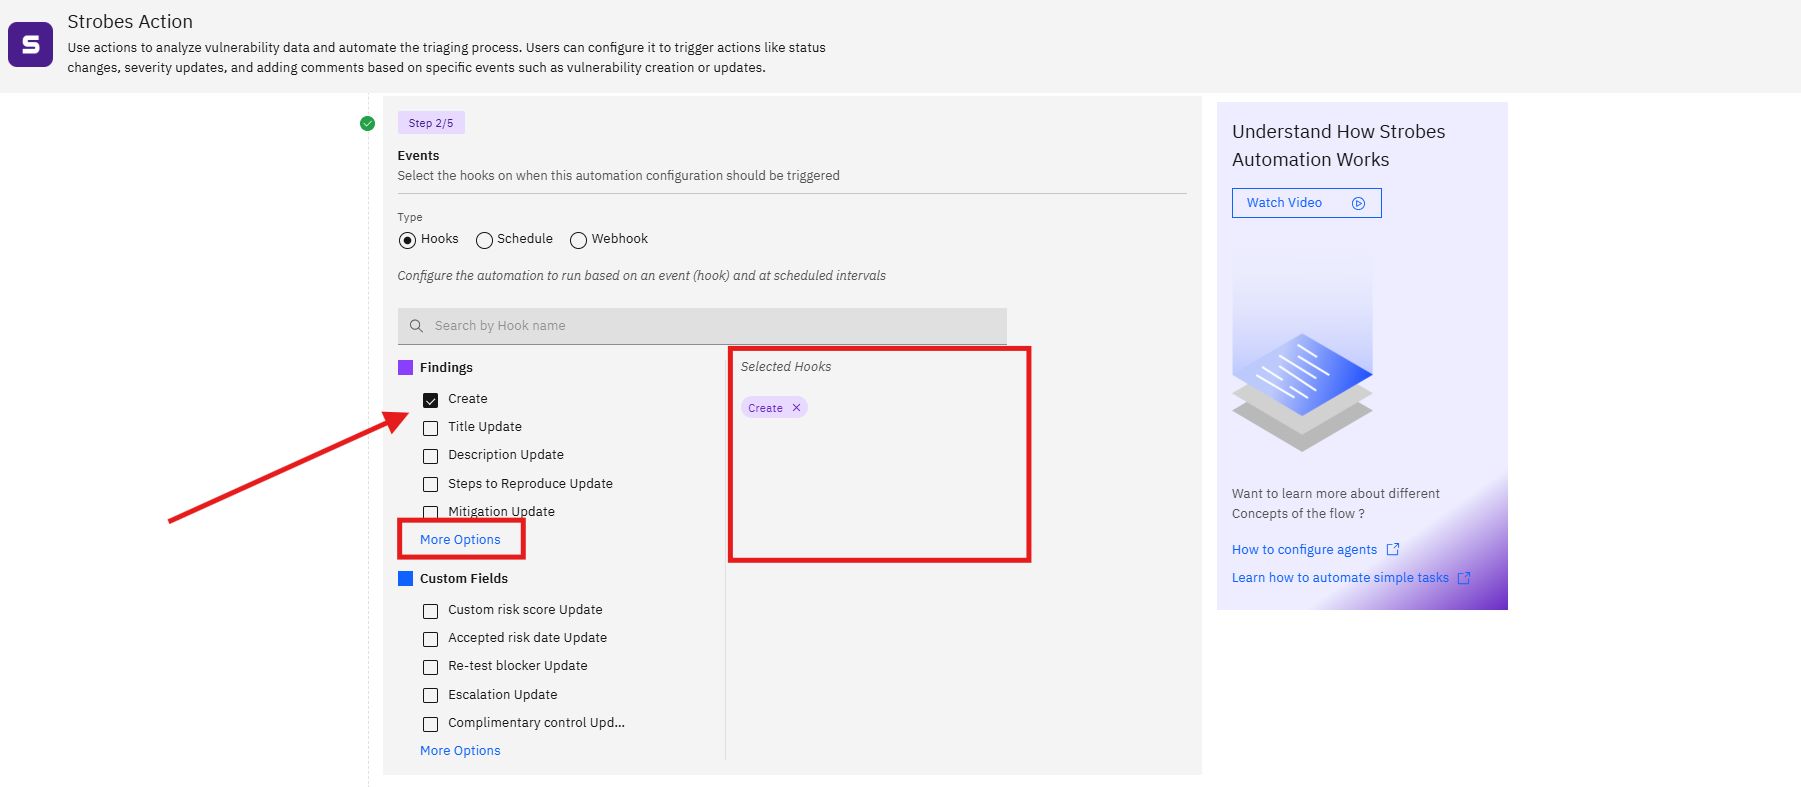
Step 2: Events (Step 2 of 5)
This step determines when the automation runs. Select a trigger type and configure it:
Type (required) Choose how the automation is triggered:
Type | Description |
|---|---|
Hooks | Fires when a specific event occurs within the platform, such as a record being created or updated |
Schedule | Fires on a recurring time-based schedule |
Webhook | Fires when an external system sends a webhook payload to Strobes |
Configuring a Hook Trigger
When Hooks is selected, the wizard shows a searchable list of available hook events grouped by category. The events available depend on the module selected in Step 1.
For the Assets and Findings modules, available hooks can we viewed by clicking on "More Options". Additional hooks are listed under Custom Fields. Click More Options to see the full list.
Select the checkboxes for every hook event that should trigger this automation. You can select multiple hooks.
Note: Hooks and Schedule can be combined. When Hooks is selected, the platform will run the automation both on the selected events and at the configured schedule intervals.
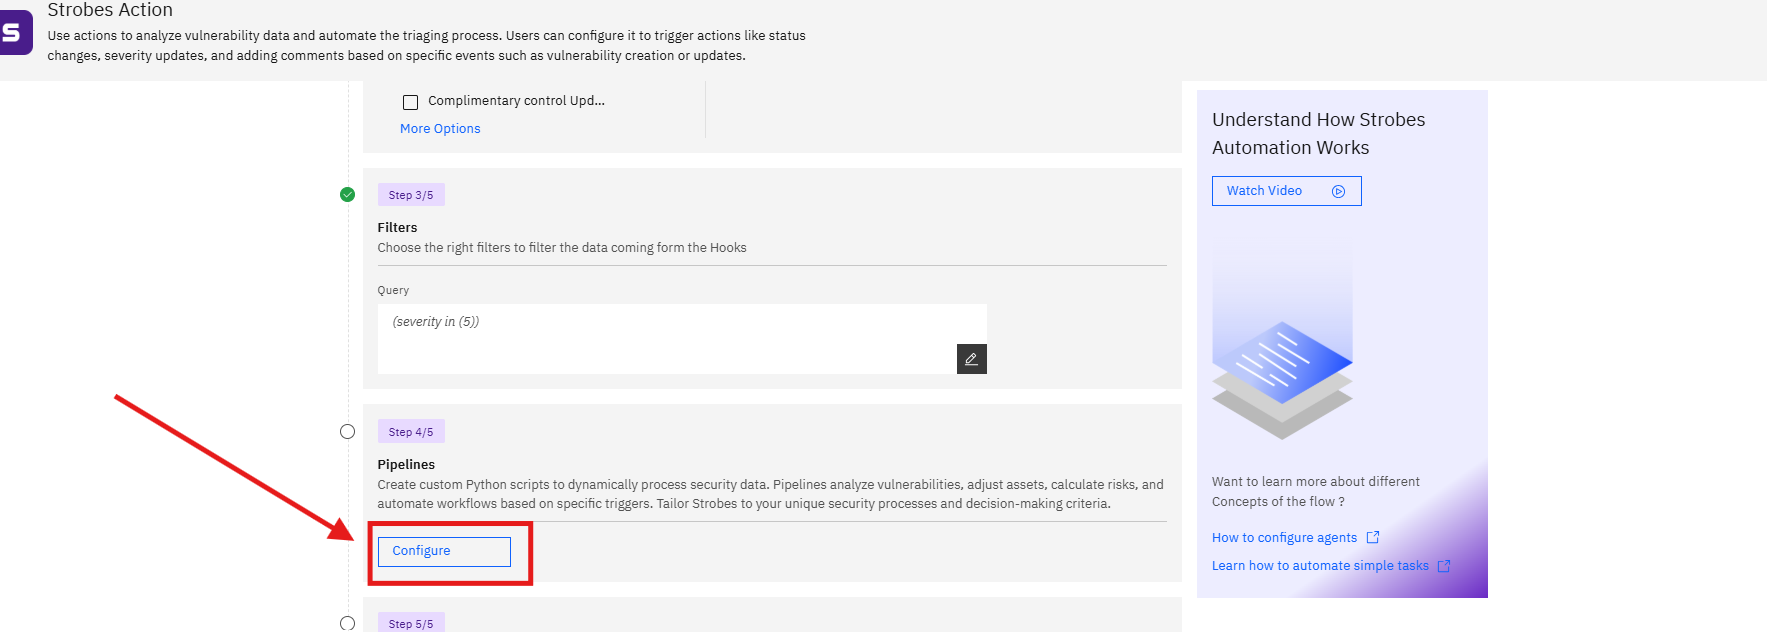
Step 3: Filters (Step 3 of 5)
Filters narrow down which records the automation acts on. Without a filter, the automation applies to every record that matches the hook trigger.
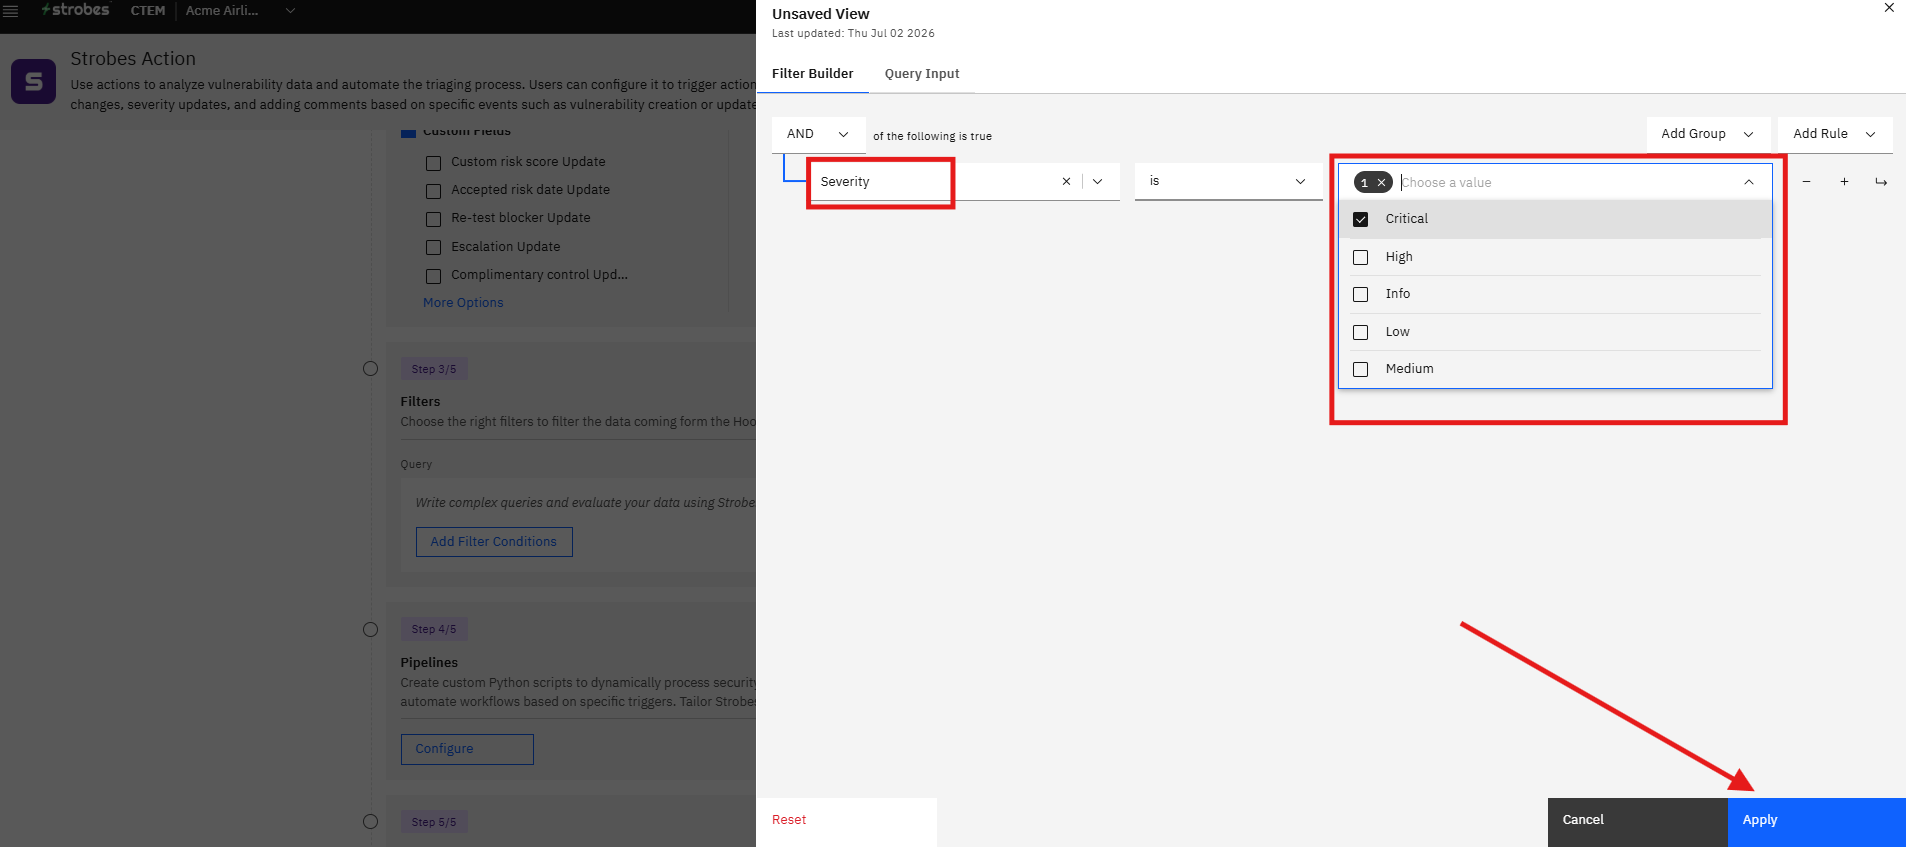
Query Use the Strobes Query Language (SQL) field to write a custom query that evaluates your data. This is useful for targeting specific subsets of records, such as only Critical severity findings or assets in a particular environment.
Add Filter Conditions Click Add Filter Conditions to build a filter using the point-and-click condition builder instead of writing a raw query. Add as many conditions as needed and combine them with AND or OR logic.
Tip: If no filter is required, you can leave this step empty and the automation will process all records matched by the hook.
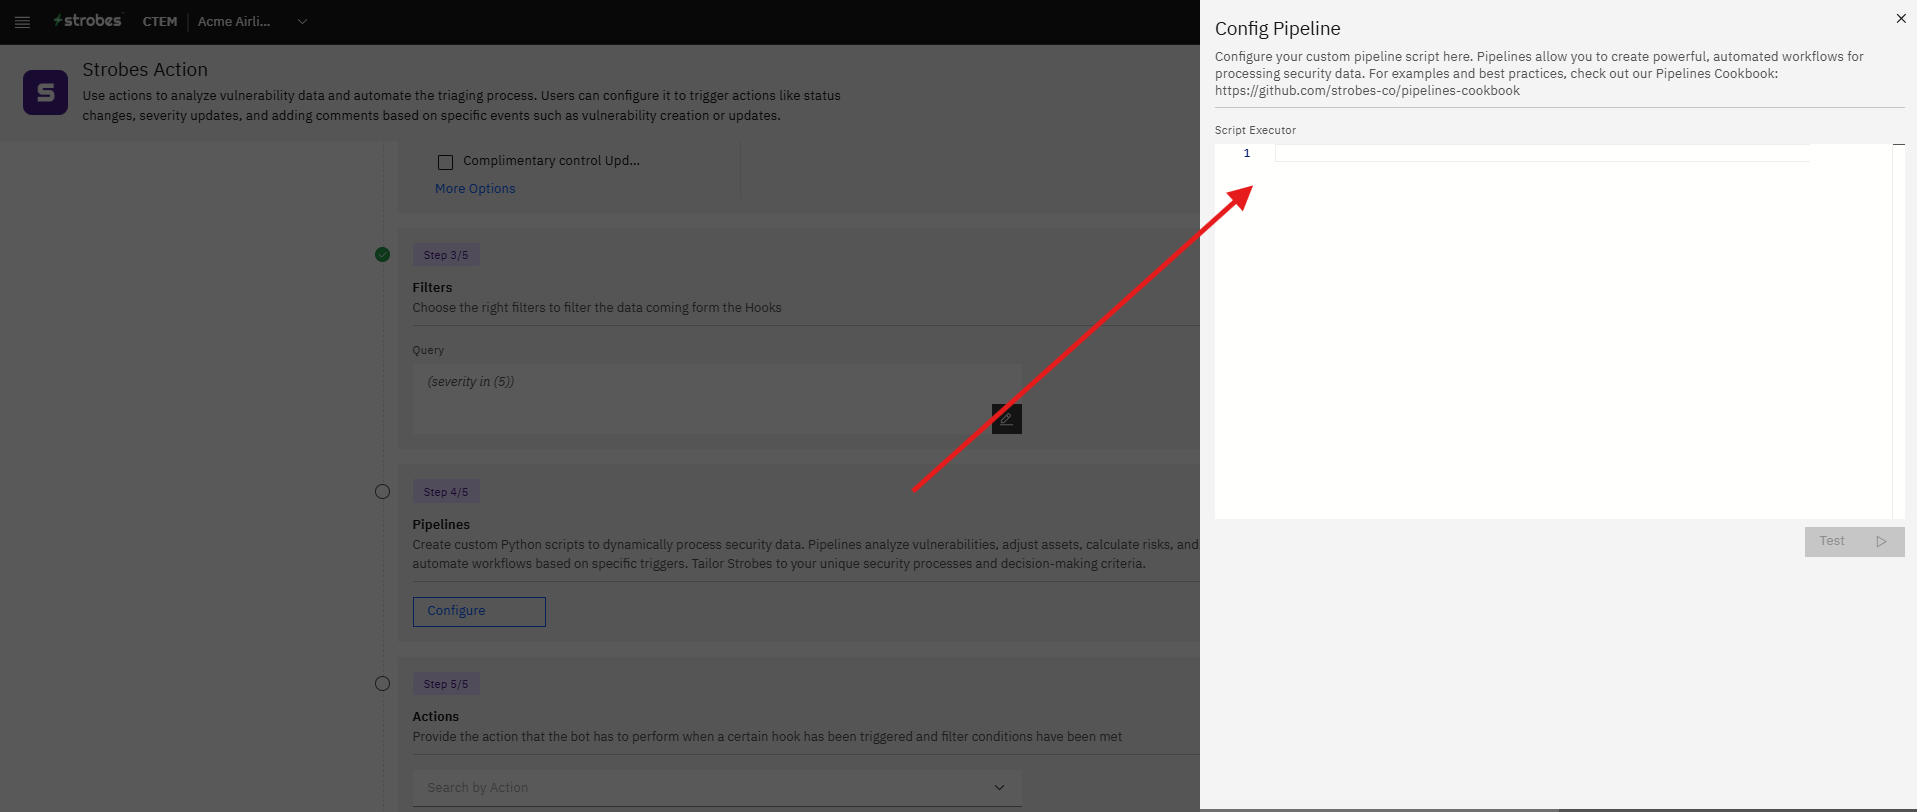
Step 4: Pipelines (Step 4 of 5)
Pipelines allow you to run custom Python scripts against the matched records before the actions execute. Use pipelines to perform complex logic that cannot be expressed through filter conditions alone, such as calculating a custom risk score, transforming field values, or enriching records with external data.
Click Configure to open the pipeline editor.
Write or paste your Python script.
Note: Pipelines are optional. If your automation does not require custom scripting, skip this step and proceed to Actions.
Step 5: Actions (Step 5 of 5)
Actions define what the automation does when the trigger fires and the filters are satisfied. You can add multiple actions if Allow Multiple Actions to Perform was enabled in Step 1.
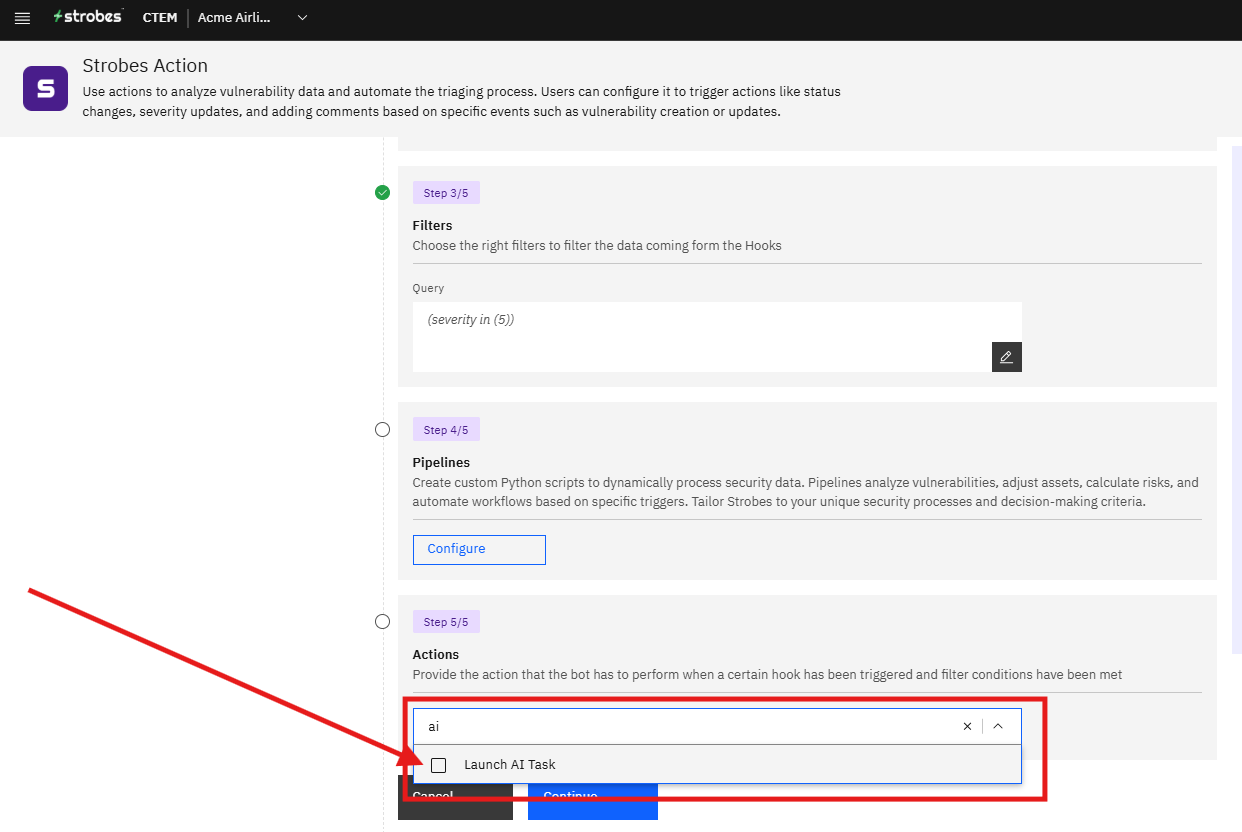
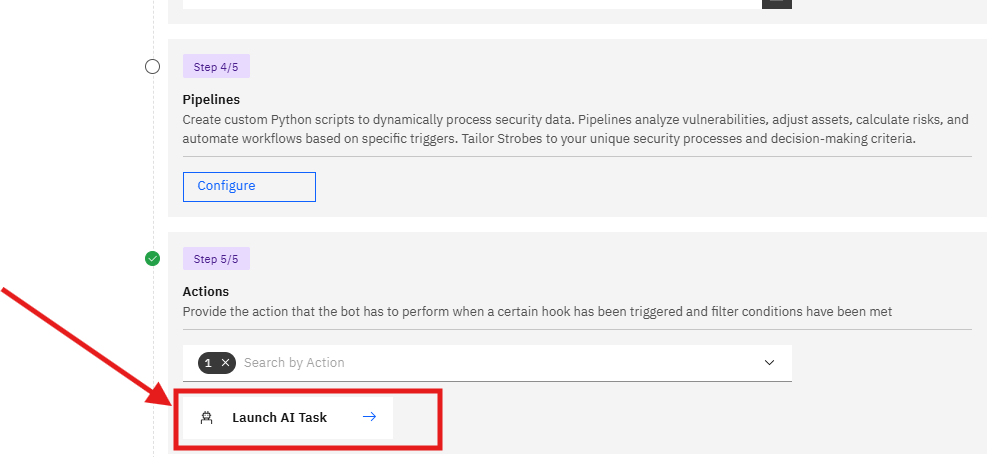
Click the Search by Action dropdown and select an "Launch an AI Task" from the list. Each action you select appears as a row below the dropdown. Click the → arrow next to an action to open its configuration panel.
Configuring Launch AI Task
Launch AI Task triggers a Pulse AI agent run the moment this automation fires. The matched records are passed to the agent as context automatically, so the agent can reason over the actual data that triggered the workflow.
Click the → arrow next to Launch AI Task to open the Configure AI Task panel and fill in the fields:
Workspace (optional) Select a workspace from the dropdown to pin this AI run to a specific workspace.
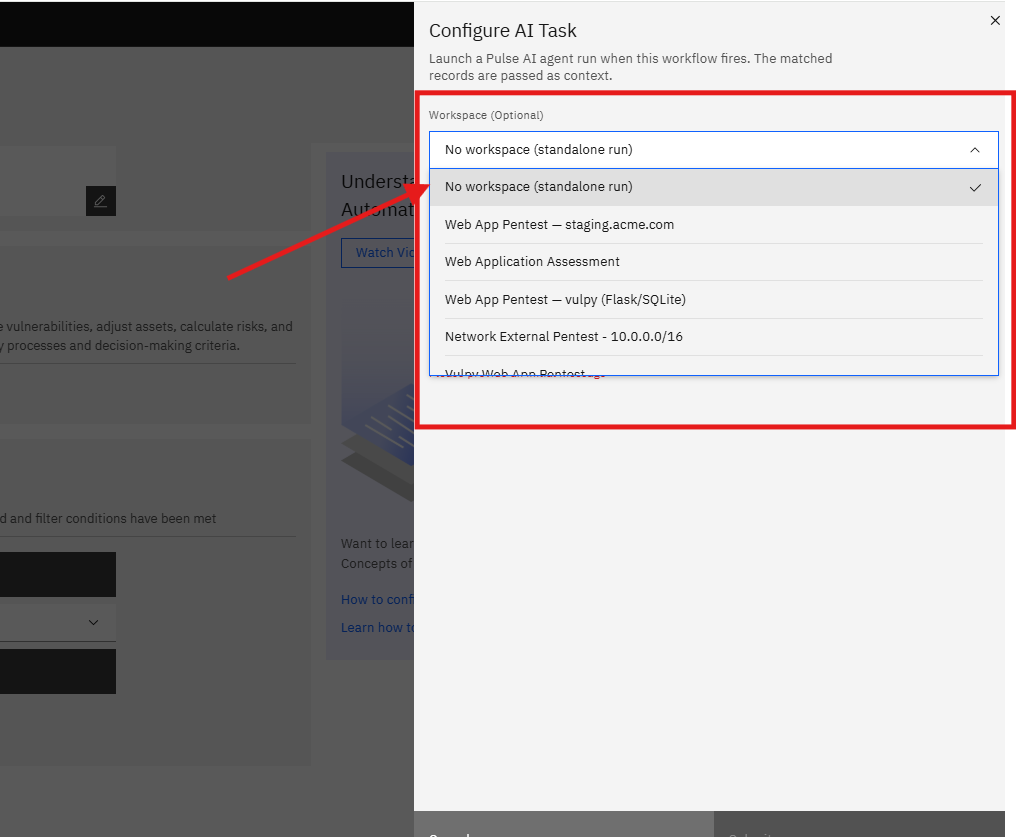
The agent run will inherit the agents, credentials, and documents configured for that workspace. If no workspace is needed, leave this set to No workspace (standalone run).
Initial Message (required) Write a prompt that tells the agent what to do with the matched records. The matched records are appended to this message automatically when the automation fires, so you only need to describe the task.
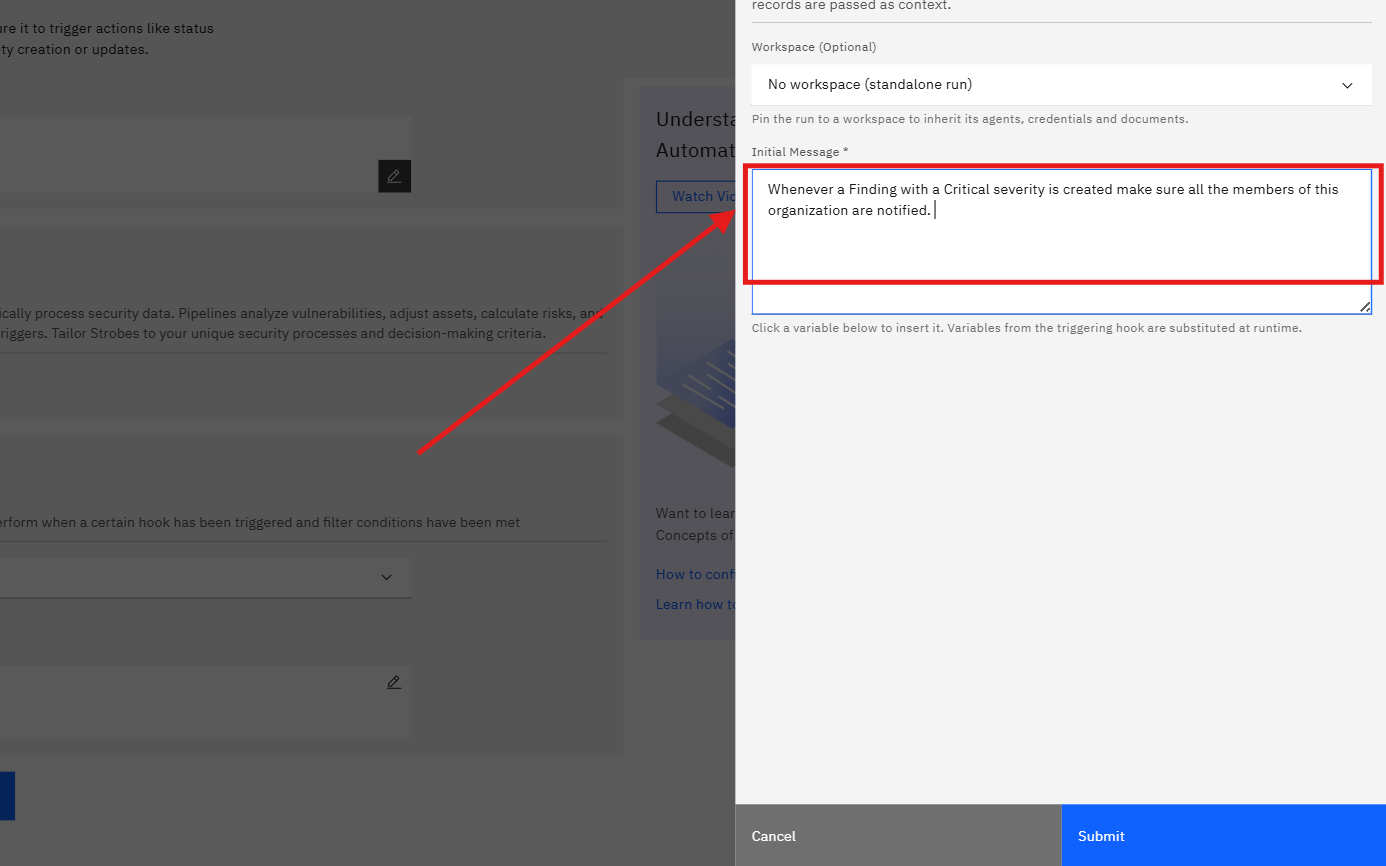
Example: "Review the matched vulnerabilities and suggest remediation priority based on severity and asset exposure."
Note: The Initial Message field is required. The panel will not submit without it.
Click Submit to save the Launch AI Task configuration and return to the Actions step.
Step 6 — Save the Automation

Once all steps are complete, click Continue to save and activate the automation. It will begin executing immediately the next time the configured trigger fires.
Tips
Name automations clearly. A name like "Auto-tag critical findings on creation" is easier to manage at scale than "Automation 1." Include the trigger, the module, and the outcome in the name wherever possible.
Combine multiple hooks for broader coverage. If you want the automation to fire on both record creation and specific field updates, select all relevant hook events in Step 2 rather than creating separate automations.
Use filters to avoid over-triggering. Without a filter, every event matching your hook will trigger the automation. Adding filter conditions ensures only the right records reach the Actions step, reducing noise and unnecessary AI task runs.
Use Launch AI Task for context-aware responses. Static actions apply the same change to every matched record. Launch AI Task lets the agent evaluate each record individually and respond based on actual content, which is more useful for triage, classification, and drafting recommendations.
Pin AI tasks to a workspace when relevant. If your workspace has custom agents trained on internal runbooks or knowledge base documents, pinning the AI task to that workspace means the agent will draw on that context rather than relying solely on the Initial Message and the matched records.