
Configuring Attack Surface Management
Overview
Strobes ASM (Attack Surface Management) continuously discovers and monitors your organization's external-facing assets, then flags exposure before attackers can find it. Configuration happens in two parts: External Attack Surface, where you define the scope of what Strobes should scan, and Attack Surface Smart Closure, where you set rules to automatically archive stale assets and resolve unaddressed alerts.
Both settings live under Settings → Attack Surface Management. You need to configure External Attack Surface first to activate scanning, and Smart Closure separately to keep your data clean over time.
Section 1: External Attack Surface
Step 1 — Open the External Attack Surface Tab
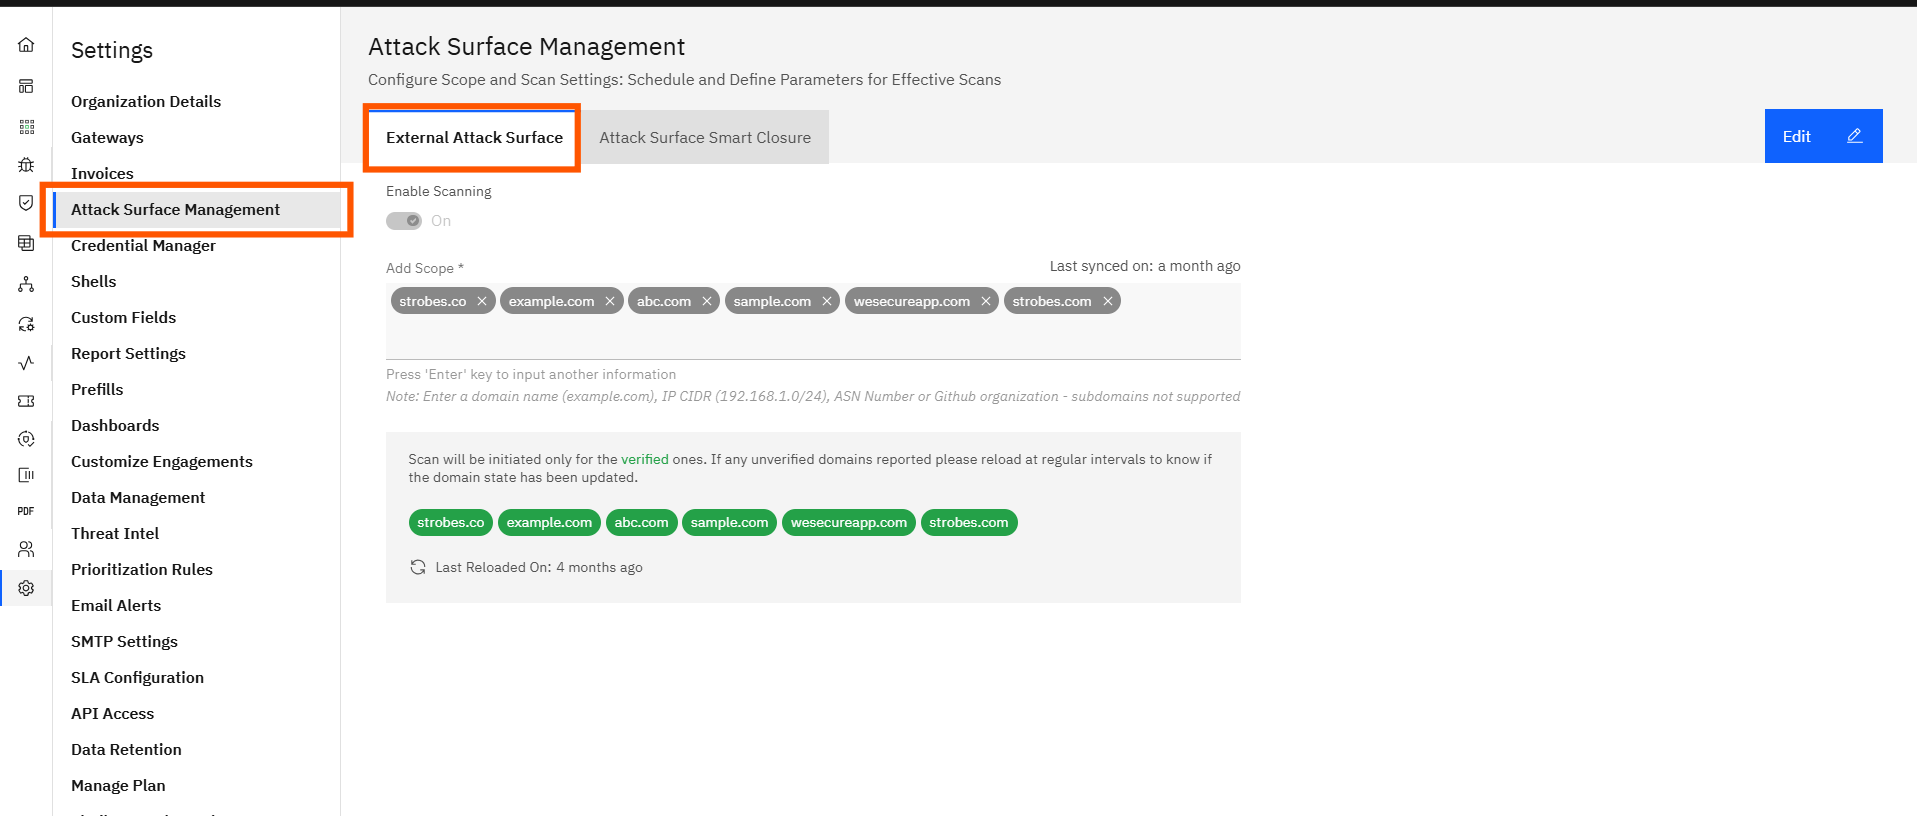
Navigate to Settings → Attack Surface Management → External Attack Surface. The External Attack Surface configuration panel opens.
Step 2 — Click the Edit Button

Click the blue Edit button at the top right of the panel. The configuration fields become editable.
Step 3 — Enable Scanning
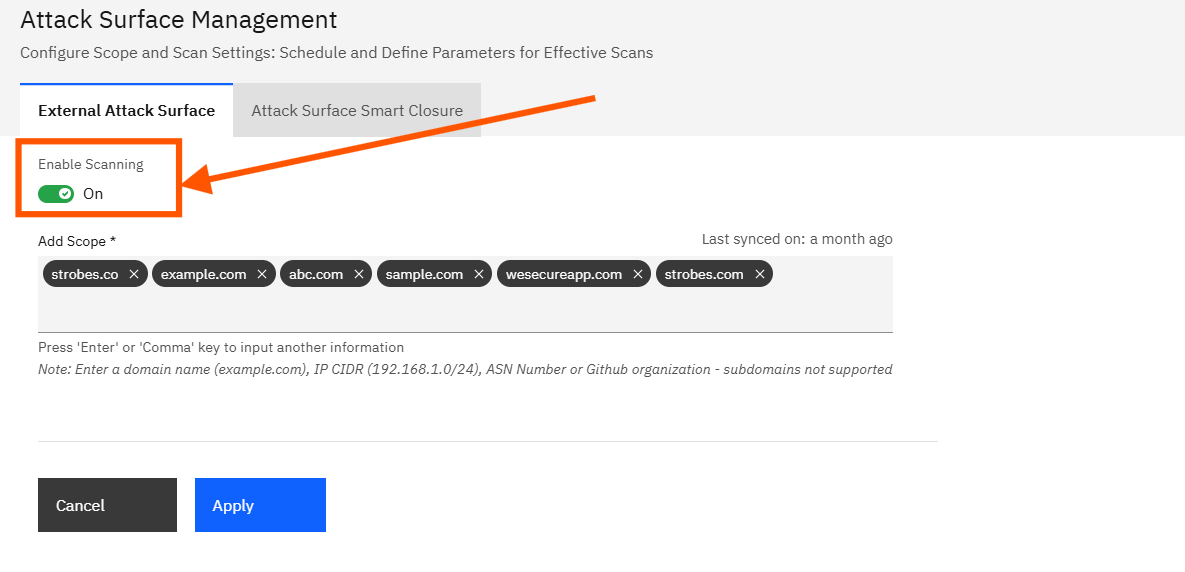
Click the Enable Scanning toggle to switch it to ON. This activates automated scanning for all verified scopes you add in the next step.
Step 4 — Add Your Scope
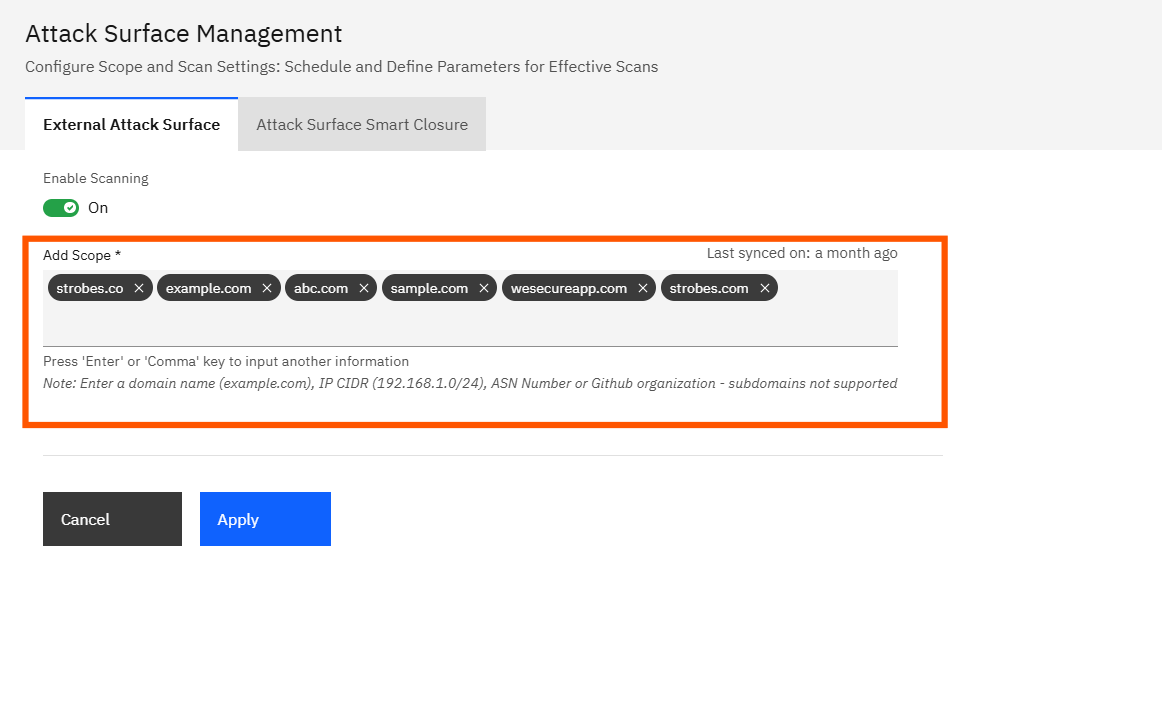
Click the Add Scope input box and type your first scope entry, then press Enter to add it. Repeat for each additional scope. Strobes accepts the following input types:
Input type | Example |
|---|---|
Domain name | example.com |
IP range (CIDR) | 192.168.1.0/24 |
ASN number | AS12345 |
GitHub organization name | your-org-name |
Step 5 — Verify the Domains
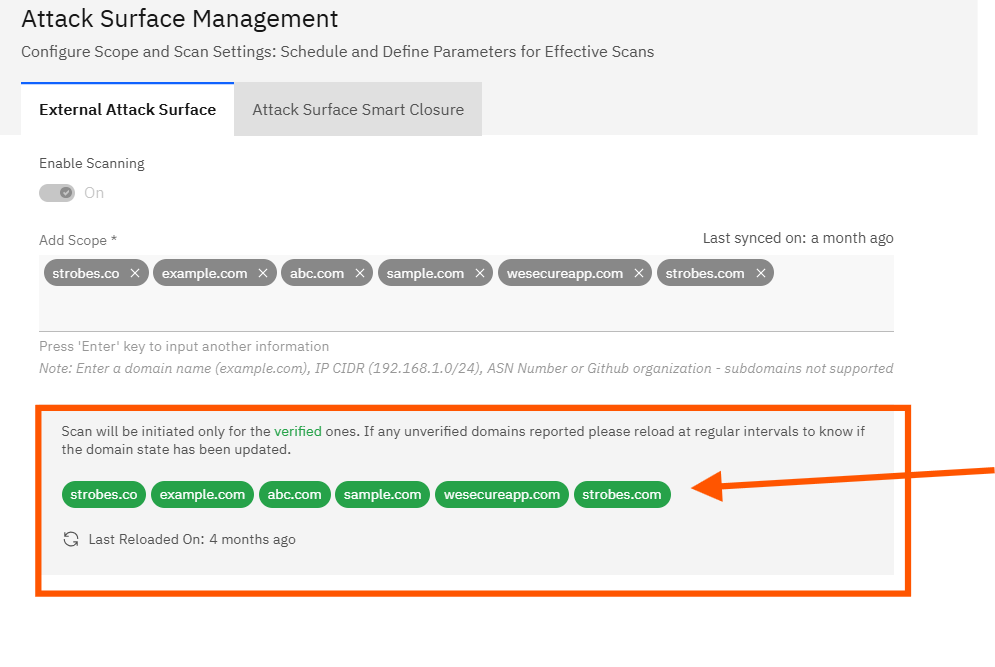
Review the scope list and confirm which entries have been verified. Strobes attempts domain verification automatically after each entry is added. Only domains shown with a green tag are eligible for scanning. Unverified entries will not be scanned until verification completes.
Step 6 — Click Apply
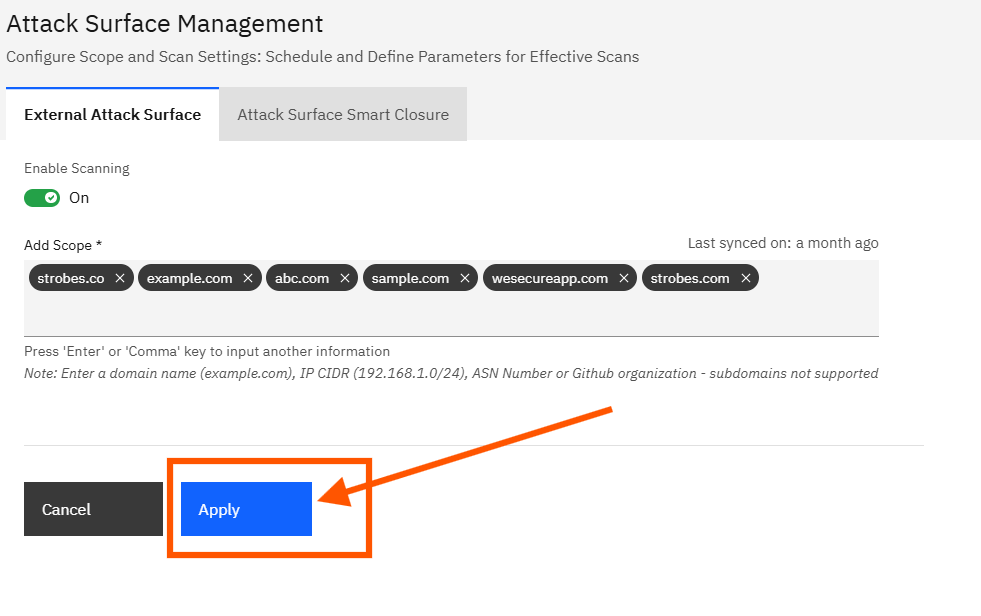
Click Apply to save your changes and start scanning. Strobes begins syncing with the ASM discovery service immediately after you apply.
Step 7 — Confirm Sync Status
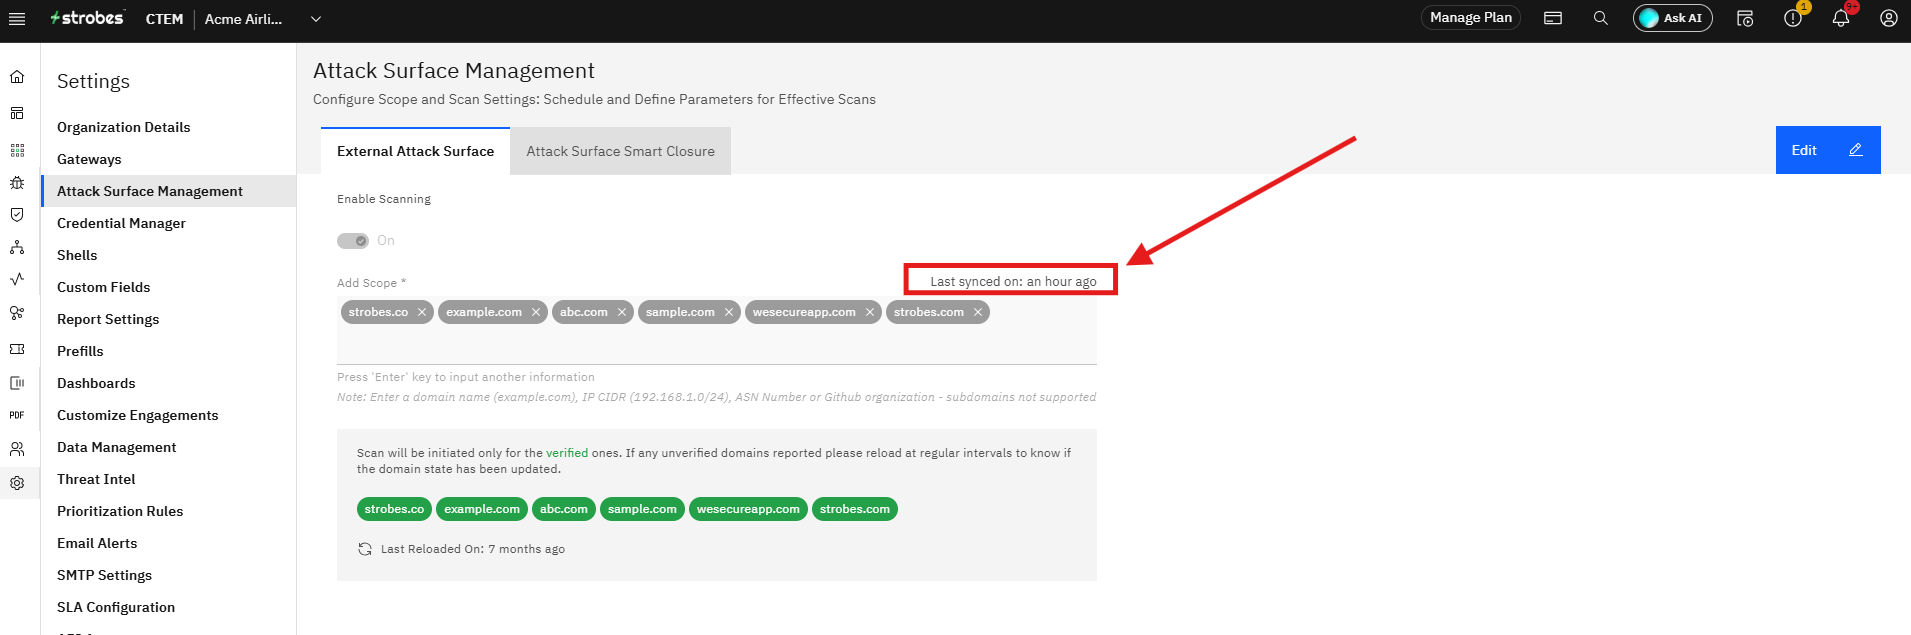
Check the sync status message that appears after applying. The message shows when Strobes last successfully synced with the ASM discovery service, for example "Last synced 3 days ago." Active scanning is now running against all verified scopes.
Section 2: Attack Surface Smart Closure
Smart Closure automates housekeeping on your attack surface. It archives assets that have gone inactive and resolves alerts that have not been addressed within a time window you define. This keeps your data focused on current, actionable exposure rather than accumulating stale records.
Step 1 — Open the Smart Closure Tab
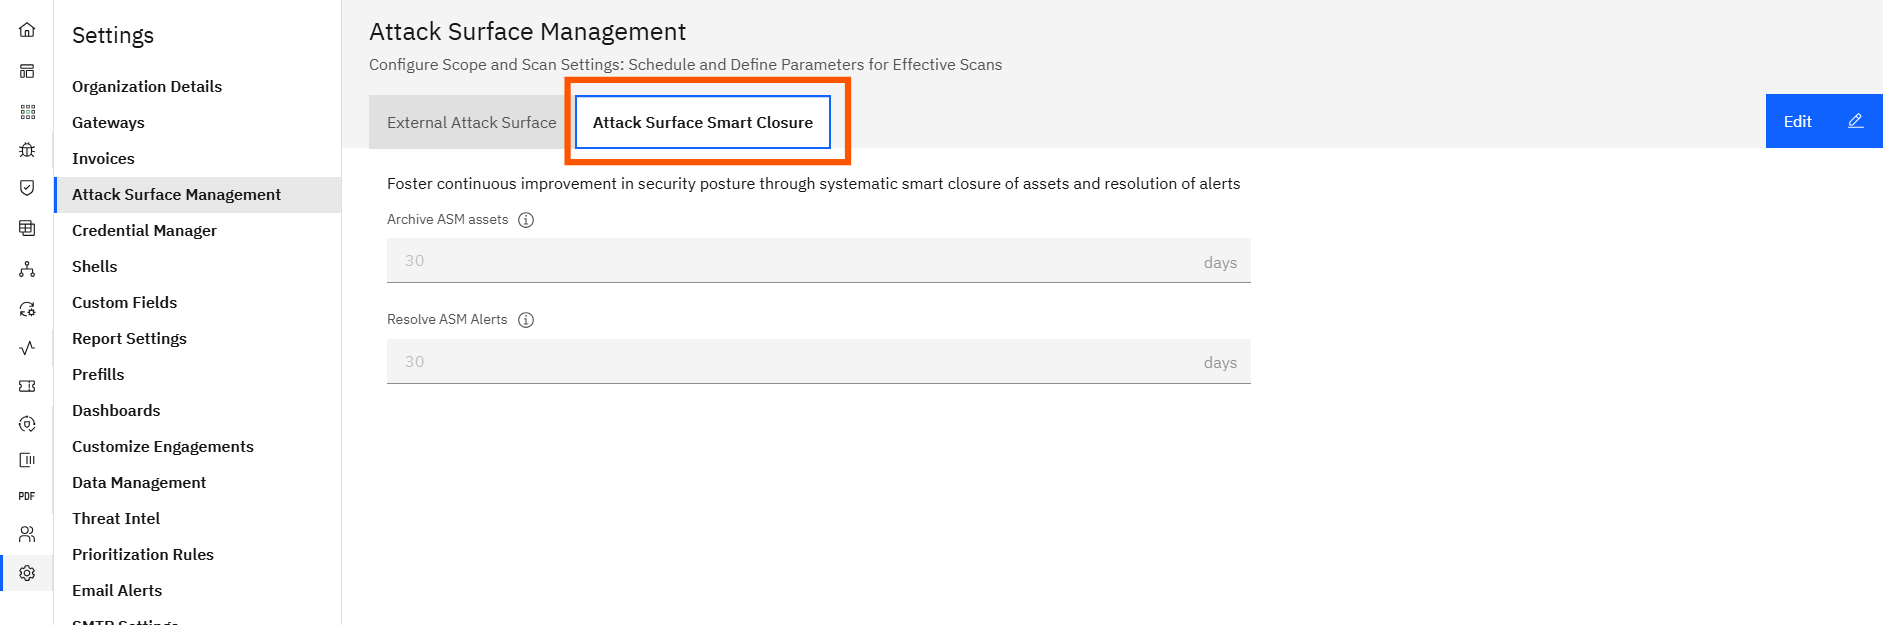
Navigate to Settings → Attack Surface Management → Attack Surface Smart Closure. The Smart Closure configuration panel opens.
Step 2 — Click the Edit Button
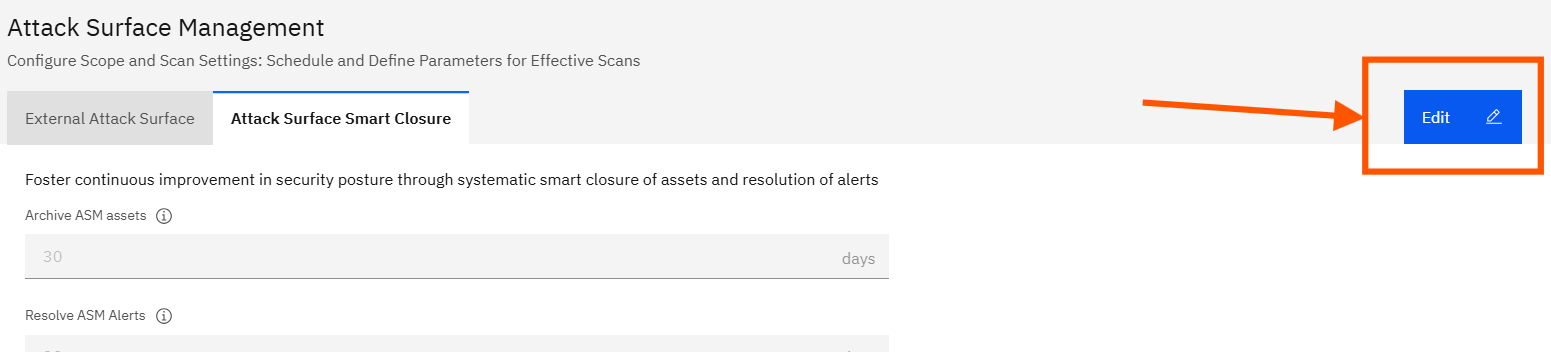
Click the blue Edit button at the top right of the panel. The toggle and input fields become editable.
Step 3 — Configure Archive ASM Assets (Optional)
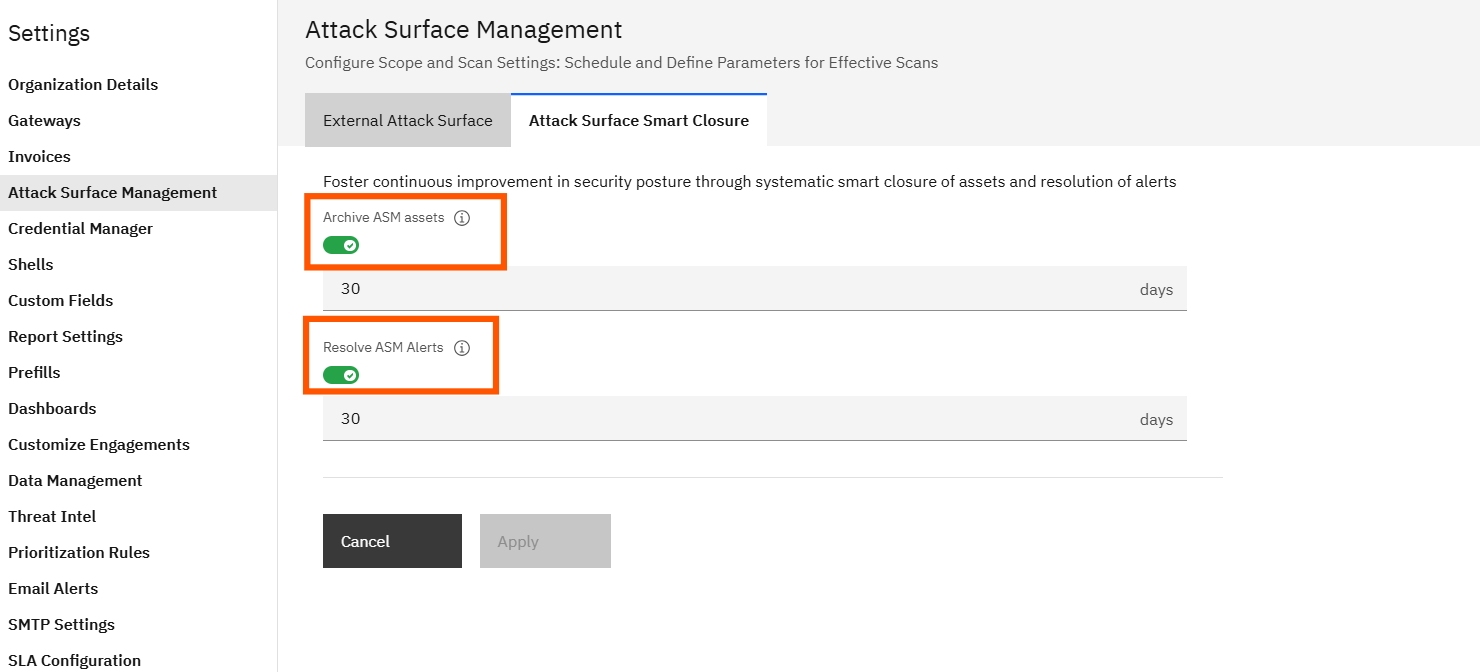
Click the Archive ASM Assets toggle to switch it to ON, then enter the number of days after which inactive assets should be archived. For example, entering 30 means any asset not seen as active in the past 30 days will be archived automatically. Leave this toggle off if you prefer to archive assets manually.
Step 4 — Configure Resolve ASM Alerts (Optional)
Click the Resolve ASM Alerts toggle to switch it to ON, then enter the number of days after which unaddressed alerts should be auto-resolved. For example, entering 15 means any alert not acknowledged or resolved within 15 days will be marked as resolved automatically. Leave this toggle off if you prefer to close alerts manually.
Step 5 — Click Apply
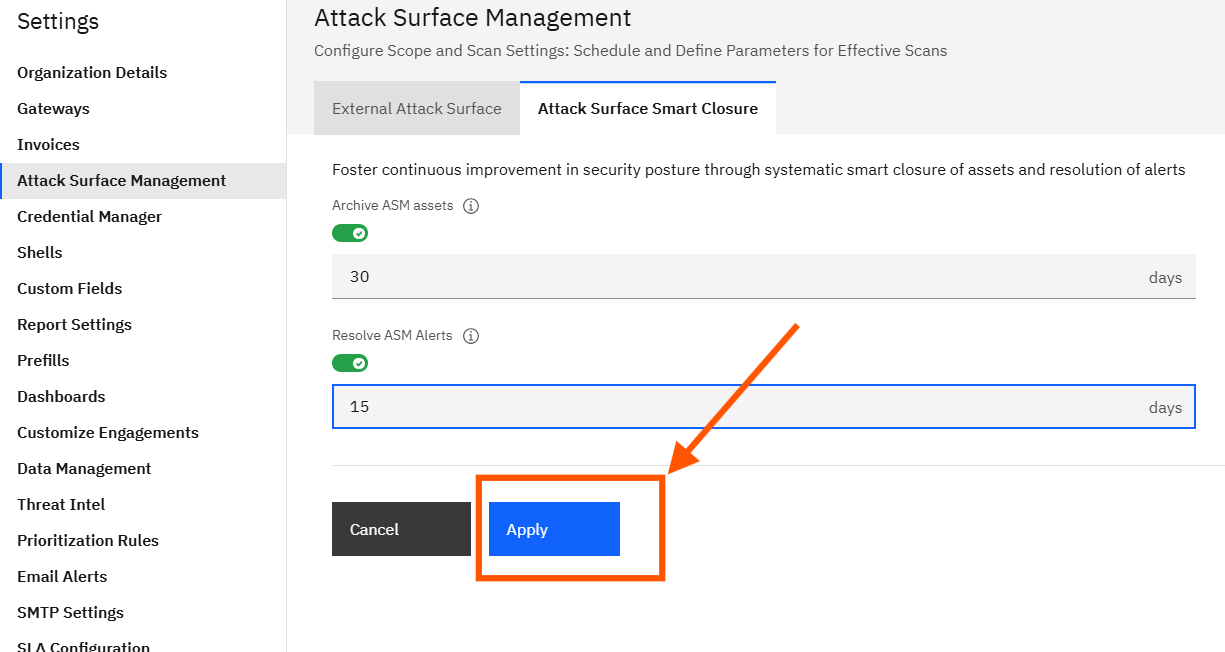
Click Apply to save your Smart Closure configuration. Once applied, Strobes begins monitoring assets and alerts against the thresholds you defined. Actions are taken automatically as assets and alerts reach the configured day limits.
What Strobes ASM Detects
With real-time discovery and continuous analysis, Strobes ASM surfaces exposure that is often invisible to internal teams. Detected issues include:
- Exposed domains and subdomains
- Open ports and misconfigured services
- Malware-hosting domains
- Phishing pages using your brand
- Expired SSL certificates
- Public code repositories linked to your organization
- Shadow IT assets
- Unpatched external-facing applications
Tips
Verify domains before relying on scan results. Unverified entries are excluded from scanning even after you click Apply. If expected assets are not showing findings, check that their domains carry a green verified tag in the scope list.
Use CIDR notation for IP ranges. When adding IP ranges to your scope, always use CIDR format (for example, 192.168.1.0/24). Plain IP ranges entered without a subnet mask may not be recognized.
Start Smart Closure thresholds conservatively. If you are setting up Smart Closure for the first time, use a longer window (such as 60 days for assets, 30 days for alerts) to avoid auto-archiving anything your team is still monitoring. Tighten the thresholds once you have reviewed a full cycle.
Smart Closure does not delete data. Archived assets and auto-resolved alerts remain accessible in Strobes. Archiving reduces noise in your active views without permanently removing records.
Add your GitHub organization to discover shadow code exposure. Entering your GitHub organization name as a scope lets Strobes identify public repositories linked to your organization that may expose credentials, internal tooling, or unreleased code.