
Threat Modeling Template
The Threat Modeling template helps security teams systematically identify threats, analyze attack scenarios, evaluate risks, and generate mitigation recommendations for applications, systems, or cloud environments.
The assessment uses industry-standard methodologies such as STRIDE and DREAD to model realistic attack paths and prioritize security risks.
Accessing the Threat Modeling Template
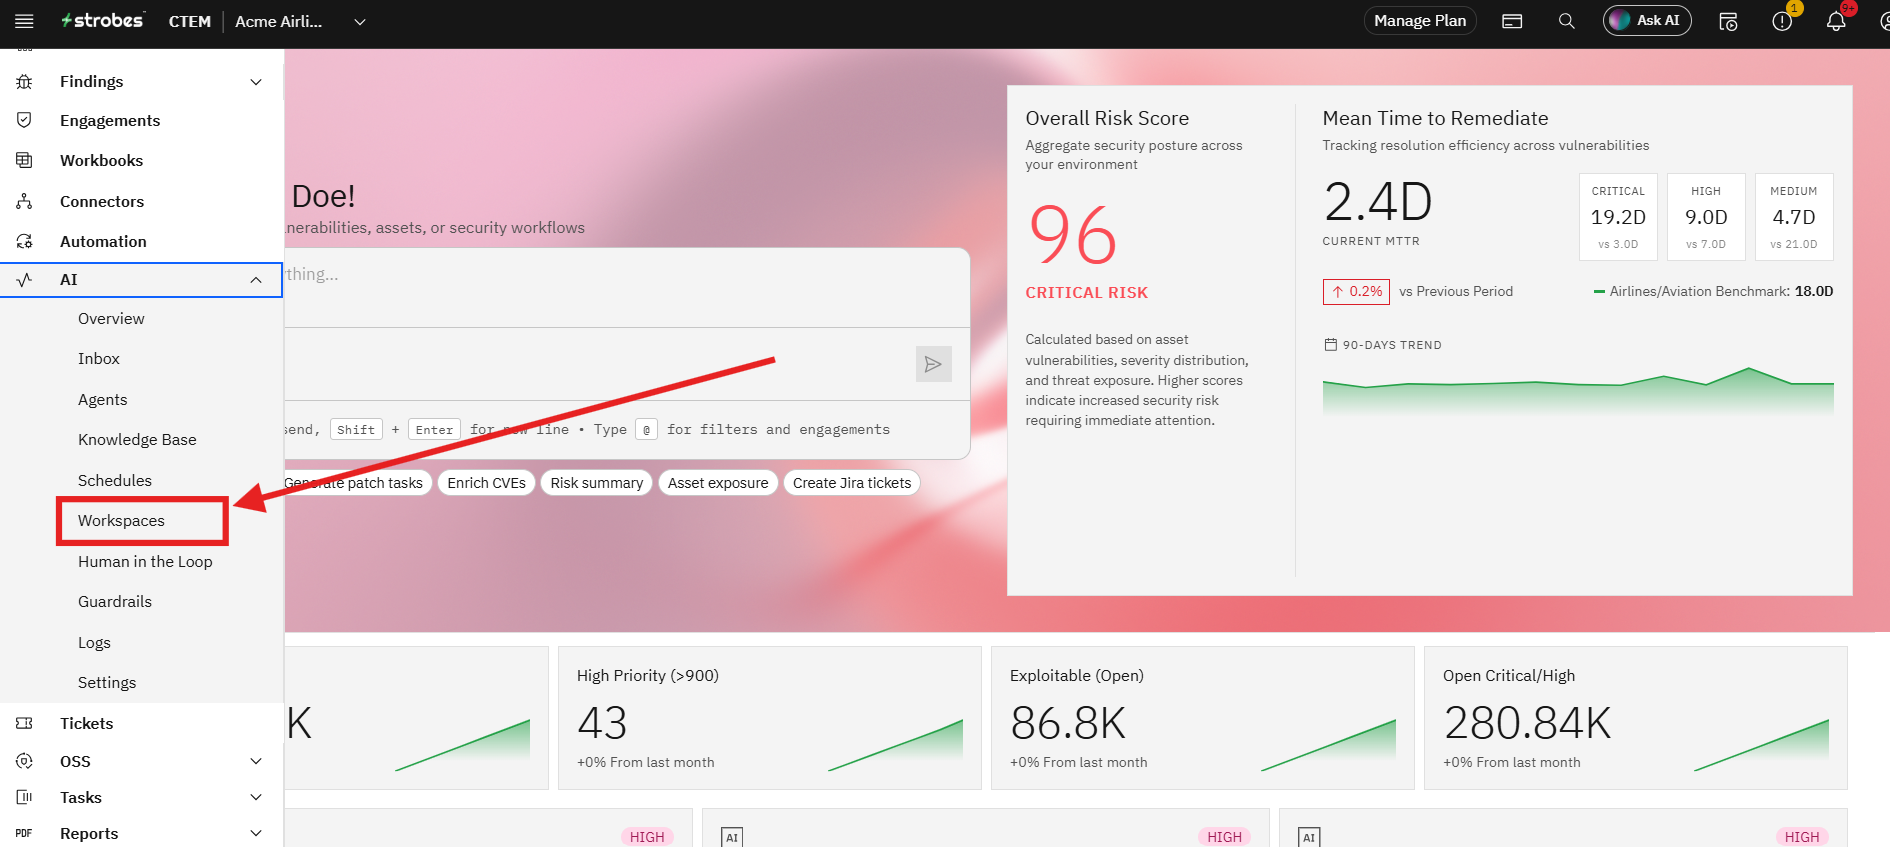
- Navigate to AI from the main navigation menu.
- Click Workspaces.
- Select New Workspace.

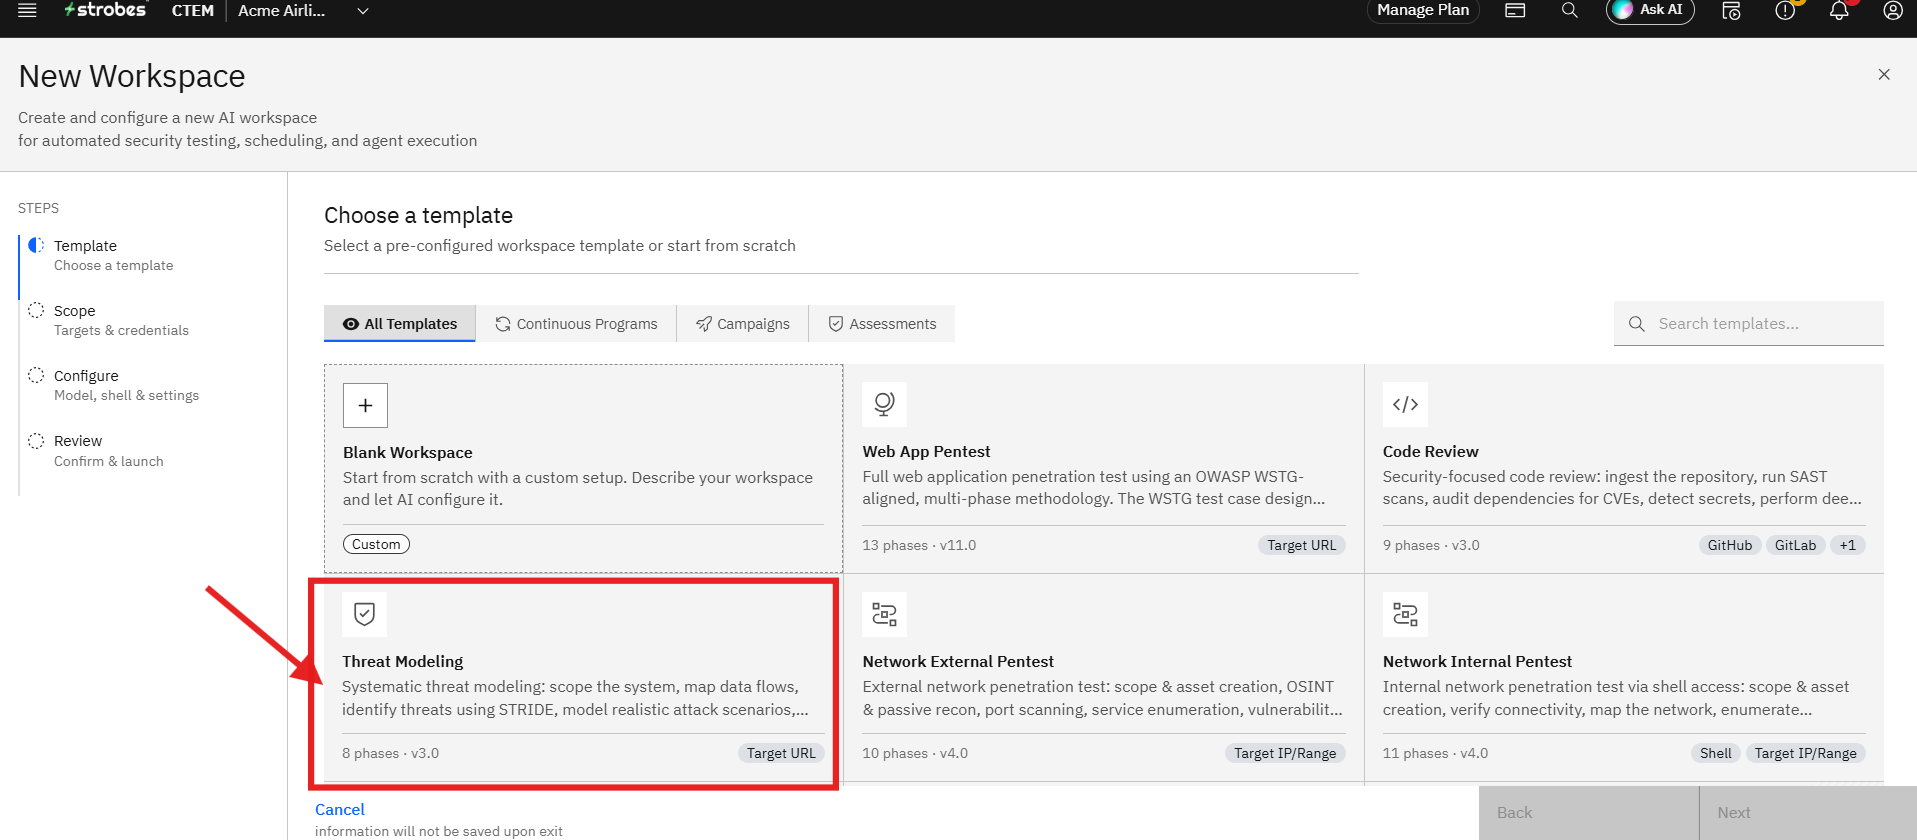
Step 1: Select the Threat Modeling Template
- From the available templates, locate Threat Modeling.
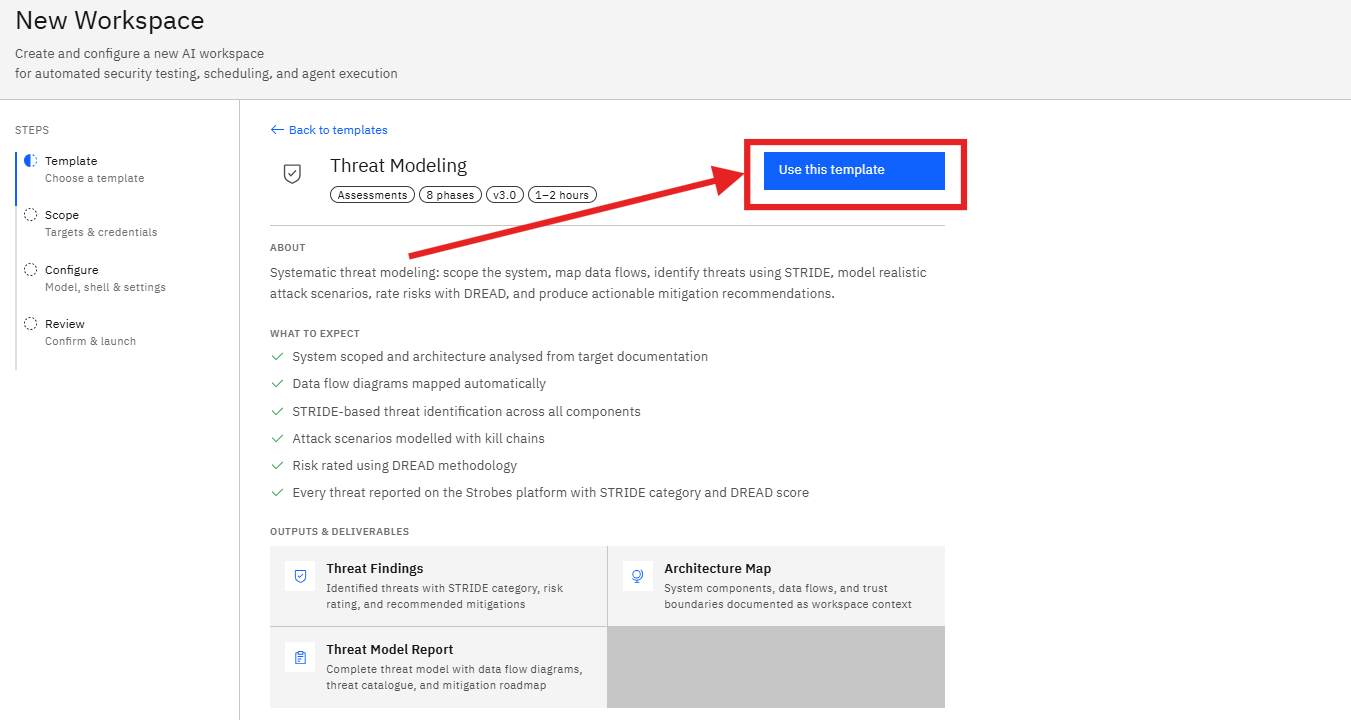
- Click the template card to view additional details.
The template provides:
- Estimated assessment duration
- Number of assessment phases
- Expected outputs and deliverables
- Threat modeling methodology
What to Expect
The assessment performs:
- System scoping and architecture analysis
- Data flow mapping
- STRIDE-based threat identification
- Attack scenario modeling
- DREAD risk scoring
- Mitigation recommendation generation
Outputs & Deliverables
The assessment generates:
- Threat Findings
- Architecture Maps
- Data Flow Documentation
- Risk Ratings
- Mitigation Recommendations
- Click Use this template.
Step 2: Enter the Workspace Name
After selecting the template, the wizard moves to the Scope step.
- Locate the Workspace Name field.
- Enter a descriptive name for the assessment.
Example:
Threat Modeling – Customer Portal
A meaningful name helps distinguish assessments across projects and environments.

Step 3: Specify the Target System
The target system defines the application, service, or environment that will be analyzed.
- Locate the System / Application URL field.
- Enter the application URL or system name.
The platform may display previously used assets or targets for quick selection.
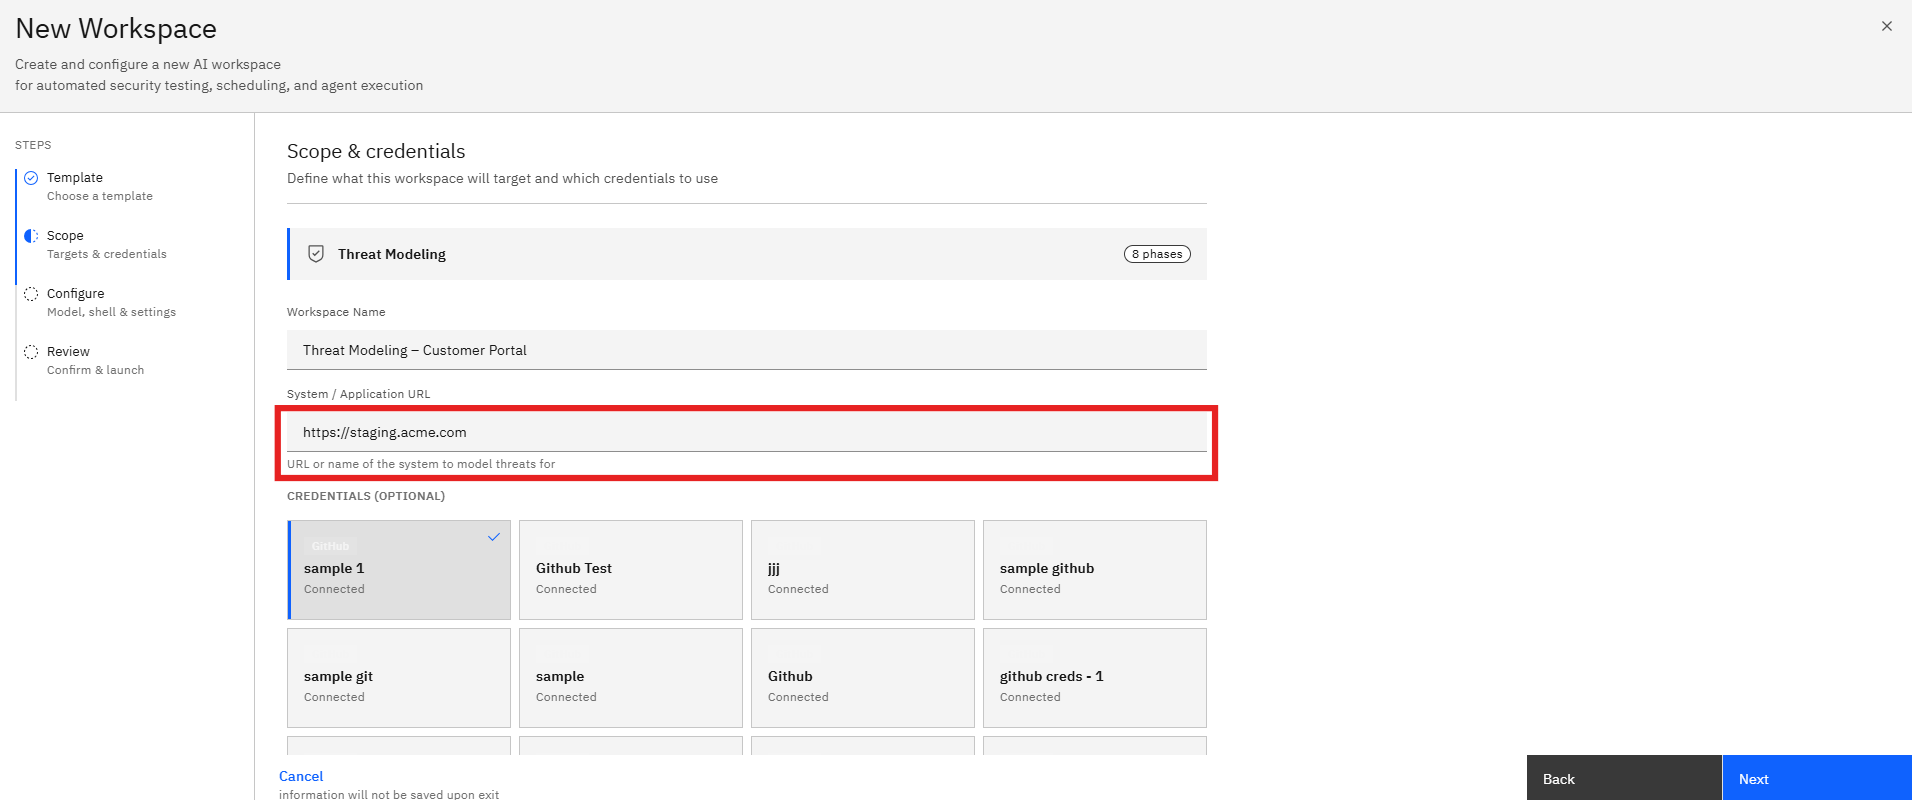
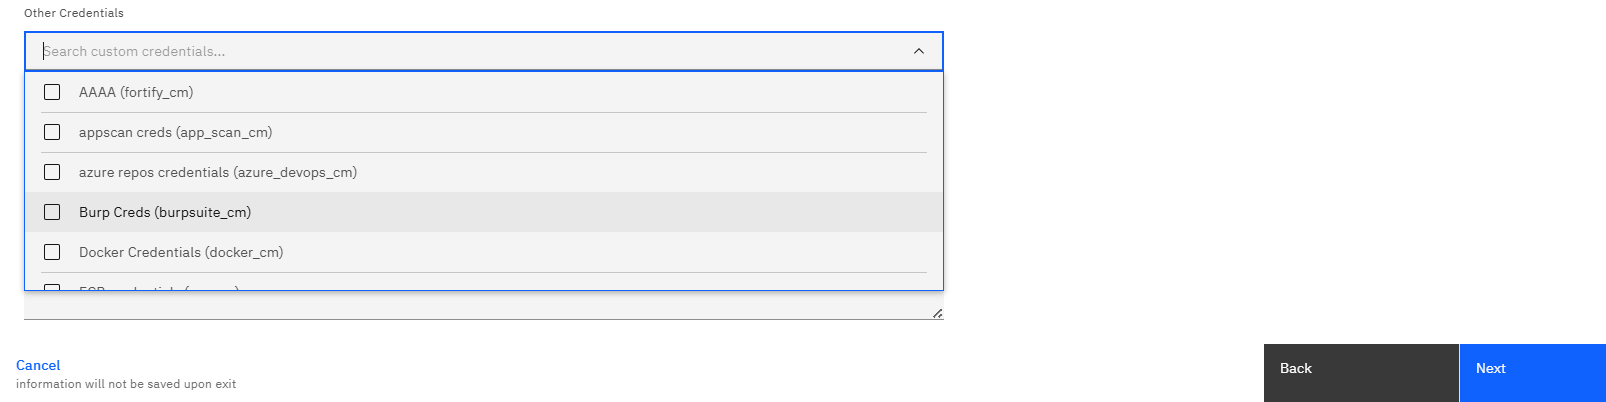
Step 4: Select Supporting Credentials (Optional)
Threat modeling can leverage existing credentials and integrations to gather additional context.
- Review the available credentials.
- Select any credentials relevant to the target environment.
Providing credentials enables the assessment to collect additional architectural and configuration information where applicable.
Step 5: Proceed to Configuration
After completing the scope details:
- Verify the workspace name.
- Confirm the target application or system.
- Review any selected credentials.
- Click Next.
The wizard opens the Configure page.
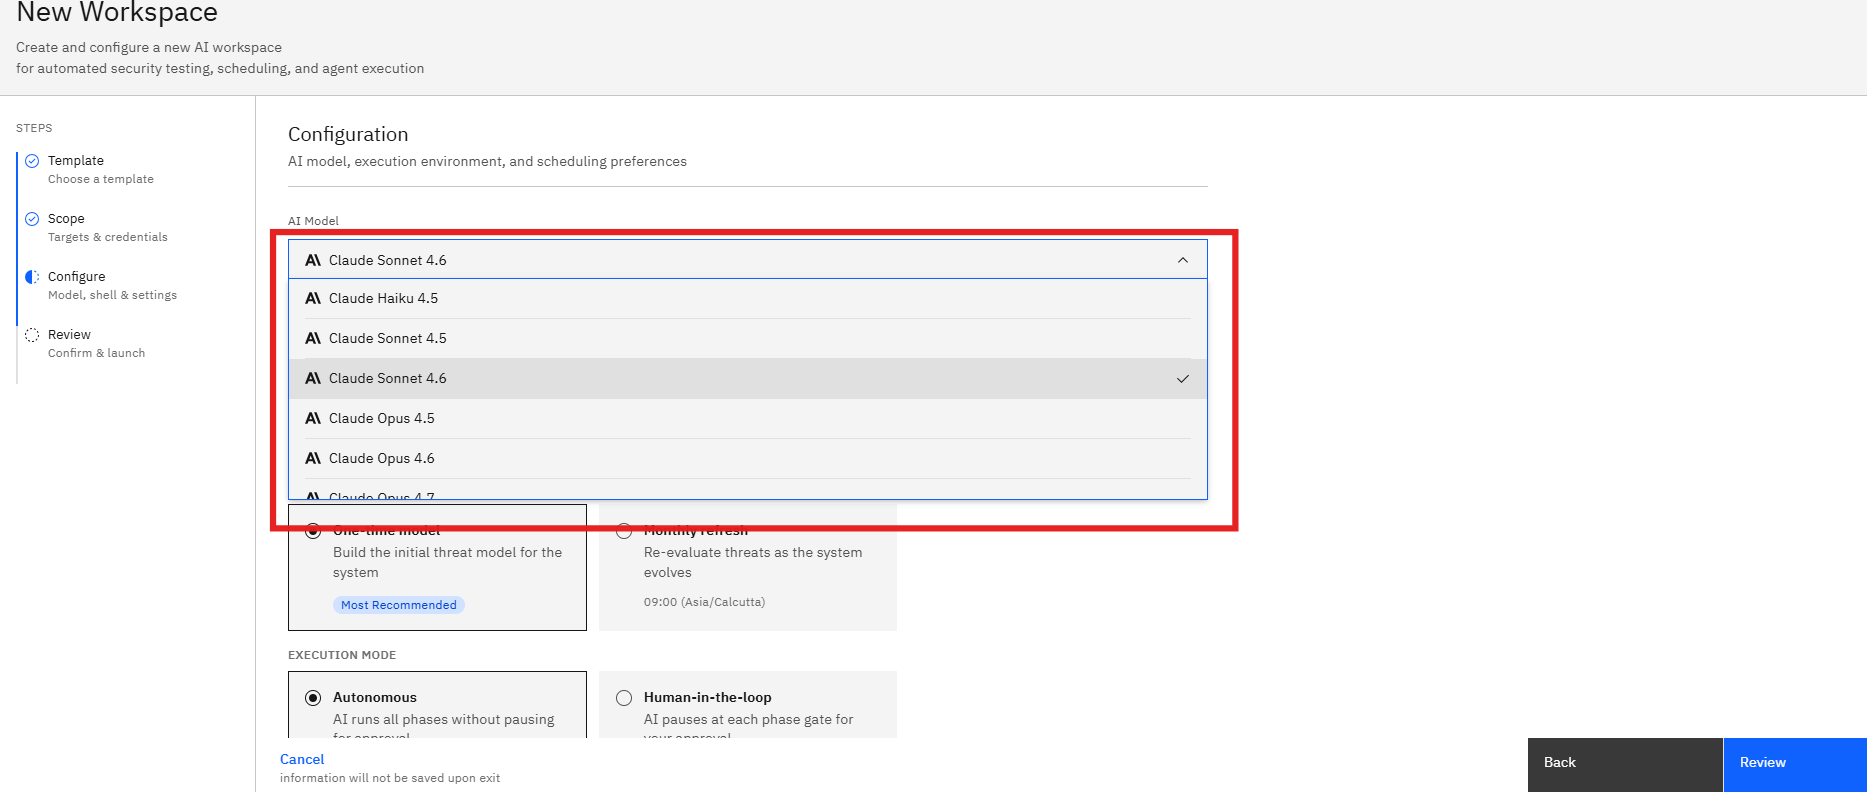
Step 6: Select an AI Model
The AI Model determines the reasoning engine used throughout the threat modeling process.
- Open the Model dropdown.
- Review the available models.
- Select the model best suited for your assessment.
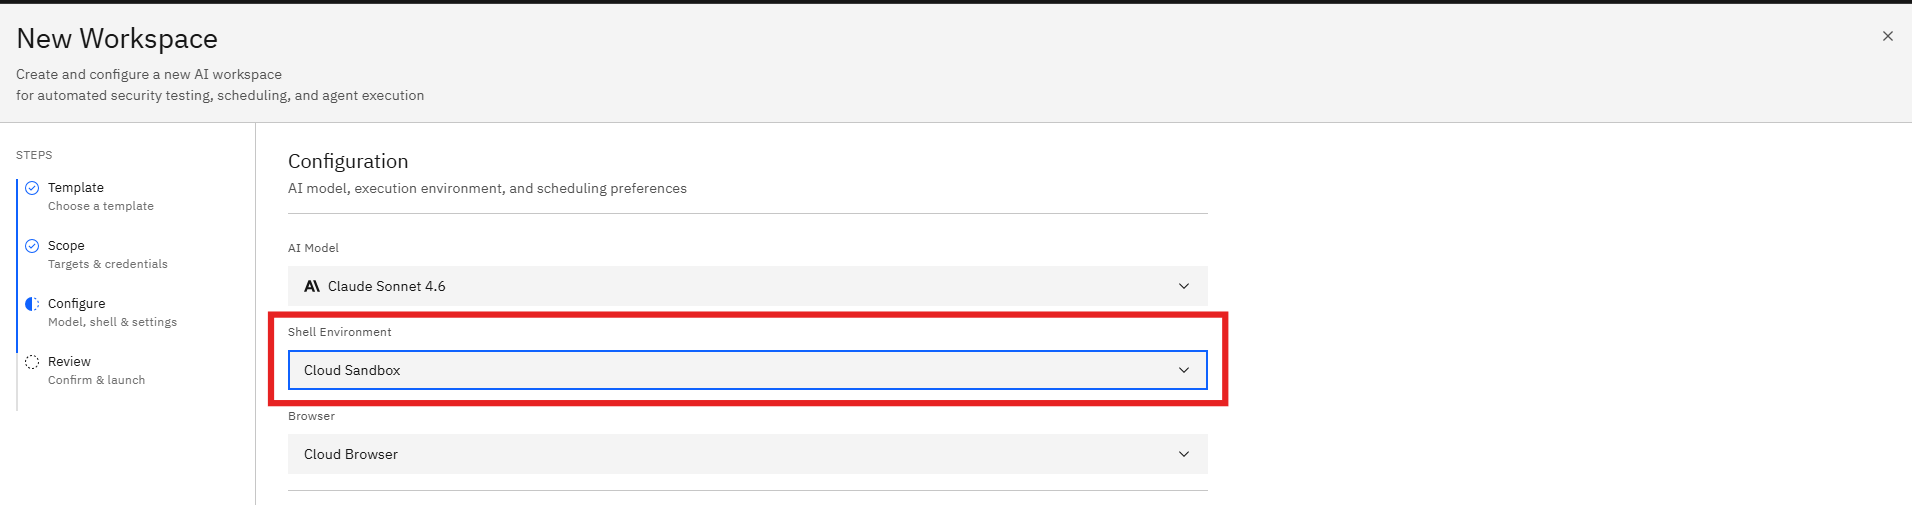
Step 7: Configure the Execution Environment
The execution environment determines how the AI agent performs the assessment.
Select the environment that best supports the target assessment.
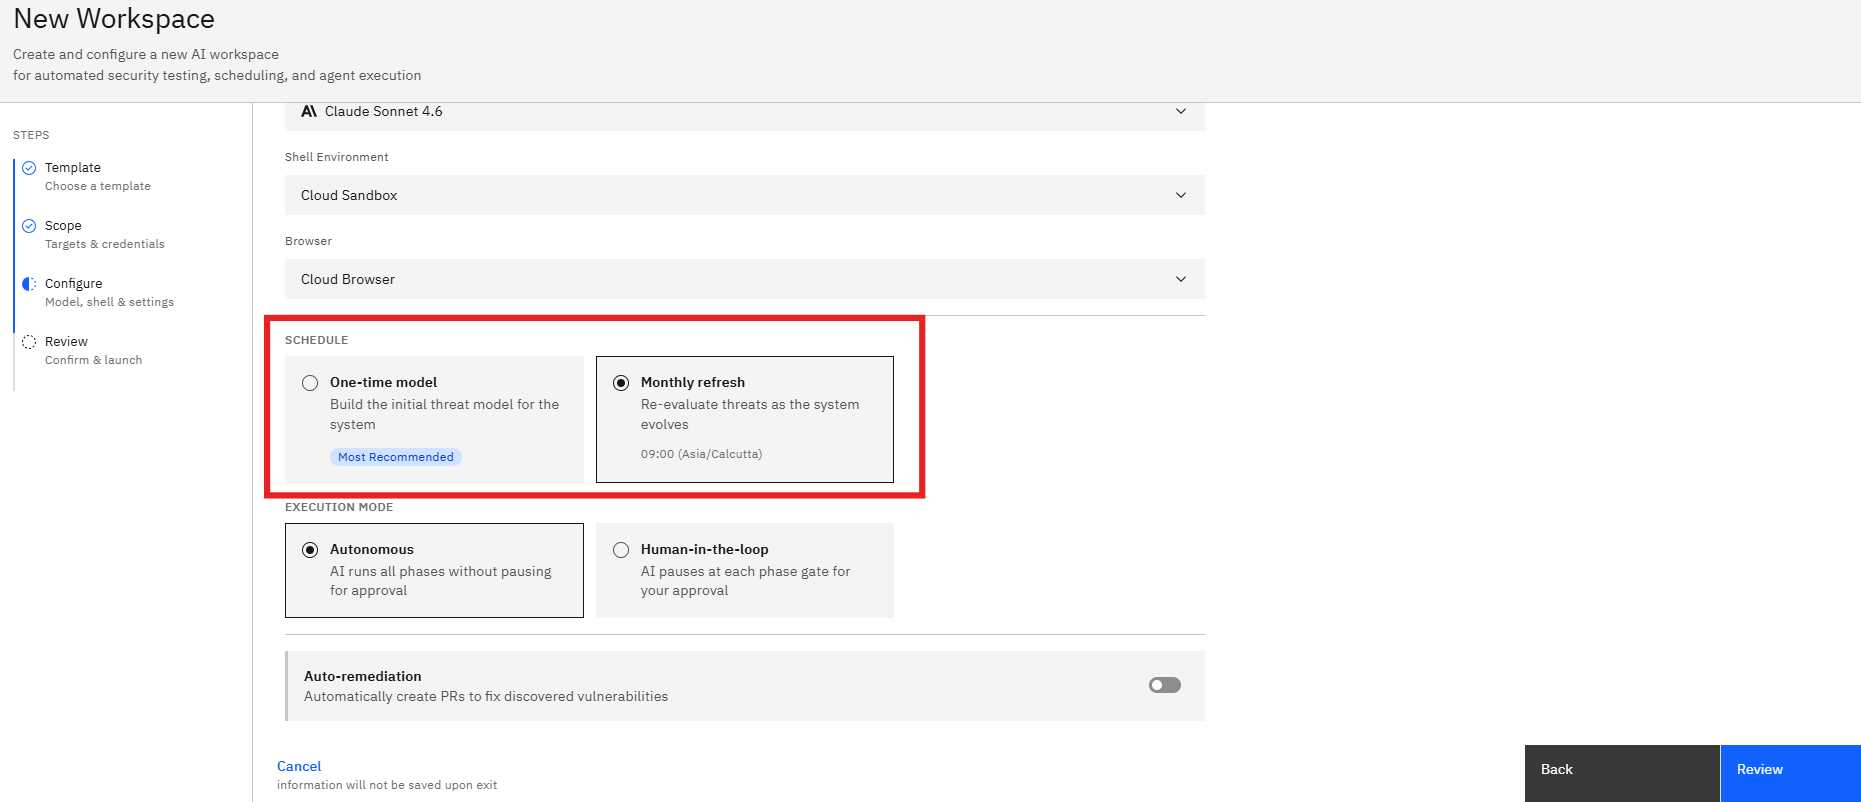
Step 8: Configure the Assessment Schedule
The Threat Modeling template supports different execution schedules.
One-Time Model
Creates an initial threat model for the selected system.
Use this option when:
- Performing a first-time assessment
- Reviewing a newly developed application
- Conducting a point-in-time analysis
Monthly Refresh
Re-evaluates threats on a recurring schedule.
Use this option when:
- The application changes frequently
- New features are released regularly
- Continuous threat monitoring is required
- Select the desired schedule.
- Review the execution frequency.
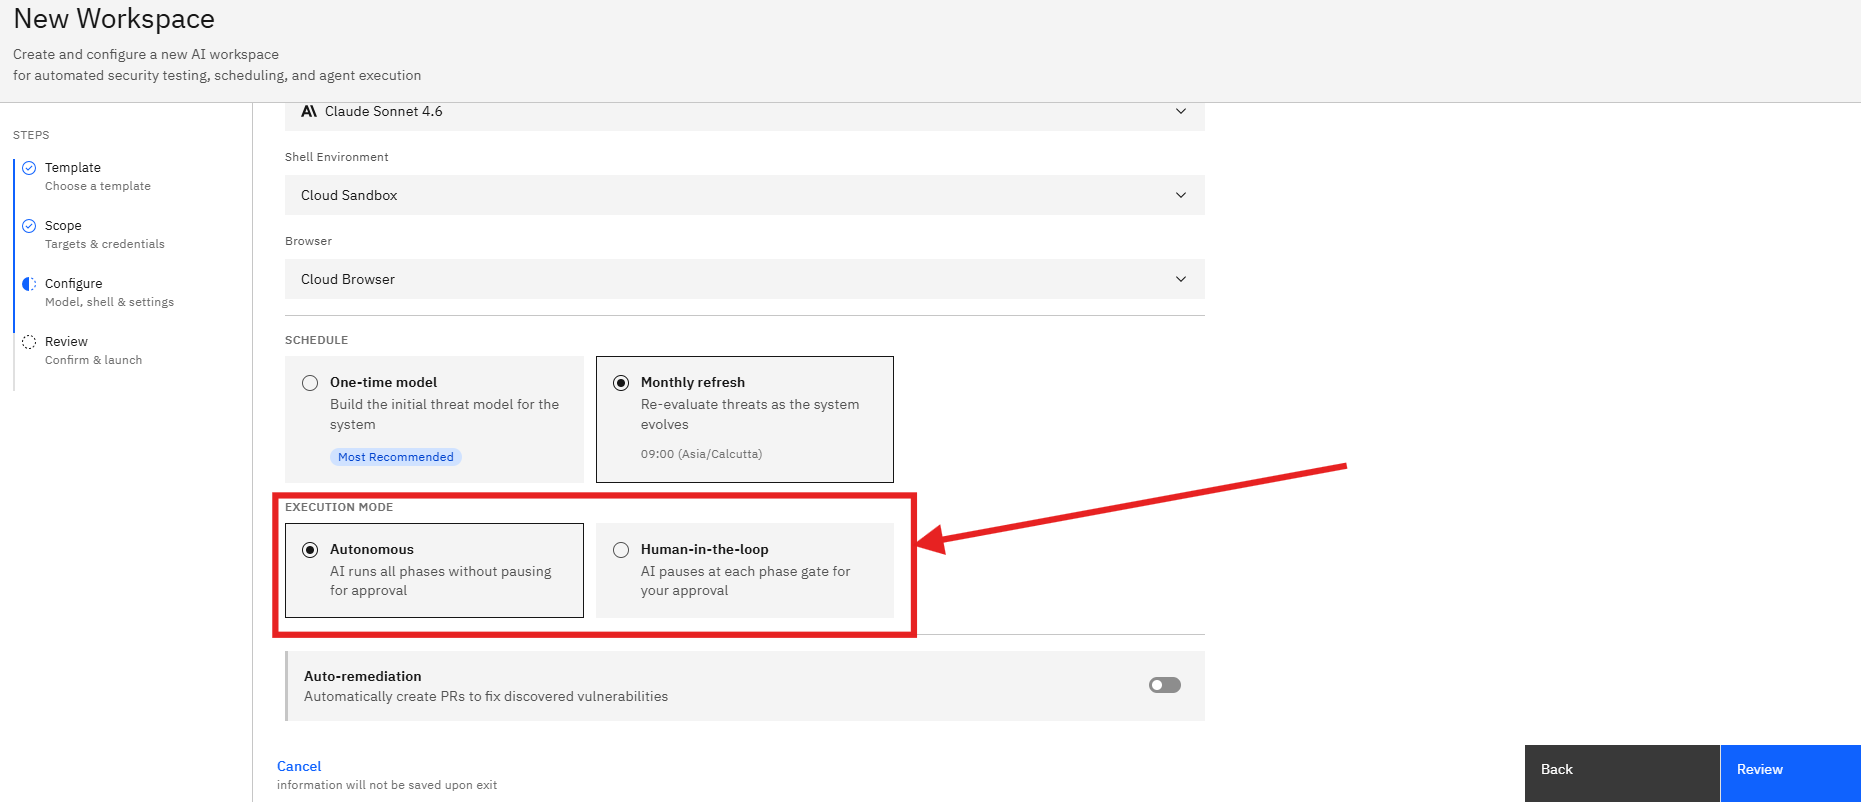
Step 9: Select the Execution Mode
Choose how the AI agent progresses through the assessment.
Autonomous
The AI completes all assessment phases automatically.
Recommended when:
- Minimal manual intervention is required.
- Faster assessment completion is preferred.
Human-in-the-Loop
The AI pauses between phases for user approval.
Recommended when:
- Validation is required before proceeding.
- Teams want greater control over assessment execution.
- Select the preferred execution mode.
- Review the associated workflow behavior.
Step 10: Configure Auto-Remediation (Optional)
Auto-remediation enables automated remediation workflows when supported.
- Locate the Auto-remediation toggle.
- Enable or disable the setting as required.
When enabled, the platform can generate remediation actions for identified security issues.
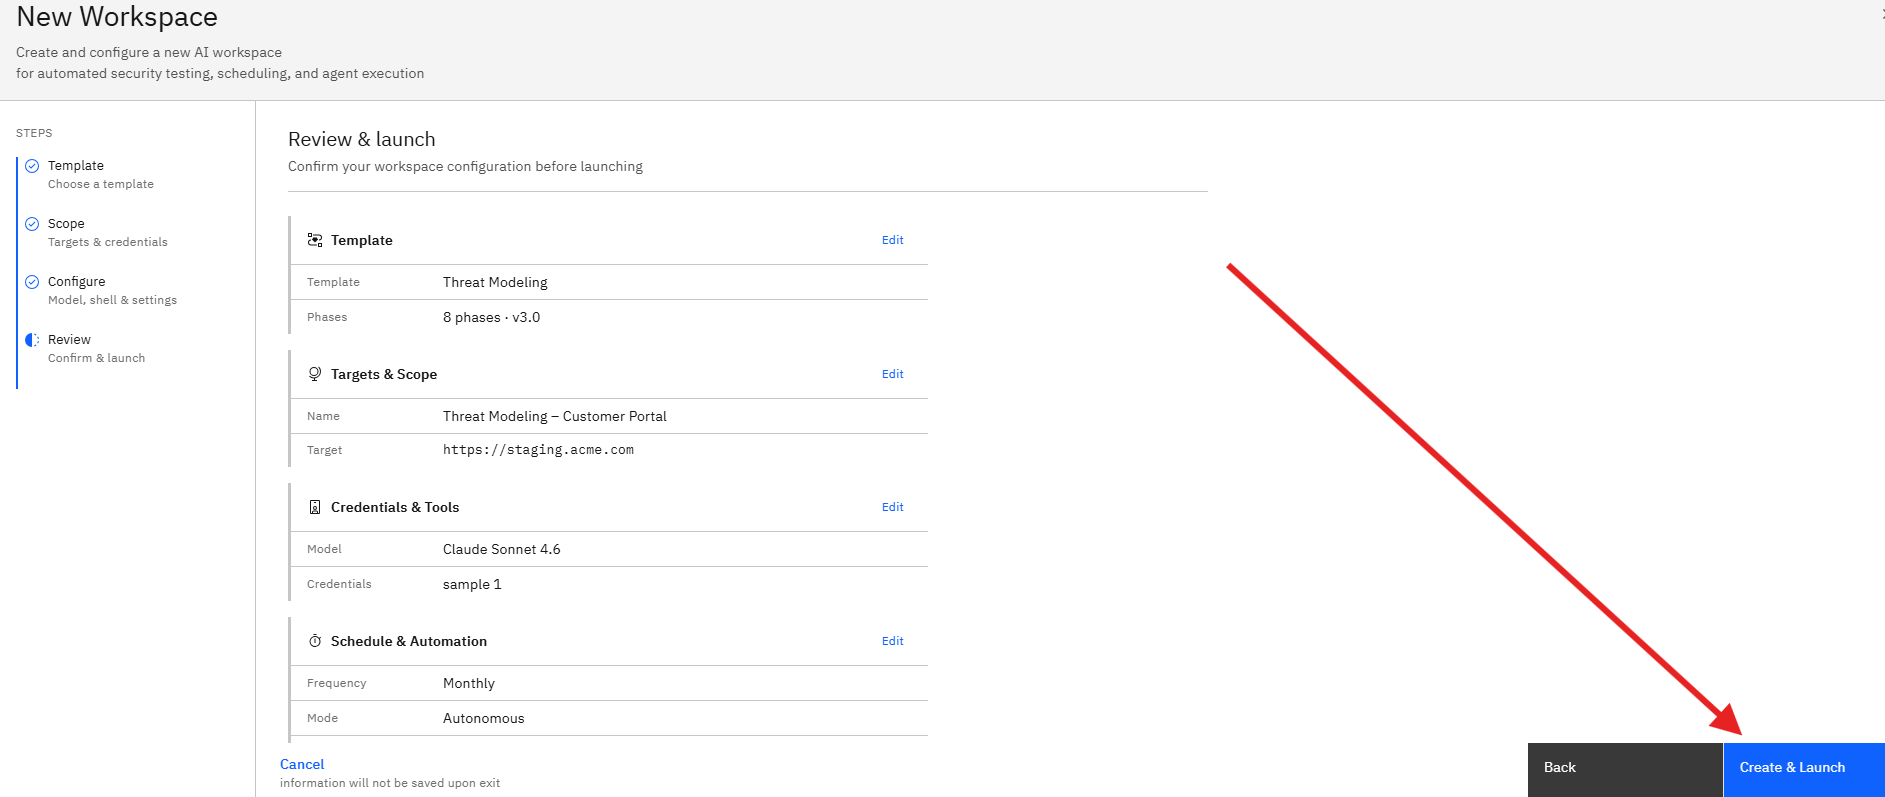
Step 11: Review the Configuration
After completing the configuration:
- Click Review.
The Review page displays:
Template Details
- Selected template
- Assessment phases
- Template version
Targets & Scope
- Workspace name
- Target application or system
Credentials & Tools
- Selected AI model
- Connected credentials
Schedule & Automation
- Assessment frequency
- Execution mode
- Automation settings
Review all settings carefully before launching the assessment.
Step 12: Launch the Threat Modeling Assessment
Once all settings have been verified:
- Click Create & Launch.
- The workspace is created.
- The Threat Modeling assessment begins execution.
The AI agent will:
- Analyze the target system
- Build architecture context
- Map data flows
- Identify threats using STRIDE
- Assign DREAD risk scores
- Generate mitigation recommendations
Notes
- Use clear and descriptive system names whenever possible.
- Providing application URLs improves assessment context.
- Monthly Refresh is recommended for frequently changing applications.
- Human-in-the-Loop mode provides additional control during assessment execution.
- Review all configuration settings before launching the assessment.