
Bringing Your Own Model to Strobes
Overview
Strobes AI is built on top of a model layer that you can customize. By default, Strobes AI uses its built-in models for tasks like agentic reasoning, knowledge base enrichment, insight generation, and data management. With the Bring Your Own Model (BYOM) feature, you can register any OpenAI-compatible endpoint instead — a self-hosted vLLM instance, Ollama, LiteLLM, a self-hosted gateway, OpenRouter, or any other service that speaks the OpenAI API format.
Once registered, your custom model appears in the agent model picker alongside Strobes' built-in options. You choose which model powers each agent, and usage is billed directly by your model provider — not against your Strobes AI credits.
Before You Start
- Role required: Organization Owner or Manager access.
- A running OpenAI-compatible endpoint: Have your Base URL, Model code, and API token ready before you begin. The endpoint must be reachable from Strobes at the time of registration.
Step 1 — Open AI Settings
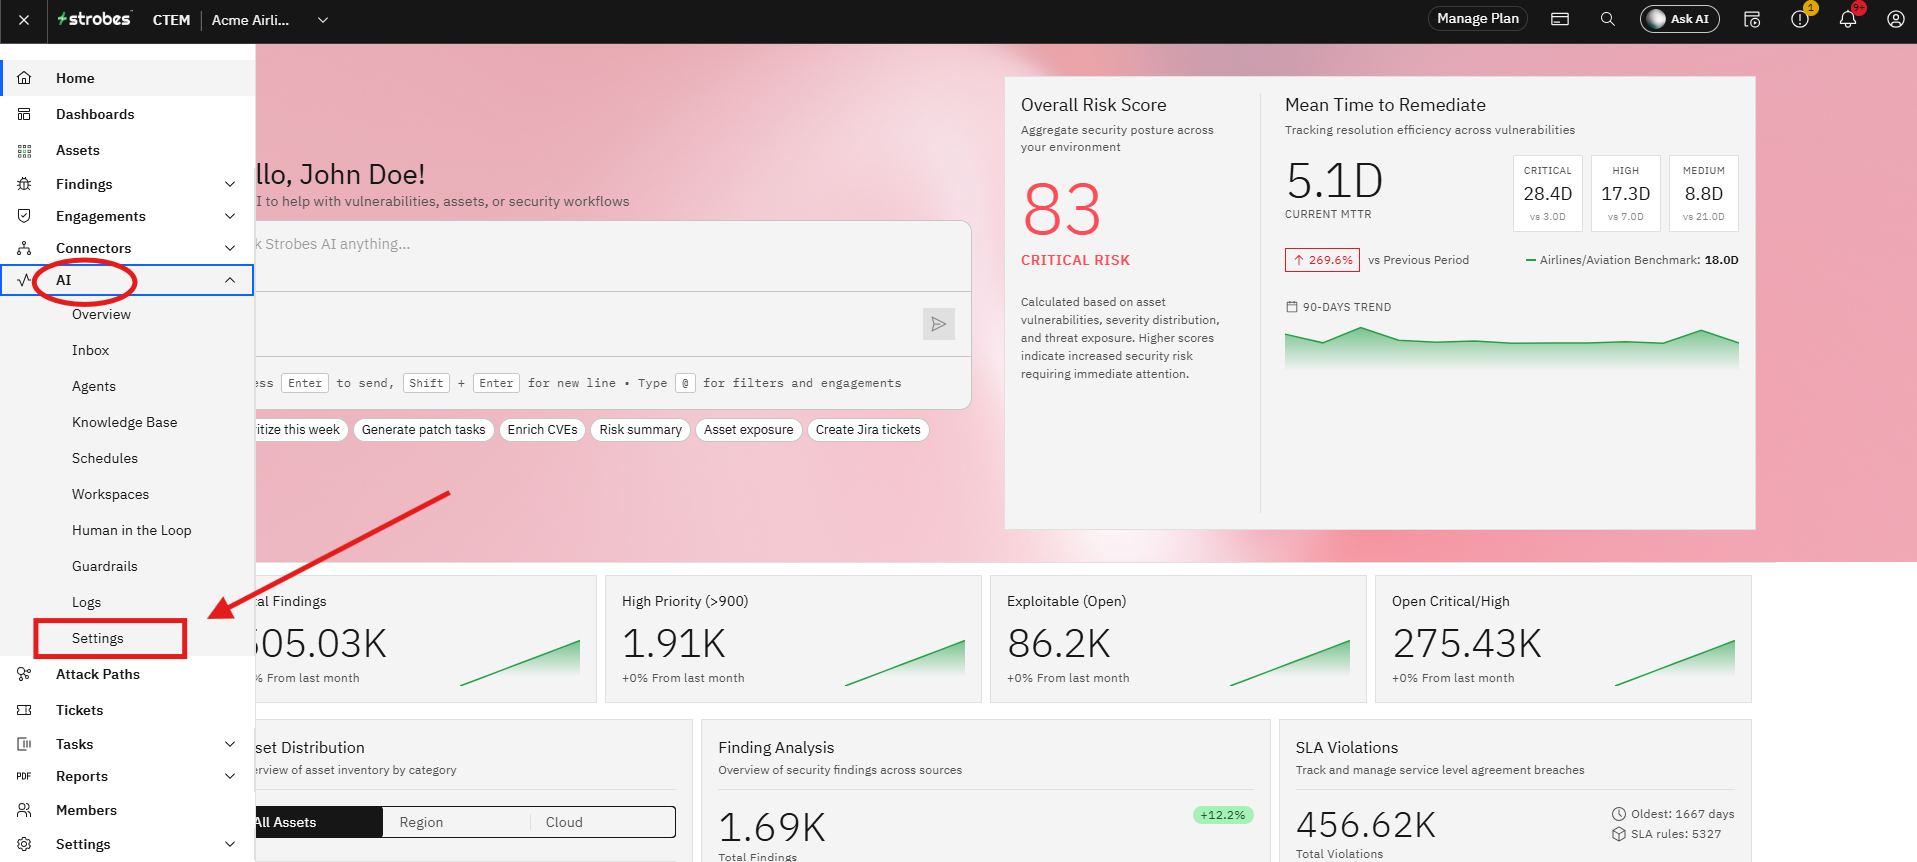
In the left sidebar, expand the AI section and click Settings. The AI Settings page opens on the Budgets tab by default.
Step 2 — Open the Models Tab
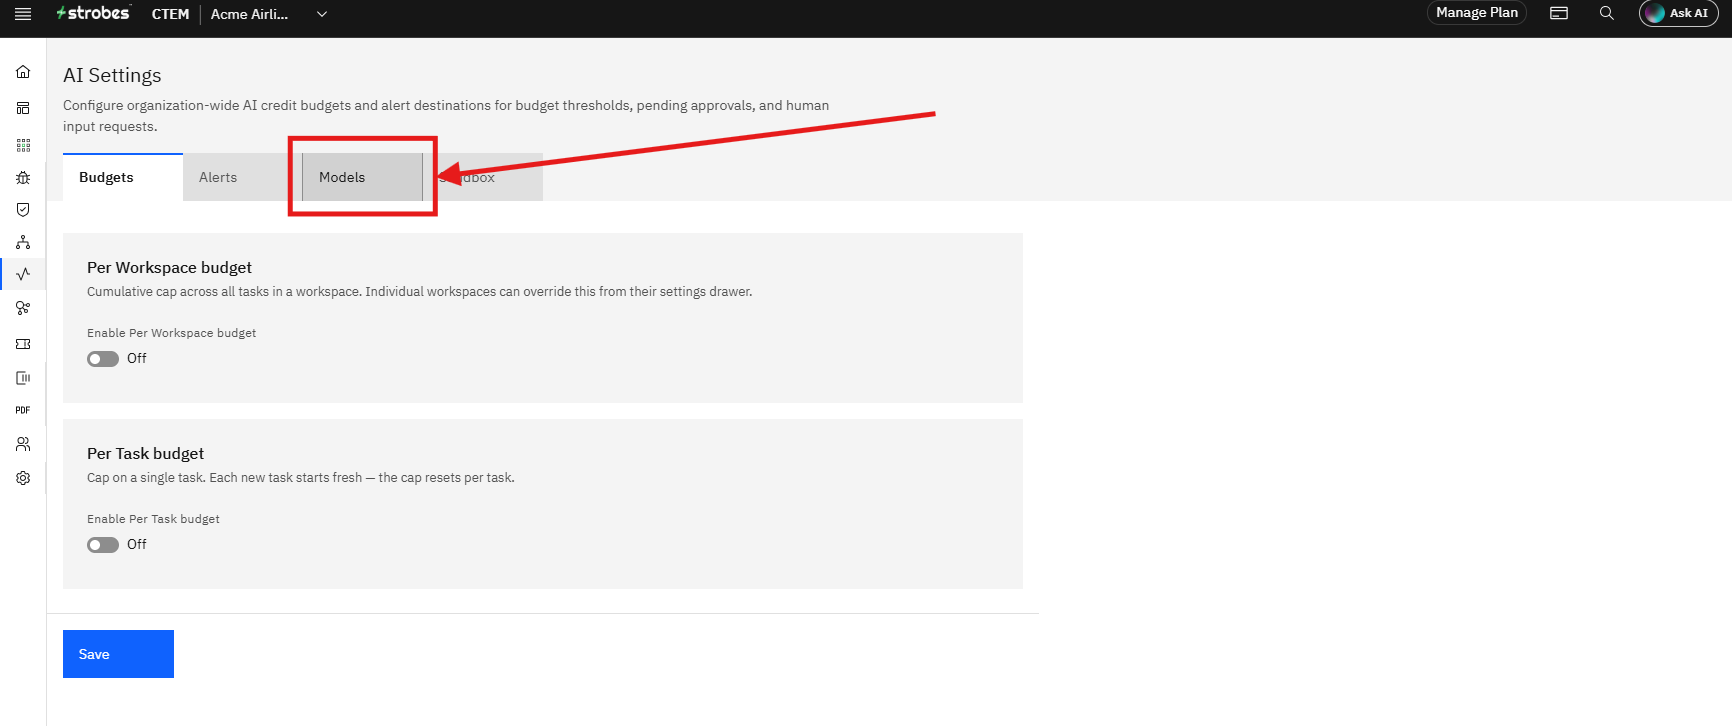
Click the Models tab at the top of the AI Settings page. The Models tab has two sections: a Default Models configuration at the top and a Custom models (Bring Your Own Model) section below it.
Step 3 — Review Default Model Assignments (Optional)
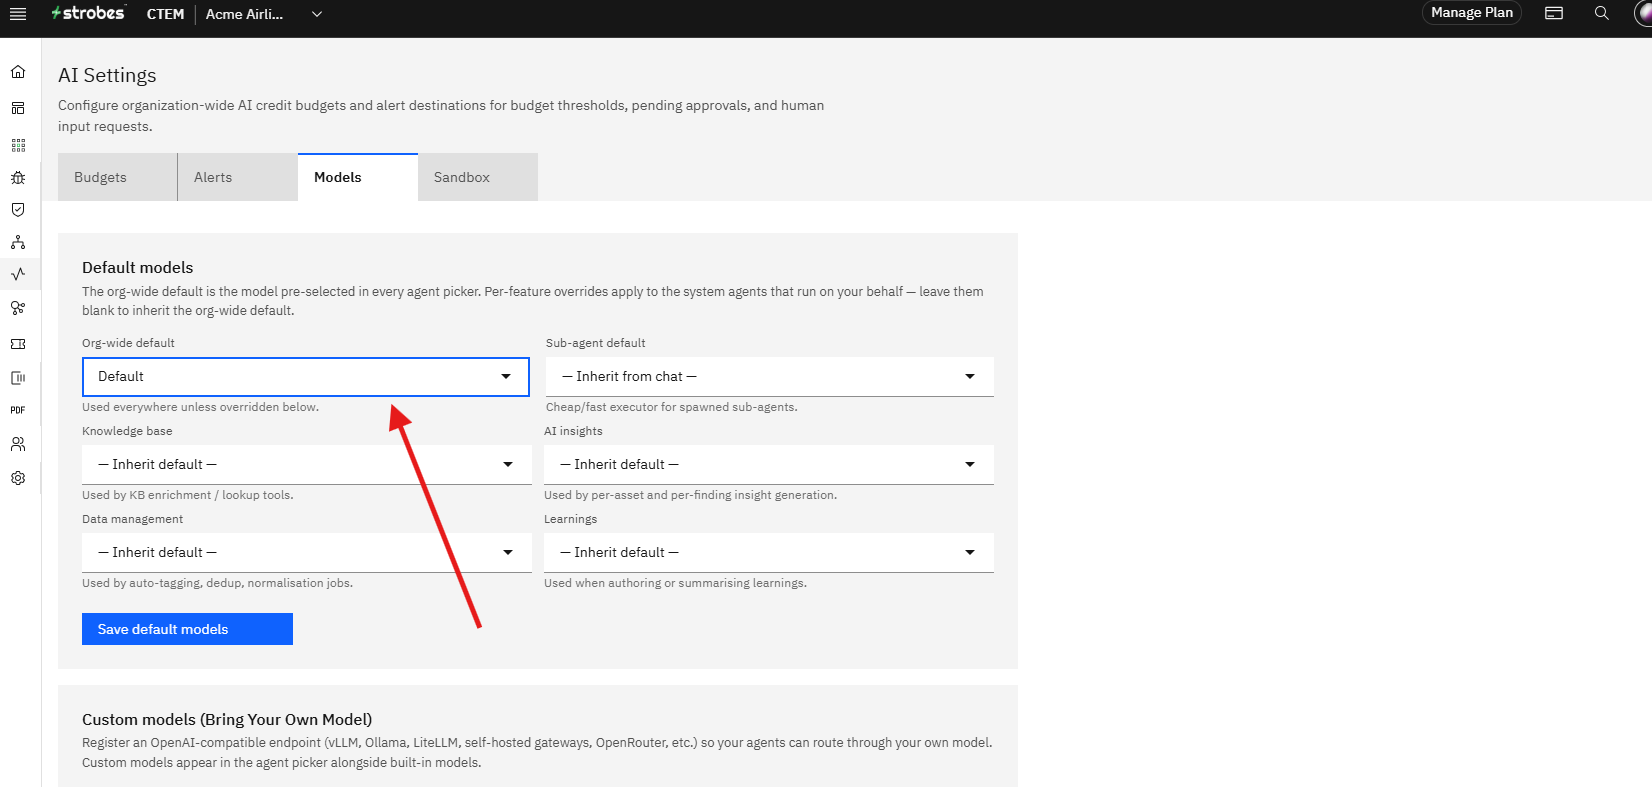
Before adding a custom model, review the Default Models section if you plan to assign your model to a specific role. The six roles and what they power are:
Role | Used for |
|---|---|
Default | All AI tasks unless overridden by a more specific role |
Inherit from chat | Cheap/fast executor for spawned sub-agents |
Knowledge base | KB enrichment and lookup tools |
AI insights | Per-asset and per-finding insight generation |
Data management | Auto-tagging, deduplication, and normalisation jobs |
Learnings | Authoring and summarising learnings |
You can assign your custom model to any of these roles after it is registered. Click Save default models to save any changes to this section.
Step 4 — Click Add Custom Model
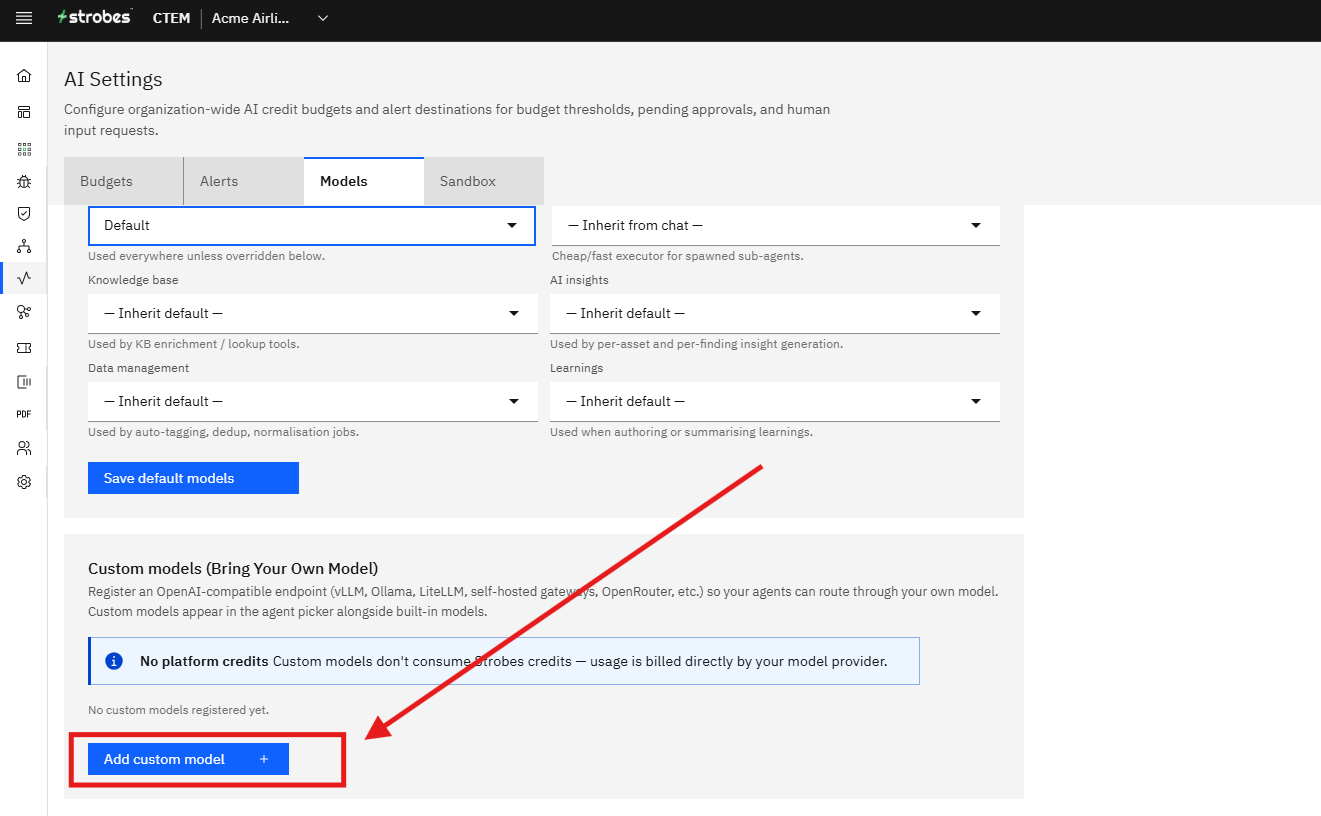
Scroll down to the Custom models (Bring Your Own Model) section and click the Add custom model button. The Add custom model form expands below the section header.
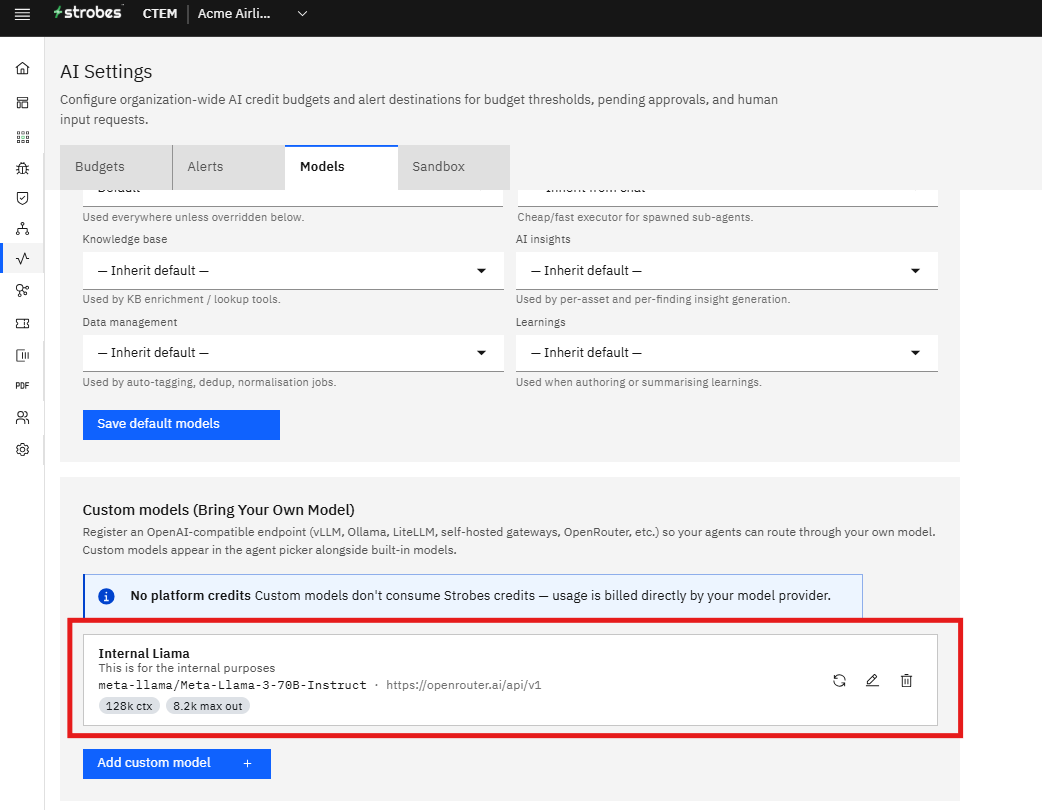
No platform credits used. Custom models do not consume Strobes AI credits. Usage is billed directly by your model provider.
Step 5 — Enter a Display Name
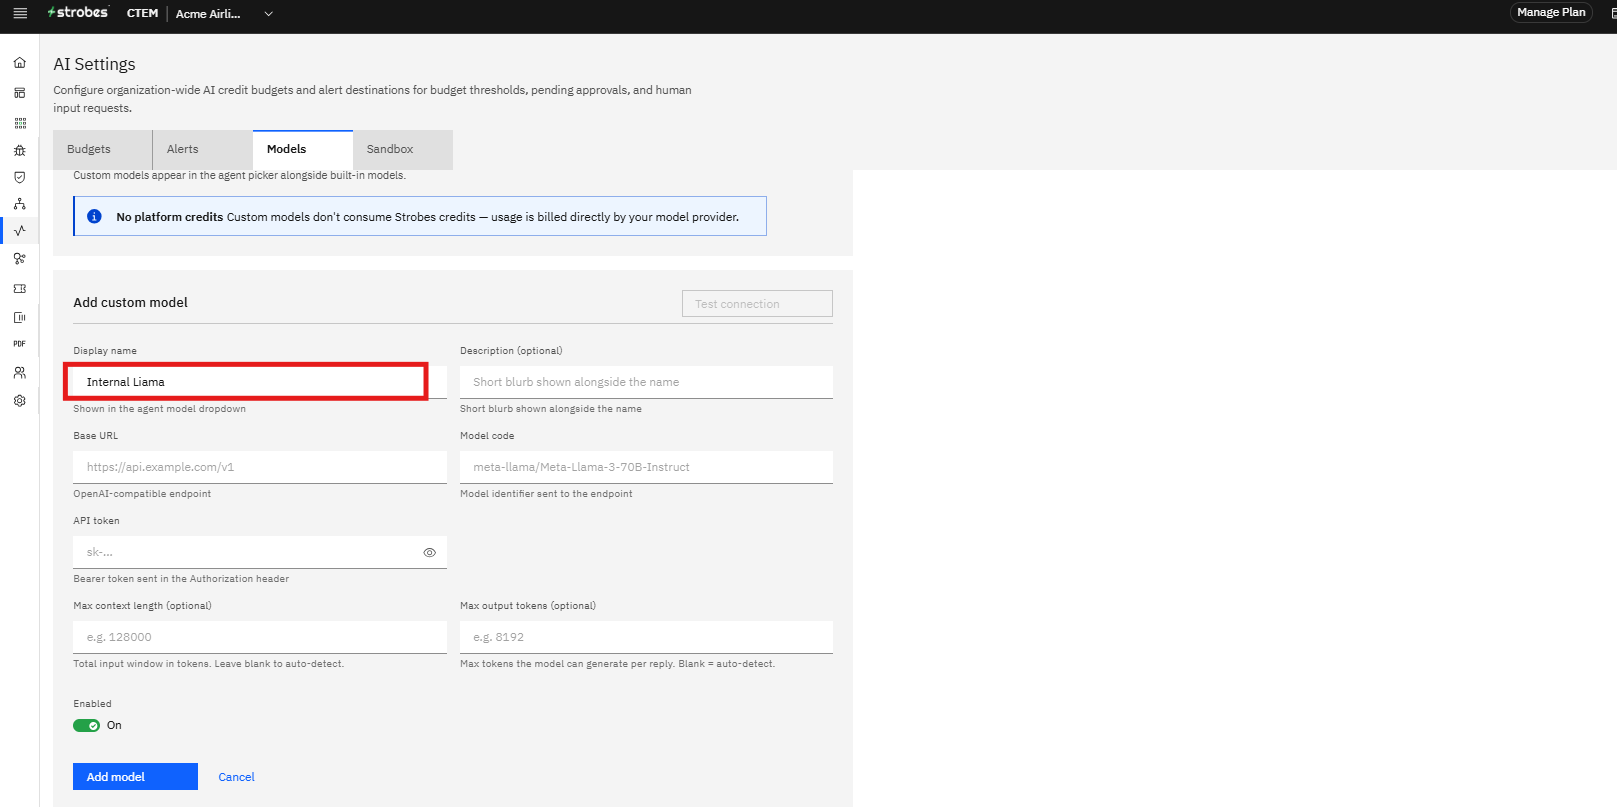
In the Display name field, type a label for your model. This is the name that appears in the agent model dropdown when users select which model an agent should use. Use a name that makes the model easy to identify, for example: "Internal Llama 3" or "OpenRouter GPT-4o".
Step 6 — Enter a Description (Optional)
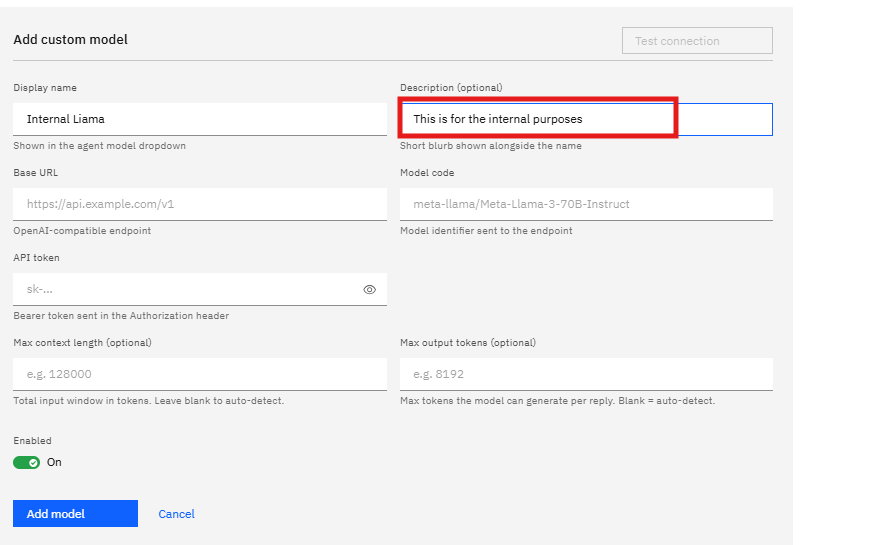
Click the Description field and type a short description of the model. This text appears alongside the display name in the agent picker to help users understand what the model is or when to use it. This field is optional.
Step 7 — Enter the Base URL
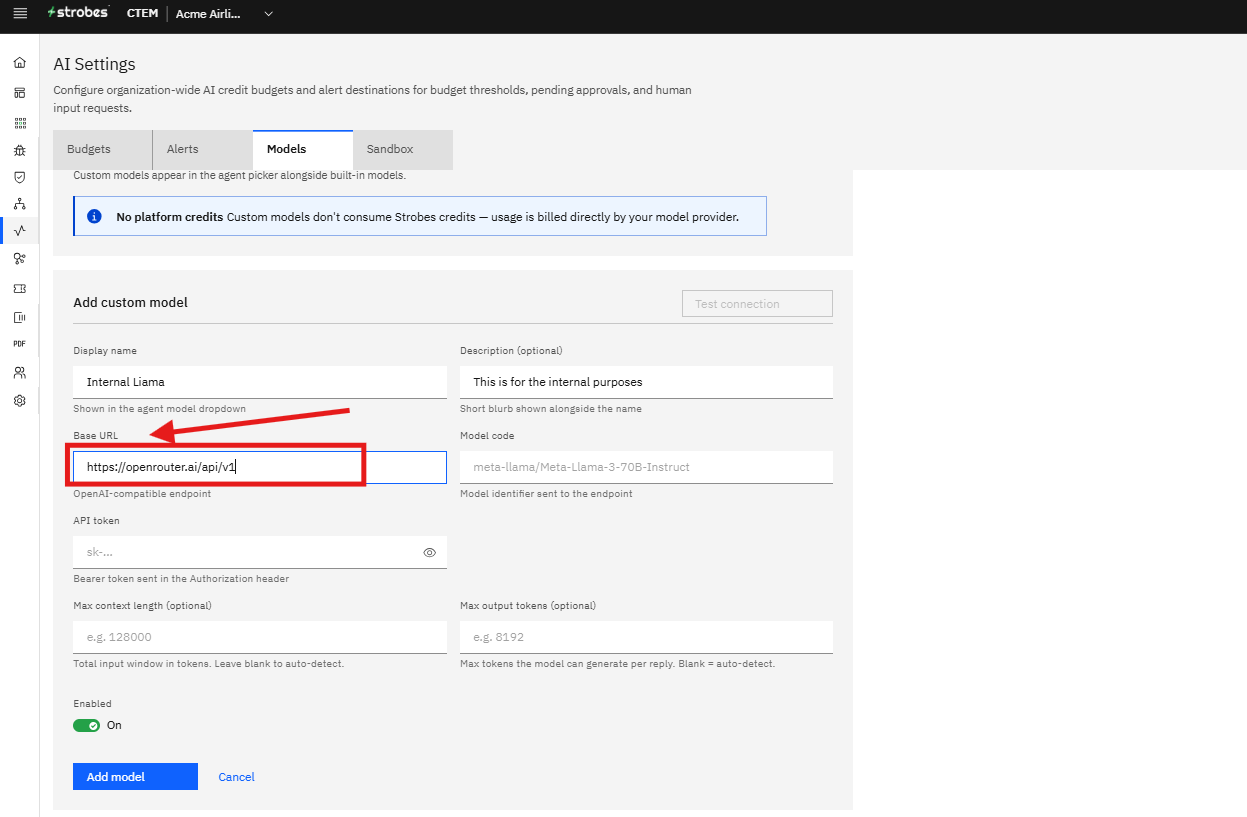
In the Base URL field, enter the root URL of your OpenAI-compatible endpoint. This is the server address Strobes will send API requests to. The URL should end in /v1, for example: https://your-host.internal/v1 or https://openrouter.ai/api/v1.
Step 8 — Enter the Model Code
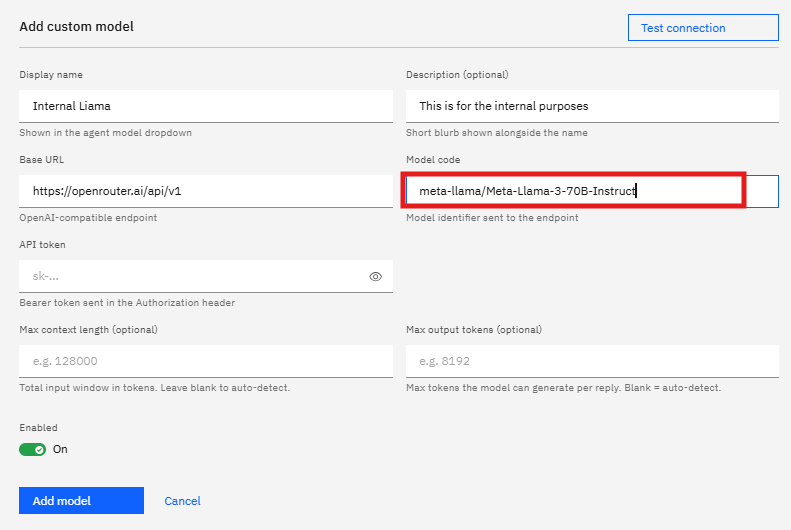
In the Model code field, enter the model identifier that your endpoint expects. This is the value Strobes sends in the model parameter of each API request. It must match exactly what your endpoint requires, for example: meta-llama/Meta-Llama-3-70B-Instruct or gpt-4o.
Step 9 — Enter the API Token
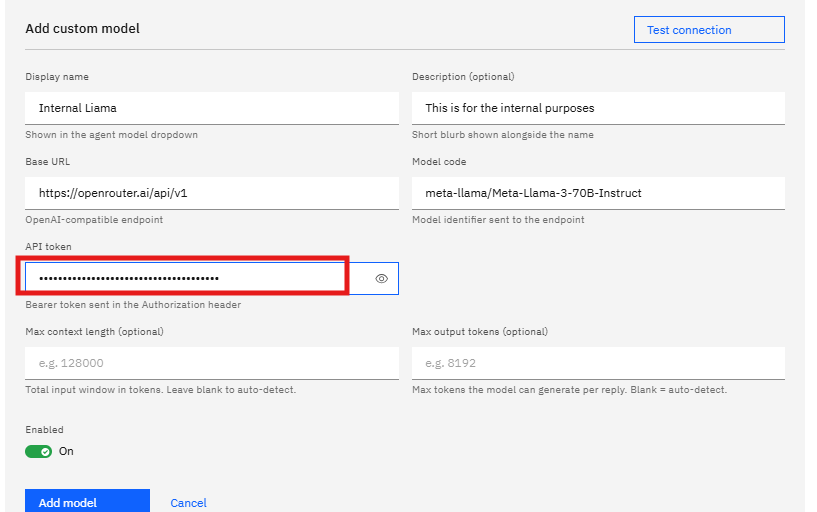
In the API token field, paste the bearer token your endpoint requires for authentication. Strobes sends this value in the Authorization: Bearer header of every request. Click the eye icon on the right to reveal or hide the token as you type.
Step 10 — Set Max Context Length (Optional)
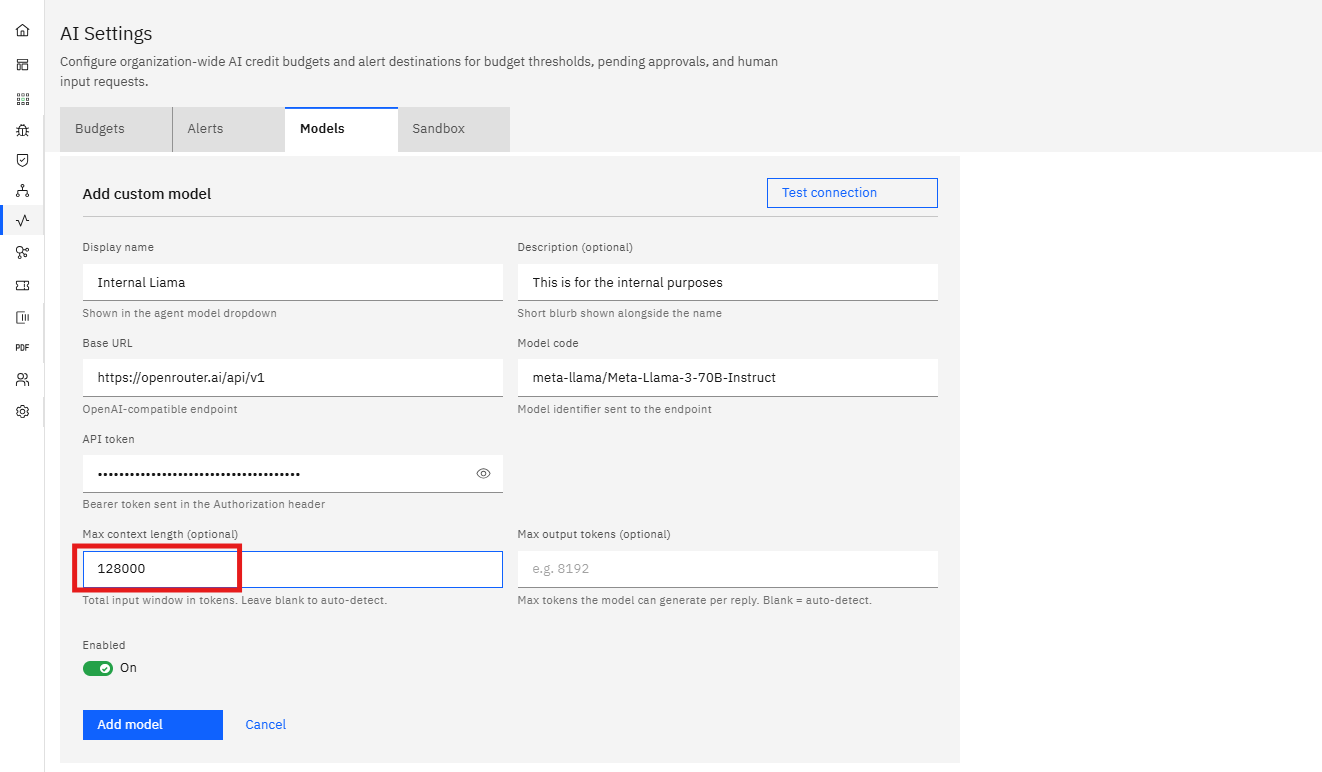
In the Max context length field, enter the total input token limit for your model if known. This is the maximum number of tokens the model can receive in a single request. Leave the field blank to let Strobes auto-detect the limit from the endpoint. Example value: 128000.
Step 11 — Set Max Output Tokens (Optional)
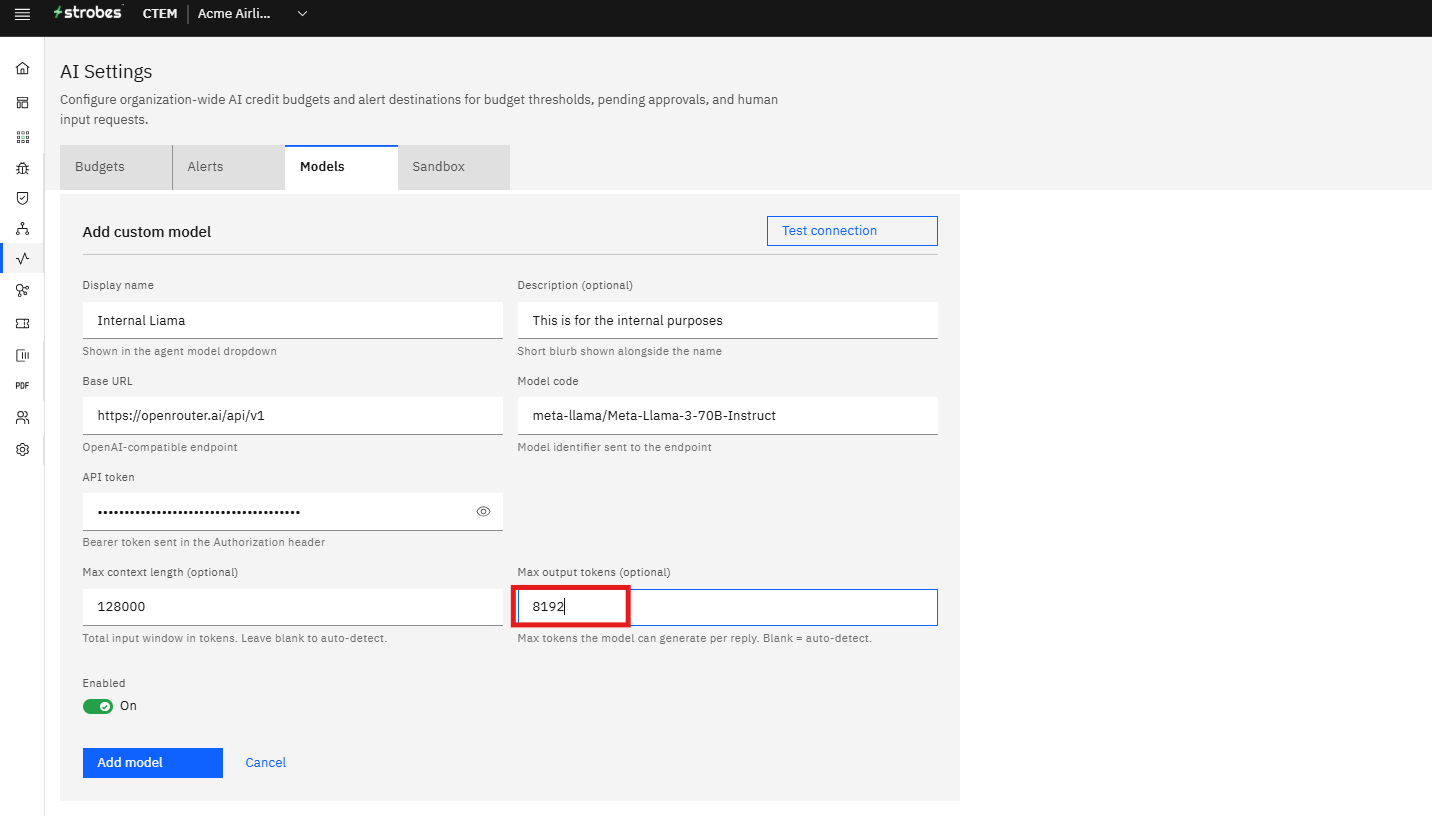
In the Max output tokens field, enter the maximum number of tokens the model can generate per reply if known. Leave the field blank to auto-detect. Example value: 8192.
Step 12 — Confirm the Enabled Toggle
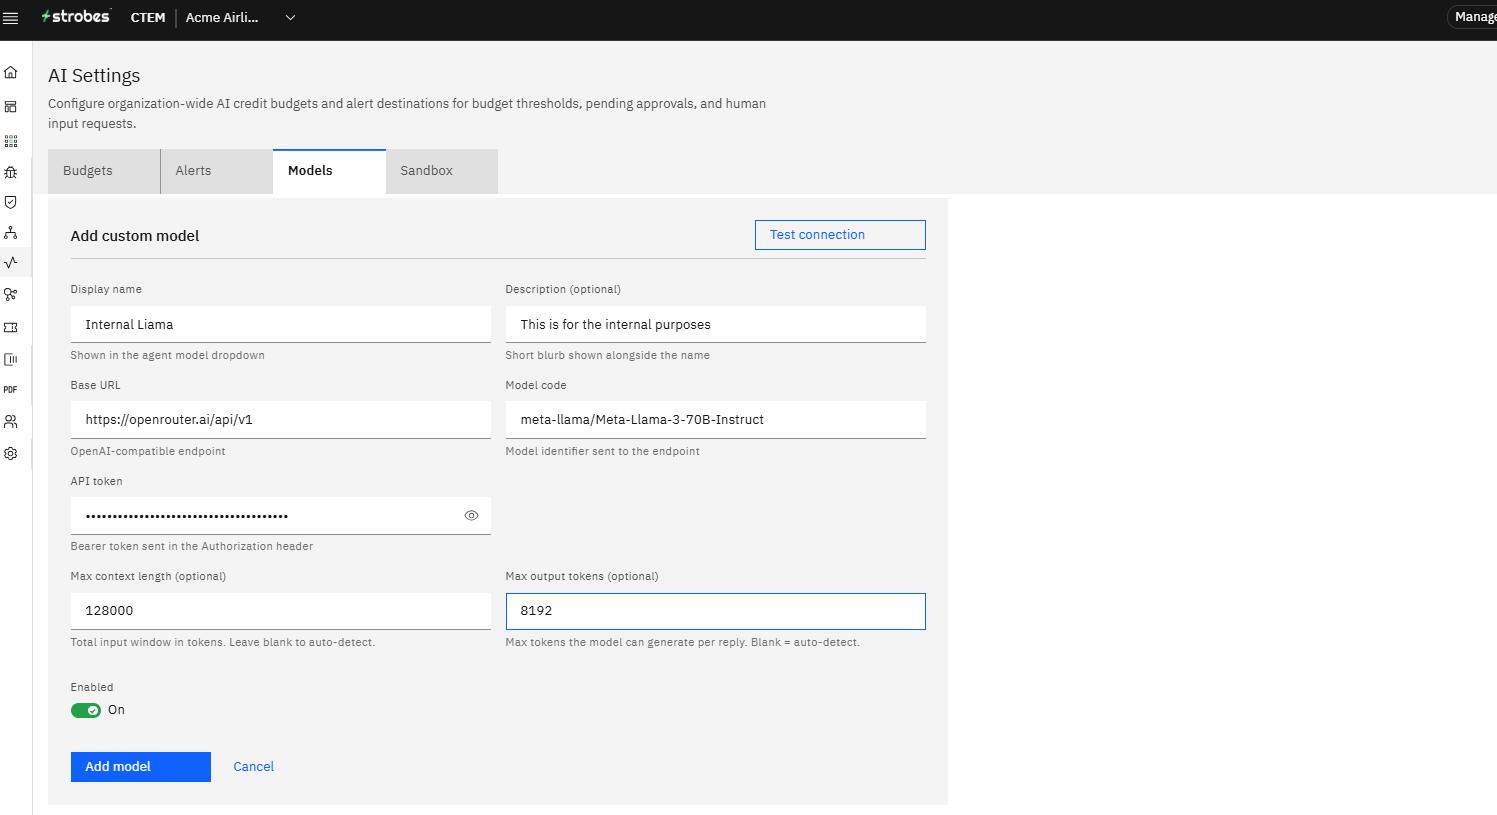
Confirm that the Enabled toggle at the bottom of the form is set to On. When enabled, the model is immediately available in the agent model picker. You can toggle it off at any time to hide the model without deleting its configuration.
Step 13 — Test the Connection
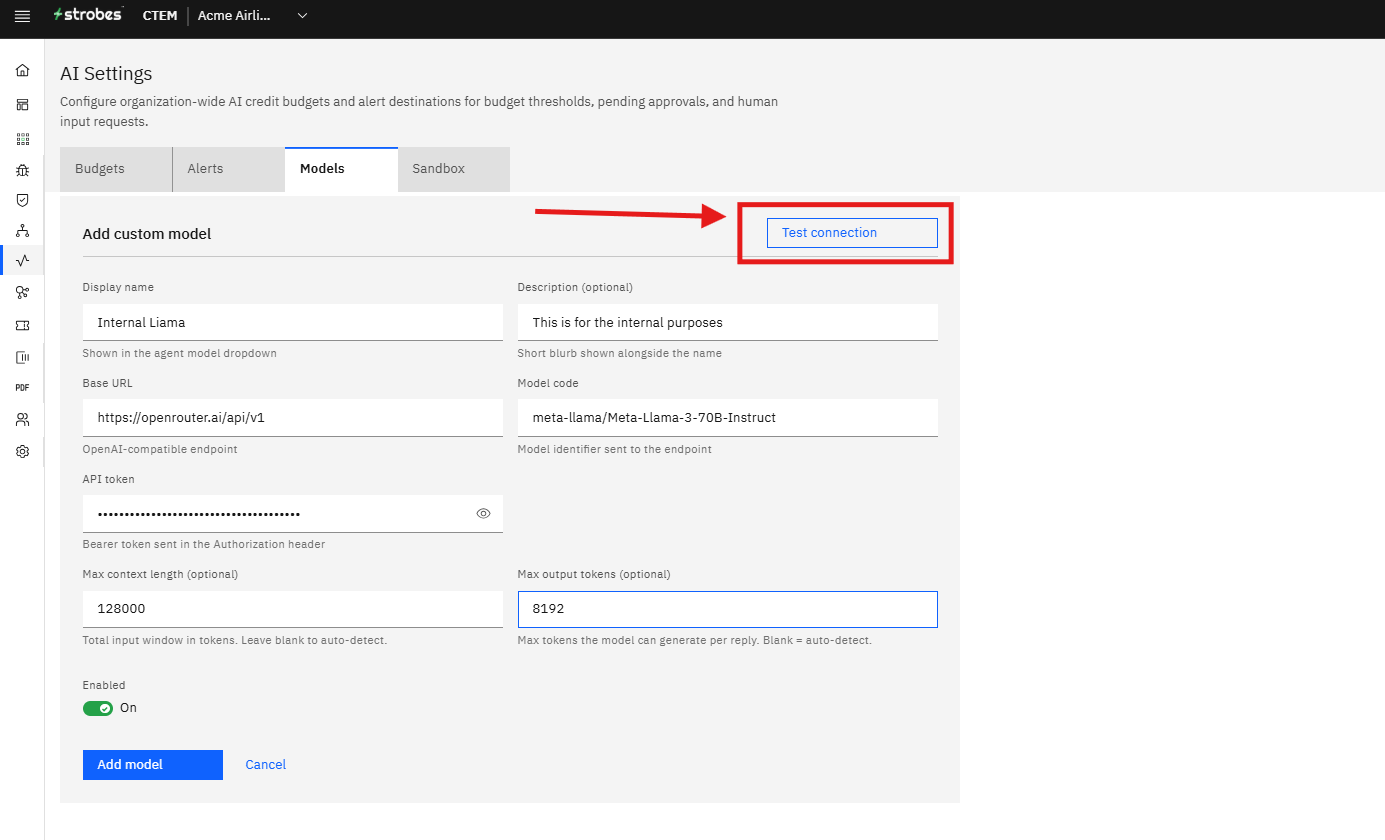
Click Test connection to verify that Strobes can reach your endpoint with the credentials you provided. The button becomes active once the required fields (Display name, Base URL, Model code, and API token) are filled. A success message confirms the connection is working. If the test fails, check that your endpoint is reachable and that the API token is correct.
Step 14 — Save the Model
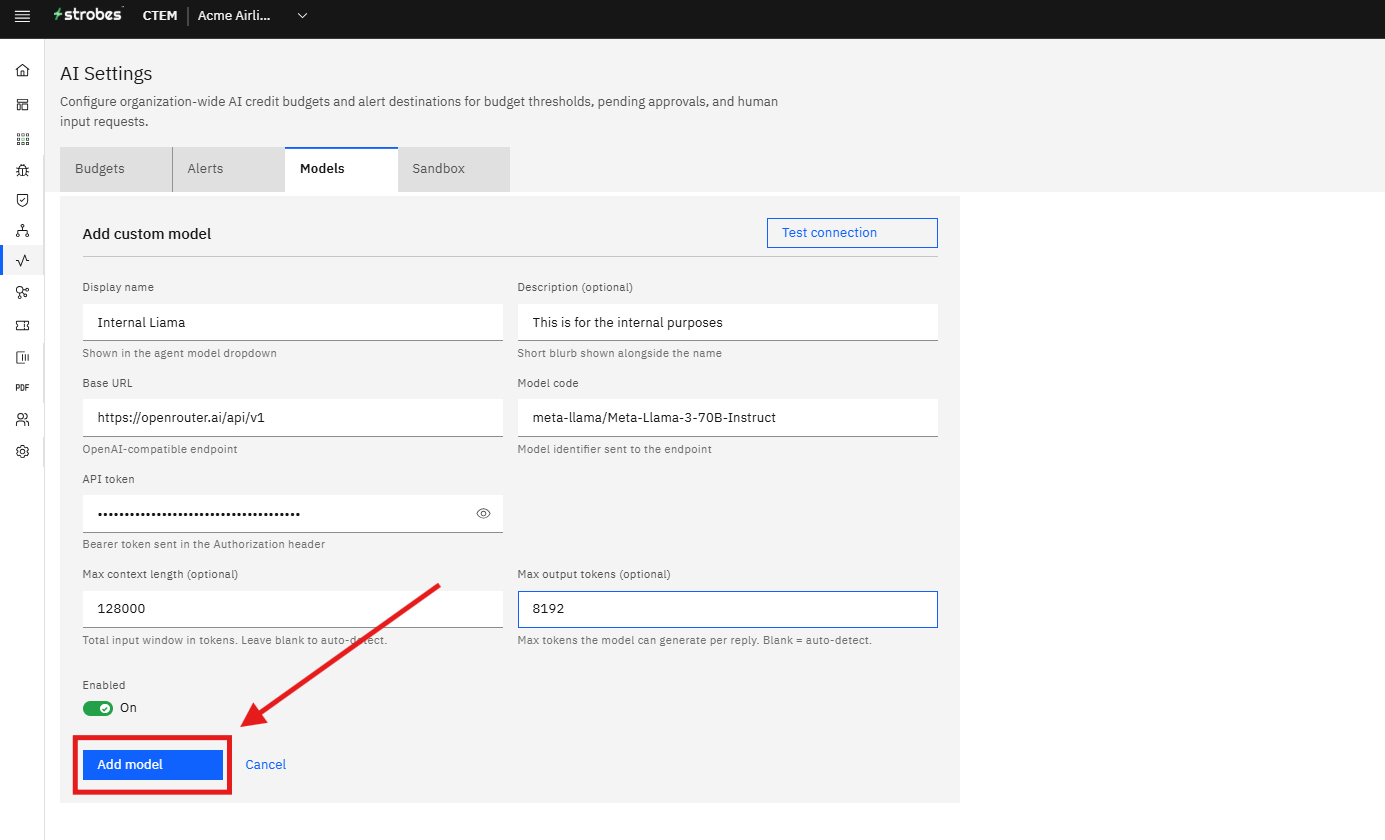
Click Add model to save your custom model. The model is registered and now appears in the Custom models list on the Models tab. It is also immediately available in the agent model dropdown across Strobes AI.
Assigning Your Model to an Agent
To route a specific agent through your custom model, open the agent's configuration and select your model from the model picker. Your custom model appears alongside Strobes' built-in options. Selecting it causes all of that agent's inference calls to route through your endpoint.
Tips
Test the connection before saving. The Test connection button confirms your endpoint is live and your API token is valid. Saving without testing can result in agent failures that are harder to debug after the fact.
Match the Model code exactly. The value you enter in Model code is sent verbatim to your endpoint in the model field of each API request. Even a small difference in casing or formatting will cause your endpoint to reject requests.
Leave token limits blank when unsure. Strobes will auto-detect context and output limits from the endpoint. Only set these values manually if your endpoint does not report them correctly or you want to apply a stricter cap than the model supports.
You can disable a model without deleting it. Toggling Enabled to Off hides the model from the agent picker without removing its configuration. This is useful if your endpoint is temporarily unavailable or you want to pause use of a specific model.
Custom model usage does not appear in Strobes credit reports. Costs for custom models are tracked and billed entirely by your model provider. Check your provider's dashboard for usage data rather than Strobes AI settings.