
Configuring ServiceNow Credentials and Connector in Strobes
Overview
Before you can configure the ServiceNow connector in Strobes, you must first add a ServiceNow OAuth credential through the Credential Manager. This is the required first step for the ServiceNow integration.
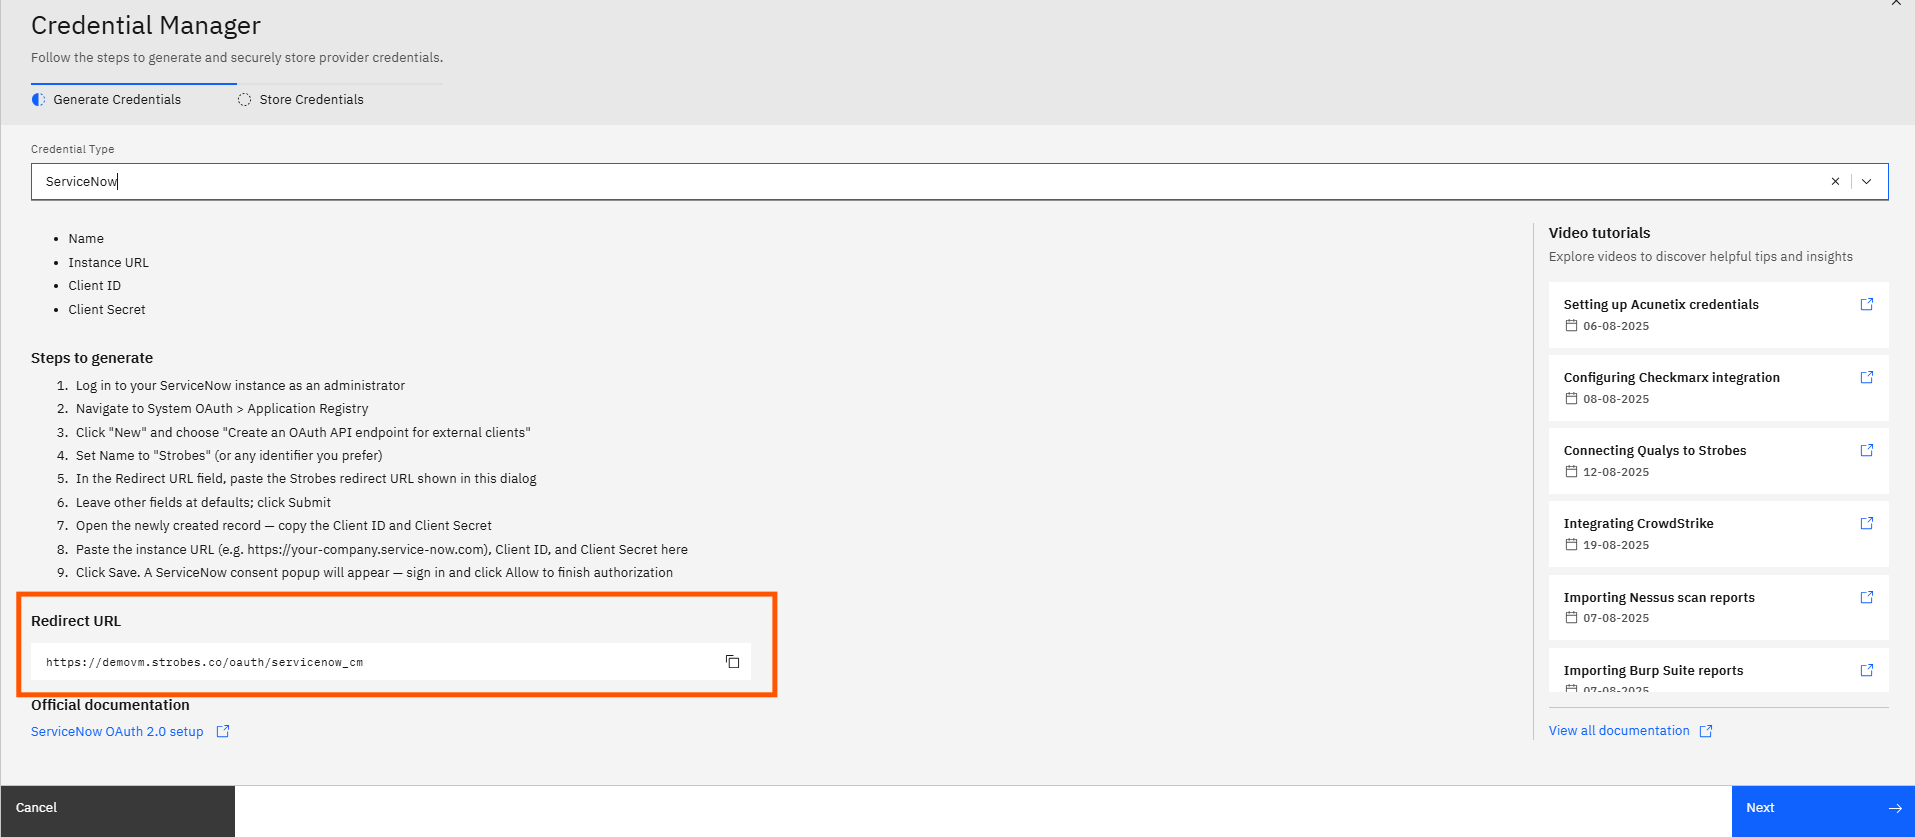
The Credential Manager walks you through two sub-steps: Generate Credentials displays the Redirect URL your ServiceNow OAuth Application Registry entry needs, along with a step-by-step setup guide. Store Credentials is where you enter the credential details — name, instance URL, Client ID, and Client Secret — into Strobes.
Once this credential is saved, you can proceed to the next article to configure the ServiceNow connector workflow.
Before You Start
- ServiceNow admin access: You need admin access to your ServiceNow instance to create an OAuth Application Registry entry. In ServiceNow, navigate to System OAuth > Application Registry and create a new entry of type OAuth API endpoint for external clients. This generates the Client ID and Client Secret you will paste into Strobes.
- Redirect URL: Strobes displays the Redirect URL on the Generate Credentials page. You must copy this URL and paste it into the Redirect URL field of your ServiceNow OAuth Application Registry entry before completing the setup.
Generate Credentials
Step 1 — Open Settings
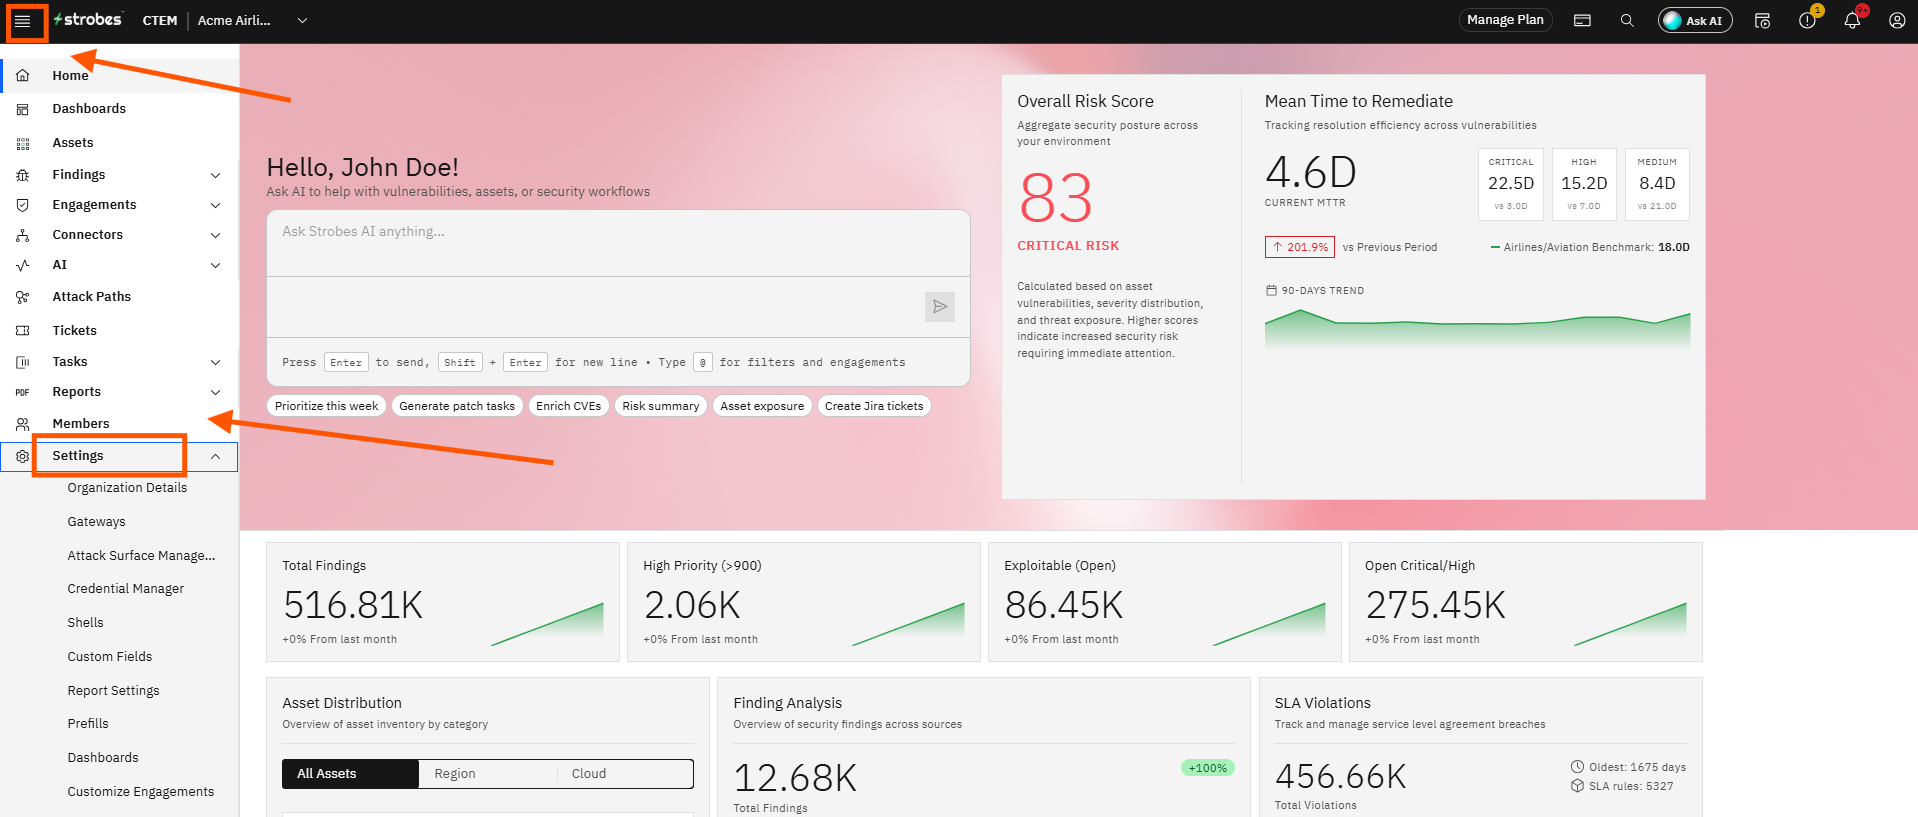
Click the Settings icon in the left sidebar. The Settings navigation panel opens.
Step 2 — Click Credential Manager
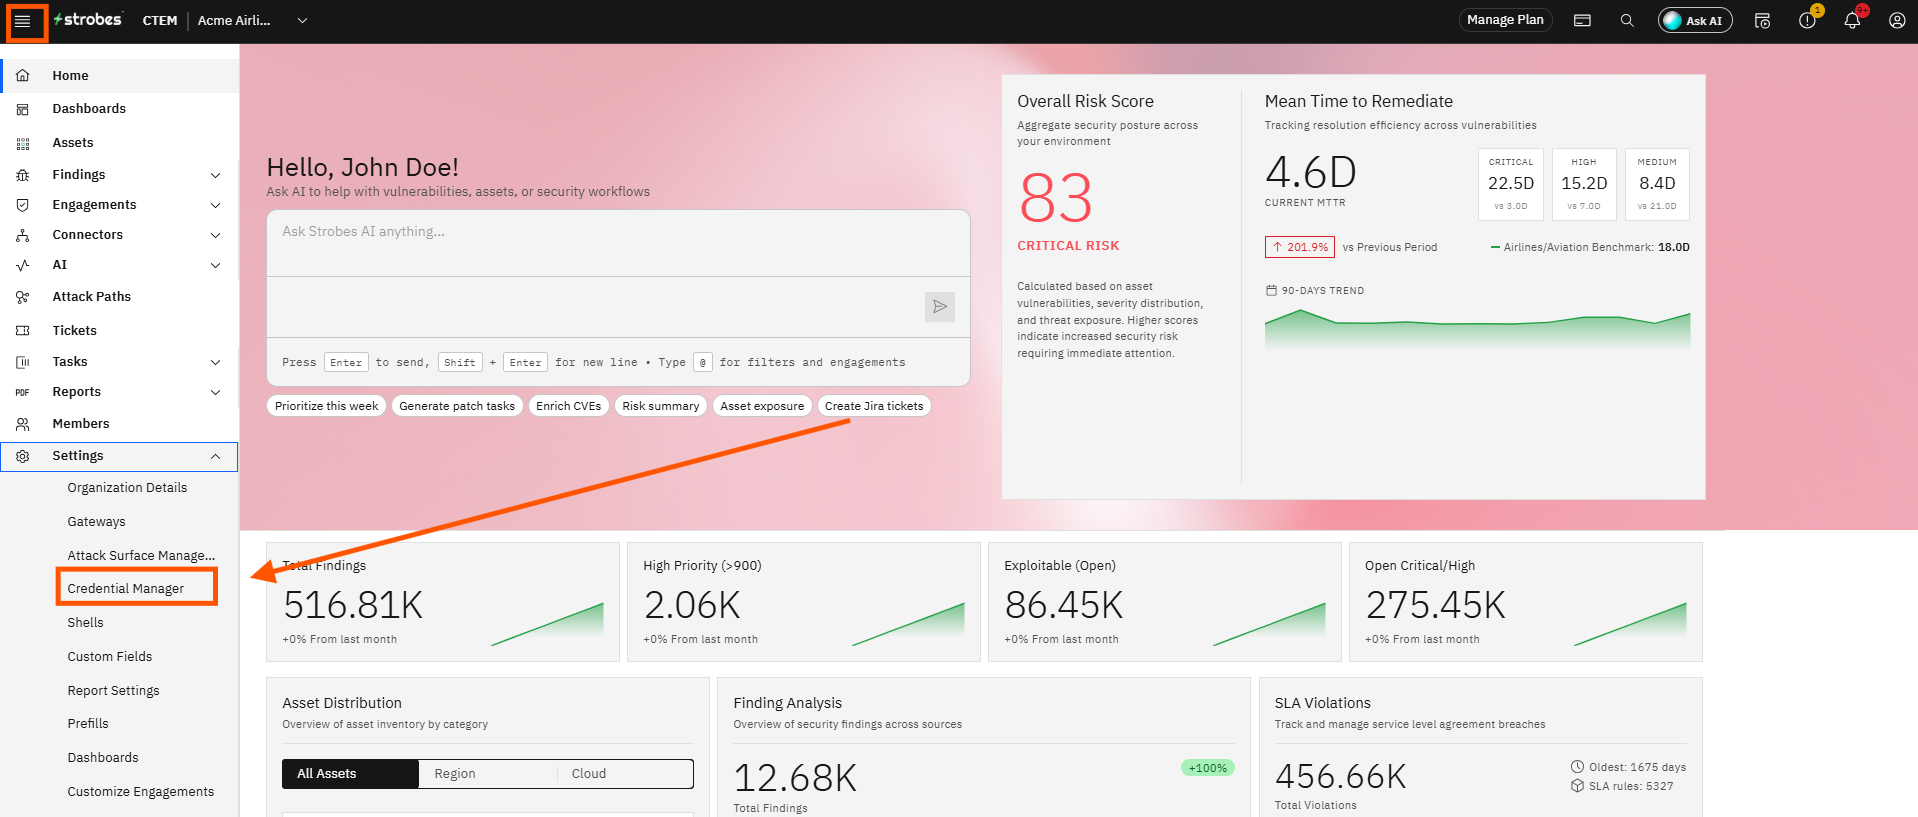
Click Credential Manager in the Settings navigation. The Credential Manager page opens showing existing credentials and an Add Credential button in the top right corner.
Step 3 — Click Add Credential

Click the Add Credential button in the top right corner. The Credential Manager wizard opens with the Generate Credentials step active and the Credential Type dropdown empty.
Step 4 — Open the Credential Type Dropdown
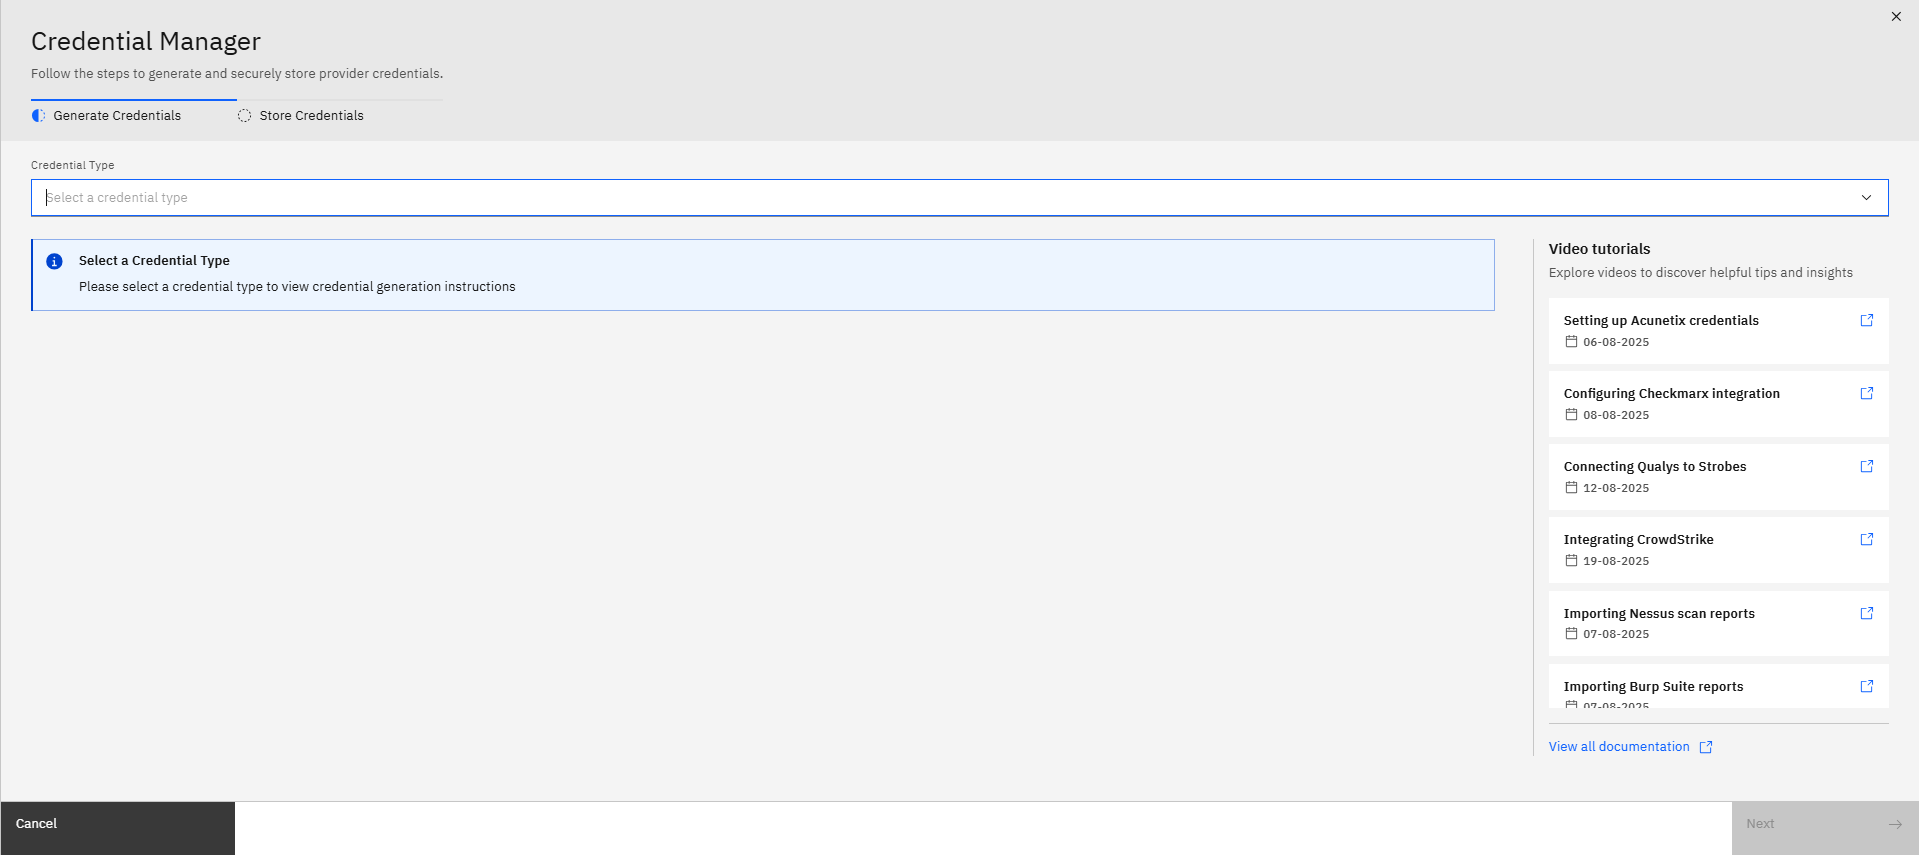
Click the Credential Type dropdown. A list of all supported credential types appears.
Step 5 — Search for and Select ServiceNow
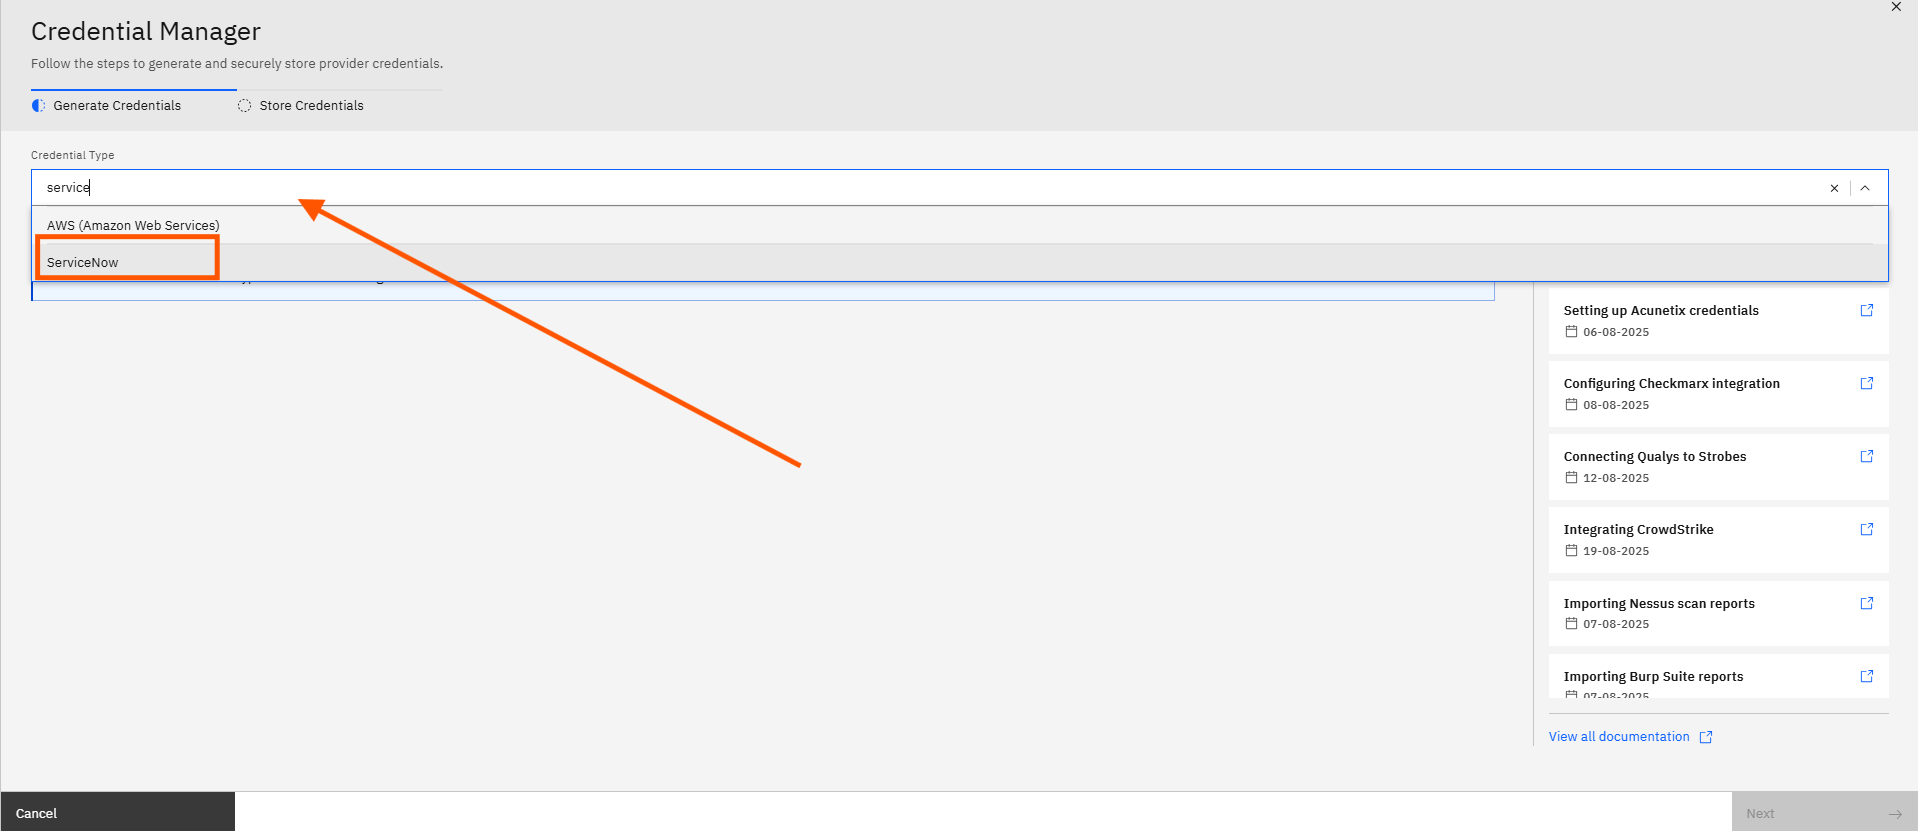
Type ServiceNow in the dropdown search field, then click ServiceNow in the filtered list. The dropdown closes and the Generate Credentials page updates to show the full ServiceNow setup instructions.
Step 6 — Review the Setup Instructions
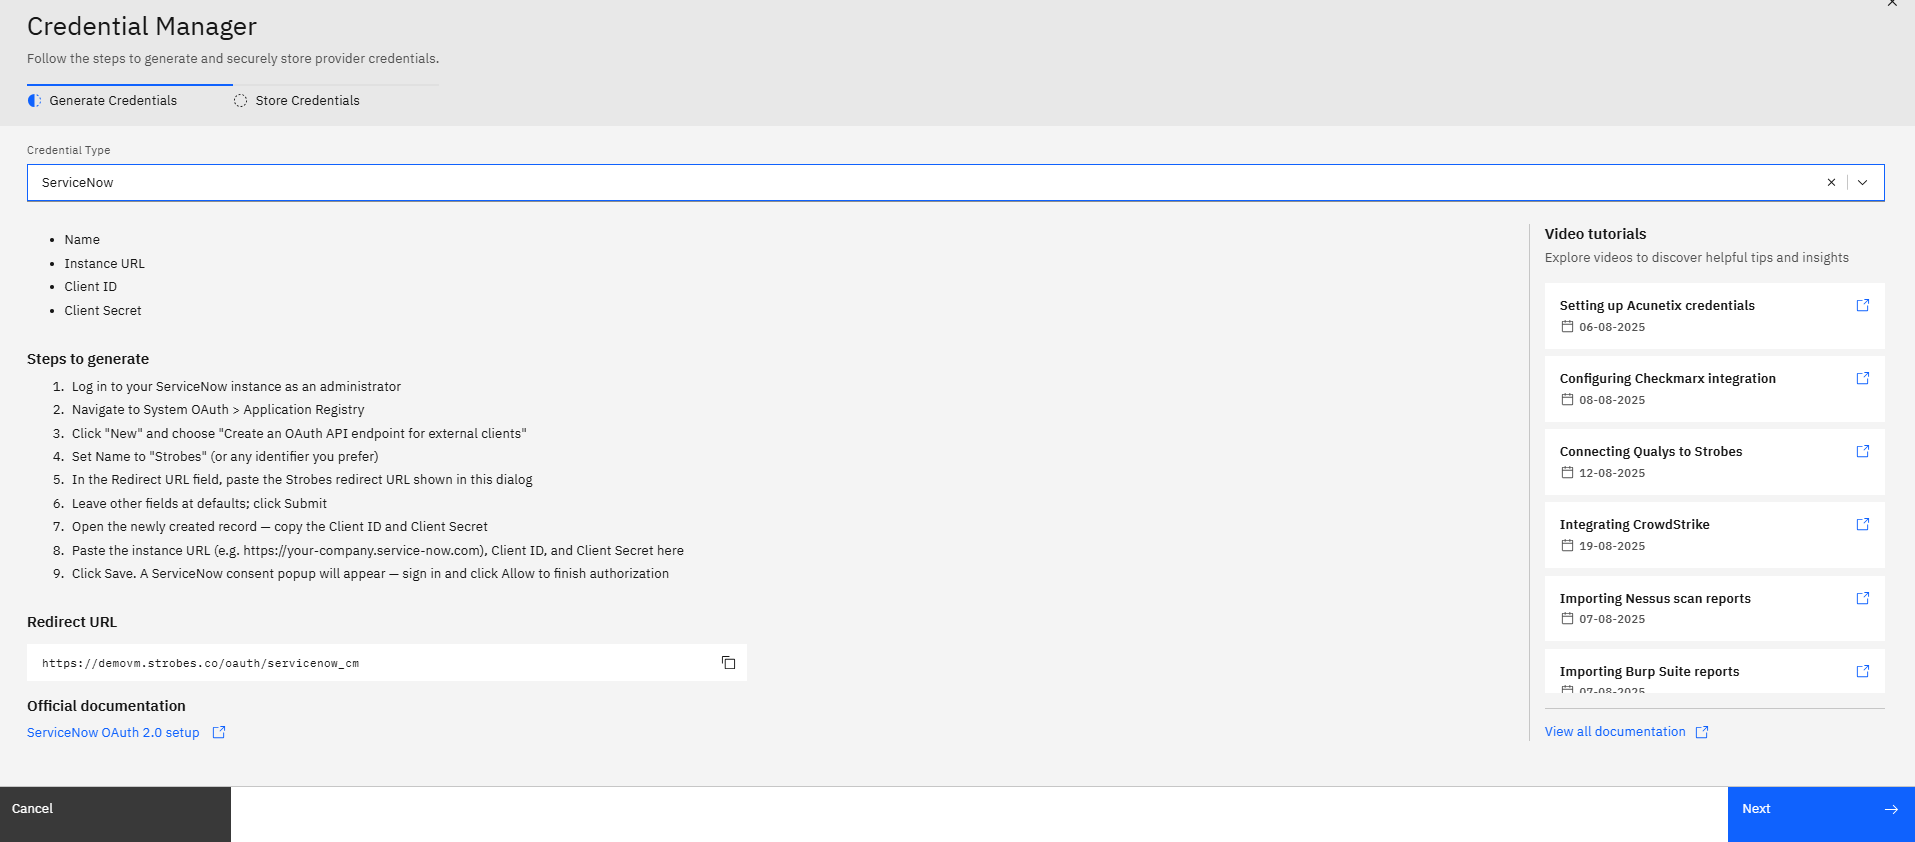
Review the setup instructions on the Generate Credentials page. The page lists the required fields, a step-by-step guide for creating the OAuth Application Registry entry in ServiceNow, and the Strobes Redirect URL you must paste into ServiceNow.
Step 7 — Copy the Strobes Redirect URL
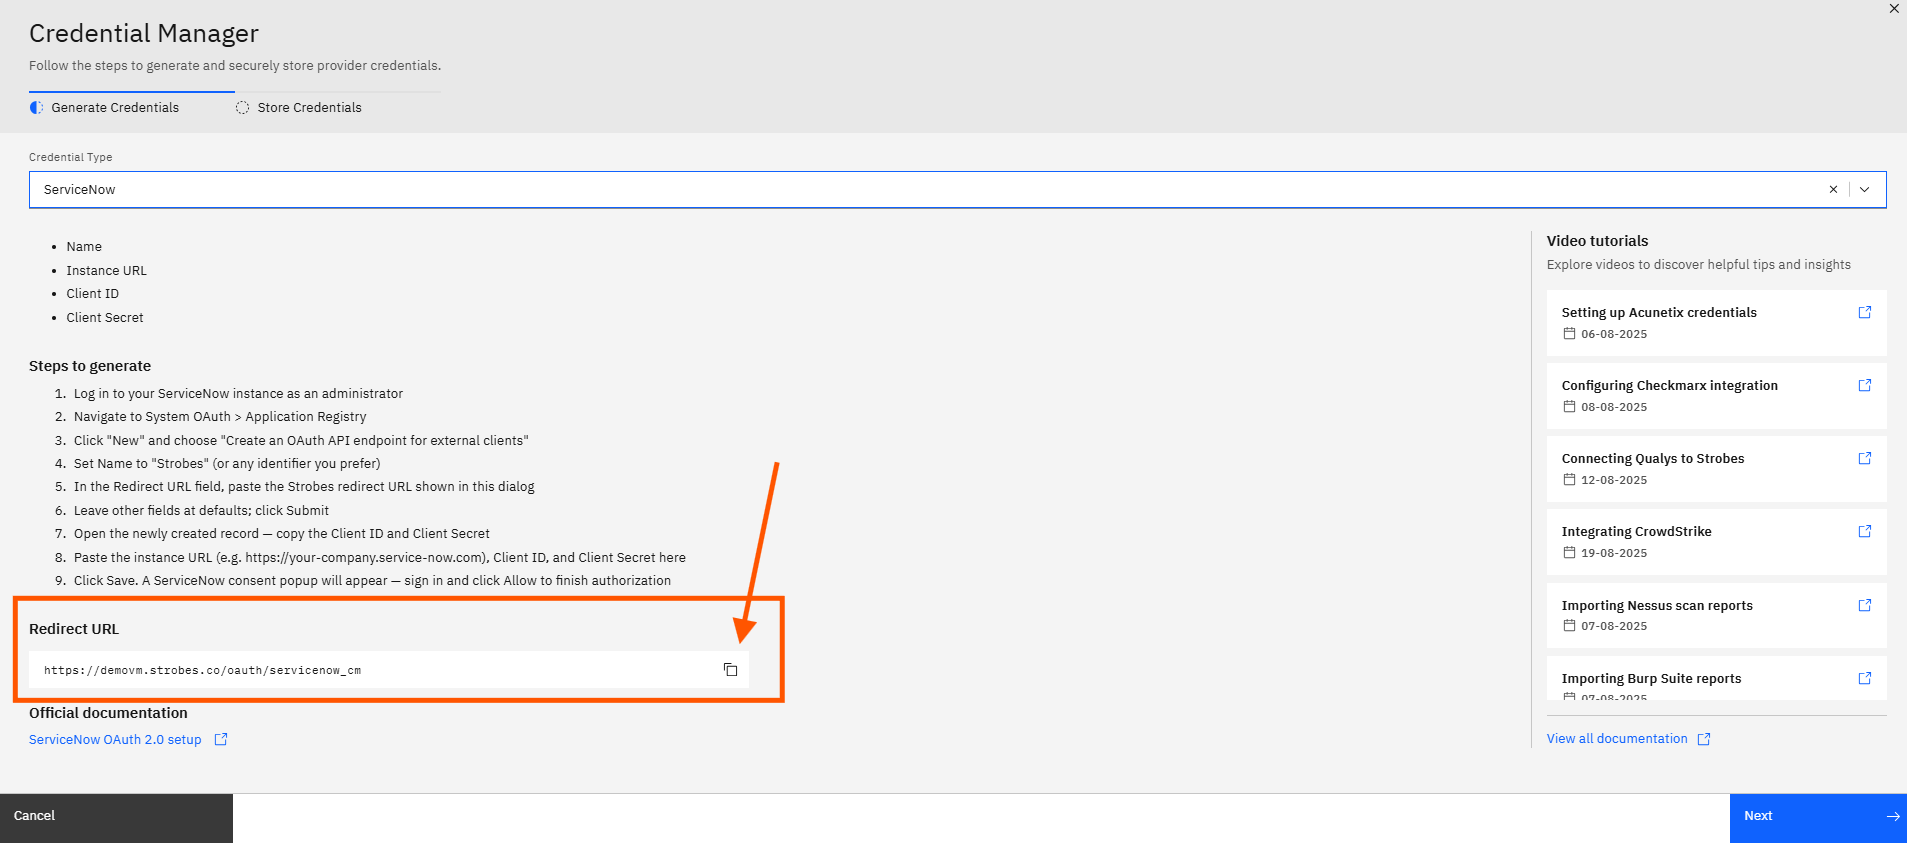
Click the copy icon next to the Redirect URL. The Redirect URL is copied to your clipboard. Paste this URL into the Redirect URL field of your ServiceNow OAuth Application Registry entry before proceeding.
Step 8 — Click Next
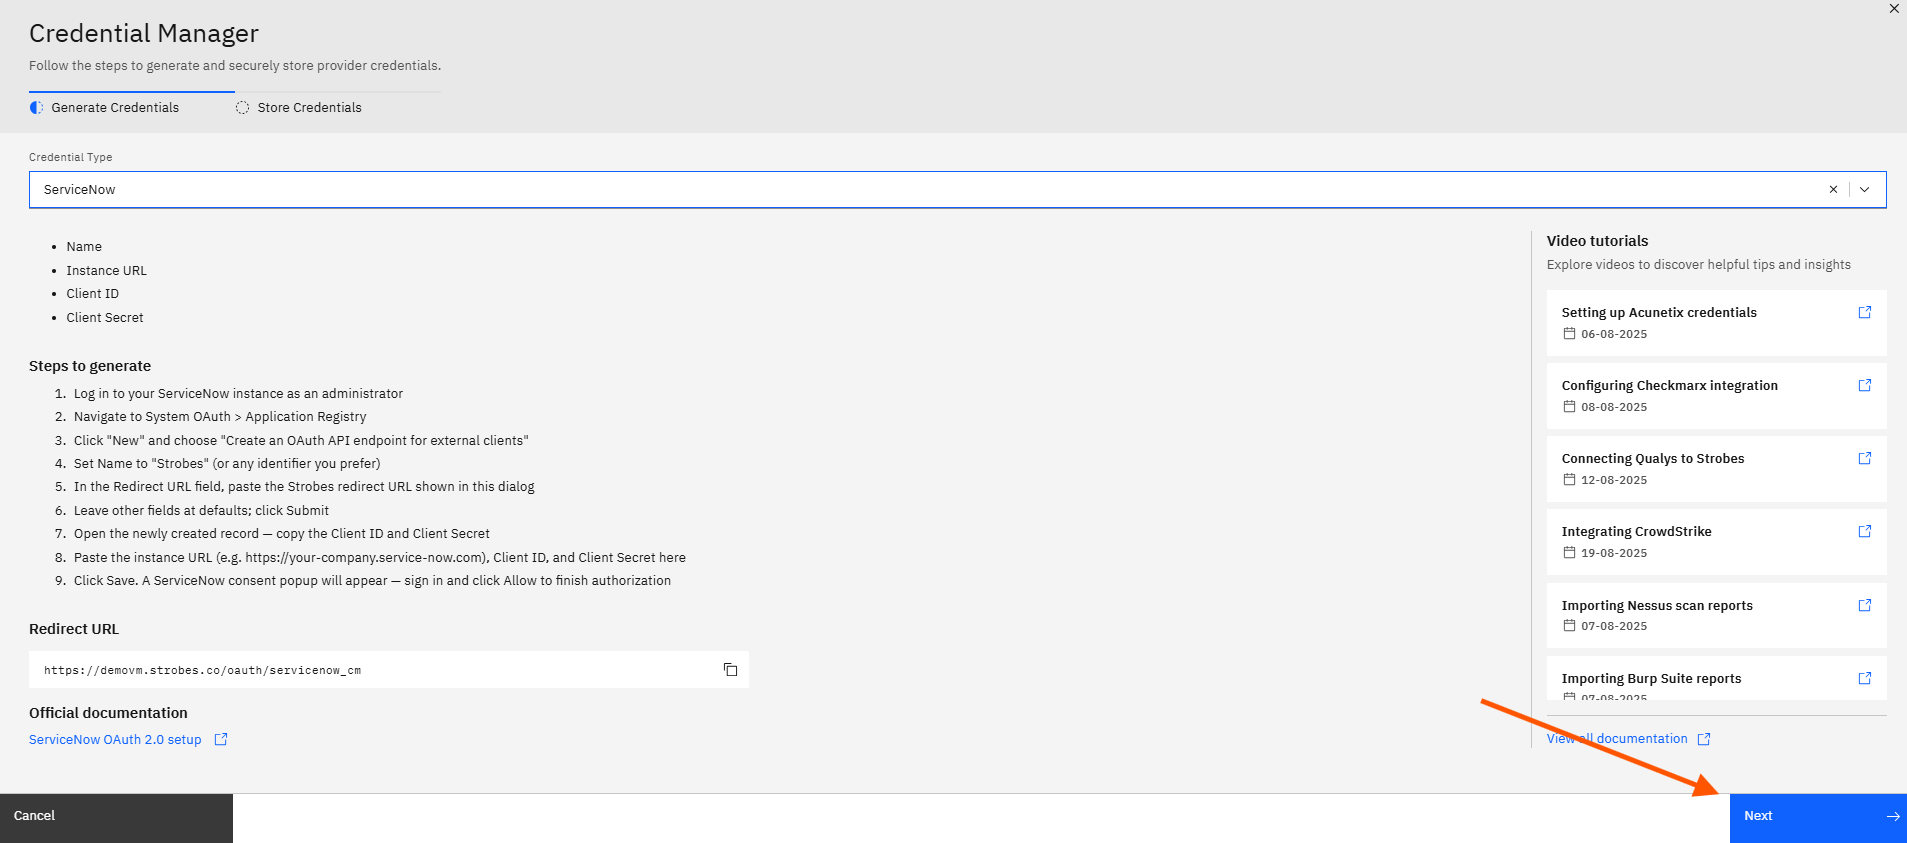
Click Next. The Generate Credentials step is marked complete with a checkmark and the wizard advances to the Store Credentials step.
Store Credentials
Step 9 — Click the Name Field and Enter a Credential Name
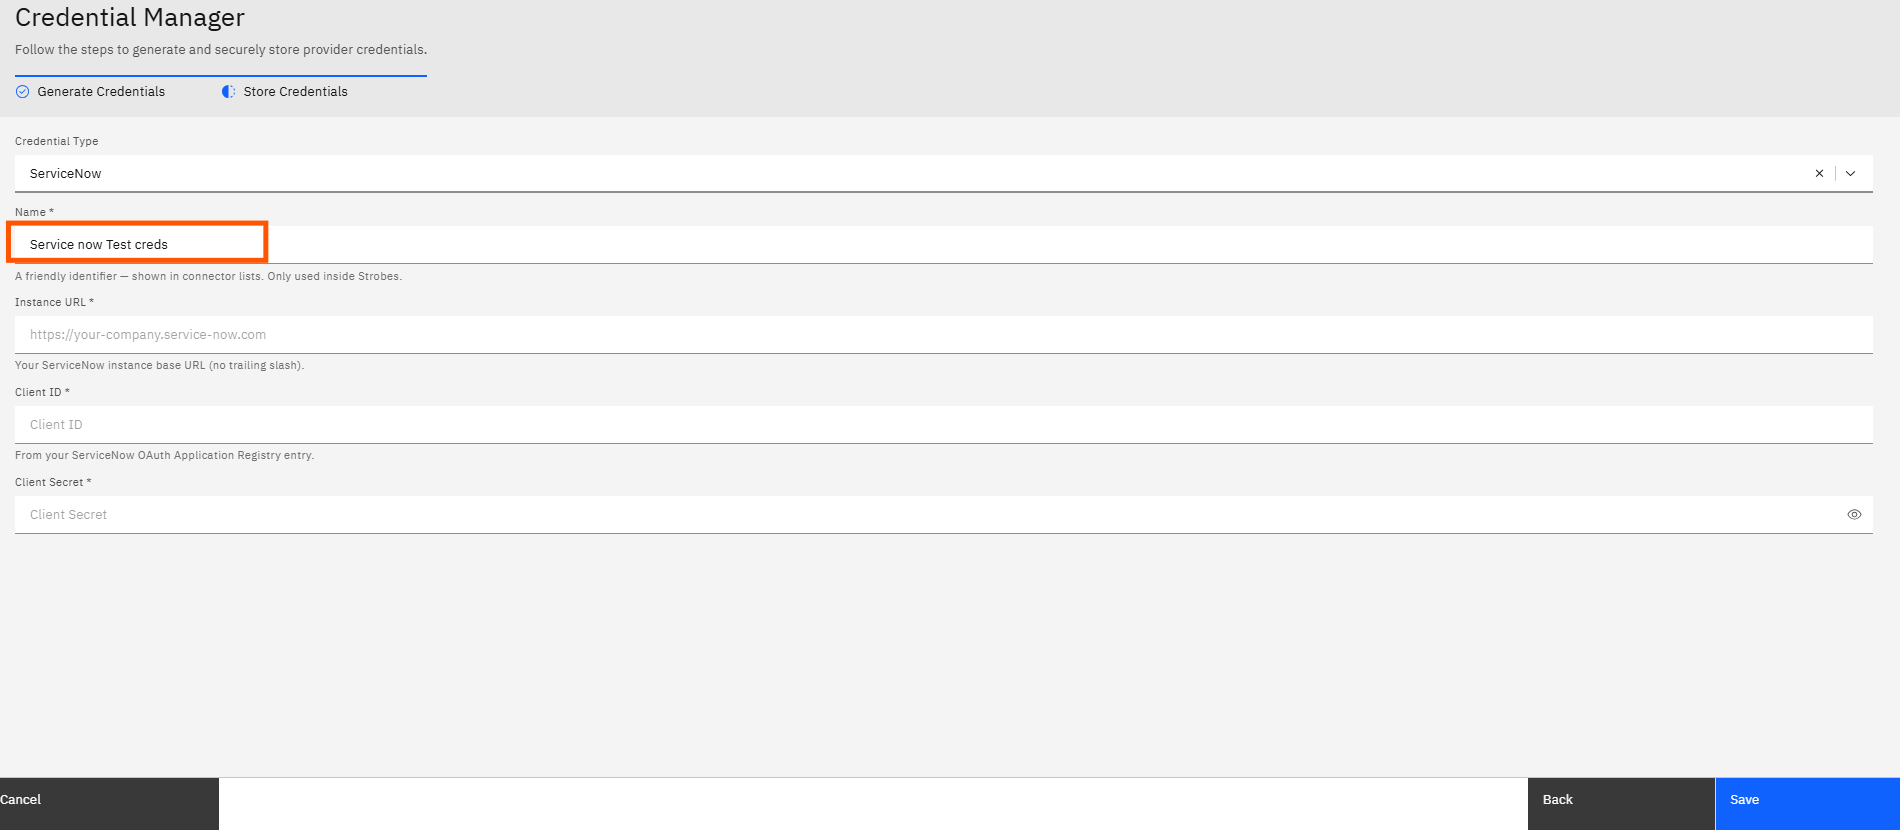
Click the Name field and type a name for this credential. This name appears in the credential dropdown when you configure the ServiceNow connector later. Use a name that identifies the environment or team, for example: Prod - Service Now.
Step 10 — Click the Instance URL Field and Enter Your ServiceNow Instance URL
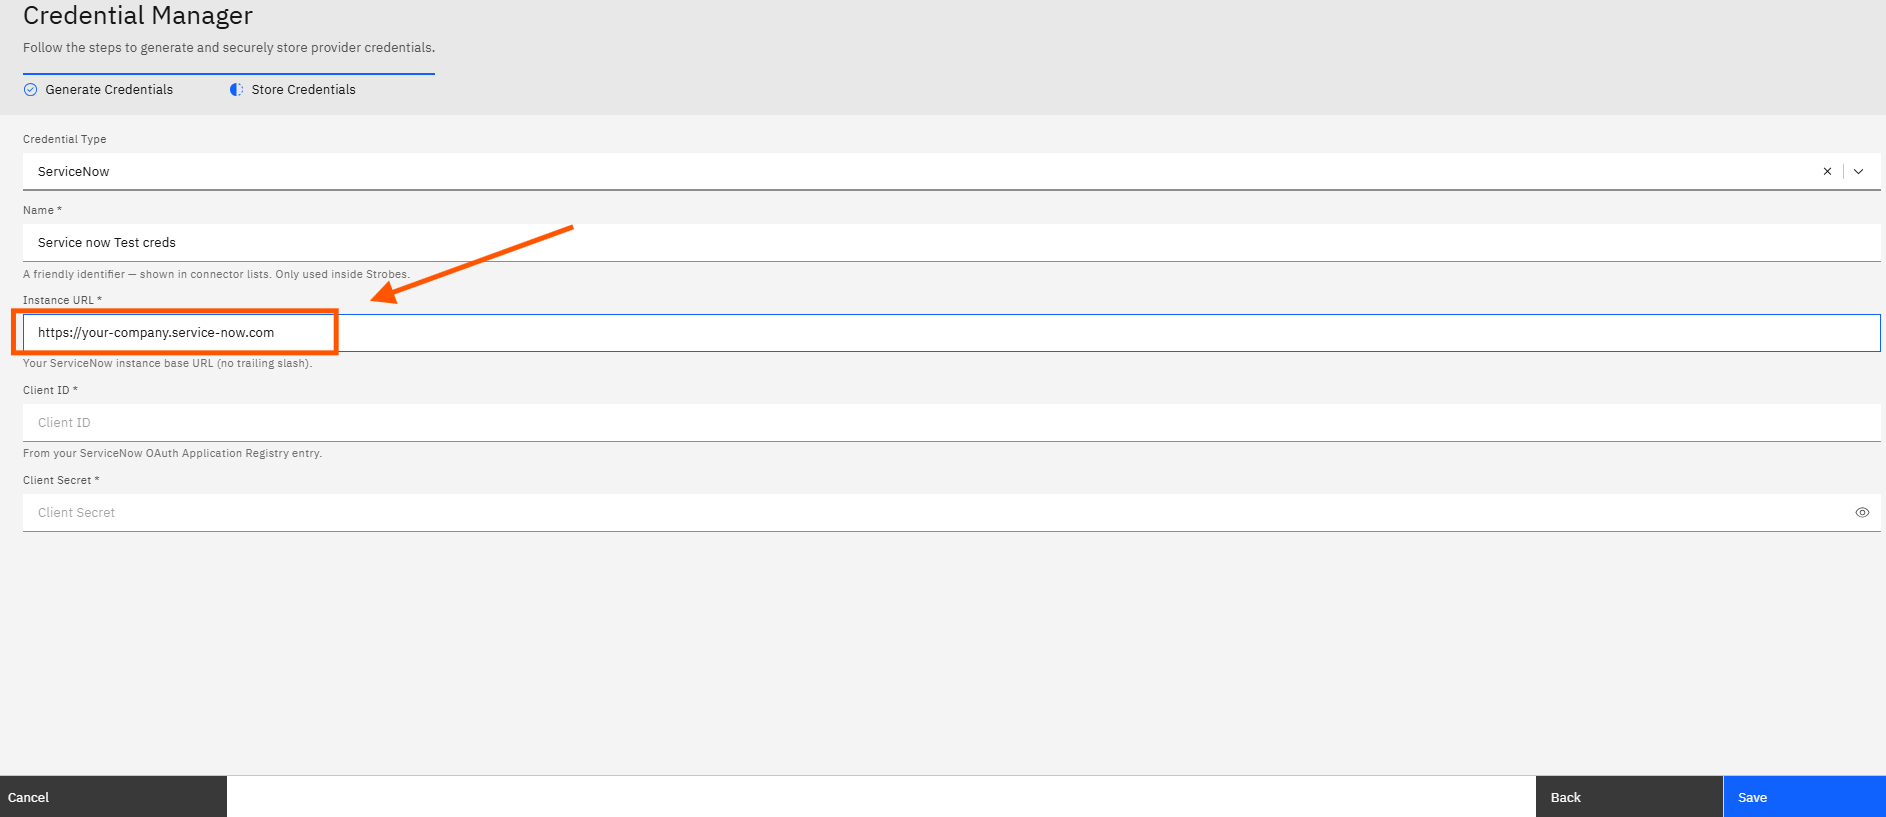
Click the Instance URL field and type your ServiceNow instance base URL. Use the format https://your-company.service-now.com with no trailing slash. This is the root URL of your ServiceNow environment.
Step 11 — Click the Client ID Field and Enter Your Client ID
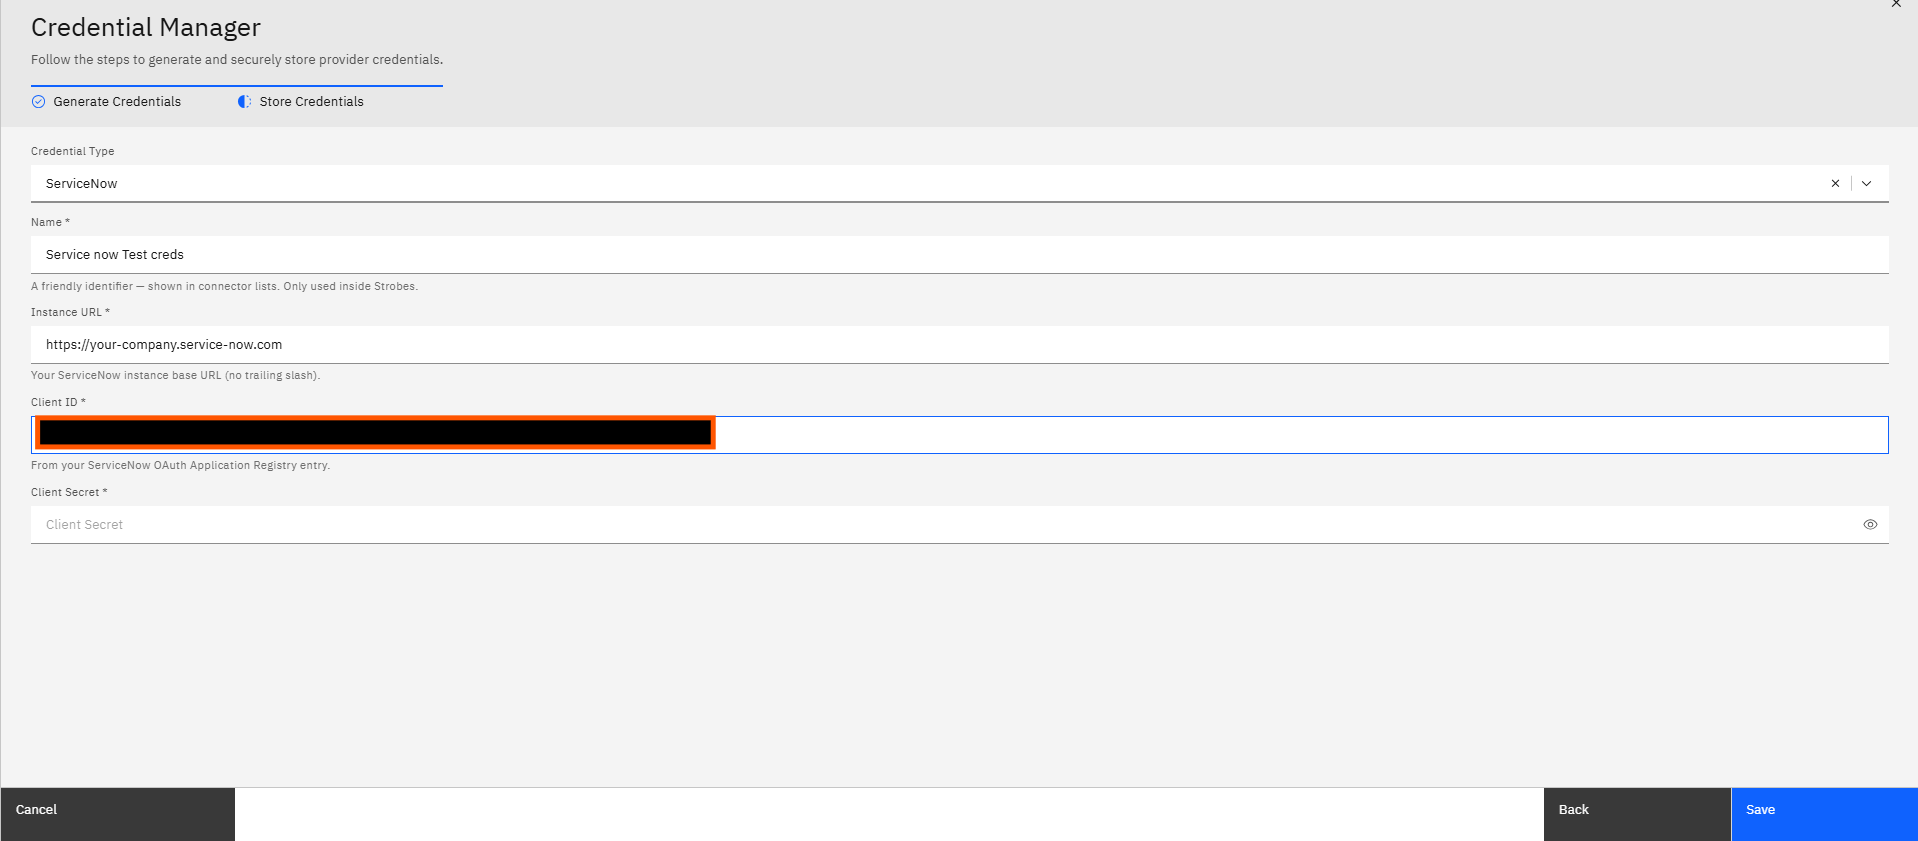
Click the Client ID field and paste the Client ID from your ServiceNow OAuth Application Registry entry. You obtained this value when you created the OAuth endpoint in ServiceNow.
Step 12 — Click the Client Secret Field and Enter Your Client Secret
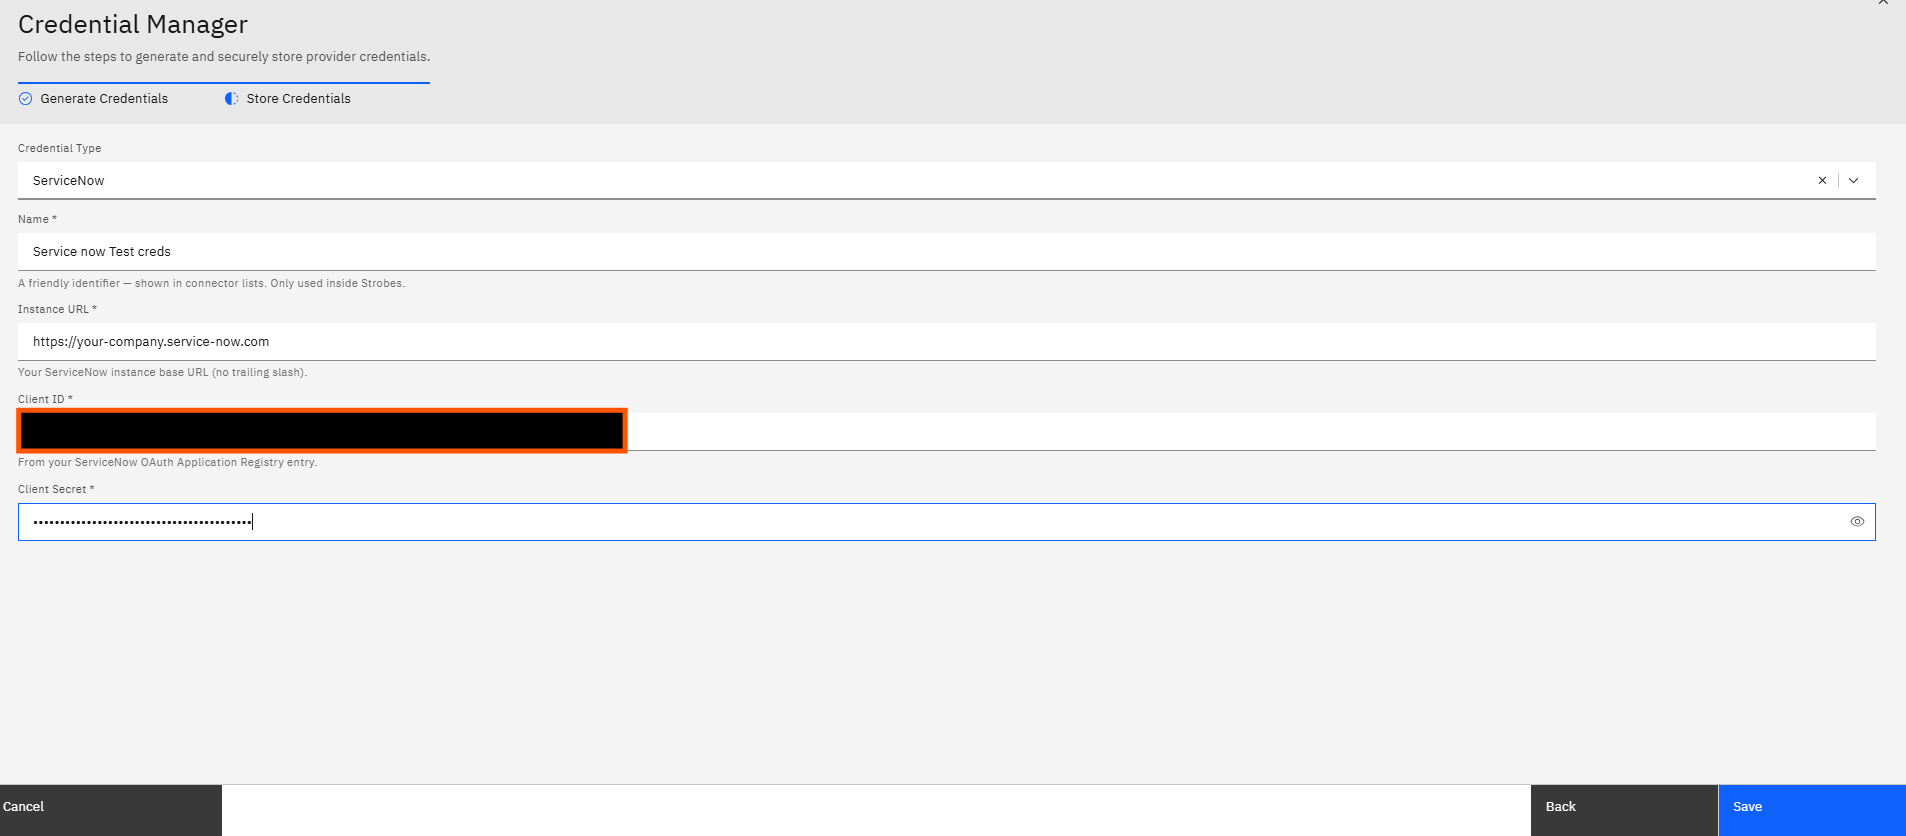
Click the Client Secret field and paste the Client Secret from your ServiceNow OAuth Application Registry entry. The value is masked by default. Click the eye icon to verify it before saving.
Step 13 — Click Save
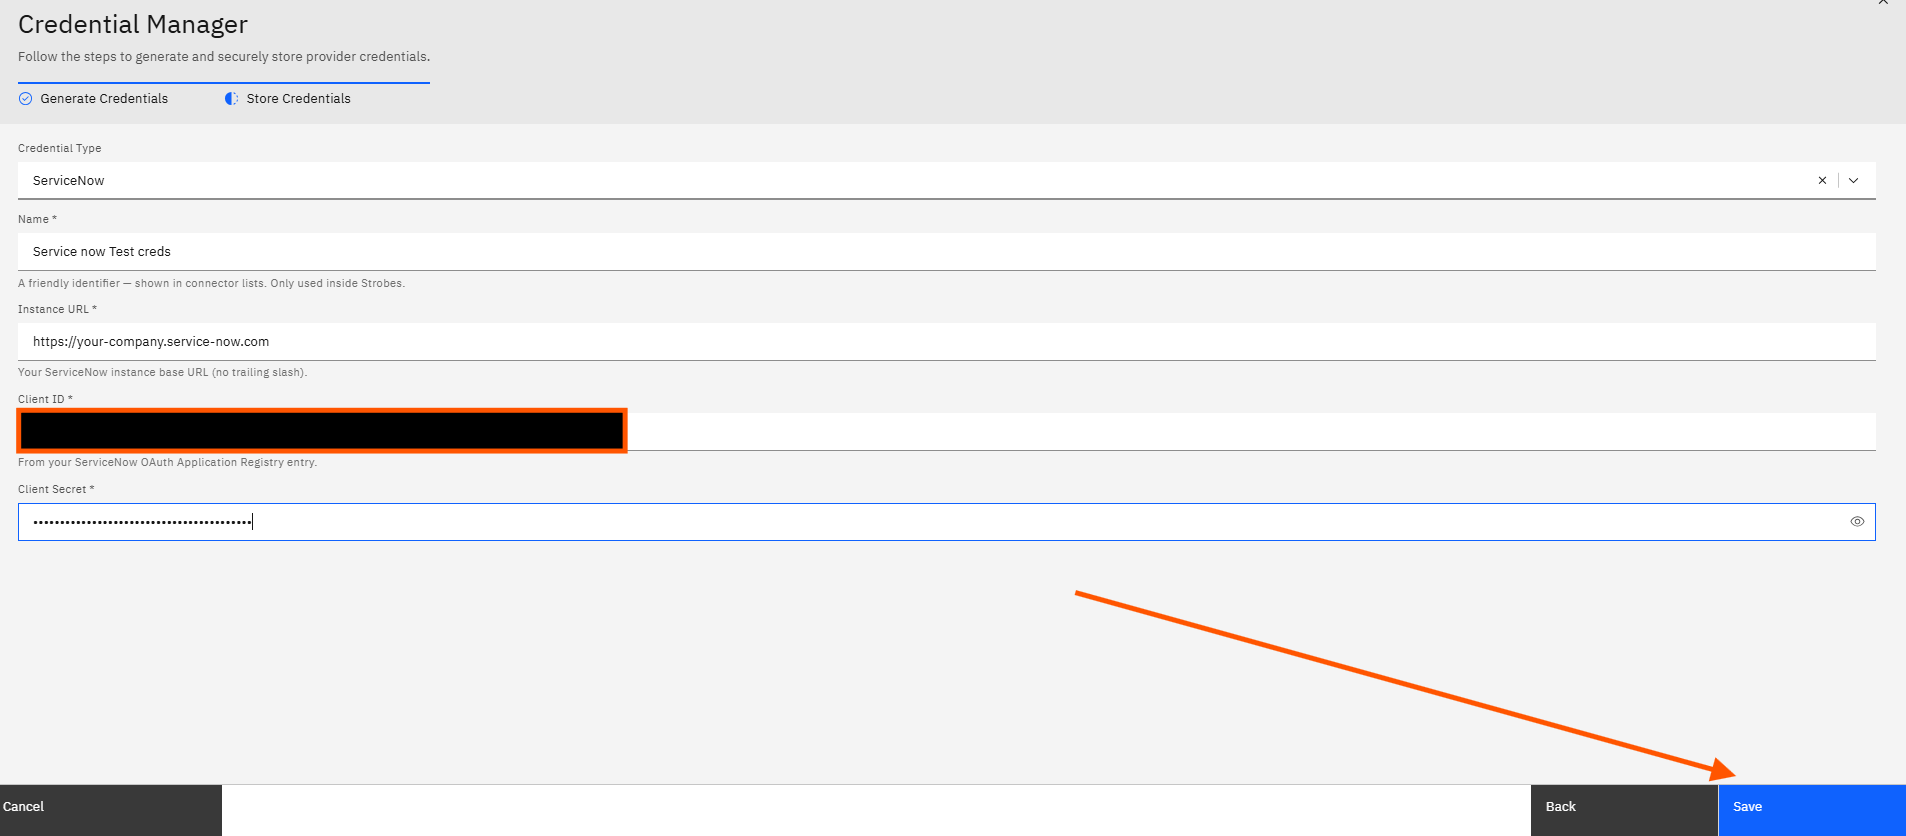
Click Save. Strobes validates and stores the credential. A saving indicator appears on the button while the request processes.
Step 14 — Confirm the Credential that Was Saved
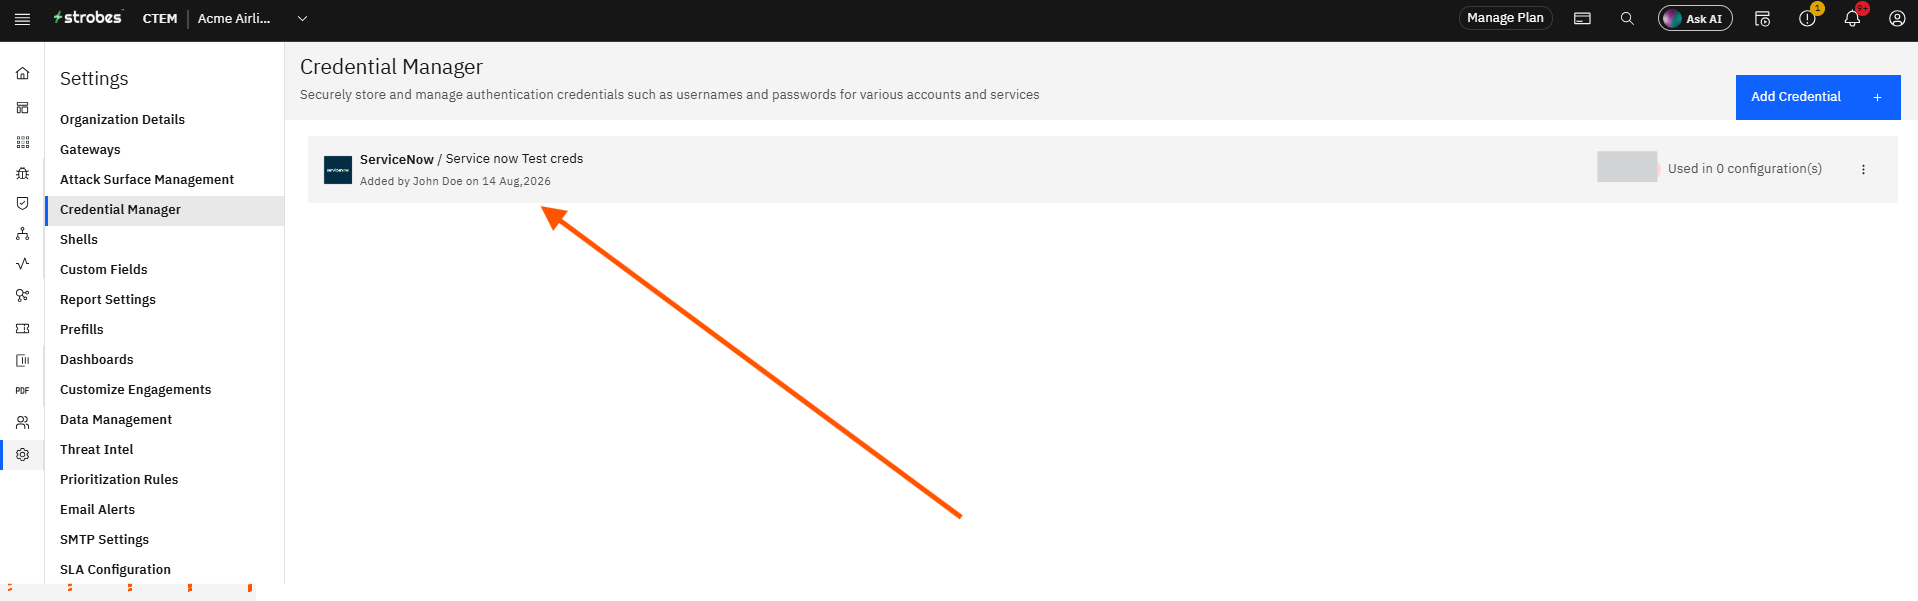
After the save completes, the Credential Manager page returns and a green "Credentials are added successfully." notification confirms the save. The new credential appears at the top of the list showing the ServiceNow icon and the name you entered.
Configuring the ServiceNow ITSM Connector in Strobes
This is Step 2 of the ServiceNow integration. You must complete the credential setup in Configuring ServiceNow Credentials in Strobes before starting here.
Before You Start
- Role required: Owner or Manager access on your Strobes account.
- ServiceNow credential saved: You must have a ServiceNow credential already saved in the Strobes Credential Manager. If you have not done this yet, complete the credential setup article first.
Step One: Configuration Name and Credential
Step 1 — Click Connectors in the Left Sidebar
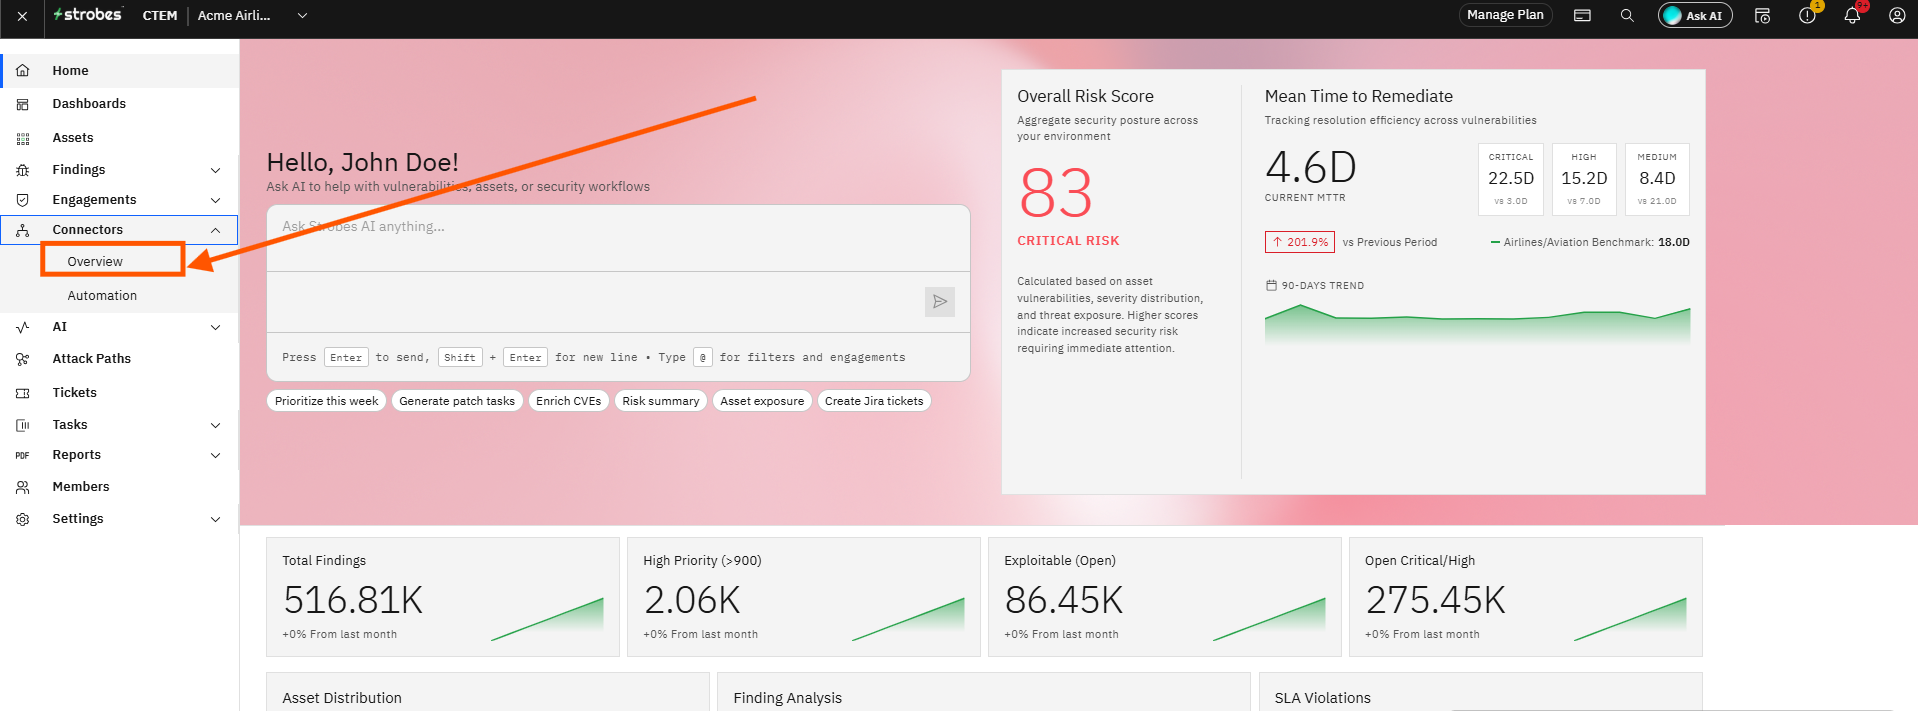
Click Connectors in the left sidebar. The Connectors page opens, showing the Look for Connectors search bar, any Installed Connectors, and the Available Connectors list.
Step 2 — Search for ServiceNow ITSM
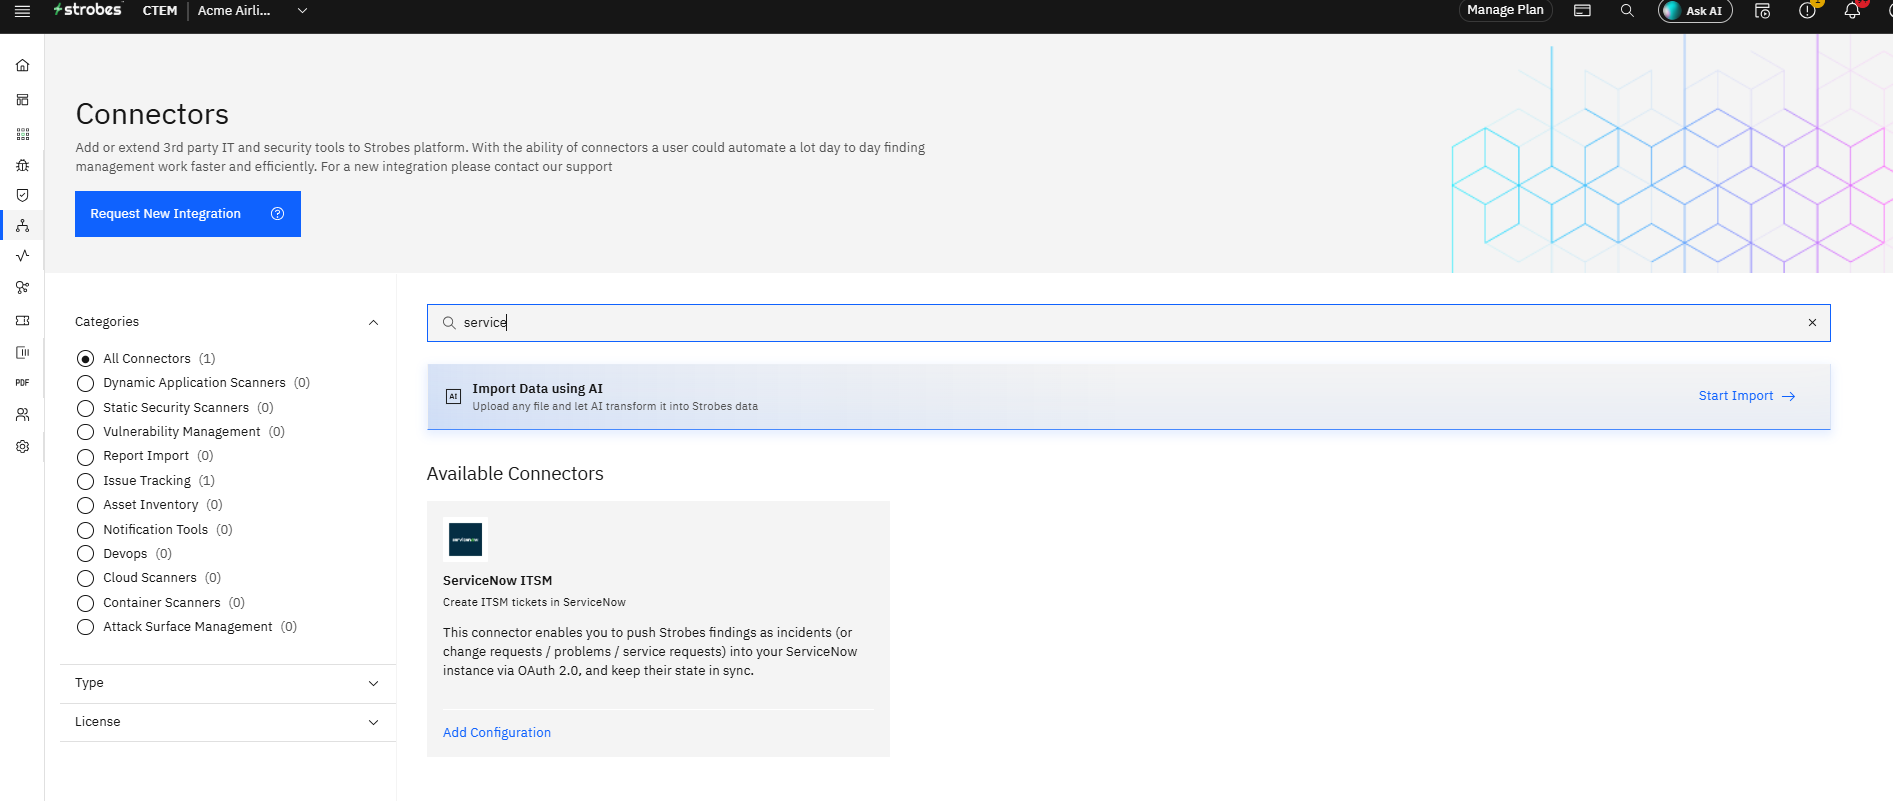
Click the Look for Connectors search bar and type ServiceNow. The ServiceNow ITSM connector card appears. The card description reads: "This connector enables you to push Strobes findings as incidents (or change requests / problems / service requests) into your ServiceNow instance via OAuth 2.0, and keep their state in sync."
Step 3 — Click Add Configuration
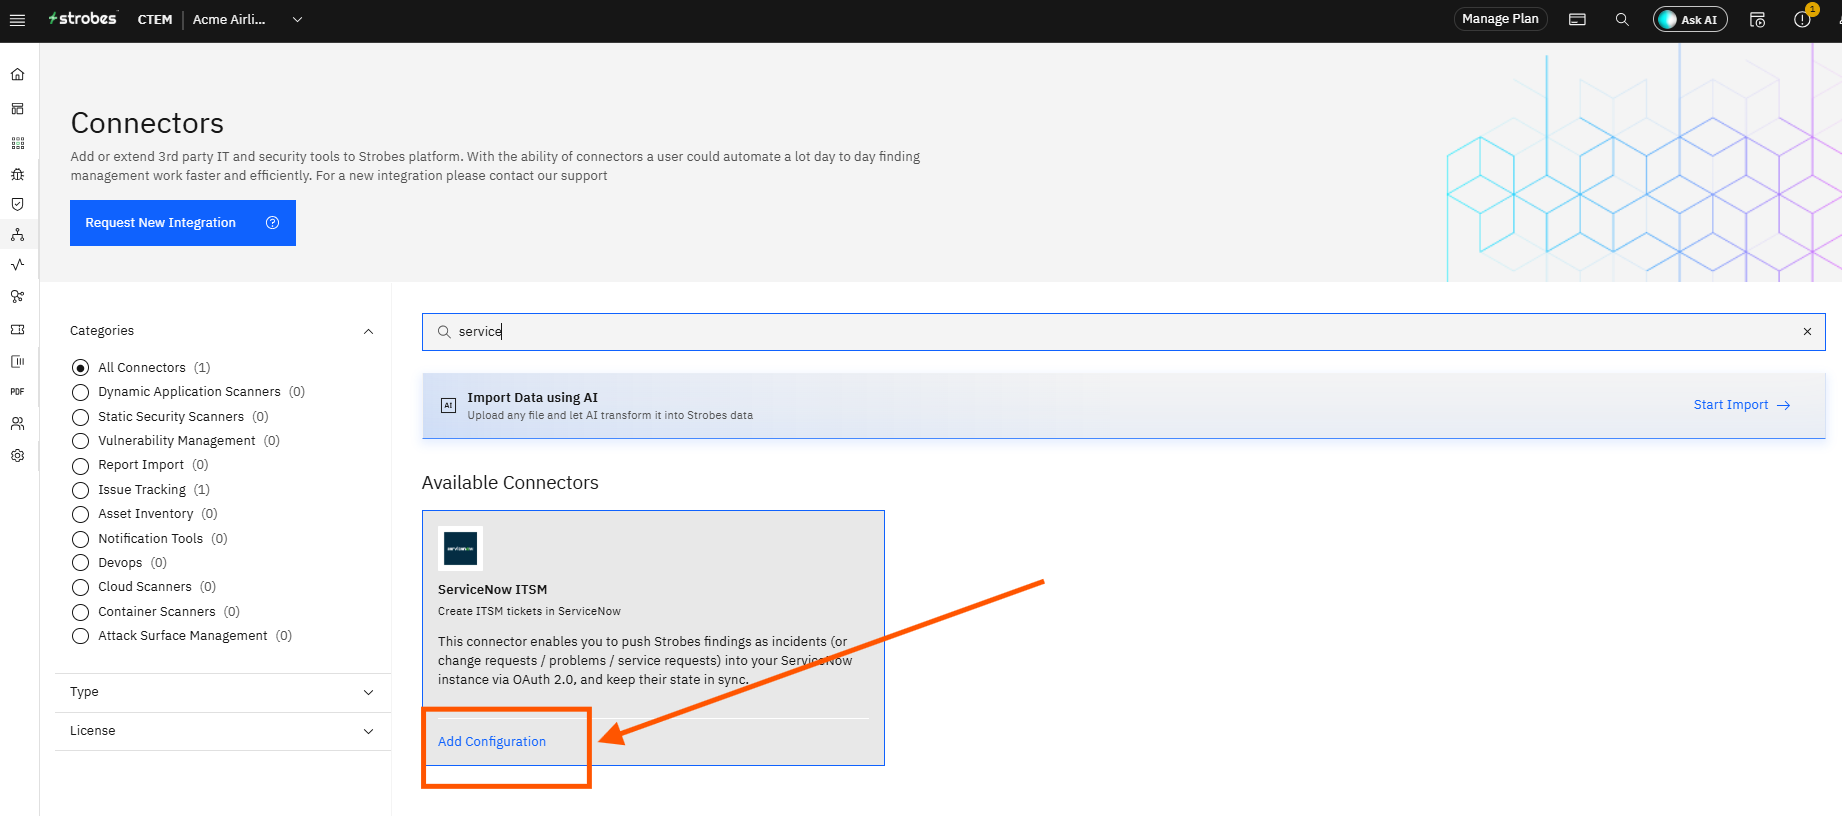
Click Add Configuration on the ServiceNow ITSM card. The Add Workflow wizard opens. The left sidebar shows two steps: Step One (Provide configuration name) and Step Two (Pick a table and map severities/states).
Step 4 — Click the Configuration Name Field and Enter a Name
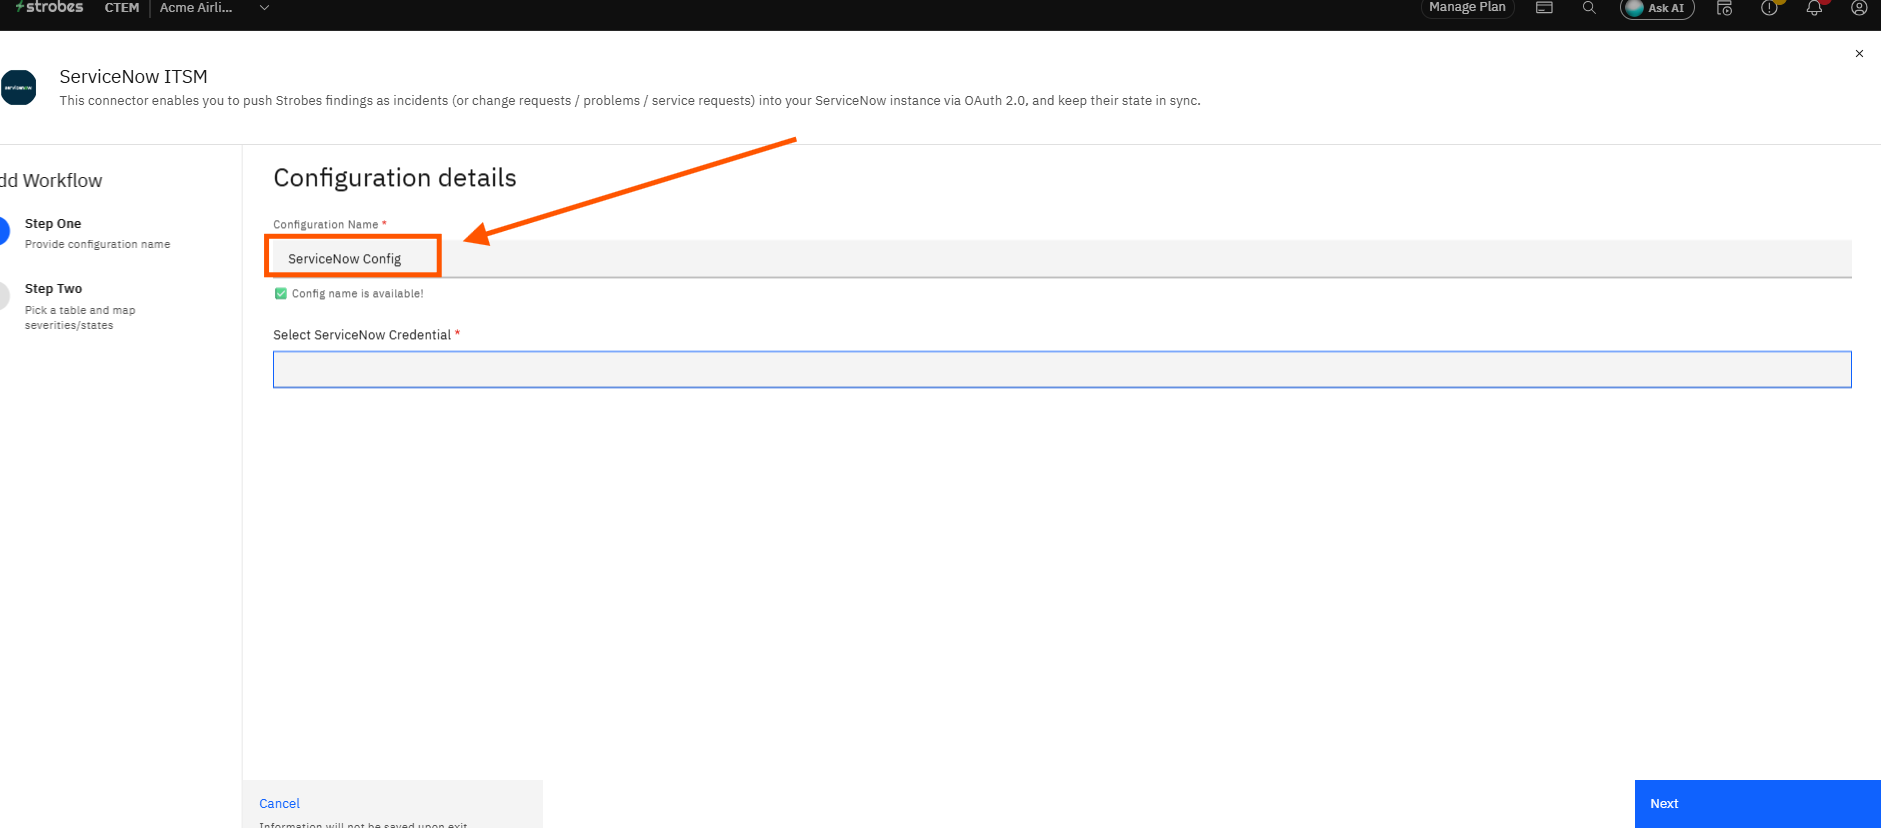
Click the Configuration Name field and type a unique name for this configuration. A green "Config name is available!" message confirms the name is not already in use. Use a name that identifies the ServiceNow environment or team being connected.
Step 5 — Open the ServiceNow Credential Dropdown
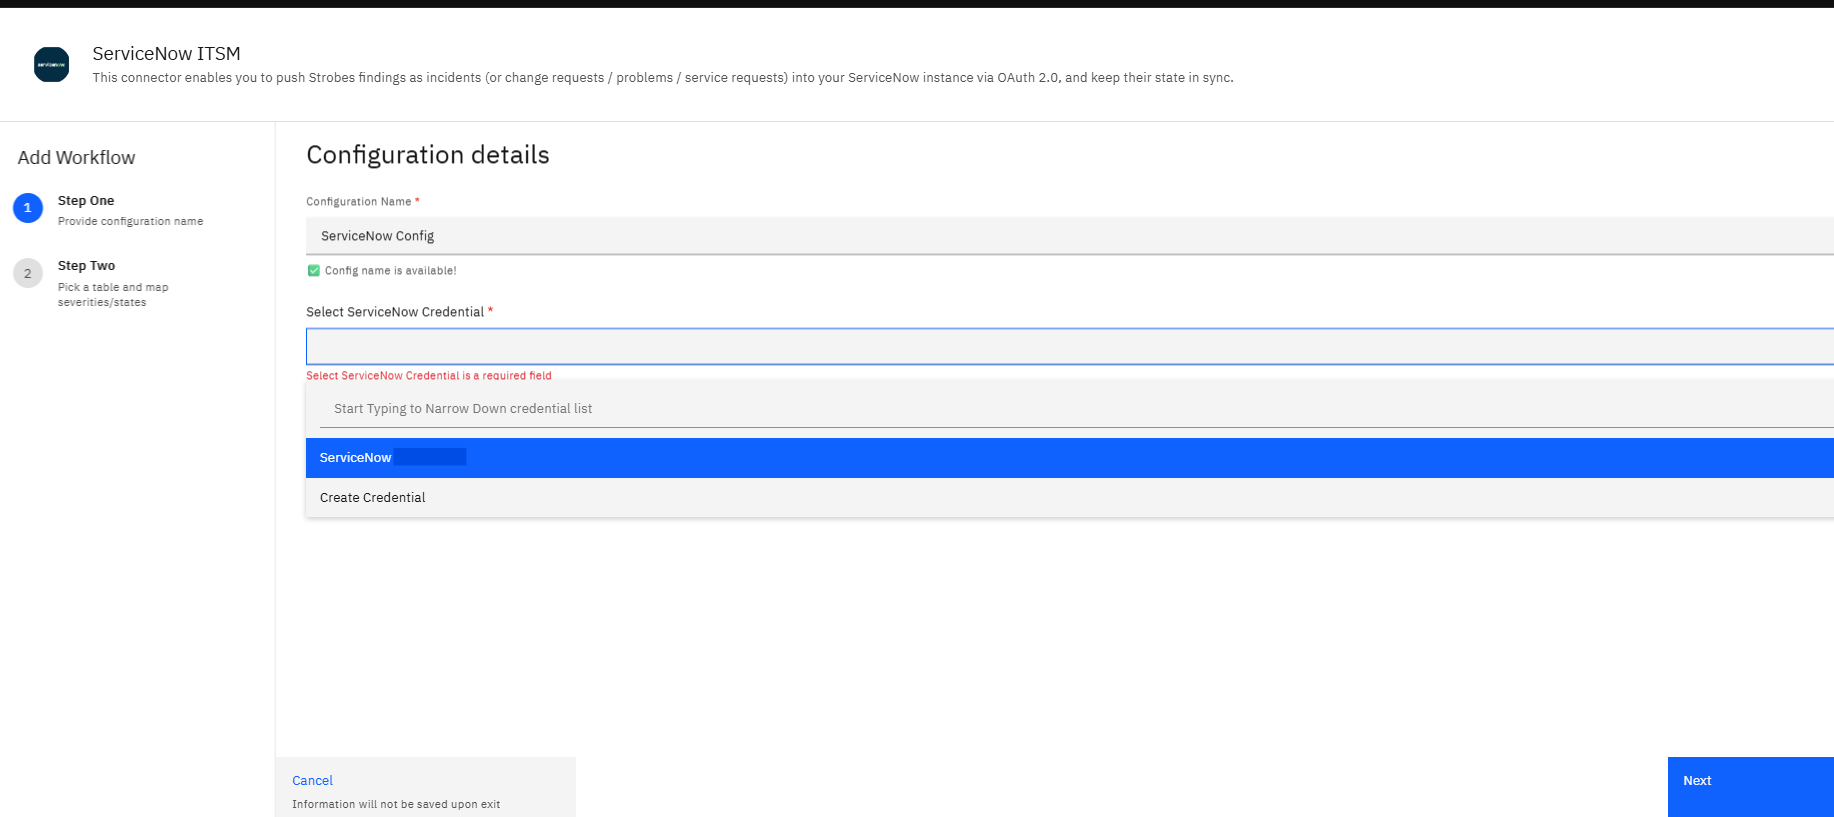
Click the Select ServiceNow Credential dropdown. Your saved ServiceNow credentials appear in the list. If you do not see your credential, use the search field inside the dropdown to narrow the list by name. If no credential exists yet, click Create Credential and complete the credential setup before continuing.
Step 6 — Select Your Saved Credential
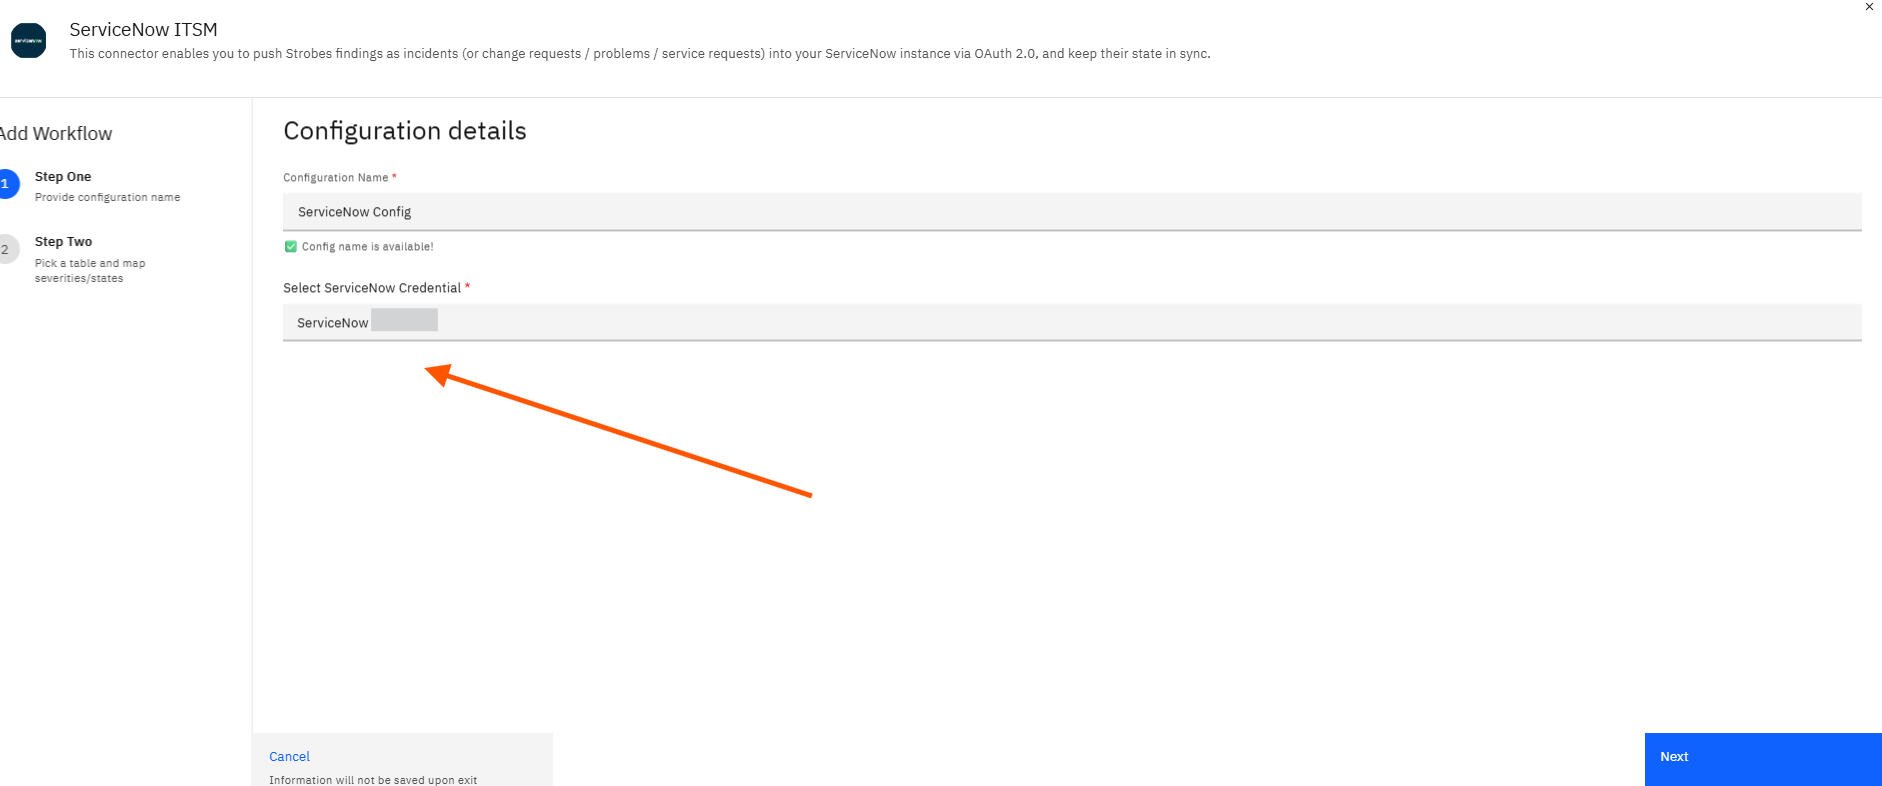
Click your saved ServiceNow credential to select it. The dropdown closes and the credential name appears in the field.
Step 7 — Click Next
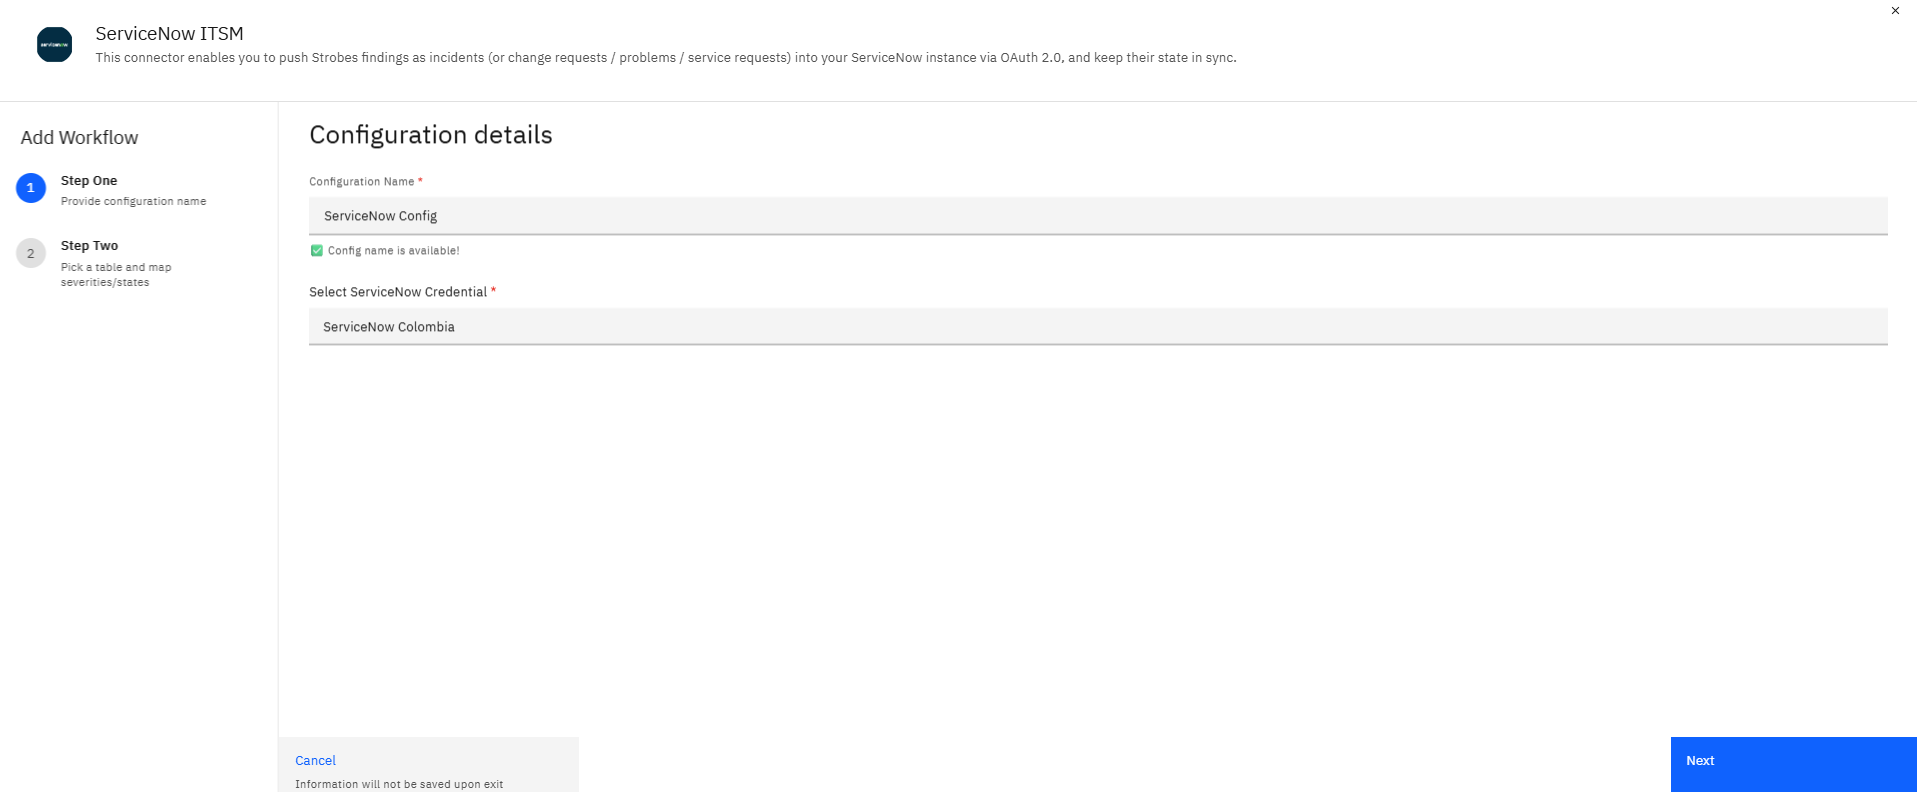
Click Next. Strobes validates the configuration and loads Step Two. A brief loading spinner appears while the ServiceNow table and field data is fetched from your instance.
Step Two: Table Selection and Mapping
Step 8 — Review the Table Selection
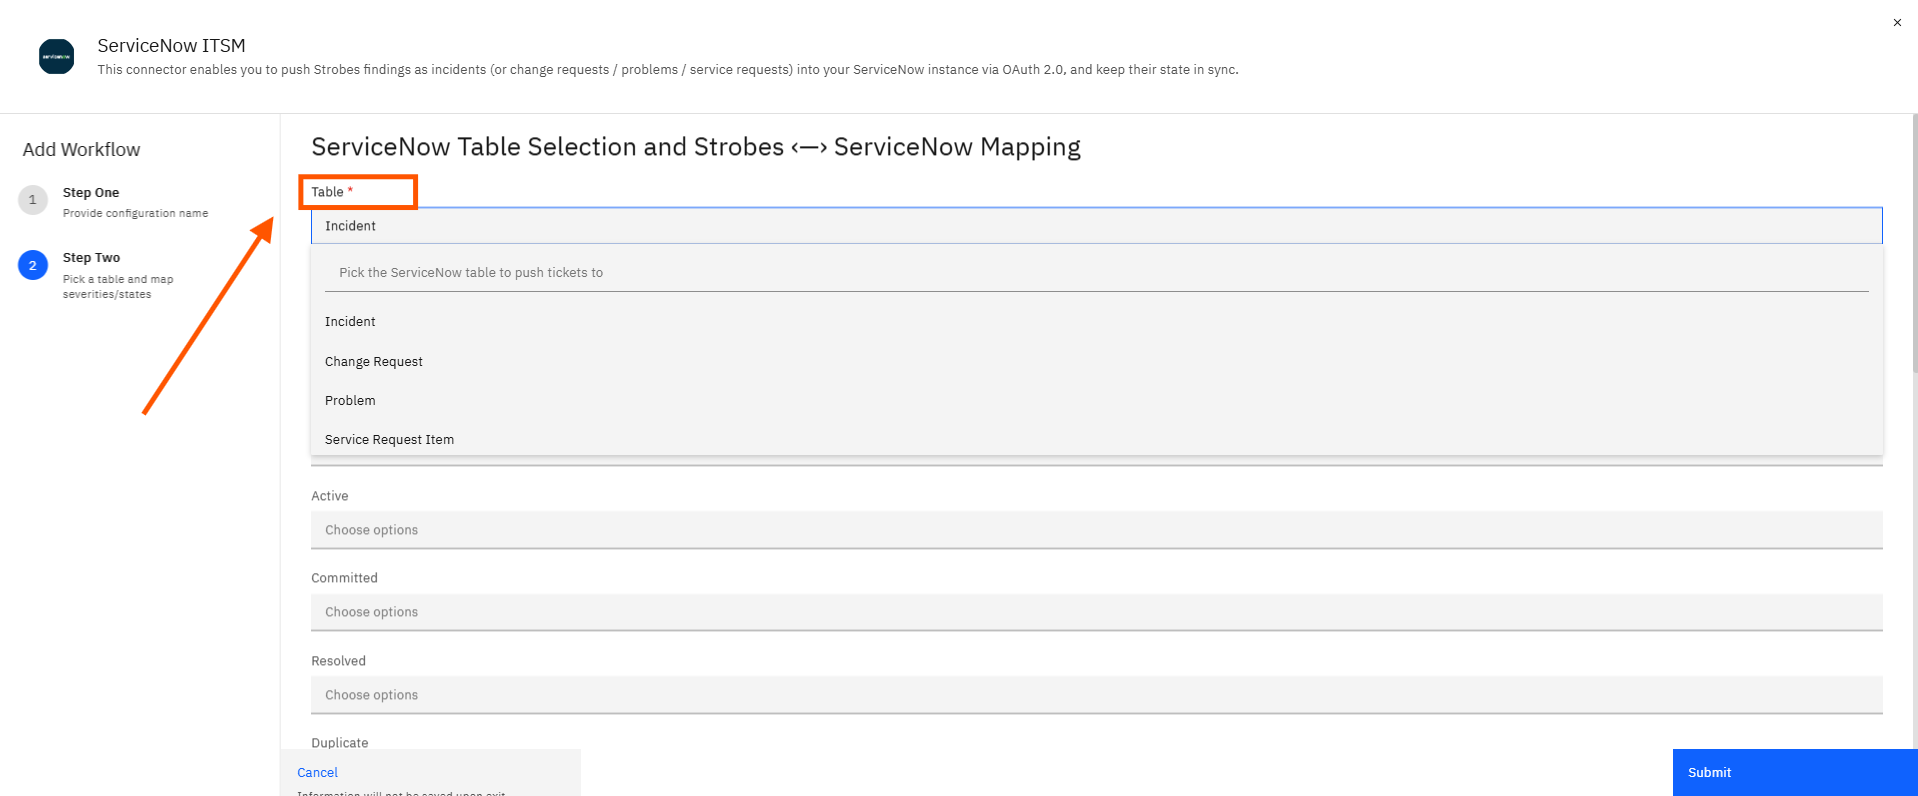
On Step Two, review the Table field. The Table field specifies which ServiceNow table Strobes will create records in. It defaults to Incident. Click the Table dropdown to change this if your team uses a different table such as Change Request or Problem.
Step 9 — Review the State Field Mapping
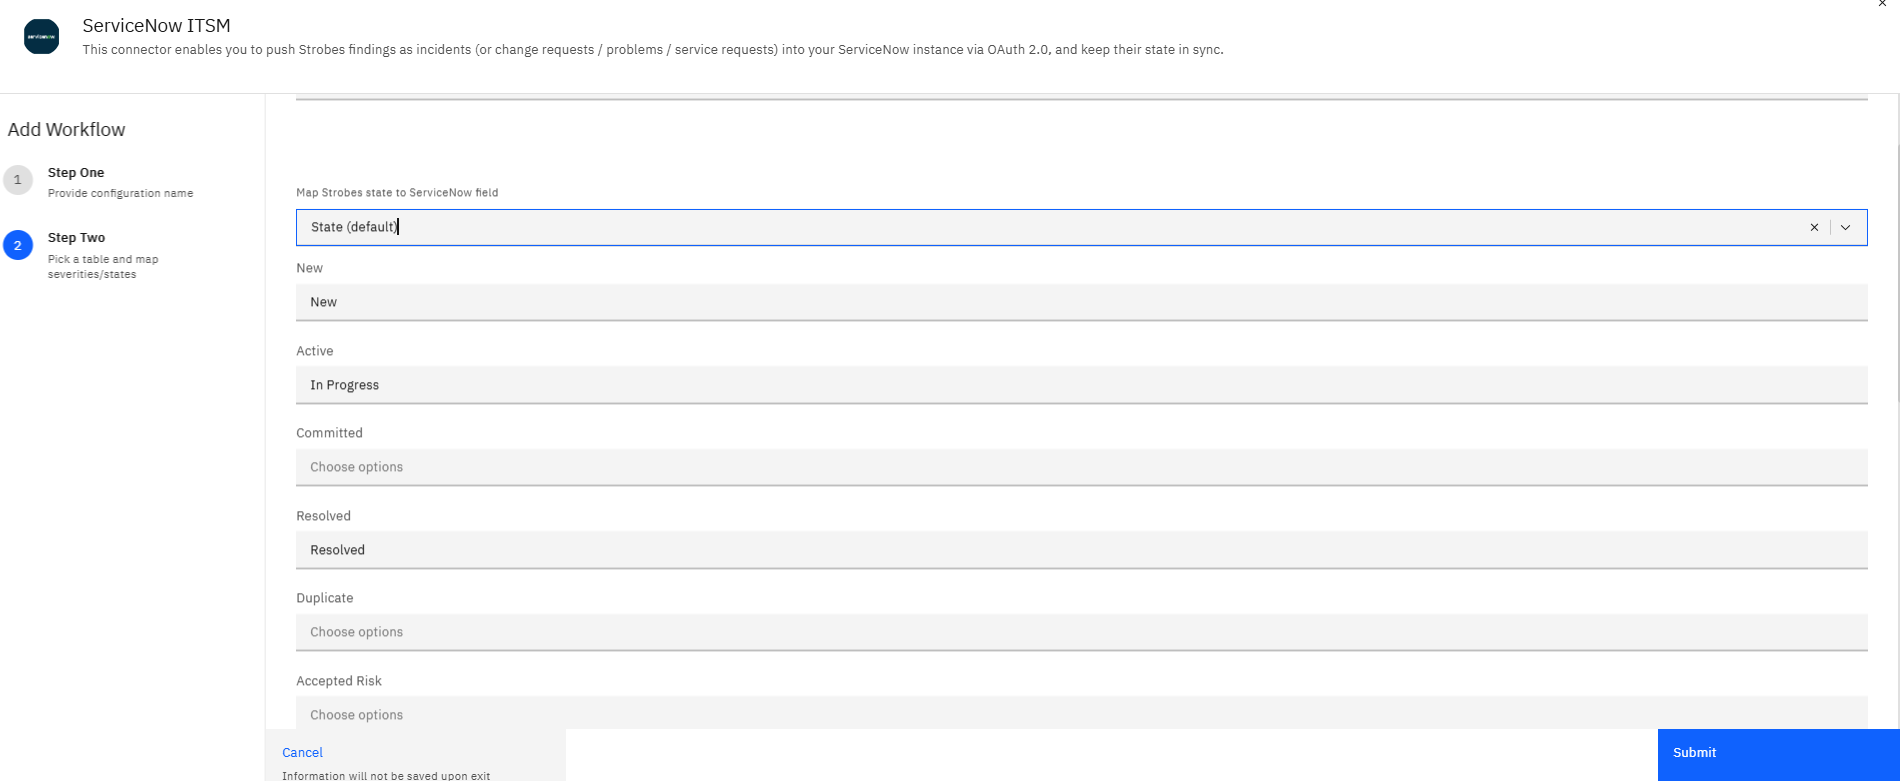
Click the "Map Strobes state to ServiceNow field" dropdown to review the available options. This dropdown controls which ServiceNow field Strobes writes the ticket state into. The default is State (default), which maps to ServiceNow's built-in State field. Select a different field only if your team tracks ticket state in a custom ServiceNow field. Click State (default) to keep the default selection.
Strobes Status | Map to ServiceNow equivalent |
|---|---|
New | ServiceNow state for new, unstarted items |
Active | ServiceNow state for items in progress |
Committed | ServiceNow state for committed or planned items |
Resolved | ServiceNow state for resolved items |
Duplicate | ServiceNow state for duplicate items |
Accepted Risk | ServiceNow state for accepted risk items |
Not Applicable | ServiceNow state for N/A items |
Wont Fix | ServiceNow state for items that will not be fixed |
Step 10 — Review the Priority Field Mapping
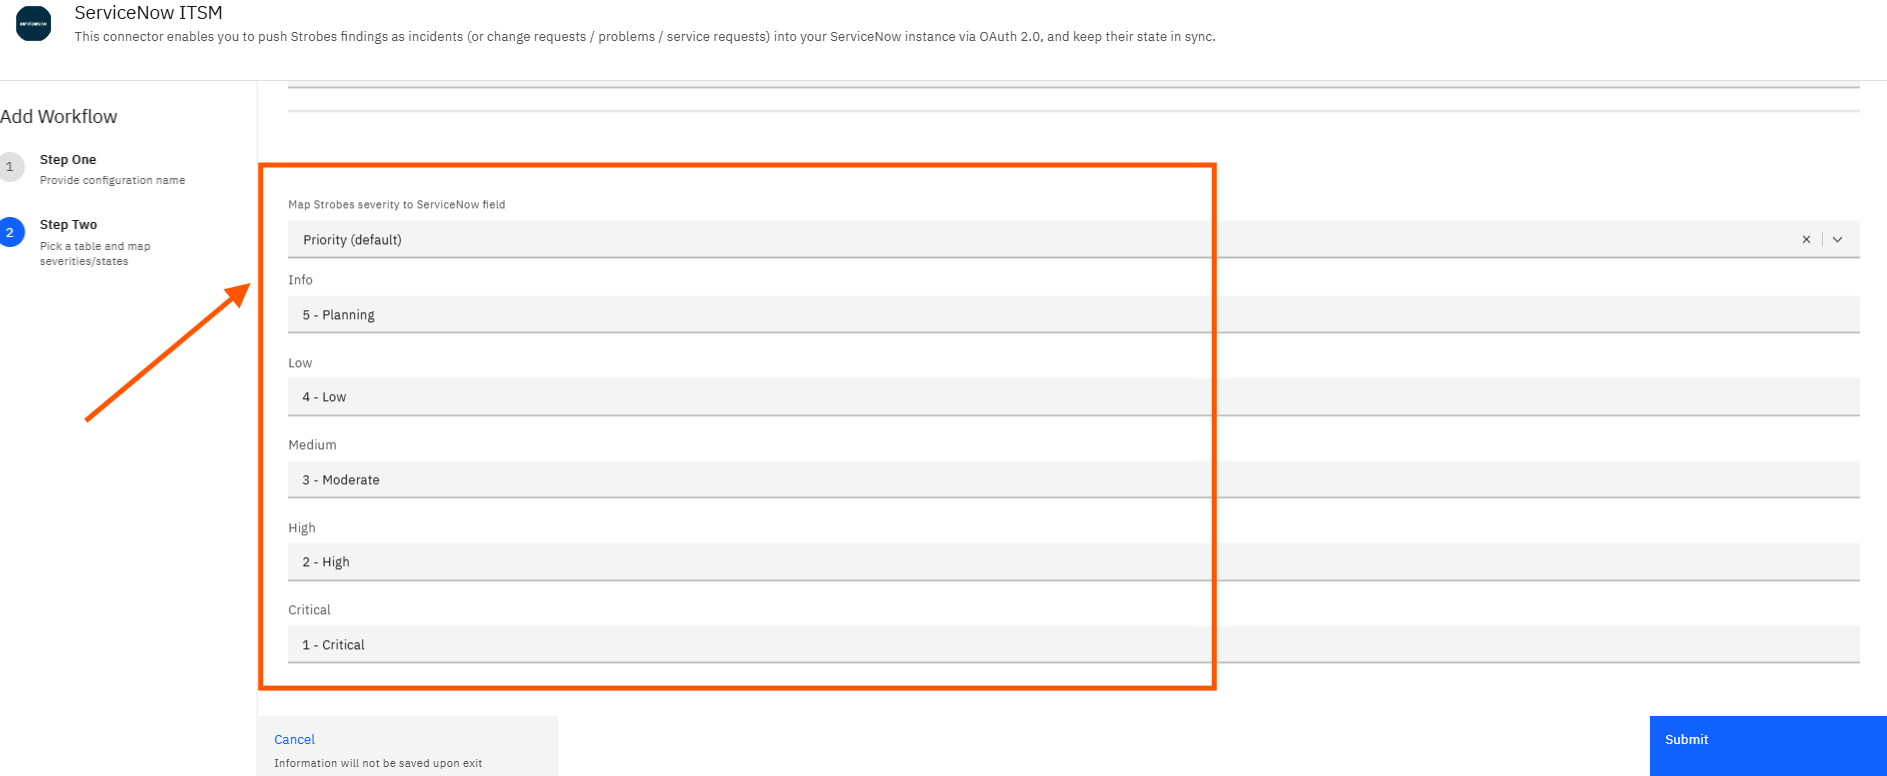
Scroll down to the Priority mapping section and review the "Map Strobes severity to ServiceNow field" dropdown. It defaults to Priority (default), which uses ServiceNow's built-in priority field. Change this only if your team tracks priority in a custom field.
Step 11 — Click Submit
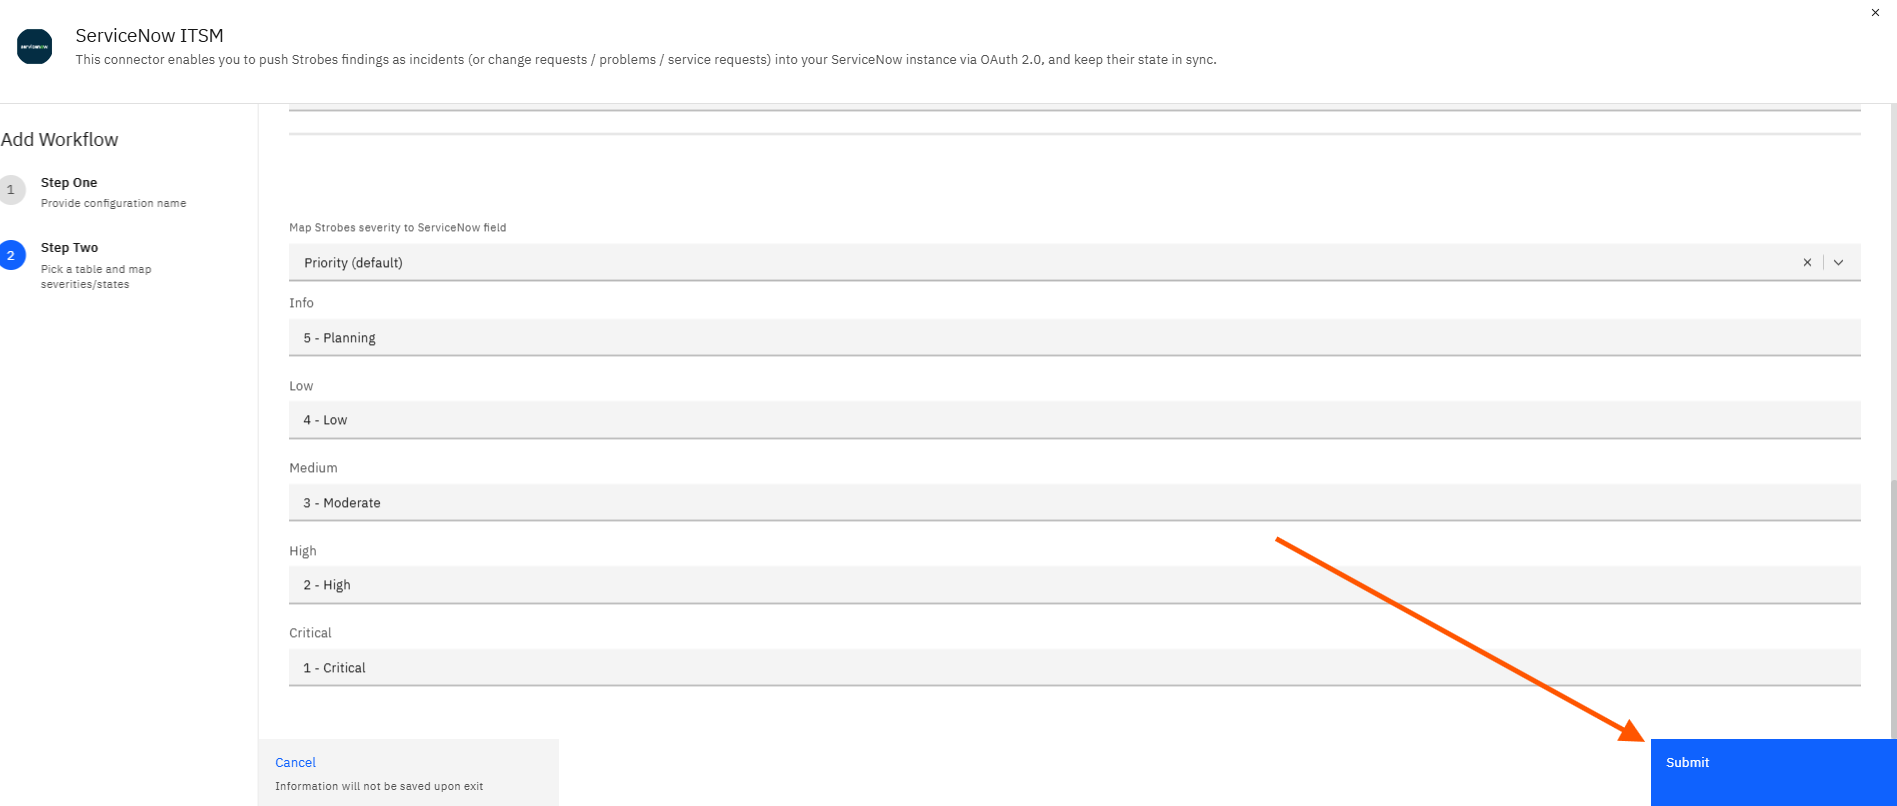
Click Submit to save the ServiceNow ITSM workflow. Strobes saves the configuration and the connector is now active. Strobes findings that match the configured mapping will be pushed to your ServiceNow instance as records in the table you selected.
Tips
Complete the ServiceNow credential setup before starting this article. The Select ServiceNow Credential dropdown will be empty if no credential has been saved yet. Follow the Configuring ServiceNow Credentials in Strobes article to create and store the credential first.
The Table field determines which ServiceNow table receives Strobes findings. Incident is the default and covers most use cases. If your team routes security findings through Change Request or Problem tables instead, change the Table selection before mapping statuses.
You do not need to fill every status or severity row. Leaving a row blank means Strobes will not sync that status or severity to ServiceNow. Only map the rows that are relevant to your team's workflow.
Each status and severity row supports multi-select. You can map a single Strobes status to more than one ServiceNow value. This is useful when multiple ServiceNow states should be treated as equivalent by Strobes.
The State (default) and Priority (default) field selectors control which ServiceNow field Strobes writes to. If your team uses custom ServiceNow fields for state or priority tracking, click these dropdowns and select the appropriate custom field before filling in the mapping rows.
Tips
Create the OAuth Application Registry entry in ServiceNow before filling in the Store Credentials form. Strobes cannot generate the Client ID and Client Secret for you. Follow the step-by-step guide on the Generate Credentials page, or use the official ServiceNow OAuth 2.0 documentation link provided there.
Copy the Redirect URL from Strobes before setting up ServiceNow. The Redirect URL shown on the Generate Credentials page must be pasted into the Redirect URL field of your ServiceNow OAuth Application Registry entry. If this value is missing or incorrect in ServiceNow, the OAuth authorization flow will not complete when you configure the connector.
Do not include a trailing slash in the Instance URL. The field requires the base URL of your ServiceNow instance with no trailing slash, for example https://your-company.service-now.com. A trailing slash may cause authentication errors when the connector attempts to connect.
All four fields in the Store Credentials form are required. Name, Instance URL, Client ID, and Client Secret must all be filled before clicking Save.
The credential name is only visible inside Strobes. The value you enter in the Name field is a label for your own reference. It is not sent to ServiceNow and does not affect the connection.