
Connecting Tenable IO to Strobes
Overview
The Tenable Vulnerability Management connector (commonly referred to as Tenable.io) enables you to bring host-level vulnerability findings from your Tenable environment directly into Strobes. Once configured, assets and findings sync automatically, giving your security team a centralized view of vulnerabilities across your infrastructure — so you can prioritize, track, and remediate without switching between platforms.
Supported Version
Cloud-based (SaaS)
Strobes connects directly to the customer's Tenable Vulnerability Management environment hosted at cloud.tenable.com. The integration works with the version currently provided by Tenable, so no separate version tracking or upgrades are required within Strobes.
Tenable Vulnerability Management Connector Details
| Field | Details |
|---|---|
Supported products | Tenable Vulnerability Management (Tenable.io) |
Category | Vulnerability Assessment |
Ingested asset type(s) | Hosts |
Integration type | Unidirectional — data is transferred from Tenable into Strobes in one direction only |
Supported version and type | Cloud-based (SaaS) — latest |
Required Credentials
To configure this connector, you need the following credentials from your Tenable Vulnerability Management account:
- Access Key — An API access key generated from your Tenable account.
- Secret Key — The corresponding secret key generated alongside the access key.
Both are generated together from your Tenable My Account page under API Keys. Tenable displays the Secret Key only once at the time of generation — it cannot be retrieved afterward.
Required Permissions
The Tenable account used to generate the API keys must have sufficient access to read and export asset and vulnerability data. The minimum required role is Standard (role value 32).
Tenable Role | Sufficient for Strobes Integration? |
|---|---|
Read-Only (0) | No — cannot export data |
Basic (16) | No — cannot export data |
Scan Operator (24) | No — can view scan results but cannot export assets or vulnerabilities |
Standard (32) | Yes — minimum required role |
Scan Manager (40) | Yes |
Administrator (64) | Yes |
The Standard role grants the account the ability to view scan results and export both asset and vulnerability data via the Tenable API — which is what Strobes uses to pull data into the platform.
If your organization uses custom roles in Tenable instead of the predefined roles above, the custom role assigned to the API key account must include at minimum:
- Explore: Read — to access asset and vulnerability data
- Explore: Export — to export that data via the API
Without these permissions, the connector will authenticate successfully but will return no data.
Setting It Up in Strobes
When configuring the Tenable Vulnerability Management connector in Strobes, you will provide the following:
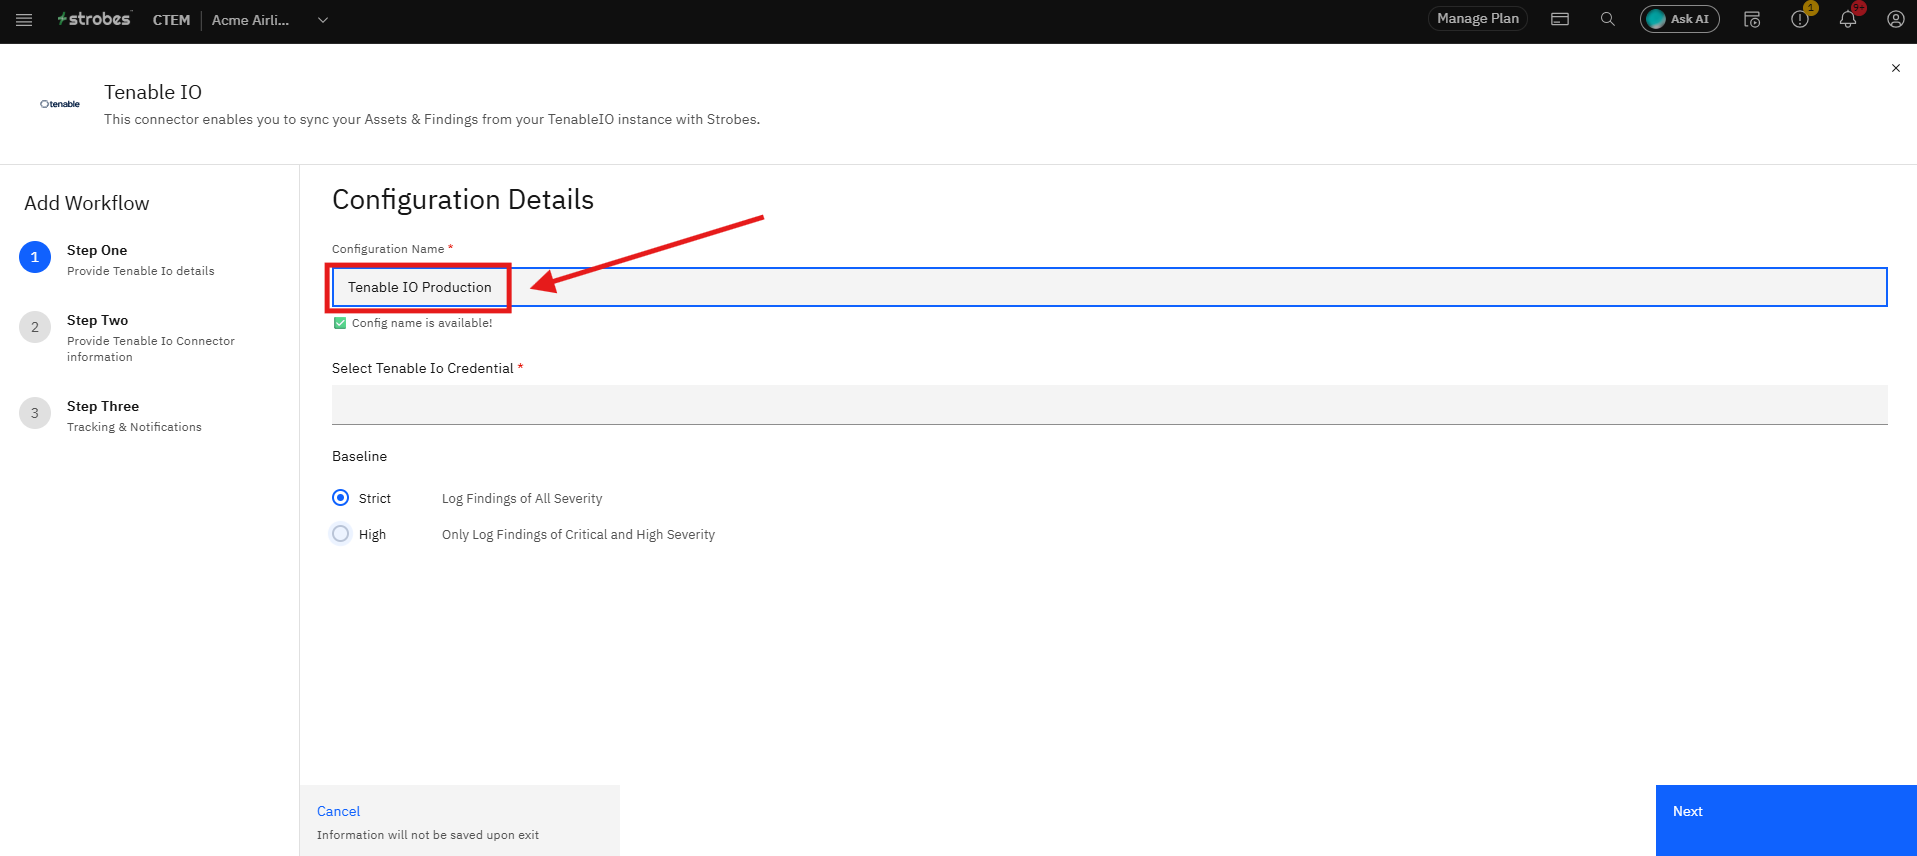
- Configuration Name — A label for this connector configuration, used only within Strobes. Choose something that identifies the environment or account, such as
Tenable IO Production. - Credential — Select a saved Tenable credential (Access Key + Secret Key), or create a new one inline.
- Baseline — Controls which severity levels are imported from Tenable:
- Strict — Imports findings of all severity levels (Info, Low, Medium, High, Critical). Recommended for full visibility.
- High — Imports only Critical and High severity findings. Use this to limit the sync to the most actionable findings only.
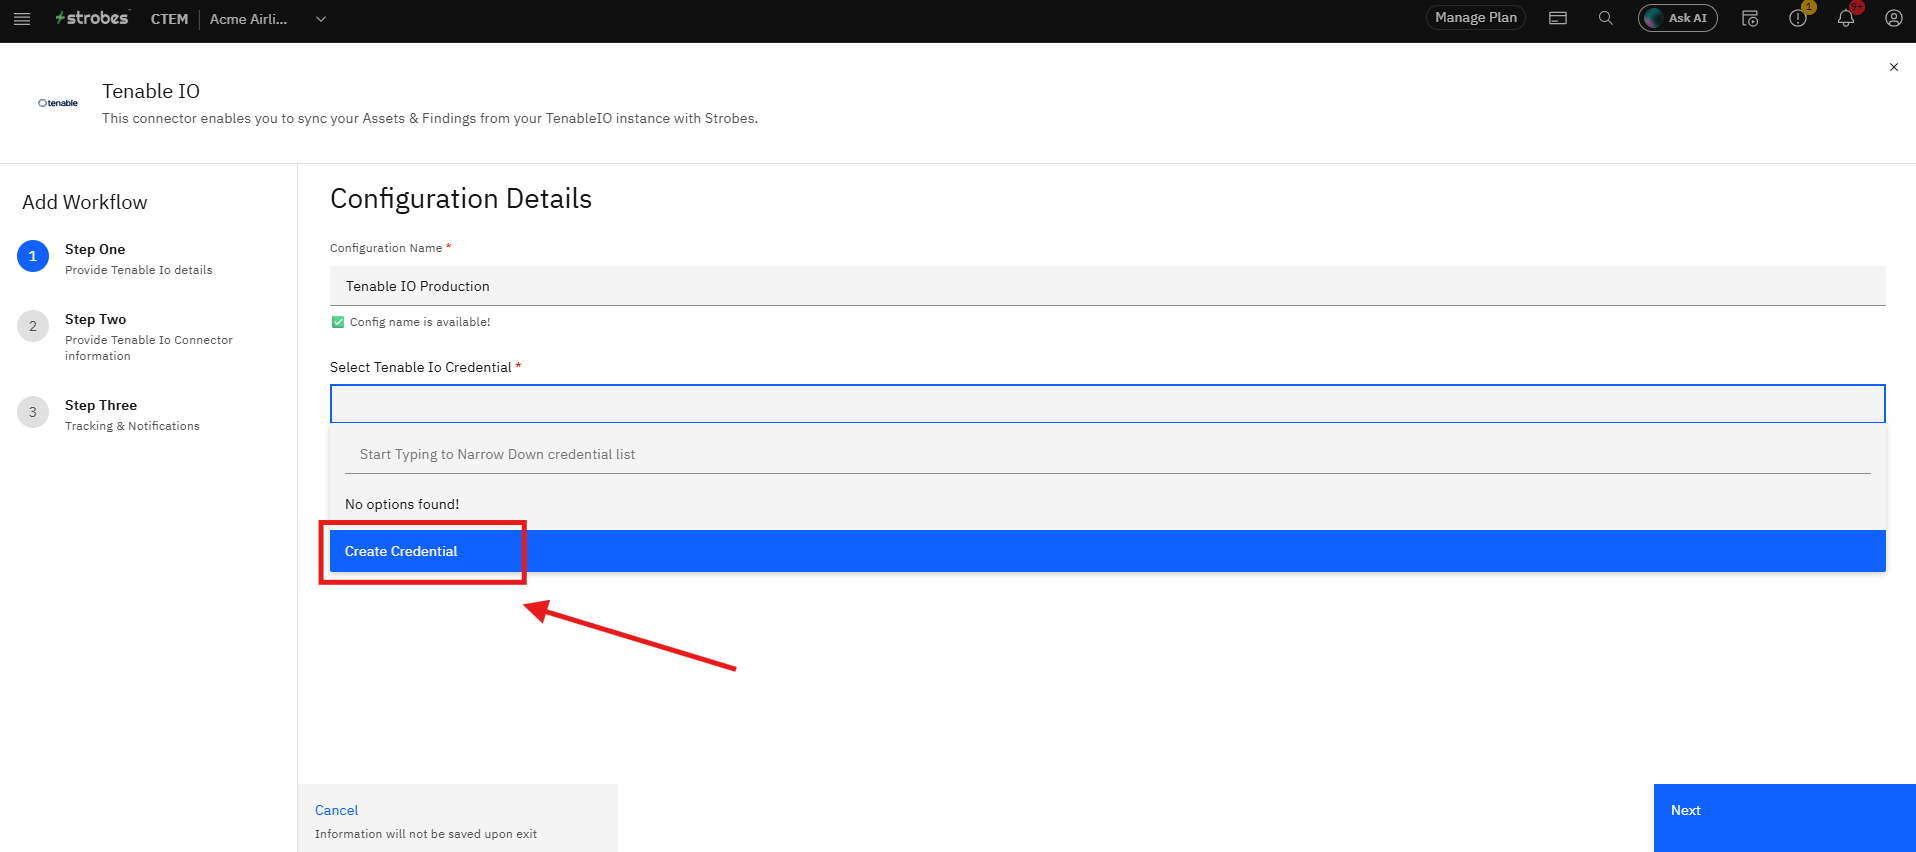
If no credential exists yet, clicking Create Credential opens an inline modal where you enter the credential name, Access Key, and Secret Key.
What Data Comes into Strobes
Assets
Assets from Tenable Vulnerability Management are imported into Strobes as Hosts — representing the servers, endpoints, and other devices scanned in your Tenable environment. Each host appears as an individual asset in Strobes with its associated metadata.
Findings
Vulnerability findings from Tenable are imported into Strobes as standard Findings, organized by asset and severity. The baseline setting you choose during configuration determines which severity levels are included in the sync.
How Status Is Kept in Sync
The status of findings in Strobes is kept in sync with Tenable Vulnerability Management through recurring syncs.
- When Tenable marks a vulnerability as resolved (no longer detected), Strobes automatically updates the matching finding accordingly.
- If Tenable continues to detect the vulnerability on subsequent scans, the finding remains active in Strobes.
This ensures the state of findings in Strobes reflects the most recent scan data from Tenable.
Part 1 — Generate API Keys in Tenable
Step 1 — Log In to Tenable Vulnerability Management
Go to https://cloud.tenable.com and log in with your Tenable account credentials. The Tenable dashboard opens after a successful sign-in.
Step 2 — Open My Account
Click the User Profile icon in the top-right corner of the Tenable interface. From the dropdown menu, click My Account. The My Account settings page opens.
Step 3 — Navigate to API Keys
On the My Account page, click API Keys in the left-side menu. The API Keys section displays any previously generated keys for this account.
Step 4 — Click Generate
Click the Generate button. Tenable displays a warning dialog informing you that generating new keys will replace any existing API keys for this account, and any integrations using the current keys will stop working.
Step 5 — Confirm and Copy the API Keys
Click Generate in the confirmation dialog to proceed. Tenable generates two credentials:
- Access Key
- Secret Key
Copy both keys immediately and store them securely. Tenable does not allow you to retrieve the Secret Key after you leave or close this page — if you lose it, you must generate a new pair.
Part 2 — Configure the Tenable Vulnerability Management -IO Connector in Strobes
Step 6 — Navigate to Connectors
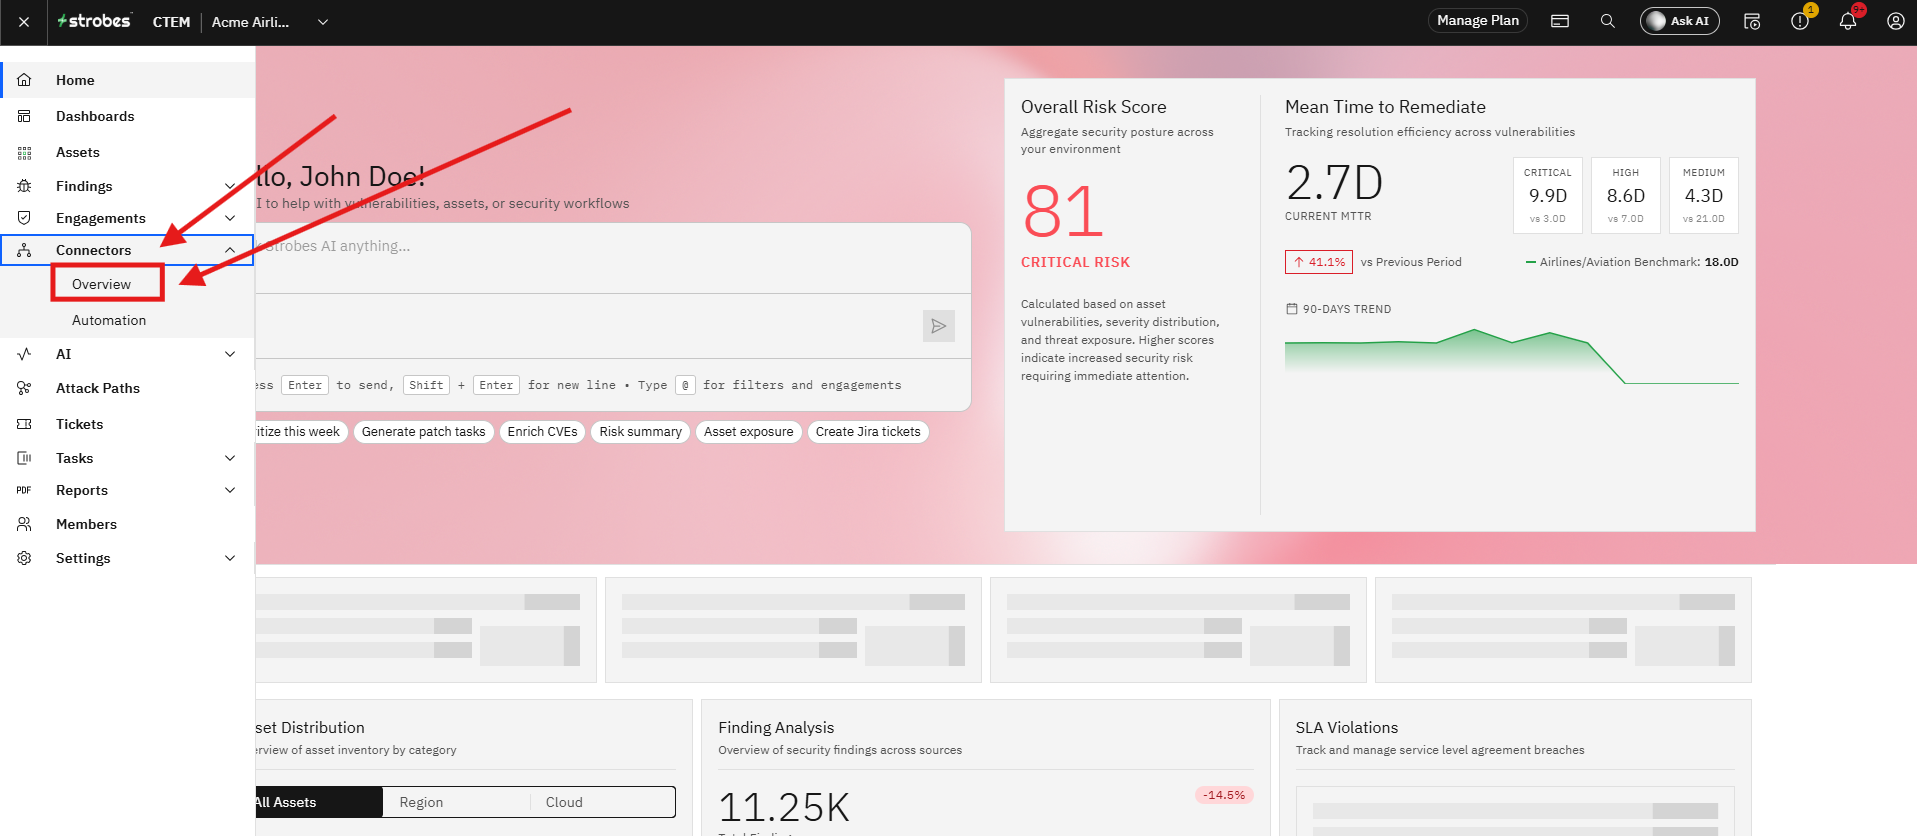
Click Connectors in the left sidebar. The Connectors page opens, showing all installed and available connectors across all categories.
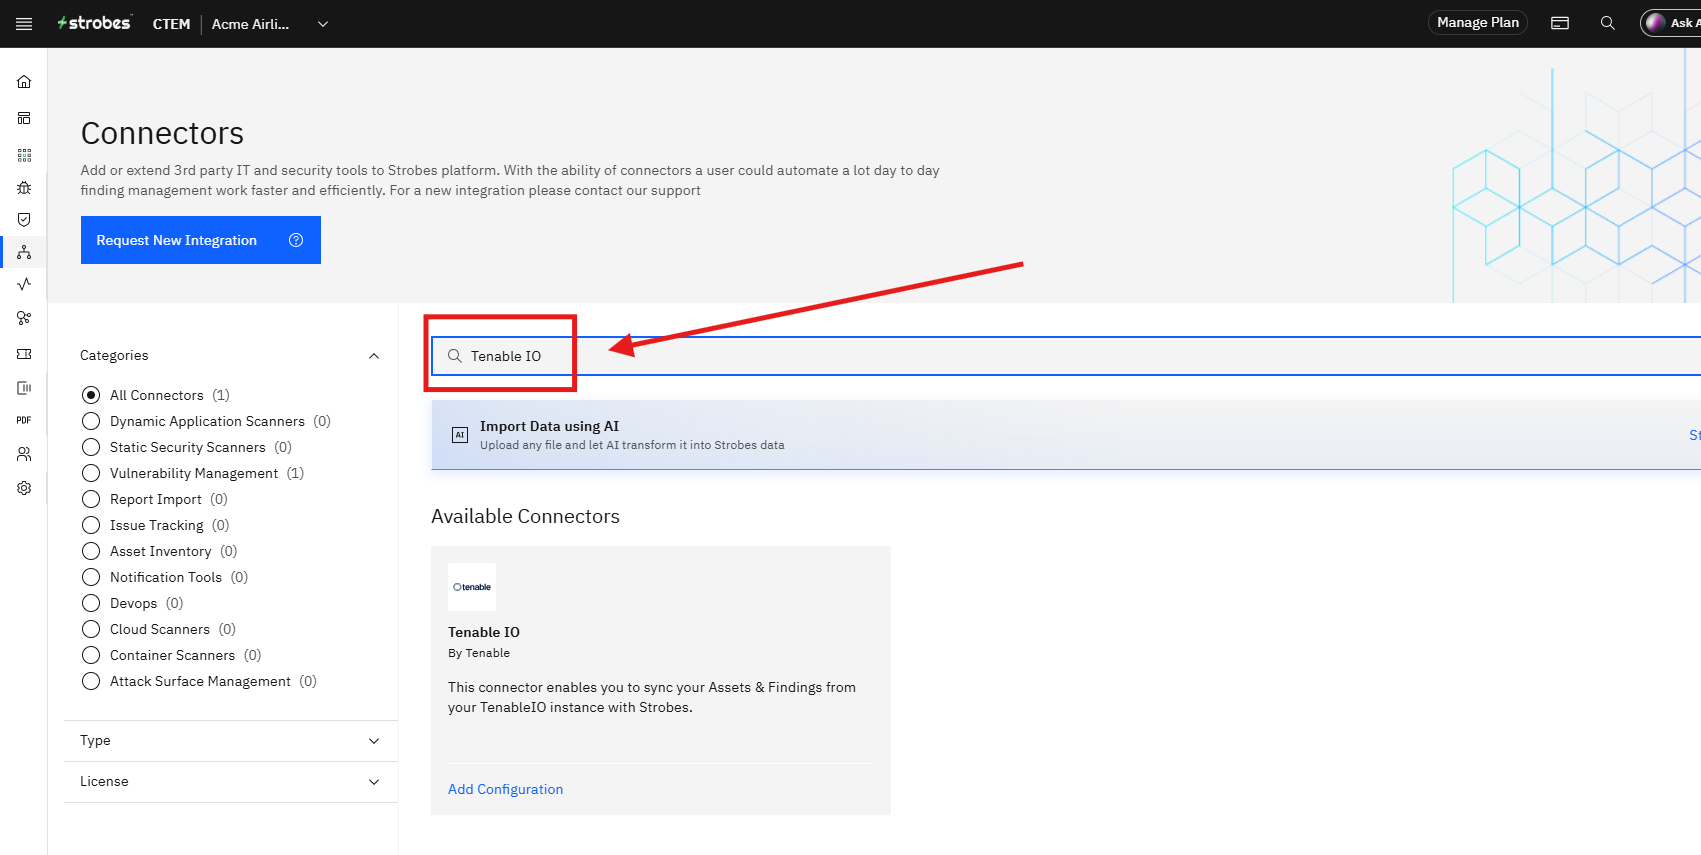
Step 7 — Search for Tenable IO
Click the search field and type tenable. The results show Tenable-related connectors. Locate the Tenable IO card under Available Connectors. The description reads: "This connector enables you to sync your Assets & Findings from your TenableIO instance with Strobes."
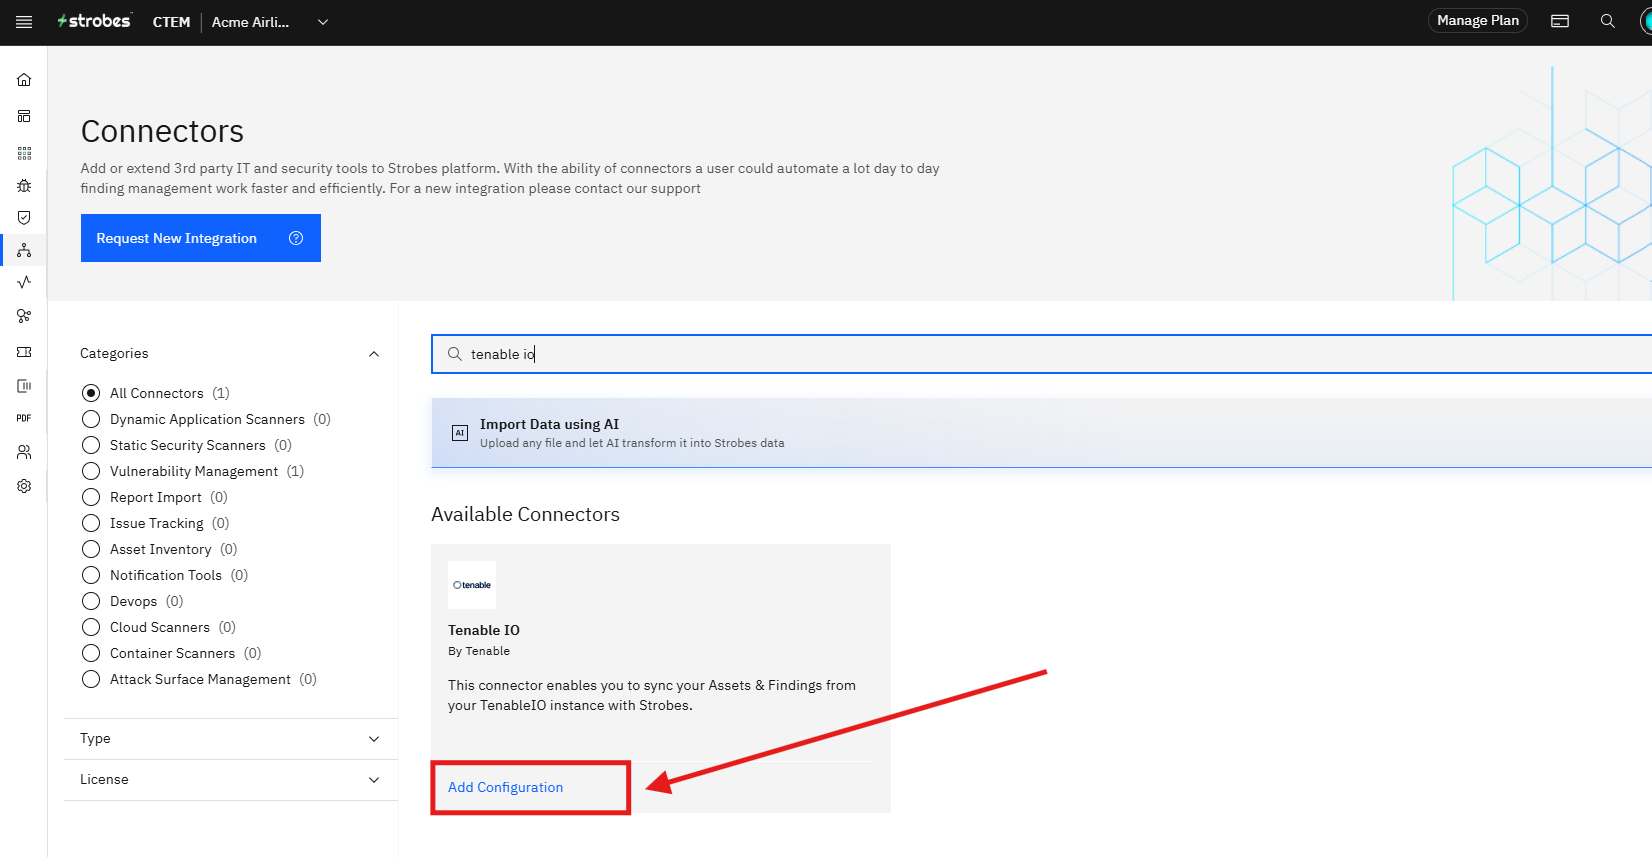
Step 8 — Click Add Configuration
Click the Add Configuration link on the Tenable IO card. The Add Workflow wizard opens at Step One.
Step 9 — Enter a Configuration Name
Click the Configuration Name field and type a name for this configuration — for example, Tenable IO Production. A green "Config name is available!" confirmation appears below the field once a valid name is entered.
Step 10 — Click the Credential Dropdown and Select Create Credential
Click the Select Tenable Io Credential dropdown. If no Tenable credentials exist yet, the dropdown shows a Create Credential option. Click Create Credential. The Add a Credential modal opens.
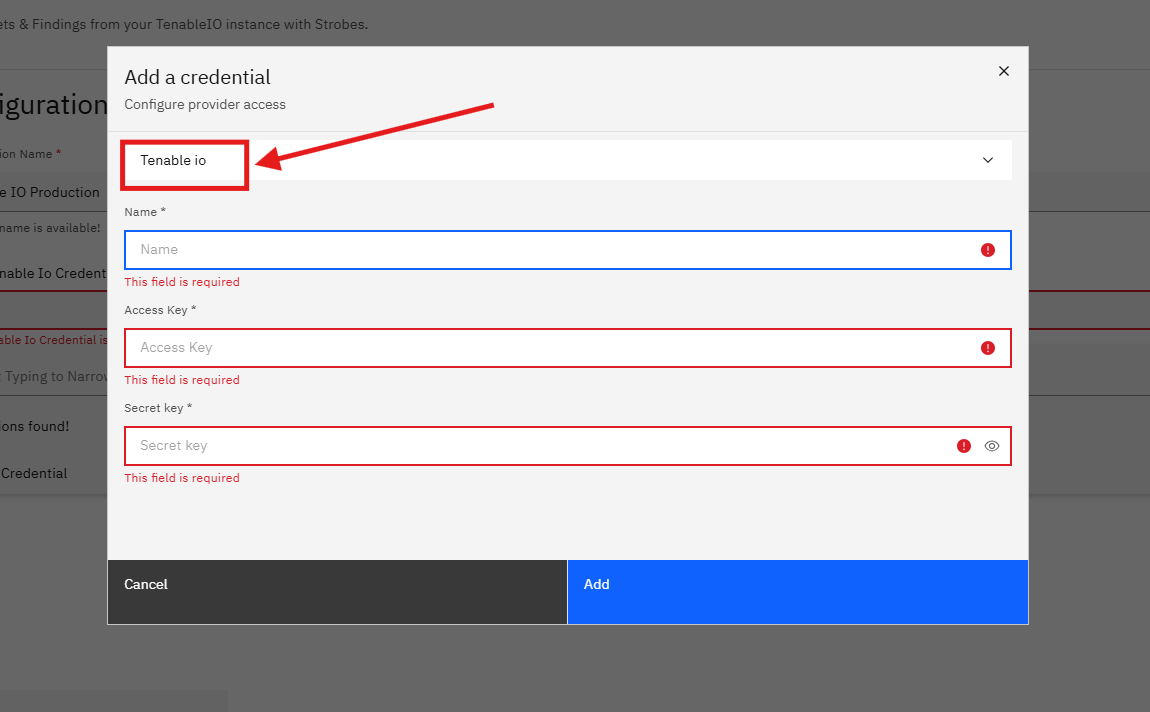
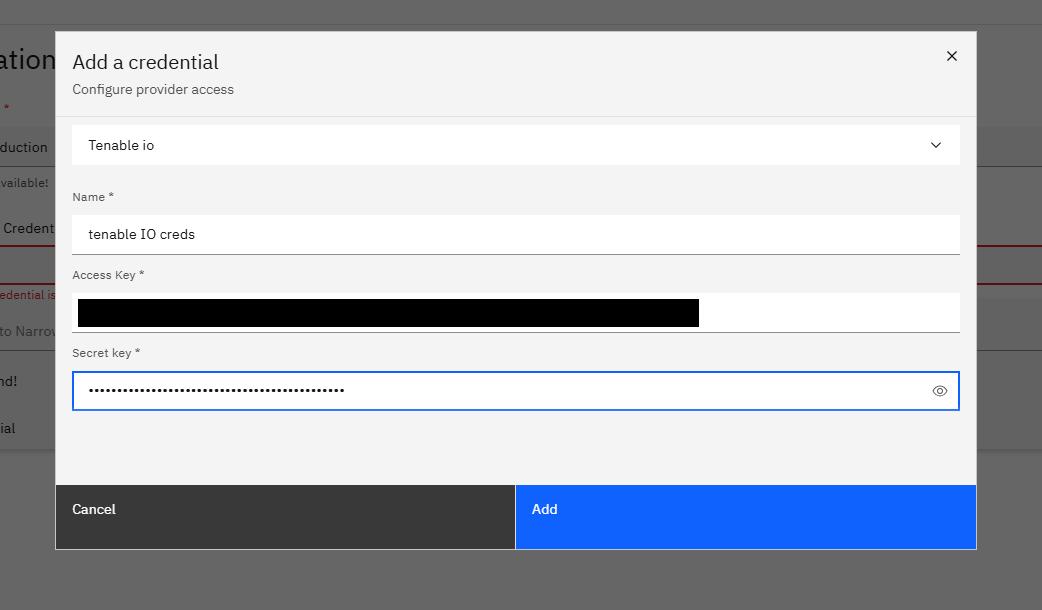
Step 11 — Verify the Provider Is Set to Tenable IO
Review the Provider field in the Add a Credential modal. It is pre-set to Tenable io and does not need to be changed.
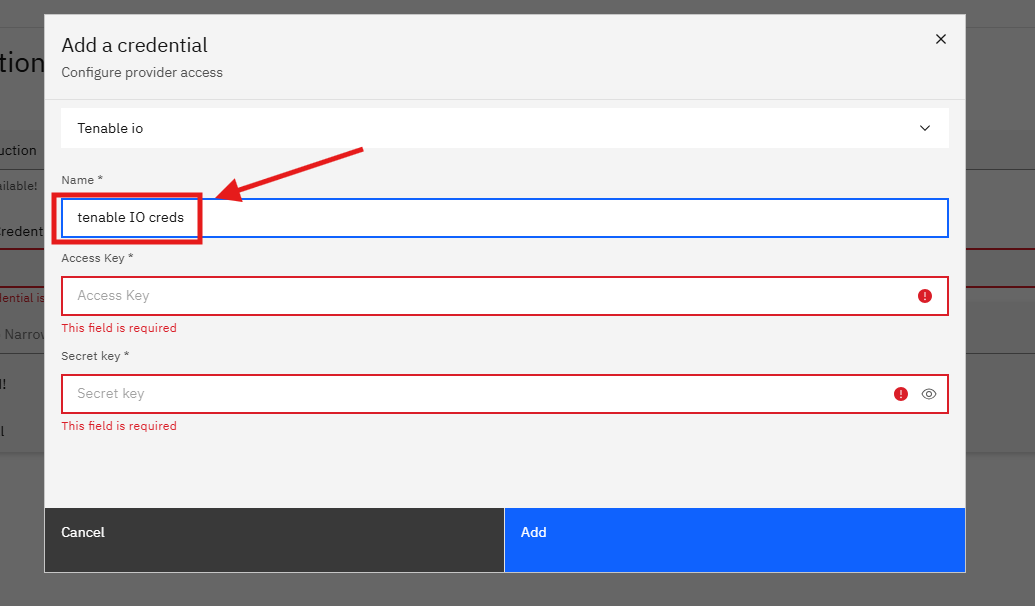
Step 12 — Enter a Name for the Credential
Click the Name field and type a name for this credential — for example, Tenable IO Creds. This name is used only inside Strobes to identify this credential.
Step 13 — Paste the Access Key
Click the Access Key field and paste the Access Key you copied from Tenable in Step 5.
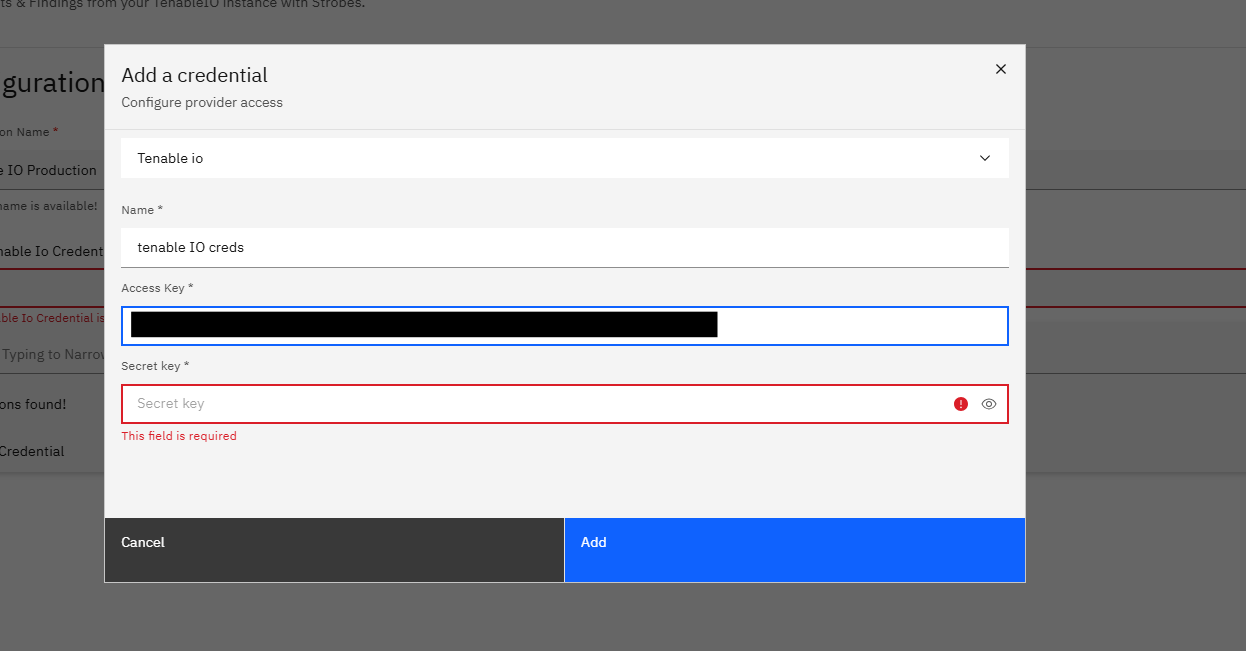
Step 14 — Paste the Secret Key
Click the Secret key field and paste the Secret Key you copied from Tenable in Step 5. The value is masked by default. Click the eye icon to reveal it if you need to verify the value before saving.
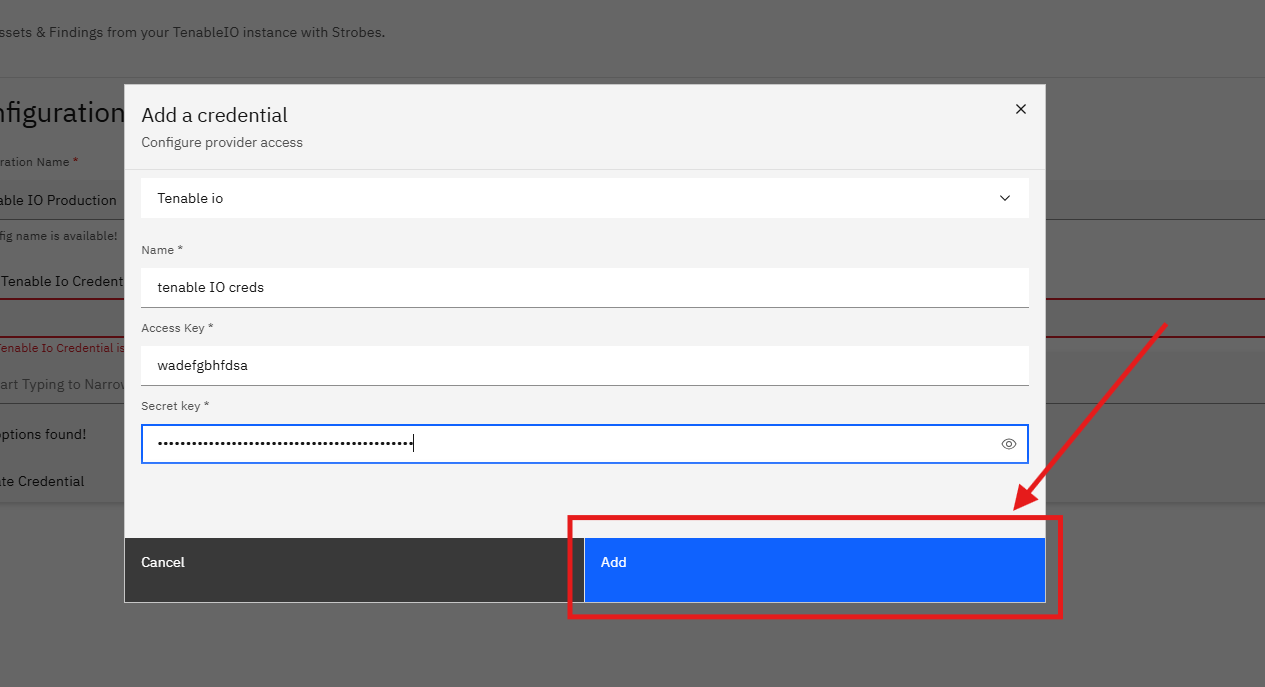
Step 15 — Click Add
Click the Add button. Strobes validates the keys against Tenable. Once validated, the modal closes and the new credential appears in the Select Tenable Io Credential dropdown automatically.
Step 16 — Select the Credential
Click the Select Tenable Io Credential dropdown and select the credential you just created. The field updates to show the credential name.
[SCREENSHOT: Add Workflow wizard — Step One — credential now selected in the dropdown]
Step 17 — Select the Baseline
Select the baseline for which findings to sync from Tenable:
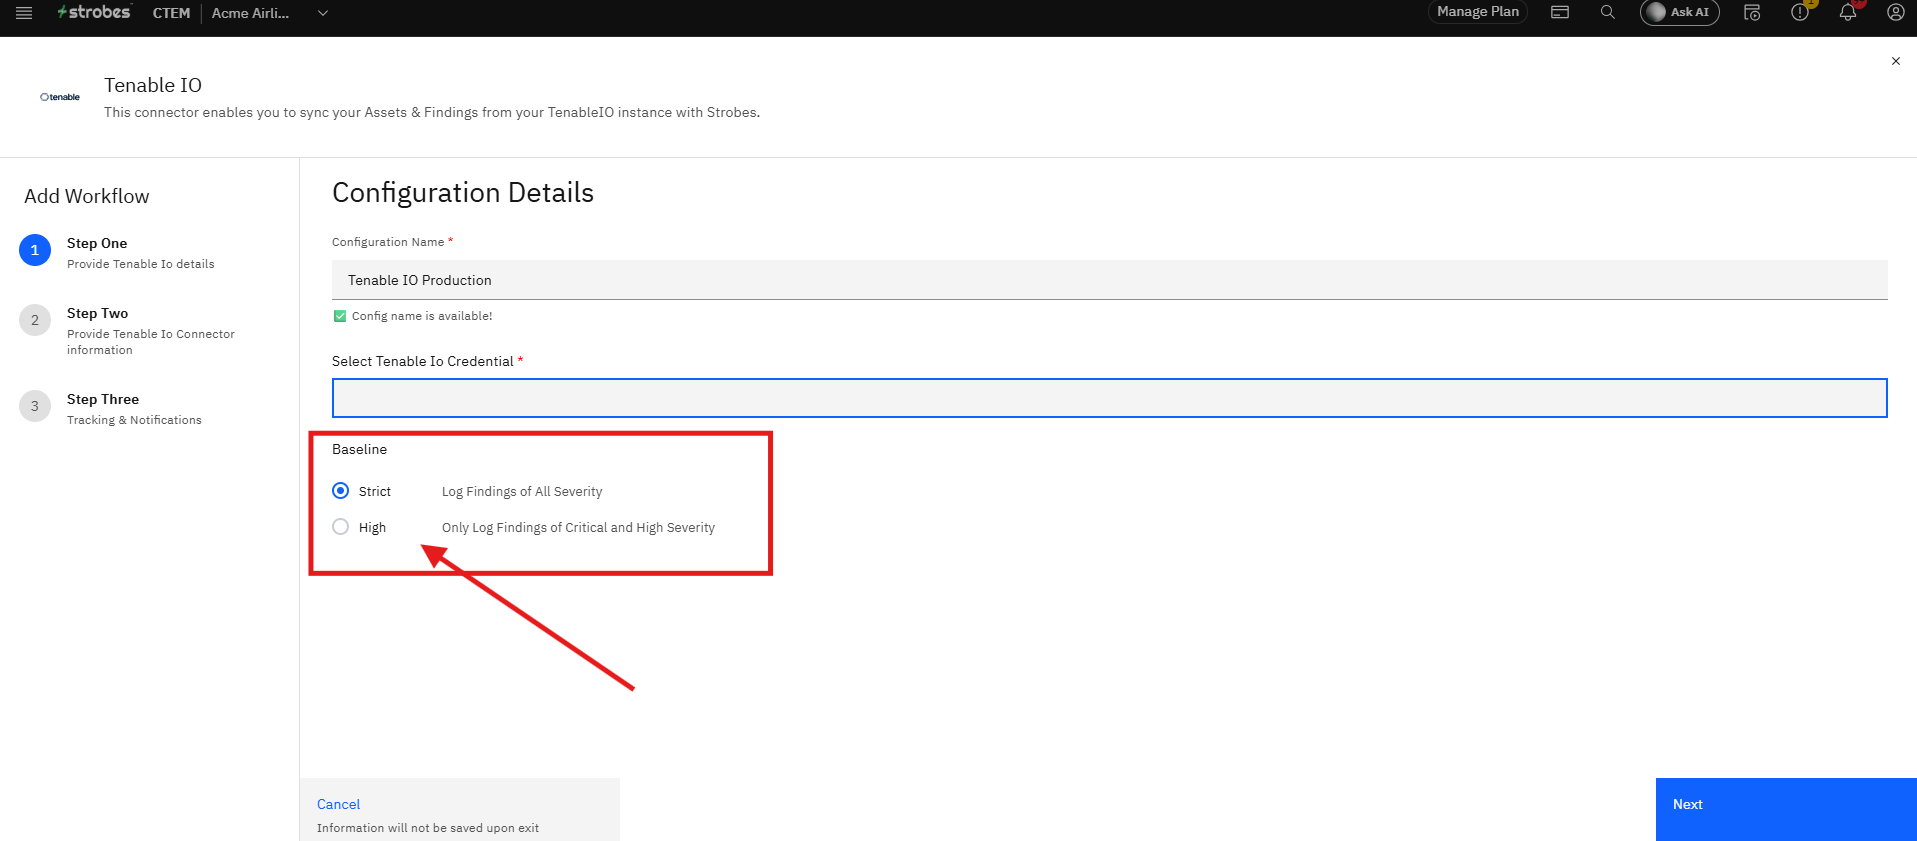
Option | What it imports |
|---|---|
Strict | Findings of all severity levels (Info, Low, Medium, High, Critical) |
High | Critical and High severity findings only |
Click the radio button next to your preferred option.
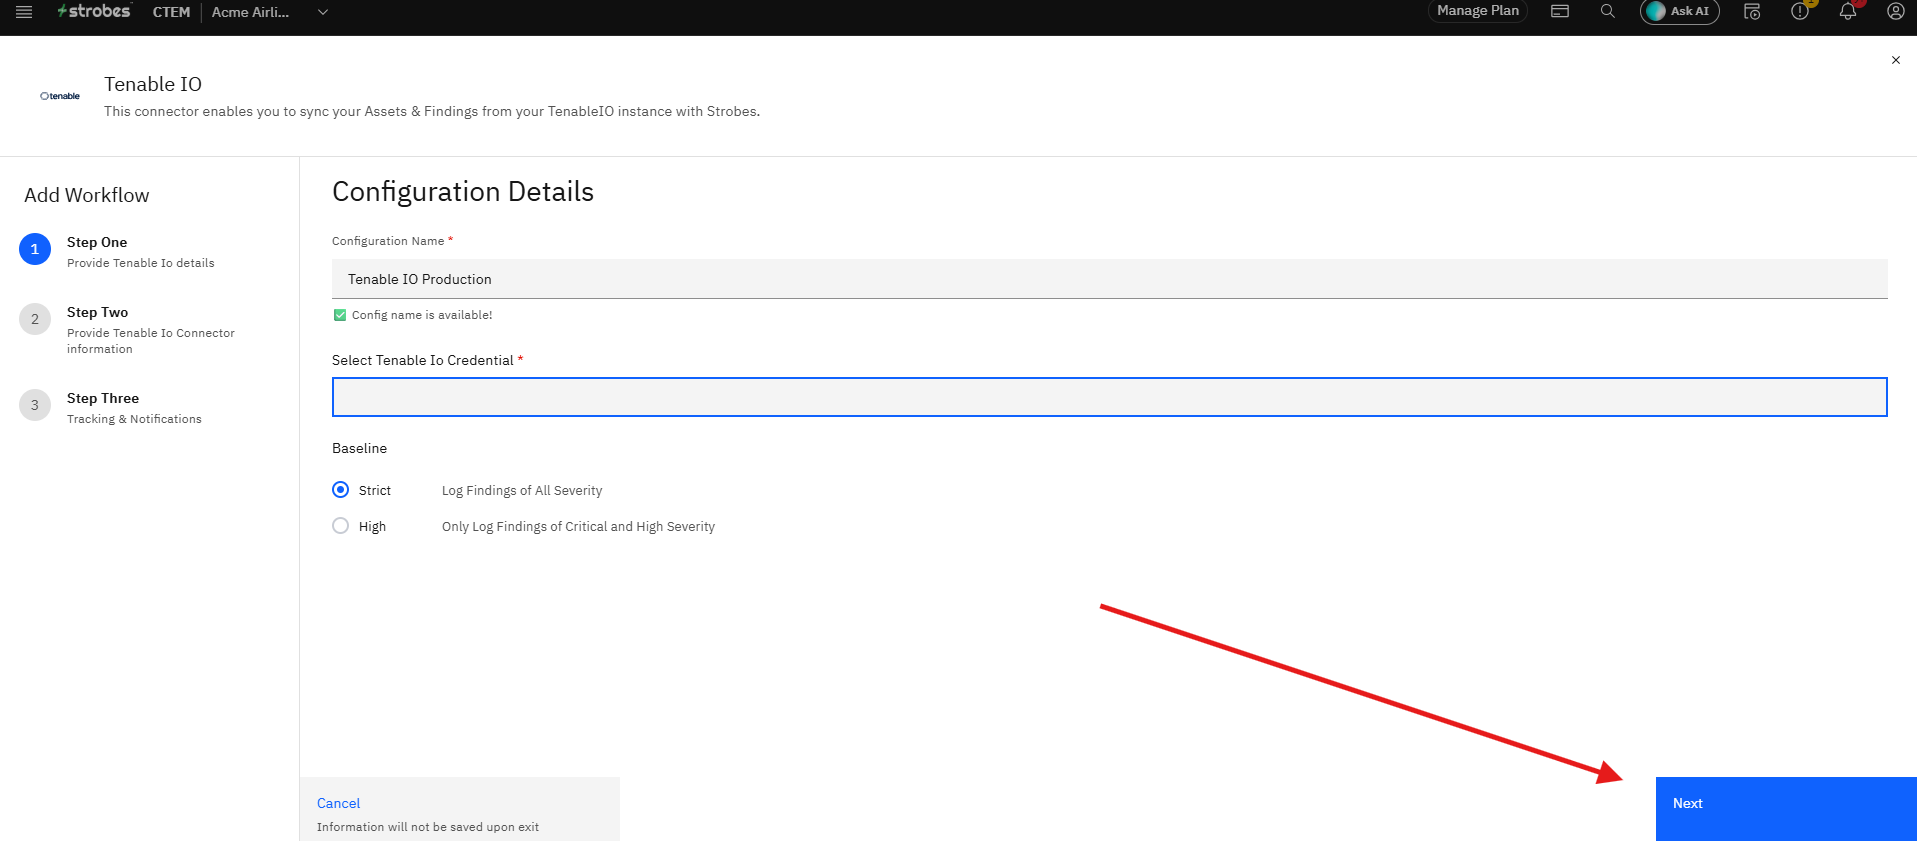
Step 18 — Click Next to Continue to Step Two
Click Next. The wizard advances to Step Two — where you configure which assets and finding types to sync.
Step 19 — Complete Step Two and Step Three
Complete the configuration options in Step Two (asset and finding sync preferences) and Step Three (tracking and notification preferences) according to your organization's requirements. Click Next after each step to advance.
Step 20 — Submit the Configuration
Click Submit on the final step. Strobes saves the connector configuration and begins the initial sync with your Tenable Vulnerability Management instance. Assets and findings from Tenable will start appearing in Strobes once the first sync completes.
Tips
Copy both Tenable API keys before leaving the page. Tenable displays the Secret Key only once — at the moment of generation. If you close the page without copying it, you must generate a new pair, which will invalidate any existing integrations using the old keys.
Use a dedicated service account in Tenable for API key generation. Generating keys from a personal user account ties the integration to that user. If the user's account is deactivated, the integration will break. A dedicated API service account avoids this dependency.
Choose Strict baseline for full data visibility. The High baseline limits the sync to Critical and High findings only. Medium and below vulnerabilities will not appear in Strobes. Choose Strict unless you have a specific reason to filter lower severities.
Generating new Tenable API keys invalidates the old ones. If you ever need to rotate your Tenable API keys, update the Strobes credential immediately after generating the new pair. Go to Connectors → Tenable IO → edit the existing credential and replace both keys.
The Tenable IO connector is separate from Nessus by Tenable. Strobes has distinct connectors for Tenable Vulnerability Management (Tenable IO) and Nessus. Make sure you configure the correct one for your Tenable product.