
What's in the Reports Page?
Overview
The Reports page is the central location for every report generated across your Strobes instance. Whether a report was produced from a pentest engagement, a SAST scan, a DAST connector, or any other module, it lands here. You can download, view, manage versions, password-protect, and regenerate reports all from one place — without having to navigate back to the source.
Step 1 — Navigate to Reports
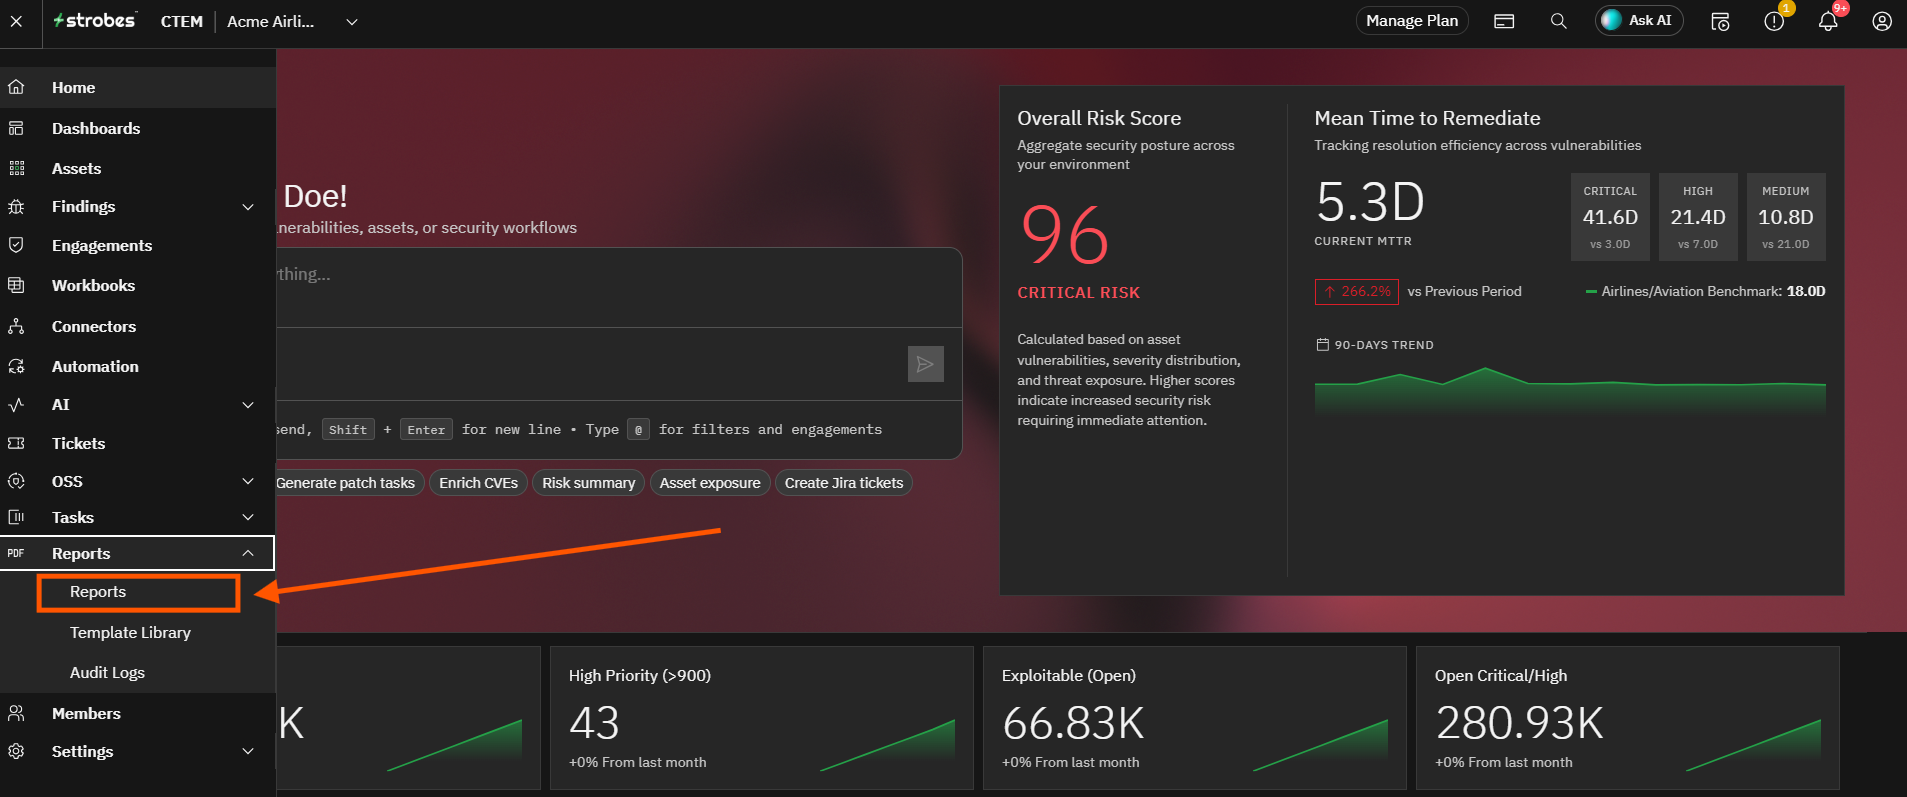
Click the Reports icon in the left sidebar. It is represented by a PDF document icon and is located near the bottom of the navigation bar. The All Reports page opens with three tabs across the top: Reports, Template Library, and Audit Logs.
Step 2 — Open the Reports Tab
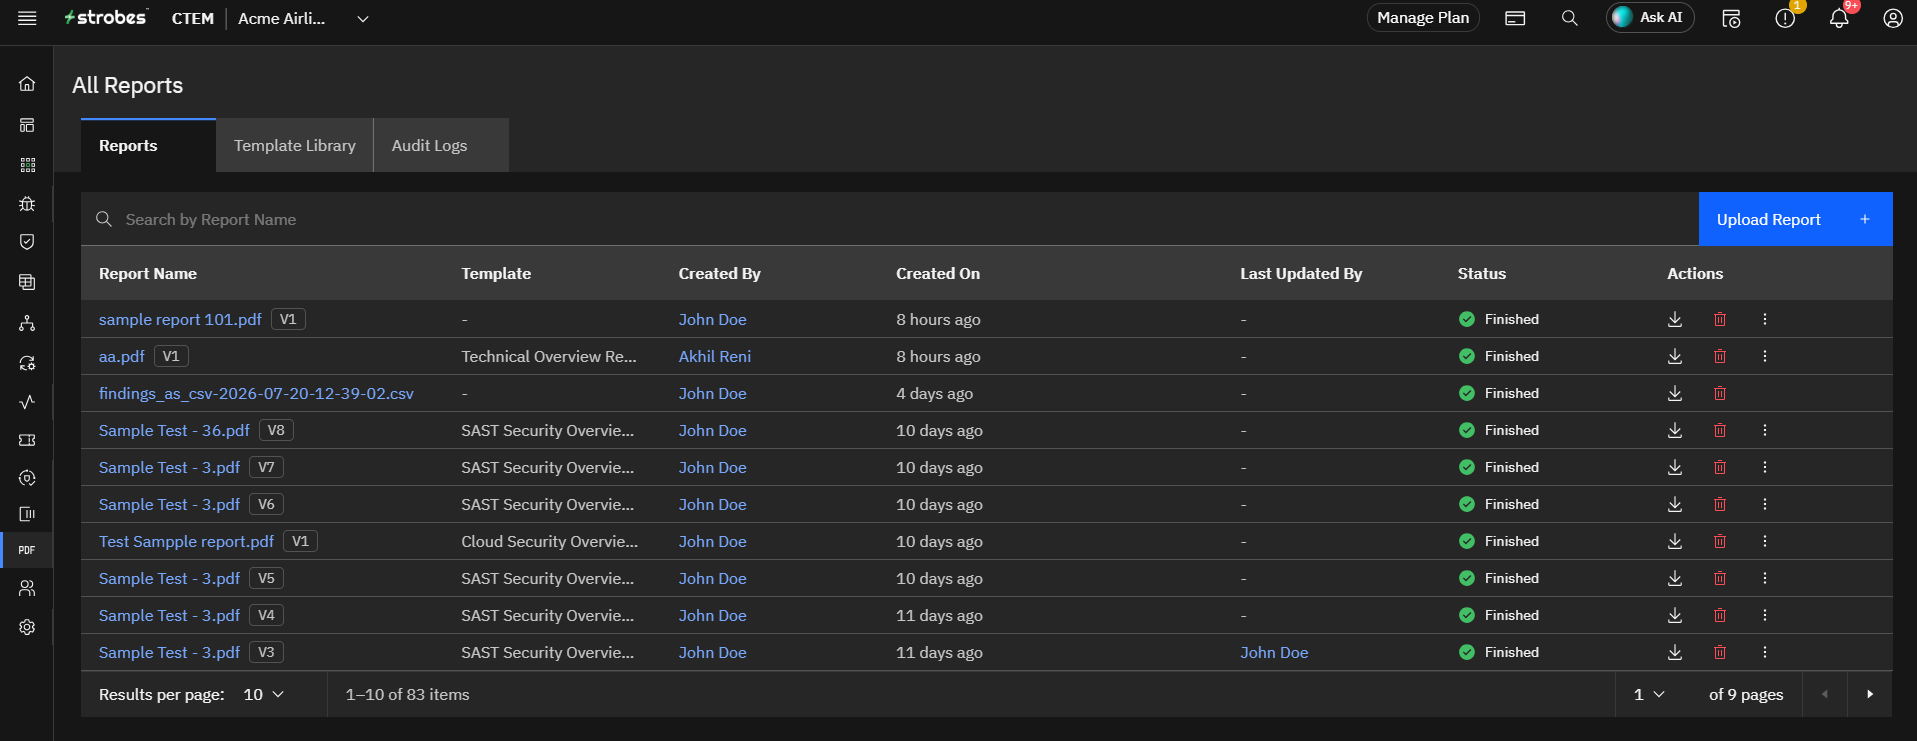
Click the Reports tab. This is the default tab when you arrive on the page. The tab shows a searchable, paginated list of every report that has been generated or uploaded across your Strobes workspace.
Step 3 — Review the Reports List
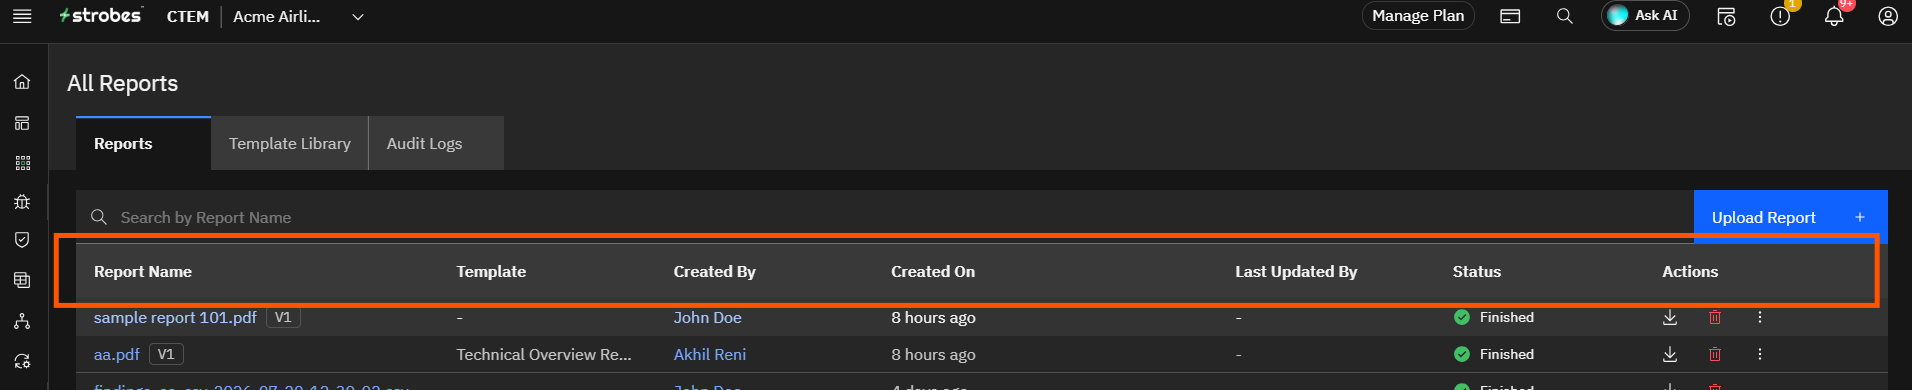
The list displays the following columns for each report:
Column | Description |
|---|---|
Report Name | The name of the report file. Version badges (V1, V2, V3...) appear next to reports that have been regenerated. Clicking the name opens the report. |
Template | The report template used to generate the report. CSV exports from Findings or other modules show a dash here. |
Created By | The team member who generated or uploaded the report. |
Created On | How long ago the report was created, shown as a relative timestamp. |
Last Updated By | The team member who last made a change to the report, if applicable. |
Status | The current generation status. A green checkmark with Finished means the report is ready to download or view. |
Actions | Icons and menus for interacting with the report (covered in the steps below). |
Note: Reports generated from many parts of the Strobes platform — engagements, scans, connectors, and data exports — all appear in this single list. The total item count and page count are shown at the bottom of the table.
Step 4 — Search for a Report
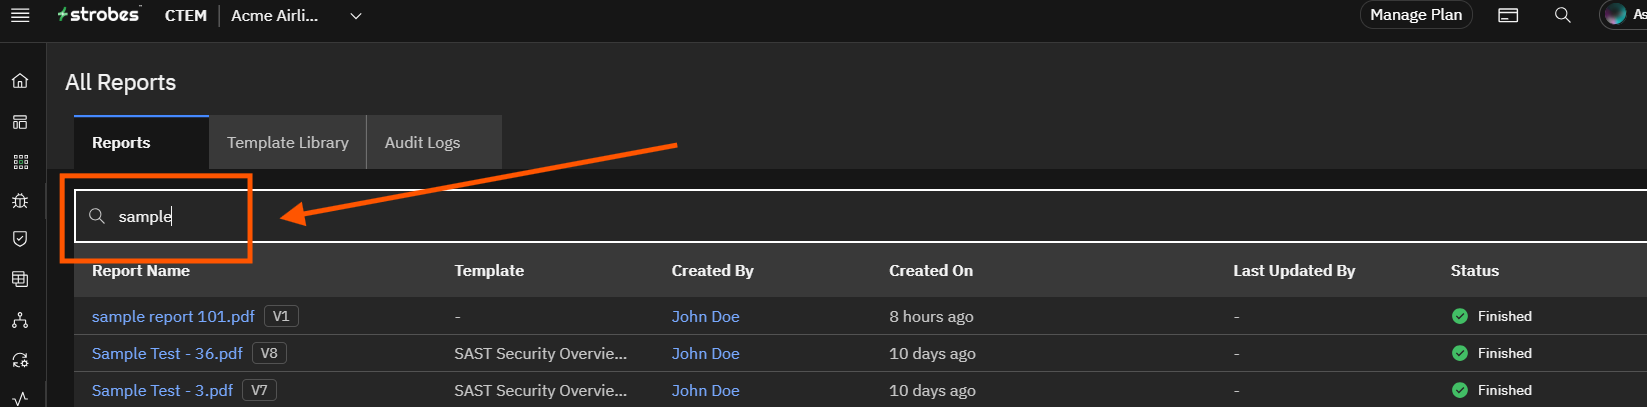
Click the Search by Report Name bar at the top of the list and type the name of the report you are looking for. The list filters in real time as you type.
Step 5 — Download a Report
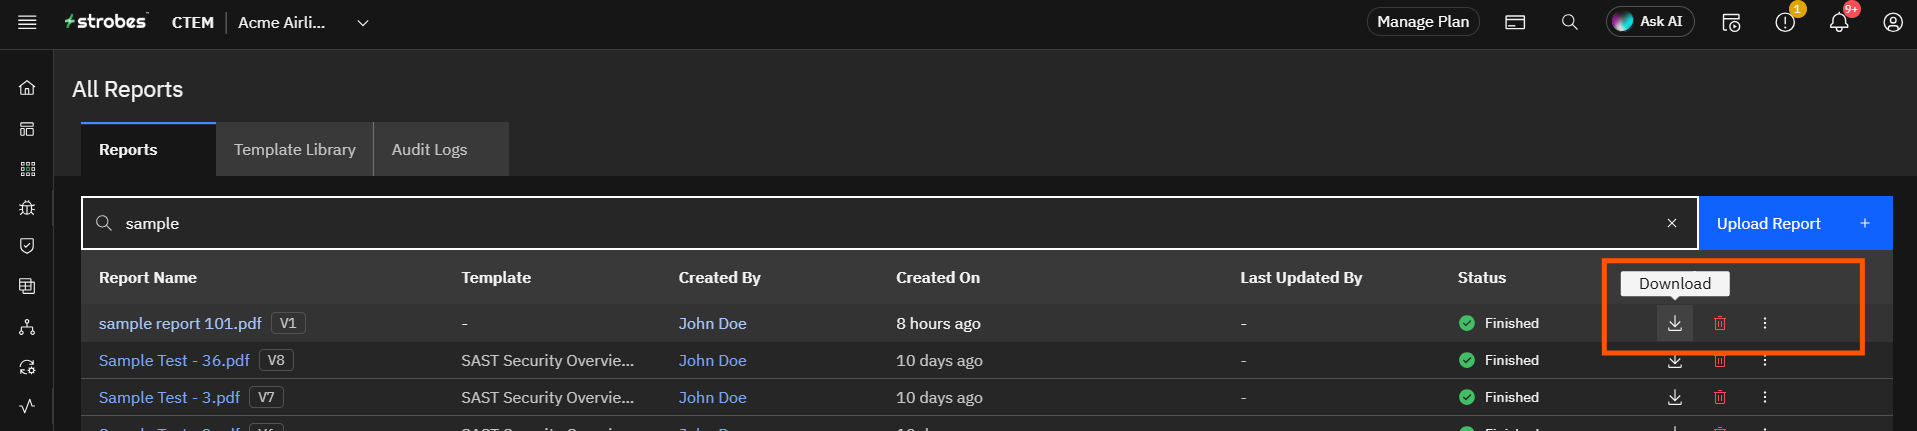
Click the download icon (arrow pointing down) in the Actions column for the report you want to download. The file downloads immediately to your browser's default download location.
Step 6 — Delete a Report
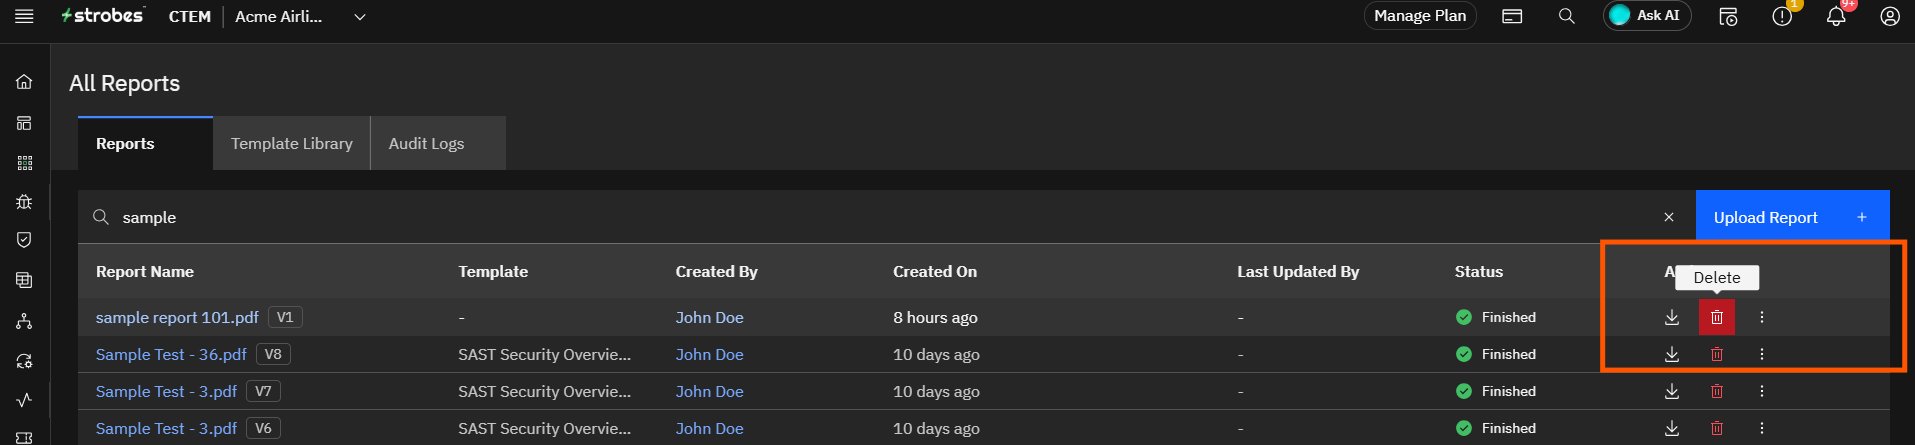
Click the trash icon in the Actions column to delete a report. A tooltip reading Delete confirms the action before you click. Deleted reports are permanently removed from the list.
Step 7 — Open the More Options Menu
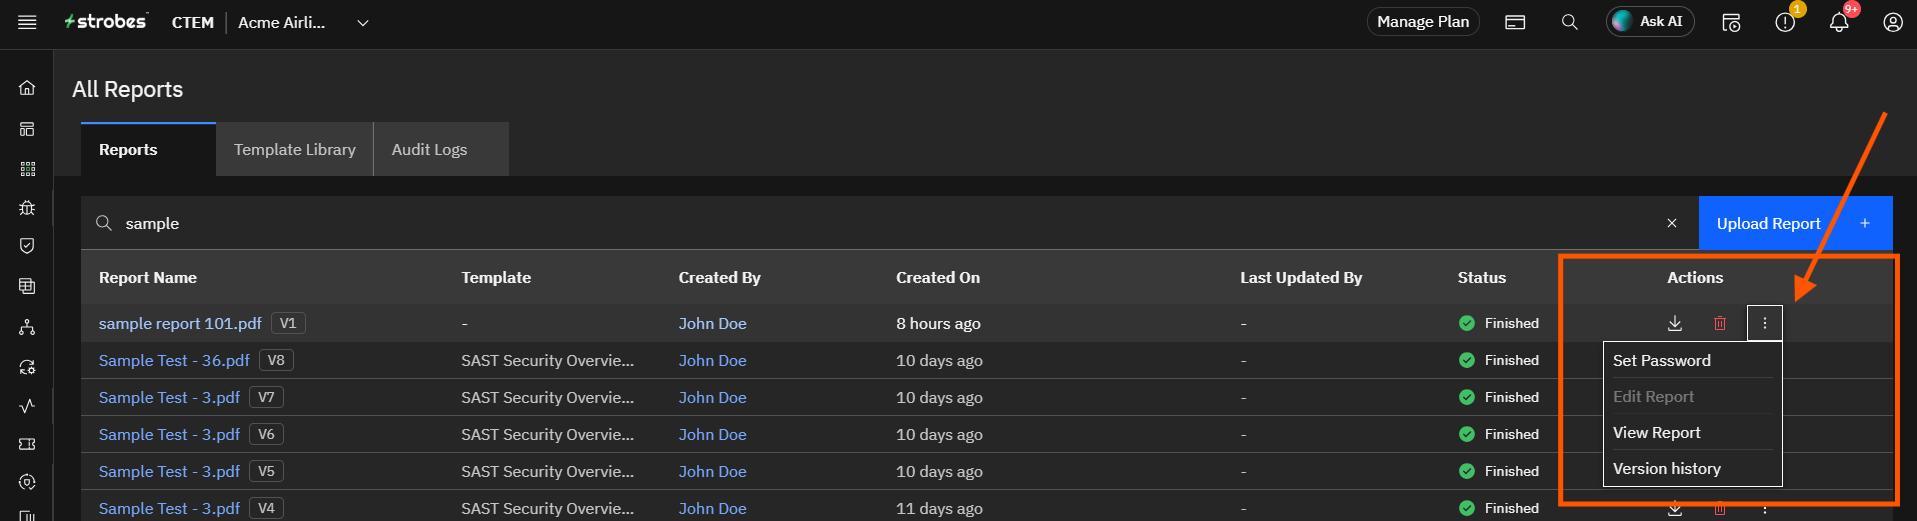
Click the three-dot menu (...) in the Actions column for a report. This menu provides five additional options:
Option | Description |
|---|---|
Set Password | Password-protect the report. Anyone opening or downloading the report will need to enter the password you set. |
Edit Report | Opens the report for editing. |
View Report | Opens the report in a viewer within Strobes without downloading it. |
Regenerate | Re-runs the report generation using the same template and scope, producing a new version. |
Version history | Opens the version history panel for this report, showing all previous versions. |
Step 8 — Understand the Edit Report Restriction
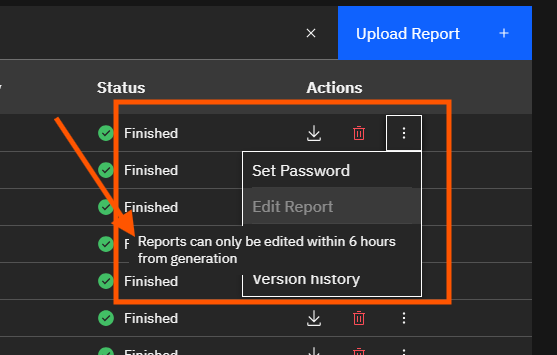
If more than six hours have passed since a report was generated, Edit Report is greyed out. Hovering over it shows the message: "Reports can only be edited within 6 hours from generation." To make changes after this window, use Regenerate to produce a fresh version, or restore a previous version from Version history.
Step 9 — Open Version History
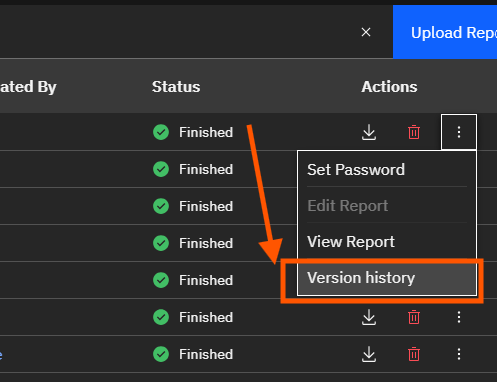
Click Version history in the three-dot menu. A panel slides in from the right side of the screen.
Step 10 — Review the Version History Panel
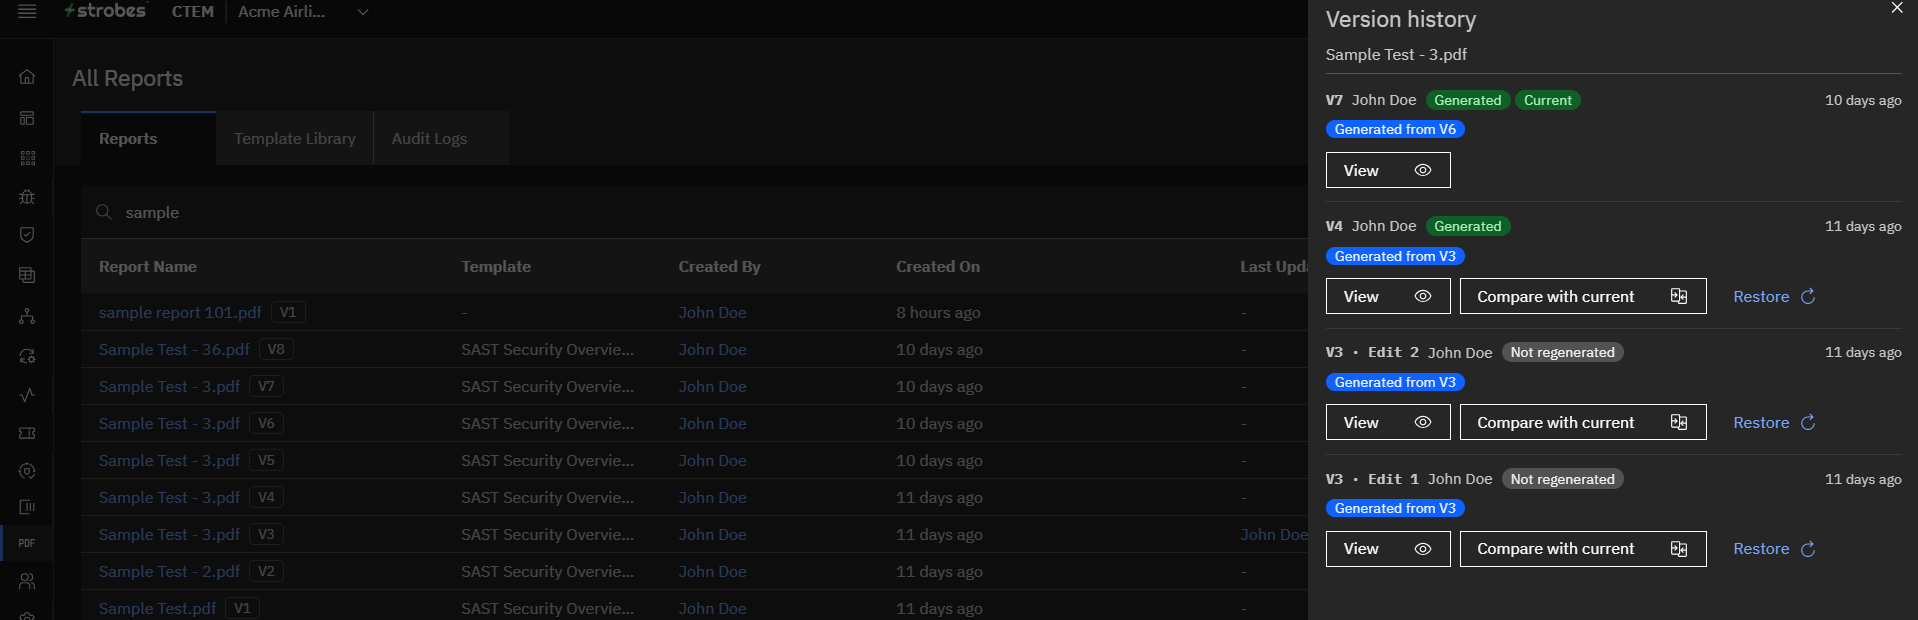
The Version history panel lists every version of the report from most recent to oldest. Each entry shows:
- The version number (V1, V2, V3...) and any edit number within that version (e.g., V3 · Edit 2)
- The team member who generated or edited that version
- A status badge: Generated (the full report was regenerated) or Not regenerated (the content was edited without regeneration)
- A lineage tag showing which version it was generated from (e.g., "Generated from V6")
- A relative timestamp
The current version is marked with a green Current badge and only shows a View button. All older versions offer three actions:
Action | Description |
|---|---|
View | Opens that version of the report for review without making it current. |
Compare with current | Opens a side-by-side or diff view between that version and the current version. |
Restore | Restores that version as the current active version of the report. |
Tips
All reports across your Strobes instance land here. You do not need to go back to an engagement or scan to retrieve a report — every generated file appears in the Reports tab automatically.
Version badges on report names show the current version at a glance. A report named "Sample Test - 3.pdf V7" is on its seventh version. Open Version history to see what changed between versions and restore an earlier one if needed.
Use Set Password before sharing reports externally. If you are sharing a report with a customer or stakeholder outside Strobes, password-protecting it adds a layer of access control without changing the file format.
Edit Report is only available within six hours of generation. If you need to make a change after this window, regenerate the report and then edit the new version within the six-hour window.
The search bar filters by report name, not template name. If you are looking for all reports generated from a specific template, use the Template column in the list to scan visually, or filter from the source module that generated them.