
Creating an Engagement
Overview
Engagements in Strobes represent a scoped security testing exercise — whether it's a web application pentest, a network security assessment, or a cloud security review. Each engagement is tied to a set of services, a defined scope of assets, and a delivery timeline. This article walks through creating a new engagement from start to finish.
Before You Start
- Know which service categories apply to your engagement (e.g., Application Security, Network Security).
- Have the scheduled start date and delivery date ready.
- Have your target assets identified — either as existing assets in Strobes or ready to be added manually.
- If testers need special access, prepare any test account credentials or VPN details in advance.
Step 1: Navigate to Engagements
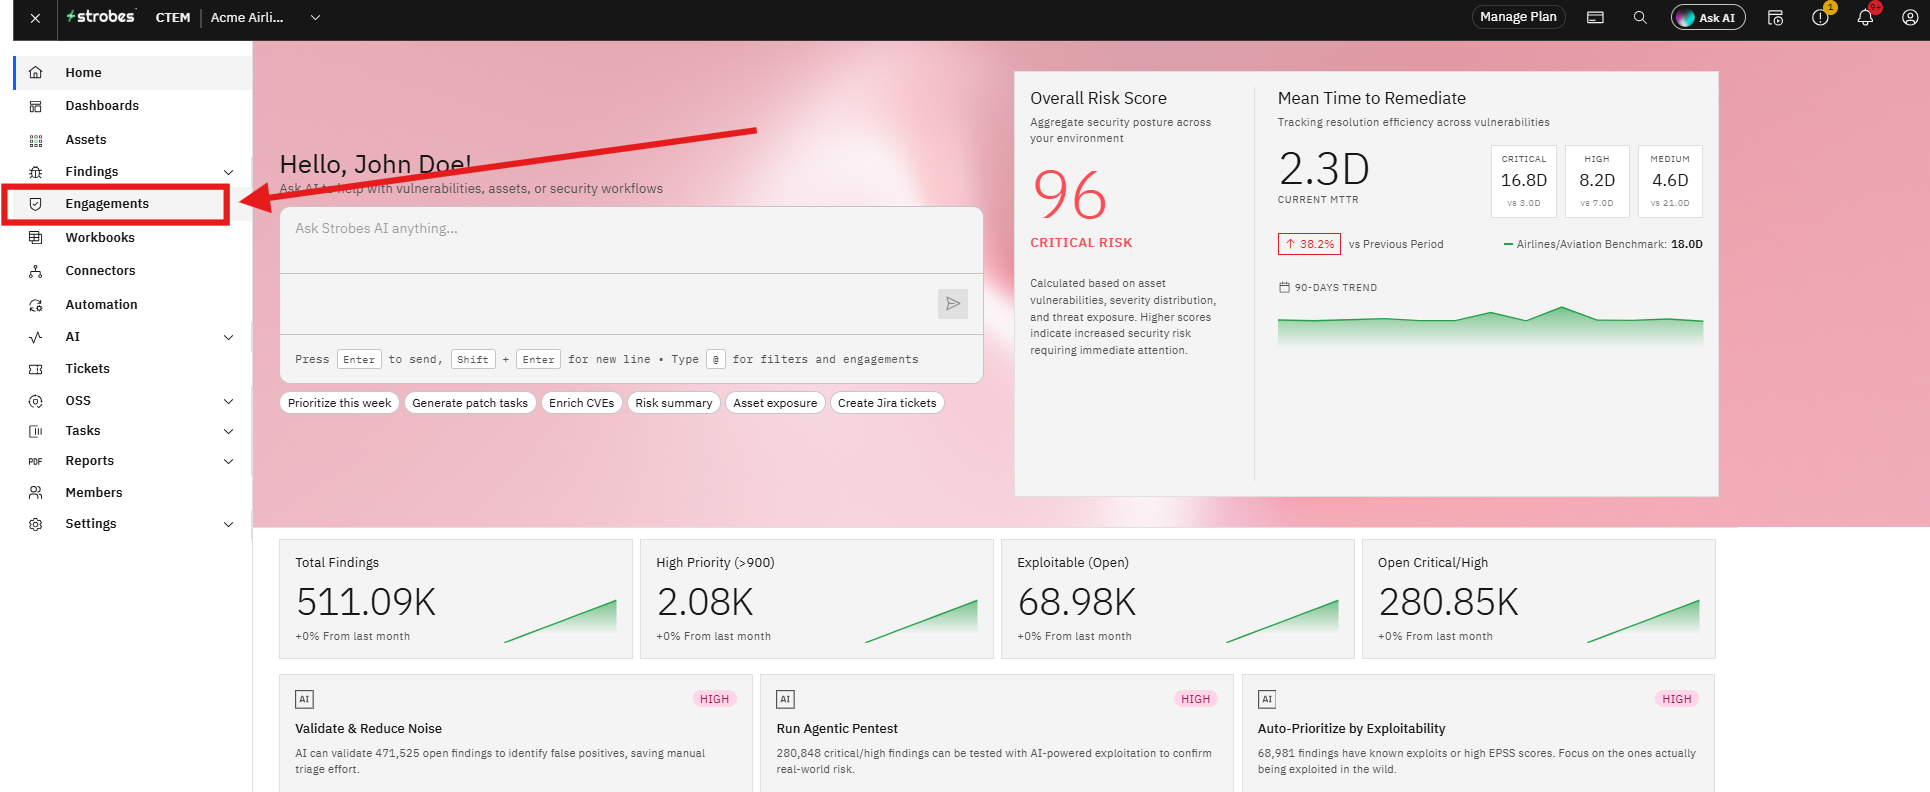
Click Engagements in the left sidebar to open the Engagements page.
Step 2: Start a New Engagement
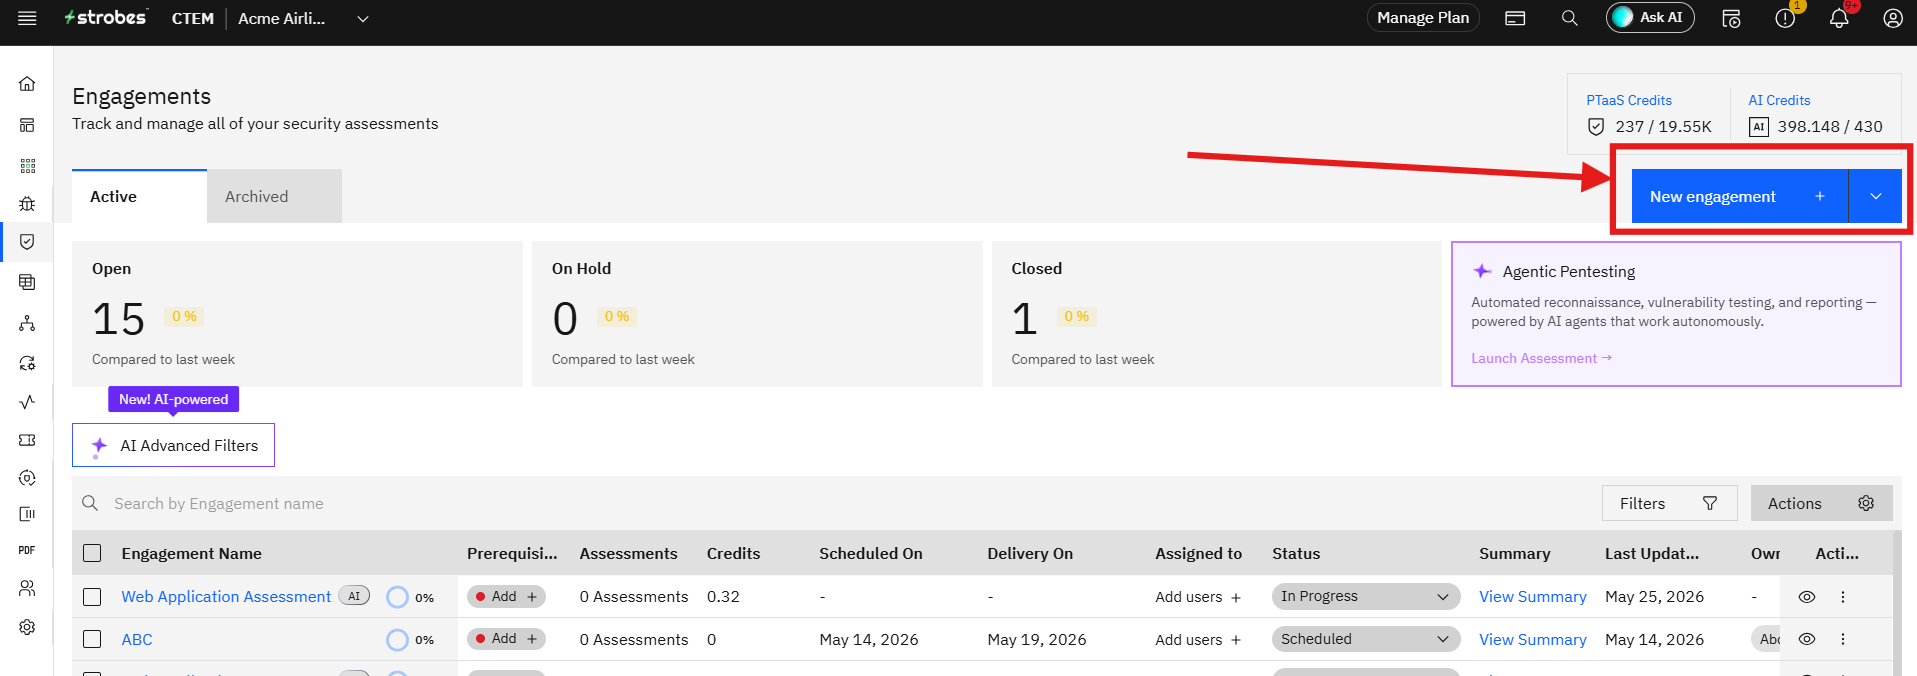
Click New Engagement in the top right corner. This opens the engagement creation wizard.
Step 3: Enter Engagement Details
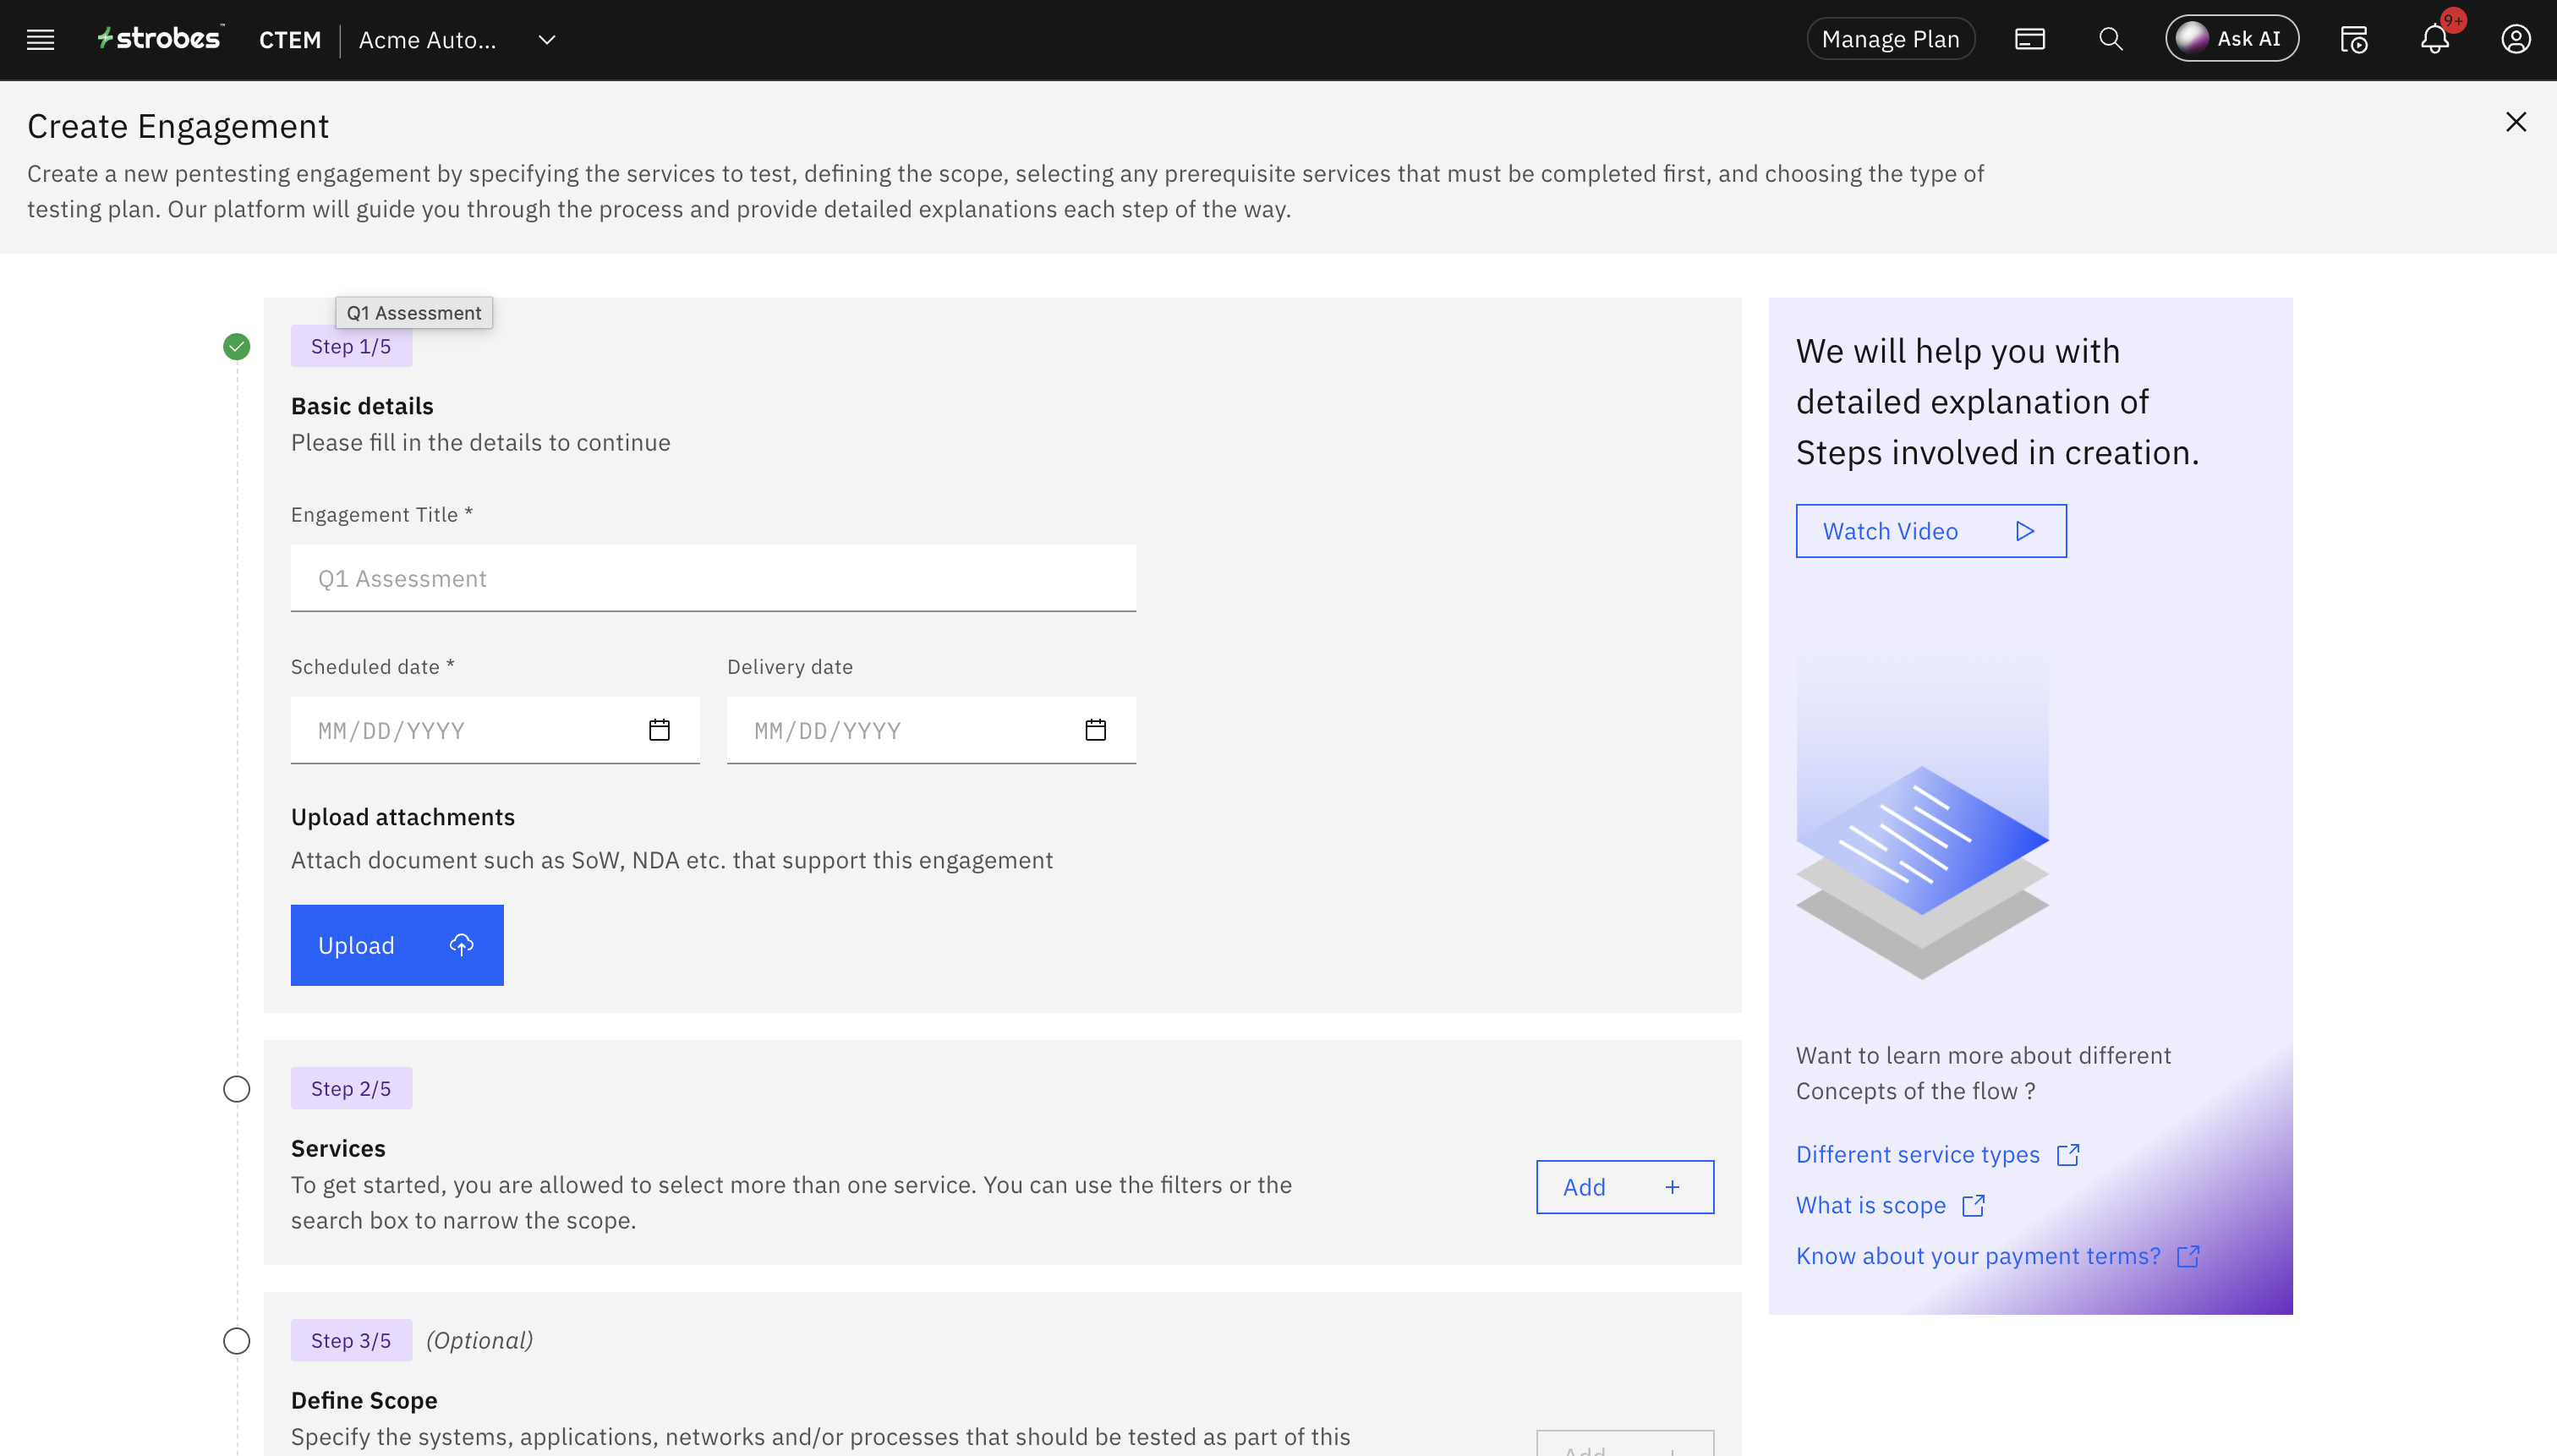
Fill in the basic details for the engagement:
Engagement Name (required) Give the engagement a clear, descriptive name. For example: "Q2 Web Application Pentest" or "Annual Network Security Assessment".
Scheduled Date (required) The date on which testing is planned to begin.
Delivery Date (required) The date by which the engagement findings are expected to be delivered.
Attachments (optional) Attach any relevant documents — for example, a statement of work, a rules of engagement document, or a pre-shared scope document.
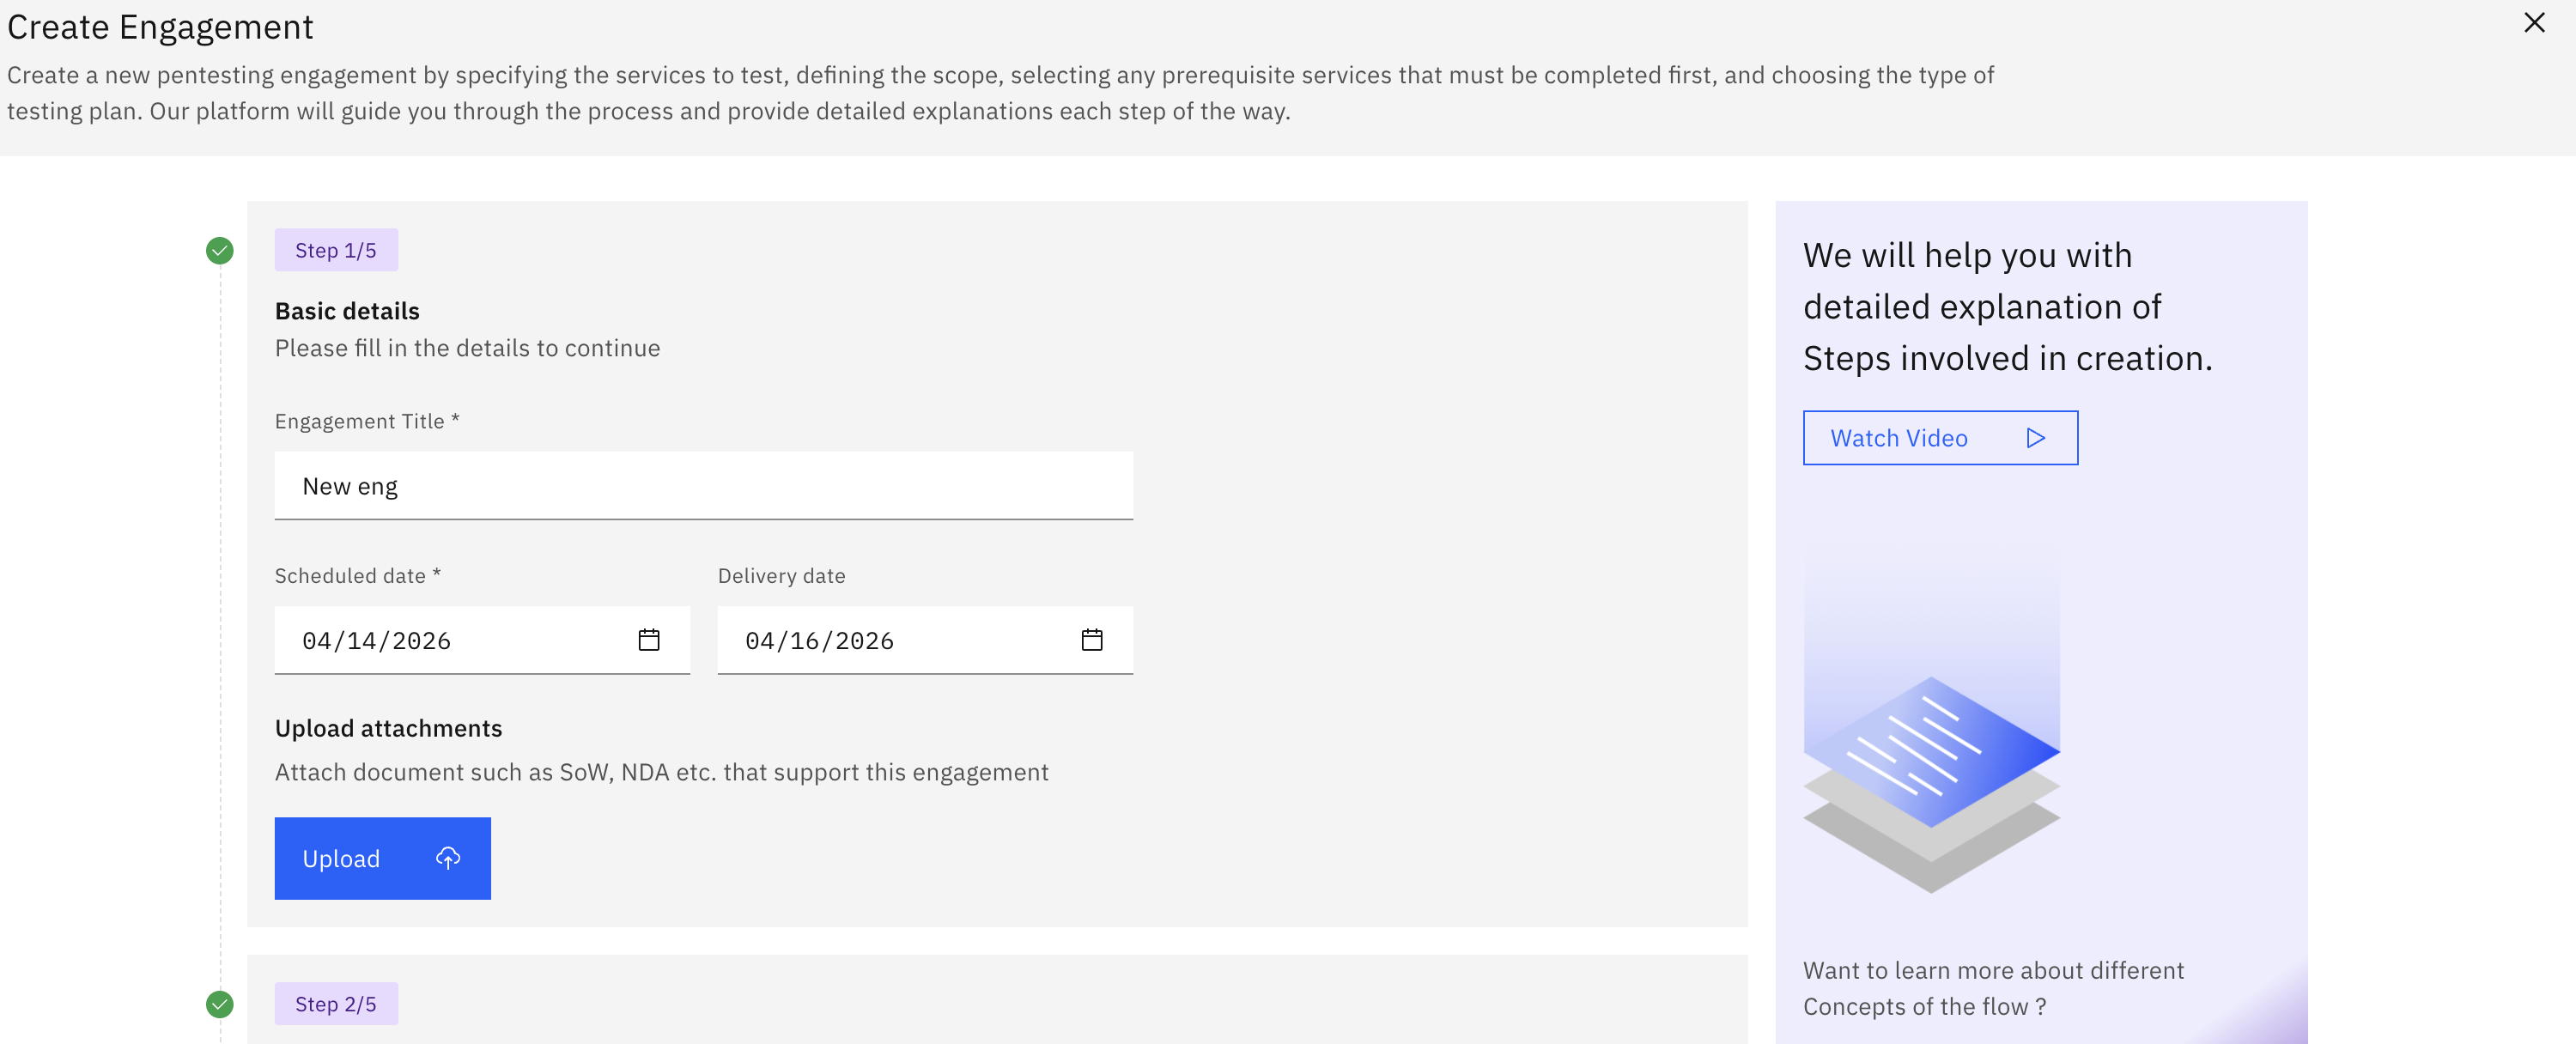
Once done, click Next.
Step 4: Select Services
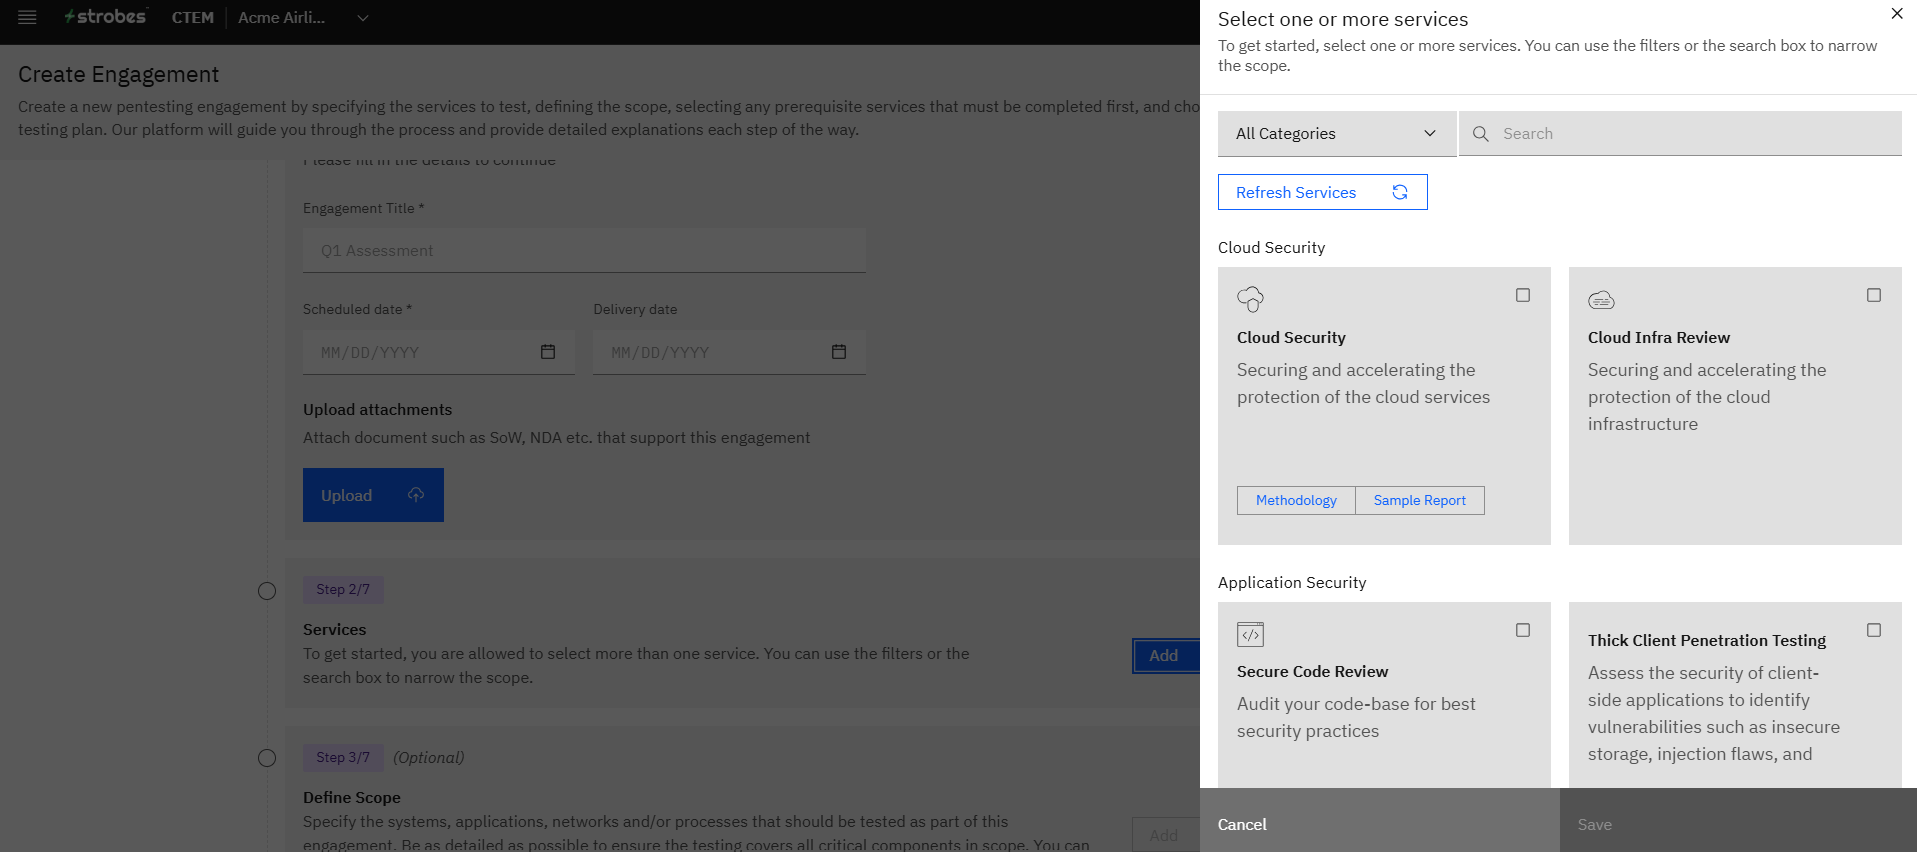
Select the service categories that apply to this engagement. You can select more than one. The available categories are:
Category | What it covers |
|---|---|
Application Security | Web apps, mobile apps, APIs, and source code reviews |
Network Security | Internal and external network infrastructure testing |
Cloud Security | Cloud environment and configuration assessments |
Threat Simulation | Red team exercises, phishing simulations, and adversarial testing |
Click one or more services to select them, then click Next.
Step 5: Define the Scope
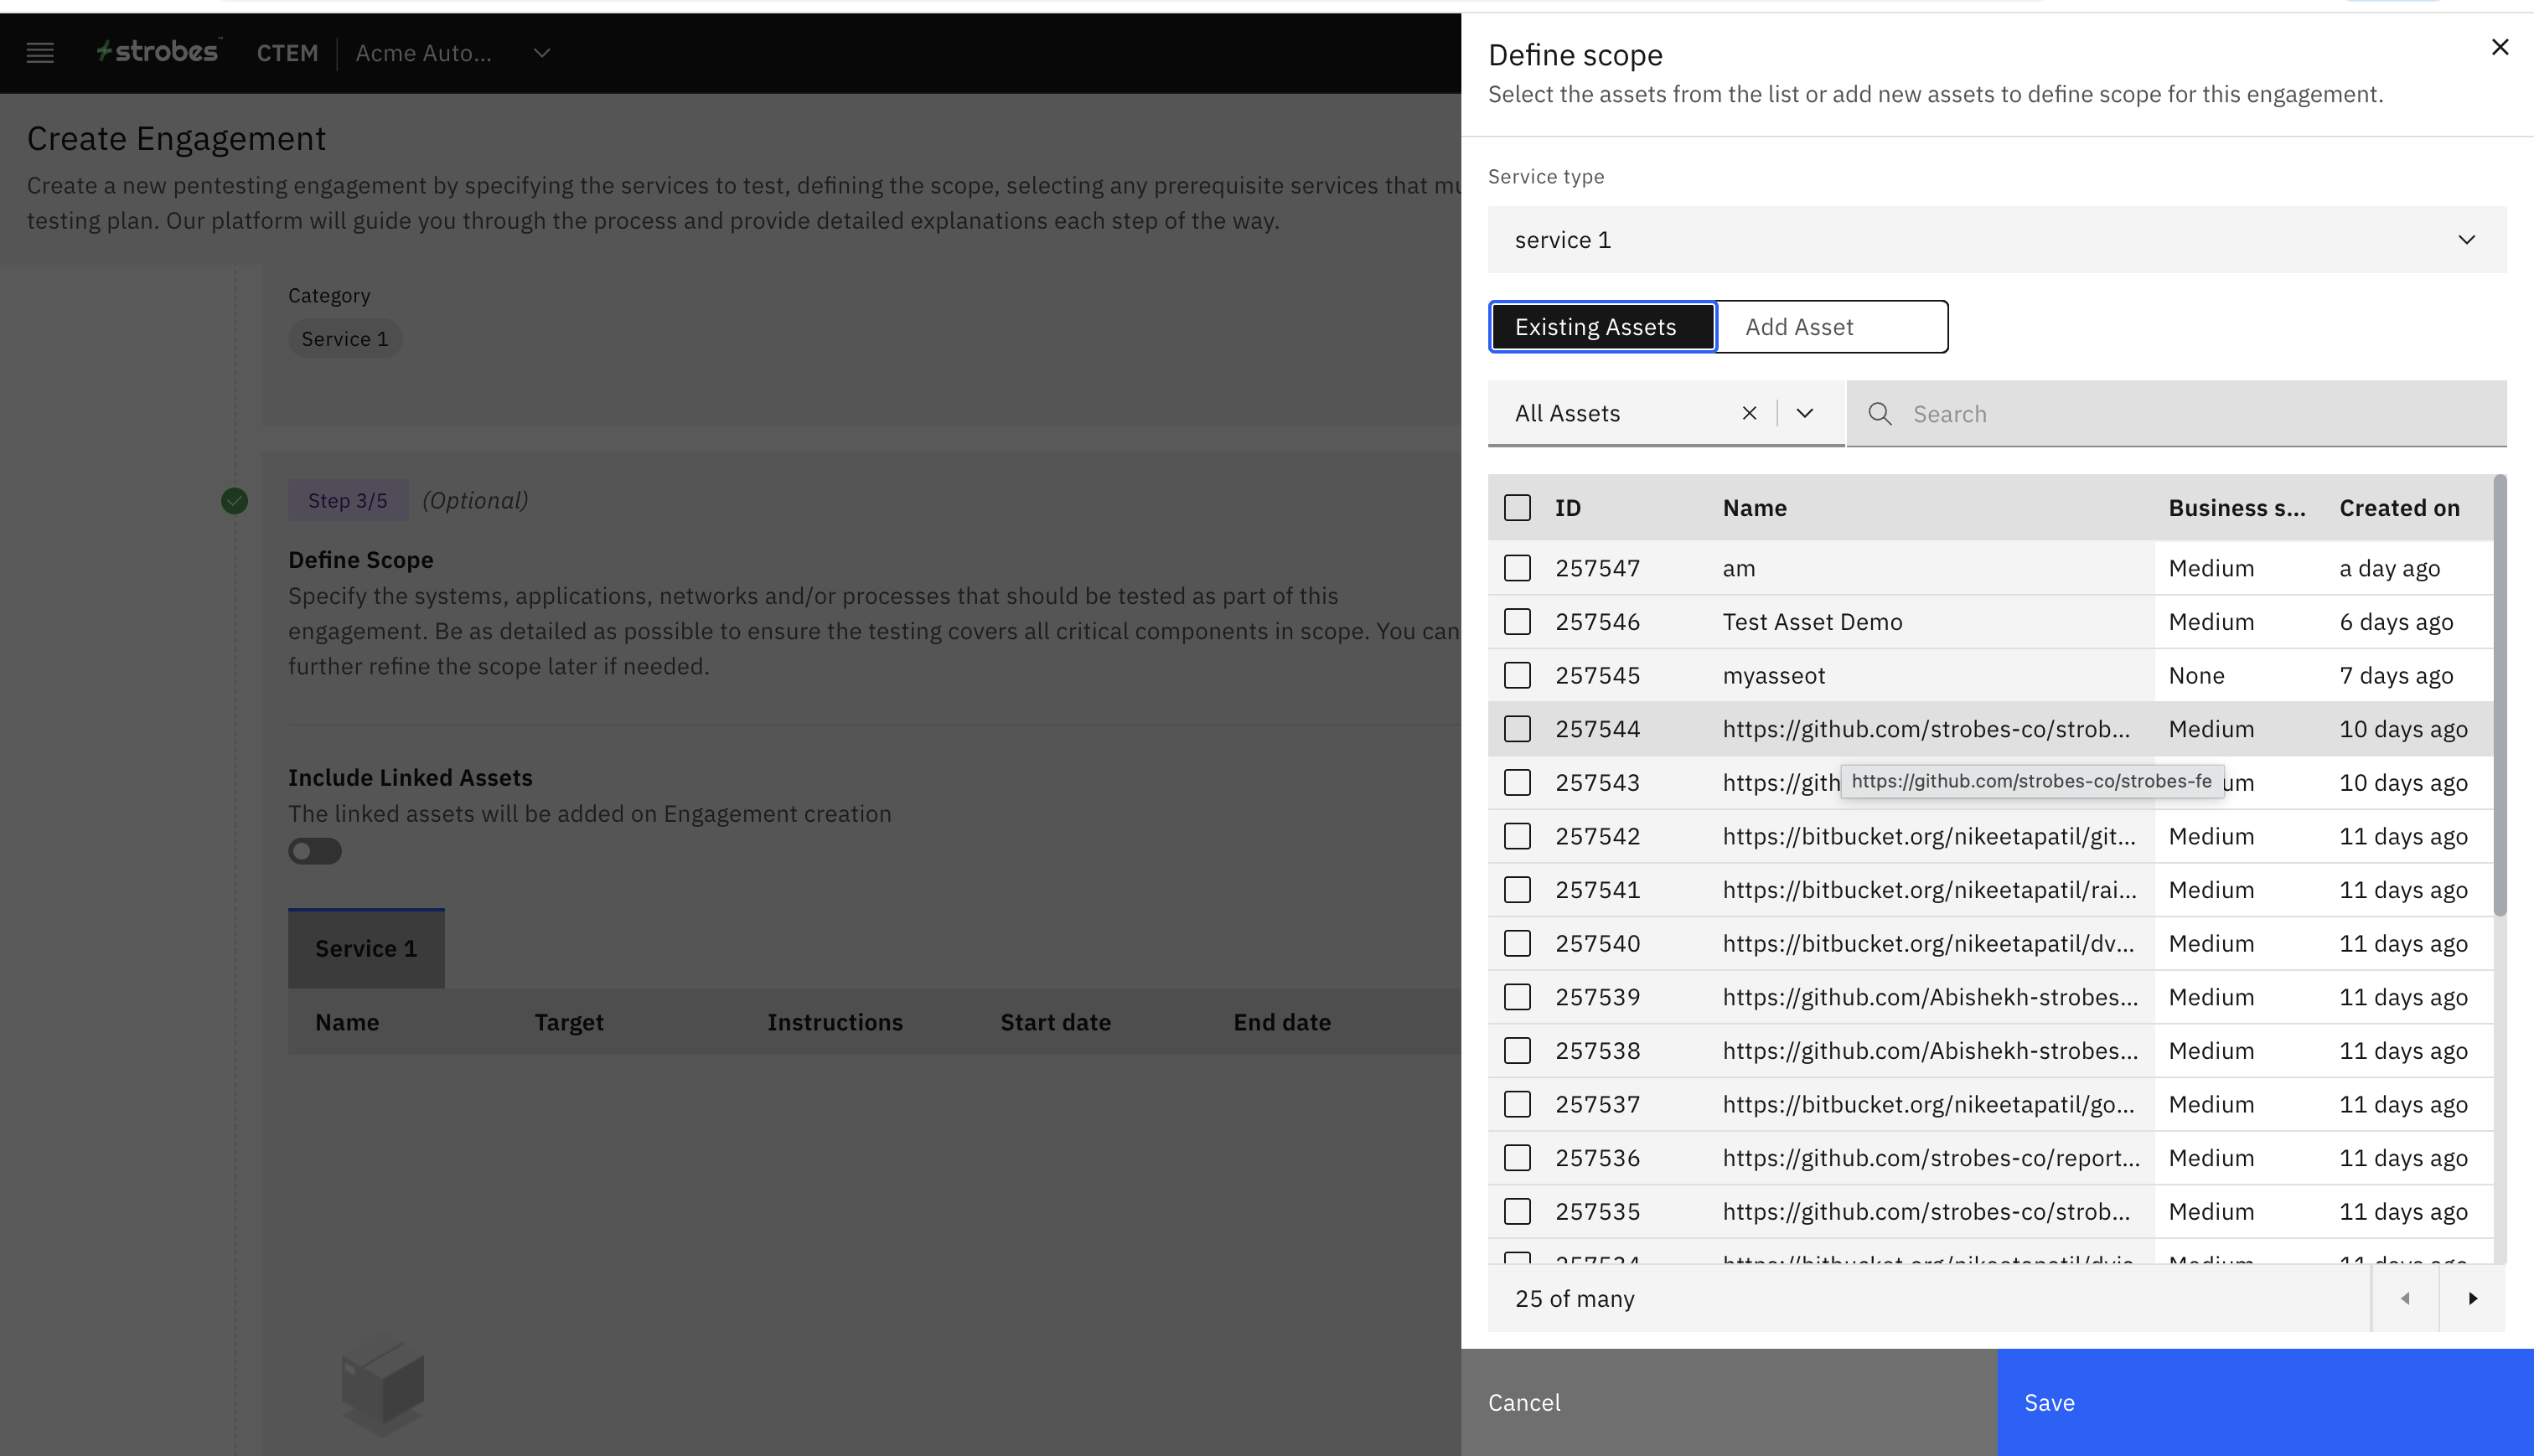
Define which assets are in scope for this engagement. You have two options:
Select existing assets Choose from assets already in your Strobes inventory. Use the Views dropdown to filter by a saved asset view — useful if you've pre-organized assets by environment, business unit, or asset type.
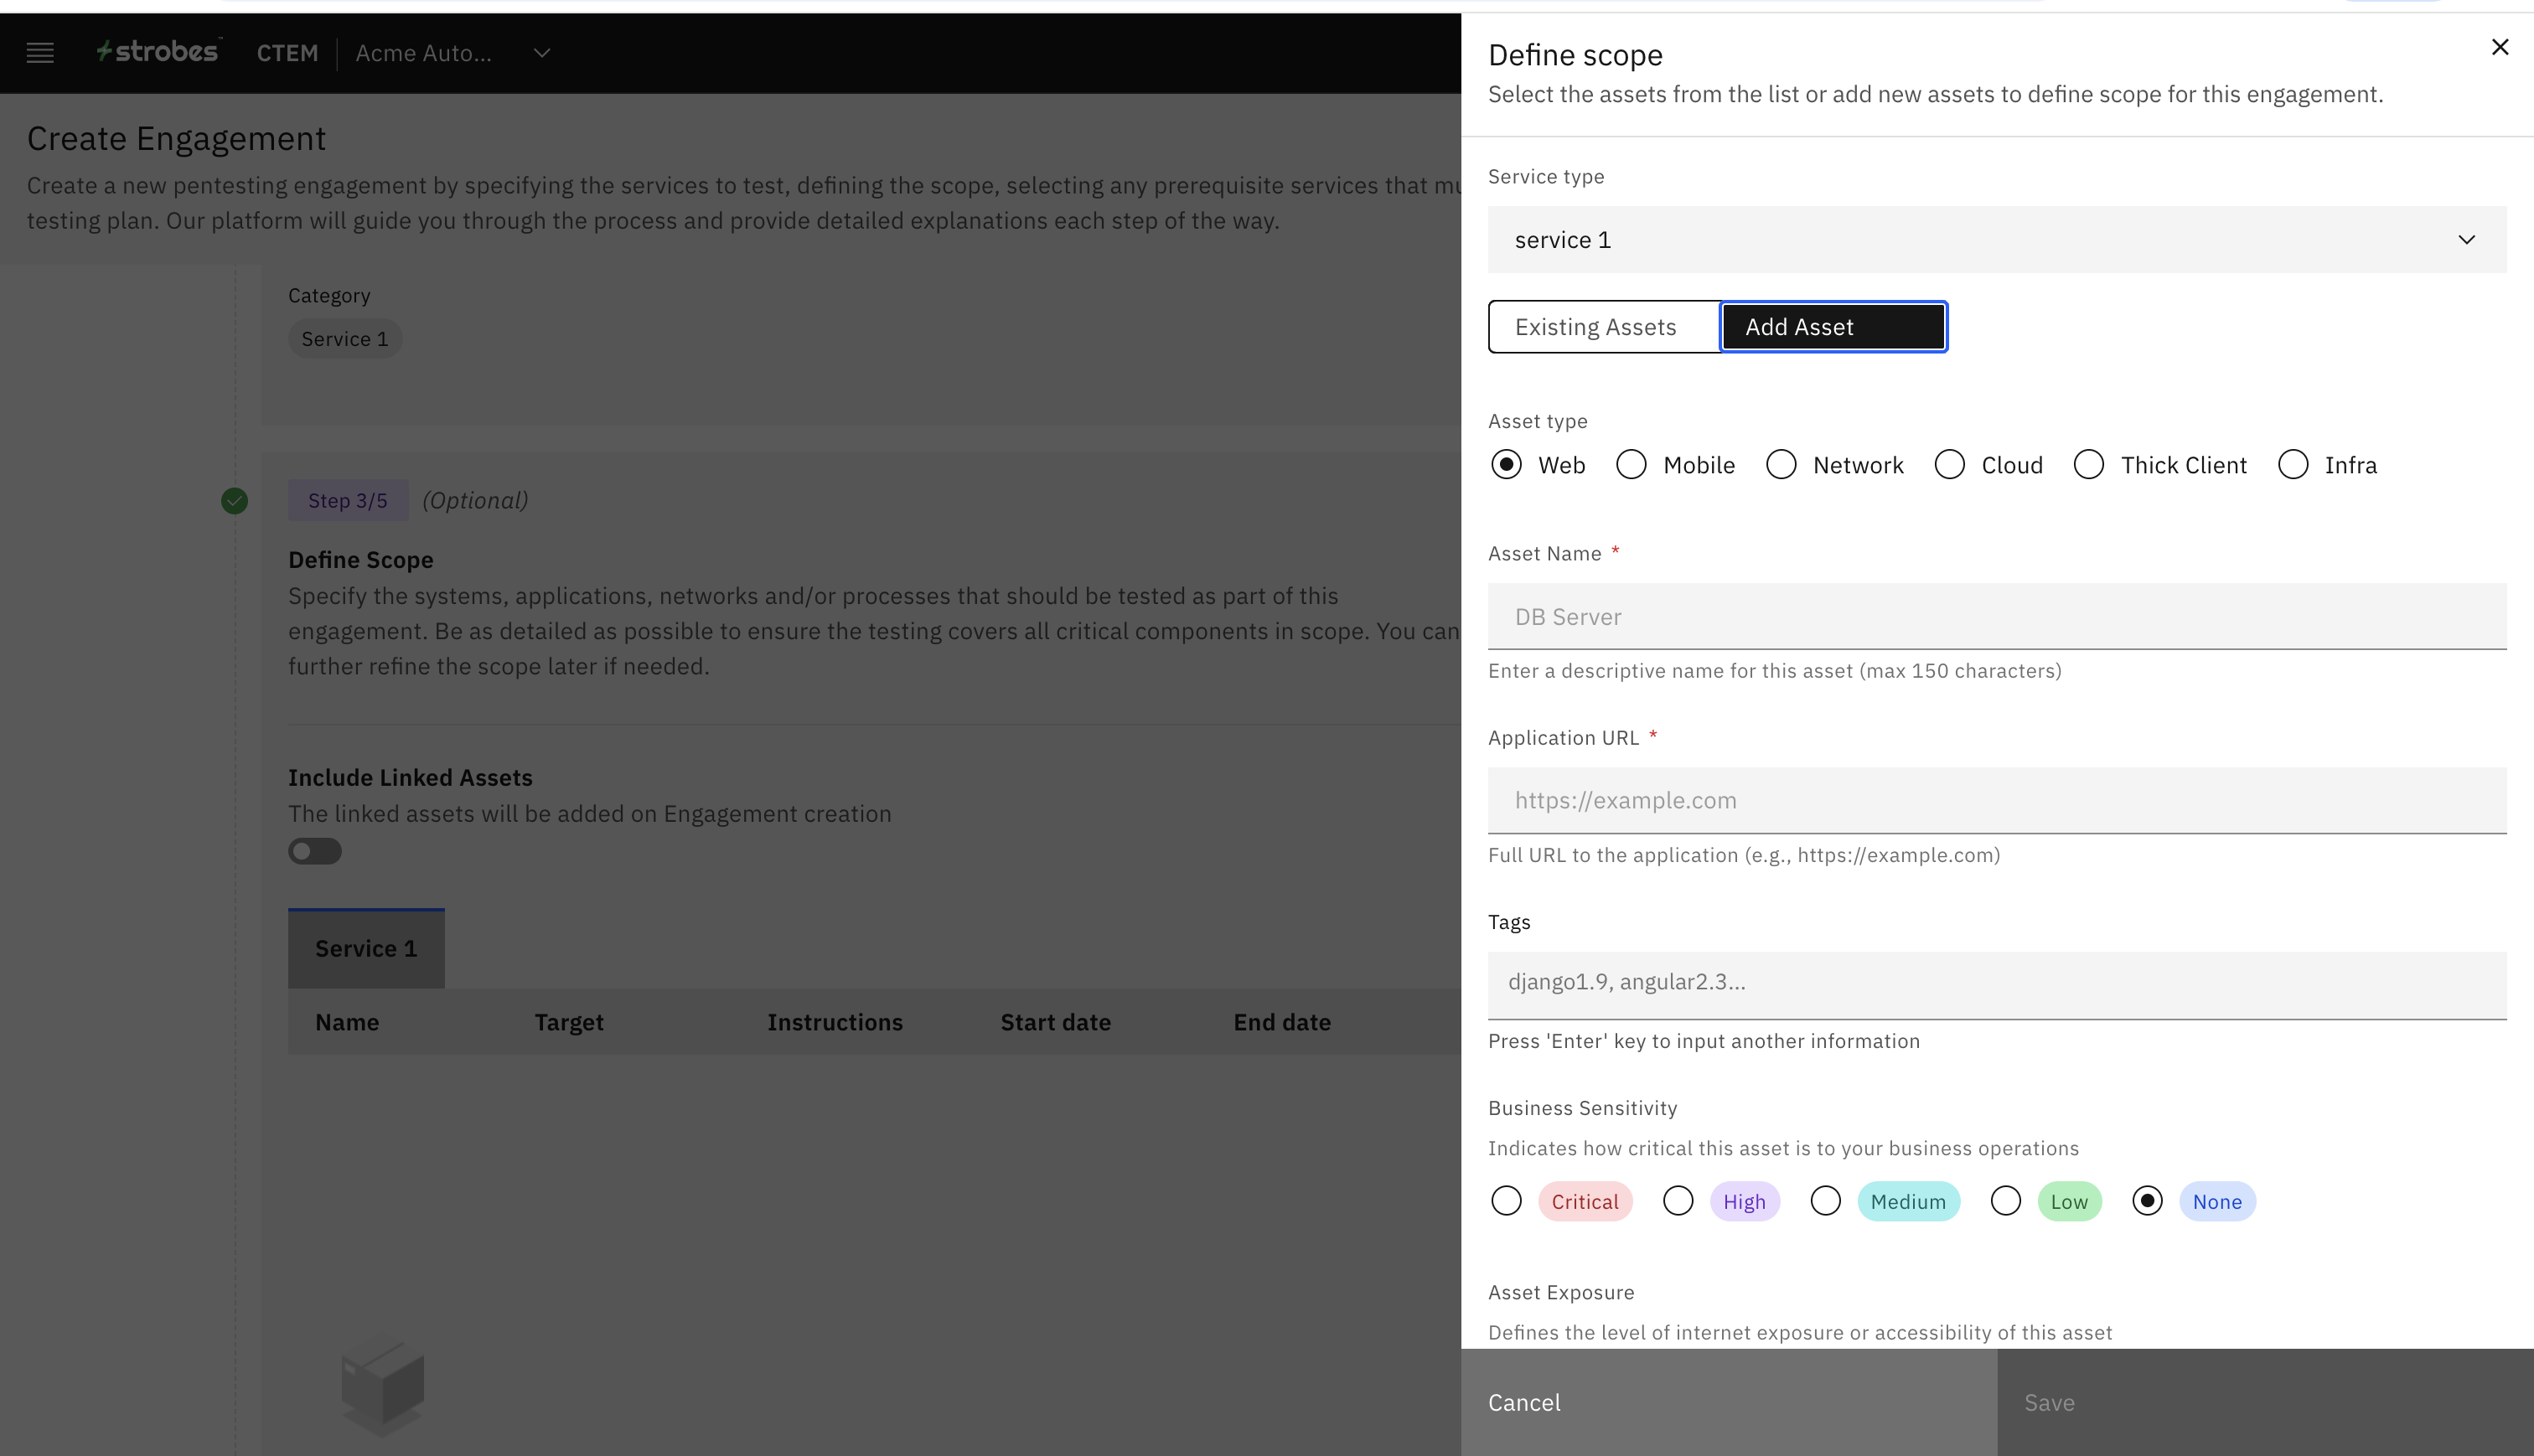
Add new assets Add assets directly if they aren't already in your inventory. Enter the asset details and they will be added to the scope.
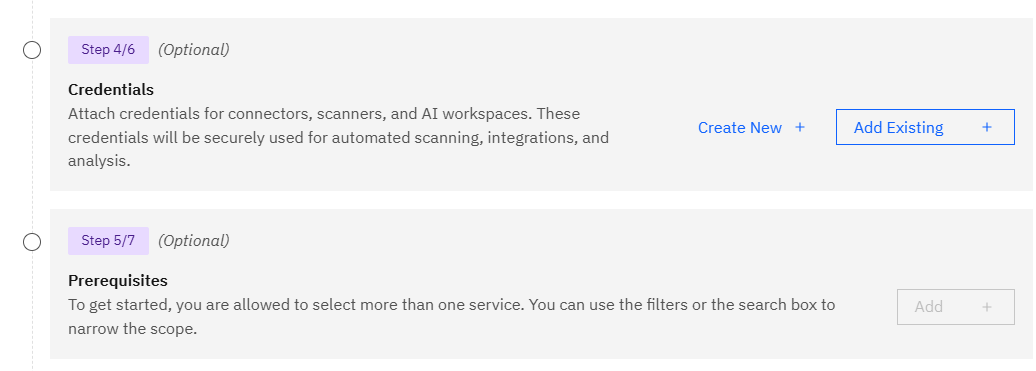
Add Credentials where required as well.
Note: Every asset added to the scope counts as one assessment. For example, if you add 10 assets, the engagement will contain 10 assessments.
Step 6: Add Instructions (Optional)
Once your assets are selected, an Add Instructions field appears on the same screen. Use this to provide testers with any access details they need to carry out the assessment, such as:
- Test account credentials (username and password)
- VPN configuration details
- Environment-specific notes or restrictions
- Out-of-scope URLs or IP ranges
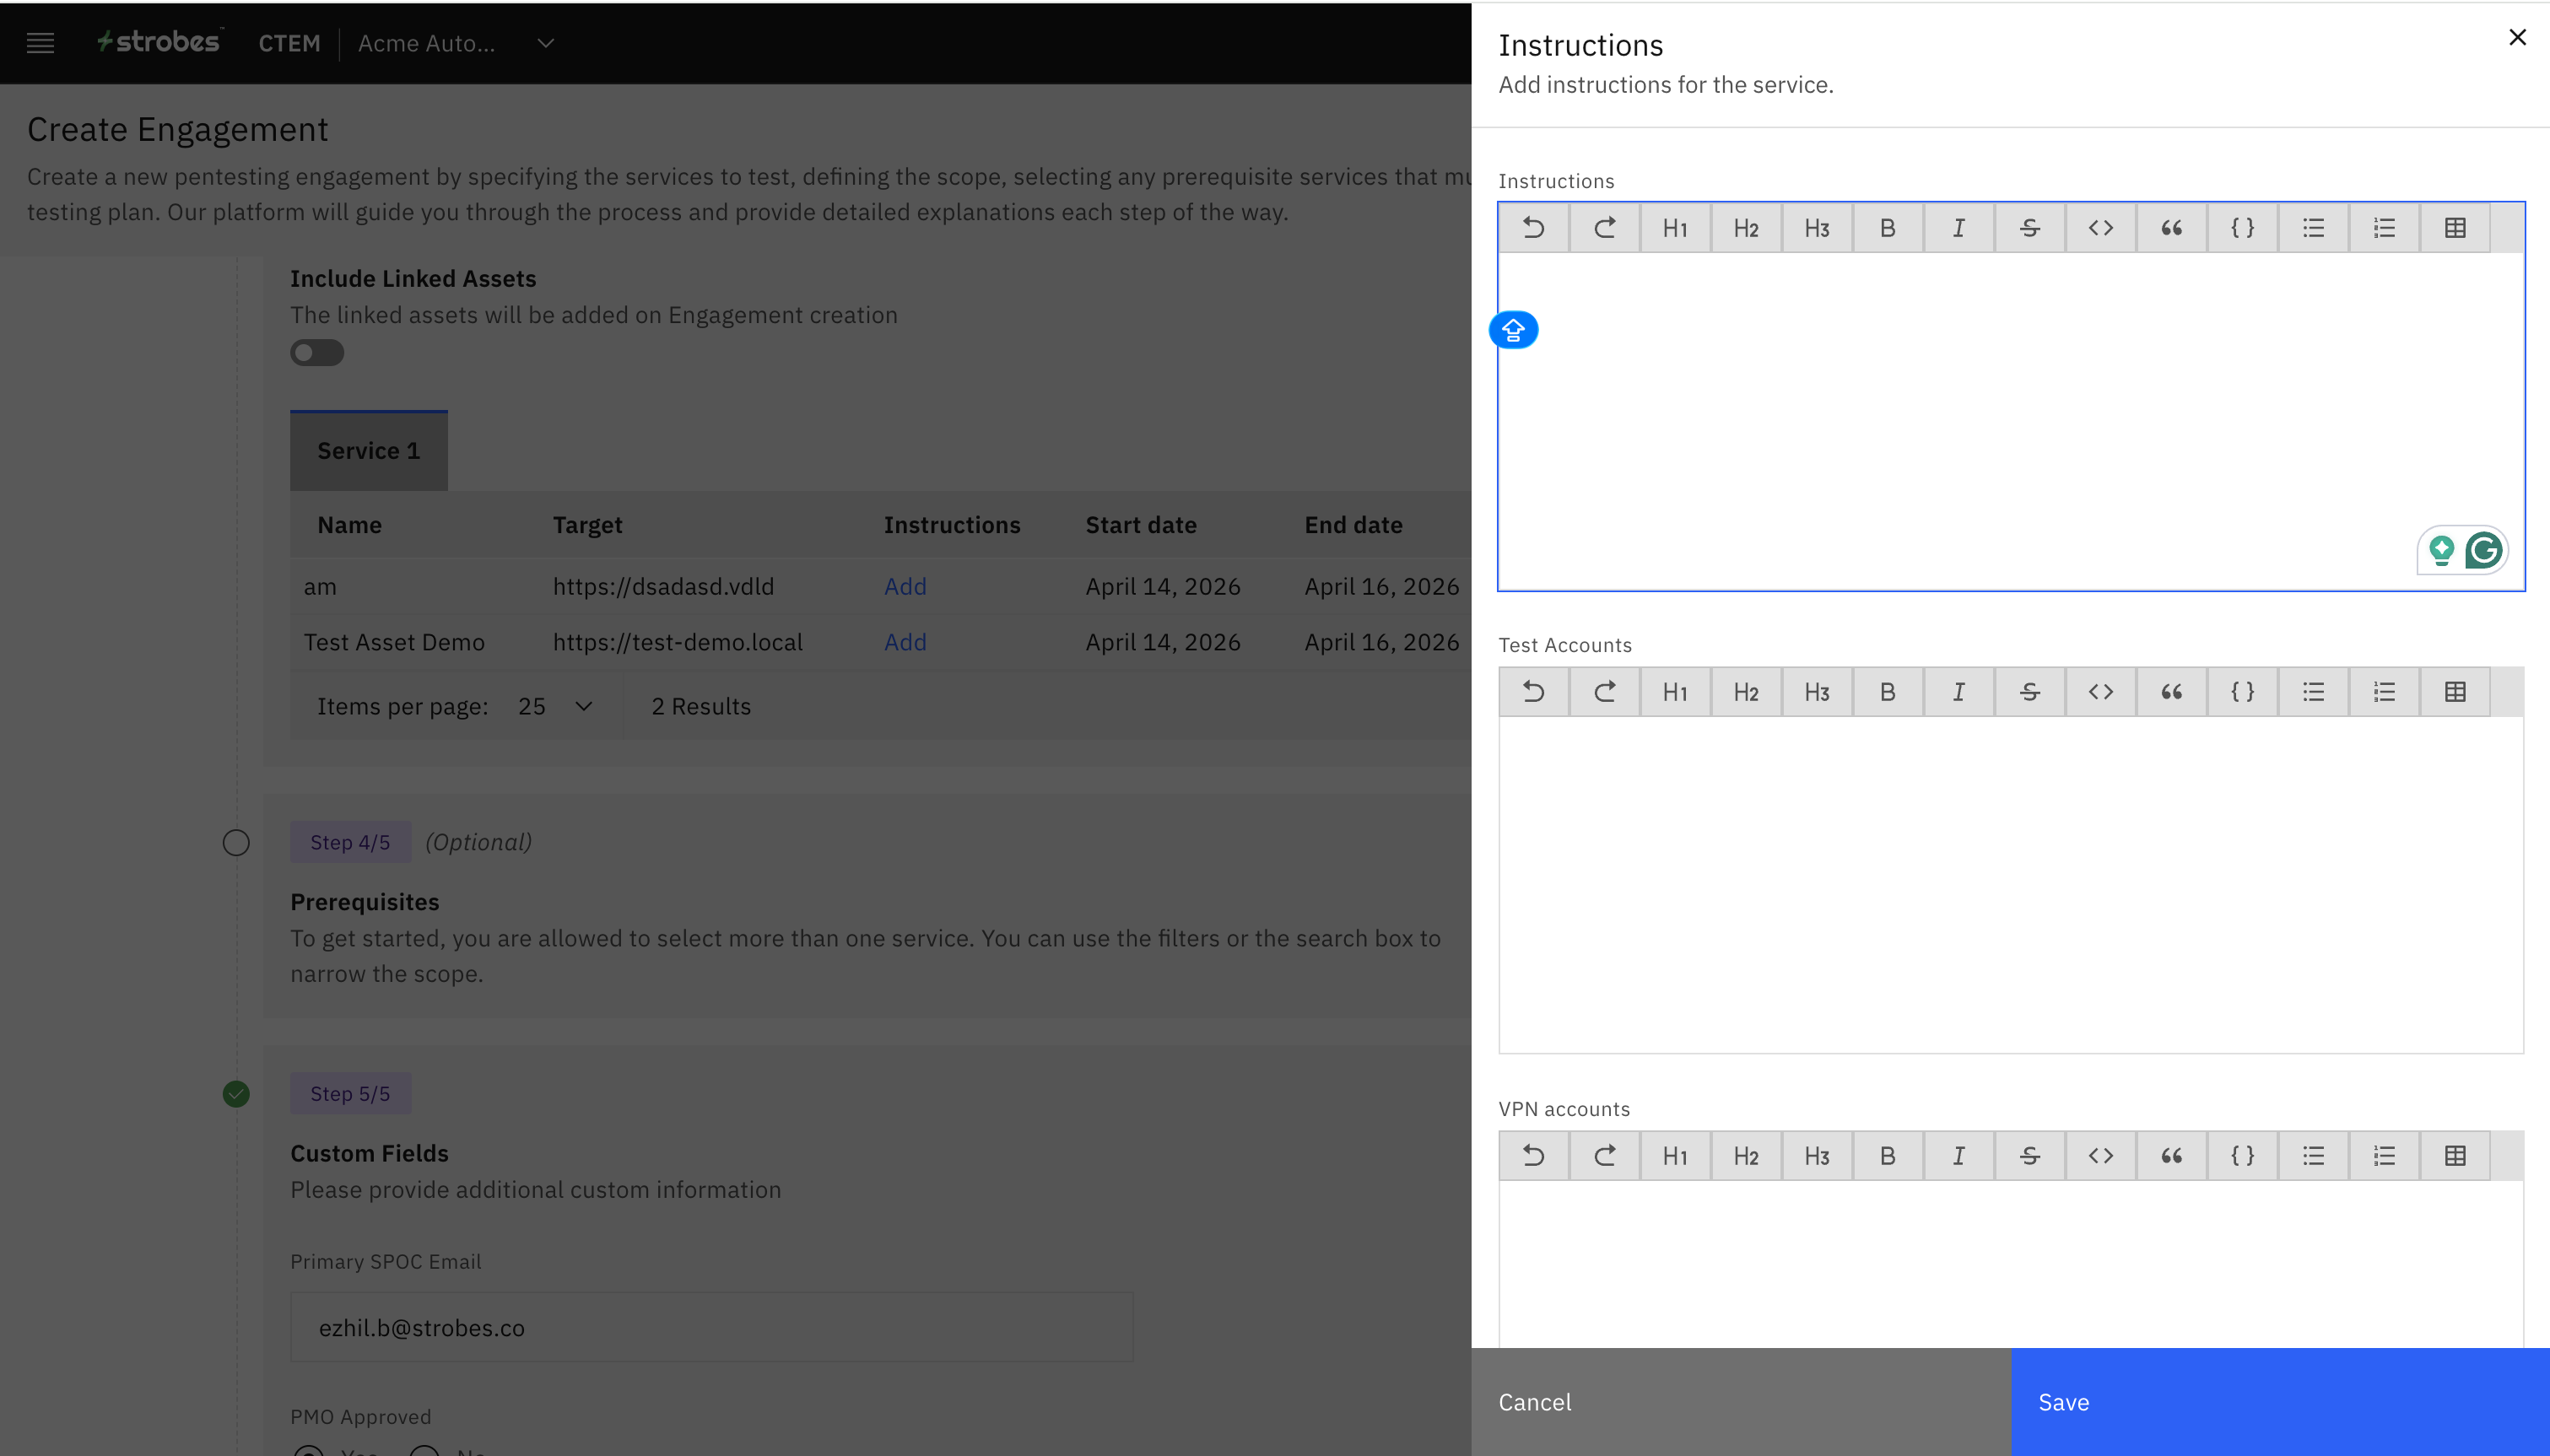
This information is visible to the assigned testers and helps them get started without needing to chase access details separately.
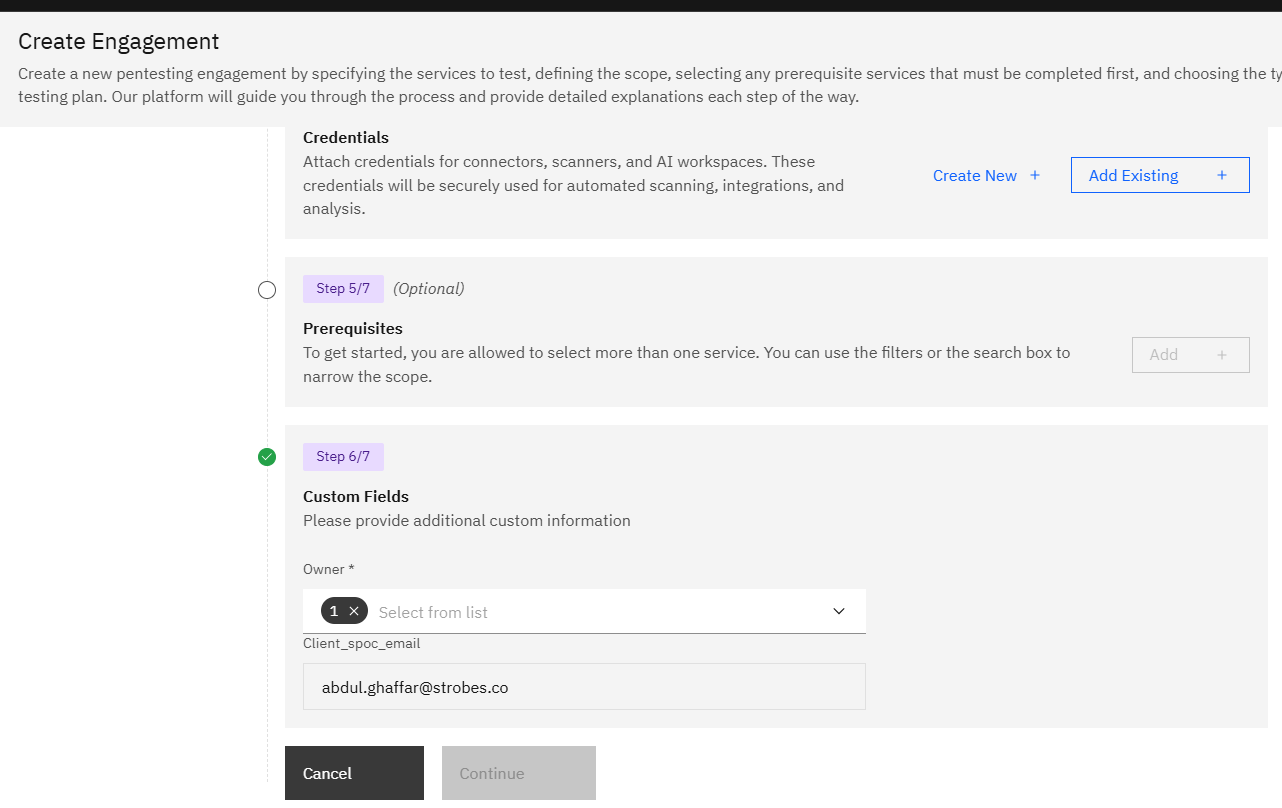
Step 7: Add the Custom Information
In this step you need to provide who will be the owner of this particular engagement and specify the email of the particular instance.
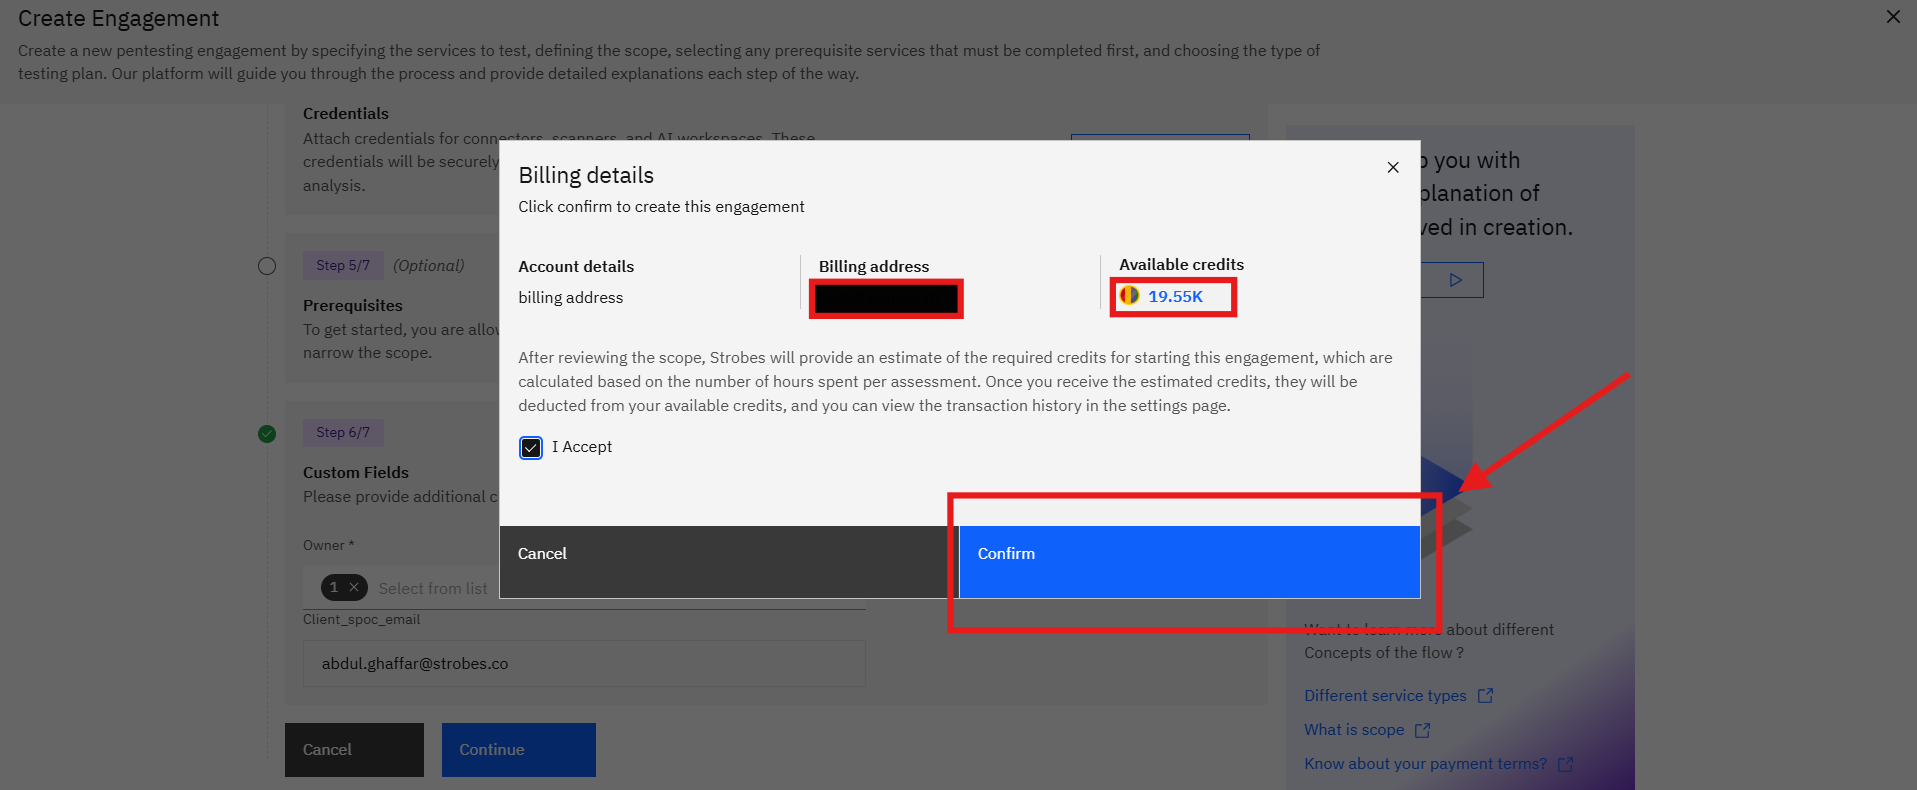
In the final step, review and accept the Terms and Conditions. Once accepted, click Submit.
The engagement is created immediately and appears in your Engagements list.
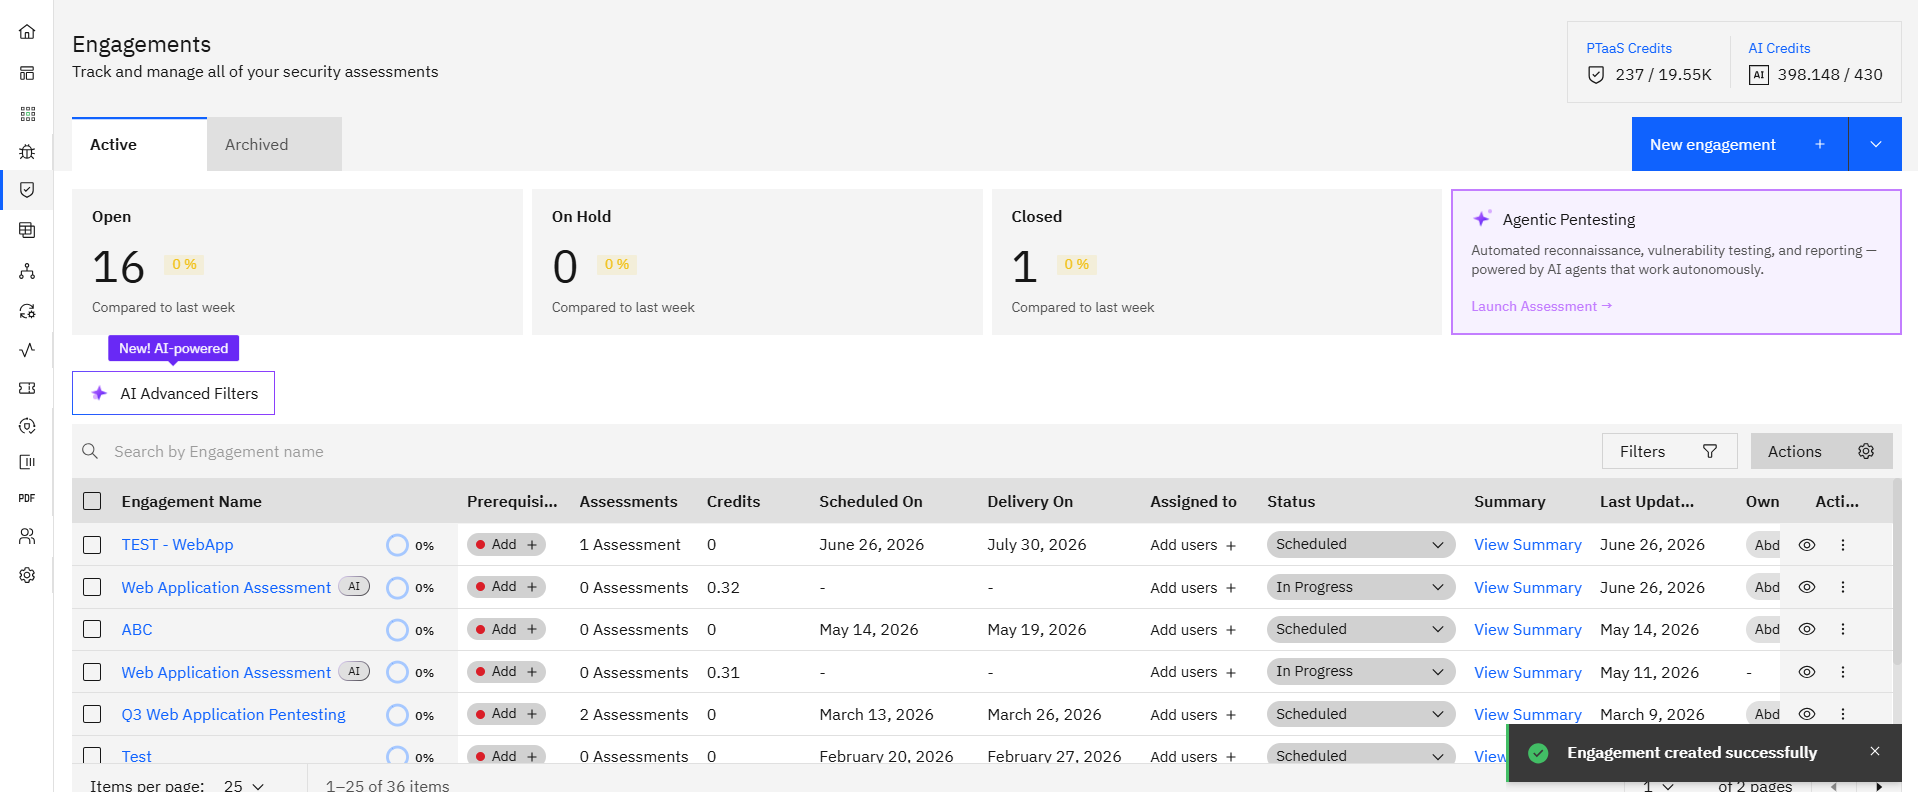
From here you can assign team members, track progress, and begin reviewing findings as they come in.
Tips
Name engagements consistently. Including the quarter, target type, and assessment type in the name (e.g., "Q3 2026 — External Network — Pentest") makes it easy to search and compare engagements over time.
Use Views when selecting scope. If you regularly test the same groups of assets, save them as an asset view in advance. You can then apply that view directly in the scope step instead of selecting assets one by one.
Add instructions before submitting. Testers can't start work until they have the access they need. Entering test credentials and VPN details at creation time avoids delays at the start of the engagement.
One asset = one assessment. Keep this in mind when scoping. If your engagement covers a large number of assets, it may be worth splitting it into multiple engagements to keep reporting and triage manageable.