
Configuring Qualys VMDR with Strobes
Overview
The Qualys VMDR connector syncs assets and vulnerability findings from your Qualys environment into Strobes, where you can invoke scans, prioritize findings, and track remediation — all in one place.
Setup takes three steps: Step One links your Qualys credentials and names the configuration; Step Two configures how Strobes imports and merges assets from Qualys; Step Three optionally connects ticketing and notification platforms to receive scan results. After the workflow is saved, you can trigger an immediate sync with the Sync Now button.
Before You Start
- Role required: Owner or Manager access on your Strobes account.
- Qualys credentials: You need your Qualys username, password, and the platform URL for your Qualys subscription (for example,
https://qualysguard.qualys.com).
Step One: Provide Qualys Details
Step 1 — Click Connectors in the Left Sidebar
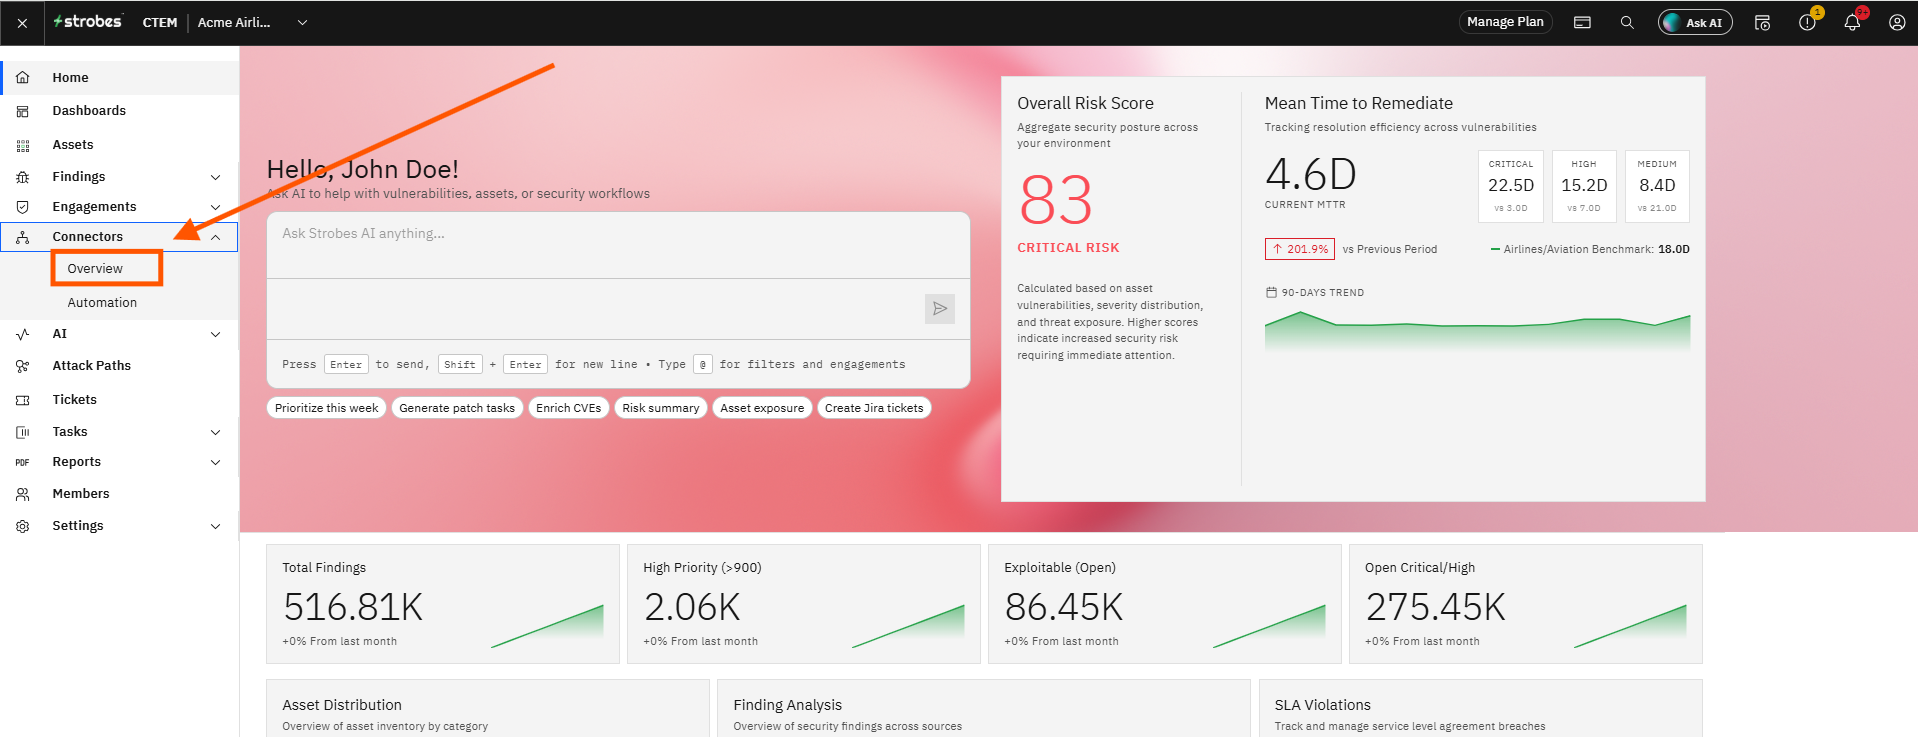
Click Connectors in the left sidebar. The Connectors page opens, showing the Look for Connectors search bar, any Installed Connectors, and the Available Connectors list.
Step 2 — Search for Qualys VMDR
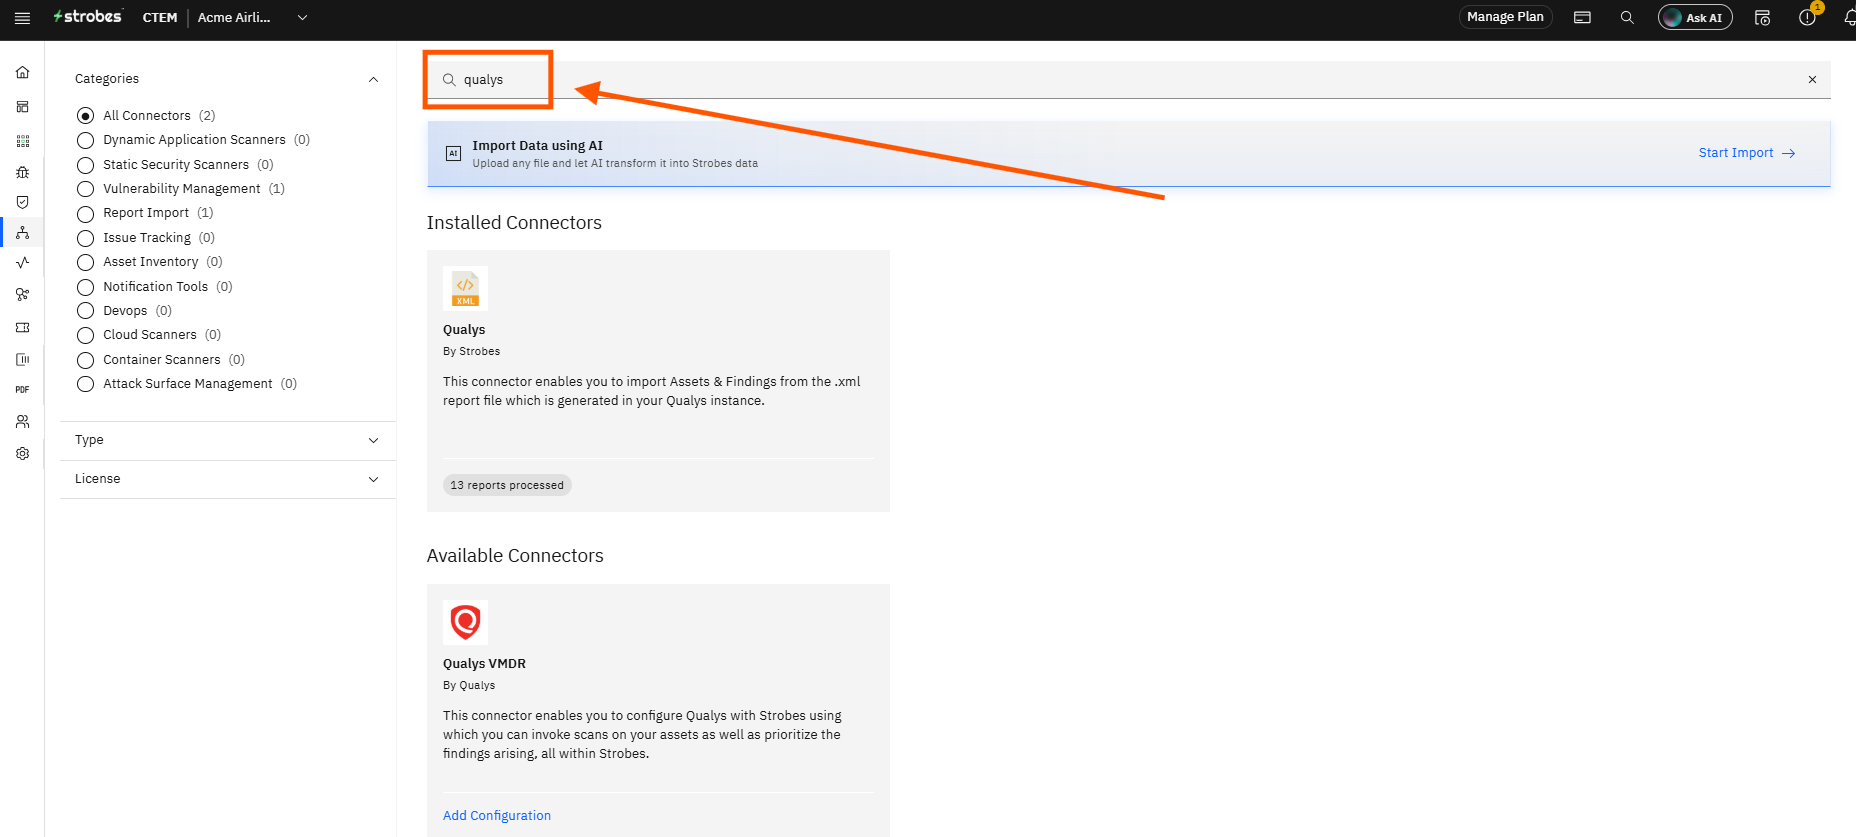
Click the Look for Connectors search bar and type Qualys. The Qualys VMDR connector card appears showing the connector description and any existing configurations.
Step 3 — Click the Qualys VMDR Card
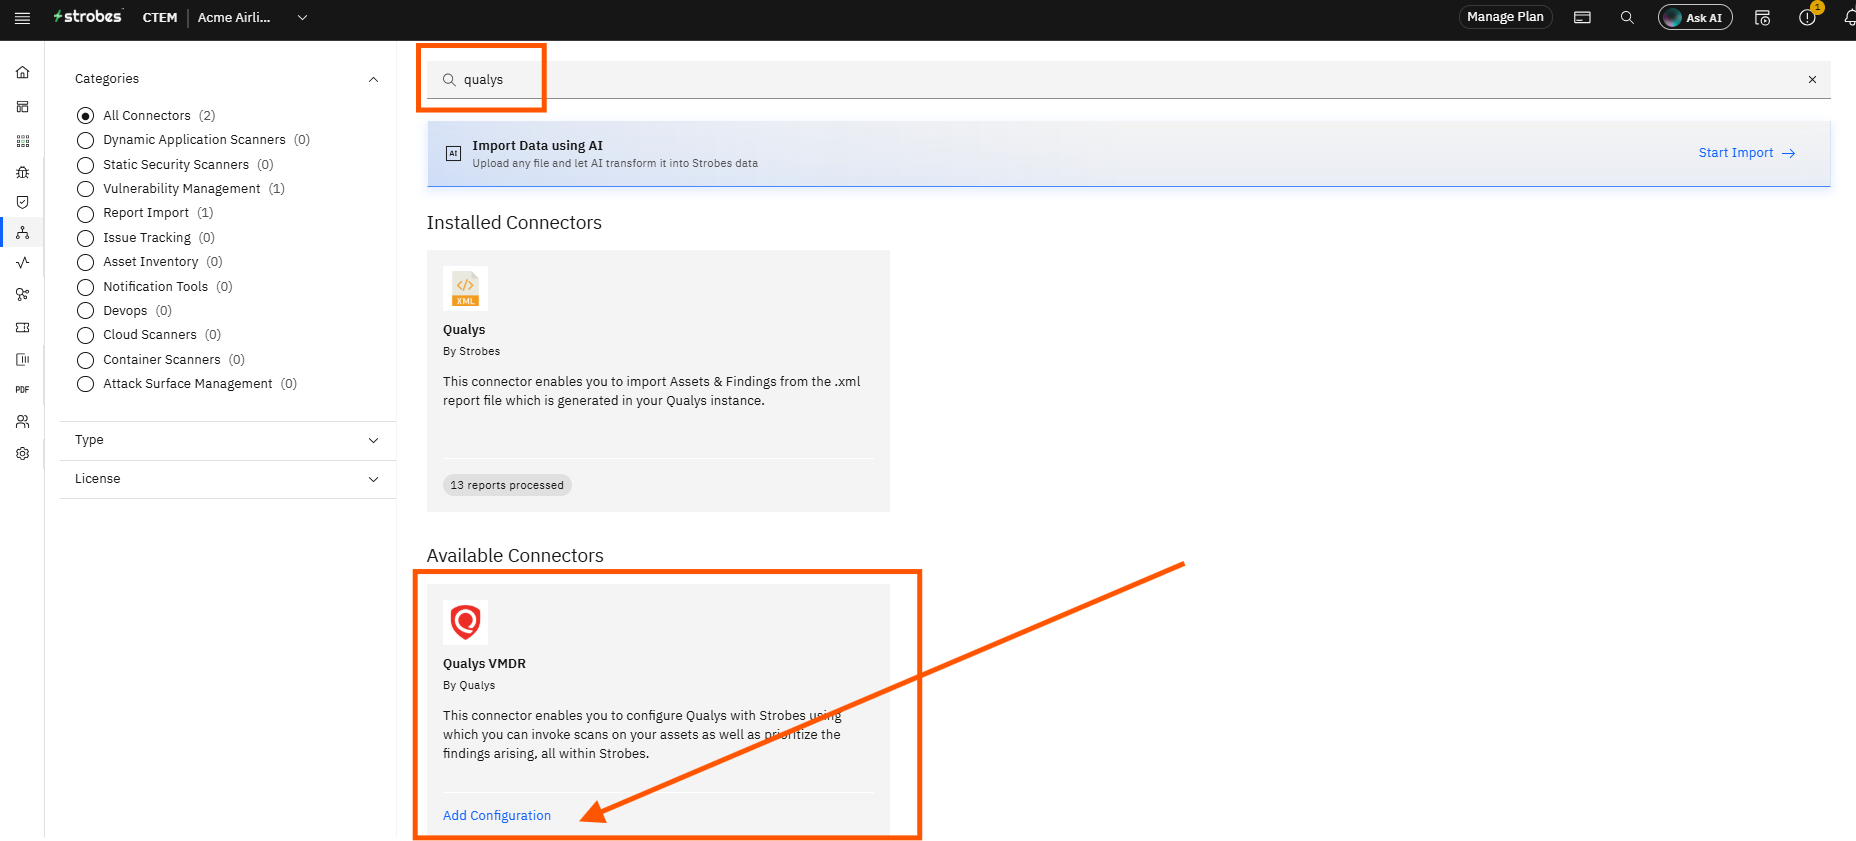
Click the Qualys VMDR card. The connector detail panel opens. Any existing workflows appear in the Workflows panel on the left. A + icon in the Workflows panel header lets you add a new workflow.
Step 4 — Click the Configuration Name Field and Enter a Name
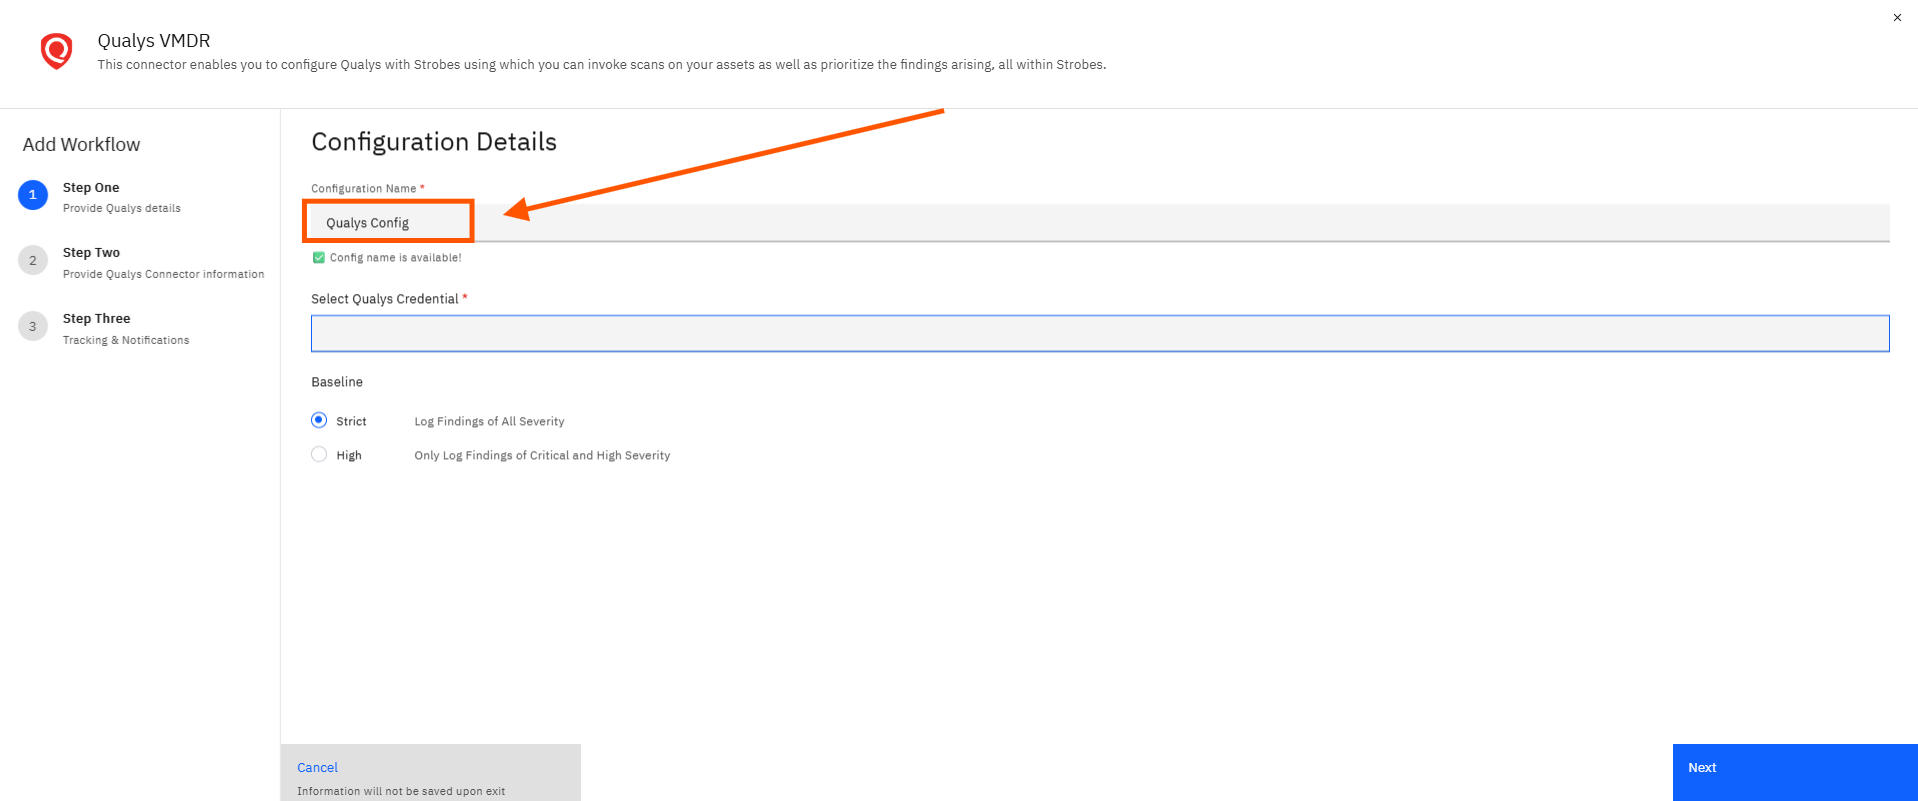
Click the Configuration Name field and type a unique name for this configuration. A green "Config name is available!" message confirms the name is not already in use. Use a name that identifies the Qualys environment or team being connected.
Step 5 — Open the Select Qualys Credential Dropdown
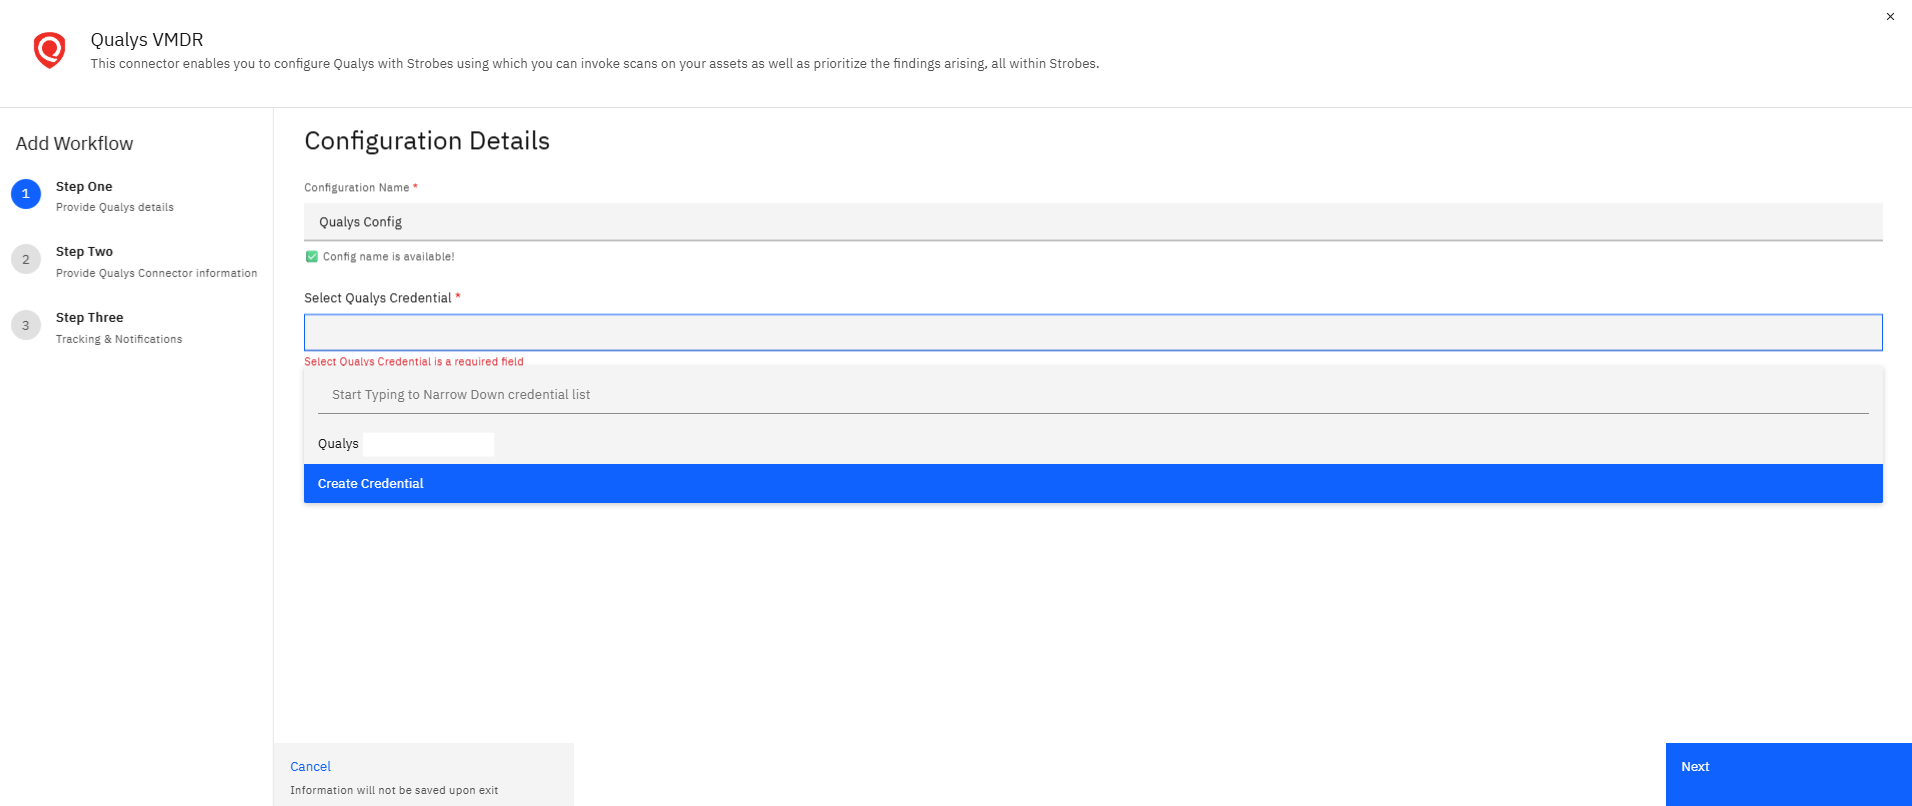
Click the Select Qualys Credential dropdown. Any saved Qualys credentials appear in the list. If you already have a Qualys credential saved, skip ahead to Step 13 to select it. If you need to create one, continue with the next step.
Step 6 — Click Create Credential
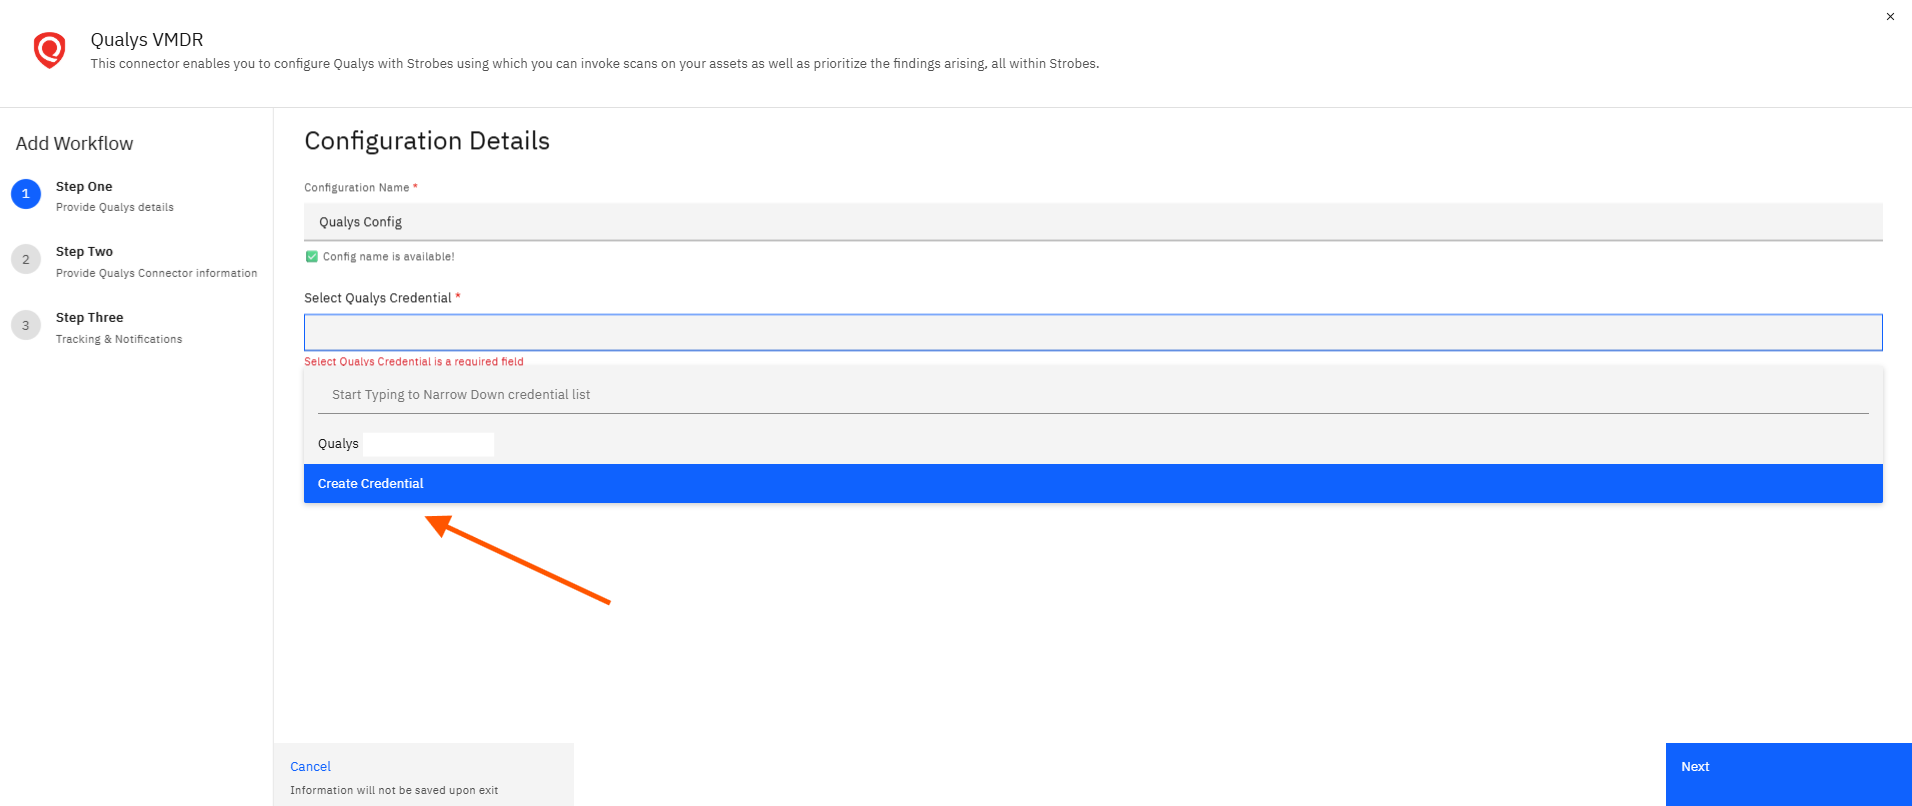
Click Create Credential in the dropdown. The Add a Credential modal opens with the credential type locked to Qualys. The modal contains four required fields: Name, Username, Password, and URL.
Step 7 — Click the Name Field and Enter a Credential Name
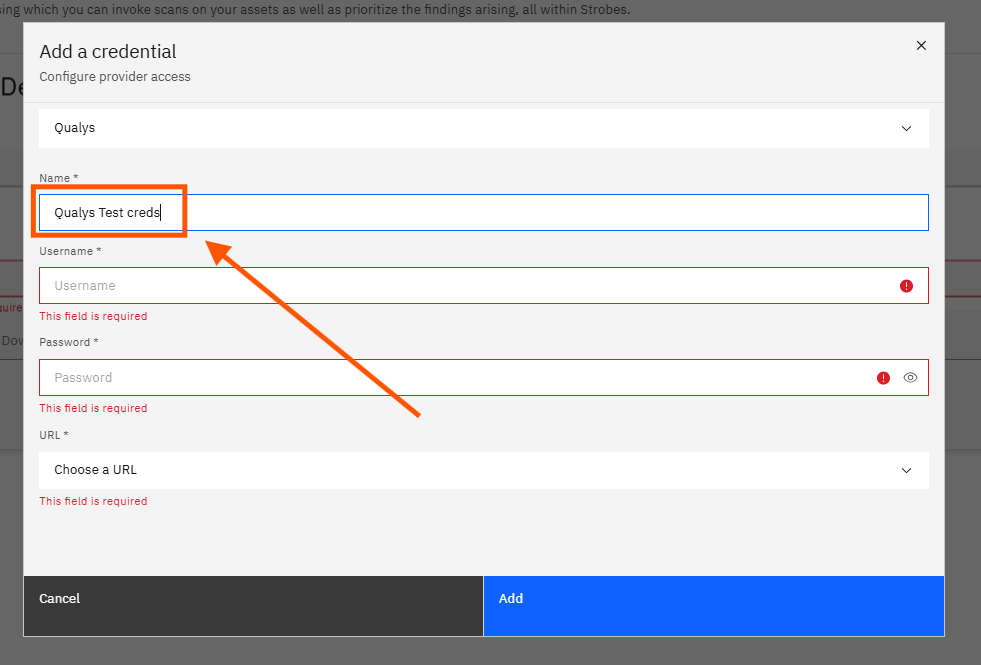
Click the Name field and type a name for this credential. This name identifies the credential in Strobes and appears in the credential dropdown when you configure Qualys connector workflows. Use a name that identifies the Qualys environment, for example: Prod Qualys.
Step 8 — Click the Username Field and Enter Your Qualys Username
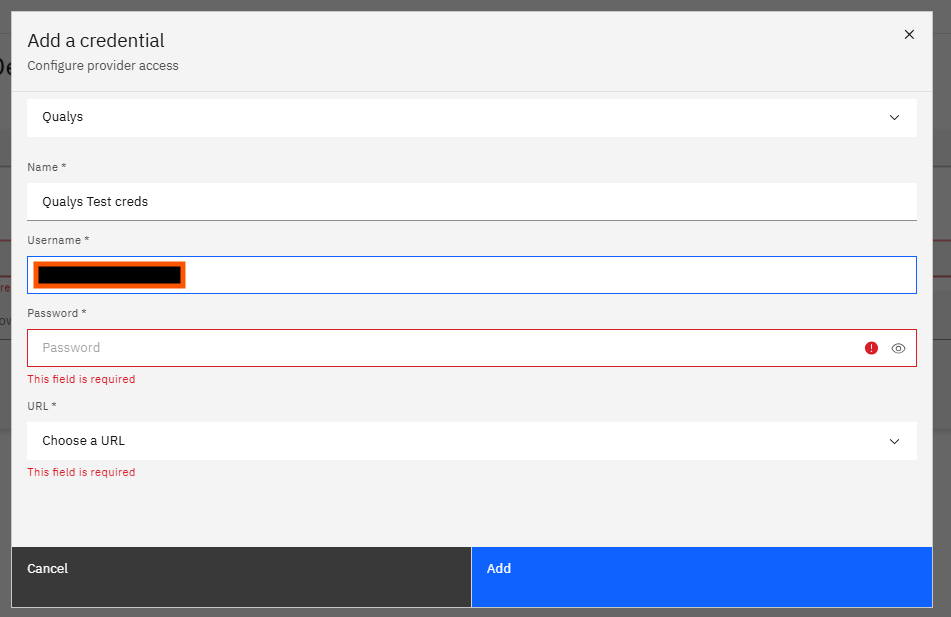
Click the Username field and type your Qualys username. This is the username you use to log in to the Qualys platform.
Step 9 — Click the Password Field and Enter Your Qualys Password
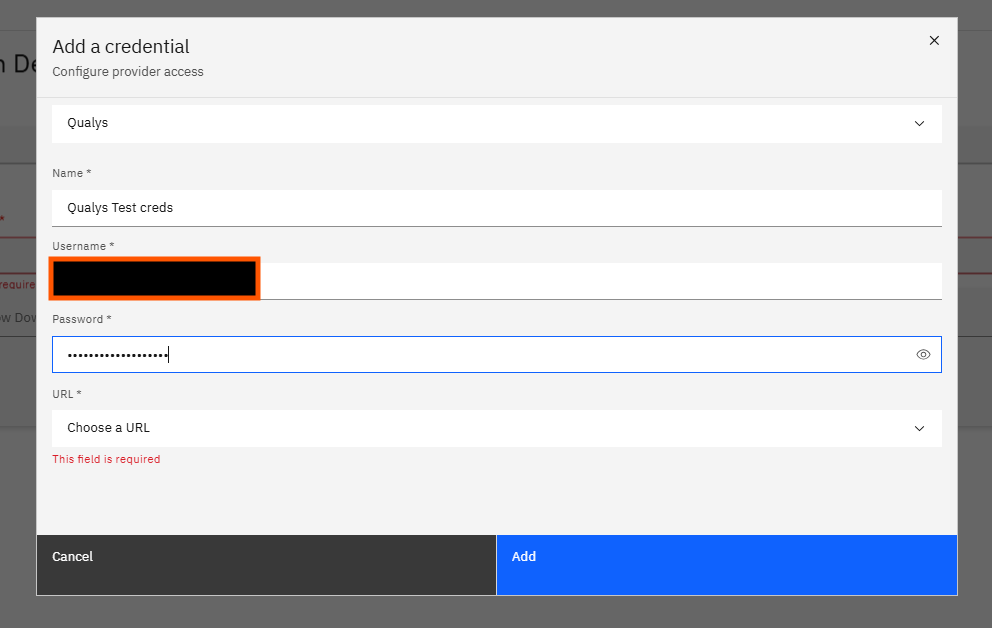
Click the Password field and type your Qualys password. The value is masked by default. Click the eye icon to verify the entry before saving.
Step 10 — Open the URL Dropdown and Select Your Qualys Platform URL
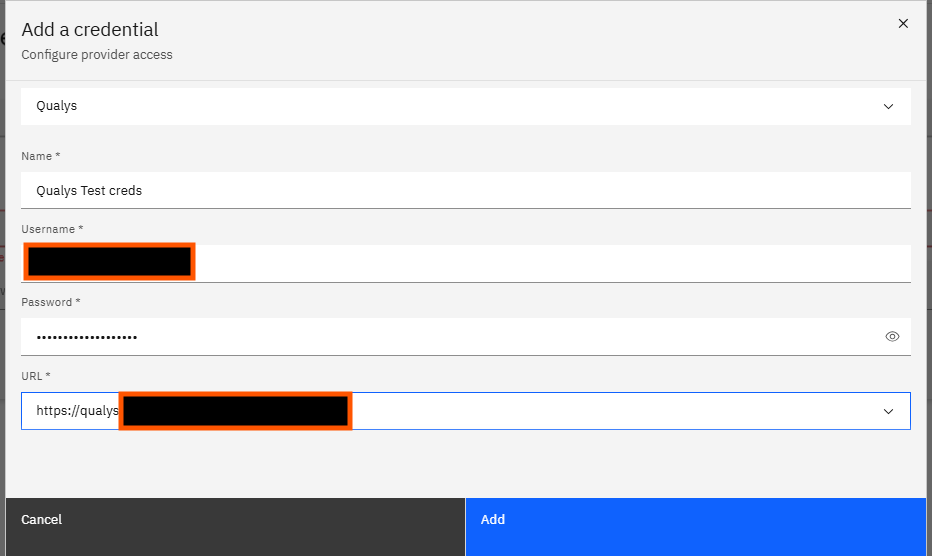
Click the URL dropdown and select the URL that matches your Qualys subscription. The dropdown lists the available Qualys platform URLs. Select the one that corresponds to your Qualys region or subscription type.
Step 11 — Click Add
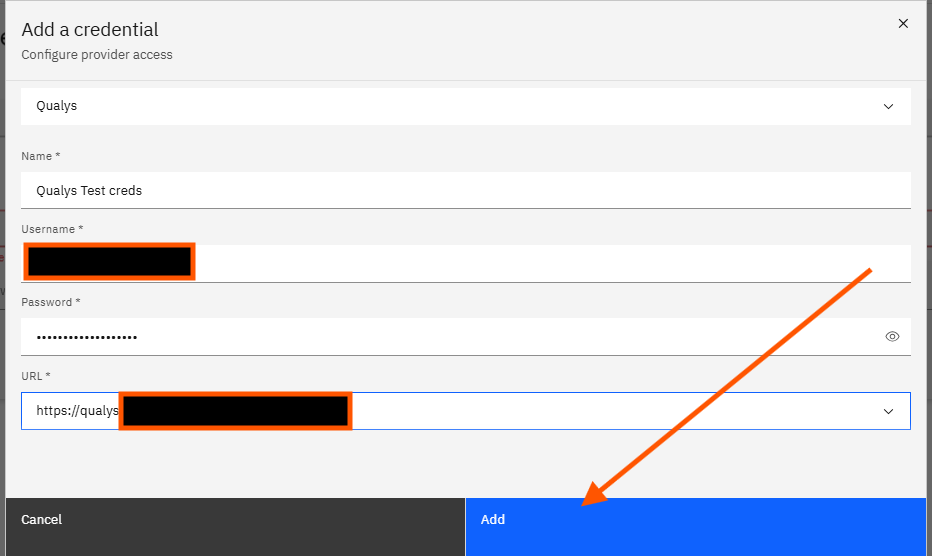
Click Add. Strobes saves the Qualys credential. The modal closes and you return to the Add Workflow wizard.
Step 12 — Select Your Qualys Credential
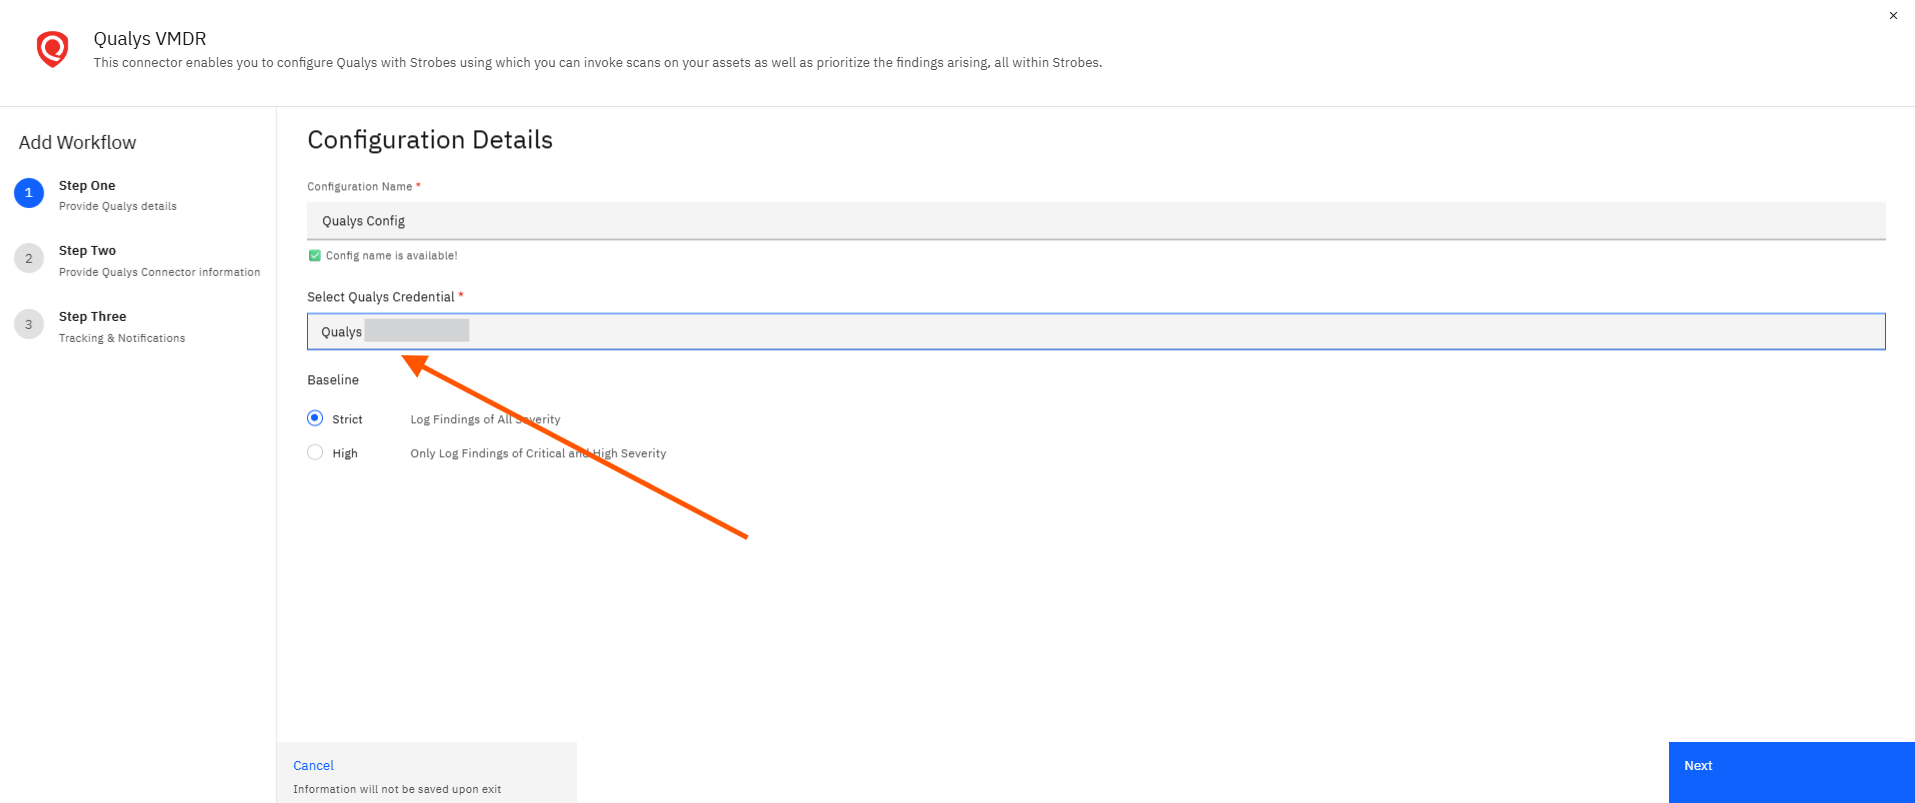
Click the Select Qualys Credential dropdown and select your saved Qualys credential. The dropdown closes and the credential name appears in the field.
Step 13 — Review the Baseline Selection
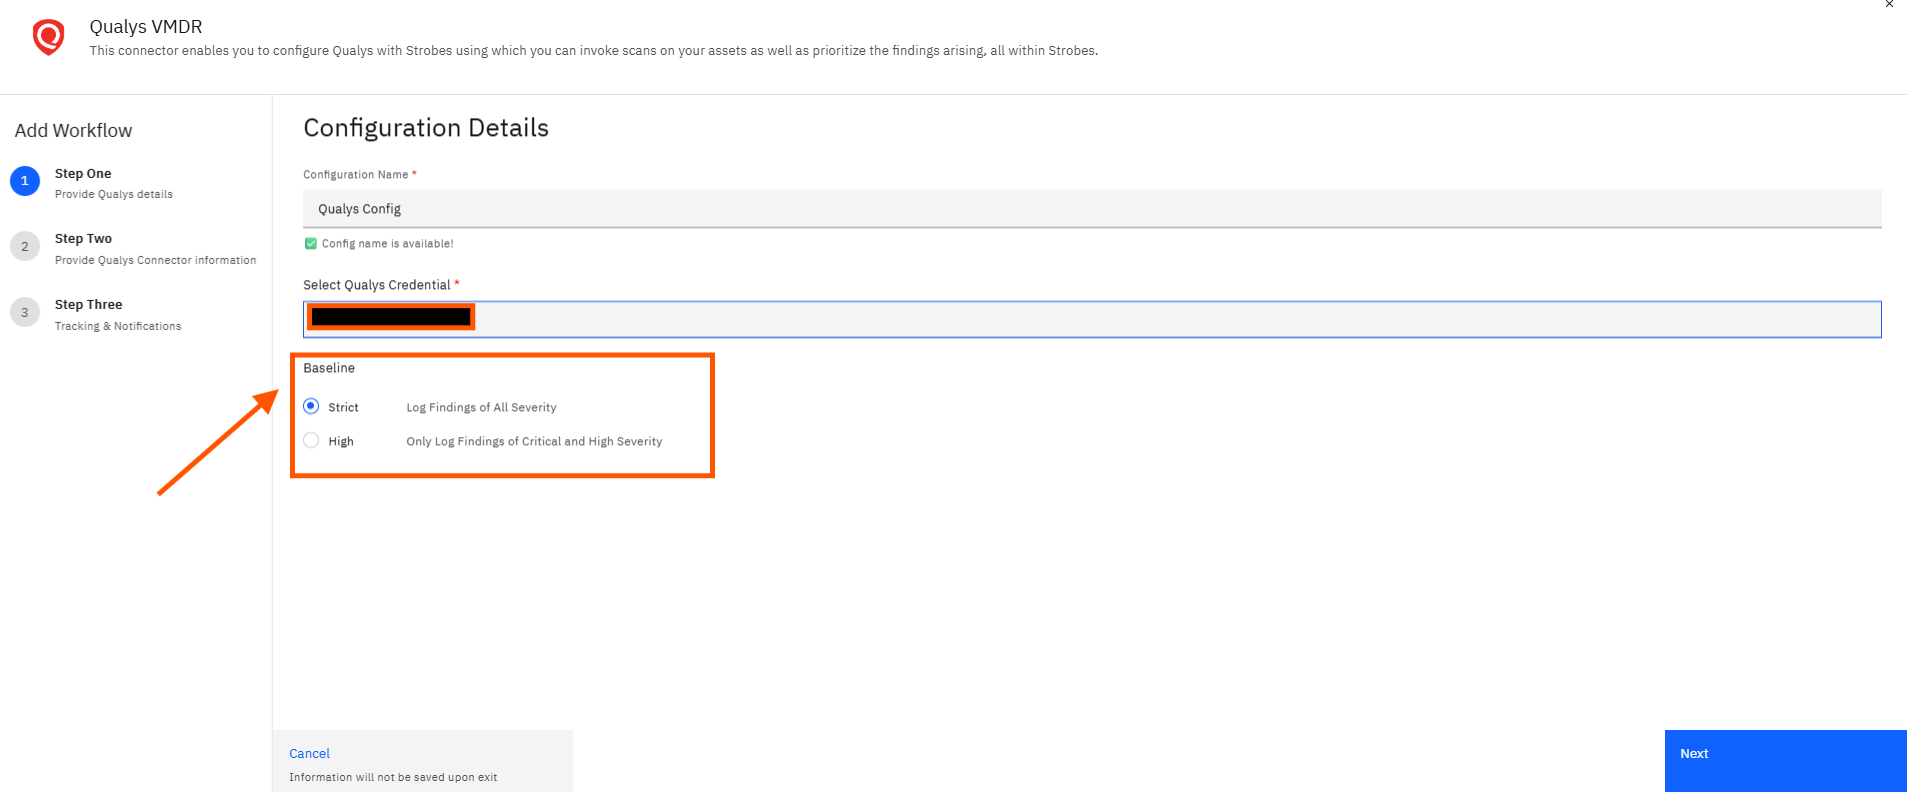
Review the Baseline selection. Two options are available:
- Strict — Log Findings of All Severity. Strobes imports findings at every severity level from Qualys.
- High — Only Log Findings of Critical and High Severity. Strobes imports only Critical and High severity findings.
Strict is selected by default. Click High if you want to limit imported findings to Critical and High severity only.
Step 14 — Click Next
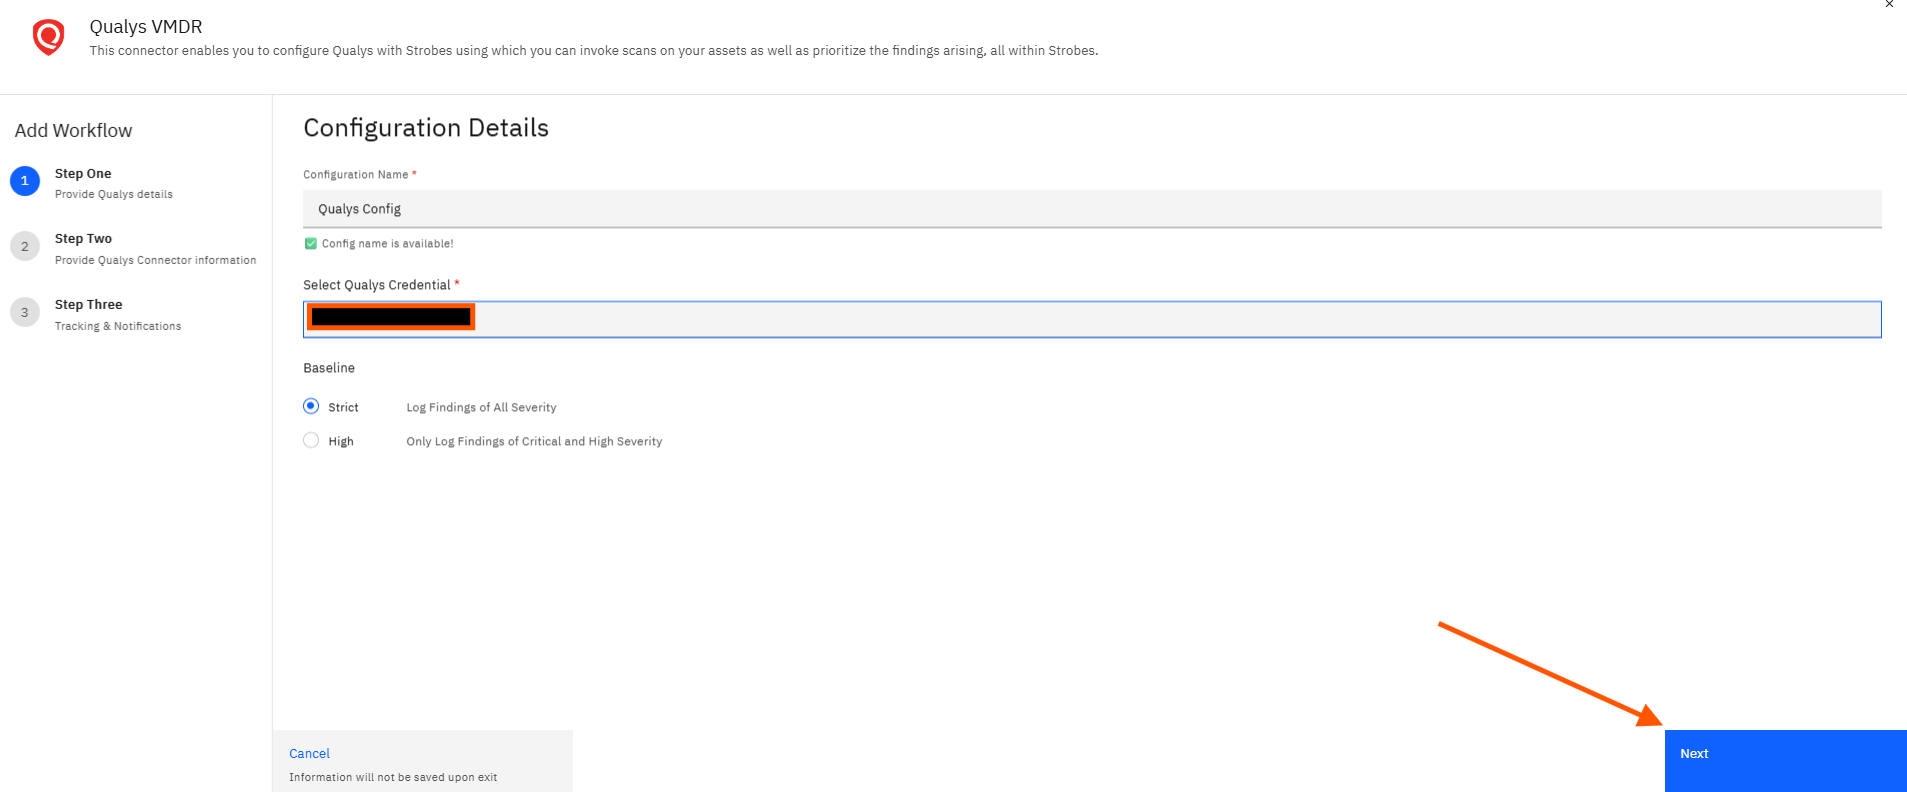
Click Next. Step One is marked complete and the wizard advances to Step Two.
Step Two: Provide Qualys Connector Information
Step 15 — Select an Agent from the Agents Dropdown
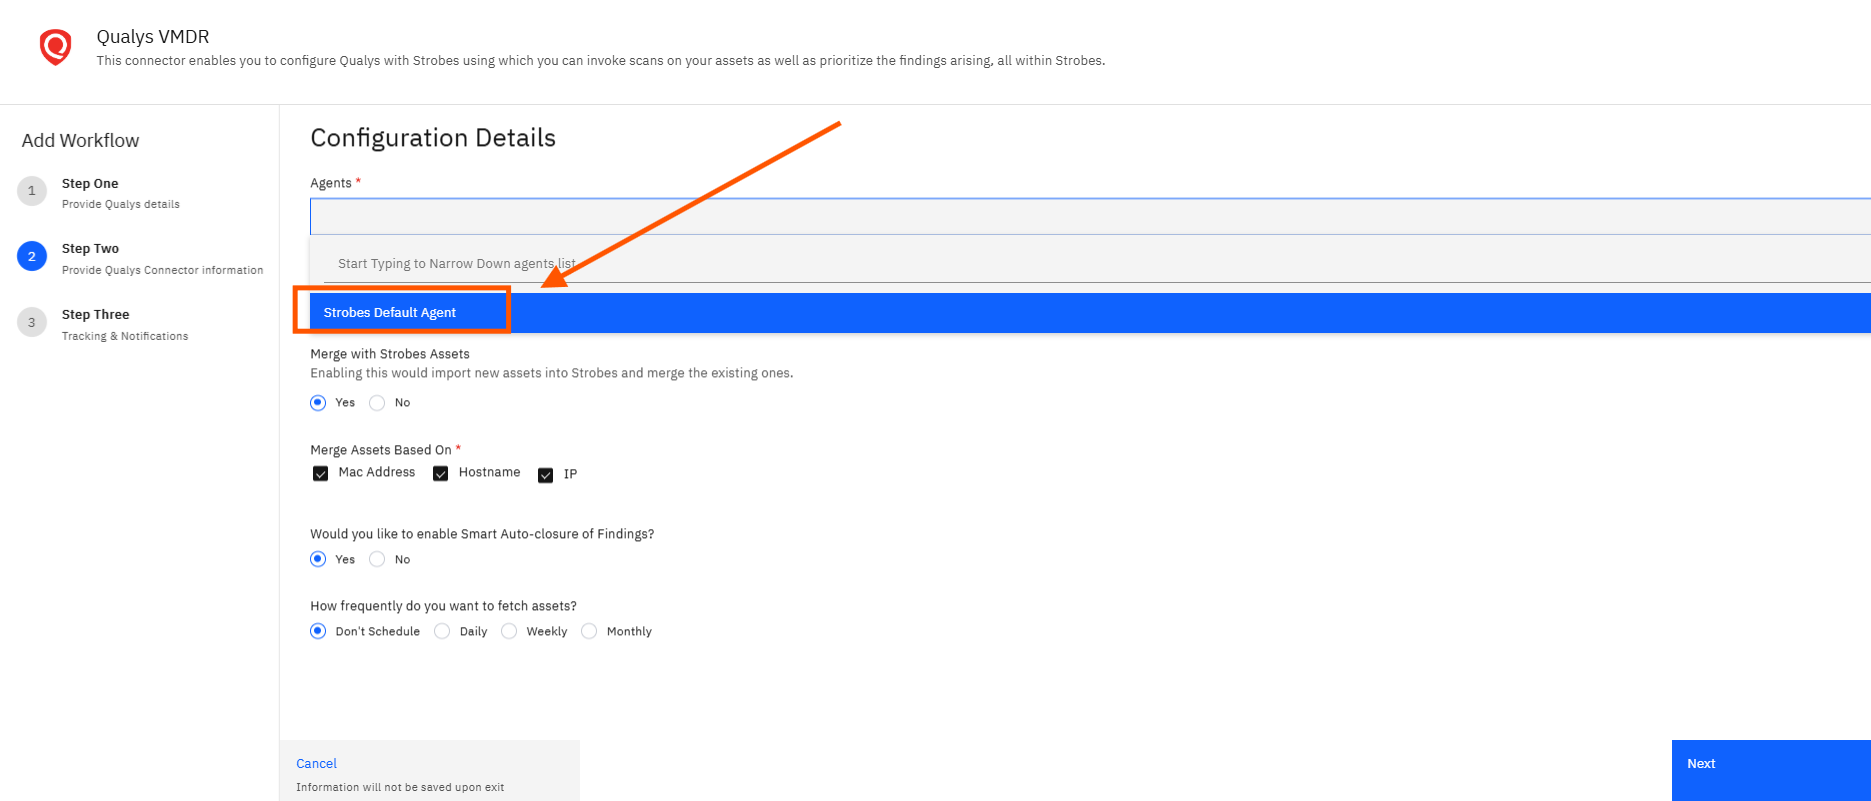
Click the Agents dropdown and select the Strobes agent that will run this connector. The Strobes Default Agent is the standard option for most setups. Select a different agent only if your organization uses multiple agents for different environments.
Step 16 — Review the Merge with Strobes Assets Setting
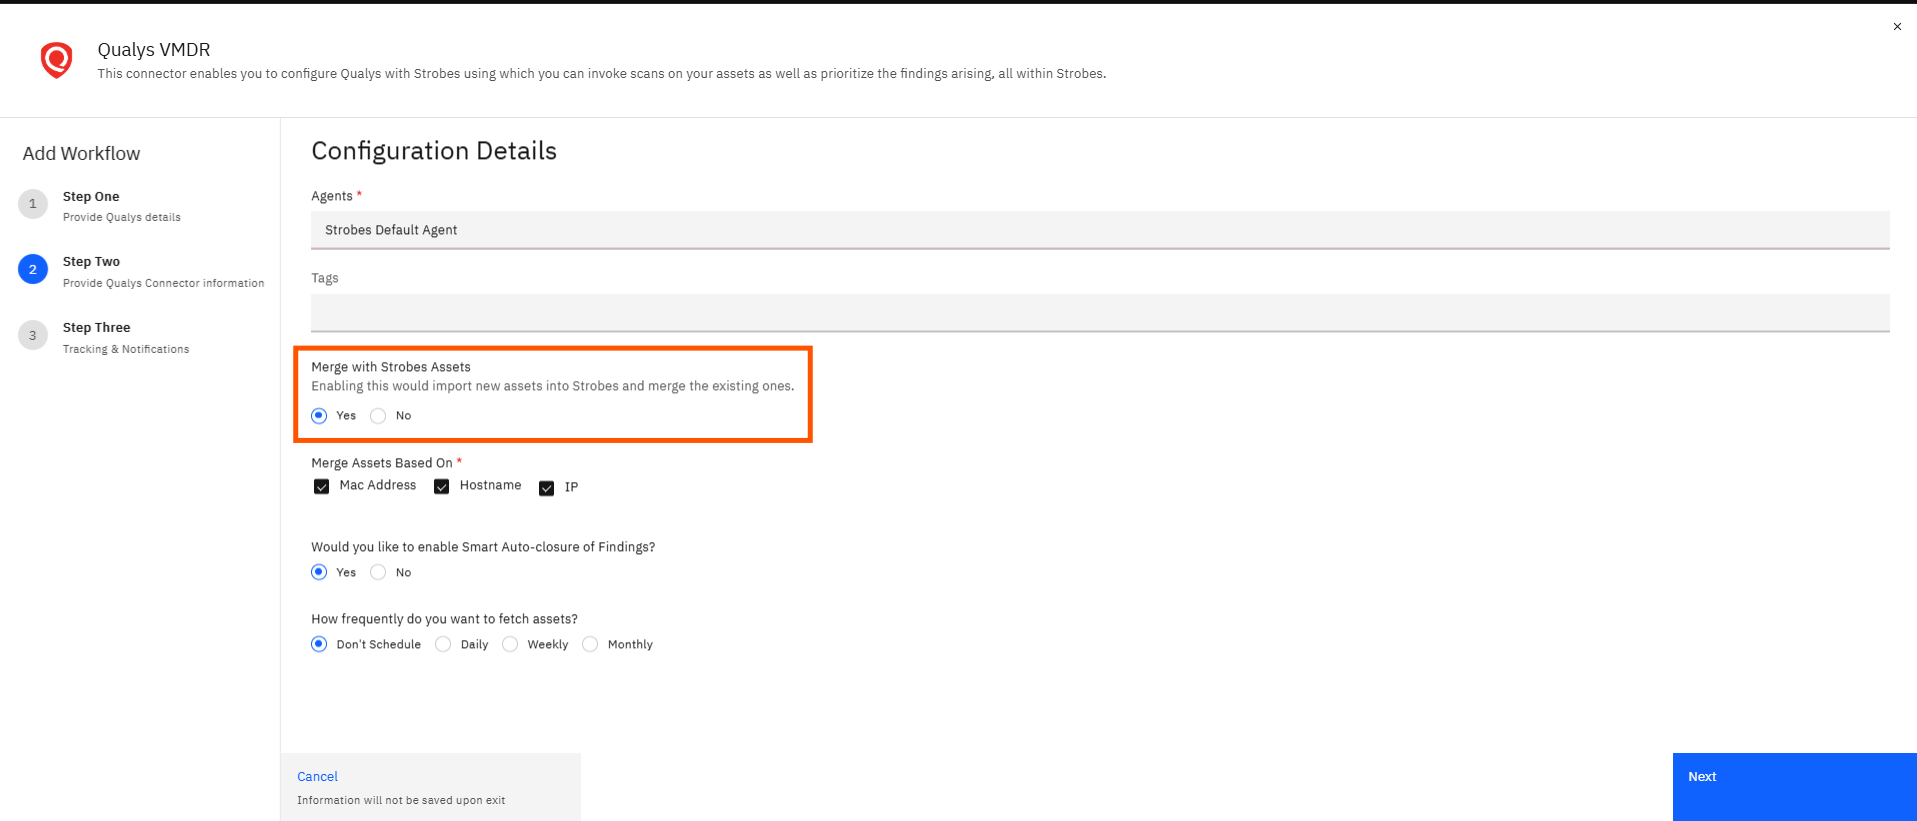
Review the Merge with Strobes Assets setting. When set to Yes (default), Strobes imports new assets from Qualys and merges them with any existing assets already in Strobes. Set to No if you do not want Qualys assets imported.
Step 17 — Review the Merge Assets Based On Checkboxes
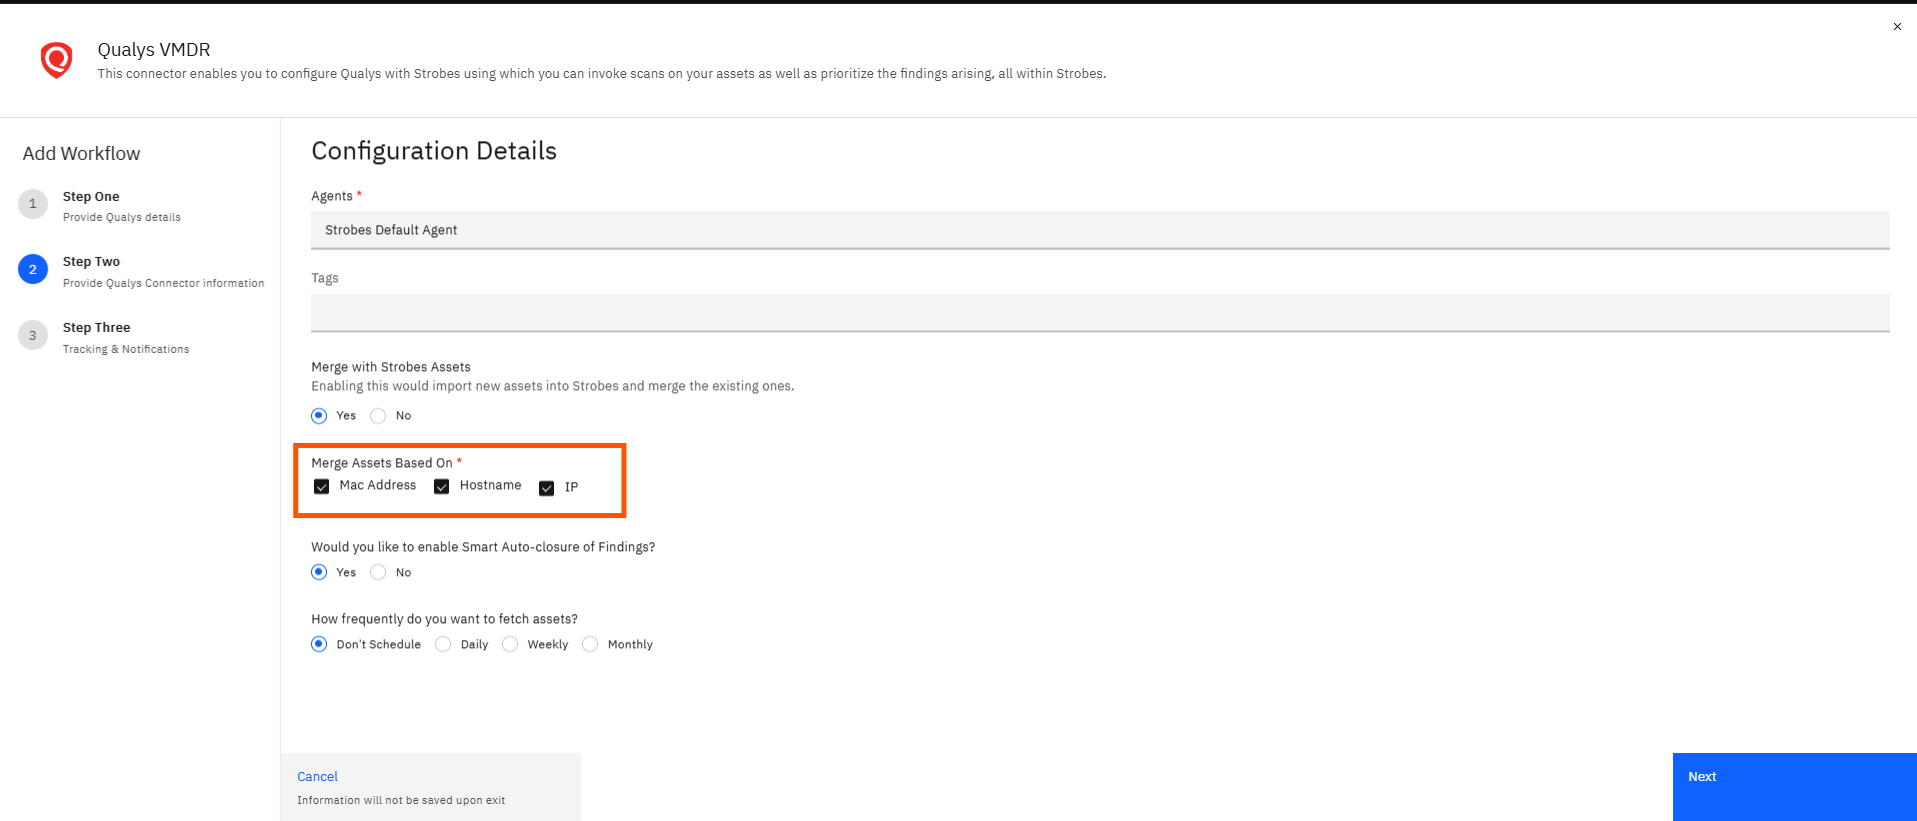
Review the Merge Assets Based On checkboxes. These controls determine which asset properties Strobes uses to match Qualys assets with existing Strobes assets during the merge. By default, Mac Address, Hostname, and IP are all selected. Uncheck any that are not relevant to your environment.
Step 18 — Review the Smart Auto-closure of Findings Setting
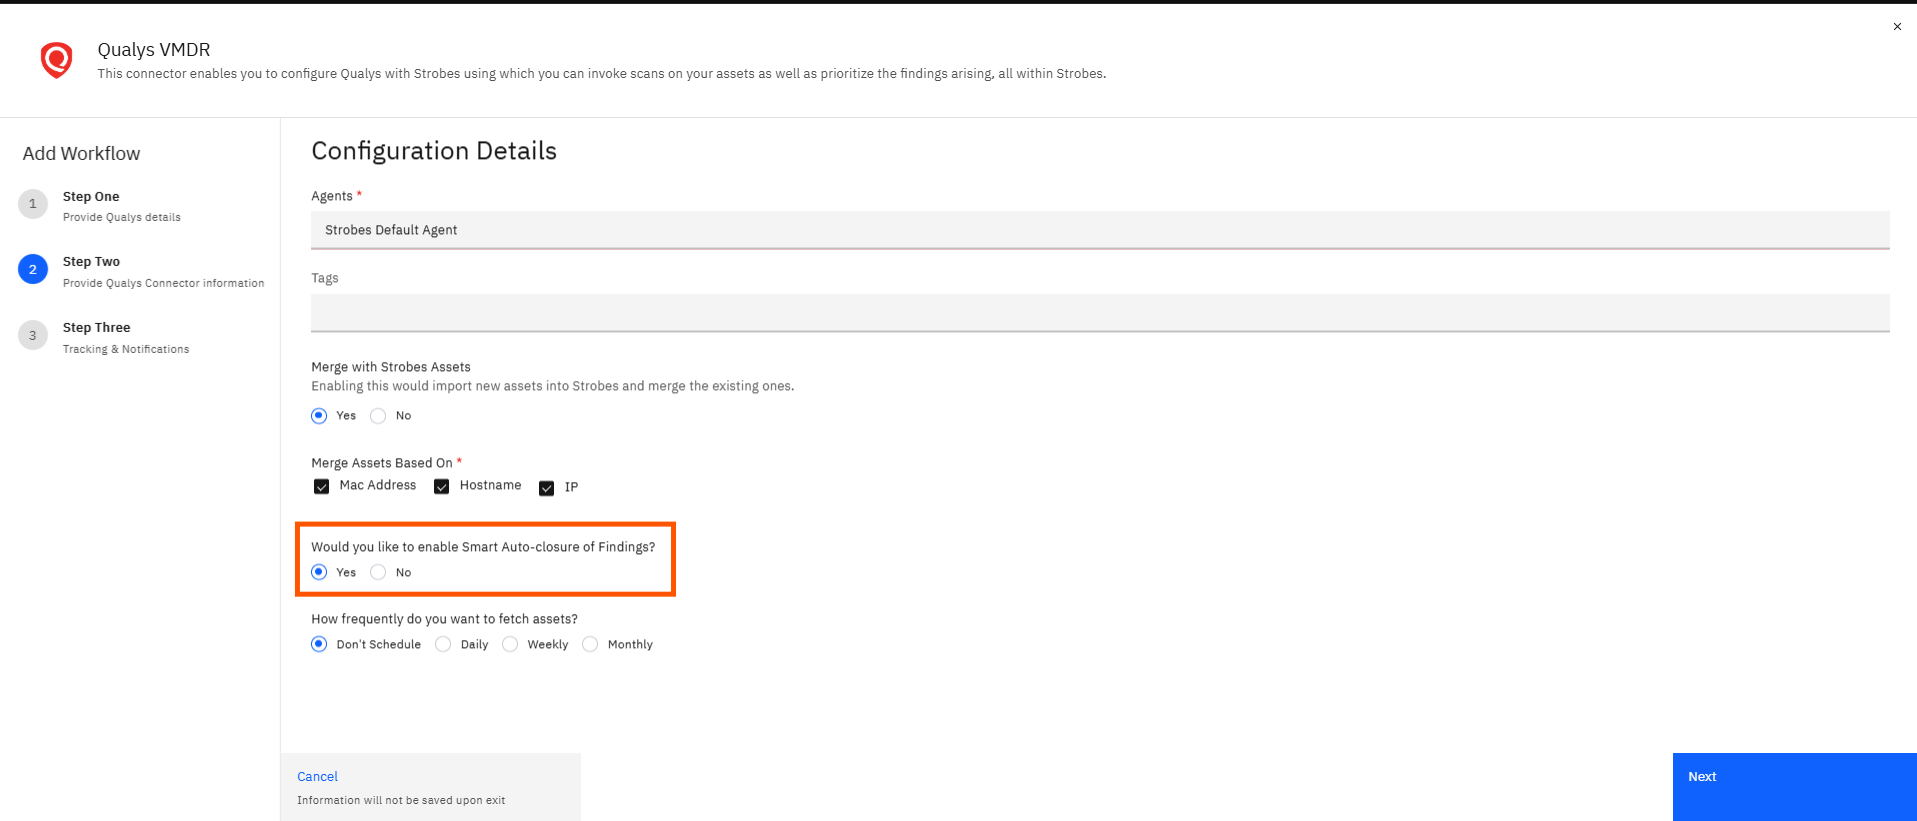
Review the Smart Auto-closure of Findings setting. When set to Yes (default), Strobes automatically closes findings that are no longer reported by Qualys in subsequent syncs. Set to No to manage finding closure manually.
Step 19 — Review the Fetch Frequency Setting
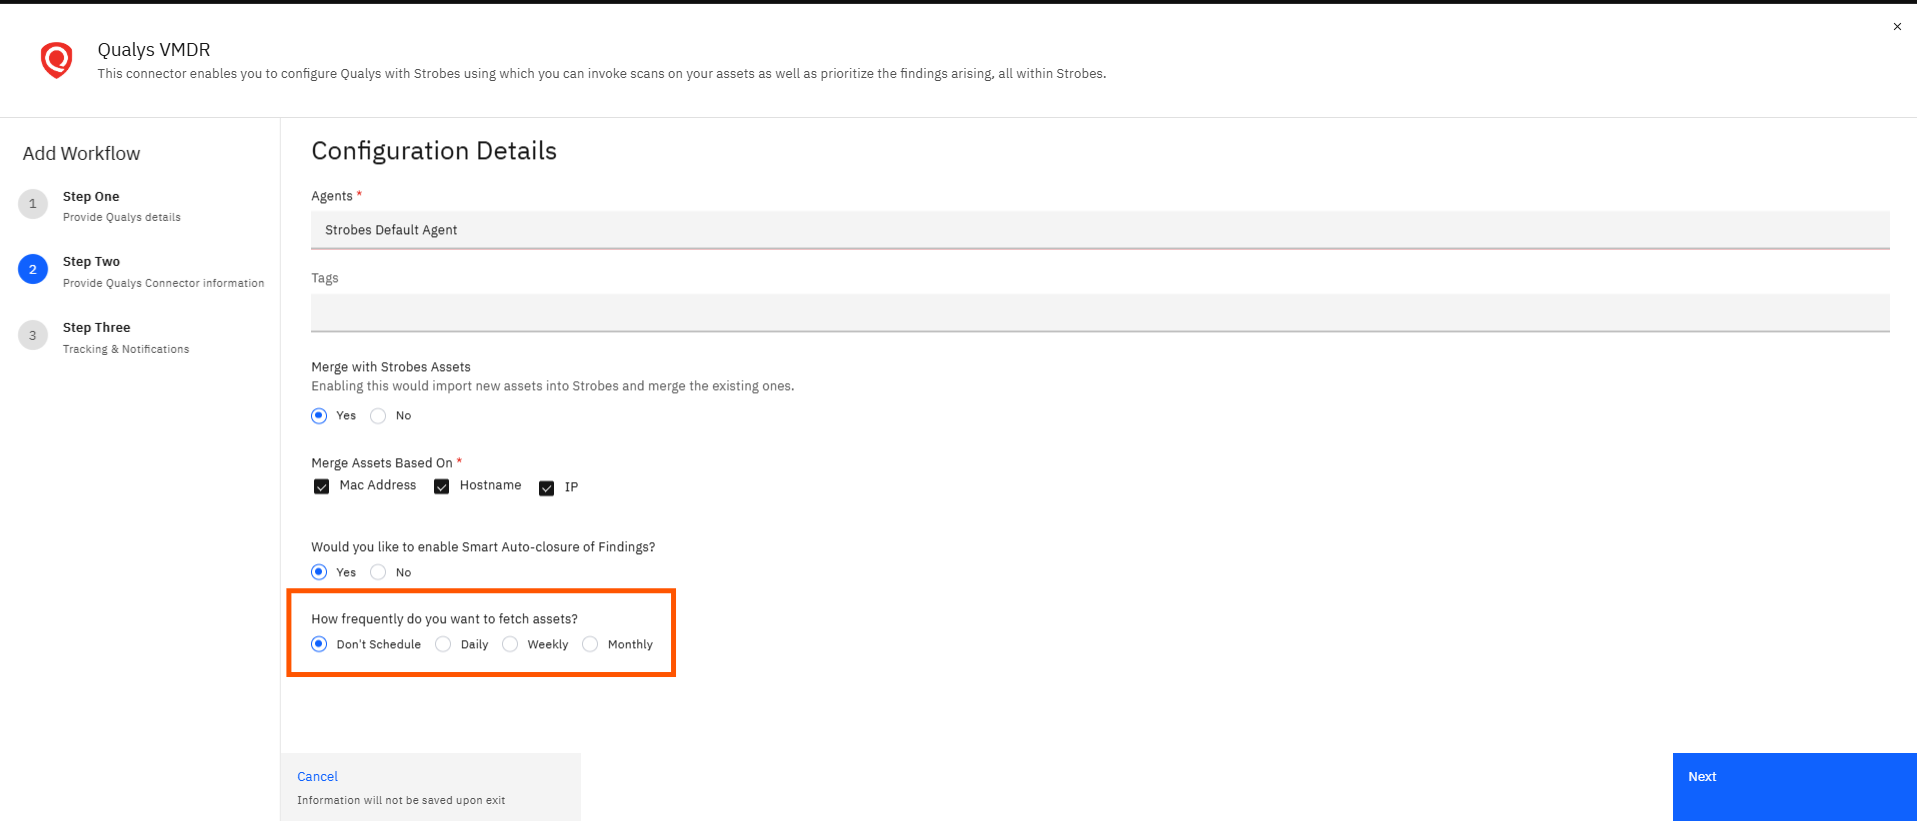
Review the How frequently do you want to fetch assets setting. Select how often Strobes should automatically pull data from Qualys:
- Don't Schedule — No automatic sync. Use Sync Now to trigger syncs manually.
- Daily — Strobes syncs once per day.
- Weekly — Strobes syncs once per week.
- Monthly — Strobes syncs once per month.
Don't Schedule is selected by default.
Step 20 — Click Next
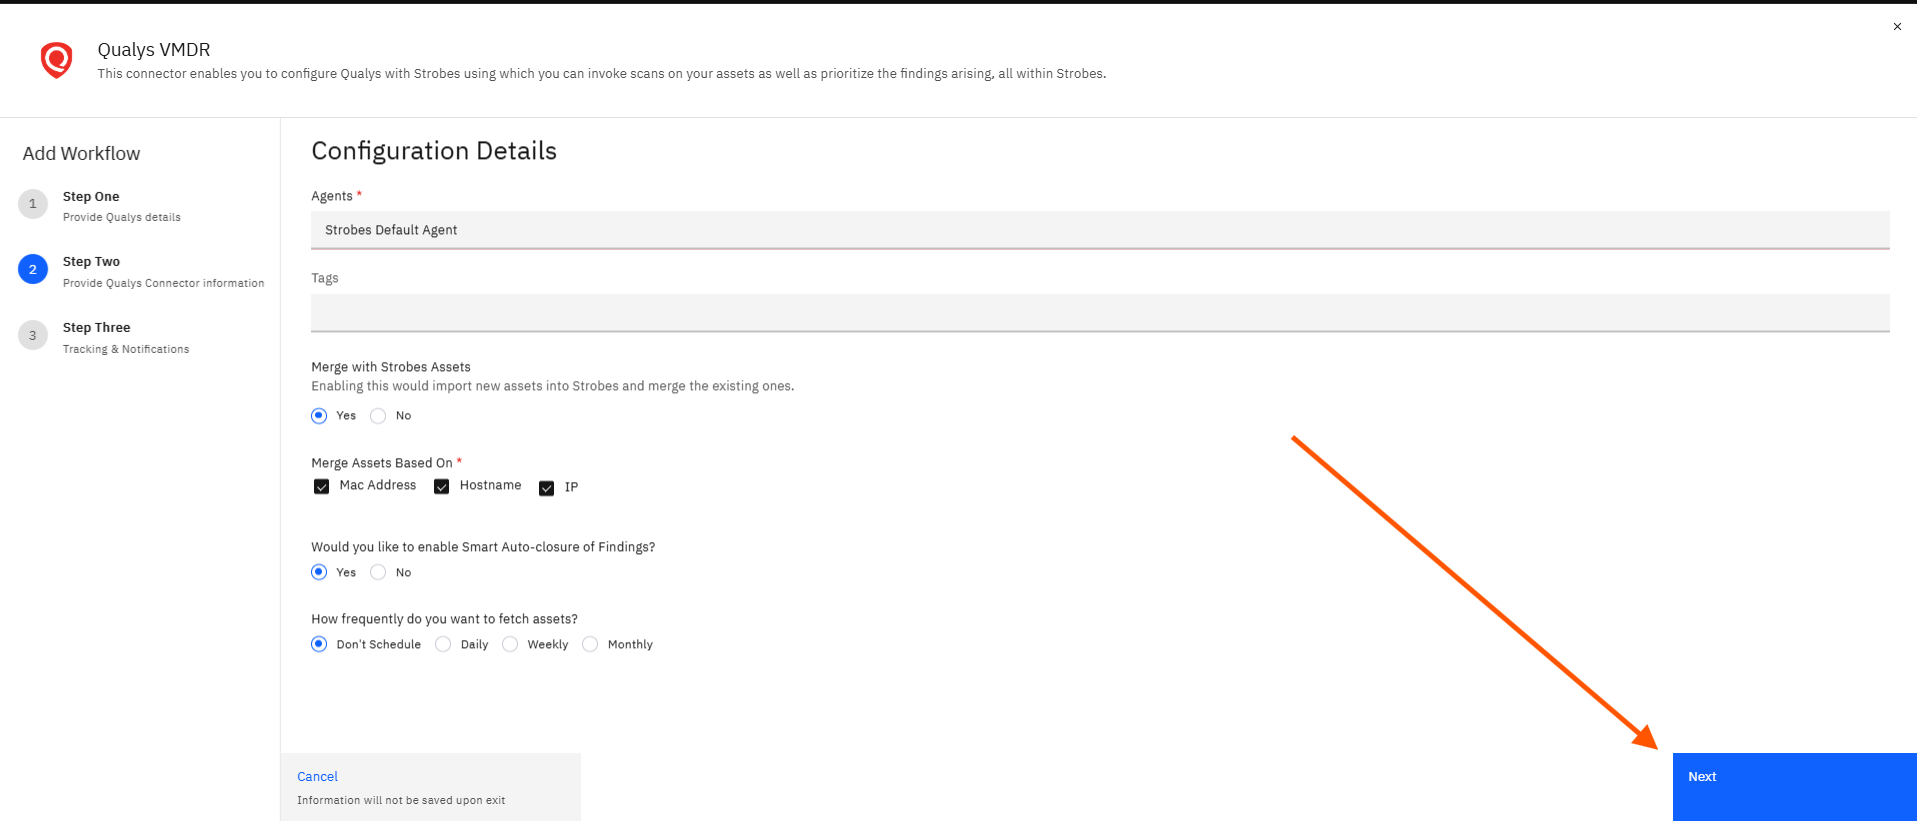
Click Next. Step Two is marked complete and the wizard advances to Step Three.
Step Three: Tracking & Notifications
Step 21 — Review the Tracking & Notifications Options
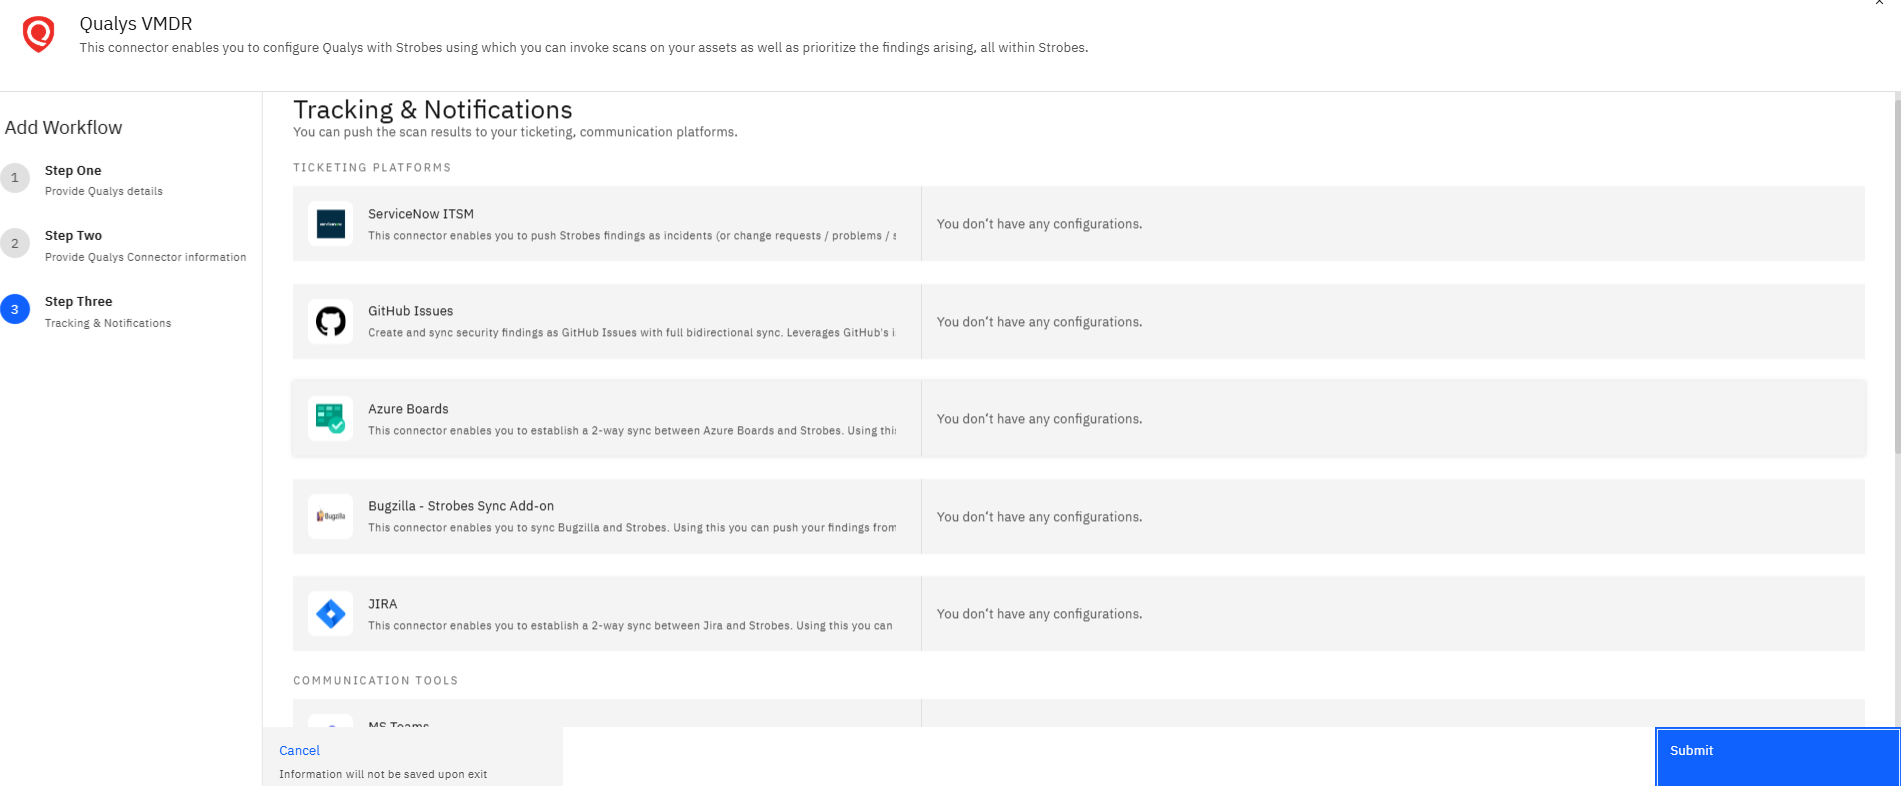
Review the Tracking & Notifications page. This step lets you link the Qualys connector to ticketing and communication platforms. Strobes will push scan results to any platform you have already configured. Each platform row shows a "You don't have any configurations." message if no connector has been set up yet for that platform. This step is optional — you can click Submit without selecting any platform and add integrations later.
Step 22 — Click Submit
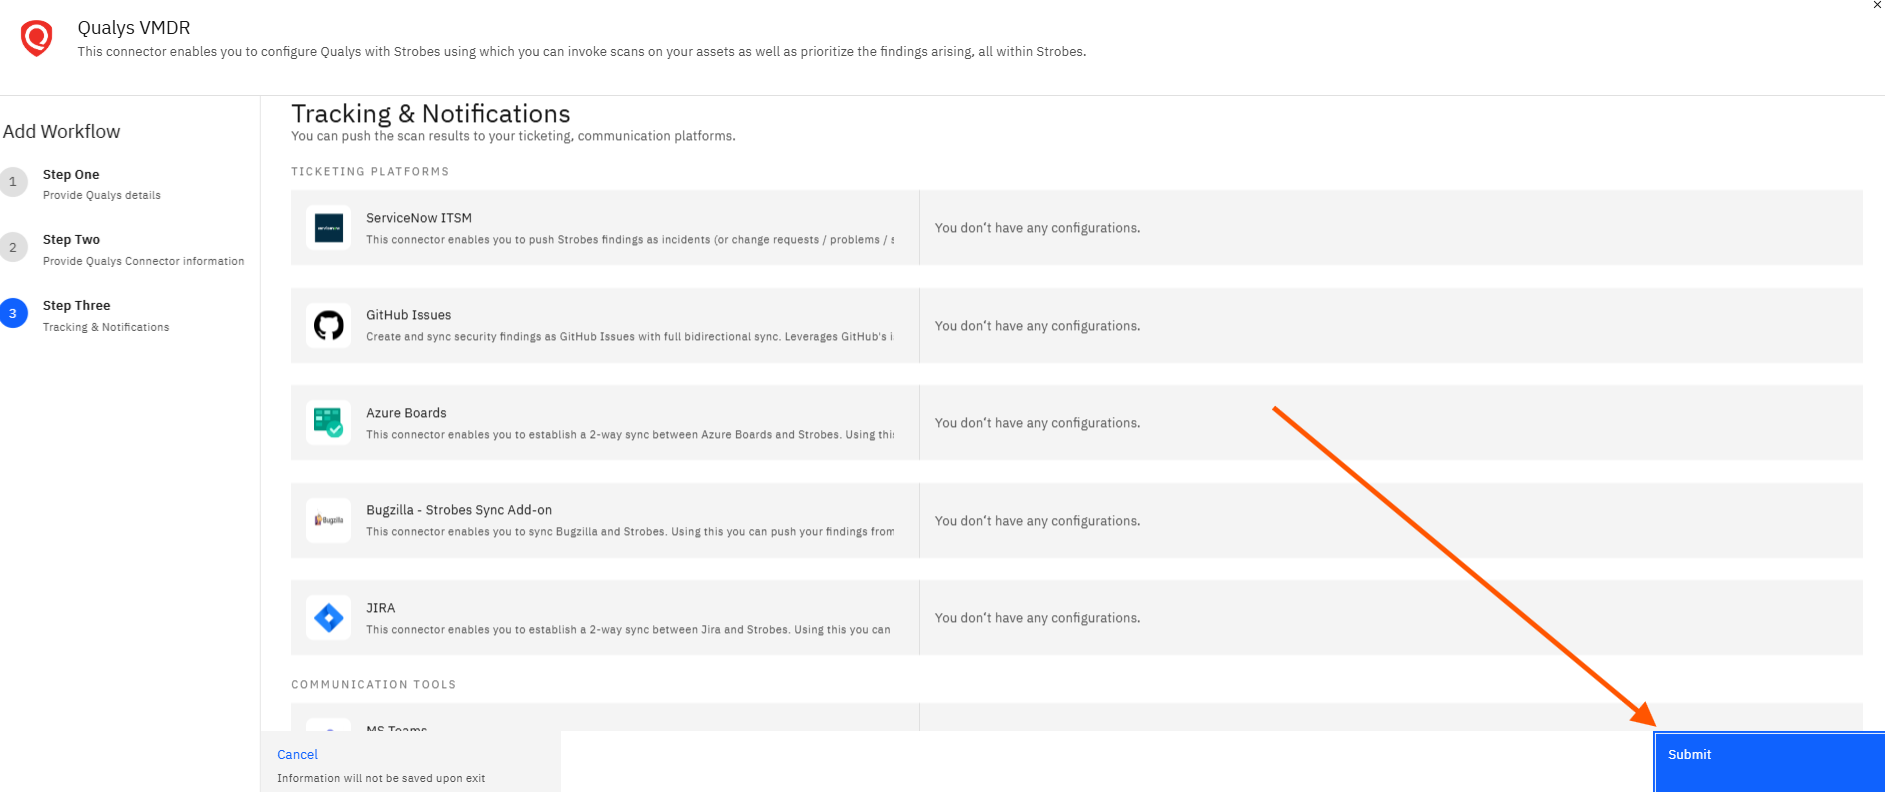
Click Submit. Strobes saves the Qualys VMDR workflow. The wizard closes and the connector detail page opens, showing your new workflow in the Workflows panel on the left and the Syncs tab active in the main area.
Trigger an Immediate Sync
Step 23 — Click Sync Now
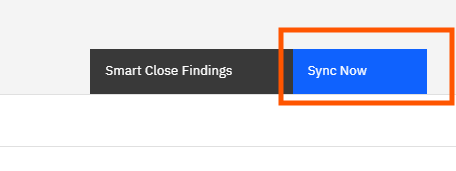
Click Sync Now in the top right corner of the workflow detail page. Strobes immediately starts a sync with Qualys. The Syncs tab updates to show the sync in progress. Once complete, the sync entry shows start time, finish time, total duration, finding status by severity, and sync metrics including new findings discovered and findings already seen in previous scans.
Tips
The Qualys credential you create during setup is reusable. If you configure multiple Qualys VMDR workflows, you can select the same saved credential from the dropdown each time instead of creating a new one.
The Baseline setting controls which findings Strobes imports. Strict imports findings at all severity levels. High imports only Critical and High severity findings. Choose based on the volume and signal-to-noise requirements of your security program.
Merge Assets Based On controls how duplicate assets are detected. Matching on Hostname and IP is sufficient for most environments. If your assets frequently change IP addresses or hostnames, check that Mac Address is also selected to ensure accurate deduplication.
Smart Auto-closure automatically resolves findings that Qualys no longer reports. This keeps your Strobes findings list current without manual cleanup. If you prefer to control when findings are closed, set this to No.
The fetch frequency setting schedules automatic syncs. Don't Schedule is the default and gives you full manual control via Sync Now. Use Daily or Weekly for environments where you want Strobes to stay continuously up to date without manual intervention.
Tracking & Notifications integrations are optional and can be added later. If you have not yet configured a ticketing or communication connector in Strobes, you can click Submit without linking one. Return to the workflow settings after adding the connector to enable notifications.