
Creating a Shell Using Shell Bridge in Strobes
What Is a Shell Bridge?
A Shell Bridge lets you connect a local machine or server to Strobes without opening inbound firewall ports. You download a lightweight agent binary, run a single connect command on the target machine, and Strobes establishes the shell connection outbound. Once connected, Strobes can use that shell to execute commands on the machine as part of security assessments.
Before You Start
- Role required: Owner or Manager access on your Strobes account.
- API key: You will need your Strobes API key from Settings > API Access.
- Machine access: You need administrator terminal access (PowerShell on Windows, Terminal on Linux/macOS) on the machine you want to connect.
- Internet access: The target machine must be able to reach your Strobes instance URL outbound.
Part 1 — Create the Shell in Strobes
Step 1 — Click Settings in the Left Sidebar
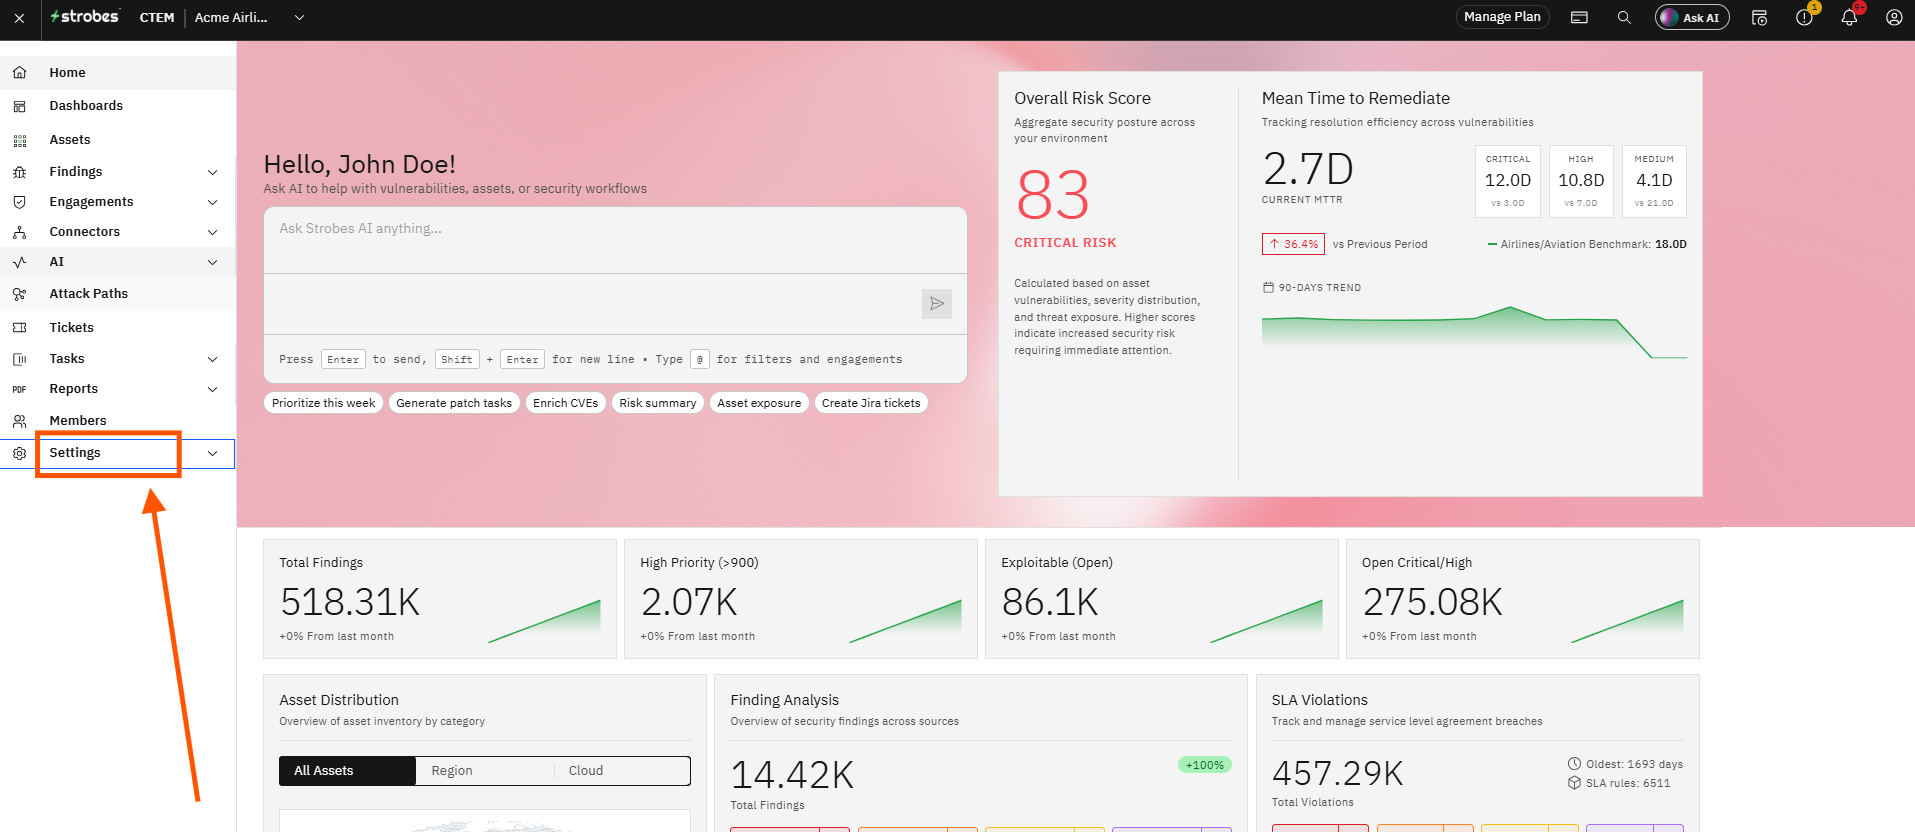
Click Settings in the left sidebar. The Settings section opens with a submenu of configuration options.
Step 2 — Click Shells
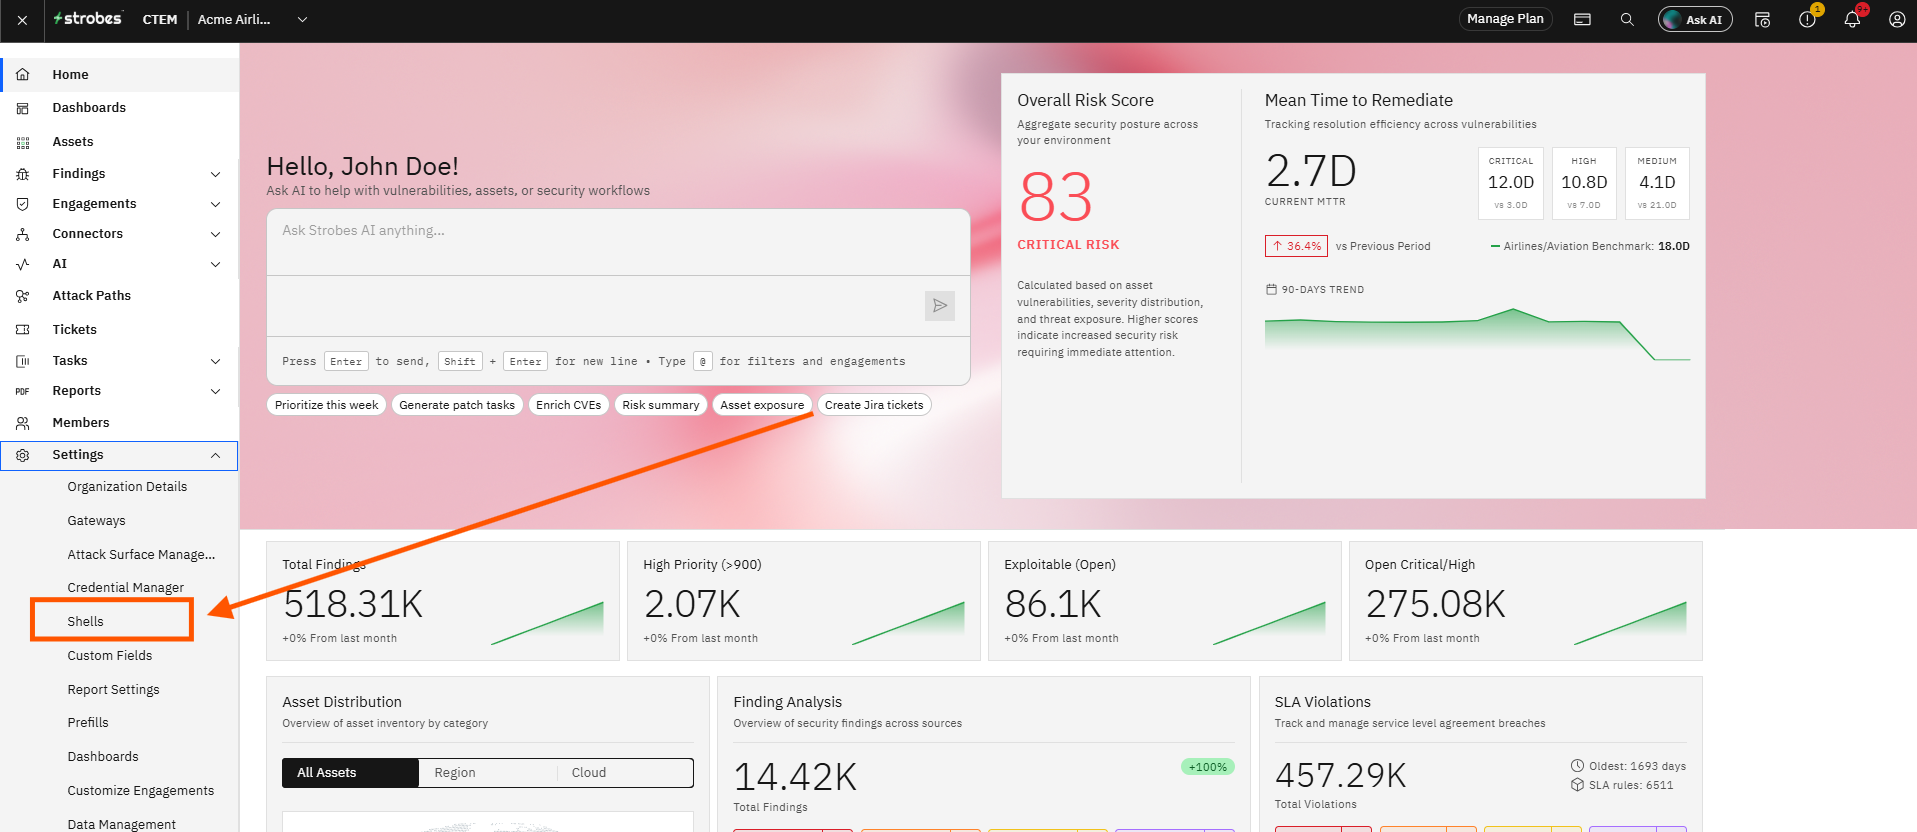
Click Shells in the Settings sidebar. The Shells page opens showing a table of existing shells and a Download Shell Bridge section with agent binaries for each supported operating system.
Step 3 — Click Create Shell
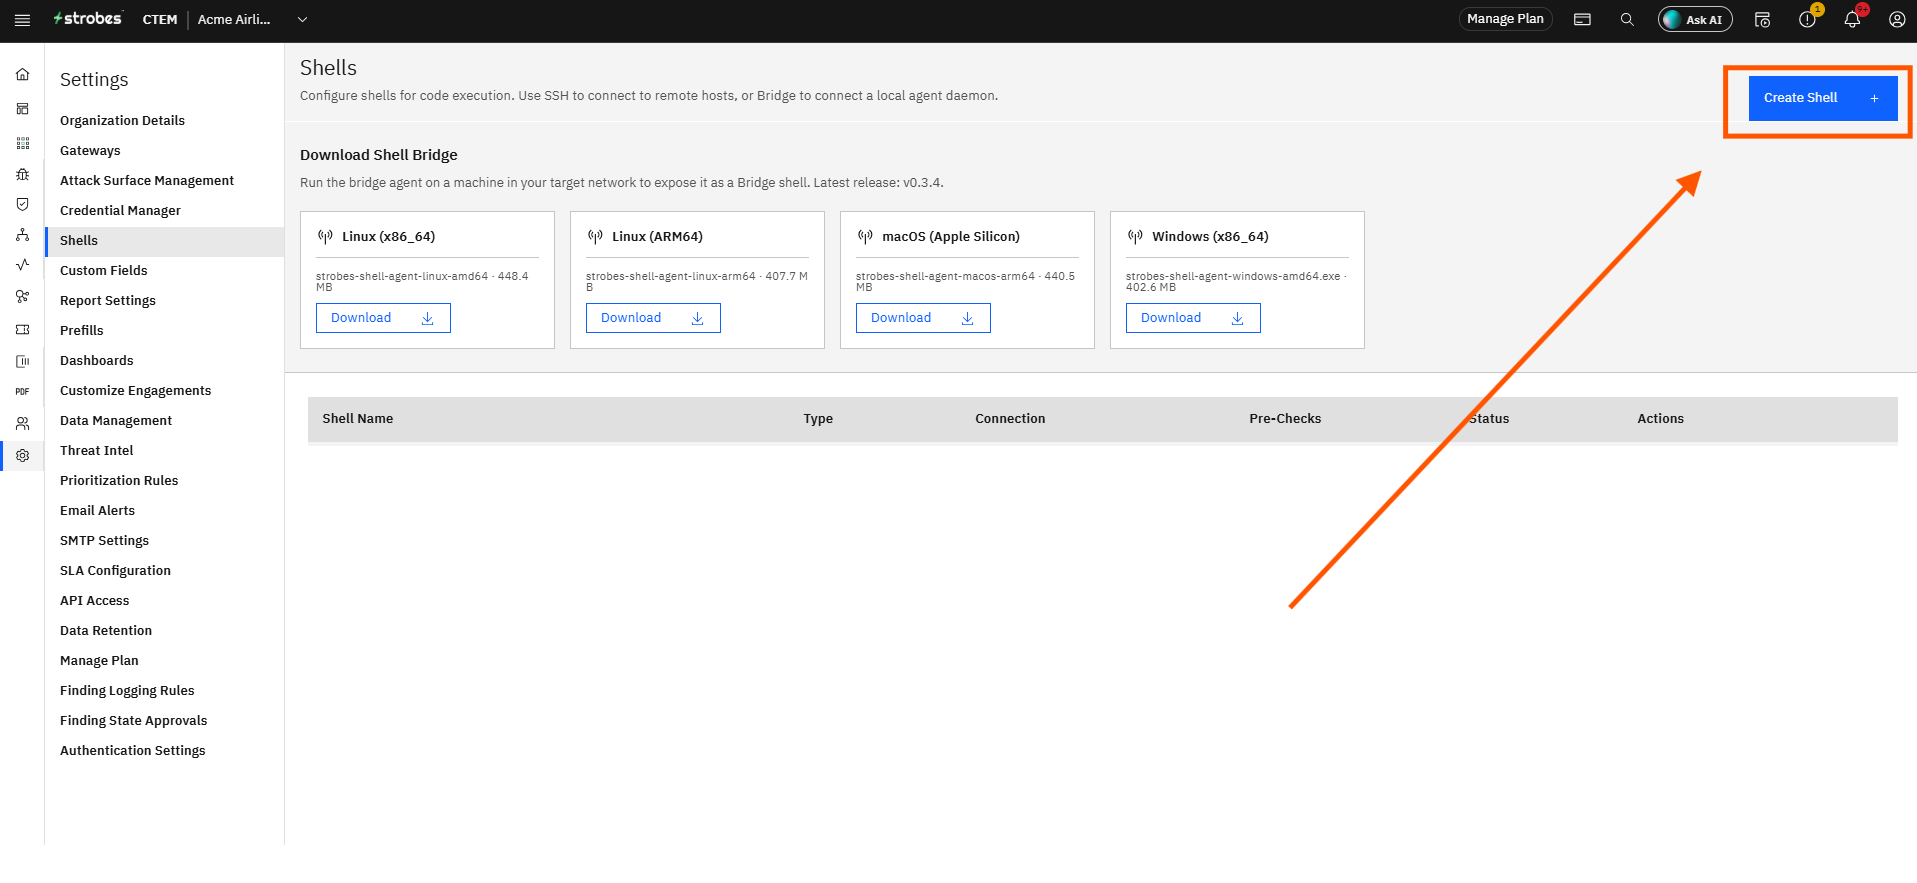
Click the Create Shell button in the top right corner of the Shells page. A form appears to configure the new shell.
Step — 4 Select Bridge as the Shell Type
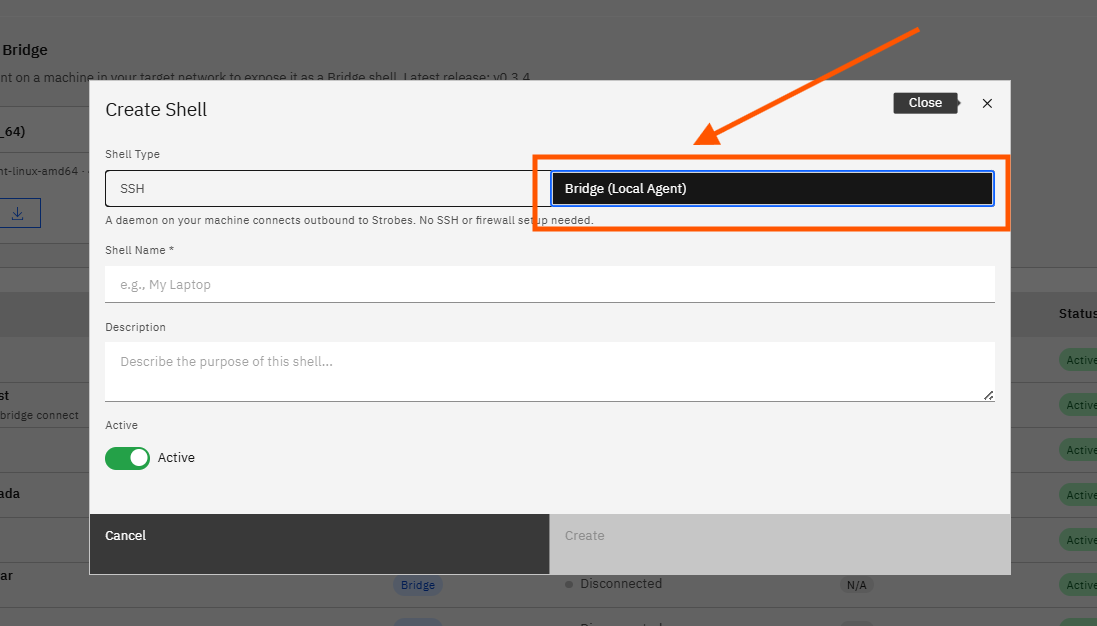
Click the Type dropdown and select Bridge. Bridge is the shell type that uses the outbound agent — no inbound firewall ports are required.
Step 5 — Enter a Name and Description for the Shell
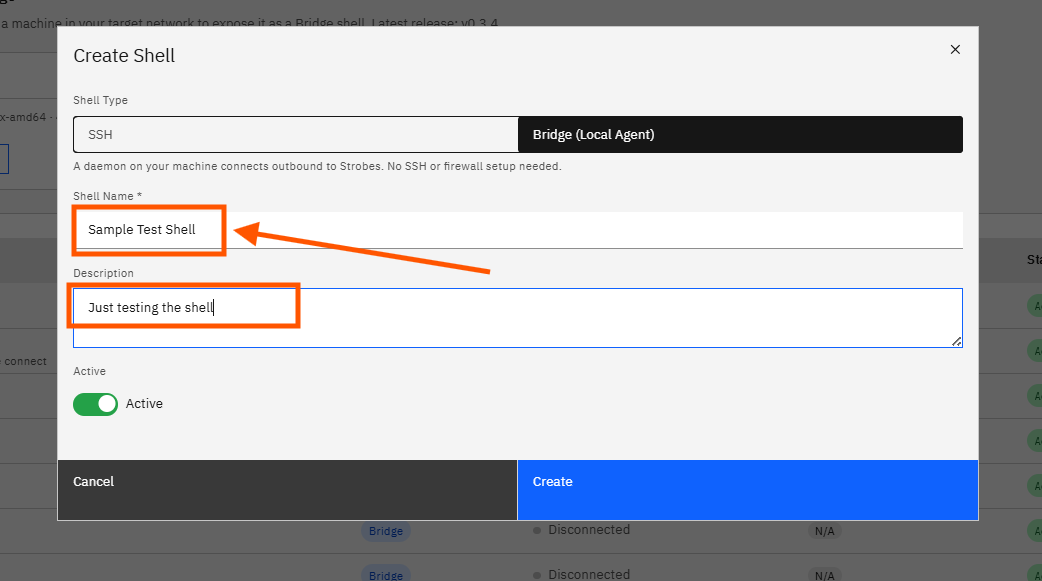
Click the Name field and type a name for this shell. Use a name that identifies the machine or purpose — for example, Production Server or Dev Machine.
Step 6 — Click Create
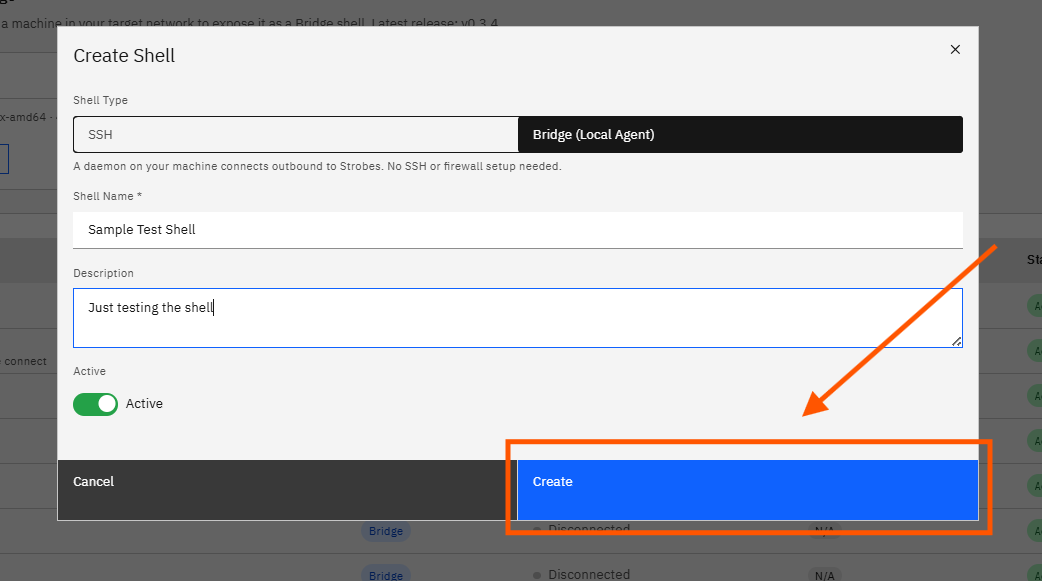
Click Create. Strobes creates the shell record and the Bridge Shell Setup modal opens automatically.
Part 2 — Download the Shell Bridge Agent
Step 7 — Review the Bridge Shell Setup Modal
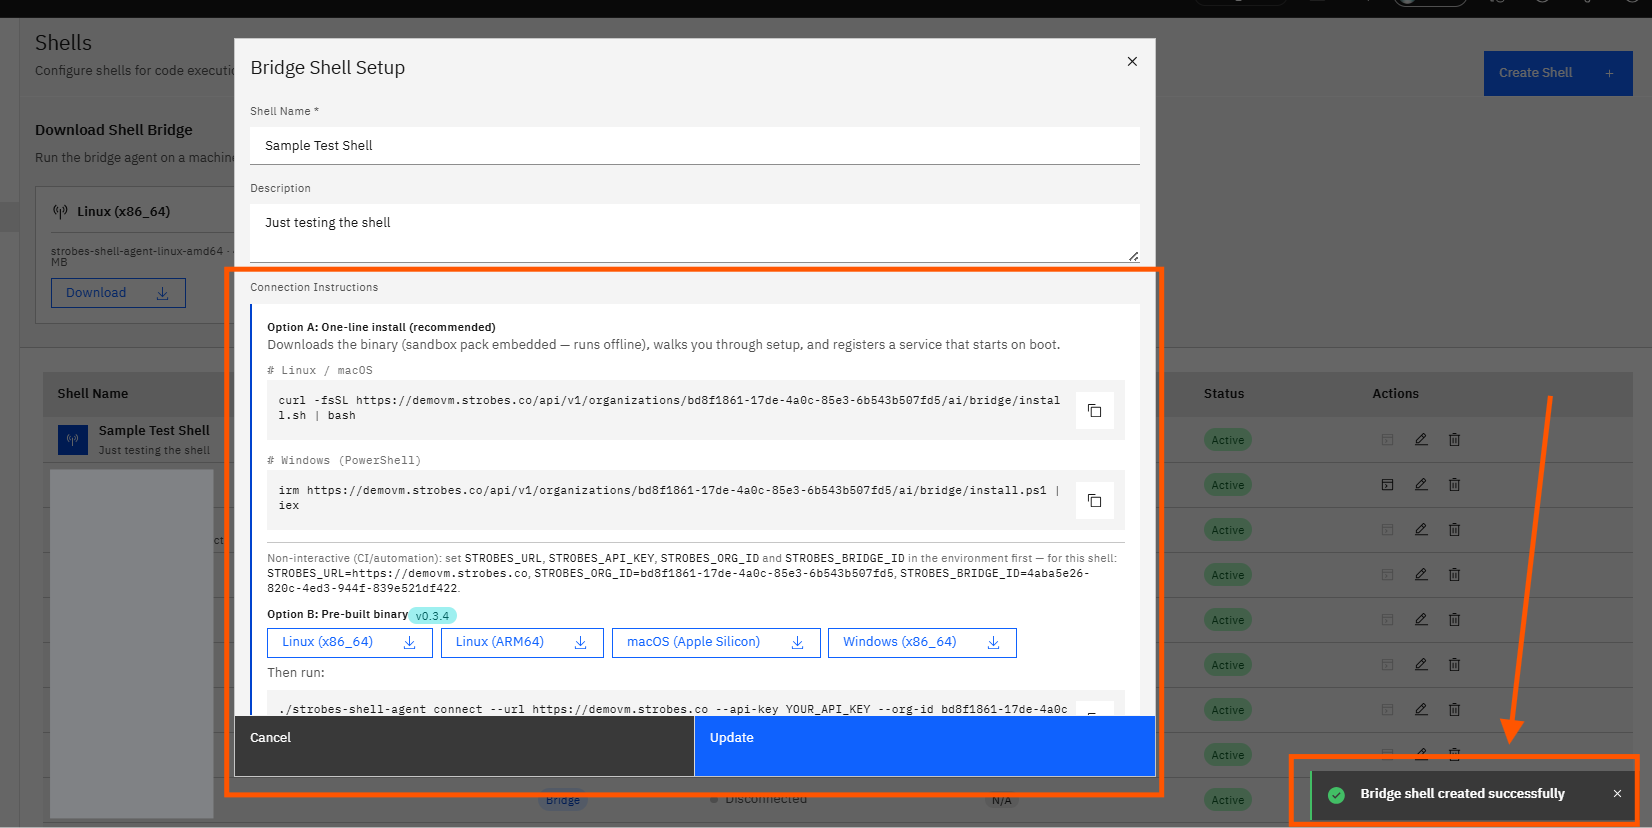
Review the Bridge Shell Setup modal. The modal has two sections:
- Download buttons — one for each supported platform: Linux (x86_64), Linux (ARM64), macOS (Apple Silicon), and Windows (x86_64).
- "Then run:" section — a pre-filled connect command with your Organization ID and Bridge ID already inserted. The only value you need to replace is
YOUR_API_KEY.
Step 8 — Click the Download Button for Your Operating System
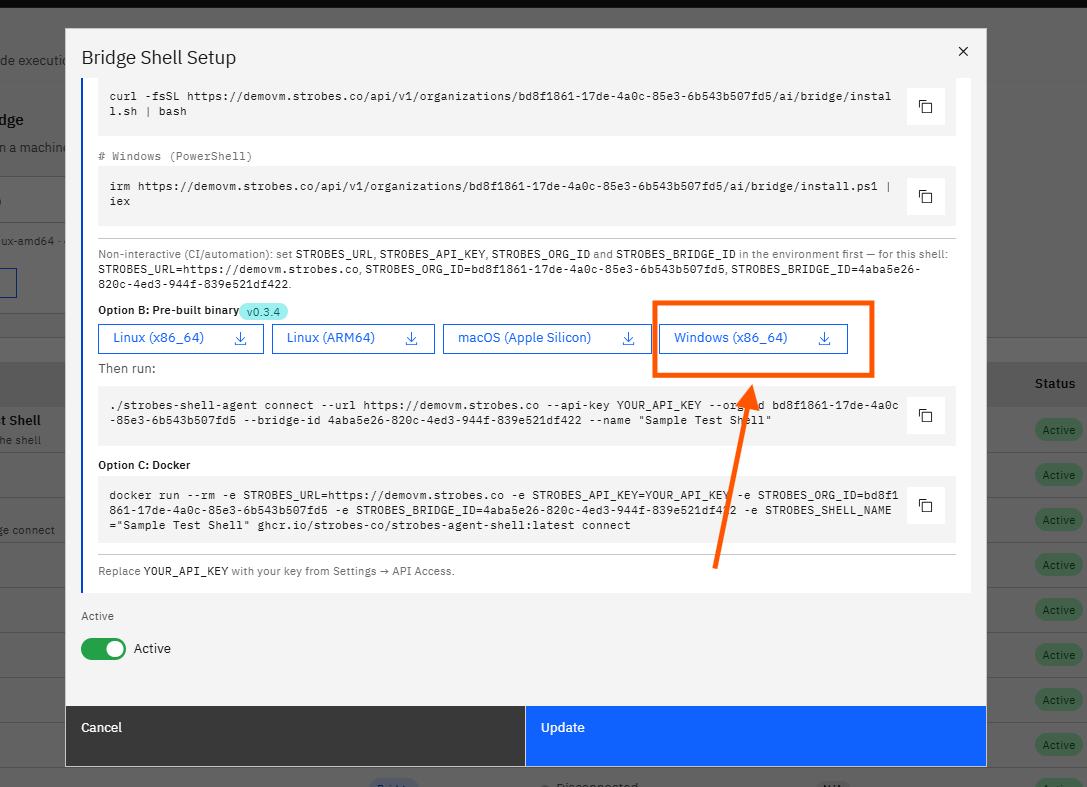
Click the download button that matches the machine you want to connect:
- Linux (x86_64) — for most Linux servers and desktops.
- Linux (ARM64) — for ARM-based Linux machines (e.g. Raspberry Pi, AWS Graviton).
- macOS (Apple Silicon) — for Macs with M1/M2/M3 chips.
- Windows (x86_64) — for Windows machines.
The agent binary downloads to your machine. The button shows a download progress percentage while the file is being saved.
Step 9 — Copy the Connect Command from the Modal
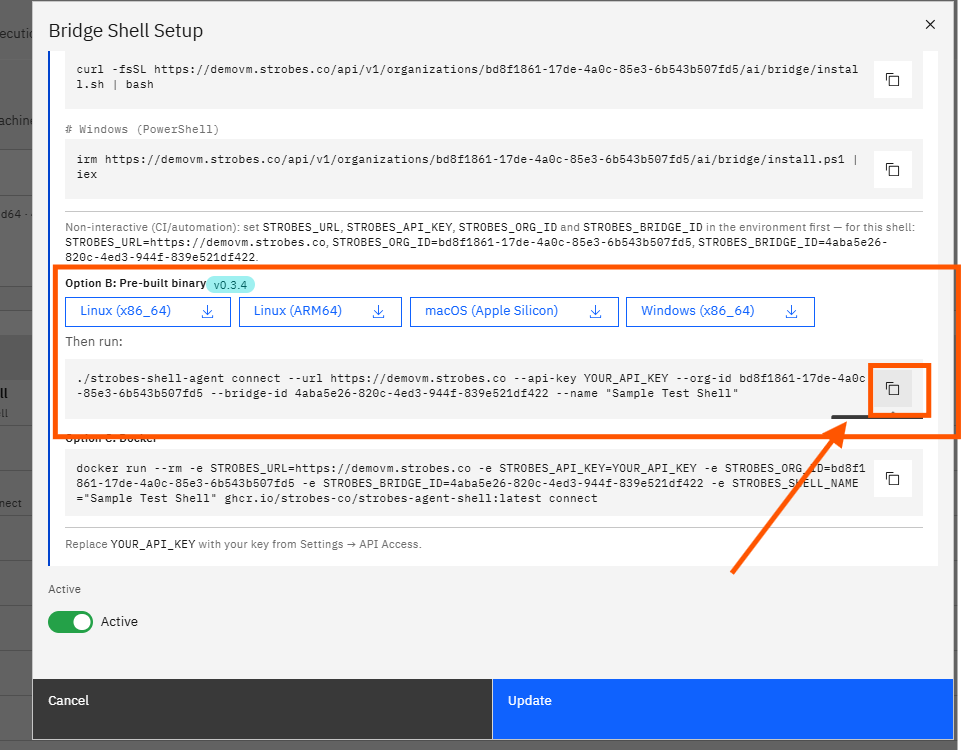
Copy the connect command shown in the "Then run:" section. The command already contains your Strobes URL, Organization ID, and Bridge ID. You will complete it in a later step by replacing YOUR_API_KEY with your actual key. Keep this command available — paste it into a text editor for easy editing.
Part 3 — Get Your API Key from Strobes
Step 10 — Click API Access in the Settings Sidebar
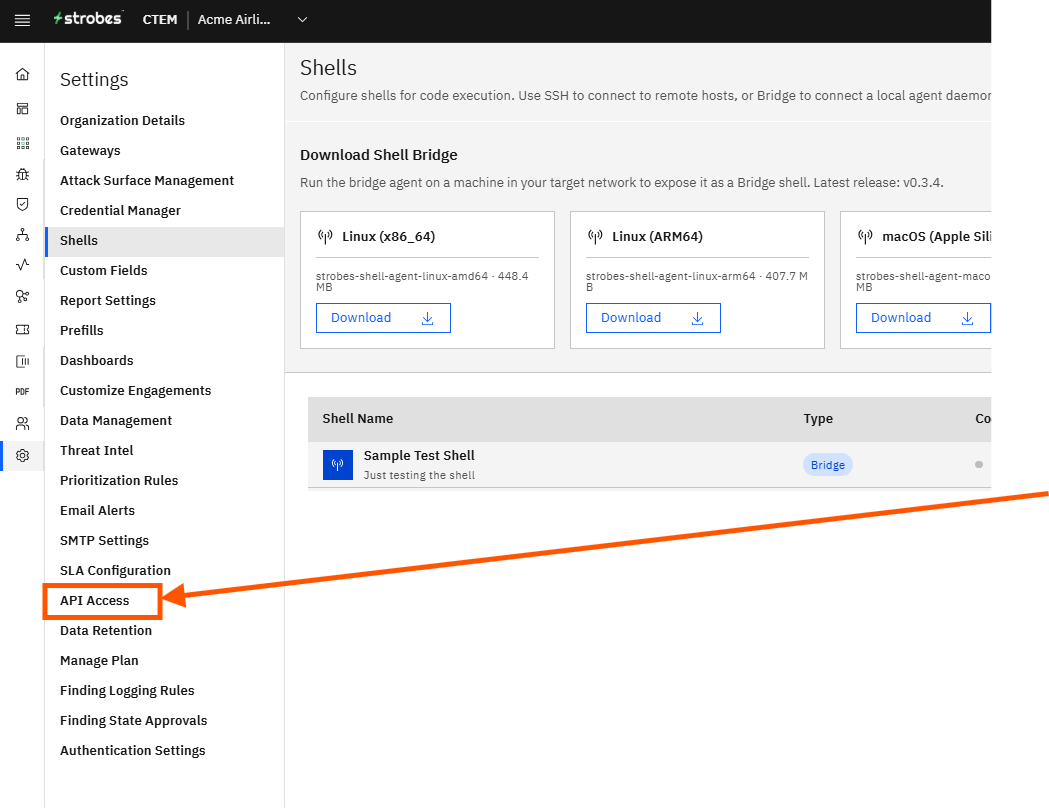
Click API Access in the Settings sidebar. The API Access page opens, showing your API key (masked) and your Organization ID.
Step 11 — Click the Eye Icon to Reveal Your API Key
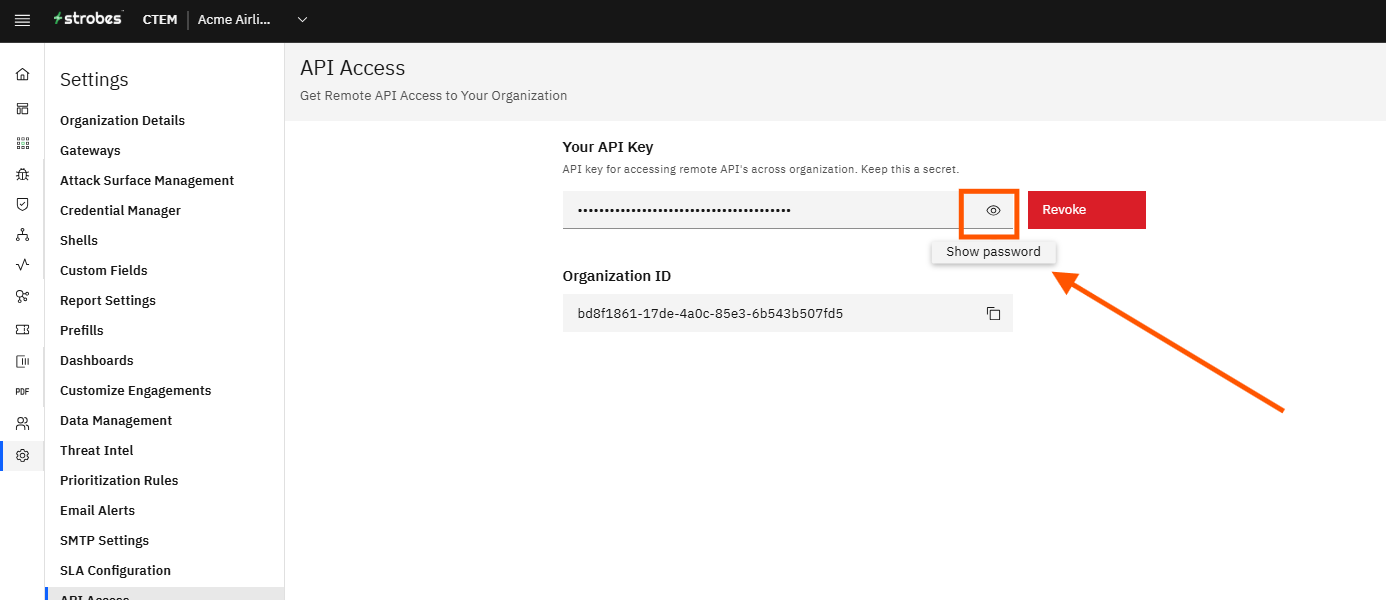
Click the eye icon (👁) next to the API key field. The key is revealed as a full string of characters.
Step 12 — Copy the API Key
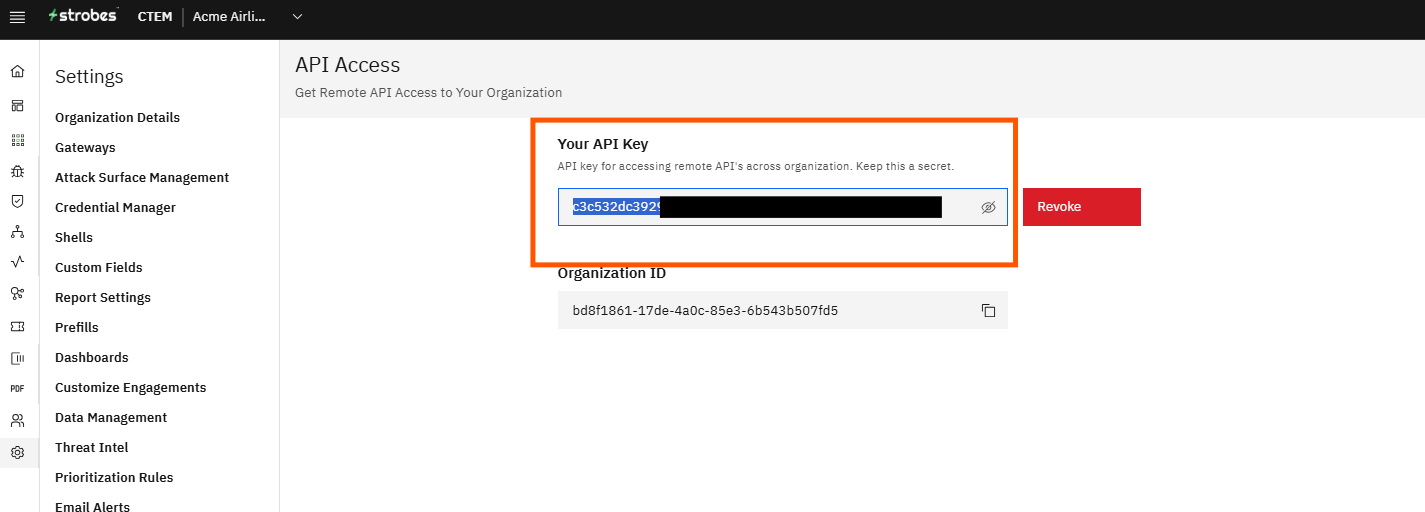
Click and drag to select the full API key, then copy it (Ctrl+C on Windows/Linux, Cmd+C on Mac). Be careful to select the entire key without any extra spaces.
Part 4 — Run the Connect Command on Your Machine
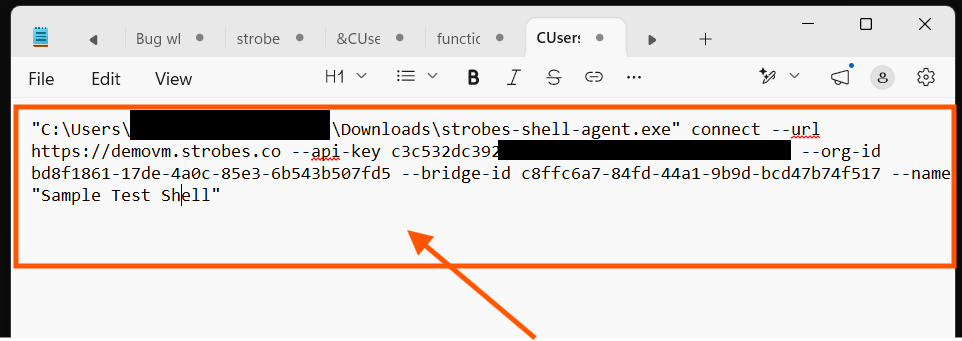
Step 13 — Paste Your API Key into the Connect Command
Open your text editor and locate the connect command you copied in Step 9. Replace the YOUR_API_KEY placeholder with the API key you copied in Step 12. The complete command should look like this:
./strobes-shell-agent connect \
  --url https://<your-strobes-url> \
  --api-key <YOUR_API_KEY> \
  --org-id <YOUR_ORG_ID> \
  --bridge-id <YOUR_BRIDGE_ID> \
  --name "<YOUR_SHELL_NAME>"
All values except <YOUR_API_KEY> are already pre-filled from the modal.
Note: Copy the path of the downloaded binary and paste it.
Step 14 — Open the Terminal on Your Machine
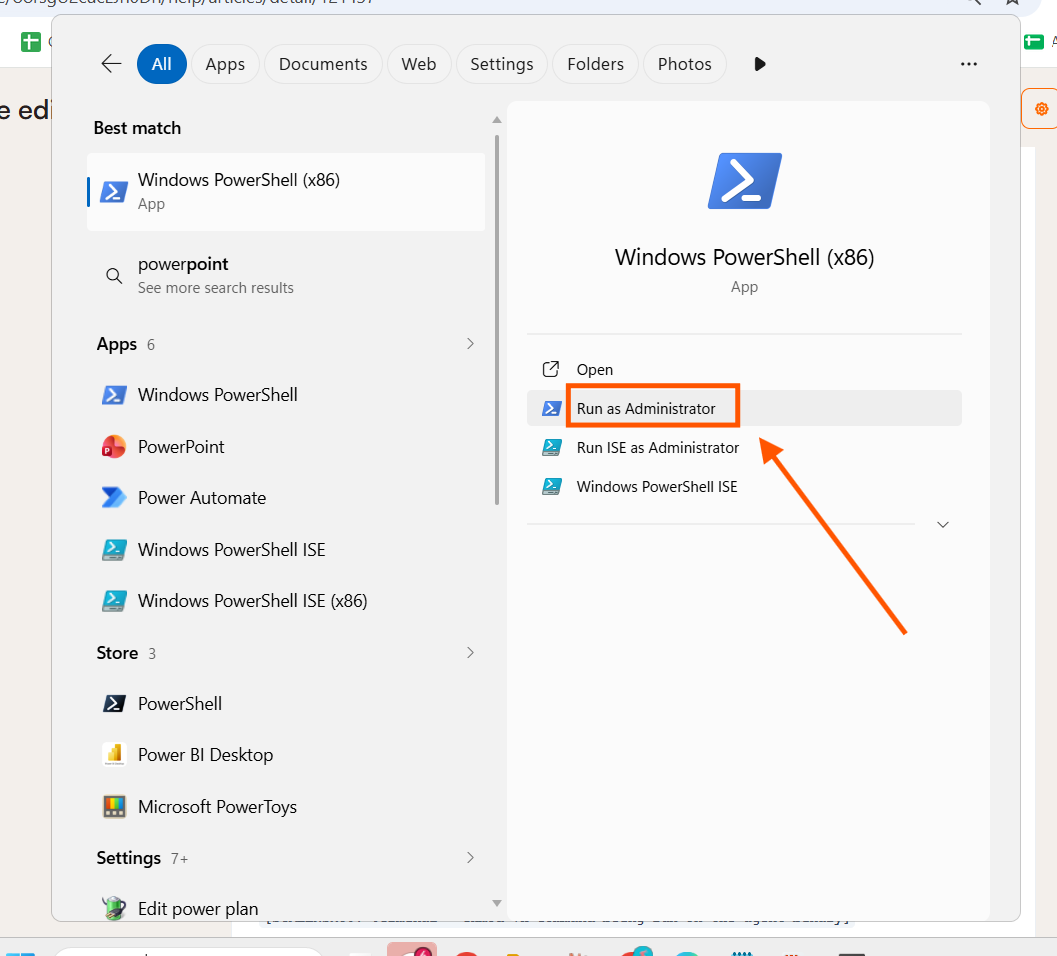
Open a terminal on the machine you are connecting:
- Windows — Open as Administrator PowerShell (search for "PowerShell" in the Start menu).
- Linux / macOS — Open Terminal.
Step 15 — Navigate to the Folder Containing the Downloaded Agent
Navigate to the folder where the agent binary was downloaded. By default this is the Downloads folder.
- Windows (PowerShell):
cd "$env:USERPROFILE\Downloads" - Linux / macOS:
cd ~/Downloads
Step 16 — (Linux / macOS only) Make the Binary Executable
Windows does not require this step.
On Linux or macOS, run the following command to make the binary executable before running it:
chmod +x strobes-shell-agent
Step 17 — Run the Connect Command
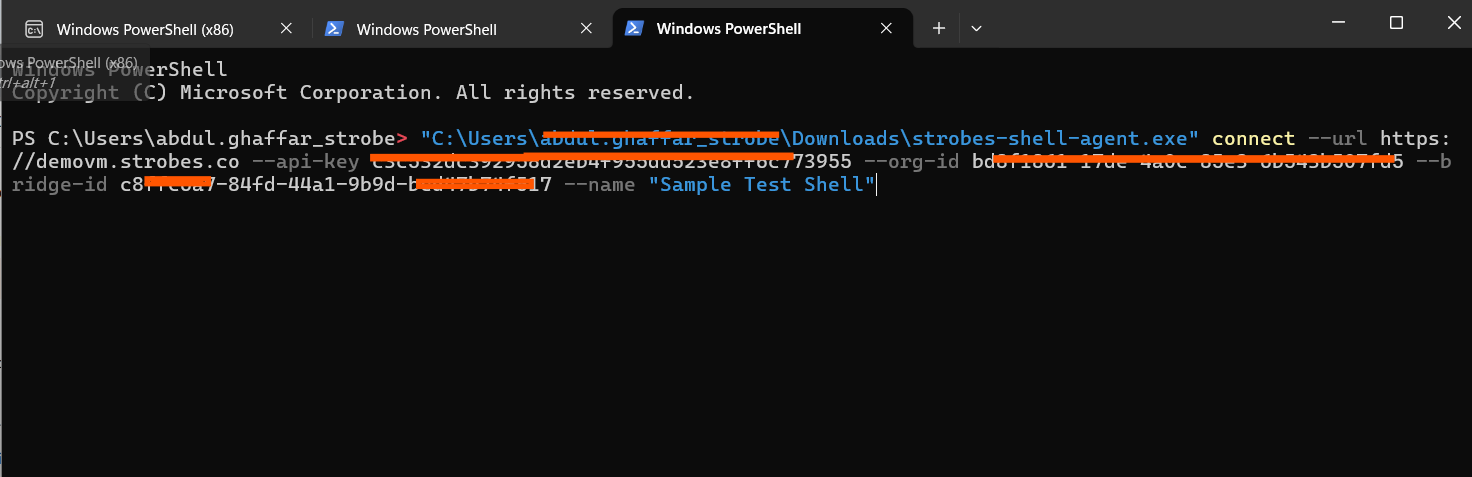
Paste the completed connect command into the terminal and press Enter.
Windows (PowerShell) / Linux / macOS::
./strobes-shell-aent connect --url https://<your-strobes-url> --api-key <YOUR_API_KEY> --org-id <YOUR_ORG_ID> --bridge-id <YOUR_BRIDGE_ID> --name "<YOUR_SHELL_NAME>"
Step 18 — Confirm the Agent Is Connected
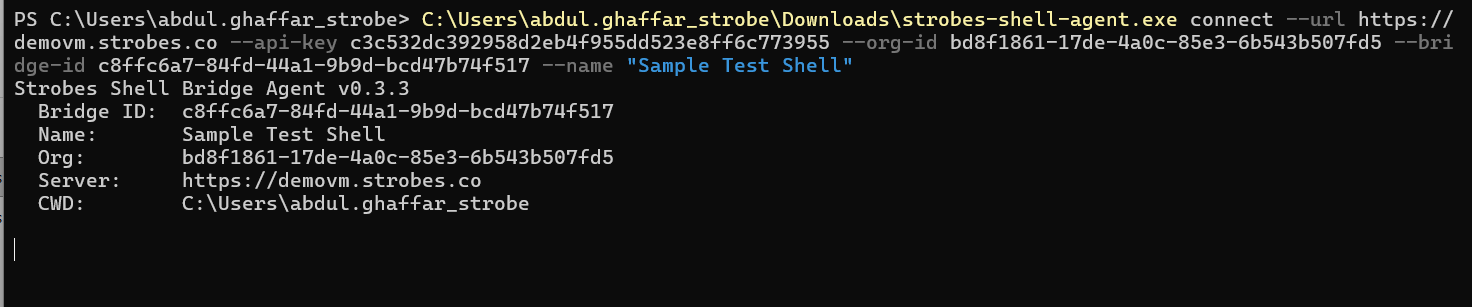
The terminal displays a confirmation block when the agent connects successfully:
Strobes Shell Bridge Agent v0.3.x
  Bridge ID:    <YOUR_BRIDGE_ID>
  Name:         <YOUR_SHELL_NAME>
  Org:          <YOUR_ORG_ID>
  Server:       https://<your-strobes-url>
  CWD:          <current working directory>
Leave the terminal window open. Closing it will disconnect the agent. The shell remains connected as long as this process is running.
Please wait until the status turns "Connected" on the Strobes instance.
Part 5 — Verify the Shell Status in Strobes
Step 19 — Return to Settings > Shells
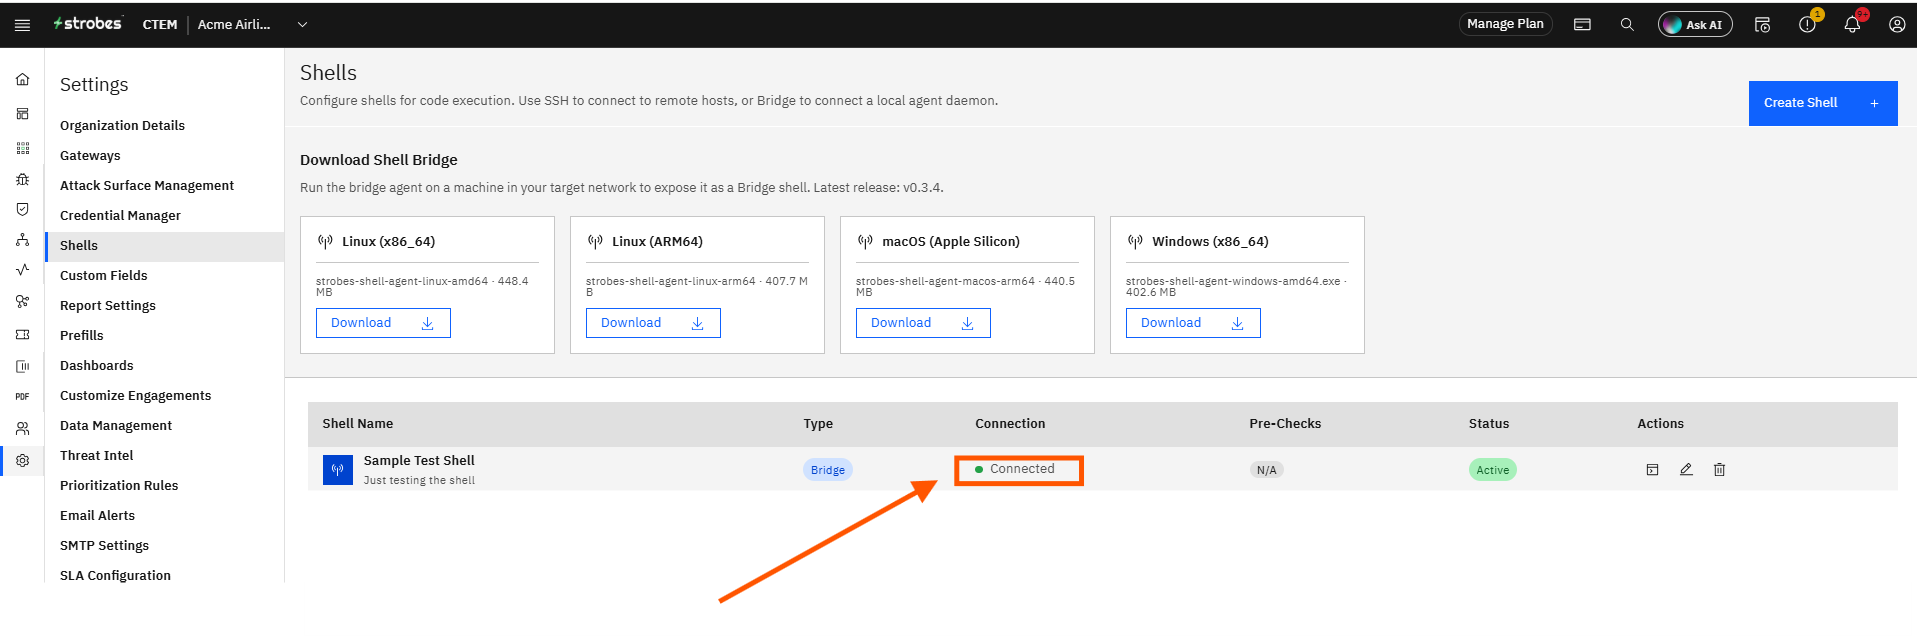
Return to Settings > Shells in Strobes. The shell you created now appears in the table with:
- Type: Bridge
- Status: Connected
- State: Active
The shell is ready to use in your security assessments.
Tips
Rename the downloaded file to remove spaces before running it on Windows. Windows PowerShell has trouble with file paths that contain spaces and parentheses (such as strobes-shell-agent-windows-amd64 (5).exe). Right-click the file in File Explorer, select Rename, and simplify the name to strobes-shell-agent.exe before running the connect command.
Keep the terminal window open while the shell is in use. The agent process must be running for Strobes to communicate with the shell. If you close the terminal, the shell status changes to Disconnected. Run the connect command again to reconnect.
To run the agent permanently on Windows, use the one-line installer. Open PowerShell as Administrator and run:
irm https://<your-strobes-url>/api/v1/organizations/<YOUR_ORG_ID>/ai/bridge/install.ps1 | iex
This downloads the agent, installs it to a permanent location, and registers it as a scheduled task that starts automatically at logon.
To run the agent permanently on Linux, set it up as a systemd service. Create a service file that runs the connect command on startup so the shell reconnects automatically after reboots.
The Bridge ID is unique to each shell. If you create multiple shells, each has its own Bridge ID from the modal. Use the correct Bridge ID in the connect command for each machine.
Your API key grants full access to your organization. Treat it like a password — do not share it or store it in version-controlled files.