JFrog Xray Connector – Violations Integration
Overview
The JFrog connector enables you to synchronize violation data from JFrog with Strobes. Resources affected by violations are imported into Strobes as Assets, and the corresponding violations are recorded against their respective Assets.
This integration provides centralized visibility into JFrog violations, allowing you to monitor affected resources and manage security issues directly within Strobes.
Supported Version and API Requirements
Supported Version
The JFrog connector has been tested and confirmed to work with JFrog Xray version 3.42.3.
The connector supports both:
- JFrog Cloud (SaaS) deployments.
- Self-hosted JFrog Artifactory/Xray installations.
The JFrog instance must expose JFrog's standard Xray REST APIs for the connector to function correctly.
API Versions Used
The connector uses two Xray API versions for different purposes:
API Version | Purpose | Endpoint |
|---|---|---|
Xray API v2 | Used during the initial connection to validate the JFrog URL and API key. |
|
Xray API v1 | Used for ongoing synchronization of violation data from JFrog. |
|
The customer's JFrog Xray instance must support both API versions. Current JFrog Cloud and self-hosted Xray deployments that expose these standard endpoints are supported.
Jfrog Xray Connector Details
Field | Details |
|---|---|
Supported products | |
Category | Software Composition Analysis (SCA) |
Ingested asset type(s) | Packages / Artifacts, Container Images |
Integration type | UNI directional (data is transferred from the Connector to the Strobes Platform in one direction) |
Supported version and type | JFrog Xray 3.42.3 — SaaS or Self-hosted |
Required Permissions
To configure the JFrog connector in Strobes, the following details are required from the customer's JFrog account:
- URL (Required) — The URL of the customer's JFrog instance.
- API Key (Required) — An API key used to authenticate the connection and retrieve violation data from JFrog.
Access Requirements
The API key must have sufficient permissions to authenticate with the JFrog Xray APIs and retrieve the required data, including Watches and violations.
For the exact permission level required to generate the API key, please refer to your organization's JFrog access policies or contact your JFrog administrator.
Setting Up in Strobes
The JFrog connector requires only the customer's JFrog instance URL and API Key to establish the connection.
Currently, the connector does not include any additional filters or configuration toggles. Once the connector is configured successfully, Strobes automatically retrieves violation data based on the Watches configured in the customer's JFrog Xray instance.
Note: Watches are JFrog Xray rules that define which resources are monitored and what violations are identified.
What Data Comes into Strobes
The JFrog connector imports violation-related data from JFrog Xray into Strobes. The imported data includes affected resources as Assets and the corresponding violations as Findings.
Assets
Assets represent the resources affected by a violation, such as:
- Software packages stored in JFrog Artifactory.
- Container images stored in JFrog Artifactory.
The asset type and details are determined based on the information provided by JFrog Xray.
Findings
Findings represent the security or license violations identified by JFrog Xray. These violations are associated with their respective Assets in Strobes, allowing security teams to monitor and manage the identified issues.
Note: Asset categorization depends on the data reported by JFrog Xray. The connector does not apply a fixed categorization rule for different artifact types.
Which Service We Talk To
Strobes connects directly to the customer's JFrog Xray instance using the provided JFrog domain and API Key.
The connector uses the following JFrog Xray APIs:
- Watches API (v2) — Called during the initial connector setup to validate the connection and confirm that the provided credentials are working.
- Violations API (v1) — Used during ongoing synchronization to retrieve violation data, which is imported into Strobes as Findings.
All data is retrieved directly from the customer's configured JFrog instance.
How Status Is Kept in Sync
JFrog Xray does not explicitly send a status update indicating that a violation has been resolved. Instead, Strobes uses its standard scan-comparison behavior to manage finding statuses.
During each synchronization, Strobes compares the latest violation data received from JFrog Xray with previously imported findings.
- If a previously identified violation is still present in the latest sync, the corresponding finding remains New.
- If a previously identified violation is no longer reported in a subsequent sync, Strobes treats the finding as Resolved.
This ensures that finding statuses in Strobes reflect the latest violation data available from JFrog Xray.
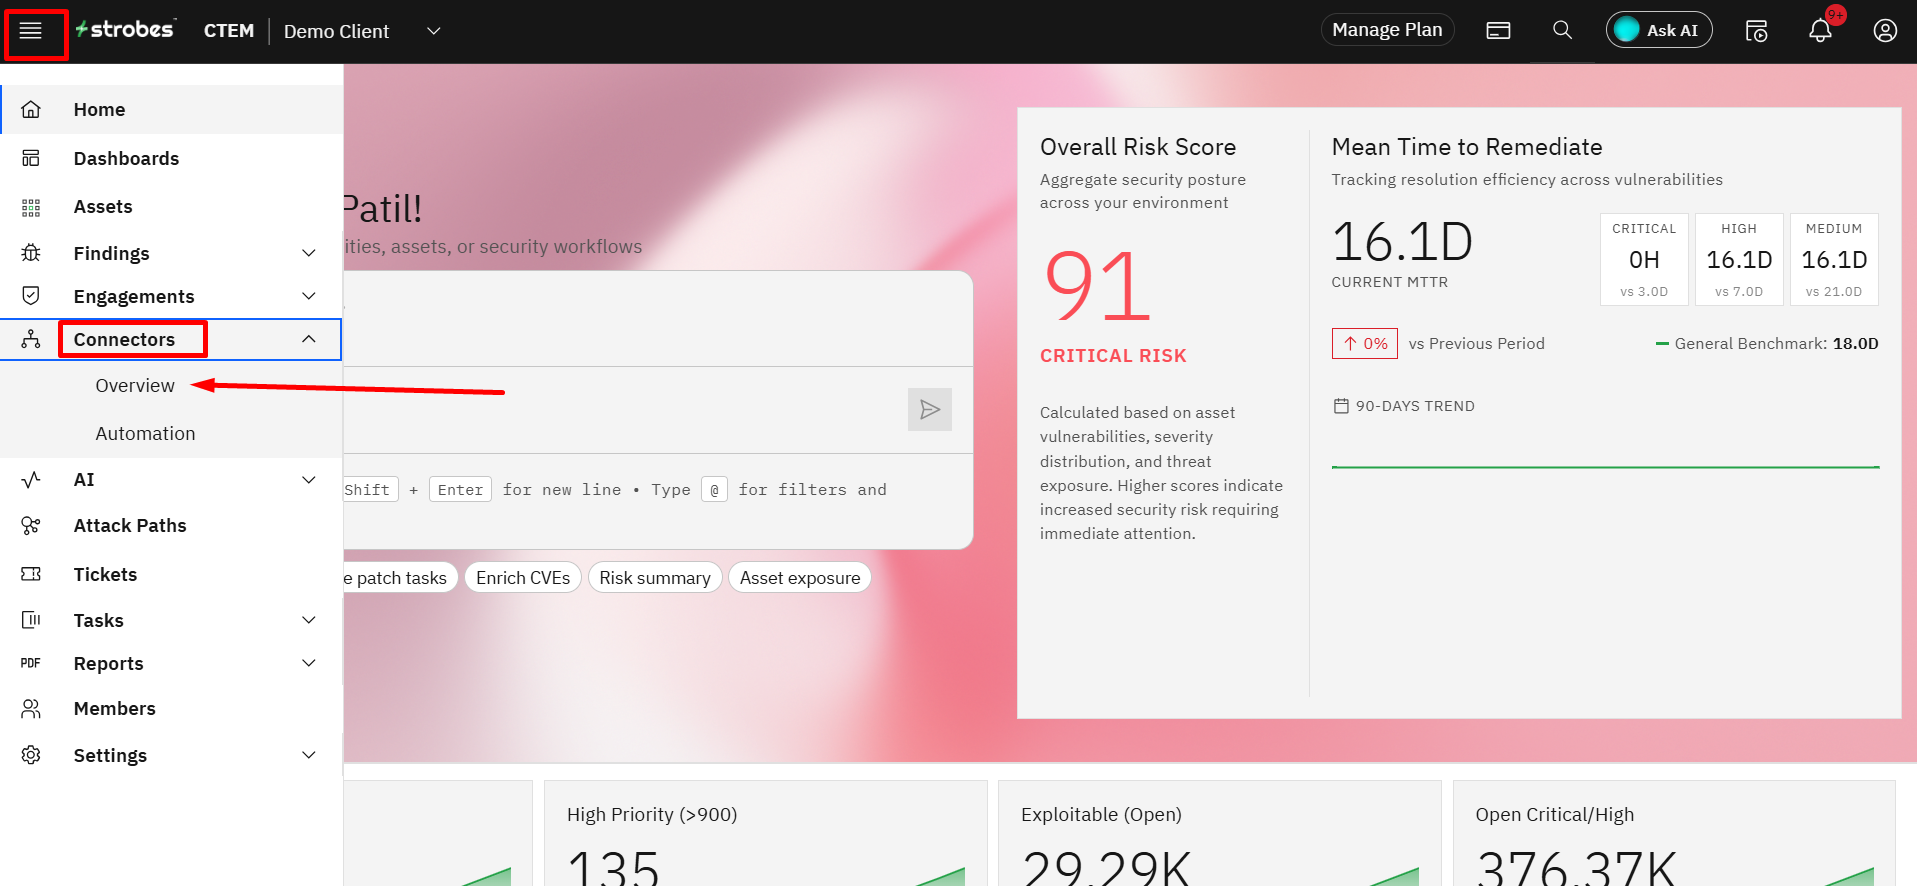
Step 1: Navigate to the Connectors
In the left navigation pane, expand Connectors and click Overview. The Connectors Overview page opens, displaying all installed and available connectors organized by category.
Step 2: Search for the Connector
In the Search bar, type Jfrog Xray. The Jfrog Xray connector is displayed under Available Connectors.
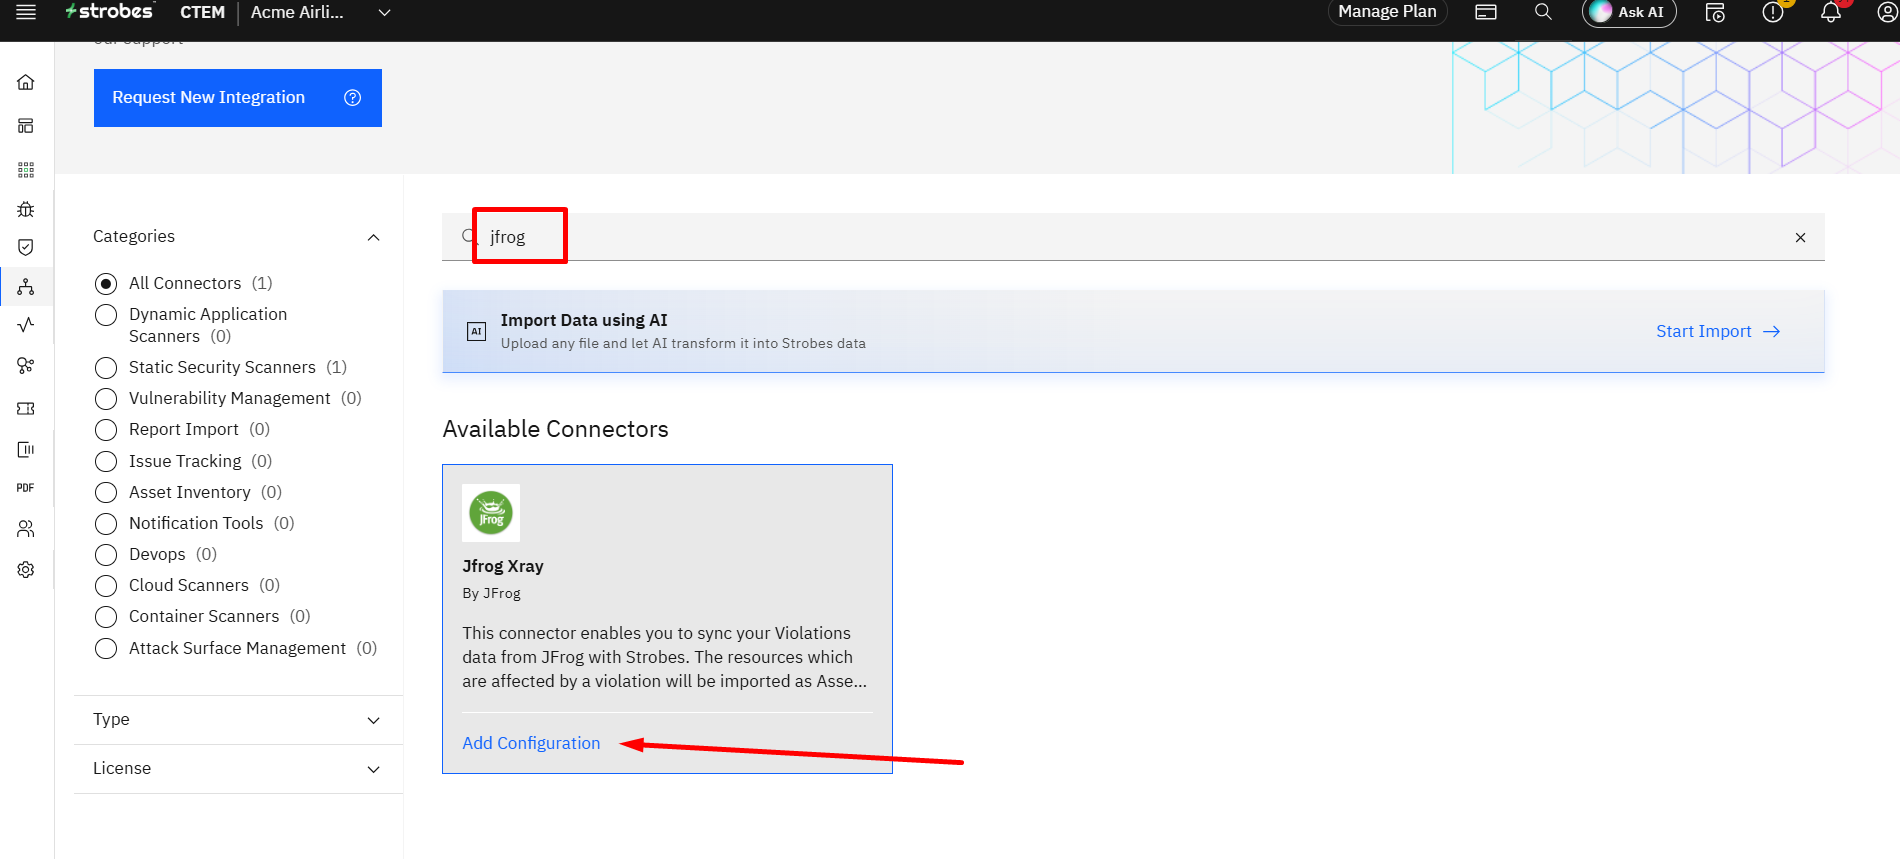
Step 3: Open the Connector
Click Add Configuration on the Jfrog Xray card. The Add Workflow panel opens with three steps listed in the left sidebar.
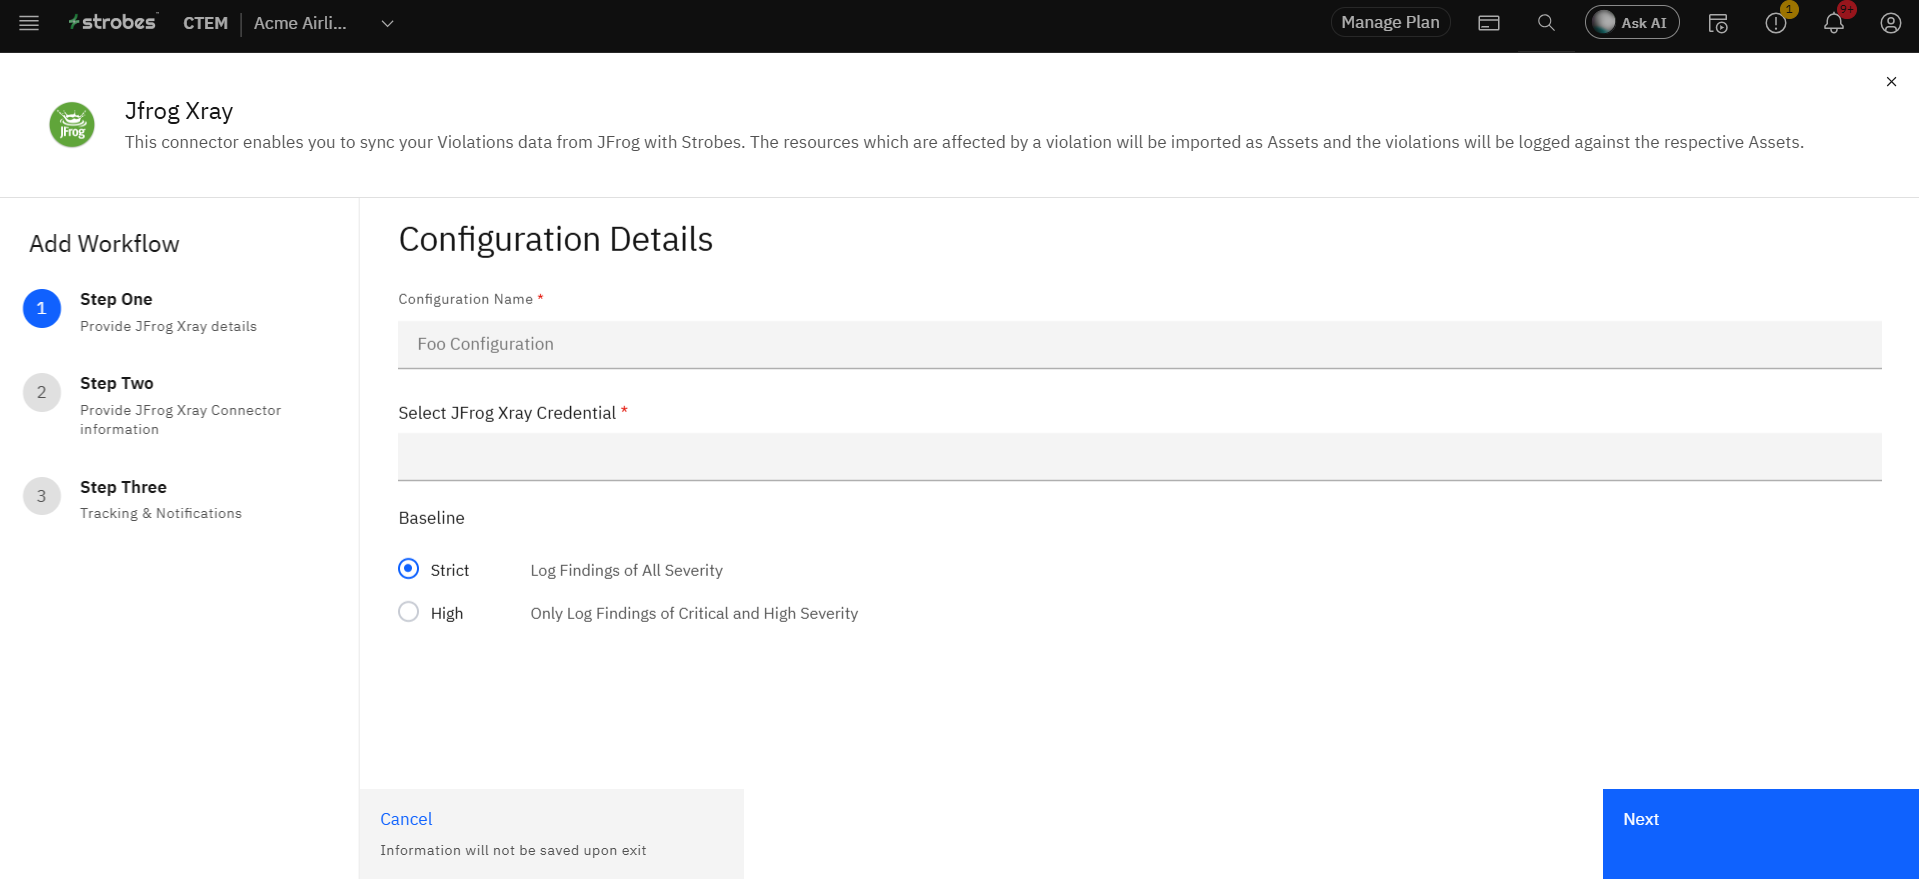
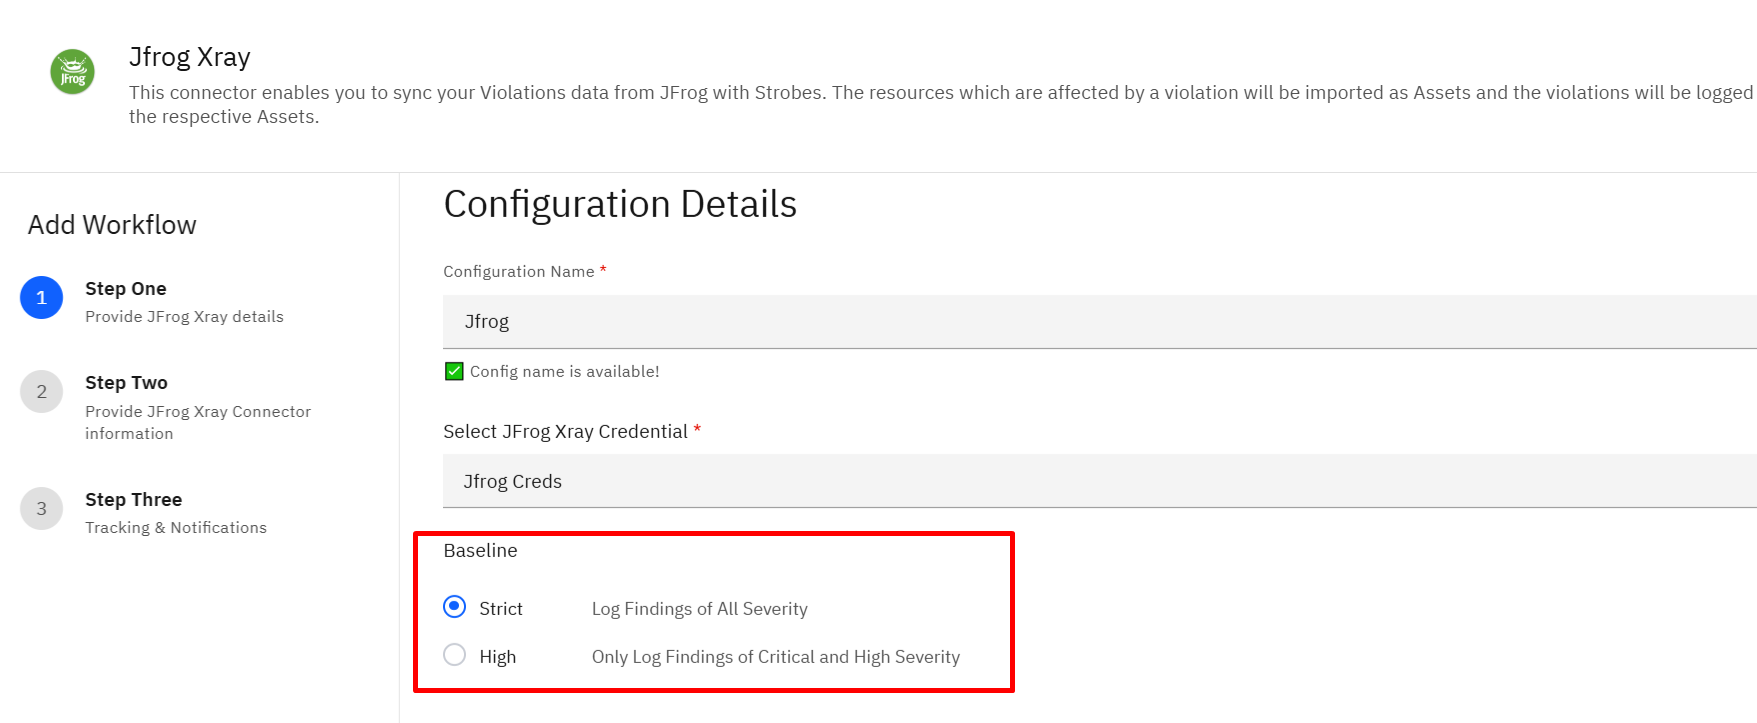
Step 4: Enter a Configuration Name
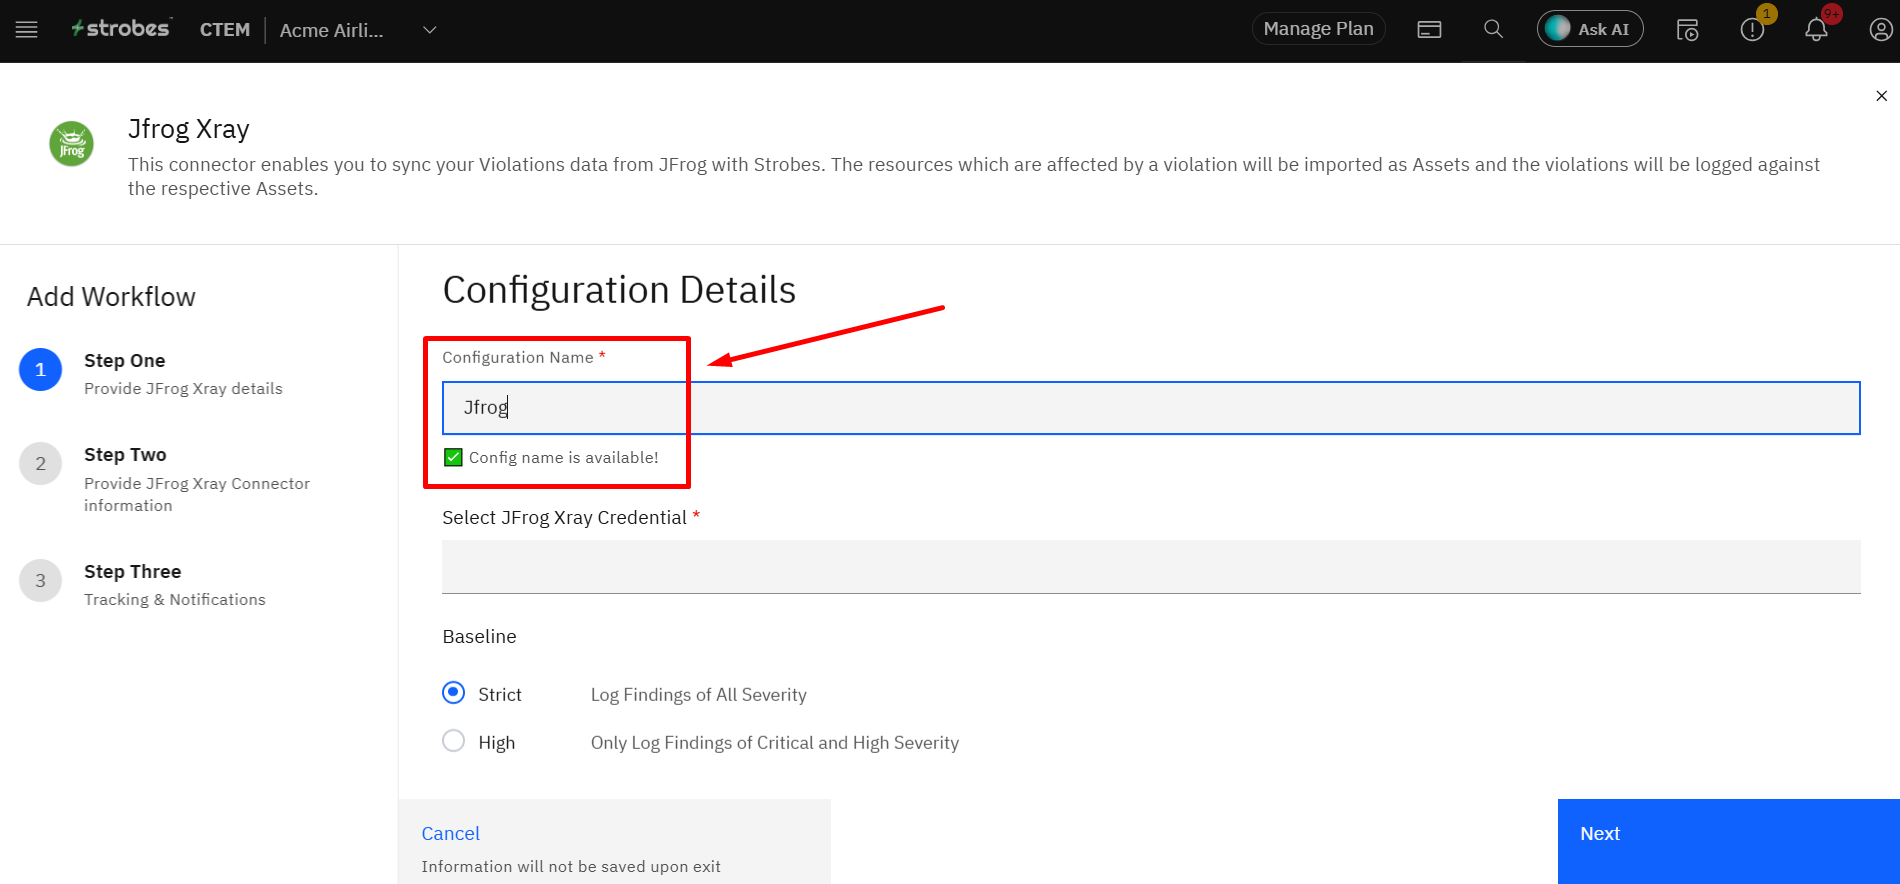
In the Configuration Name field, enter a unique name for the configuration. A green "Config name is available!" message confirms that the name is not already taken.
Step 5: Select JFrog Xray Credential
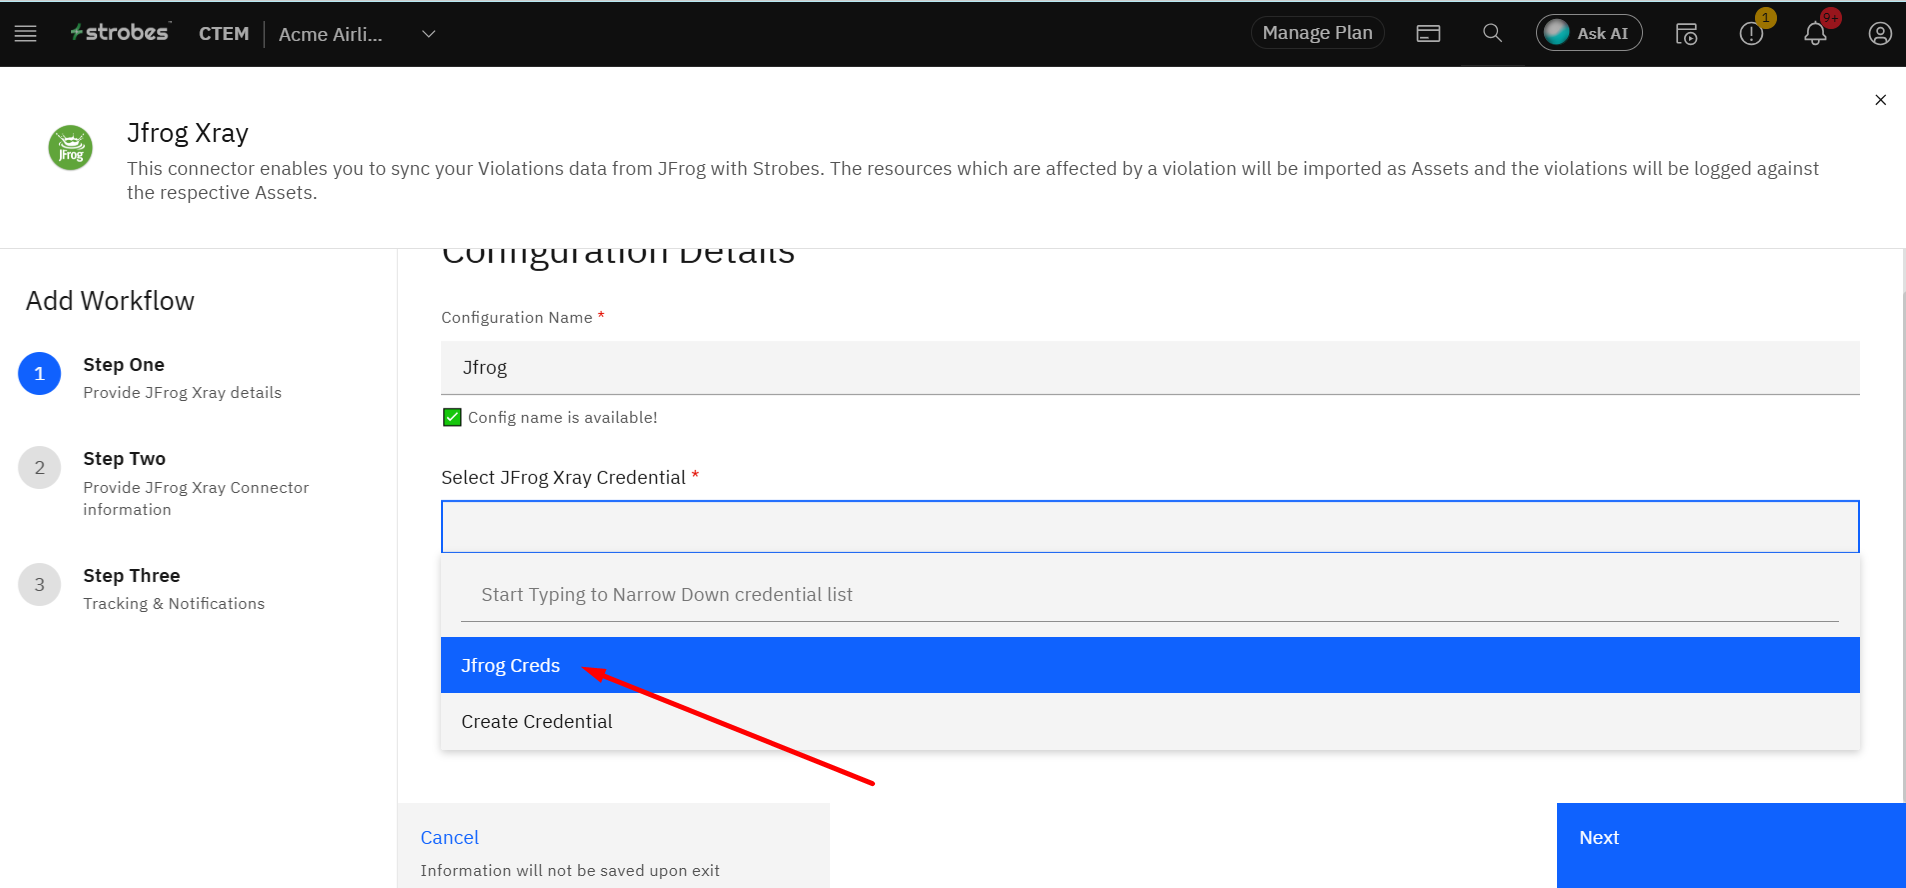
Click on the Select JFrog Xray Credential dropdown. If you have an existing saved credential, select it from the list. If not, click Create Credential to add one now.
Step 6: Add a New Credential (if needed)
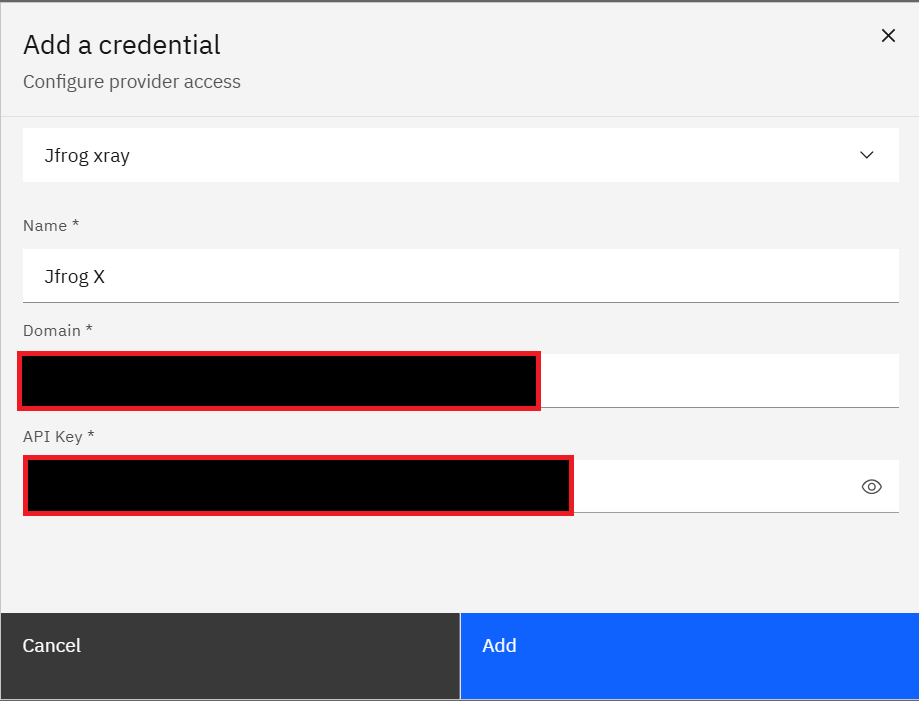
The Add a Credential modal opens. Select Jfrog as the provider and fill in the following fields:
- Name (Required) — Enter a descriptive name for the credential. This name is used for internal reference within Strobes.
- Domain (Required) — Enter the domain URL of your JFrog instance.
- API Key (Required) — Enter the API key generated from your JFrog account.
Step 7: Save the Credential
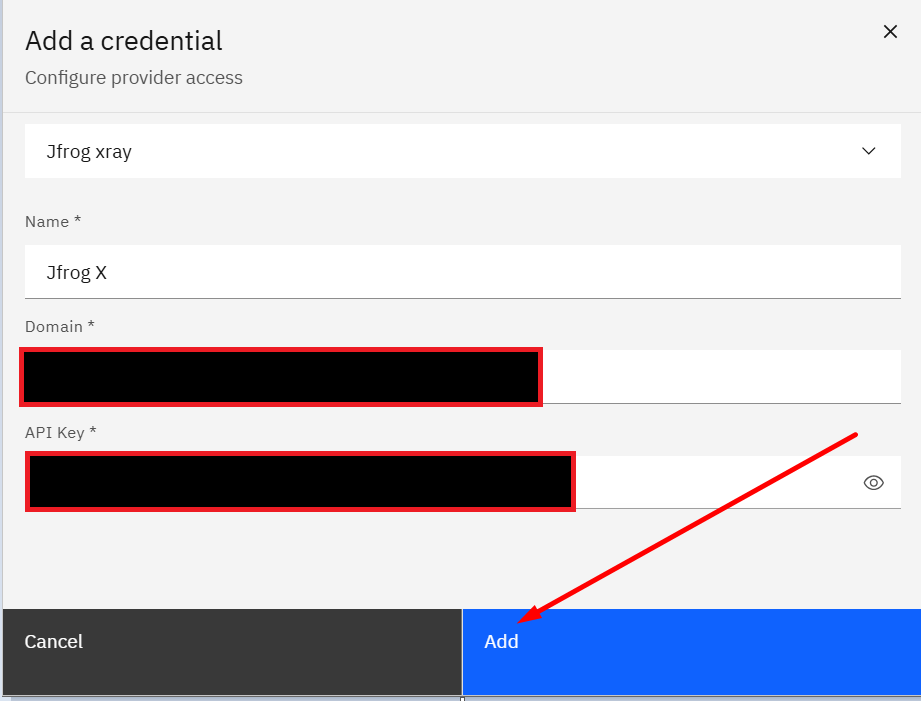
Click Add. The modal closes, and the newly created credential is automatically selected in the Configuration Details form.
Step 8: Choose a Baseline
Under Baseline, select which findings to import from CrowdStrike:
Option | What it imports |
Strict | Findings of all severity levels |
High | Critical and High severity findings only |
Step 9: Proceed to Step Two
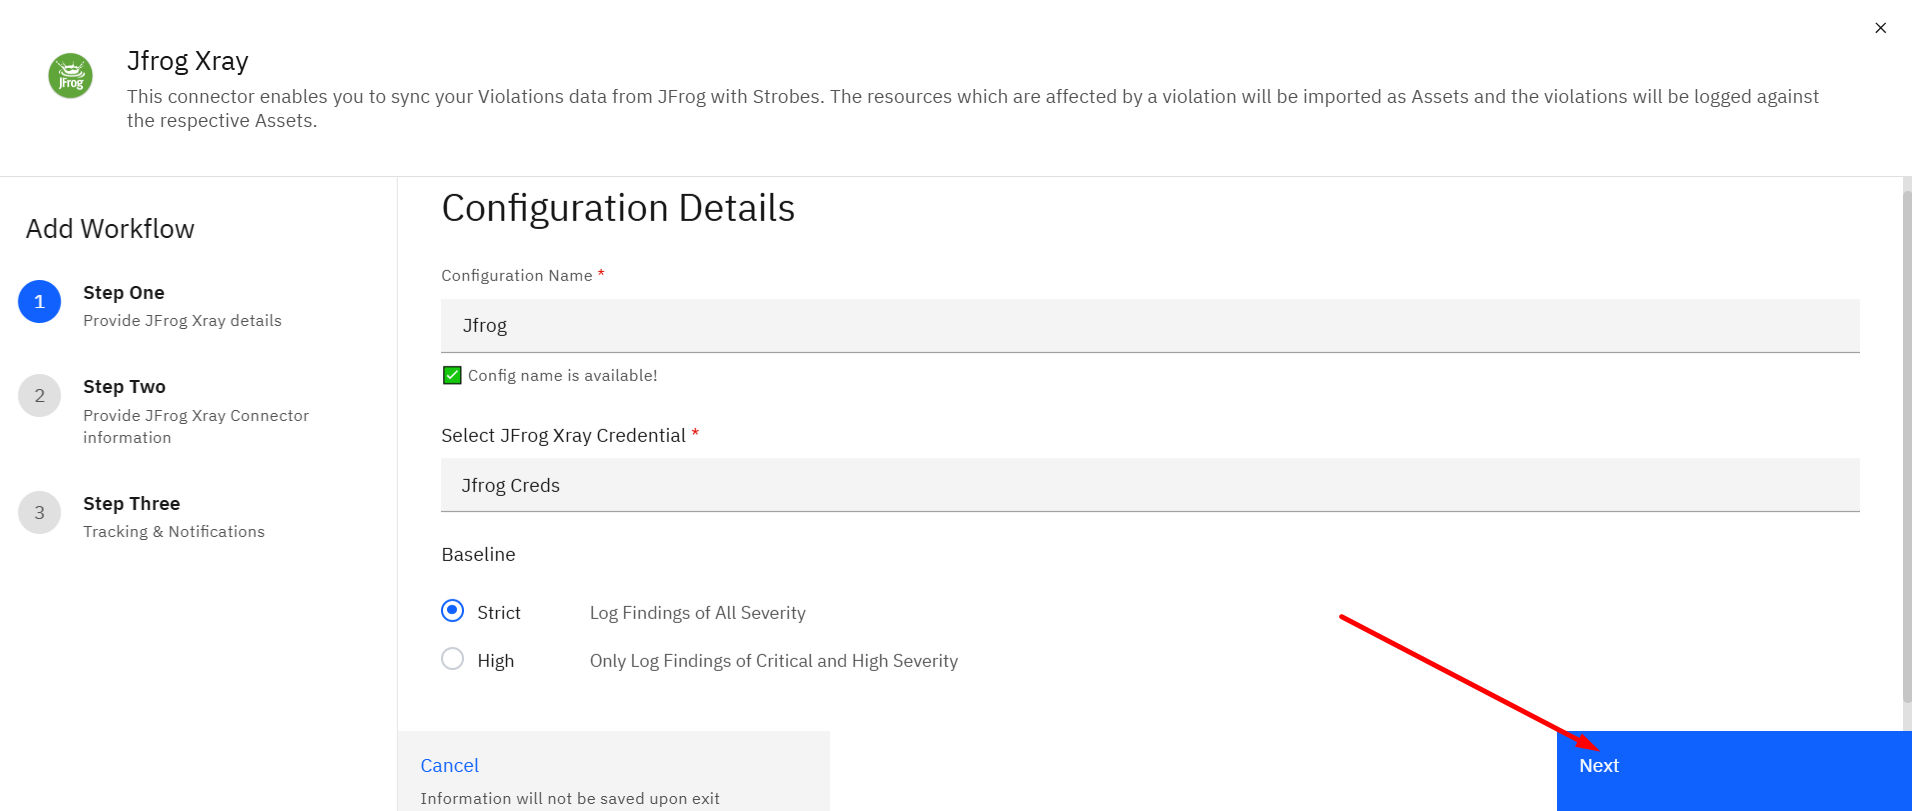
Click Next to proceed to the next configuration step.
Step 10: Select an Agent
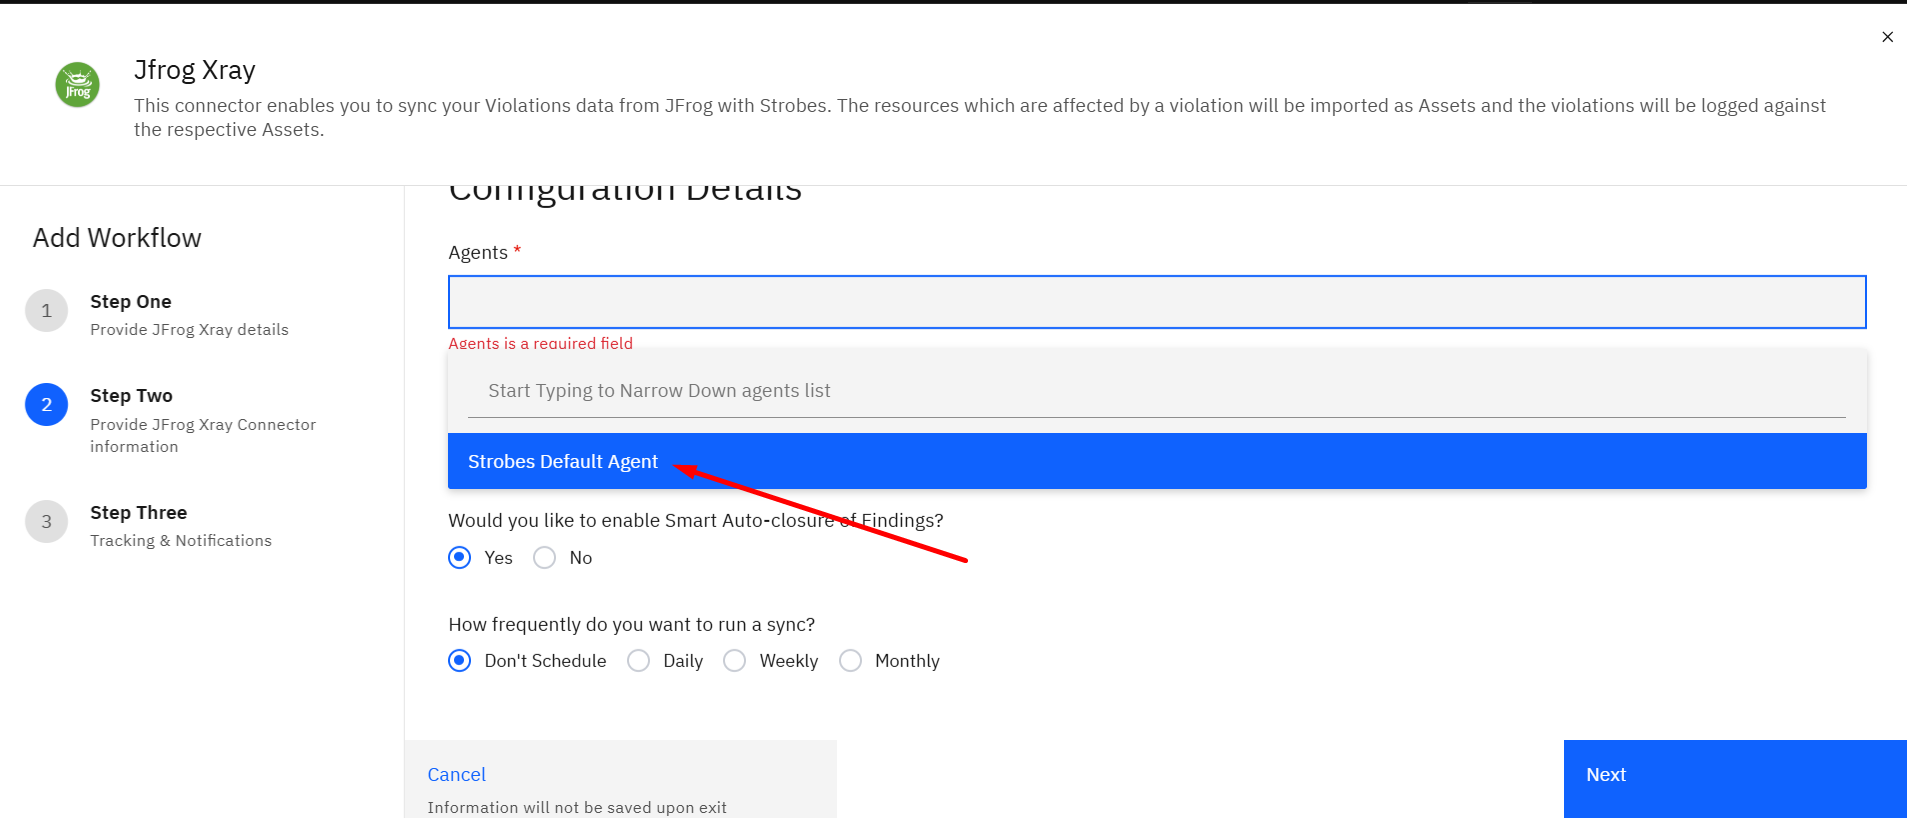
Click the Agents field and select the Strobes agent that will handle the connector's data. By default, Strobes Default Agent is selected.
Step 11: Add Tags (Optional)
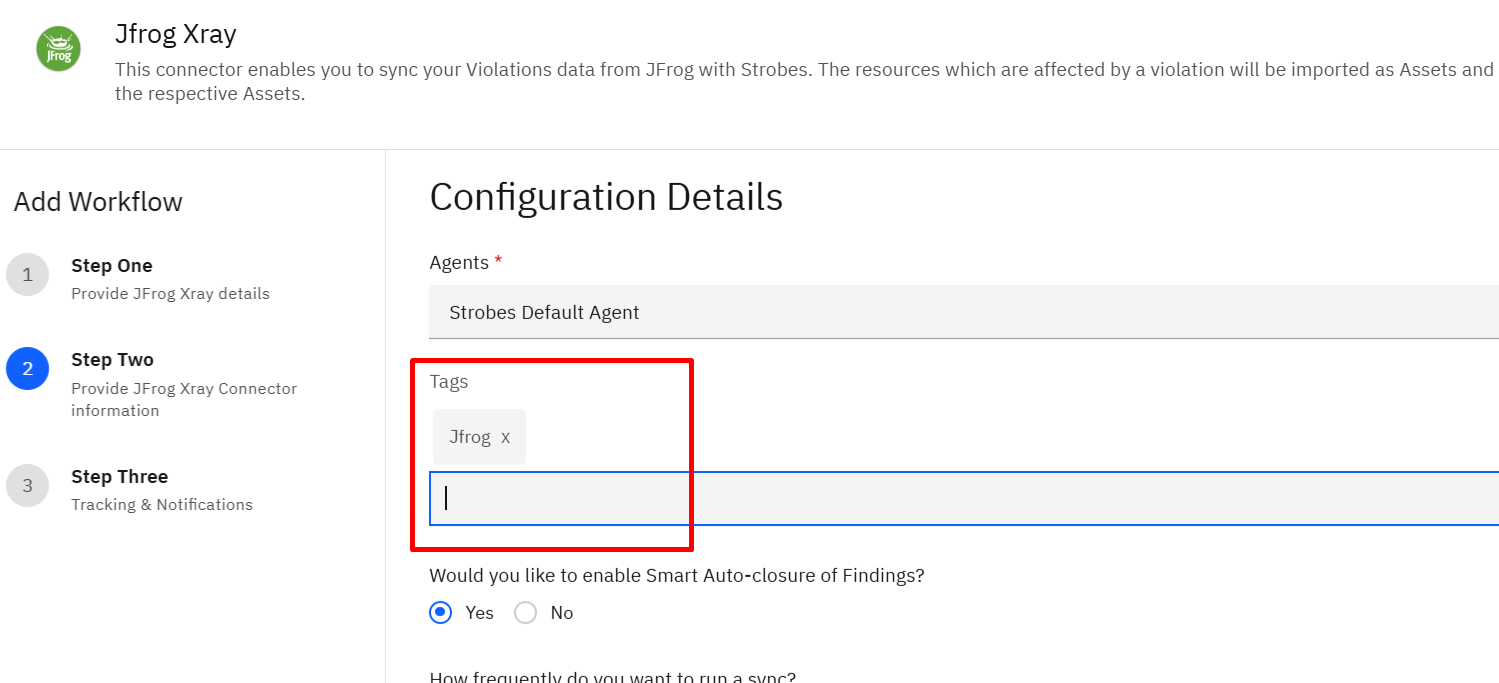
Click the Tags field and enter any tags you want to apply to the assets and findings imported by this connector. Tags help with filtering and scoping data within Strobes. Leave this field empty if no tags are needed.
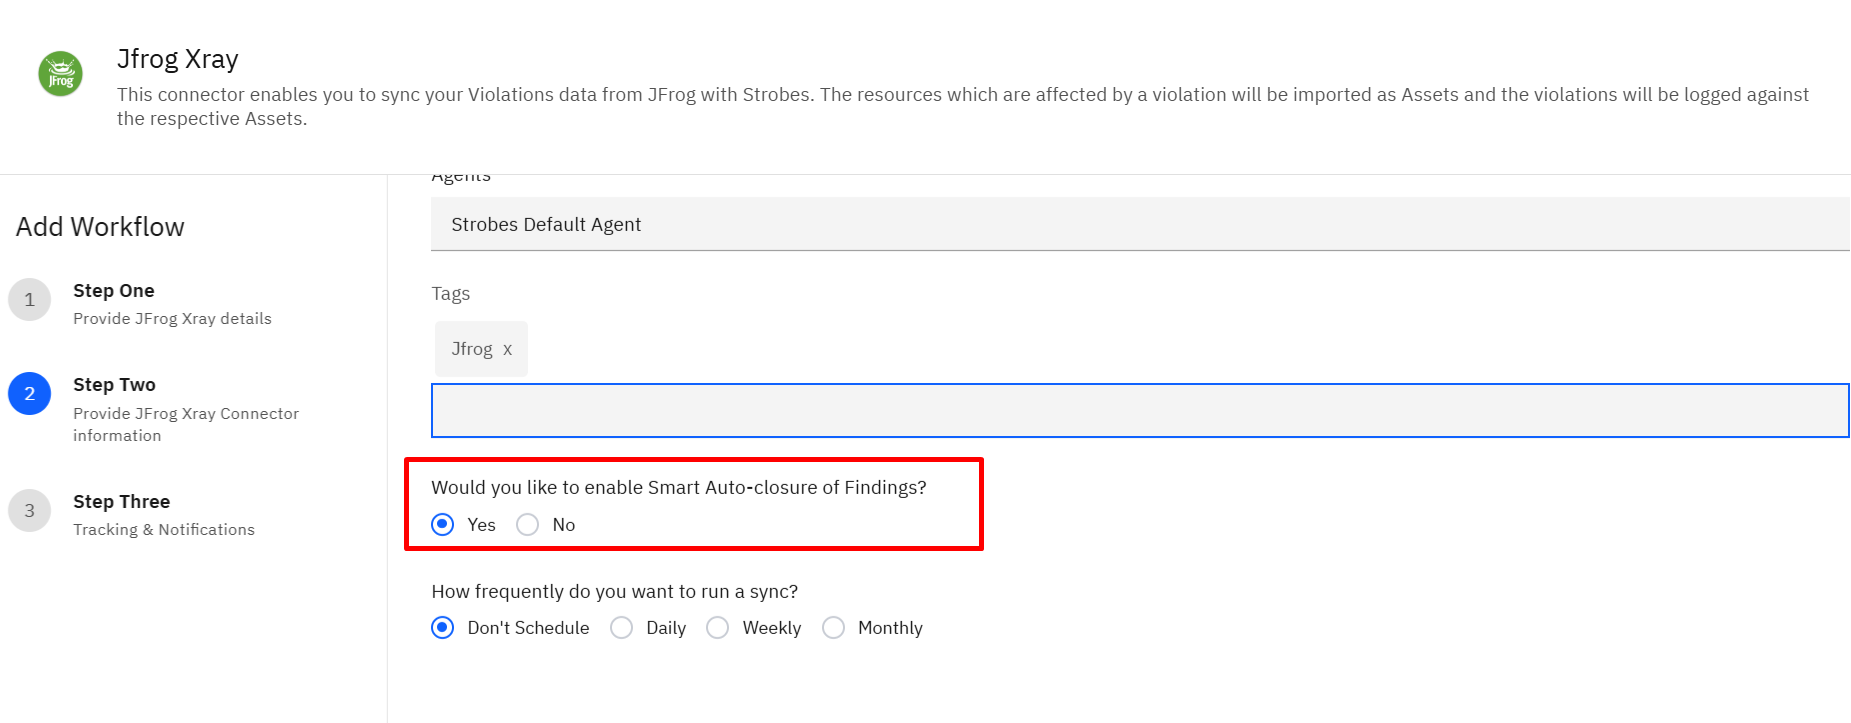
Step 12 : Enable Smart Auto-closure
Under Would you like to enable Smart Auto-closure of Findings?, select Yes to have Strobes automatically close findings that no longer appear in the latest Jfrog sync, or No to manage finding states manually.
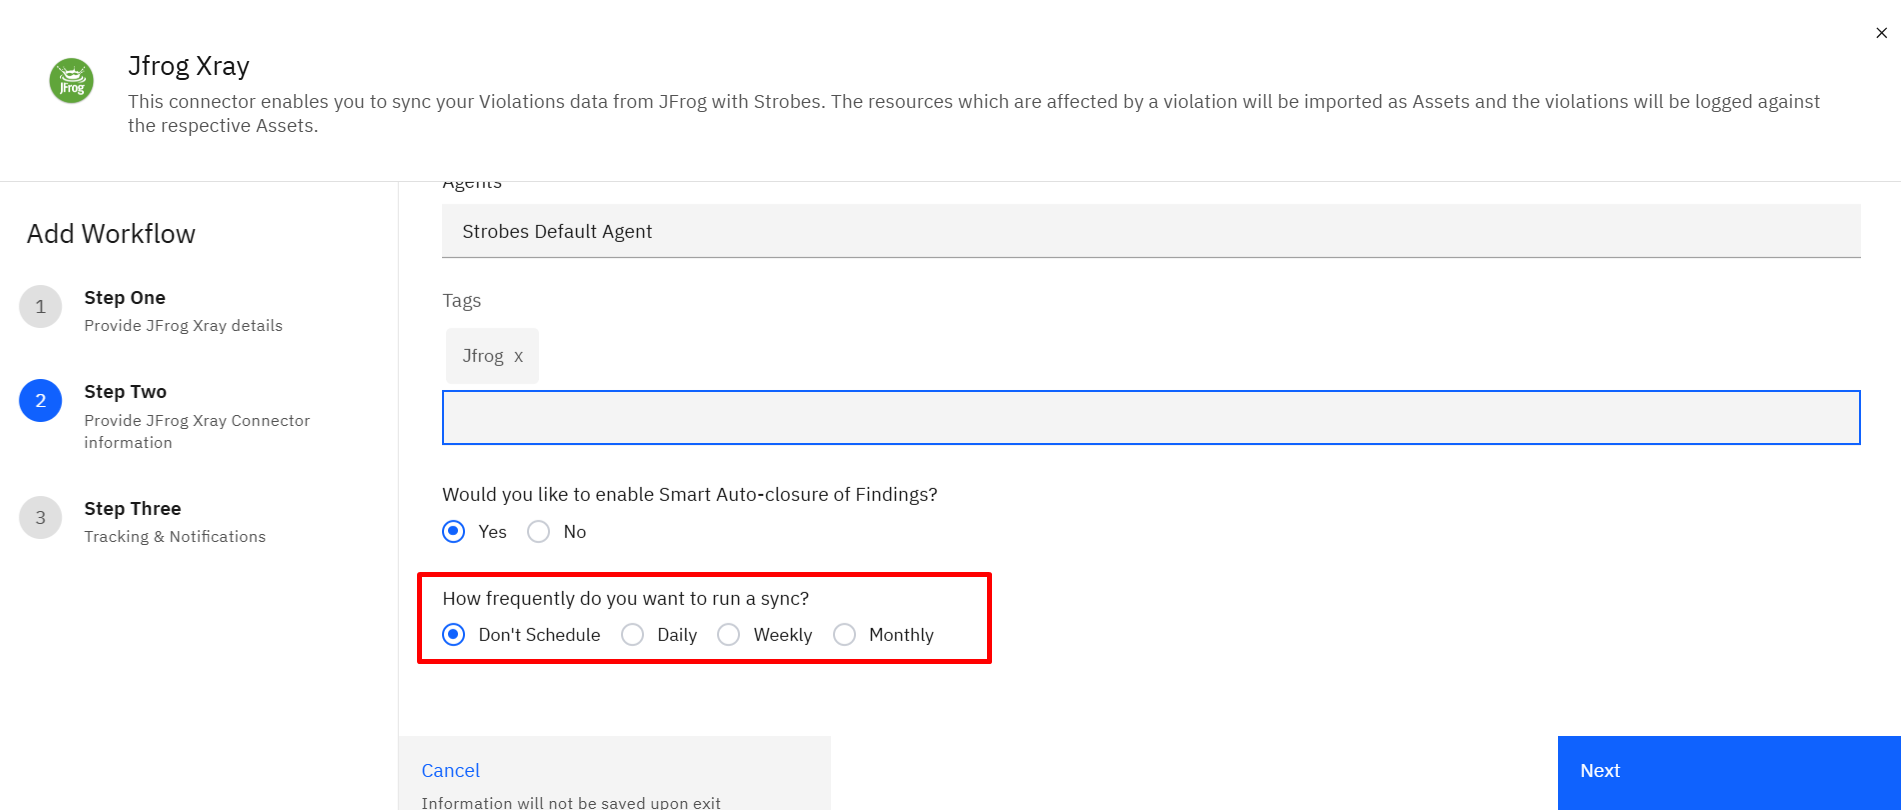
Step 13: Set Sync Frequency
Under How frequently do you want to run a sync?, select the desired recurring sync schedule for importing violation data from JFrog into Strobes.
Option | Description |
Don't Schedule | Run syncs manually only |
Daily | Sync once every day |
Weekly | Sync once every week |
Monthly | Sync once every month |
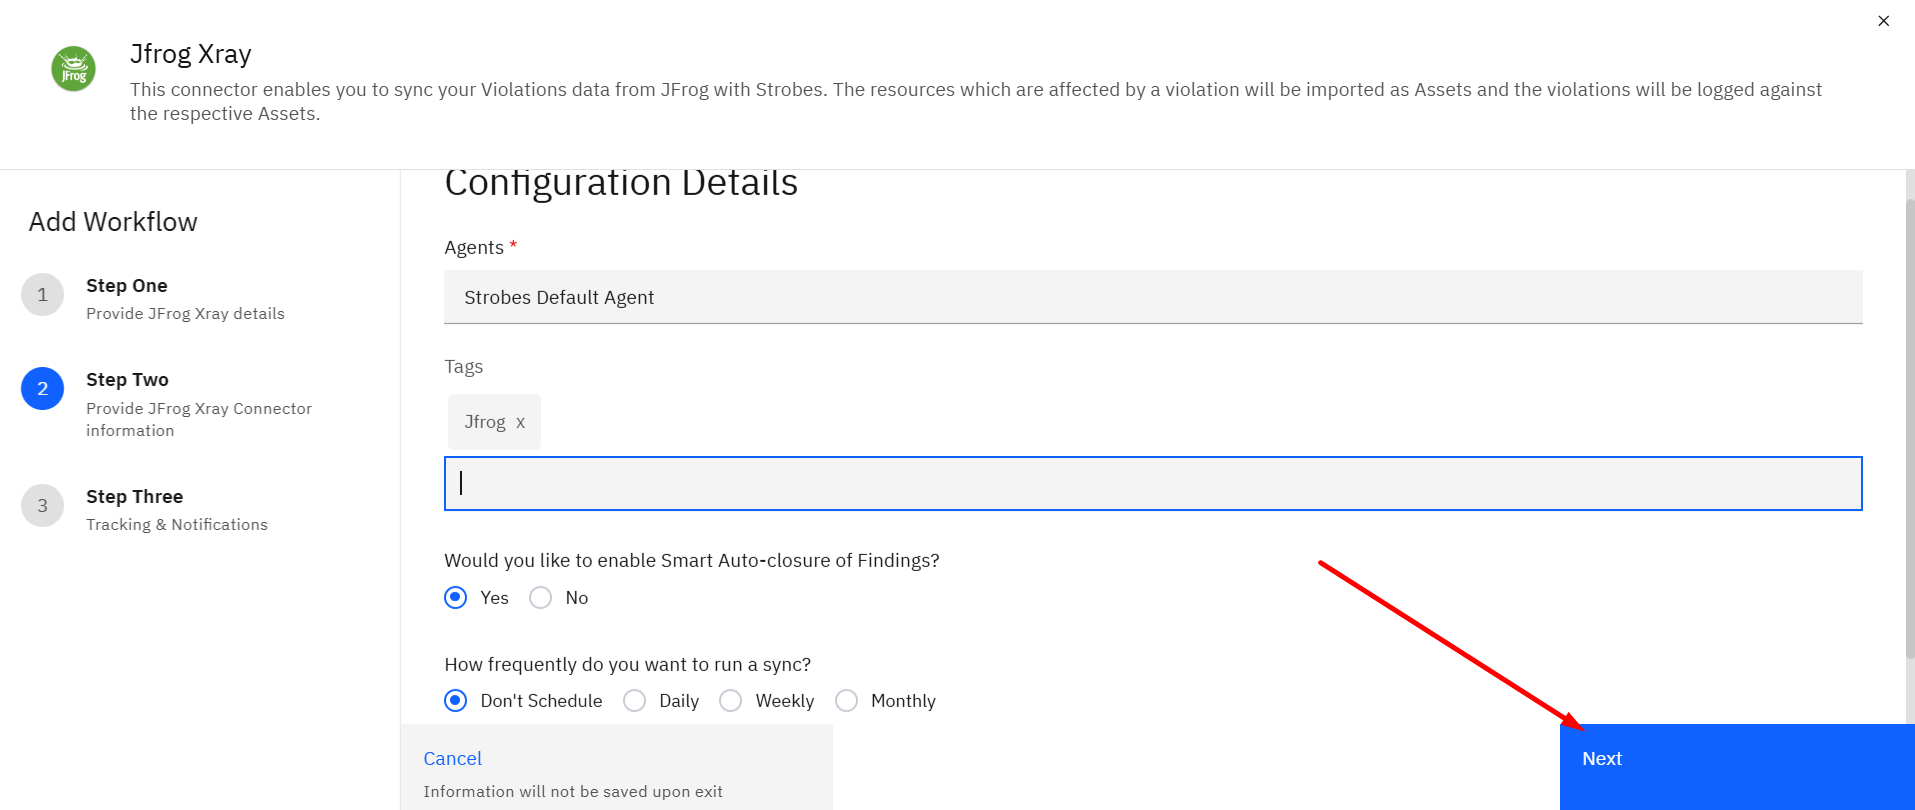
Step 14: Proceed to Step Three
Click Next to proceed to the third and final configuration step.
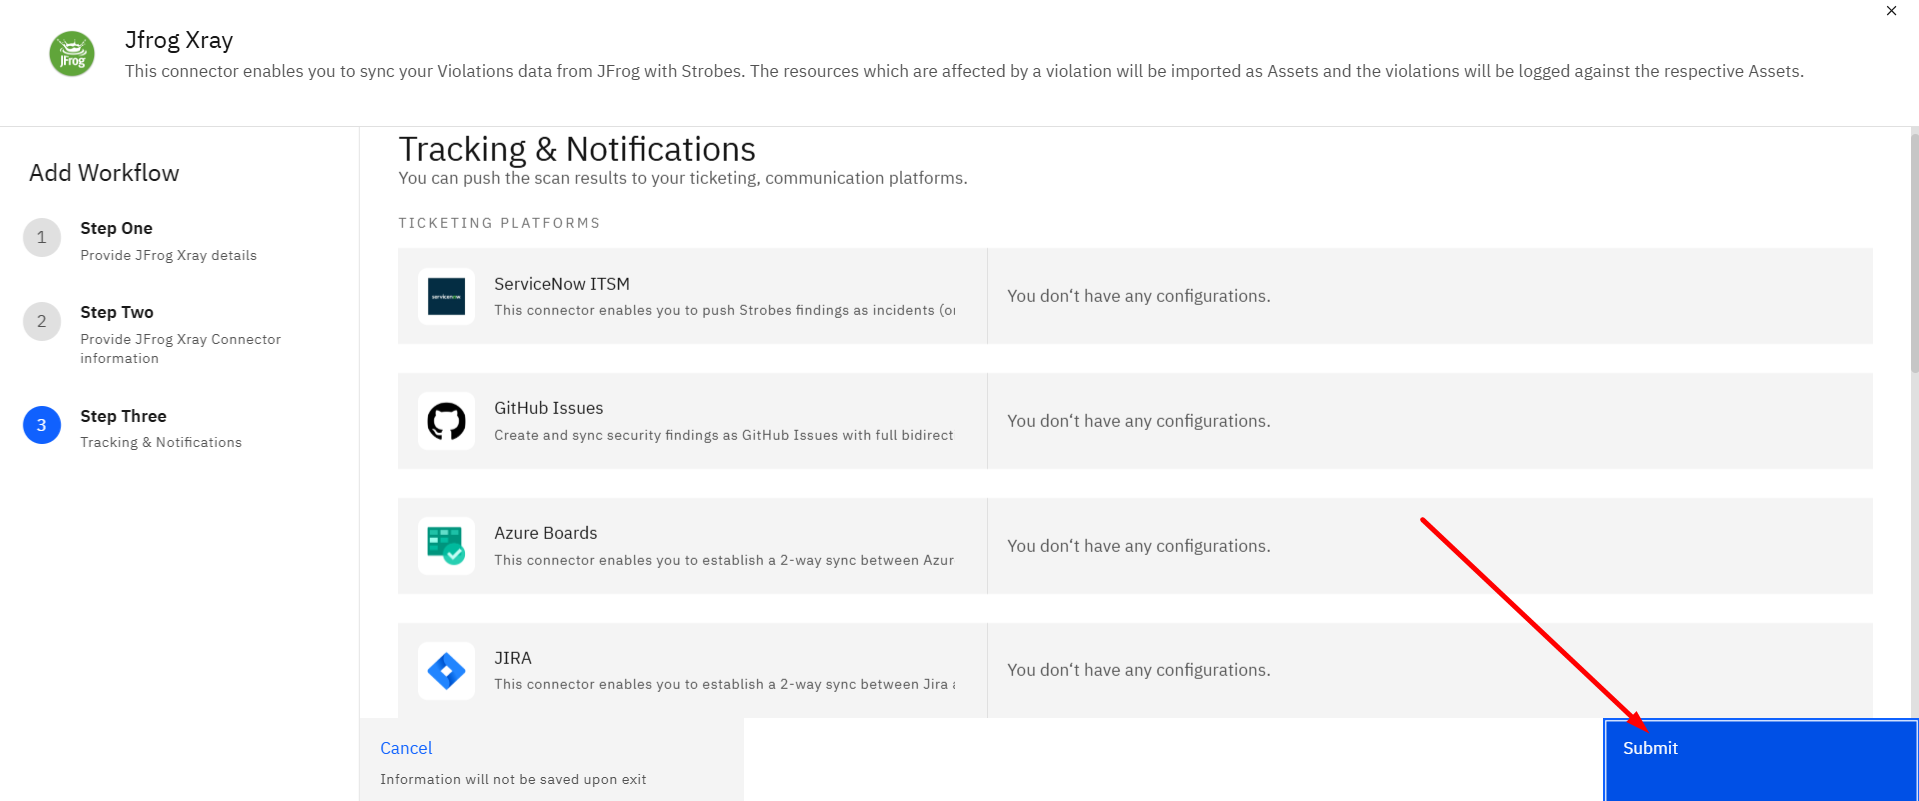
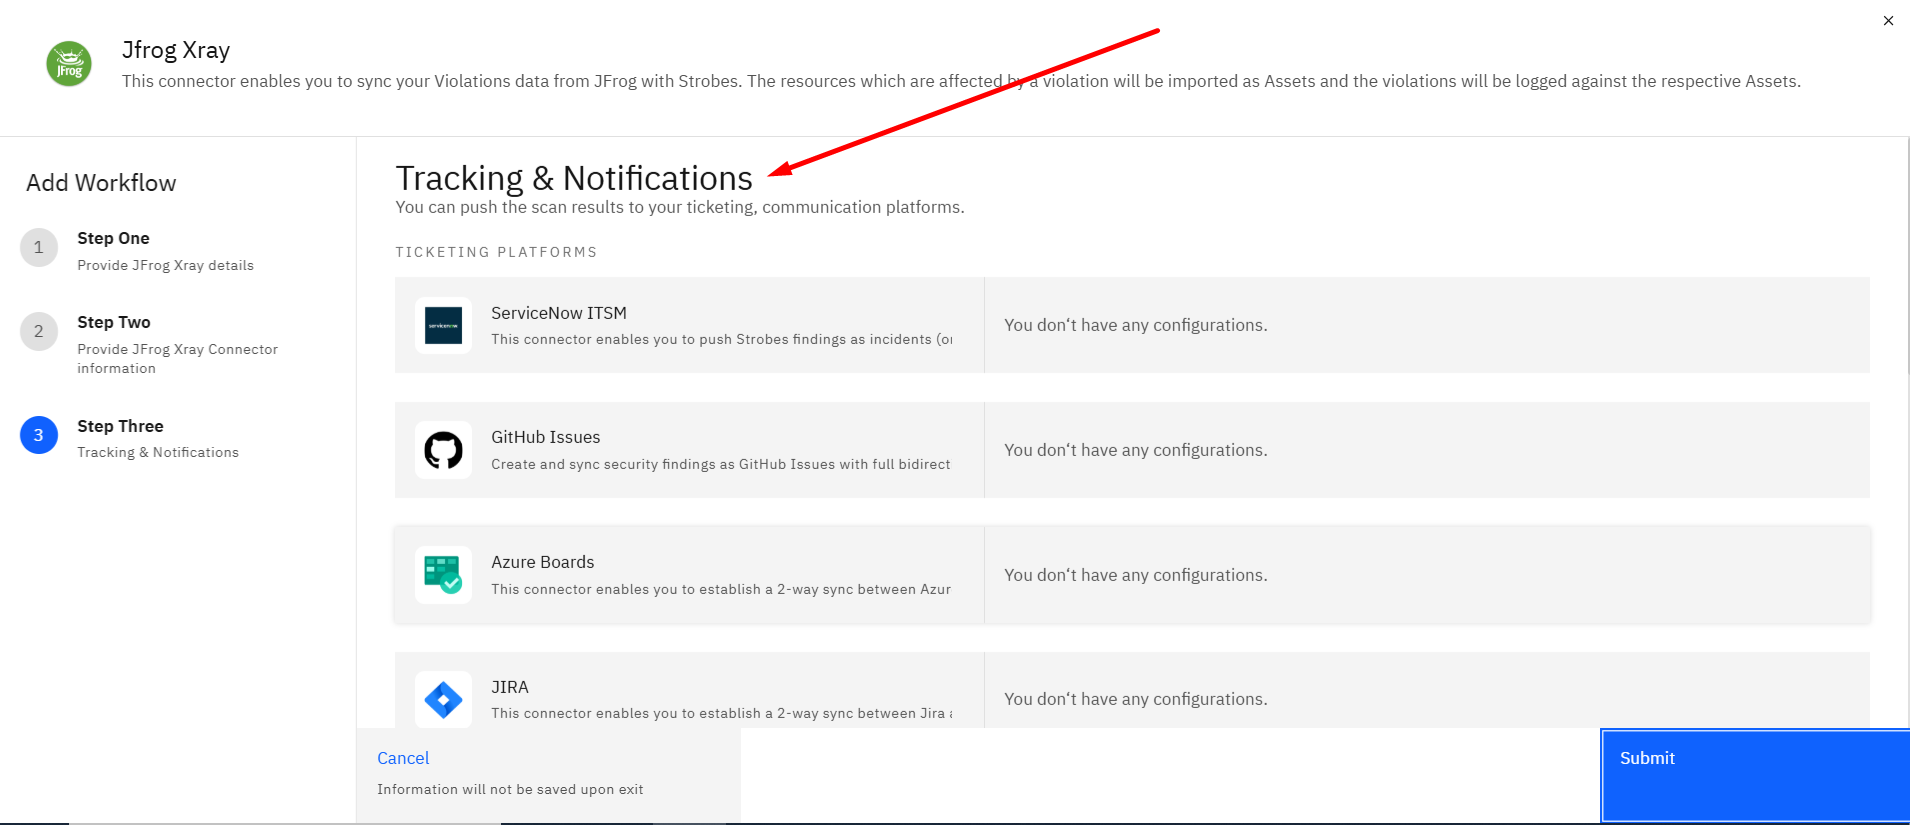
Step 15: Configure a Notification or Tracking Channel (Optional)
This step allows you to connect notification and tracking channels to the JFrog connector.
Notification Channels
Configure a notification channel to receive updates when the connector synchronizes violation data or imports new findings from JFrog. The available notification channels include:
- MS Teams
- Microsoft 365 Email
- Flock Messenger
- Slack
Tracking Tools
Connect tracking tools to receive imported JFrog findings as tickets for further tracking and remediation. The available tracking tools include:
- ServiceNow ITSM
- JIRA
- GitHub Issues
- Azure Boards
- Bugzilla – Strobes Sync Add-on
If notification or tracking configurations are already available in Strobes, they will appear in the respective lists and can be linked to this connector. This step is optional and can be skipped if no notification or tracking configuration is required.
Step 16: Submit the Configuration
Click Submit to save and activate the connector. Strobes will begin syncing violation data from JFrog according to the configured sync schedule.