
Invite Members and Manage Roles in Strobes
Overview
Strobes solves the silos among the stakeholders by allowing you to bring everyone under one roof. You can on invite your:
- Leadership team
- Product owners
- Development team
- IT & patch management team
- Internal security team
- External security vendors etc.
With proper access controls in place, you get to decide who has access to what data.
The Members section in Strobes lets you manage who has access to your organization, what role they hold, which assets they can see, and what actions they can perform. Members are organized by organization workspace, and roles define the permission sets applied to each member.
This article covers four areas: navigating the Members page and understanding the member table, inviting new members, adjusting individual member settings including permissions and role assignment, and managing roles on the Roles tab including creating custom roles.
Before You Start
- Role required: Owner and Manager access to invite members, change roles, or create custom roles. Manager access is sufficient for most other member management tasks.
Part 1 — Navigate to the Members Page
Step 1 — Click Members in the Left Sidebar
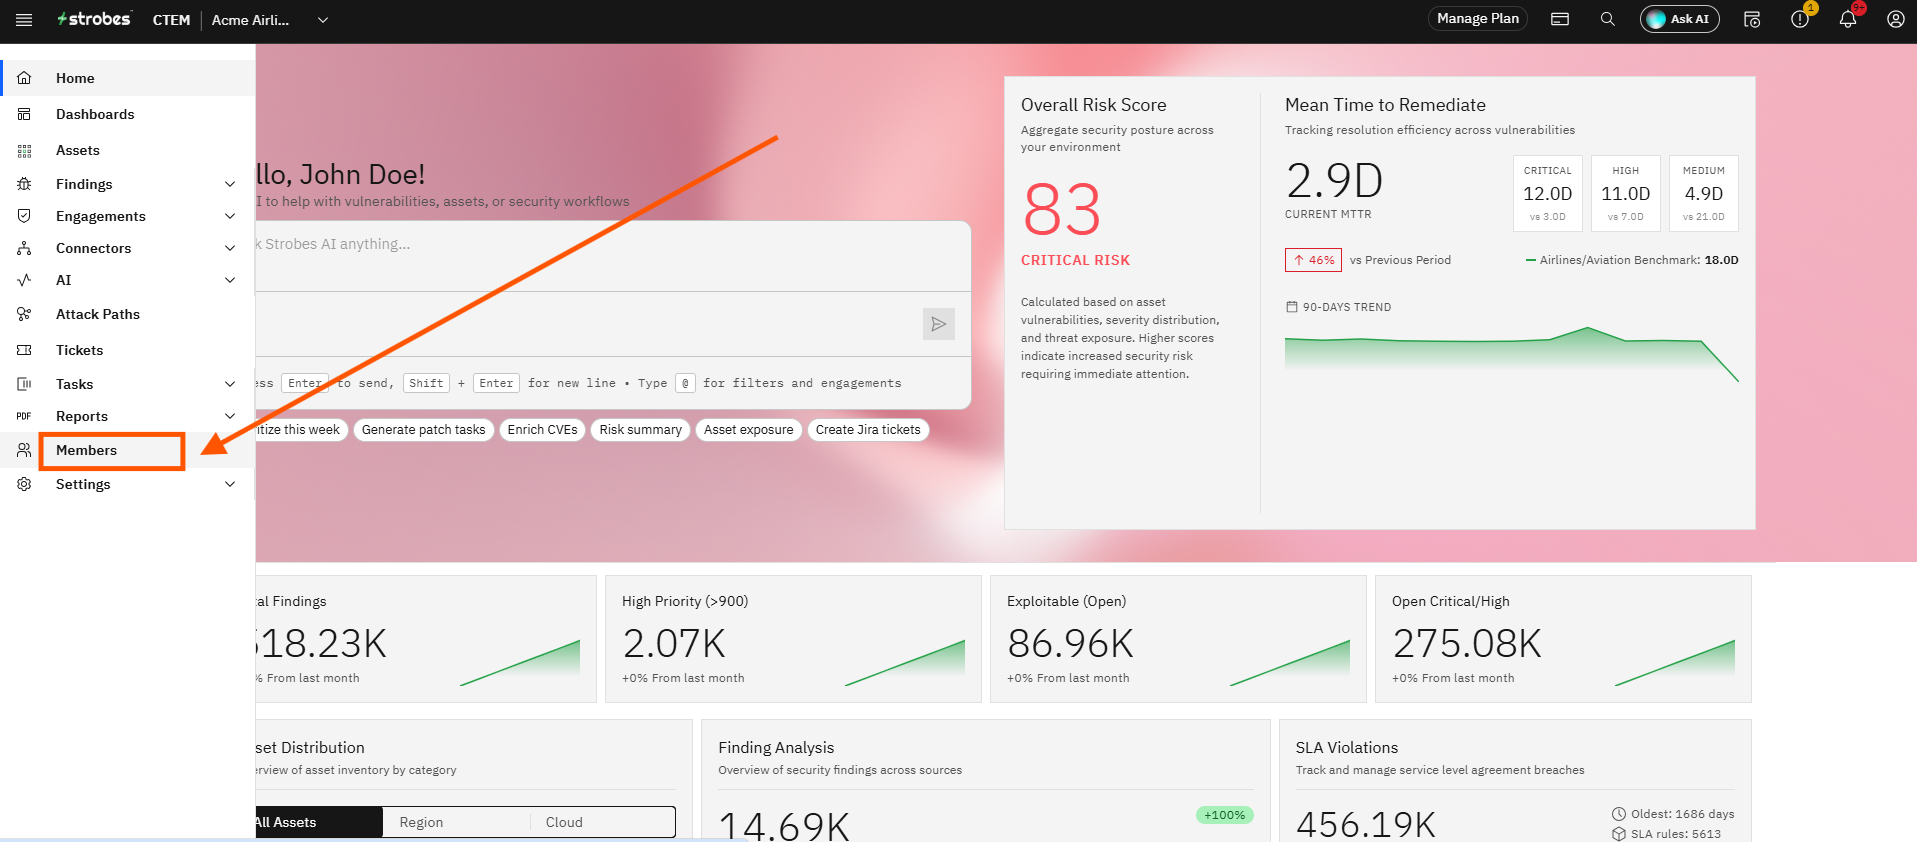
Click Members in the left sidebar. The Members page opens, defaulting to the organization tab. The page displays all members of your organization along with their role, asset access scope, and join date.
Step 2 — Understanding the Members Table
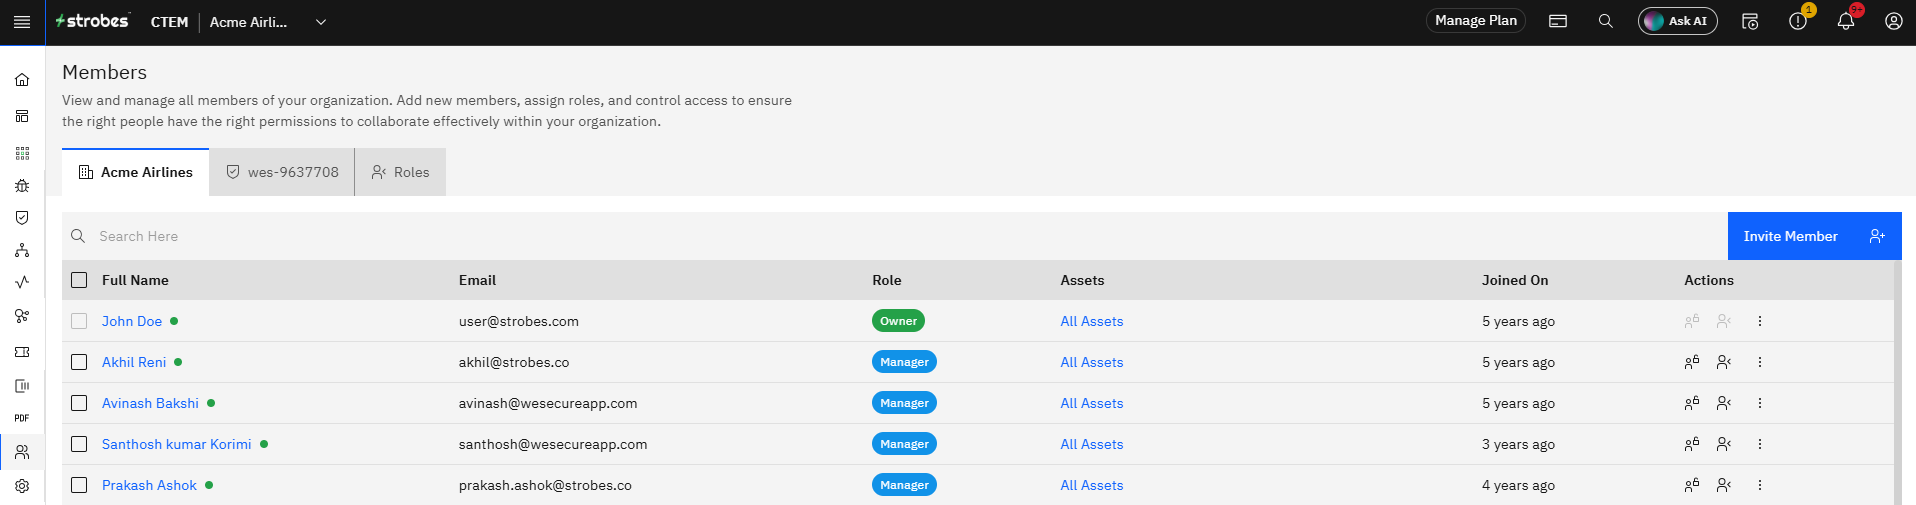
Review the Members table. The table has six columns:
- Full Name — The member's display name. A green dot indicates the member is currently online.
- Email — The email address associated with the member's Strobes account.
- Role — The role badge assigned to the member. Built-in roles include Owner (green), Manager (blue), Member (green), and Read Only (teal). Custom roles also appear here if created.
- Assets — The asset scope the member can access. Shows "All Assets" for unrestricted access, a truncated filter expression for scoped access, or an "Assign Assets" link if no assets have been assigned yet.
- Joined On — A relative timestamp showing when the member joined the organization.
- Actions — Three controls per row: a Permissions icon (shield), a Change Role icon (person with arrows), and a three-dot menu for additional options.
The Search Here bar at the top filters members by name or email in real time. The Items per page control at the bottom adjusts how many rows are shown. The total member count is shown next to the pagination control.
Part 2 — Invite a New Member
Step 3 — Click Invite Member
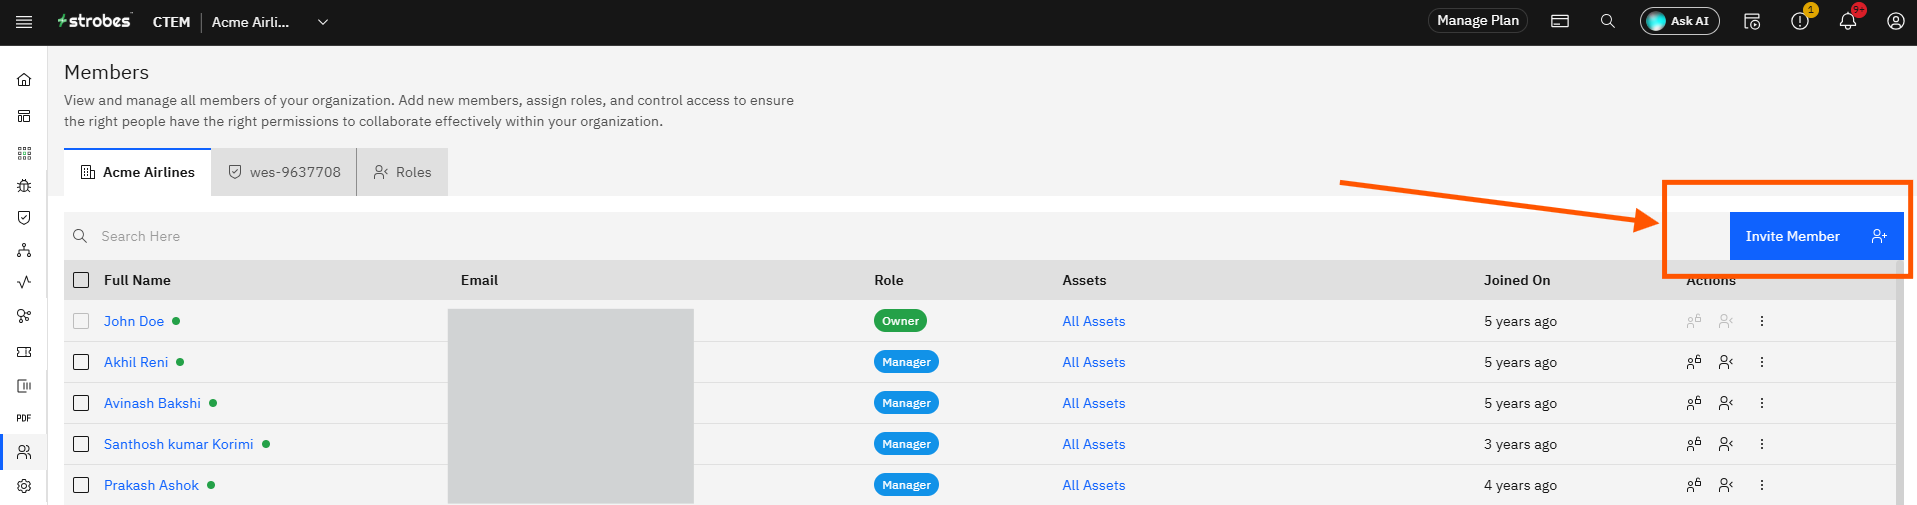
Click the Invite Member button in the top right corner of the Members page. The Invite Members to Your Team modal opens.
Step 4 — Enter the Email Addresses and Select a Role
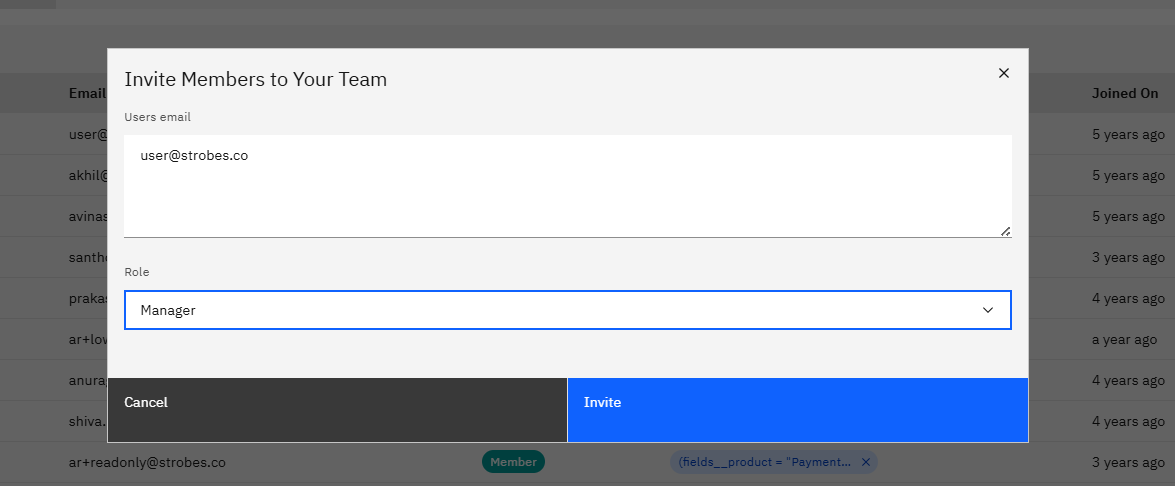
In the Invite Members to Your Team modal, complete the following fields:
- Users email — Click the text area and type the email address of the person you want to invite. To invite multiple people at once, separate each email address with a comma. The field accepts any number of addresses. The placeholder reads:
user1@workspace.com,user2@workspace.com. - Role — Click the Role dropdown and select the role to assign to all invited users. The default is Manager. All invitees receive the same role — you can change individual roles afterward.
Click Invite. Strobes sends an invitation email to each address. Invited users appear in the Members table once they accept.
Part 3 — Manage Individual Member Settings
Step 5 — Open Member Alert Preferences
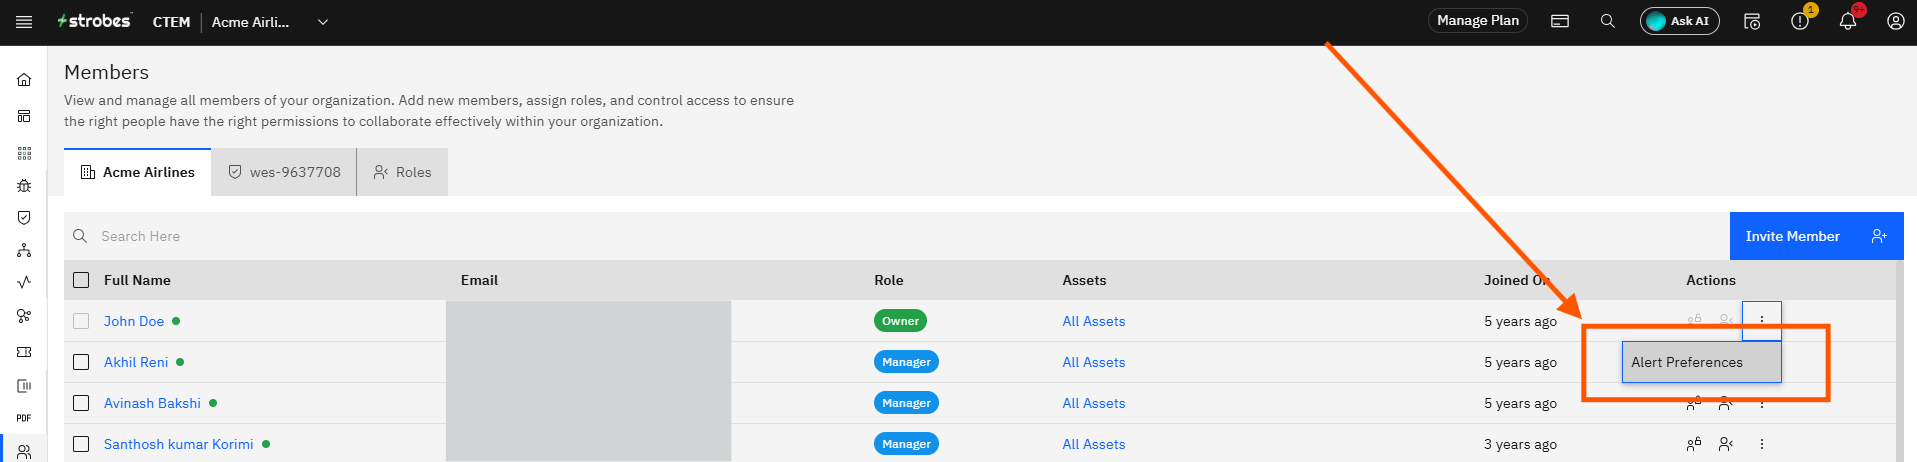
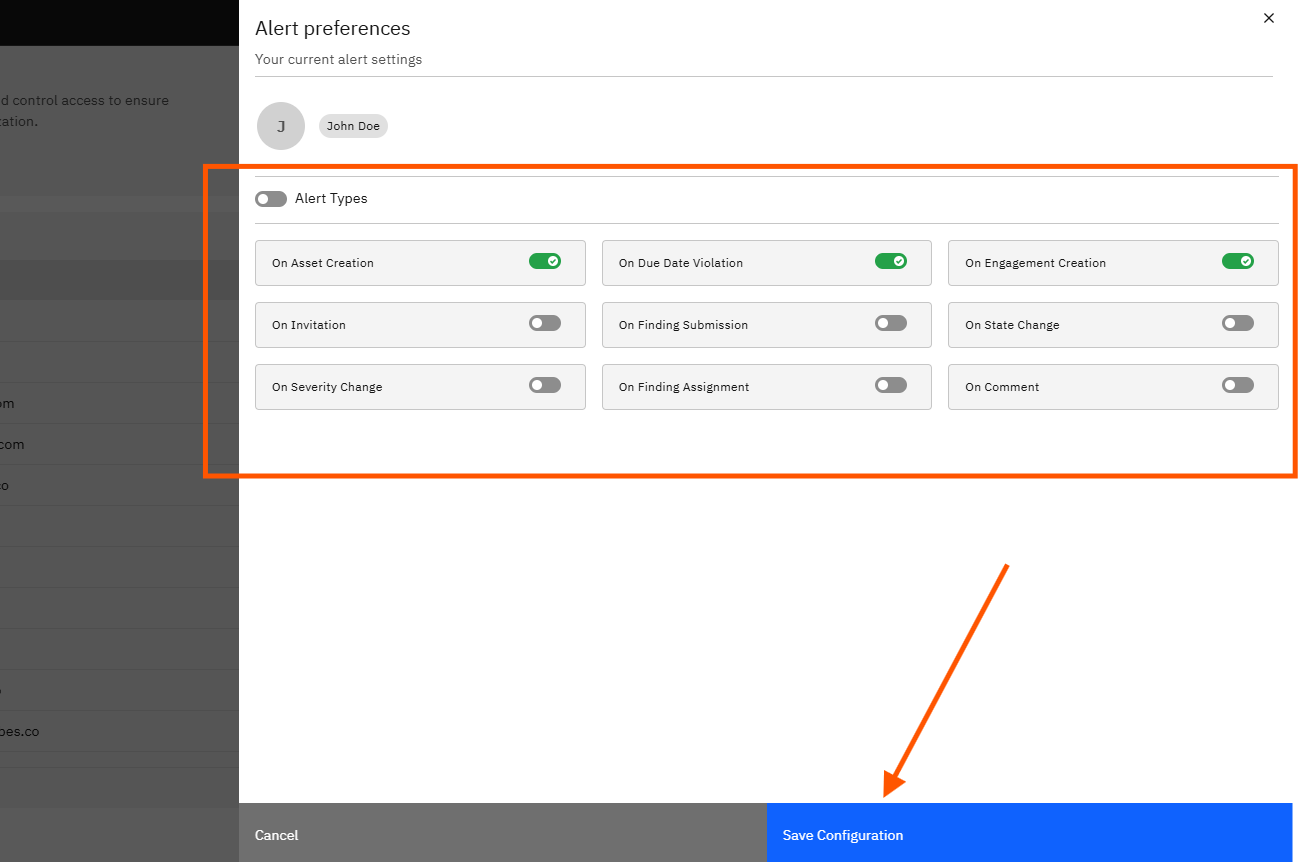
Click the three-dot (⋮) menu at the right end of any member row and click Alert Preferences. This opens the notification settings for that specific member, where you can configure which events and severity levels trigger alerts for them.
Step 6 — Open the Access Details Panel
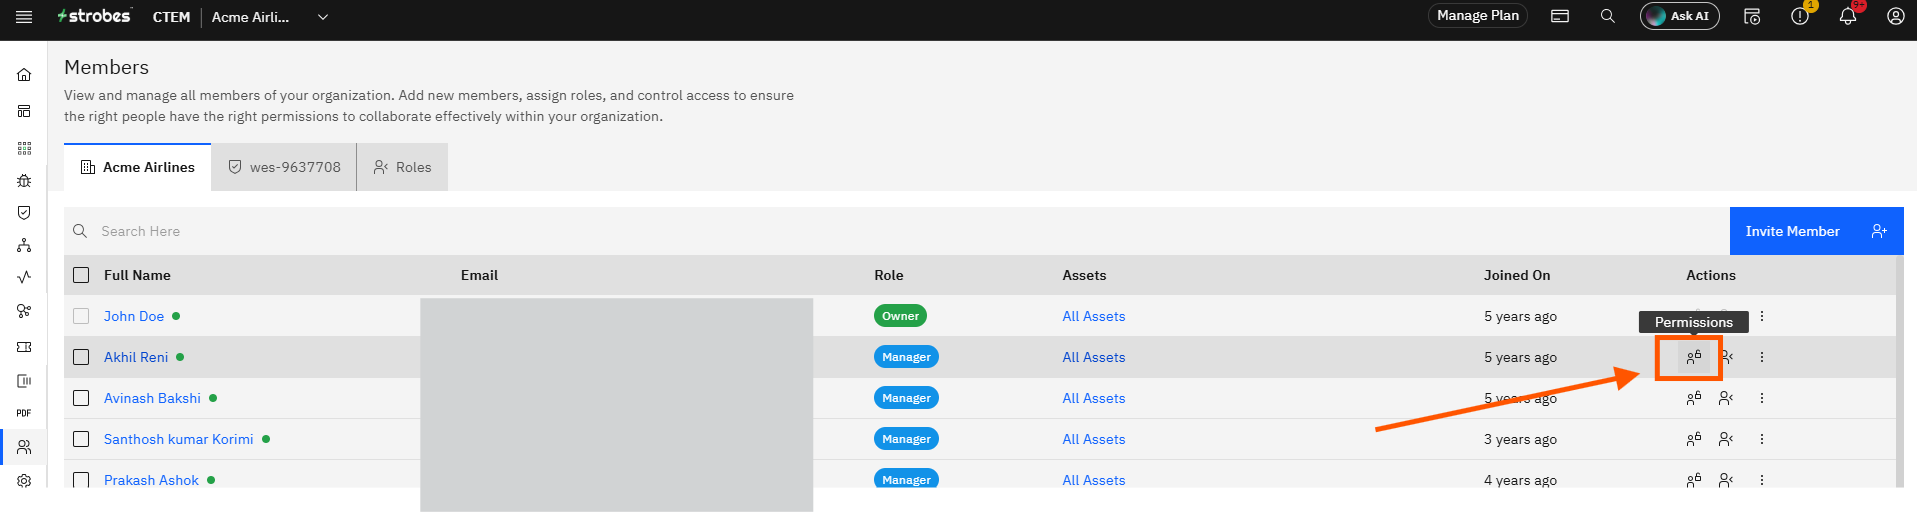
Click the Permissions icon (shield) in the Actions column for any member. A "Permissions" tooltip confirms the button. The Access Details panel slides open on the right side of the screen.
Step 7 — Configure the Access Details Panel
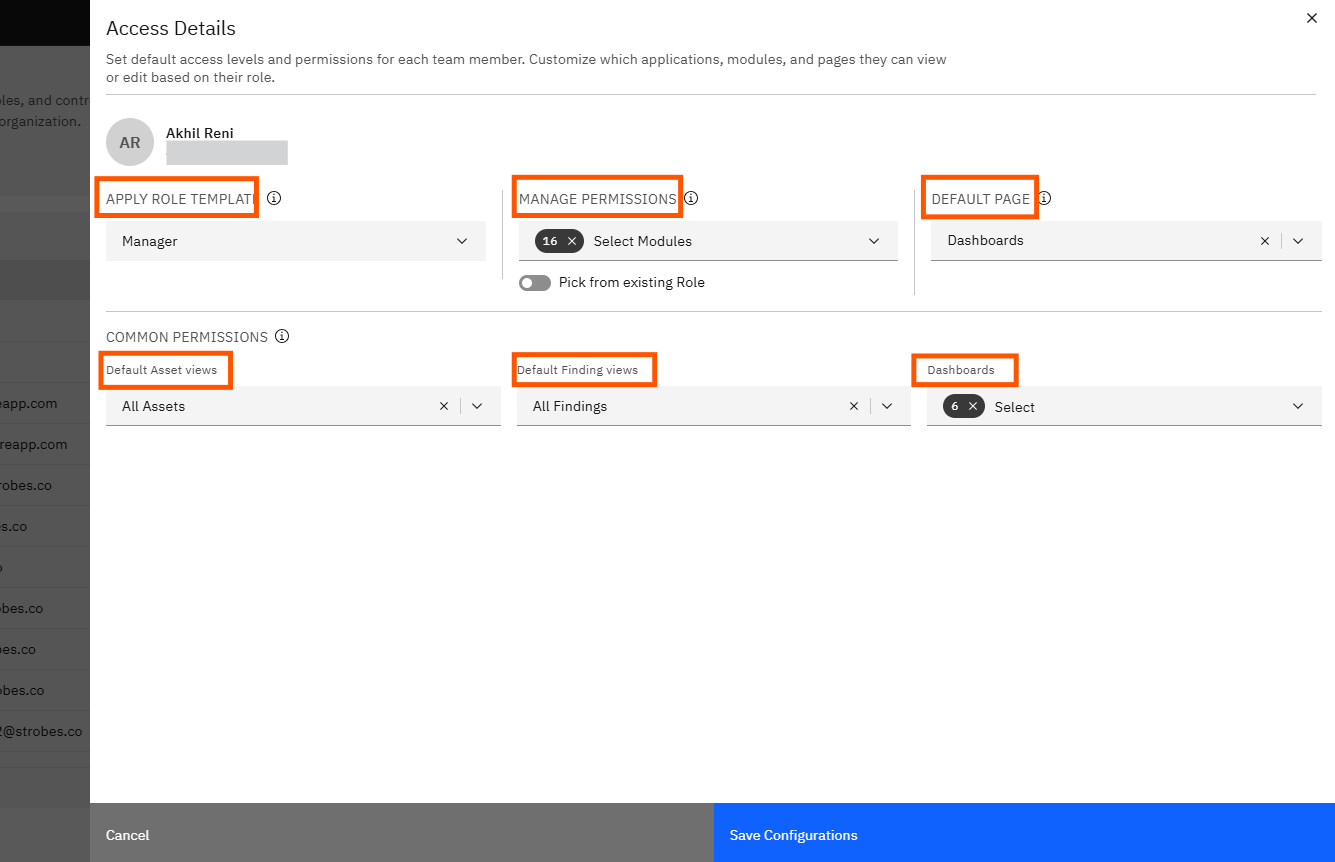
The Access Details panel has the following fields:
- Apply Role Template — Select a role from the dropdown to apply that role's permission set as a starting point for this member. This pre-fills the Manage Permissions section with the selected role's defaults. Useful when you want to base a member's access on an existing role before making individual adjustments.
- Manage Permissions — Displays a count of individually selected permissions for this member (shown as "N x"). Use the Select Modules dropdown to add or remove specific module-level permissions. Enable the Pick from existing Role toggle to copy the full permission set from a saved role directly.
- Default Page — Set the page this member lands on after logging in. Click the dropdown to choose from available pages (for example, Dashboards), or click the X to clear the default.
- Default Asset views — Controls which asset view this member sees by default. Set to "All Assets" for unrestricted access, or specify a filtered scope.
- Default Finding views — Controls which finding view this member sees by default. Set to "All Findings" for unrestricted access, or specify a filtered scope.
- Dashboards — Select which dashboards are available to this member using the Select dropdown. The badge shows how many dashboards are currently assigned.
Click Save Configurations to apply all changes to this member.
Step 8 — Open the Change Role Dialog
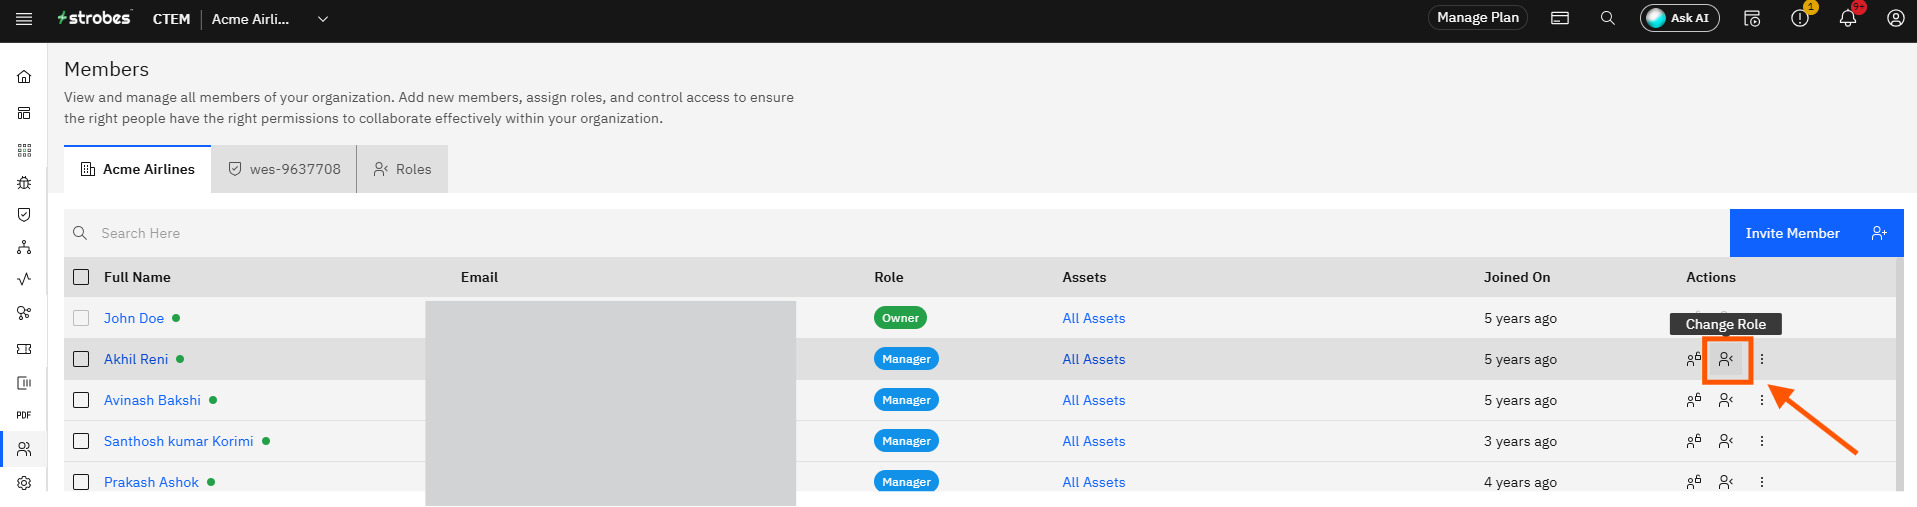
Click the Change Role icon (person with arrows) in the Actions column for any member. A "Change Role" tooltip confirms the button. The Change User Role modal opens.
Step 9 — Select a New Role and Click Update
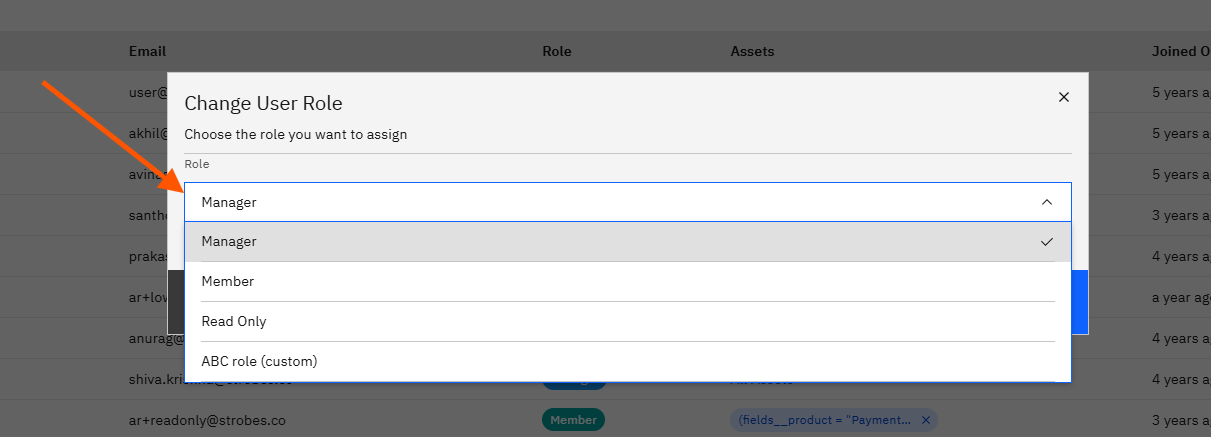
In the Change User Role modal, click the Role dropdown and select the new role for this member. The available options include:
- Manager — Can manage members, assets, and findings.
- Member — Standard organization member.
- Read Only — Read-only access to assets and findings.
- Any custom roles your organization has created also appear in this list.
Click Update. The member's role badge in the Members table updates immediately.
Part 4 — Manage Roles
Step 10 — Navigate to the Roles Tab
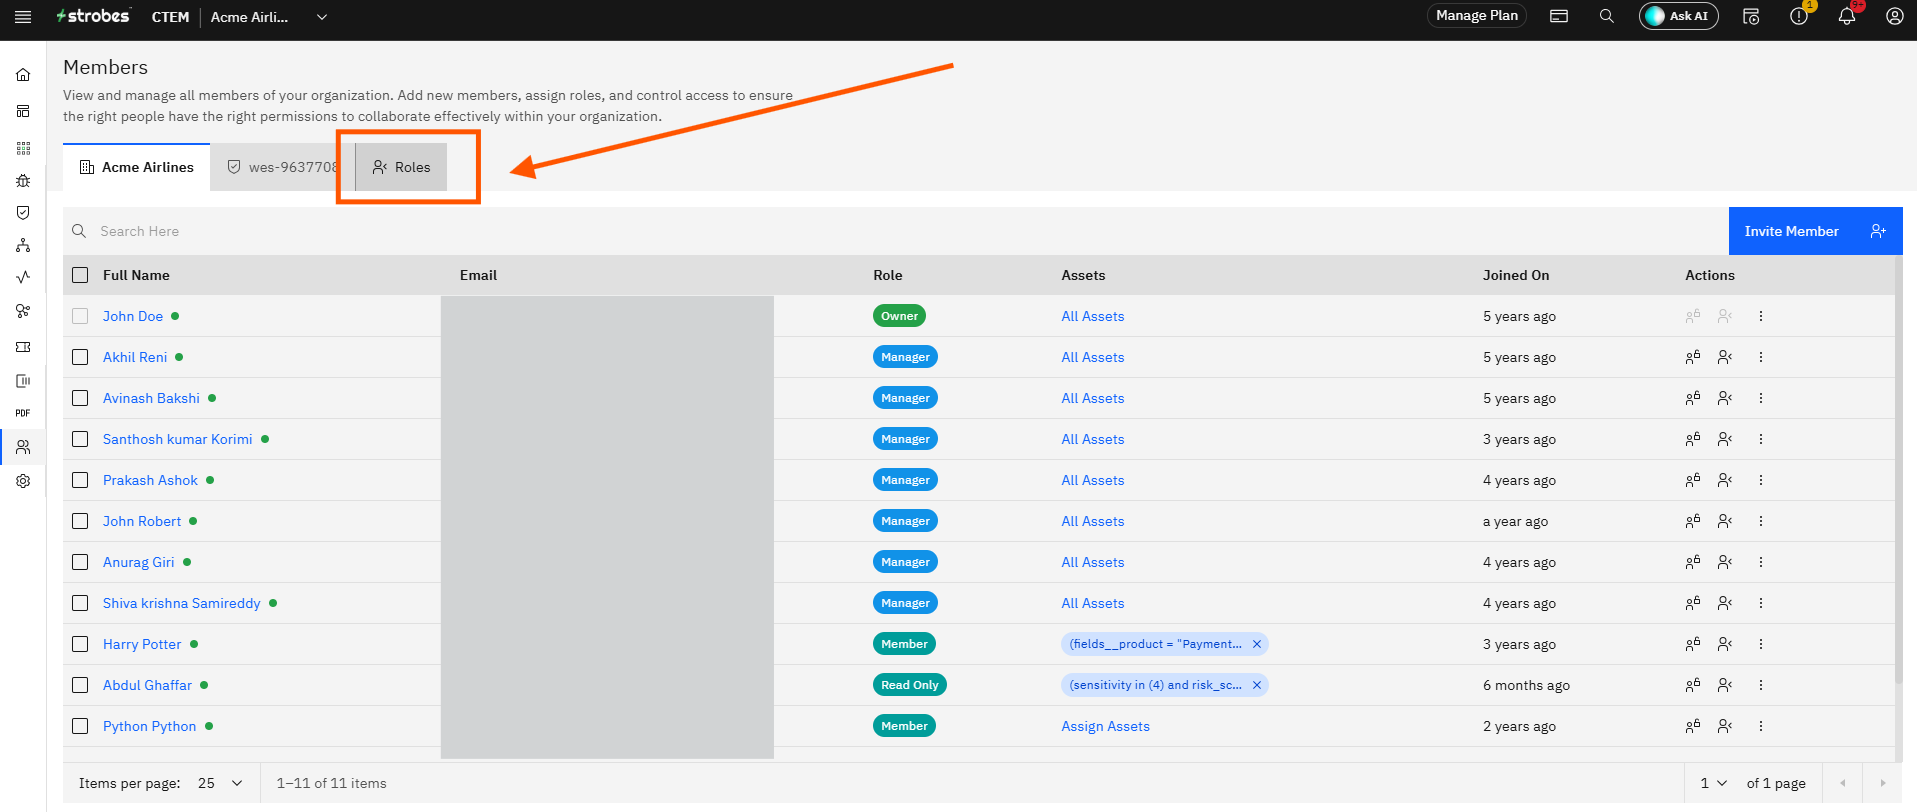
Click the Roles tab at the top of the Members page. The Roles tab opens with the description: "Custom roles bundle a set of permissions you can assign to members. System roles are read-only — duplicate them to customize."
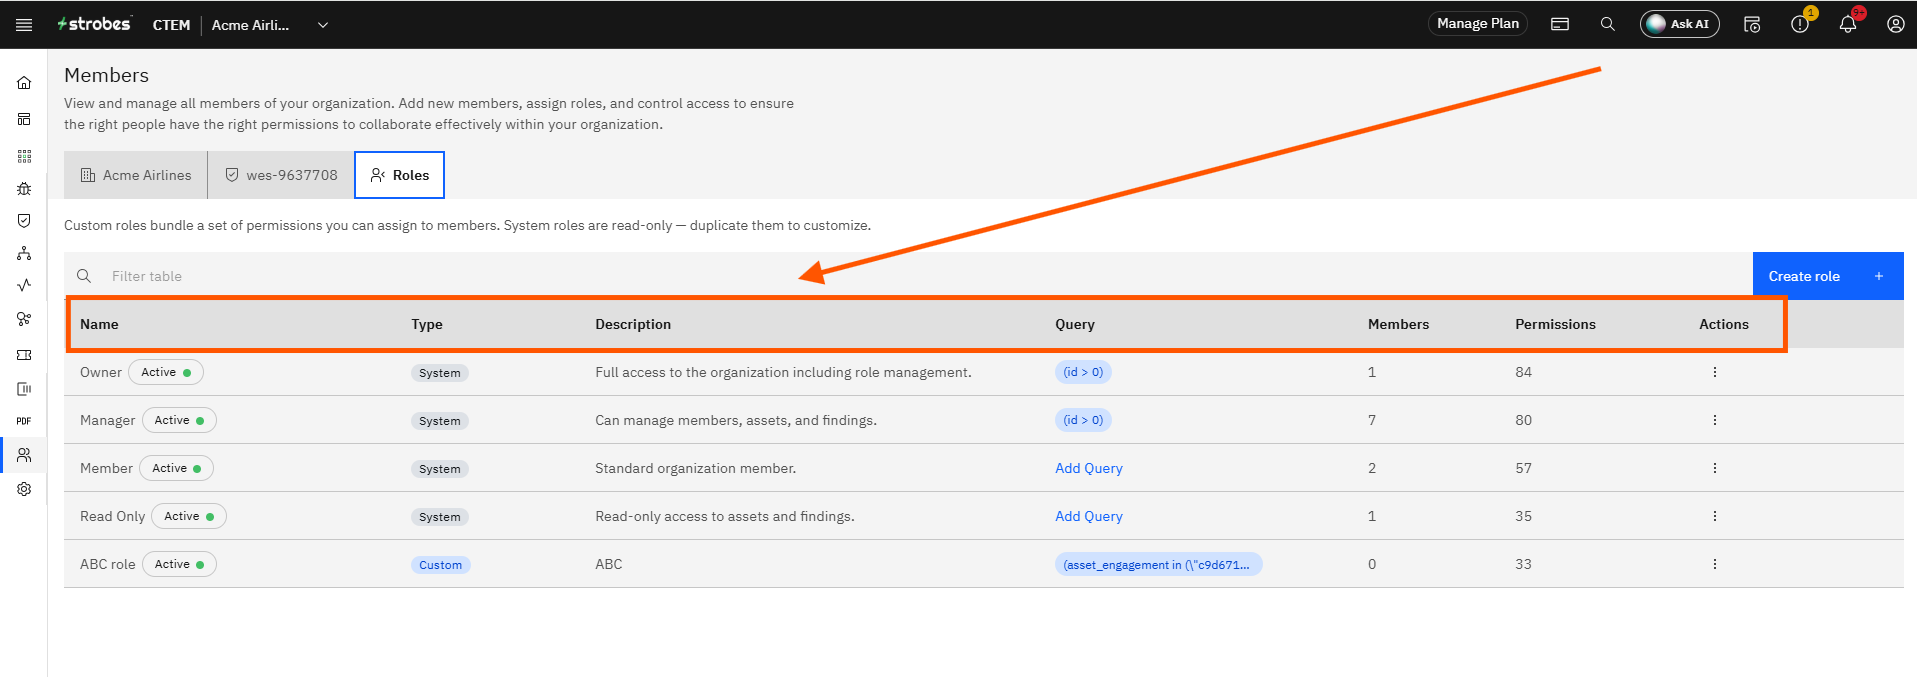
The Roles table has seven columns:
- Name — The role name with an Active status badge.
- Type — Either System (built-in) or Custom (user-created).
- Description — A short description of what the role allows.
- Query — The RQL asset filter applied to members with this role. Shows
(id > 0)for all-access roles, a custom expression for scoped roles, or an "Add Query" link for roles with no filter set. - Members — The number of members currently assigned this role.
- Permissions — The total number of individual permissions active for this role.
- Actions — A three-dot menu for options such as Edit, Duplicate, or Delete (where available).
A Filter table search bar lets you search roles by name.
Step 11 — Review the System Roles
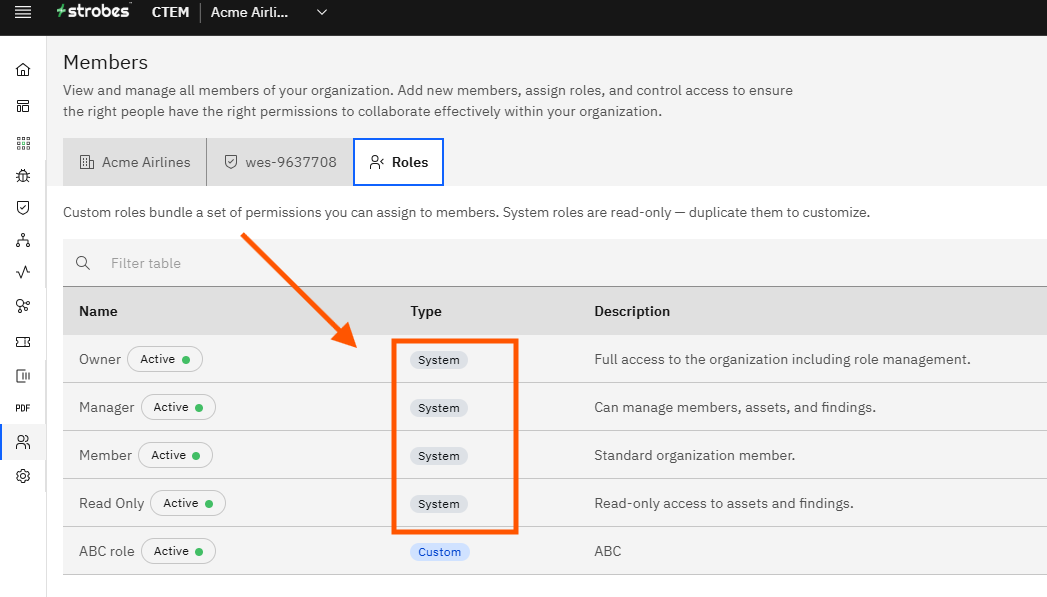
The four built-in system roles are listed below. System roles carry a System type badge and cannot be edited directly. To customize a system role, use its three-dot menu to duplicate it and then edit the copy.
- Owner — Full access to the organization including role management. Default query:
(id > 0). 84 permissions. - Manager — Can manage members, assets, and findings. Default query:
(id > 0). 80 permissions. - Member — Standard organization member. No default asset query filter. 57 permissions.
- Read Only — Read-only access to assets and findings. No default asset query filter. 35 permissions.
Custom roles appear below the system roles with a Custom type badge.
Step 12 — Click Create Role
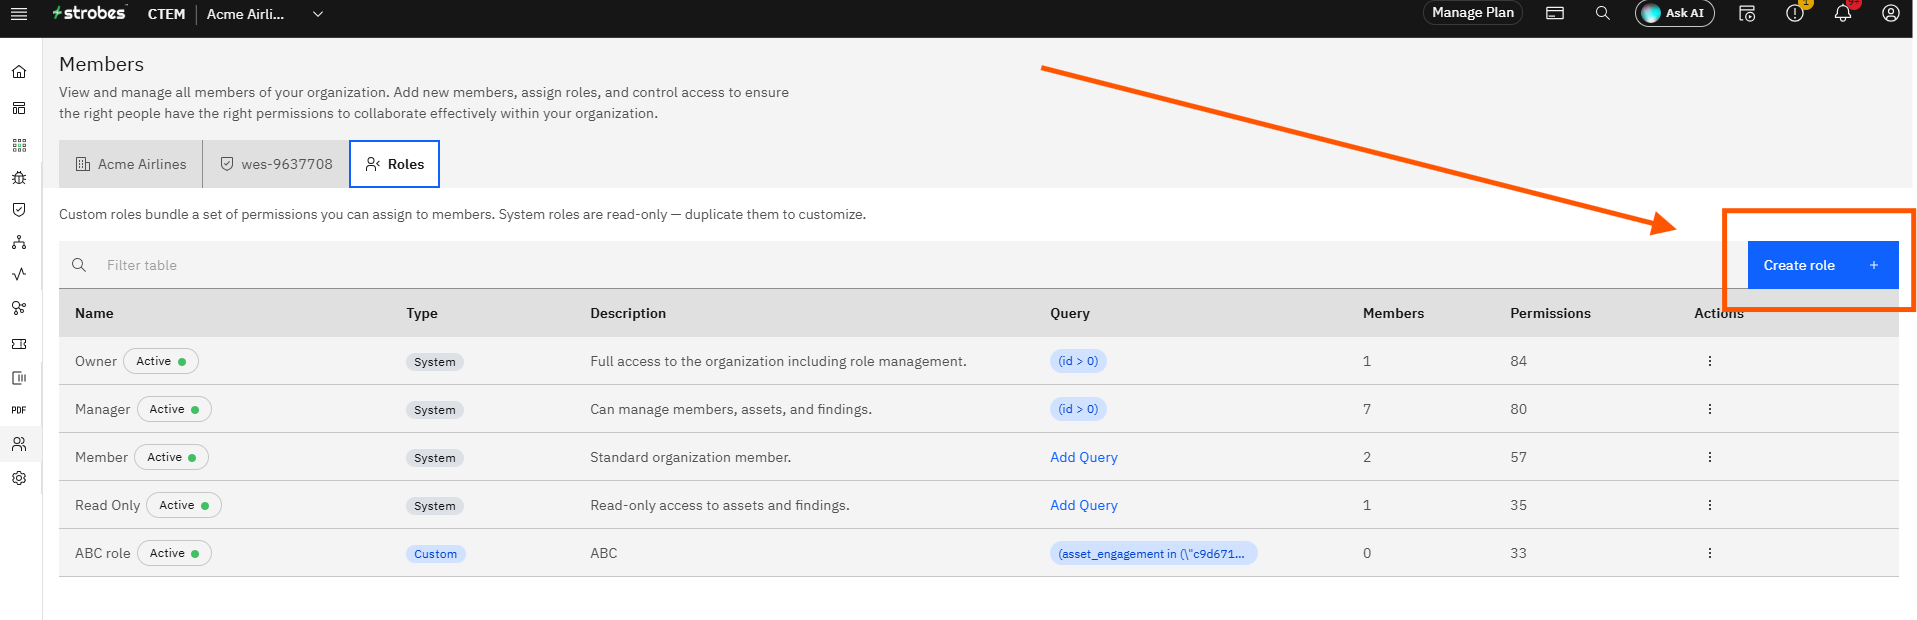
Click the Create role button in the top right corner of the Roles tab. The Create role modal opens.
Step 13 — Enter the Role Name and Description
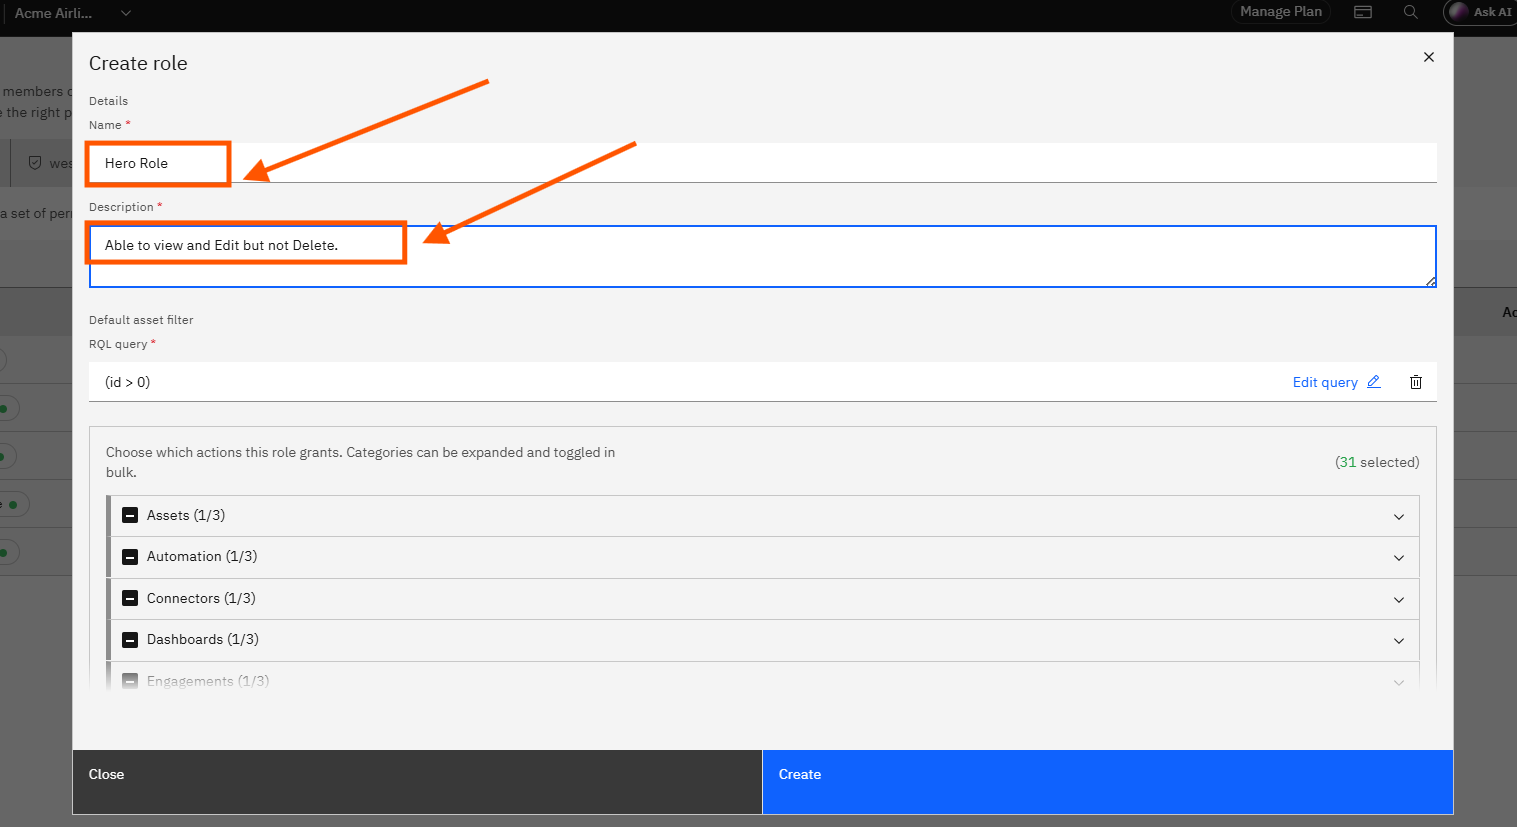
In the Details section of the Create role modal, fill in the following required fields:
- Name — Type a name for the role. This name appears in the Roles table and in the Role dropdown when inviting or reassigning members.
- Description — Type a description explaining what this role is for. This text appears in the Description column of the Roles table.
Step 14 — Set the Default Asset Filter
In the Default asset filter section, review or edit the RQL query that determines which assets members with this role can access by default.
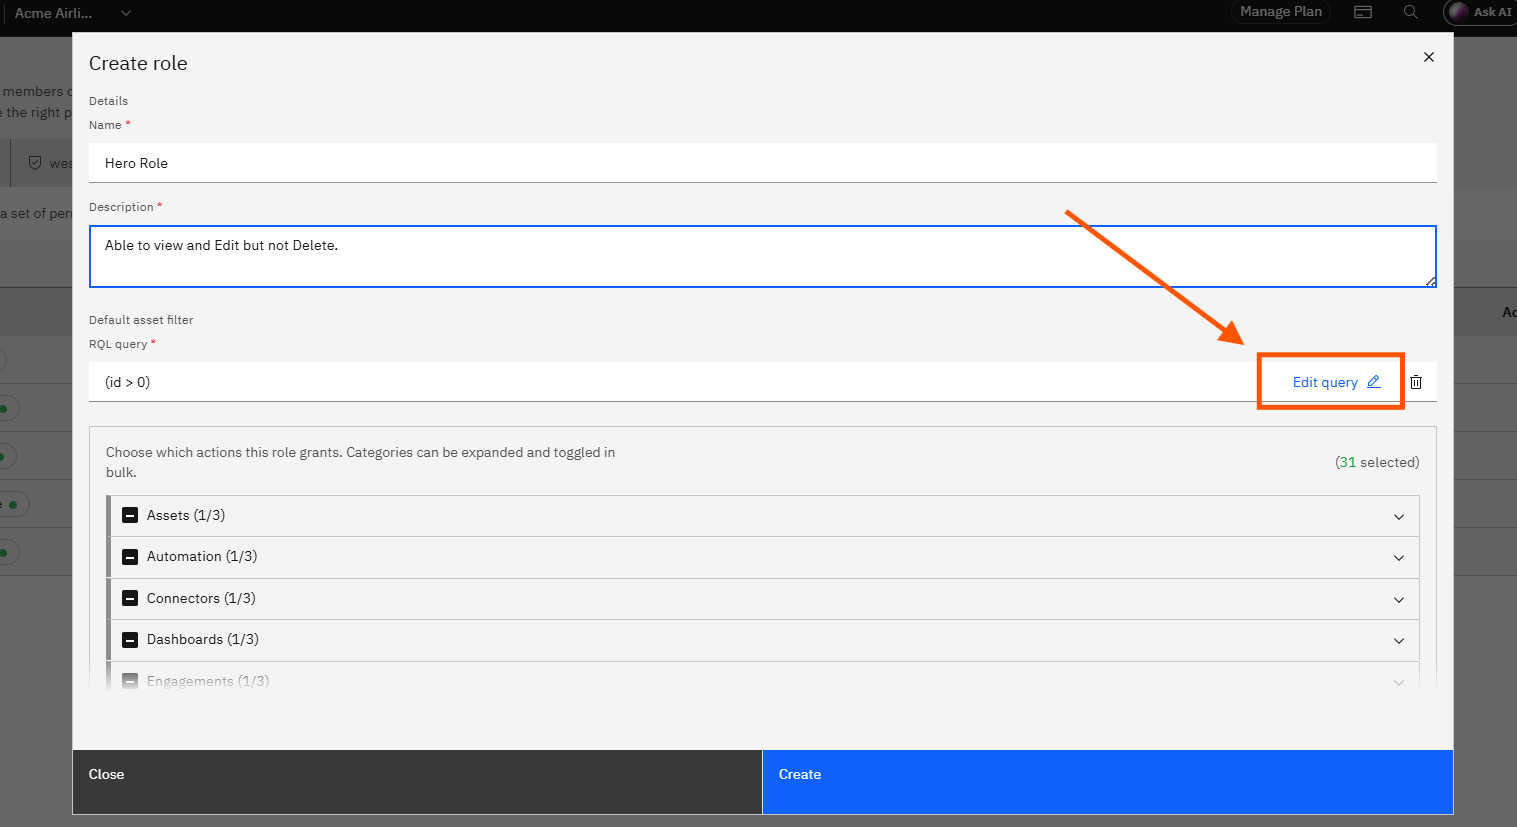
The pre-filled value is (id > 0), which grants access to all assets. Click the pencil (Edit query) icon to open the query editor and write a more restrictive filter if needed — for example, filtering by product line, sensitivity level, or asset tag.
Step 15 — Configure Permissions by Category
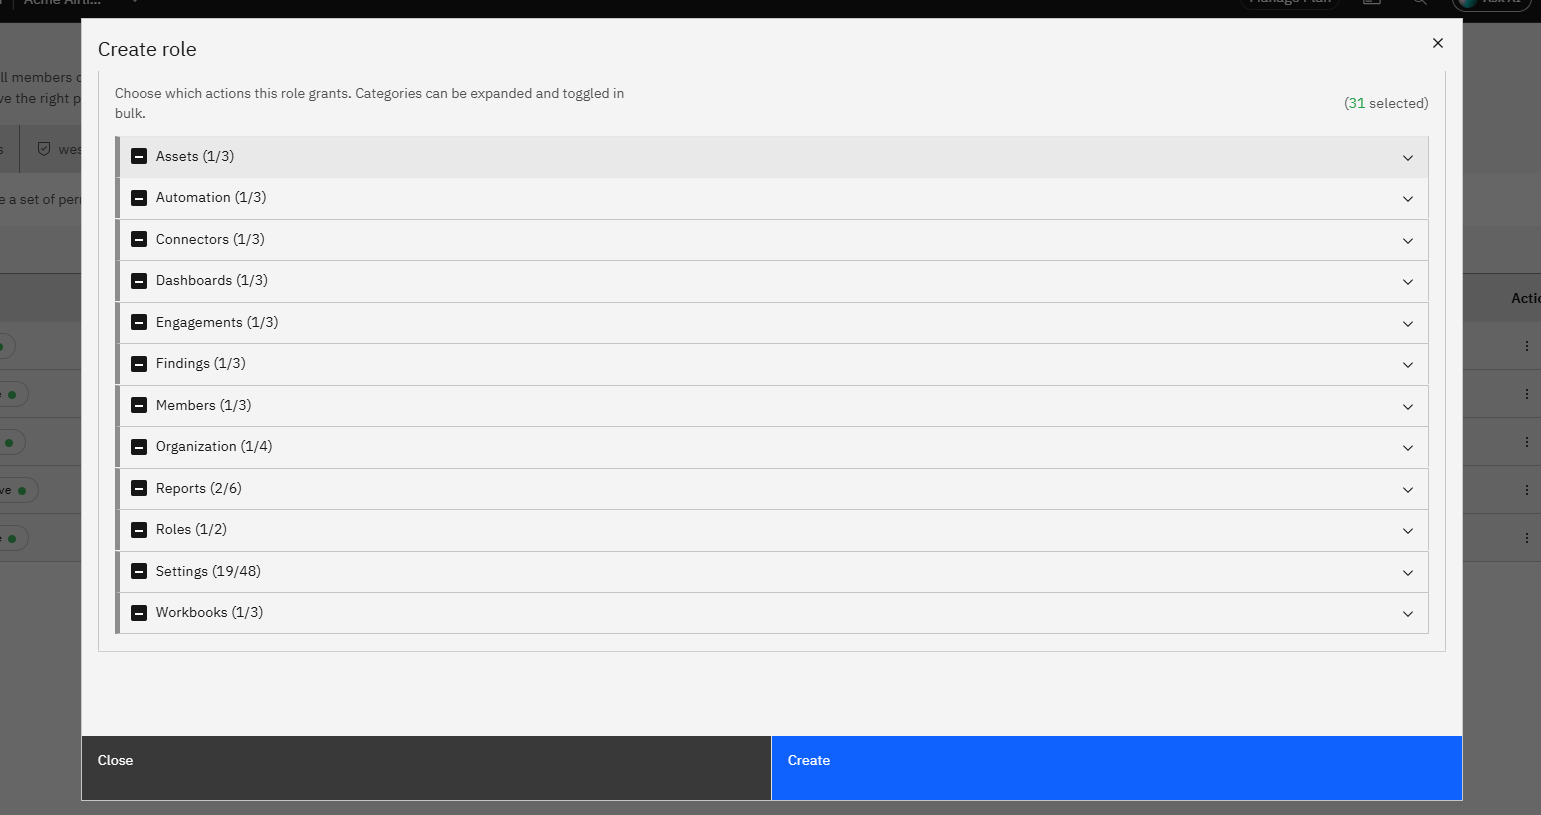
Scroll down to the permissions section. The modal lists every permission category available in your organization. Each category shows a count of how many permissions are currently selected for this role. The categories are:
- Assets — Access to asset records and asset management actions.
- Automation — Automation rule creation and management.
- Connectors — Connector configuration and management.
- Dashboards — Dashboard access, creation, and management.
- Engagements — Engagement creation and workflow management.
- Findings — Finding access, triage, and management.
- Members — Member invitation and role management.
- Organization — Organization-level settings and configuration.
- Reports — Report generation and access.
- Roles — Role creation and management.
- Settings — Access to Settings pages, including sub-categories such as API Access, Attack Surface, Data Management, Email Alerts, Gateways, Logging Rules, Plan, Prefills, Prioritization Rules, Shells, SLA, SMTP, State Approval, and Threat Intel.
- Workbooks — Workbook creation and access.
Step 16 — Expand a Category and Toggle Individual Permissions
Click any category name to expand it. Each expanded category reveals individual permission checkboxes — typically Read, Write, and Delete.
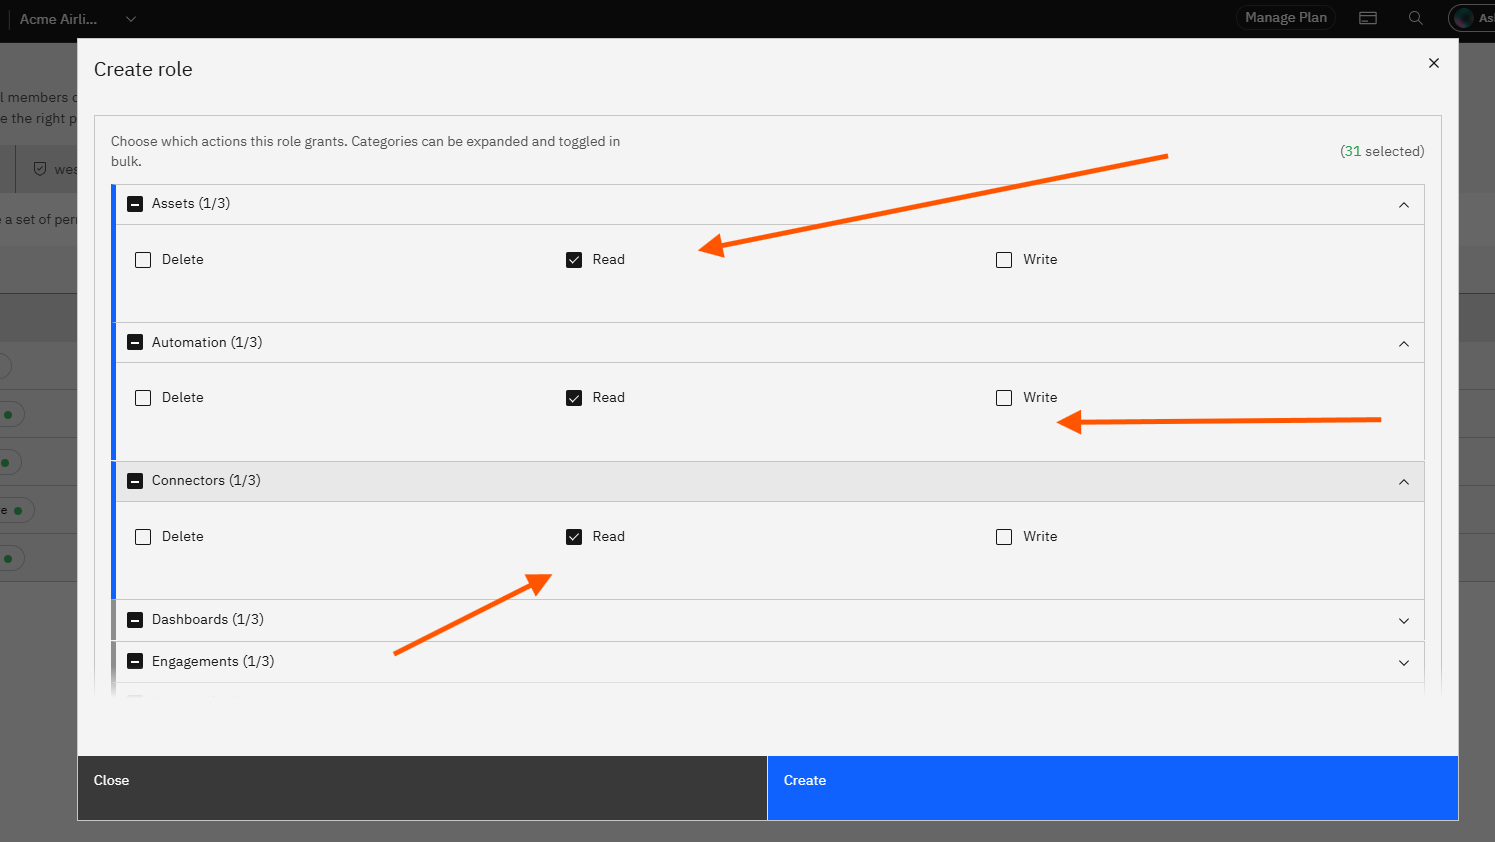
Check the permissions you want to grant for this role and uncheck those you want to restrict. The count next to the category name updates as you make selections. Categories can also be toggled in bulk by using the toggle next to the category header.
Step 17 — Click Create
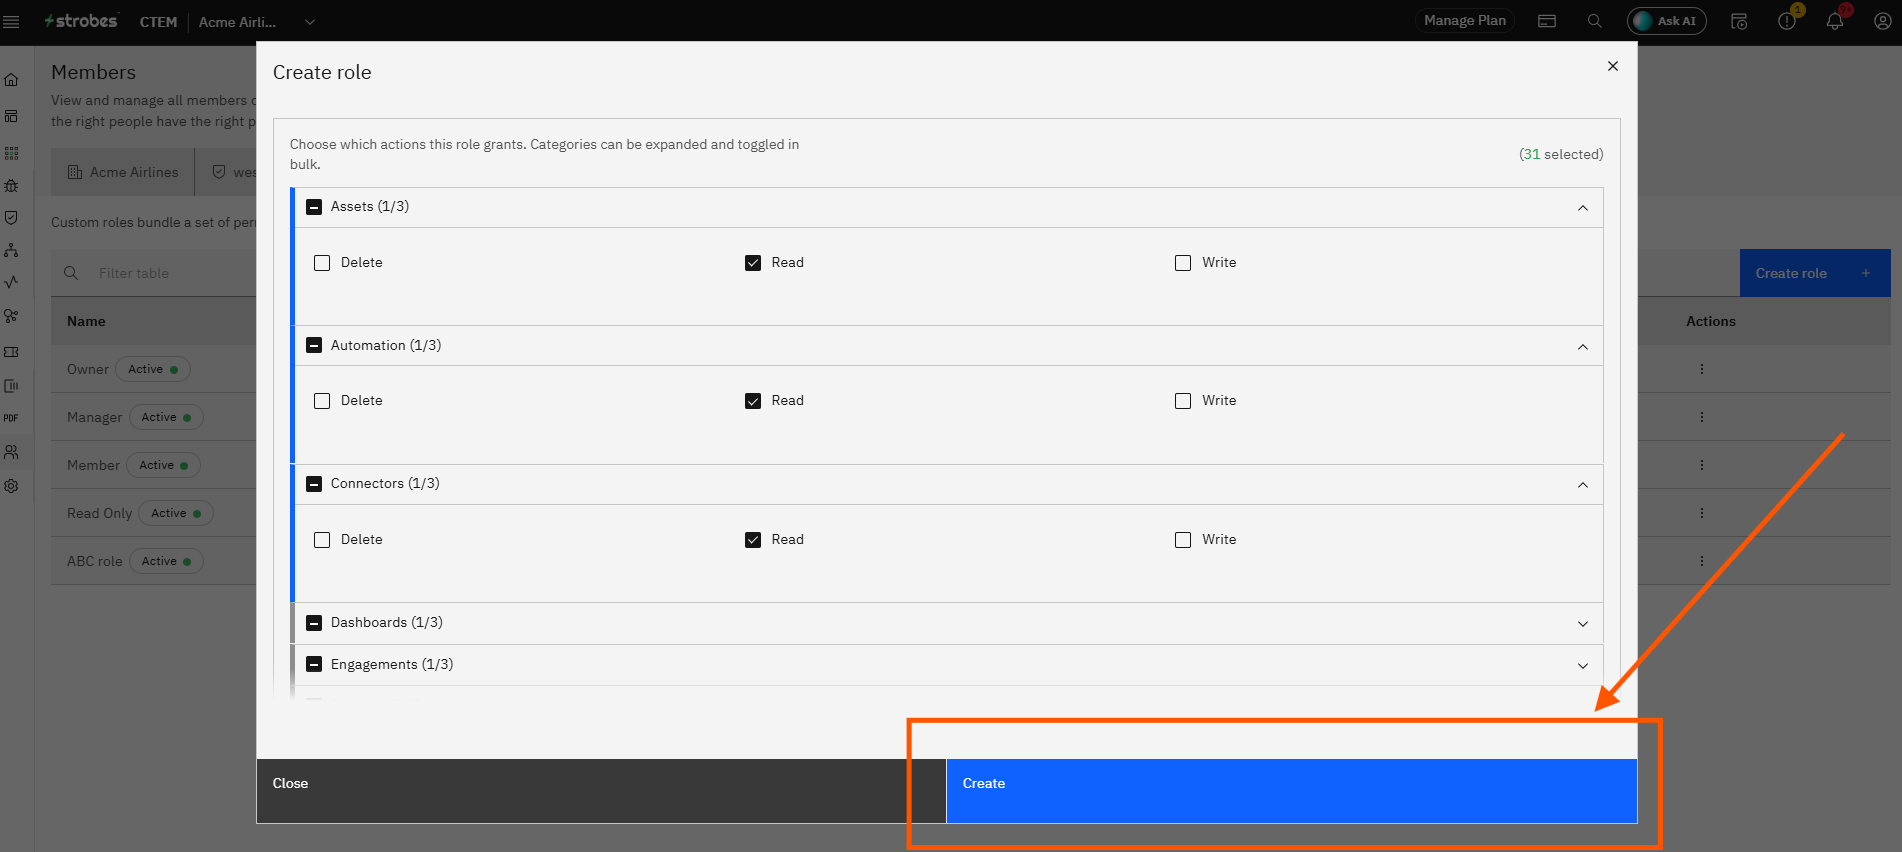
Once the Name, Description, Default asset filter, and permissions are configured, click Create. The new custom role is saved and appears immediately in the Roles table with a Custom type badge. It is available to assign to members right away from the Invite Member modal or the Change User Role dialog.
Tips
System roles cannot be edited directly. If you need a variation of a system role, use the three-dot menu on that role row and select Duplicate. The copy is editable and retains the original permissions as a starting point.
The Default asset filter on a role restricts which assets role members can access. The default (id > 0) value gives access to all assets. Use a specific RQL expression to scope role members to a subset — for example, to a particular product, severity level, or asset group.
You can invite multiple members with the same role in one step. Enter all email addresses as a comma-separated list in the Invite Members modal. All invitees receive the same initial role. Individual roles can be changed afterward using the Change Role icon.
The Access Details panel allows per-member overrides without creating a new role. Use it when a single member needs access that differs slightly from their assigned role, rather than creating a dedicated role for one person.
Custom roles appear alongside system roles in every role selection dropdown across Strobes — including the Invite Member modal, the Change User Role dialog, and the JIT Provisioning default role setting in SSO configuration.