
Managing Engagement Prerequisites
Overview
Prerequisites allow you to define checklist items that need to be satisfied before an assessment can begin — for example, providing VPN access, sharing test credentials, or confirming scope approval. You can add as many prerequisites as needed to an assessment, assign them to responsible team members, and track their completion directly within the engagement.
Adding Prerequisites
Step 1: Navigate to Engagements
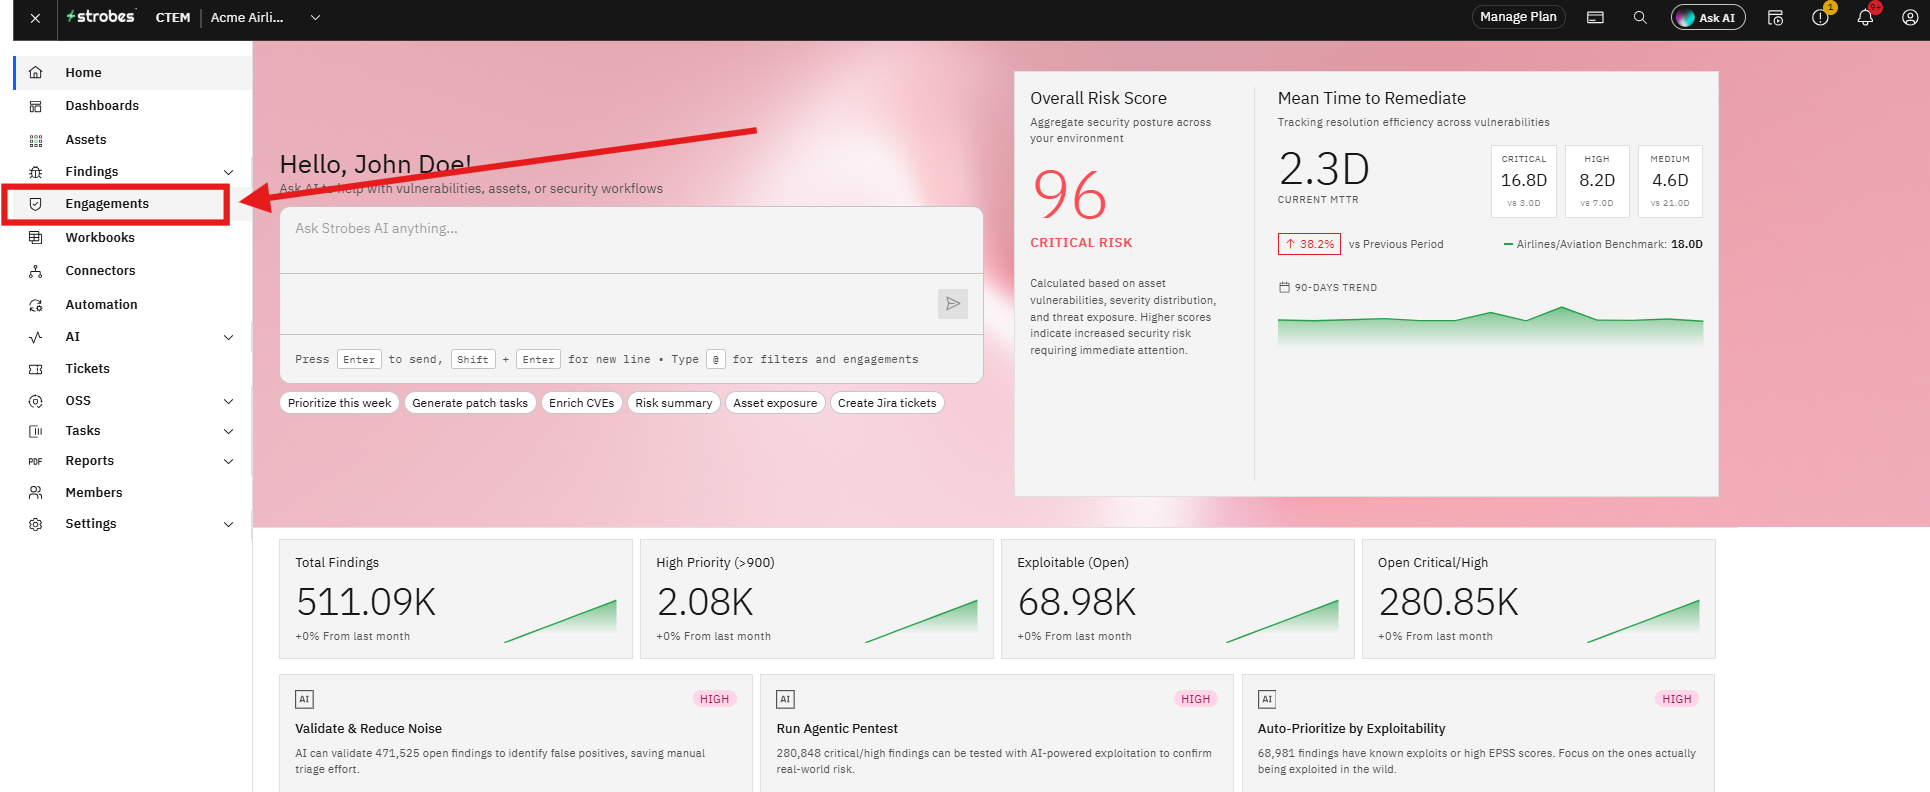
Click Engagements in the left sidebar, then select the engagement that contains the assessment you want to add prerequisites to.
Step 2: Open the Assessment
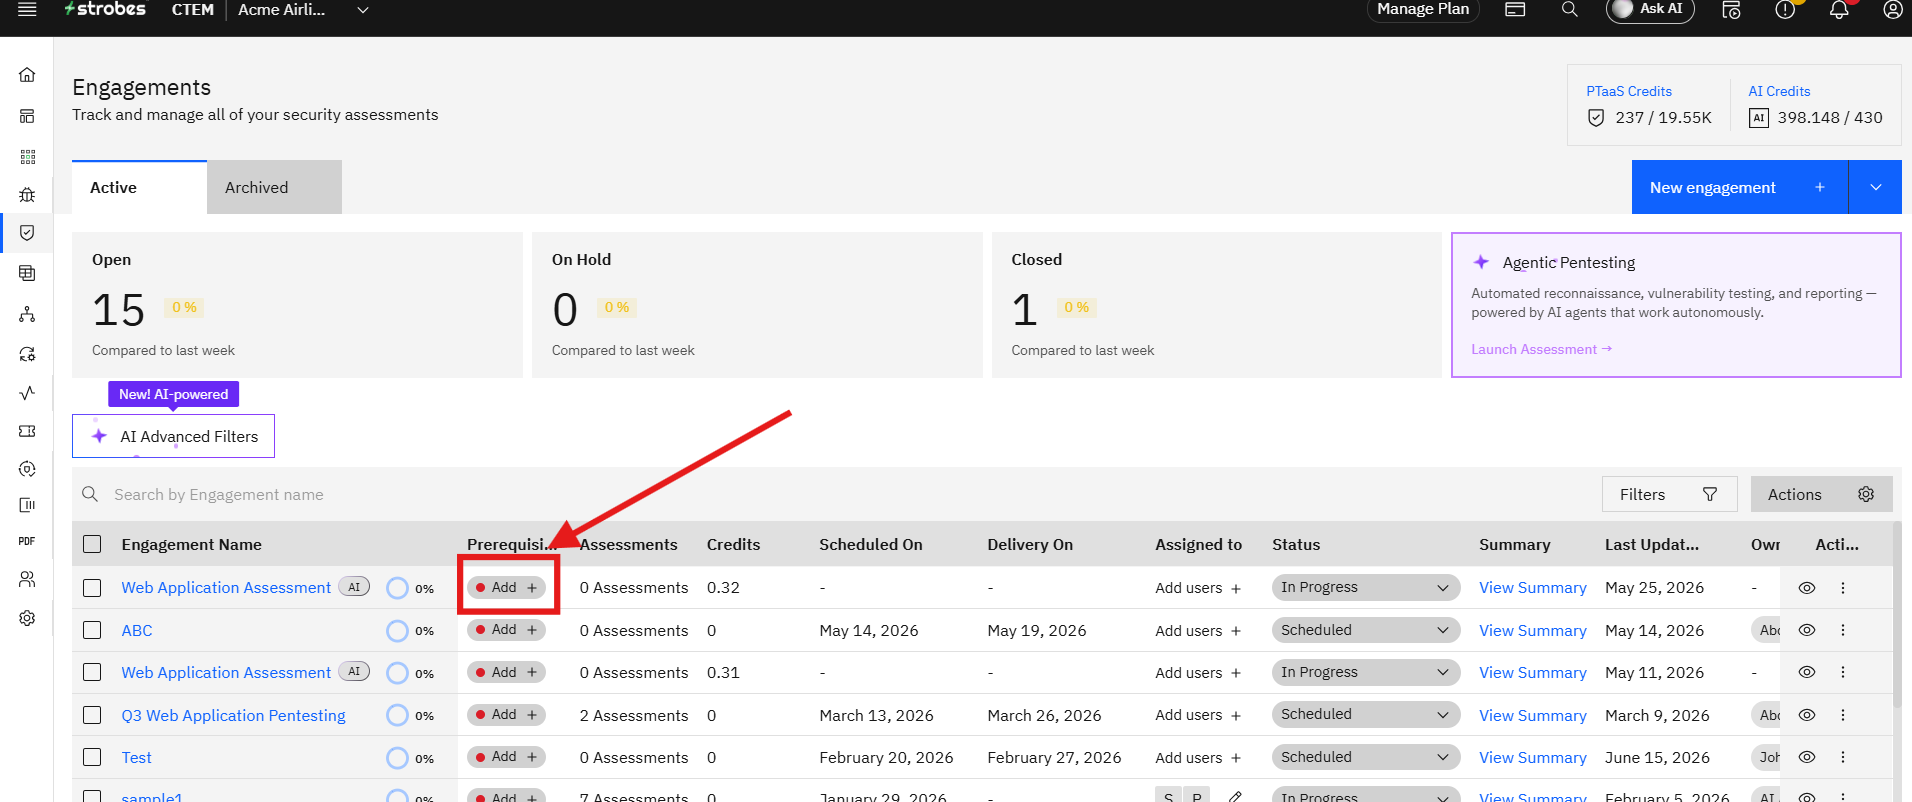
Select the specific assessment for which you need to add prerequisites. This opens the assessment detail view.
Step 3 — Add a Prerequisite Checklist
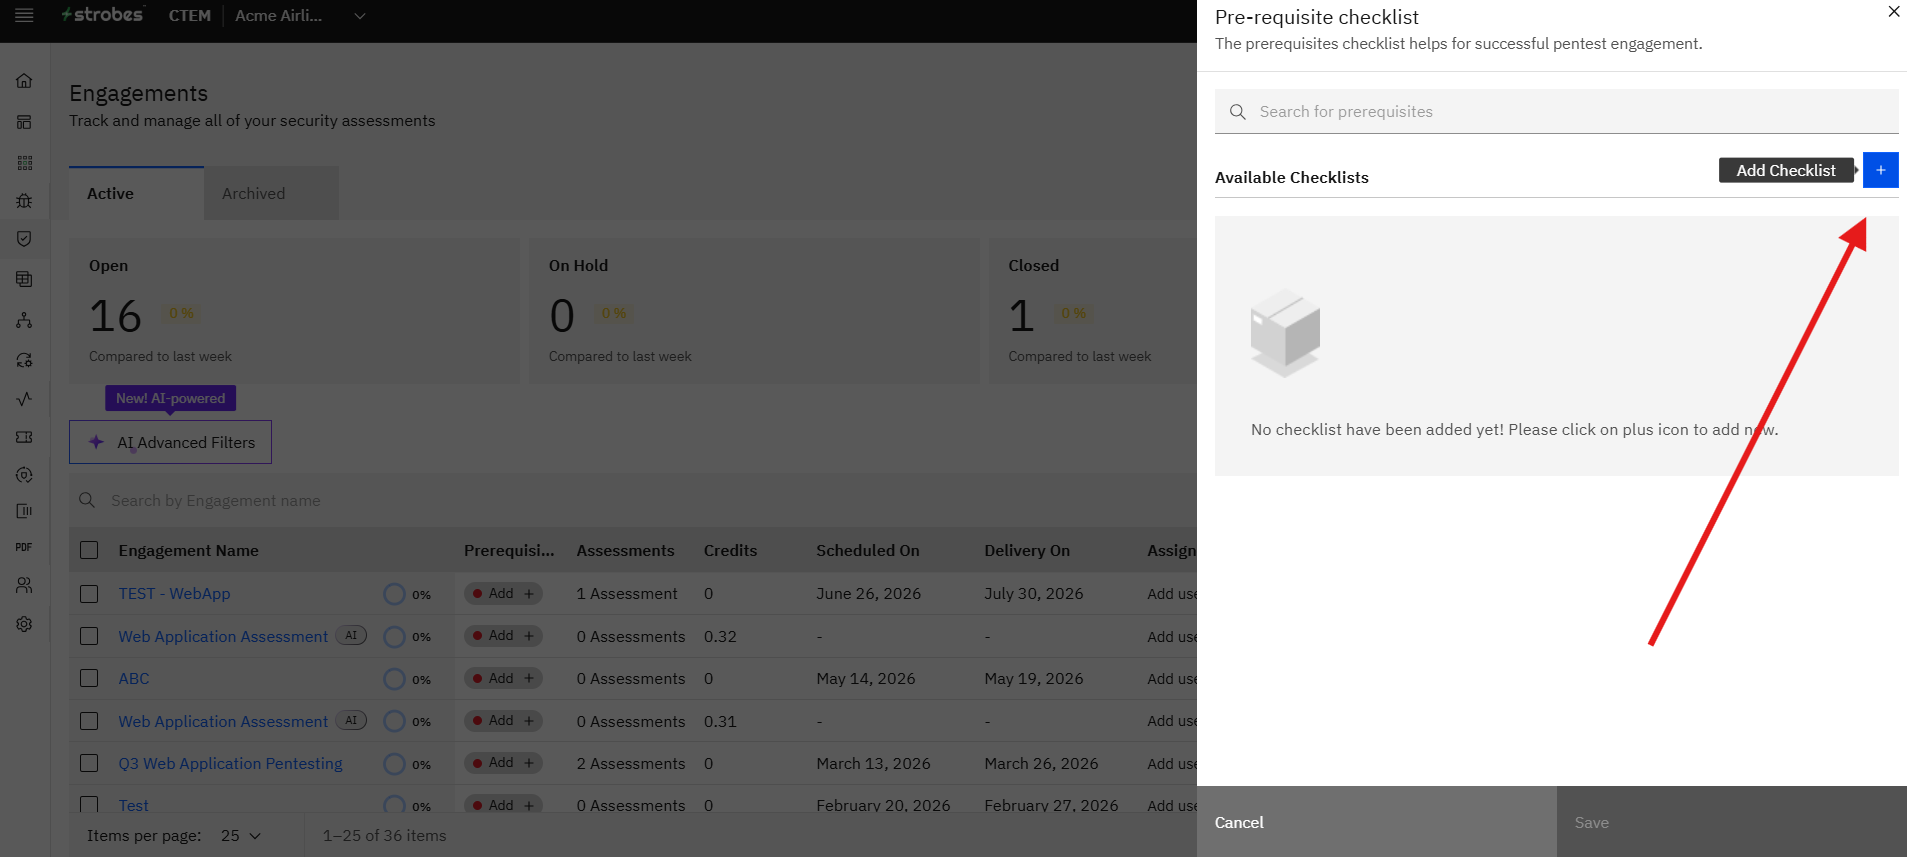
Click the + button under the Prerequisites field. Then click Add Checklist to open the prerequisite form.
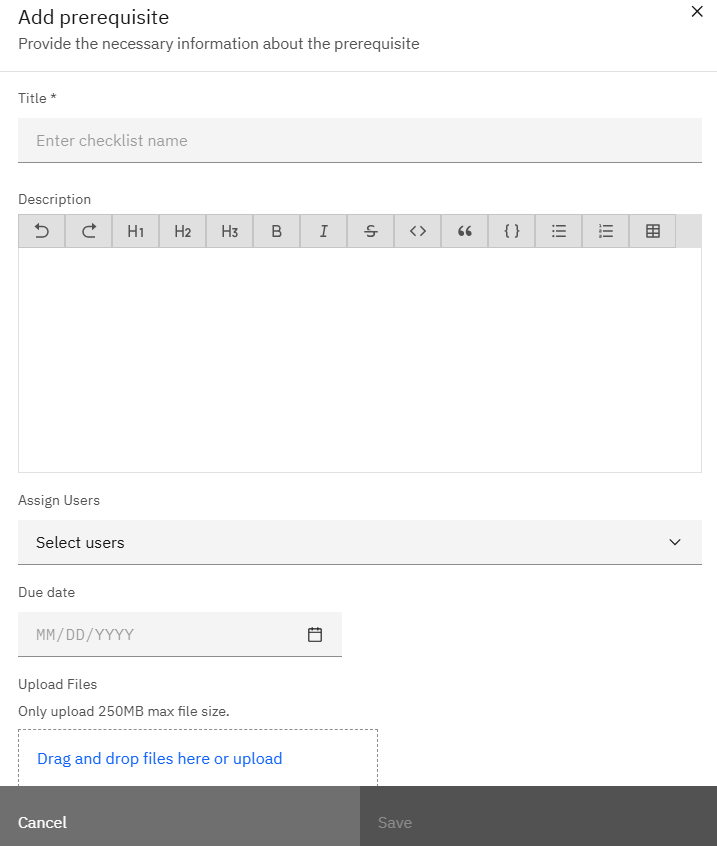
Step 4 — Fill in the Checklist Details
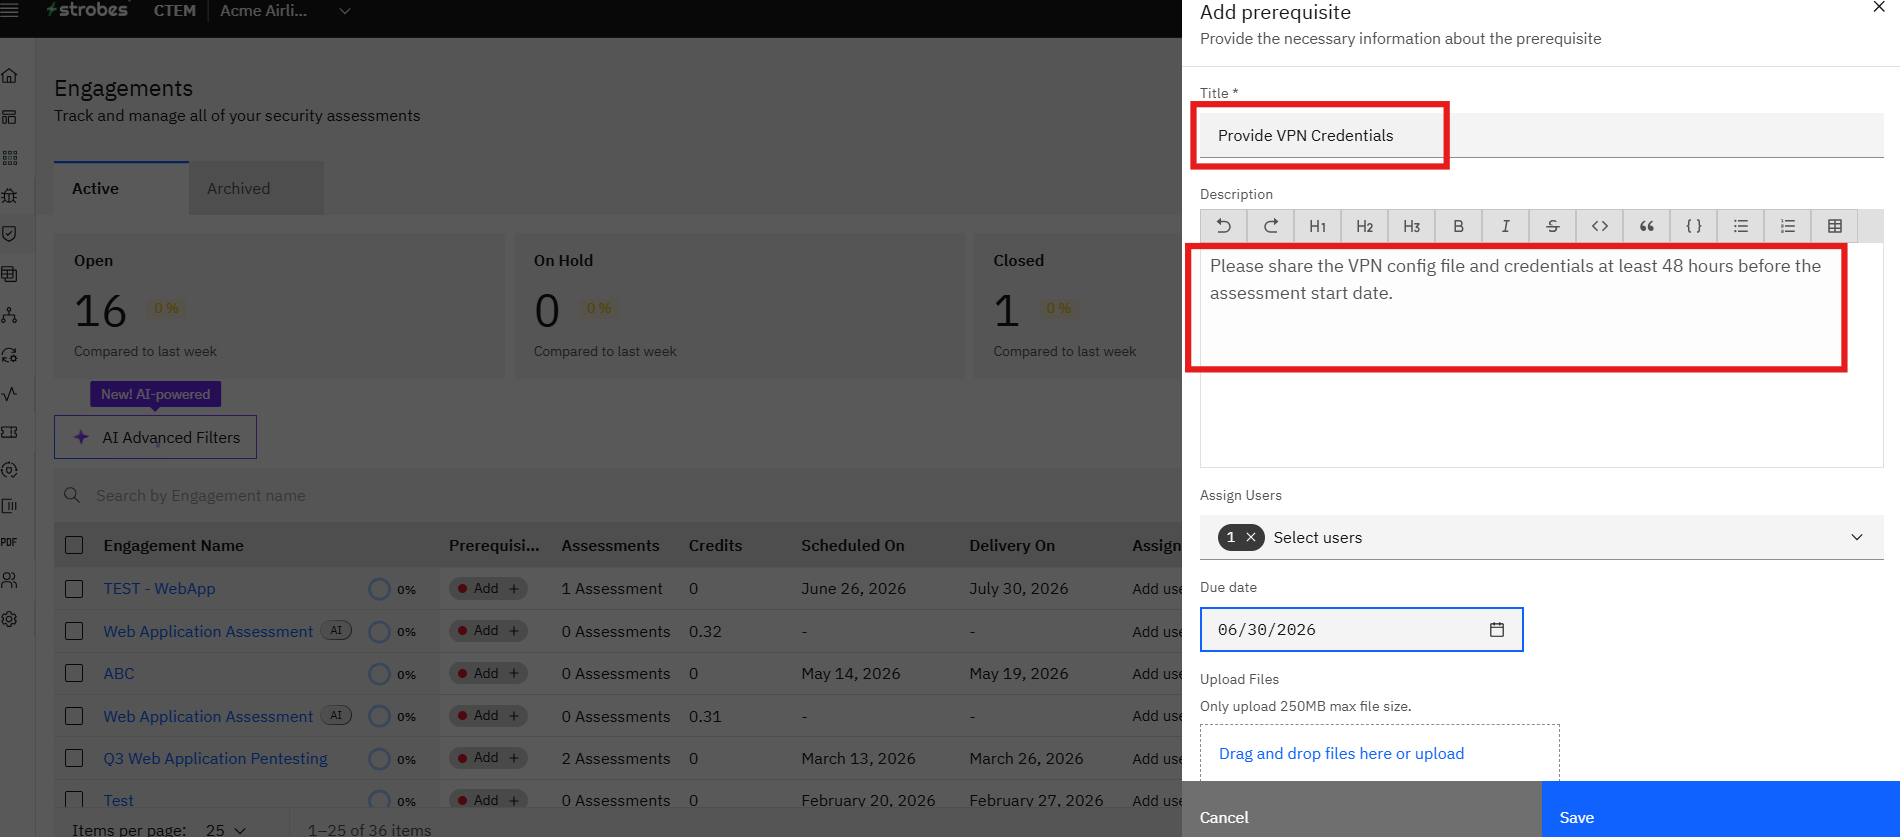
Complete the fields in the Add Checklist form:
Title (required) Enter a clear name for the prerequisite. For example: "Provide VPN Credentials" or "Confirm Scope Sign-off".
Description (optional) Add any additional context or instructions for the person responsible. For example: "Please share the VPN config file and credentials at least 48 hours before the assessment start date."
Assign Users (optional) Select the team members responsible for satisfying this prerequisite. Only users who have been invited to your Strobes organization will appear in the list.
Due Date (optional) Set a deadline by which the responsible user must complete the prerequisite.
File Upload (optional) Attach any relevant files — for example, a scope document, NDA, or configuration template.
Step 5 — Save the Prerequisite
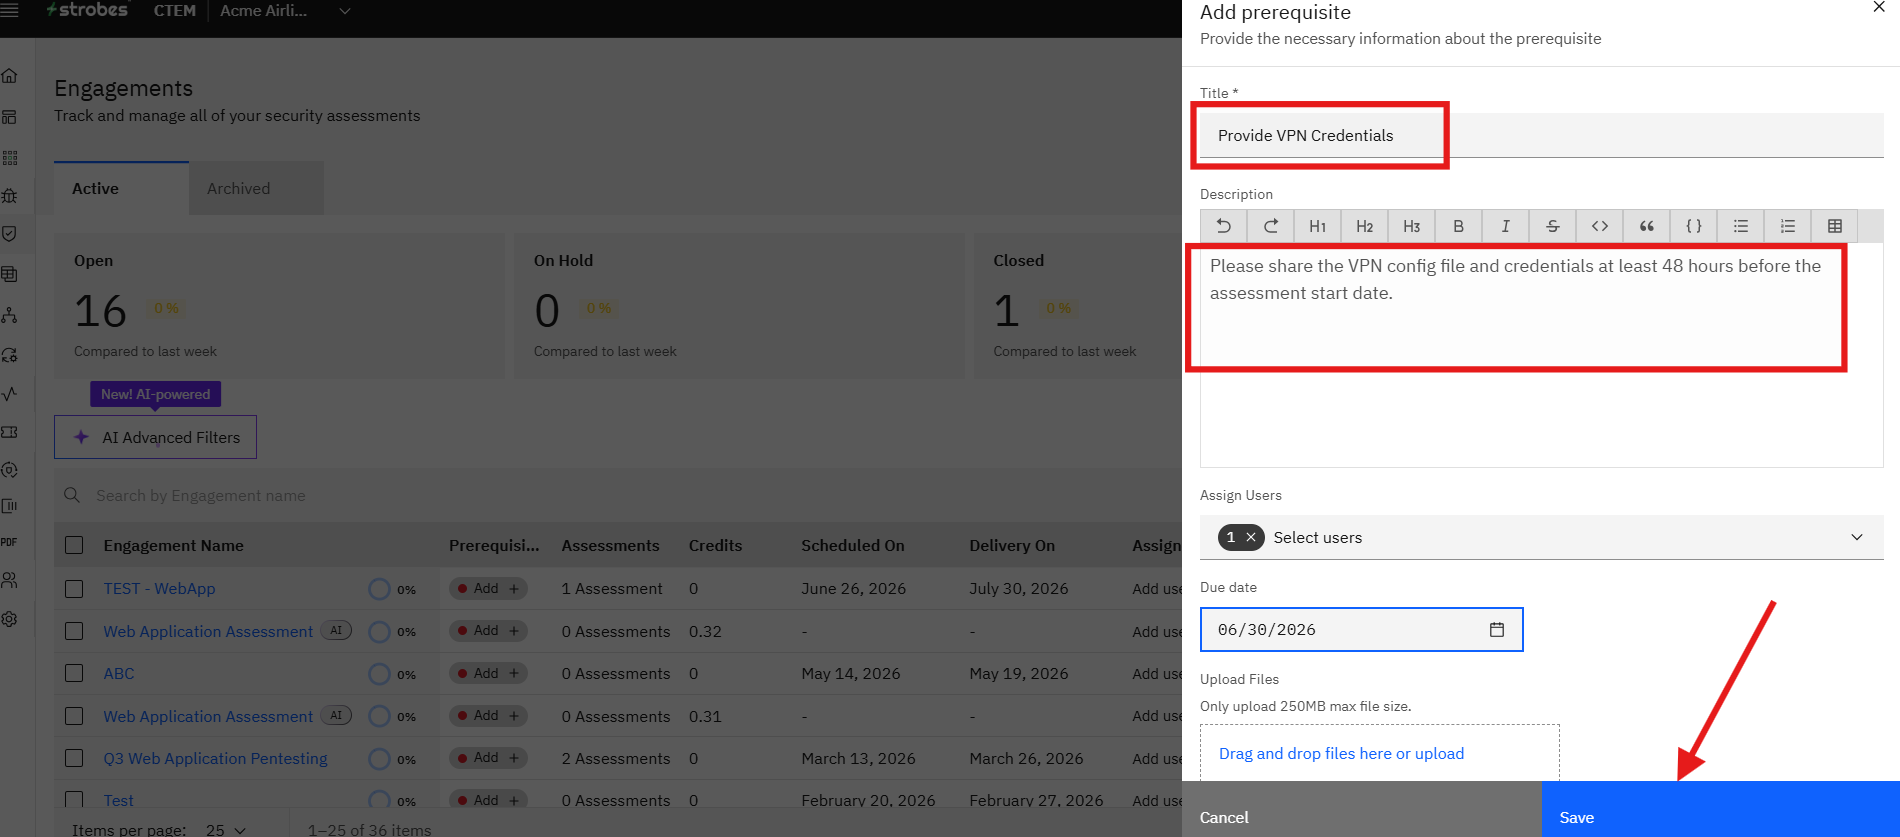
Click Save. The prerequisite appears under the Prerequisites section of the assessment.
Repeat Steps 3–5 to add more prerequisites. There is no limit to the number of prerequisites you can add to a single assessment.
Marking a Prerequisite as Complete
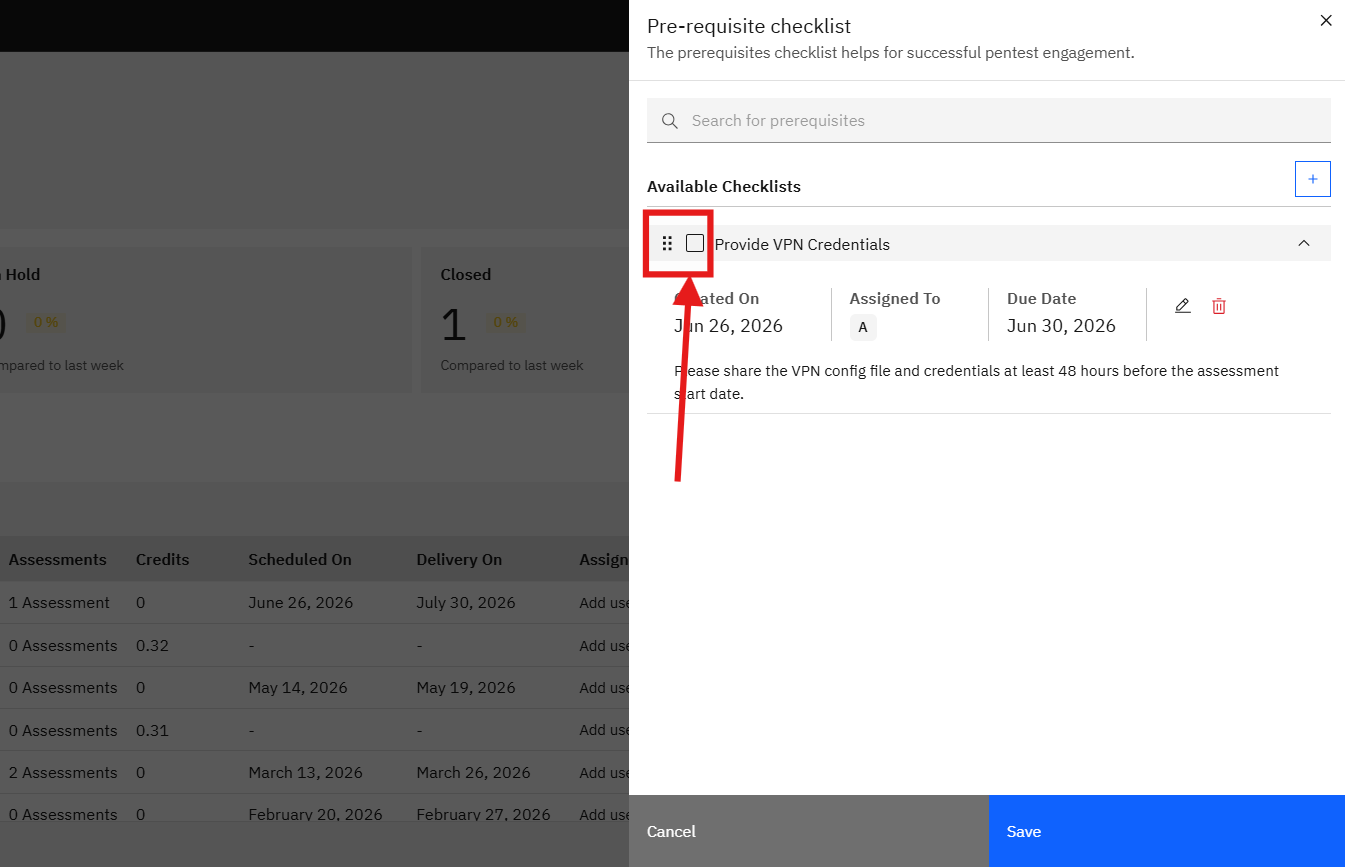
Once a prerequisite has been satisfied, mark it as closed by clicking the checkbox next to the prerequisite name. This updates its status so the team can track which items are done at a glance.
Editing Prerequisites
If you need to update a prerequisite after it has been created, you can edit it at any time.
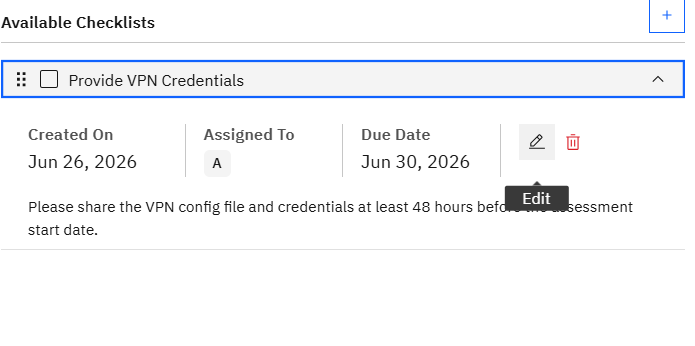
- Expand the prerequisite you want to edit by clicking on it.
- Click Edit.
- Update the relevant fields.
- Click Save to apply the changes.
Deleting Prerequisites
If a prerequisite is no longer needed, you can remove it from the assessment.
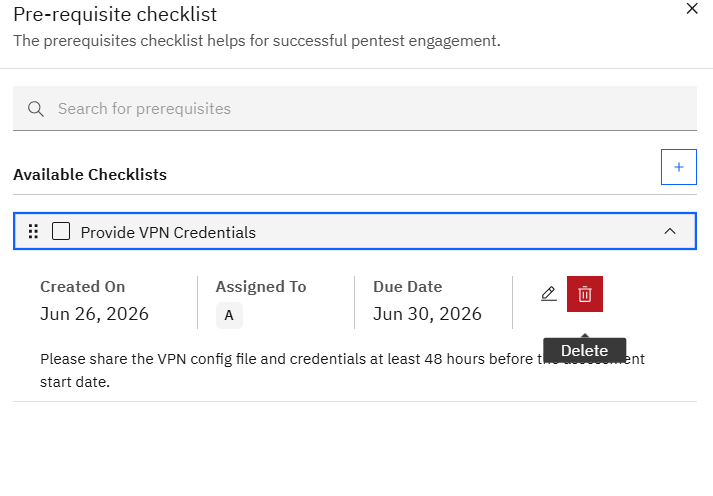
- Expand the prerequisite you want to delete by clicking on it.
- Click Delete.
The prerequisite is removed immediately. This action cannot be undone.
Tips
Use descriptive titles. A title like "VPN Access — Tester Team" is much clearer than "Access" when you have multiple prerequisites and several people tracking them.
Assign due dates for time-sensitive items. If an assessment can't begin without a specific prerequisite being met, set a due date that gives the responsible person enough lead time before the start date.
Use the file upload for supporting documents. Attaching the relevant document directly to the prerequisite — rather than sharing it over email — keeps everything in one place and avoids version confusion.
Check off prerequisites as they're satisfied. Closing completed items keeps the list clean and gives the whole team a clear view of what's still outstanding before the assessment can proceed.